
2010 Turbo Build: a.k.a. "Project JETS3T 8"


Might work....but you will definitely end up with more heat transferred to the coolant at the iron in that area....time will tell if that becomes an issue
I think the inserts are made of something similar to inconel....so I can't see a cheap alternative that will not melt in that area?
Thanks for the experimentation...that's what it is going to take to get more out of this engine.....Took a lot to get the other engines to the cookie cutter stage as well...so we need brave souls that are willing to play around and grenade multiple engines trying things out of the box
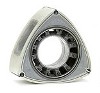
This is very roughly the idea I would like to try . It leaves the body of the sleeve in place with the divider removed and a deflector attached to the iron .

Last edited by Brettus; Jan 7, 2011 at 04:03 PM.


Thread Starter
Registered
Joined: Jun 2008
Posts: 305
Likes: 18
From: SoCal
-The motor has to be torn down first.
-There are 4 roll-pins in each side housing, two on each side, so a total of 12 roll-pins if you're removing all of the exhaust inserts.
-Use a #6 1/2" sheet metal screw and thread it into the roll-pin as far as it will go, probably about a 1/4".
-Then use either the prying end of a hammer (or some other preferred means) to pry the roll pin out (or tap it out by hitting the lip of the screw upwards)...it isn't as easy as it sounds, you will probably break or strip a few screws during the whole process.
-The rear housing has two Allen head set screws on the trans. facing side that need to be screwed out first to access those roll-pins. Replace those Allen head set screws when you're done.
-I'd recommend plugging the rest of the exposed holes with the same type of Allen head set screws that are in the rear housing, I actually had a tiny exhaust leak because I didn't do it the first time. Use a little bit of Loctite Threadlocker Blue or Red on the threads. You'll also need to tap the holes of course, extremely easy.
That's pretty much it.
Good luck.
I would argue that for maximum port runner size you need to get rid of the divider . Leaving the divider there is always going to seriously restrict the flow on both sides whether the sleeve is still there or not.


Thread Starter
Registered
Joined: Jun 2008
Posts: 305
Likes: 18
From: SoCal
Woohoo! You better be there! Who else is gonna take all those new orders for a Turblown Engineering 425rwhp Turbo kit!?


Registered User
Joined: Jul 2009
Posts: 121
Likes: 0
From: Your Mouth

Good luck RG!
Registered
Joined: Jun 2006
Posts: 855
Likes: 0
From: Laveen,Az
Had a question I know u chose to use throttle by cable instead of wire and..
I know everyone had there own goals. By any chance have u tried looking for a bigget throttle body that was for the electronic version or u didn't want to be bothered with the search.
I know everyone had there own goals. By any chance have u tried looking for a bigget throttle body that was for the electronic version or u didn't want to be bothered with the search.
Thread Starter
Registered
Joined: Jun 2008
Posts: 305
Likes: 18
From: SoCal
(Note* Again, this is just personal preference, I am not setting or stating a precedence that the cable operated TB is better than a dbw.)

Thread Starter
Registered
Joined: Jun 2008
Posts: 305
Likes: 18
From: SoCal

Bat Mobile Driver
Joined: Sep 2005
Posts: 548
Likes: 0
From: From Florida back to my home lands in MIchigan
thats good to hear, everythings leading to the dyno...Thank for the update

Thread Starter
Registered
Joined: Jun 2008
Posts: 305
Likes: 18
From: SoCal


