Lotek Gauge Pod


 03-28-2007, 01:08 AM
#153
Originally Posted by Easy_E1
Hey Wafer ,,, for the price it can't be beat. I've ben toying with getting one and putting up some gauges. Is the material hard on the surface?
Because the thought of painting it has crossed my mind, and a few other things down from there.
Because the thought of painting it has crossed my mind, and a few other things down from there.
04-01-2007, 08:37 AM
#154
The Chief
Thread Starter
iTrader: (7)
Join Date: Jun 2005
Location: Virginia Beach, VA
Posts: 827
Likes: 0
Received 0 Likes
on
0 Posts
I got mine and the finish is probably more black than the oem panel as opposed to lighter as some of the pics look like. The grain matches very closely to the panel on top of the speedometer but is larger than the grain of the oem dash panel. It isn't perfect, but if you look at aftermarket gauge pods in any car, they never are.
04-01-2007, 10:34 PM
#155
2JZ Powered

Join Date: Sep 2005
Location: Meridian, MS
Posts: 185
Likes: 0
Received 0 Likes
on
0 Posts
Just got mine
but i can't test fit yet because the car is in a different state
and even if it wasn't i couldn't compare the texture because mine is painted
but from i can tell it look great and for the price ypou can't beat it
if you expect to get the best mod in the world, or even the best looking gauge pod for less than $60 then you are crazy
but i'm not worried about oem finish anyways becasue i'm going to do something.......
well lets just say, different
now i just have to get gauges, wish i could find some as nice as the pod for a similar price lol
i haven't decided between the Autometer nexus (which is what i am getting for my other car) or the Defi blue racer (which are the only defi's that come in 52mm i think)
 04-04-2007, 11:34 PM
#158
Registered
iTrader: (1)

Join Date: Jun 2006
Location: Da Hills of Va
Posts: 662
Likes: 0
Received 0 Likes
on
0 Posts
Just installed my guage pod and prosport guages. The sending unit for the oil pressure and oil temp sensor are not hooked up yet. One of my best investments yet.....check them out.
Last edited by 1stgen8; 04-04-2007 at 11:40 PM.
04-05-2007, 06:14 AM
#159
FourOneMuthaFcuknFive

Join Date: Sep 2003
Posts: 512
Likes: 0
Received 0 Likes
on
0 Posts
Originally Posted by 1stgen8
Just installed my guage pod and prosport guages. The sending unit for the oil pressure and oil temp sensor are not hooked up yet. One of my best investments yet.....check them out.
where and how you tap your wires for the +12v power from? im confused as i read theres a few opitions to do this..does the dimmer switch for the car work with the guages... really need help how to do the wiring thing when i get mine, help would be Appreciated...finally a product for the 8 thats super decently priced.
does anyone have a picture of the whole interior with the pod and gauges at night?
04-05-2007, 08:28 PM
#160
Registered
iTrader: (1)
Join Date: Jun 2006
Location: Da Hills of Va
Posts: 662
Likes: 0
Received 0 Likes
on
0 Posts
Originally Posted by Dookie_Rx-8
Looks like your the first with the screws.... looks nice.....
where and how you tap your wires for the +12v power from? im confused as i read theres a few opitions to do this..does the dimmer switch for the car work with the guages... really need help how to do the wiring thing when i get mine, help would be Appreciated...finally a product for the 8 thats super decently priced.
does anyone have a picture of the whole interior with the pod and gauges at night?
04-05-2007, 09:05 PM
#161
Registered
iTrader: (1)
Join Date: Jun 2006
Location: Da Hills of Va
Posts: 662
Likes: 0
Received 0 Likes
on
0 Posts
I should have mentioned it would be a good idea to get the oil filter adaptor plate if you plan on getting the oil pressure and/or oil temp guages. Cost about $38 bucks from prosport and saves you from having to tap into something. You will also need a 26mm socket to install the adaptor. Hope you have small hands cause you dont have much room back there. What i did was run the wires thru the firewall to the oil filter. I used the hole that is just below the master cylinder as my pass thru. I ran the wires under the master cylinder to help conceal them...see the green wire in the lower right corner of the second pic running under the master cylinder. I left a lot of extra wire so I didn't have to lean over the engine while I installed the temp sensor and sending unit into the adaptor plate. You may want to use teflon tape or Honda bond on the threads. Next I installed the adaptor plate and pulled the extra wire back thru the firewall. You can ground the temp sensor and sending unit somewhere in the engine bay....I did mine near the stock strut bar. Might as well change the oil while you have the filter off.
Last edited by 1stgen8; 04-06-2007 at 06:27 AM.
 04-05-2007, 11:01 PM
#164
Asshole for hire
iTrader: (1)

Join Date: Jun 2006
Location: Colfontaine, Belgium
Posts: 3,214
Likes: 0
Received 3 Likes
on
3 Posts
1stgen, very nice. but i have a question; whats with the orange-out(black-out) of the lower radio panel and the HVAC *****? is it actually that way, or is it a photochop to conceal something being done?
04-05-2007, 11:22 PM
#165
Registered
iTrader: (1)
Join Date: Jun 2006
Location: Da Hills of Va
Posts: 662
Likes: 0
Received 0 Likes
on
0 Posts
Originally Posted by paulmasoner
1stgen, very nice. but i have a question; whats with the orange-out(black-out) of the lower radio panel and the HVAC *****? is it actually that way, or is it a photochop to conceal something being done?
You can check out some of my work on these threads:
Interior work
-----------------
https://www.rx8club.com/series-i-exterior-appearance-body-kits-27/custom-rear-emblems-99386/
Custom short ram and CAI
----------------------------------
https://www.rx8club.com/series-i-aftermarket-performance-modifications-23/custom-cai-wish-me-luck-103093/
04-06-2007, 12:40 AM
#167
Registered
iTrader: (1)
Join Date: Jun 2006
Location: Da Hills of Va
Posts: 662
Likes: 0
Received 0 Likes
on
0 Posts
Originally Posted by Dookie_Rx-8
thanks.. have everything expect 26mm socket .... what 'type' of connectors did you use? thanks again
04-06-2007, 02:37 PM
#168
Registered

Join Date: Jan 2005
Posts: 86
Likes: 0
Received 0 Likes
on
0 Posts
Originally Posted by 1stgen8
Here you go. From the guages I twist all of the same color wires (except green) together and put them in one end of the barrel type connector (on left). Then I used another piece of wire & put it into the other side of the barrel connector and ran it to my source....ie yellow wire on cig lighter, red/yellow wire to cig light bulb, etc. To tie into the source I used the connector on the right in the event I have to disconnect the guages. I did not use a quick disconnect for the ground only the barrel connector.
To wire mine up I only used 2 of the connector on each end wires and 1 cable with the bare wires. The back of the gages had 2 spots to put the white connectors. These can be used to daisy chain the power across each one.
See the attachment.
For the +12V & -12V (Gnd) I found 2 wires in the head unit harness that had 12V constant even with the key off and out of the ignition. I peeled back about 1/4" of insulation soldered and then wrapped with electrical tape. For the ACC I ran a wire down to the ashtray and did the same thing. For the Light I ran to the light in the ashtray and once more peeled, soldered and taped.
Be sure when peeling the insulation of the wire back that you do it far enough away from the harness so that if you accidentily cut the wire all the way through you have enough room you do some repair work. That didn't happen to me on this project but I have slipped with the knife before on another job and it sucks.
04-10-2007, 03:45 PM
#169
The Chief
Thread Starter
iTrader: (7)
Join Date: Jun 2005
Location: Virginia Beach, VA
Posts: 827
Likes: 0
Received 0 Likes
on
0 Posts
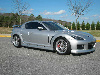
I know some people were questioning the match of the gauge pod and dash piece with some of the pictures in this thread, so I thought I'd post a few that I took of mine out of the car to get rid of the lighting issues.

 04-11-2007, 12:23 AM
#171
Originally Posted by Easy_E1
WOW, Looks real nice 1stgen! I'm waiting chickenwafer to see yours.
 04-15-2007, 05:33 AM
#173
FourOneMuthaFcuknFive
Join Date: Sep 2003
Posts: 512
Likes: 0
Received 0 Likes
on
0 Posts
Originally Posted by LiL BenNy
where are you guys running your wires from to the gauge pod?
im almost done with mine.. im using tap splices 16-14 awg, will this work?
04-15-2007, 10:20 AM
#174
the stig is my hero

Join Date: Feb 2006
Location: NC
Posts: 701
Likes: 0
Received 0 Likes
on
0 Posts
How is the viewing angle for the gauges? From the pics, they seem to be tilted up a bit. Oh, and anyone else that's finished their installation without screw holes, please post pics!
04-15-2007, 10:36 AM
#175
I just got all my stuff today. But I thought I should let people know this;
RACING BEAT GAUGE ADPATORS DO NOT WORK WITH PROSPORT SENDERS!!!!!!!!!!
The RB adapors for oil press and water temp are 3/8", the ProSport senders are 1/8"!! You need the ProSport adaptors! I found this out the *annoying* way of buying the RB adaptors and finding out they don't work. Luckily I hadn't installed them yet, or else I would have been even more pissed.
I'm gonna cut my dash piece anyways and wire up the gauges today, and send all the wires for the sending units to the engine bay so when I get the new adaptors all I have to do is connect the sending units and screw them into the adaptors, then install the adaptors and I'm all good to go.
I'll try to post pics later.