Lotek Gauge Pod
 08-11-2007, 03:11 AM
#251
a.k.a. WhITeRE8
iTrader: (8)
Join Date: Apr 2005
Location: Nor Cal *
Posts: 2,231
Likes: 0
Received 0 Likes
on
0 Posts
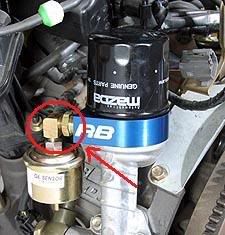
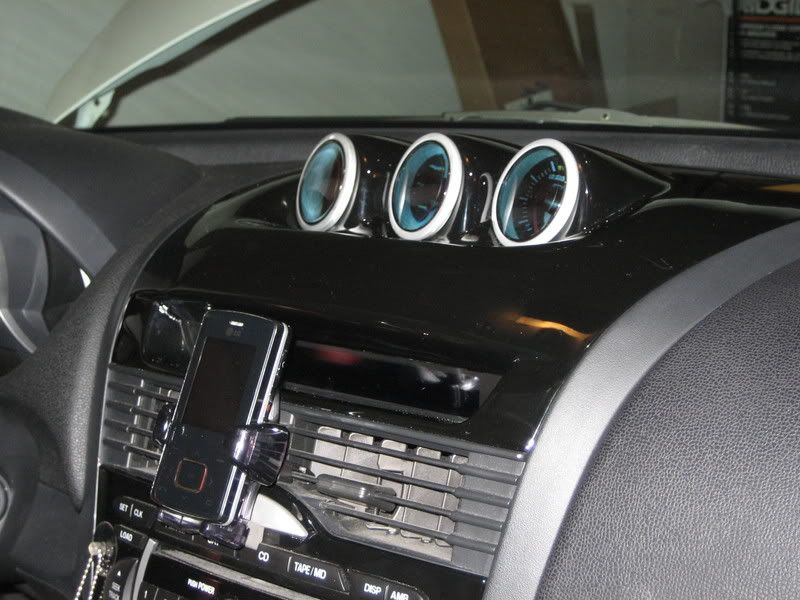
kinda need some help, so dun mean to high jack this thread... i bought the lotek gauge pod, the prosport gauges, and the racing beat oil pressure & temp sensor adapter. i am not sure if this piece (in the picture circled in red) which connects the oil pressure sensor to the adapter comes with the prosport oil prsssure gauge because i dont see it, unless it is already in my car. if not, does anybody know where i can buy it? thanks!

 08-11-2007, 09:51 AM
#253
Rotary addict
iTrader: (1)
Join Date: May 2004
Location: Virginia
Posts: 65
Likes: 0
Received 0 Likes
on
0 Posts
The Racing Beat adaptors aren't the same size as the Protech sensors. I had this same problem with my temperature sensor and adaptor. Just pick up a transition piece at Lowes or Home Depot.
08-16-2007, 06:45 AM
#255
a.k.a. WhITeRE8
iTrader: (8)
Join Date: Apr 2005
Location: Nor Cal *
Posts: 2,231
Likes: 0
Received 0 Likes
on
0 Posts
ok just to let you guys know and maybe help someone out who has the racingbeat adapter with prosport gauges... i found the nut adapters to make the oil press sensor to fit on to the racing beat oil adapter and they cost about $7 total. i went to home depot and ask this guy for help to find these, but turned out that he didnt know jack sh*t about what im talkin about, so he told me they dont carry them. but fortunately i didnt believe him and just searched for them myself, and luckily i found them. so dont trust them if they tell you they dont have them cause its bullsh*t. you just kinda needa look for it yourself in the plumbing section. ok these are the 3 pieces of nuts you would need to buy:
the brand is WATTS!
1. FIP to MIP street elbow 3/8"----- part number: A-782
2. pipe bushing 3/8" MIP x 1/4" FIP ----- part number: A-778
3. pipe hex bushing 1/4" MIPx 1/8" FIP ----- A-738
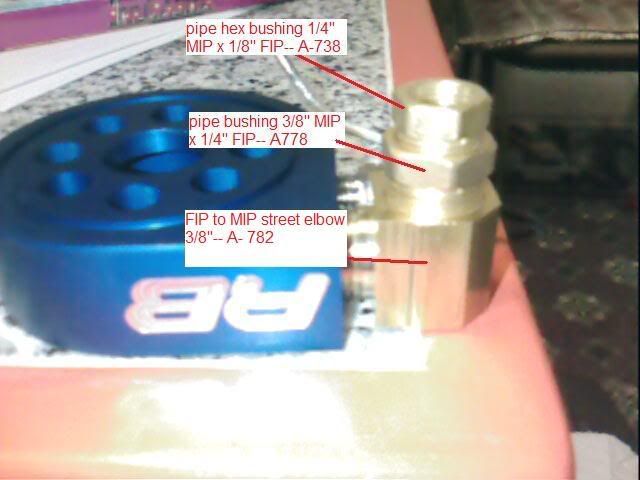
the brand is WATTS!
1. FIP to MIP street elbow 3/8"----- part number: A-782
2. pipe bushing 3/8" MIP x 1/4" FIP ----- part number: A-778
3. pipe hex bushing 1/4" MIPx 1/8" FIP ----- A-738

 09-20-2007, 12:49 PM
#260
2JZ Powered

Join Date: Sep 2005
Location: Meridian, MS
Posts: 185
Likes: 0
Received 0 Likes
on
0 Posts
 10-24-2007, 02:42 PM
#264
Thought I would add mine here as well.
http://www.youtube.com/watch?v=9Vt3hZbplUI - Crappy cell video - but sounds nice.
Autometer Cobalt

http://www.youtube.com/watch?v=9Vt3hZbplUI - Crappy cell video - but sounds nice.
Autometer Cobalt
10-25-2007, 03:38 PM
#265
angry racoon!

Join Date: Sep 2007
Location: VA
Posts: 8
Likes: 0
Received 0 Likes
on
0 Posts
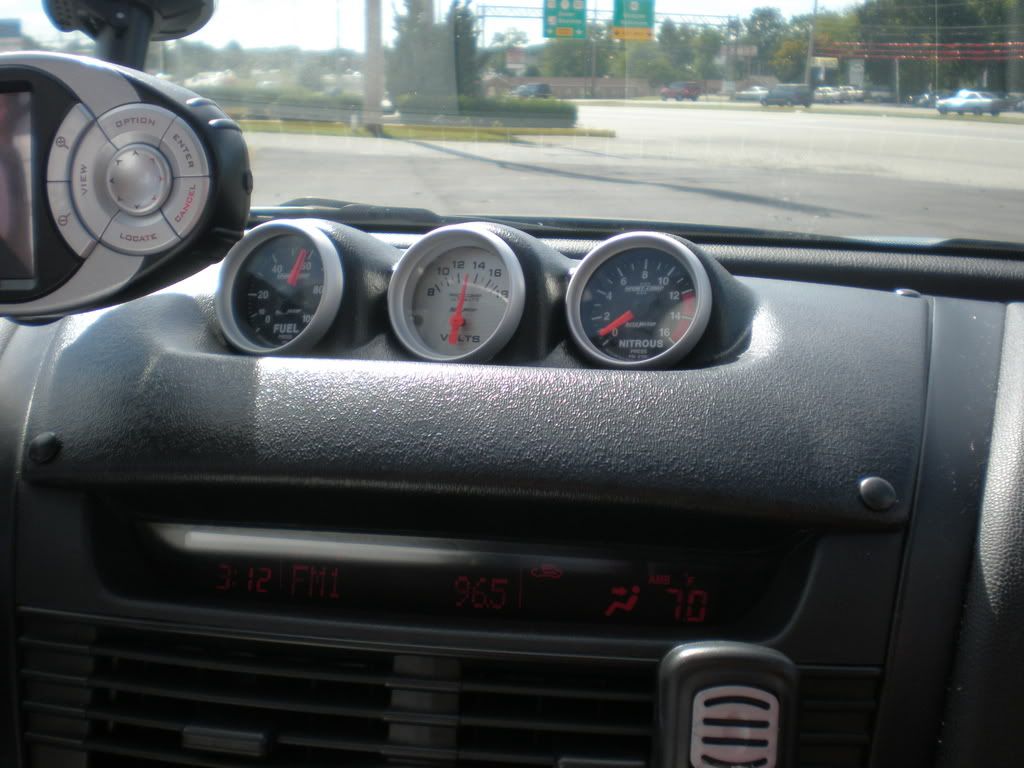
I have to get one of these w/ my greddy! Has anyone used the aem boost controller gauge from mazsport? It looks sweet...
What other 2 gauges should i put next to it, oil pressure, oil temp, water temp, or AFR???
What other 2 gauges should i put next to it, oil pressure, oil temp, water temp, or AFR???
12-03-2007, 06:44 PM
#267
Power!!

Hi folks. I installed my gauge pod this weekend and the RTV is not holding up. I'd like to switch to screws or something like it to secure it. Anyone have any good ideas on the size and type of screw and cover to go on it so it looks nice and clean on the dashboard? I'm going to hit up Home Despot after work and will be perusing the nuts and bolts aisle for ideas.
Also when hooking up a mechanical oil pressure gauge is it okay to have air in the lines or do I need to bleed it at the back of the gauge? I would think the air in the lines would mess up the accuracy of the gauges since its compressible. The gauge manual doesn't mention anything though.
Thanks!
Also when hooking up a mechanical oil pressure gauge is it okay to have air in the lines or do I need to bleed it at the back of the gauge? I would think the air in the lines would mess up the accuracy of the gauges since its compressible. The gauge manual doesn't mention anything though.
Thanks!
12-04-2007, 01:51 AM
#269
a.k.a. WhITeRE8
iTrader: (8)
Join Date: Apr 2005
Location: Nor Cal *
Posts: 2,231
Likes: 0
Received 0 Likes
on
0 Posts
Hi folks. I installed my gauge pod this weekend and the RTV is not holding up. I'd like to switch to screws or something like it to secure it. Anyone have any good ideas on the size and type of screw and cover to go on it so it looks nice and clean on the dashboard? I'm going to hit up Home Despot after work and will be perusing the nuts and bolts aisle for ideas.
Thanks!
Thanks!
12-04-2007, 12:23 PM
#270
Power!!
12-04-2007, 12:25 PM
#272
Power!!
I'll give it another shot this weekend. I suppose I just need to let it cure longer with the clamps on it. That and maybe glob more on than I originally used.
12-09-2007, 12:04 AM
#273
Power!!
Well I bled the oil pressure line and re-glued the panel and let it sit for 2 days. It all fits perfectly now and looks great. I'll add some pictures later.
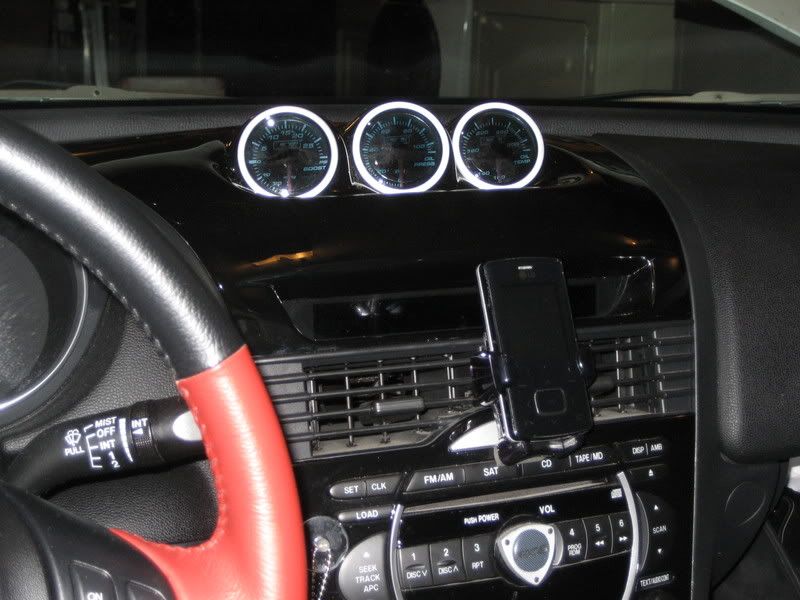
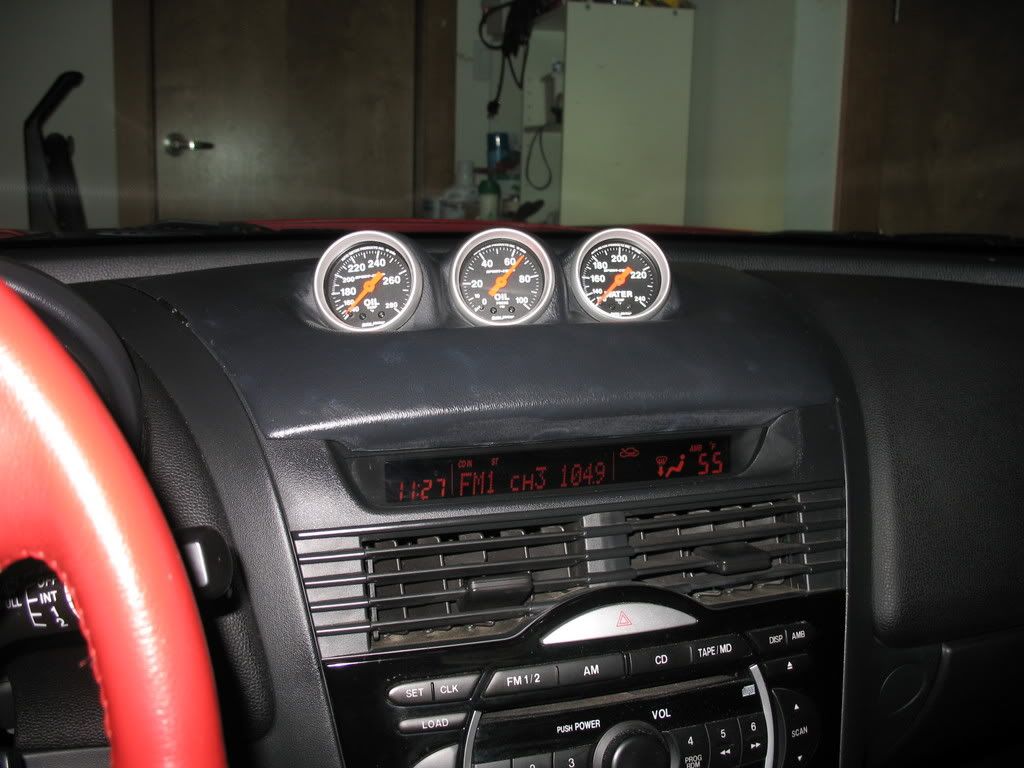
For those keeping score I bought the Racingbeat gauge kit and the Lotek pod and installed everything in the Lotek pod instead of Racingbeat's pod. It was definiltely more expensive but I was worried about not having everything I needed to put everything together. Now that I've done it once I'd buy the gauges and adapters separately and save some money.
The Racingbeat adapters work fine and there was enough run on the two temp gauges to be able to run them behind the stereo head unit down into the transmission lever opening and up to the adapters. It was a little tight but it worked.
One piece of advice is make sure you install the temp probes into the adapters before installing the adapters in the car. It was really tight to work in their installed locations. Also you need to put a brass fitting between the probes and the adapters. Otherwise screwing the probes directly into the adapters doesn't seal well enough and they leak.
All in all though I learned a bunch and it looks and works great! I can't wait to see how the engine really performs on our next track day in February!
12-09-2007, 01:49 PM
#275
Power!!
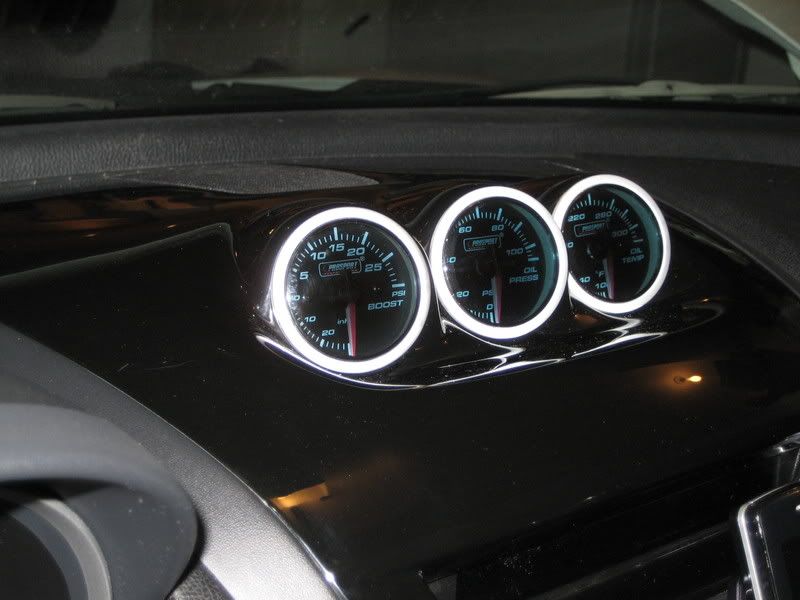
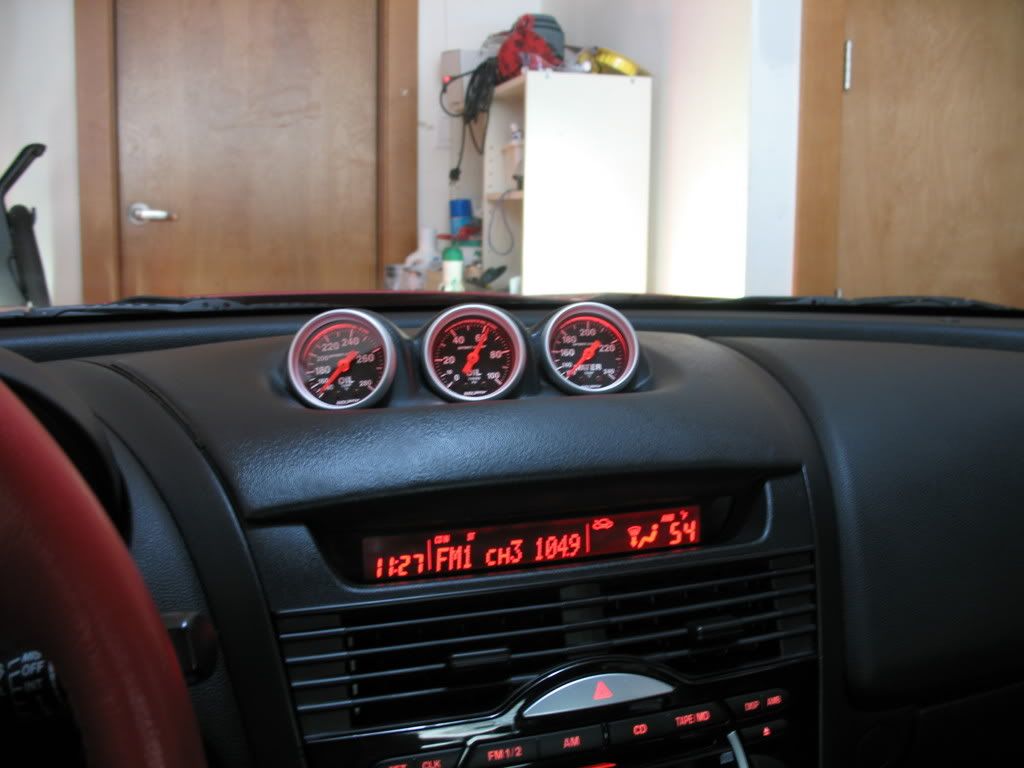
With and without the flash.
You can see some of my fingerprint marks in the flash picture. Those will clean up with some Armor All.
Notice the red backlighting similar to the stock lighting with the flash off. It looks very close to stock.
with flash
without flash and lights on
I also took a quick video to show how much the oil pressure moves with RPM. I can see why Mazda didn't put a true mechanical oil pressure gauge on the car. People would freak out if they saw how much their oil pressure fluctuated without understanding why??
http://www.youtube.com/watch?v=Pgt1cLd2NuQ