When you click on links to various merchants on this site and make a purchase, this can result in this site earning a commission. Affiliate programs and affiliations include, but are not limited to, the eBay Partner Network.
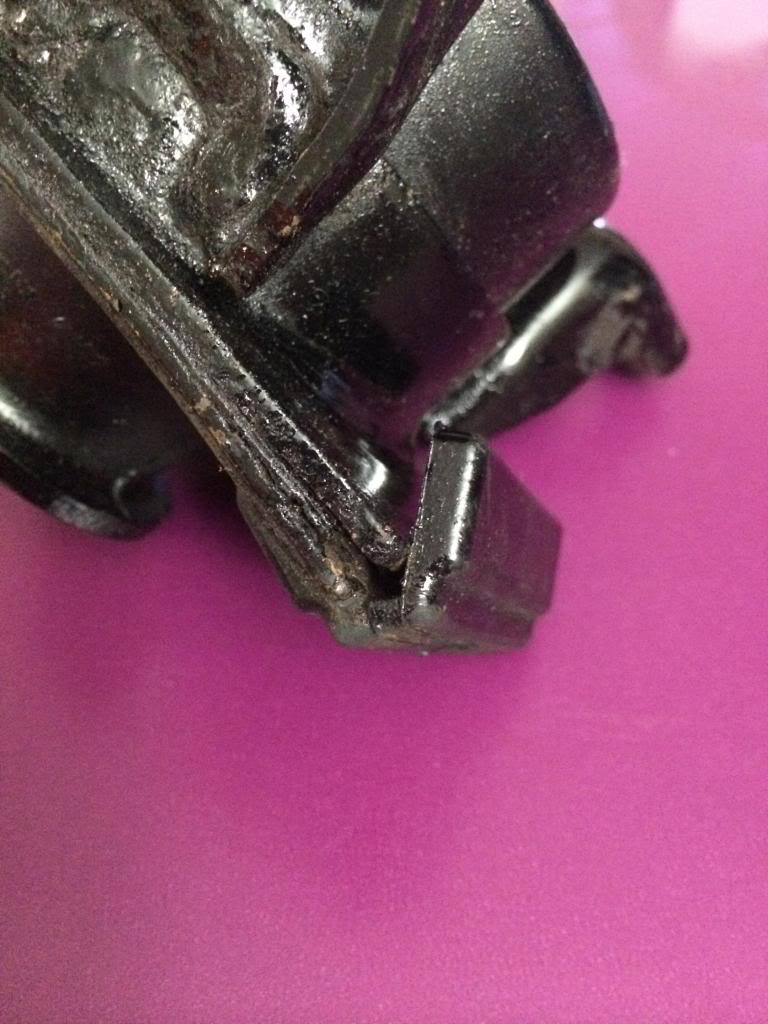
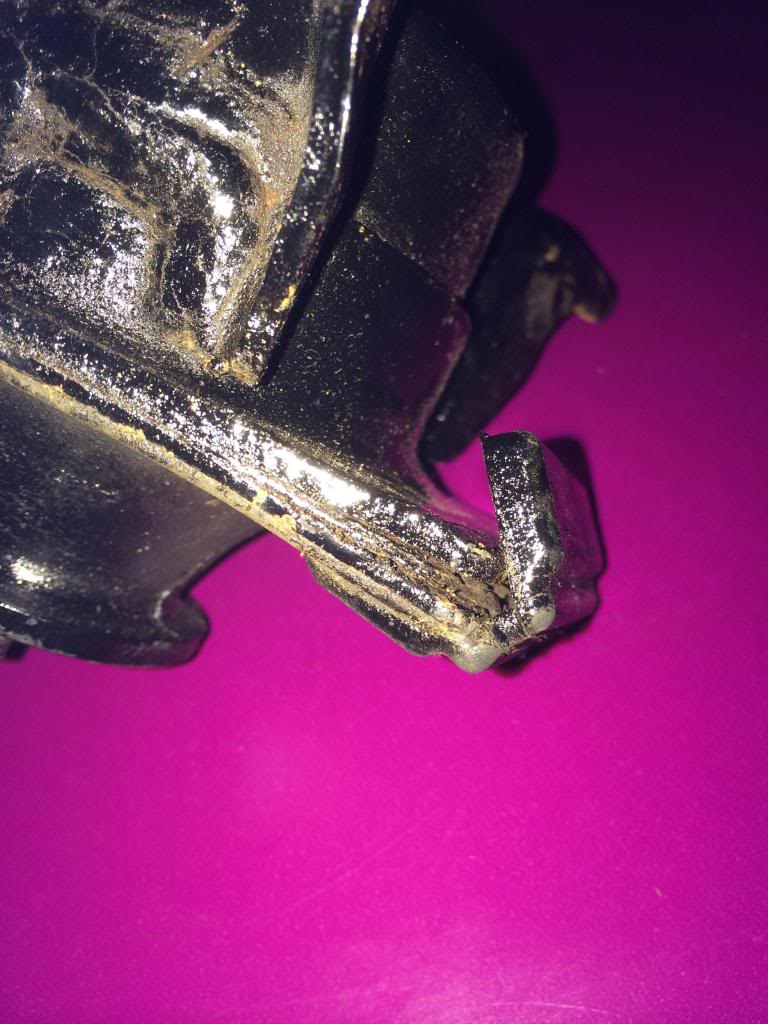
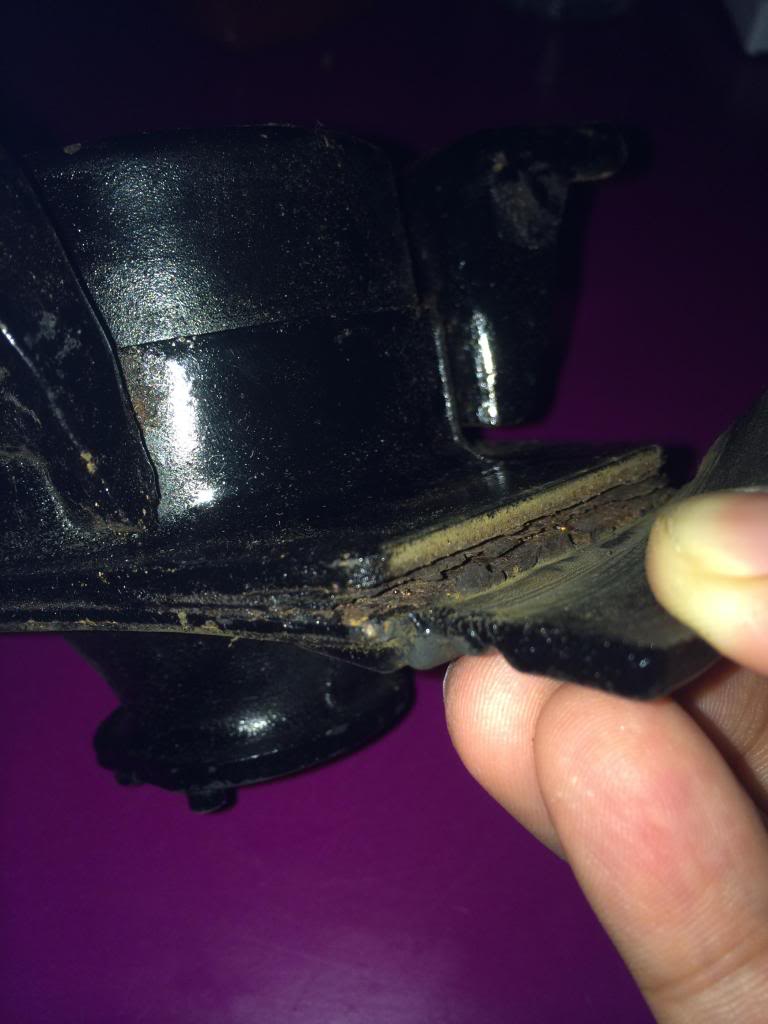
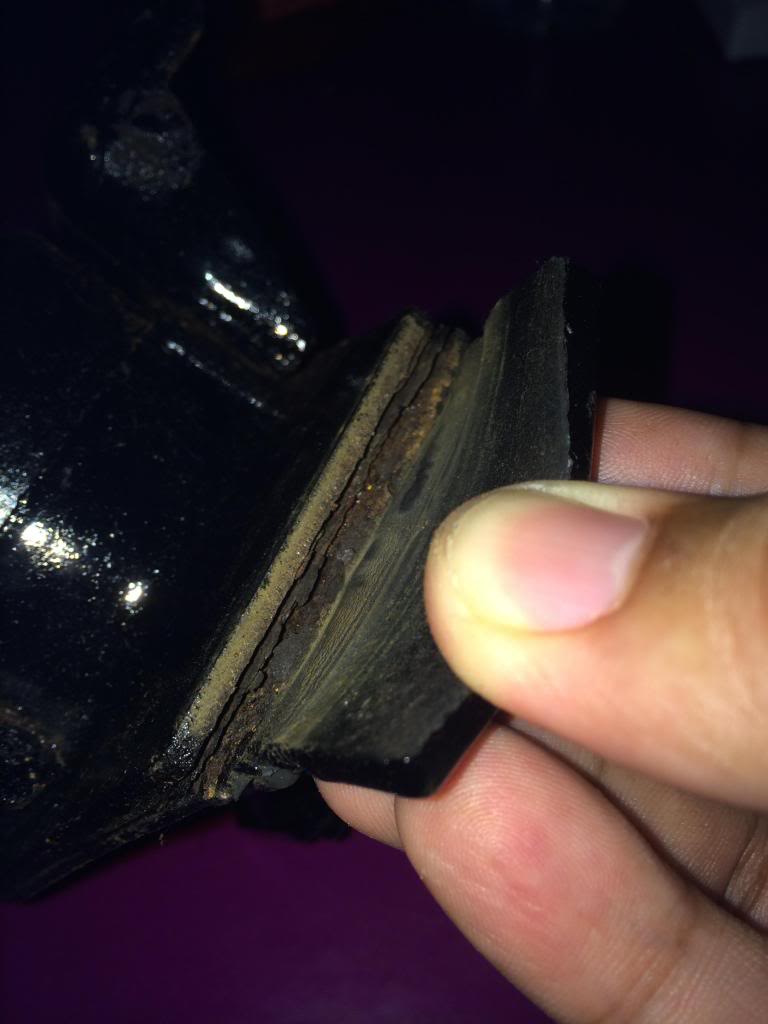
Ok... So I started this DIY last night, and decided to drill the holes in the mount today. I tried to be very careful, but just went a little too far on one of the holes and went through the rubber. It's a tiny hole, but I wanted to know if I can either bond it up with something, or will the urethane just fill in the hole anyways?
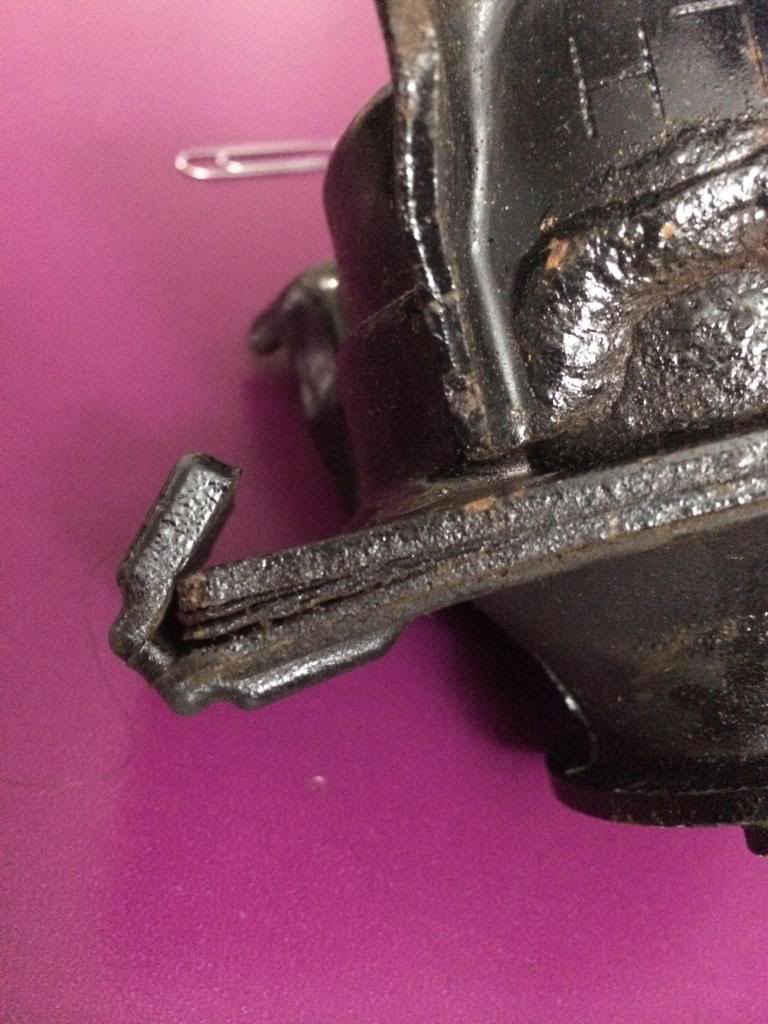
Luckily this was an extra mount I had lying around, so it's just a test mule for this DIY so I don't mess up on the real thing since I'll have to have my car out of commission for a week when I do the real thing.
As for that, can I just lift the engine with the floor jack method and 2x4's , then use two jack stands, one at the end of each pan, to rest the engine on? I'd place 2x4's in between the oil pan and jack stands just so the jack stand doesn't go through the pan. Lol
On my 04 manual, i have replaced the mounts with BHR medium stiffness inserts. It eliminated the shifter shake, but now have a light vibration in cabin. I exchanged inserts to low stifness and now have no vibration. I rebuilt the stock motormounts with shore 80 neoprene and painted with black Plastic Dip .they can be had for $60. + shipping SOLD
Last edited by Trackrat; May 18, 2014 at 02:46 PM.
Reason: added info
Hi all, When drilling out my LH engine mount I somehow managed to go slightly through the rubber top hat. I was wondering if anyone could give me some guidance as to whether it is still usable or if I need to source another one to fill with urethane,
Any help appreciated!
Last edited by -=drvr=-; Oct 8, 2014 at 04:26 AM.
Reason: Missing text
Let me add one thing to Team's excellent urethane filling instructions. If you do not want to leave your engine on a floor jack for a week, you can press fit pieces of 2x4 into the spaces normally occupied by the mounts and set the engine down on them. S2 cars have a somewhat fragile oil pan configuration, and even though I put lumber across it to more evenly distribute the weight, I did not want to leave a jack under it for 8 days.
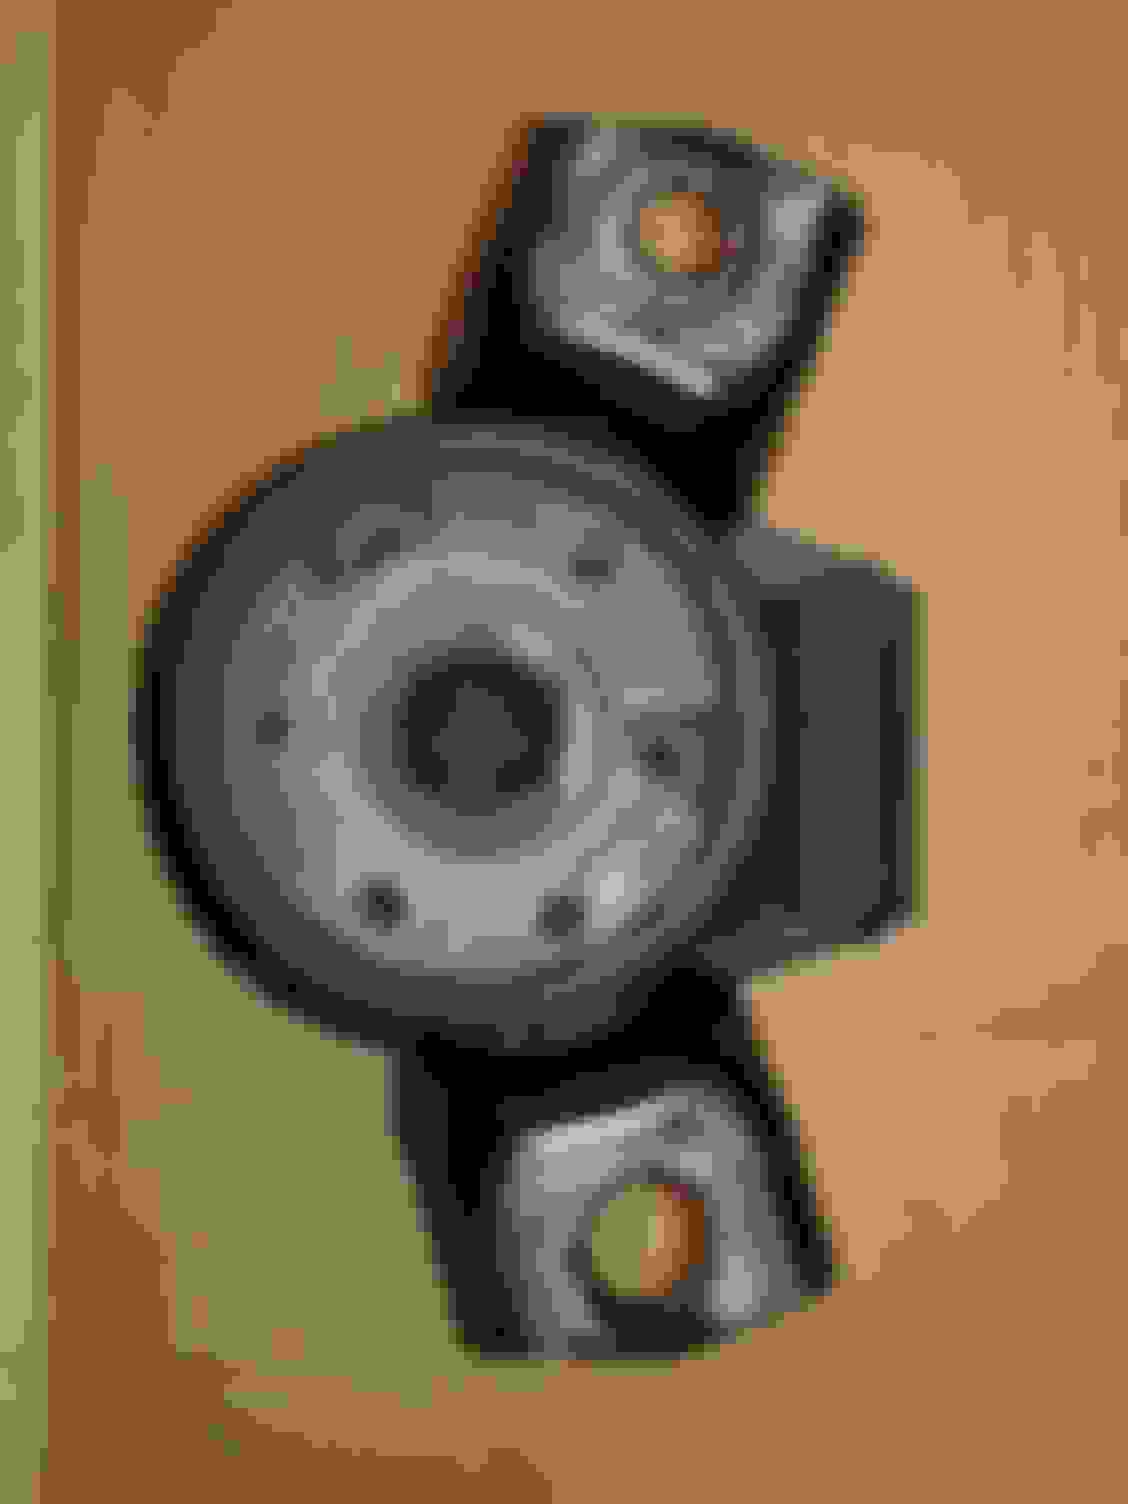
Here are some photos from when I did mine.
Drilled, washed, and blown dry with compressed air
Repainted, taped, ready to fill
Filled
Still filled
My procedure was a little bit different than Team's. Instead of using solvent, I soaked mine in a bucket of Joy detergent and hot water. I changed the soapy water and soaked them again, then rinsed thoroughly with hot water. I also taped mine, so I could pour about 1/16" extra urethane. That allowed me to file the urethane level, as the mounts do not sit level when turned upside-down. The extra material enabled me to precisely control the finished height. When I was finished working them, I beveled the edges with a sharp knife. I pulled the tape off after about 6 hours of cure time, then waited 7 days before working with them again. It has been a year, and they are performing very well. There is some added NVH, but it is isolated to under 2K RPM and isn't bad.
.
Last edited by Steve Dallas; Jan 28, 2019 at 09:14 AM.
Somewhere down the line, they added two small heat shields as the right engine mount prone to fail by exhaust heat.
It's a 5min and a 5penny job, I used a 0.5 mil metal sheet to be able to bend them during instal.
except it’s pretty much always the LH side that fails than the RH side where the exhaust is
the heat is not the cause of the failure, it’s the LH side being under tension under high engine loading which tears it out vertically while the RH side is under compression
Except on race/ track application mechanical stress might be the prominant factor,
however, on daily use, the heat cycle would cook engine mount way before. ( in RH version the UJ as well)
Under 20mile speed rx8 bay engine is an oven by the design fault, being exposed to exhaust heat would facilitate it more.
My RH engine mount was toasted while my LH was like brand new 38,000 milage, so as the most of rx8s I've seen.
As far I know there are three revisions regarding the heat failer for RH mounts.
I am doing an S1 and an S2 currently. My �04 had both mounts with centre plug visible and my �09 had both mounts with metal plates. One question I have, how much out of 1 lbs. is leftover after doing one set of mounts?
1lb. was enough for 2 sets. As suggested by teamRX8, I think it is a good idea to drill holes till the 3rd level. Don�t worry about going all the way. Now waiting for them to cure.