Smutterbutter Build
 03-27-2013, 02:14 AM
#1
Listen...you smell that?
Thread Starter

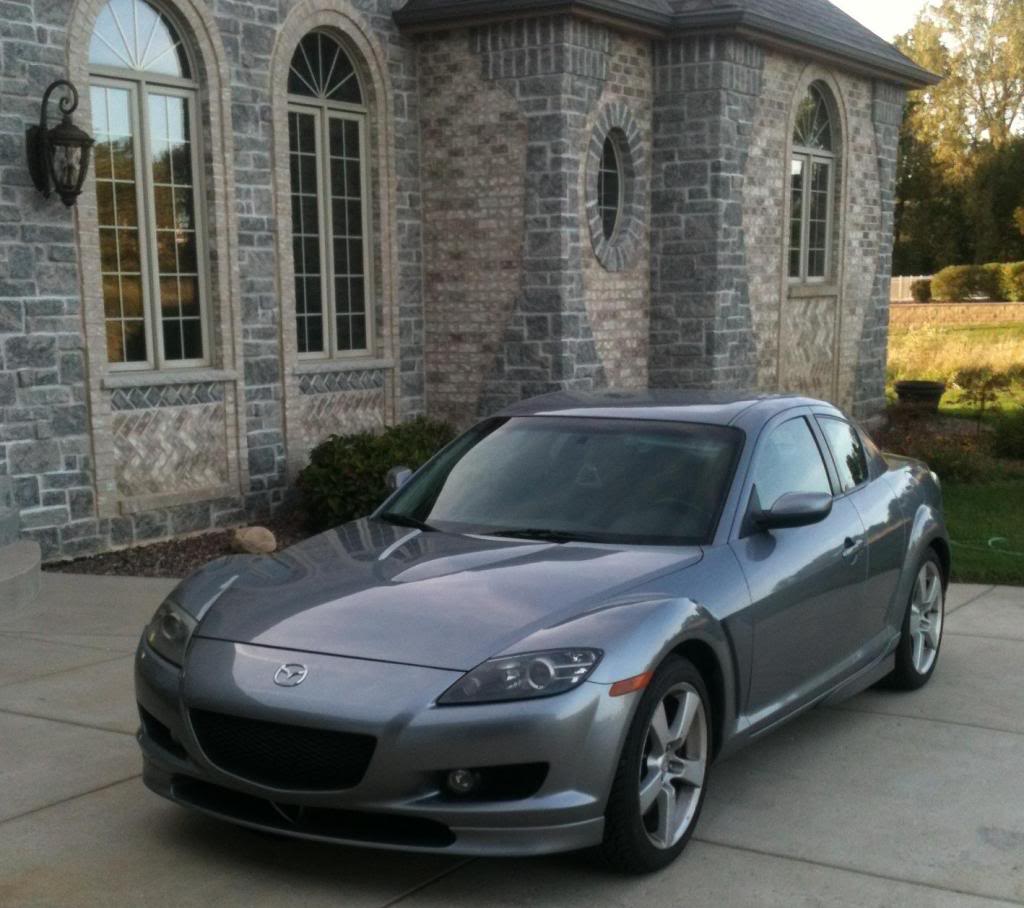
Greetings my fellow rotards! Being a Mazda fan since forever, the first car I purchased myself was a 2003 Protege5. At the time I was very tempted to hold out for my dream car at the time, the soon to be released all new RX8, but due to the circumstances at the time I went with the Prot�g�5 (still best all around car I've ever had to this day). Fast forward almost a decade and the Protege is long gone, I've stuffed my 99 Miata into a tire wall, my wife tells me I'm done with track days now that we have a kid. Bummer. So I spent the next few months searching for my next project. Wanted a FD but couldn't find one that wasn't raped 3 times over within 500 miles. Looked at going back to my Protege roots with the thought of boosting a P5, or restoring a MP3 but the thought of going back to FWD made me angry. Then destiny intervened and a titanium grey 04 Sport popped up for sale on the forum. The car was literally a mile from my house! Bonus!
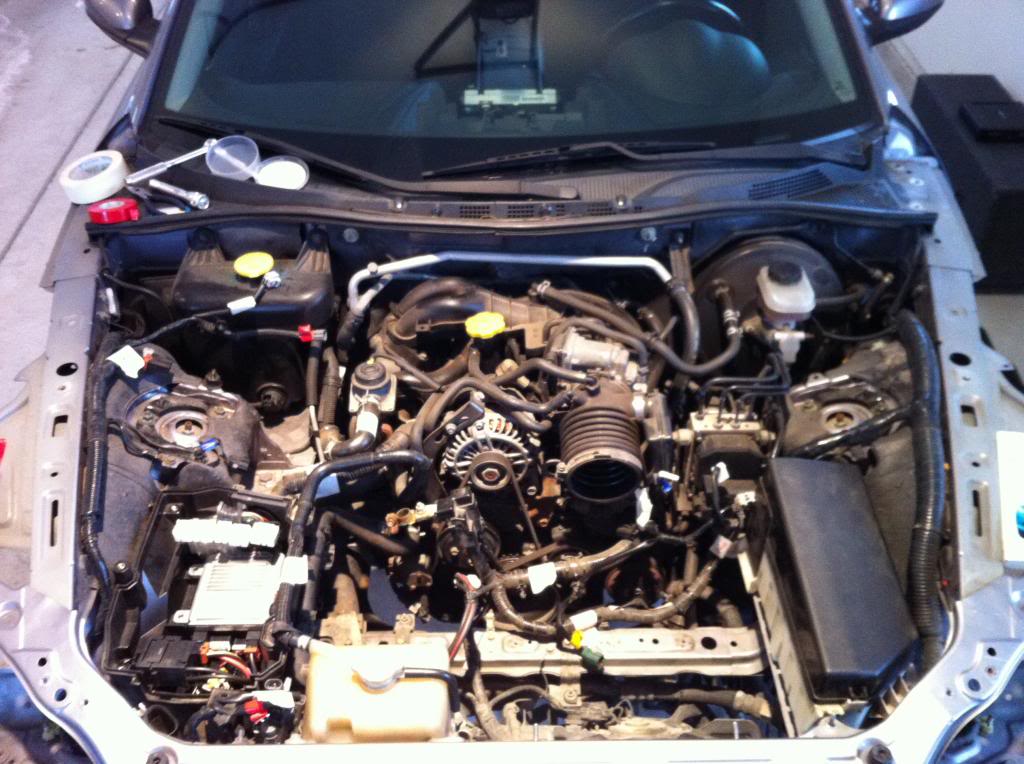
The car looked in pretty good shape externally. Despite spending its whole life in WI and IL there really was no rust at all, the passenger front fender was banged up pretty good from when the seller tried to flee his GF in a hurry, some scrapes on the rear bumper but nothing horrible. It had 100k miles and the guy selling it was the second owner. He used Castol 5w-20 unfortunately and was unsure about the previous owner. The car was branded by Mazda so since he couldn't get a free reman he wanted out. The engine did actually start after about 8-10 seconds of cranking. It would stall immediately if you let the RPM's drop below 1k. The clutch was shot, but cruising around and on the highway it ran surprisingly well. So a day after discovering it, I finally owned a piece of rotary history!
So here's the plan: Rebuild the engine - New housings no matter what, all new seals/gaskets, if irons are still ok and within spec, will get them lapped, possibly ported along with LIM and reuse them. If more than one iron and/or rotor are FUBAR, I may be giving Mazmart a call. Use thermal bybass pellet, Mazmart remedy water pump and oil pressure mod. BHR ignition. Upgraded starter. Fuel injectors flow tested. New OMP lines. Racing beat oil cooler lines. Oil temp and water temp gauges. New clutch. Racing Beat ECU flash. Catless Midpipe. New radiator/hoses. Probably a bunch of other little things I can't remember right now but that's the jist of it.
Let me add that prior to jumping into this project I have been reading, researching, and searching etc. for months if not years. So I may be wrong but I feel I've done my homework, I've got every book/manual/dvd/tool/ one could possible need to rebuild this thing short of a lapping machine. I'm no ace mechanic but I've been wrenching on cars for 10 years, mostly Mazda, but no rotary. Never rebuilt an engine but everybody has there first, right? So I thought I thought I'd start my first build thread to document my first rotary rebuild and, whether I succeed or fail miserably, hopefully along the way I'll gain some useful insight and guidance from the experienced guys and give a little encouragement to the guys in my shoes 6 months ago.
Before I get started I'd like to thank RotaryResurrection for his threads on engine removal and teardown. Made the whole process incredibly easy.
First day with the car. Driving it home was interesting and pretty damn fun. Nothing like the funny looks you get at a stop light while blipping the throttle to keep her going, bwa bwa bwaa bwaa bwaa bwaaaa!
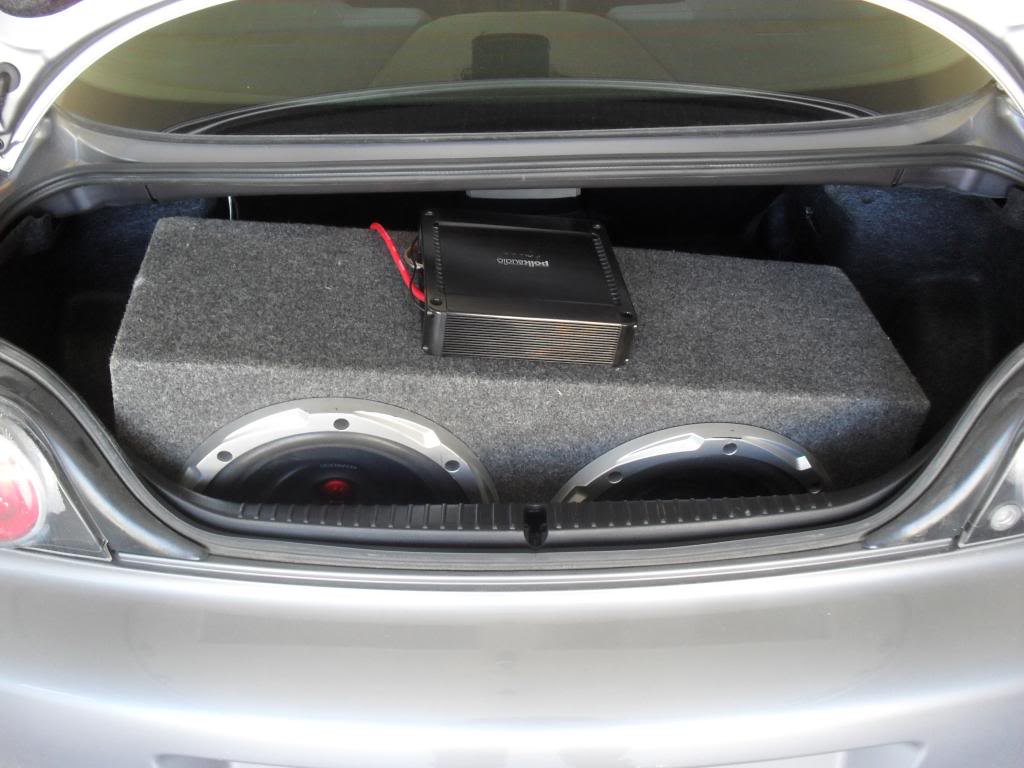
First order of business was to remove some dead weight. This beast weighed in at over 50lbs! WTF! All I have to say is why...WHY?!
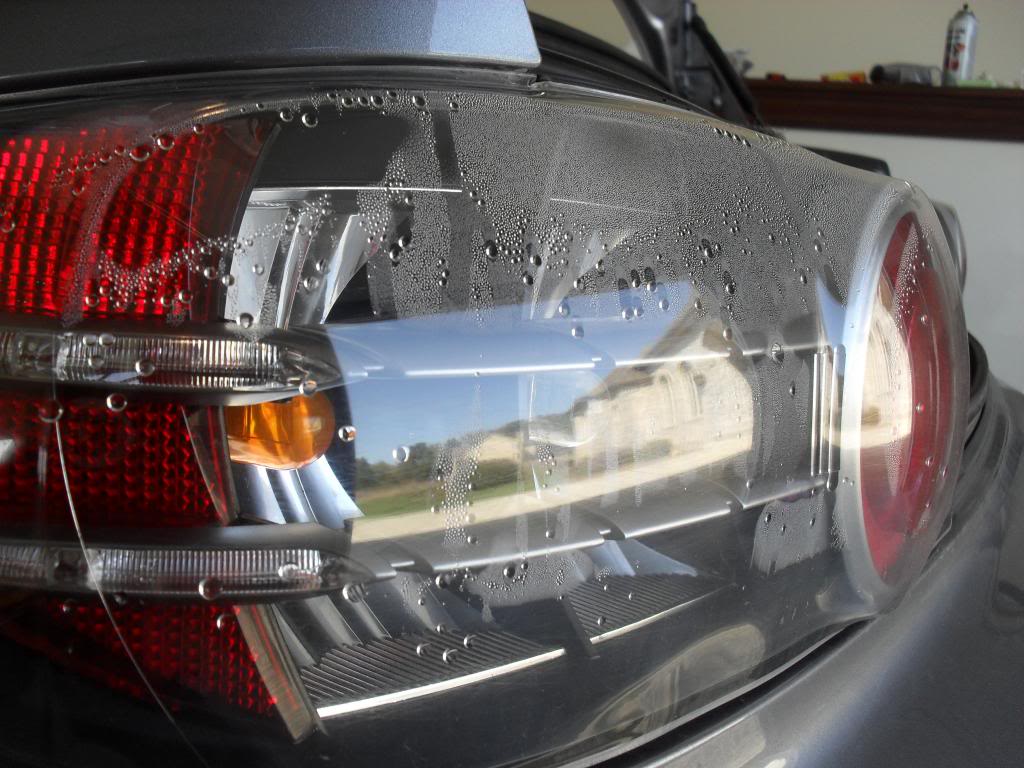
As the days of researching went by I had to find little jobs to tide me over. Started by fixing the fishbowls.
Next order of business was to remove the wiring for the sub and remove the entire aftermarket alarm system that was acting up. Previous owner paid almost $200 to have this system installed. It was done fairly well and was a huge pain in the *** to disconnect all the taps and connections made to the OEM harness but managed to get it out with no damage done.
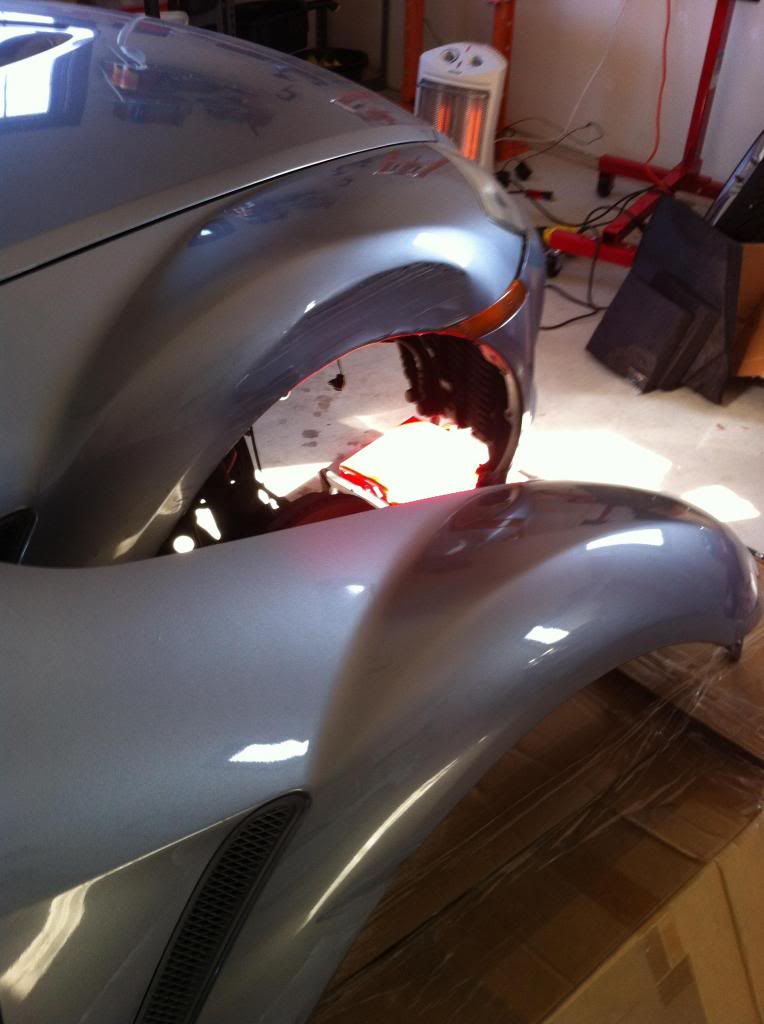
Here is the damage that the previous owner inflicted while trying to flee his underground parking spot quickly after a fight with his girlfriend...With time on my side I was able to wait around on the forum until one of the same color became available. Color looks pretty damn close, we'll see what it looks like in the sun someday.
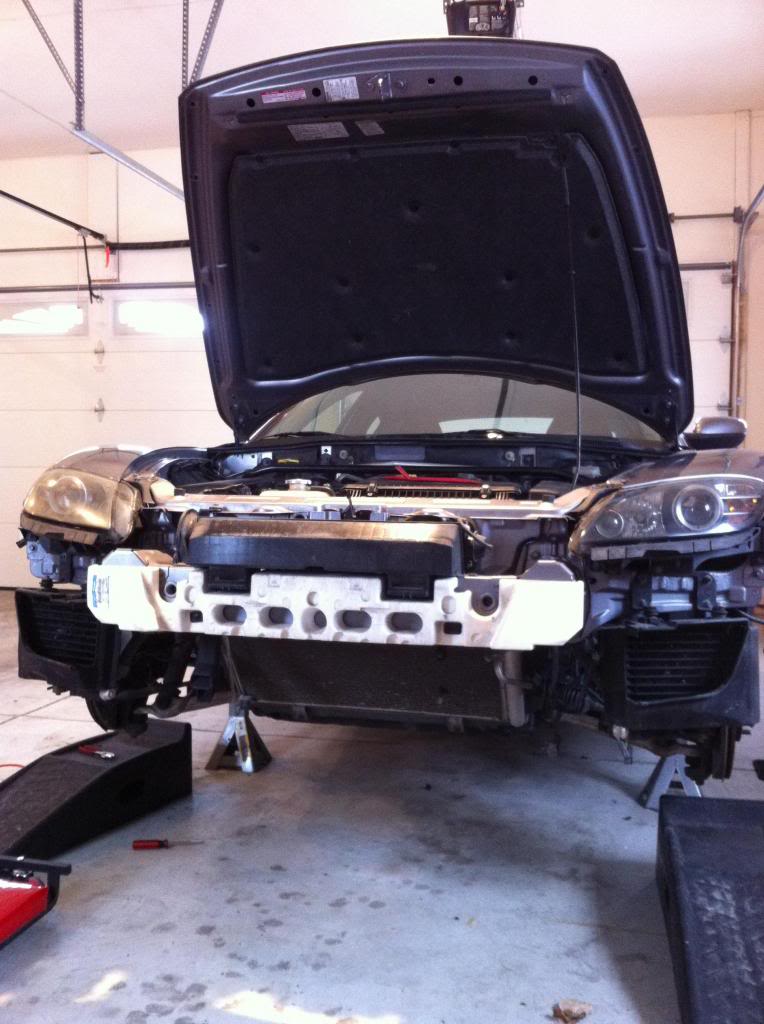
The car sat for a couple months like this while I gathered as much knowledge and tools as possible. Then the fun began!
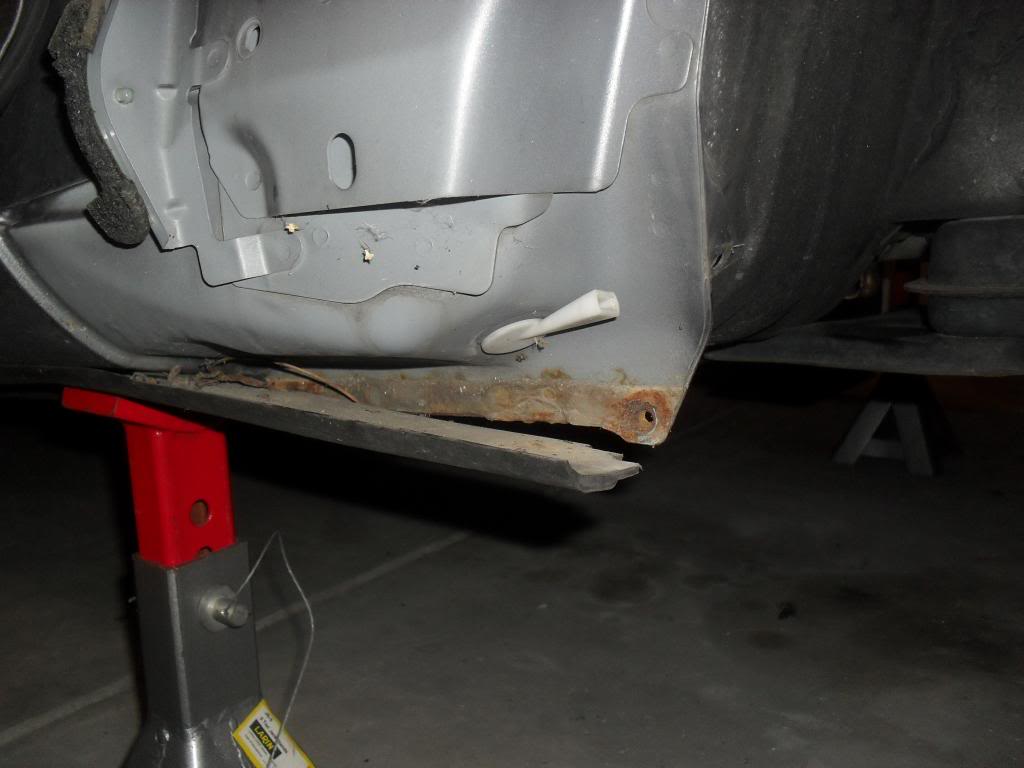
So I guess I was wrong about there being no rust...Still not bad for 9 years of WI/IL weather.
In order to try to keep everything as organized as possible I devised a pretty simple system of color coded electrical tape to help me remember what connects with what and where. I also put each individual parts hardware in a labeled freezer bag. By this point I already had about 30 bags full of bolts/brackets etc. I ended up with over 100...
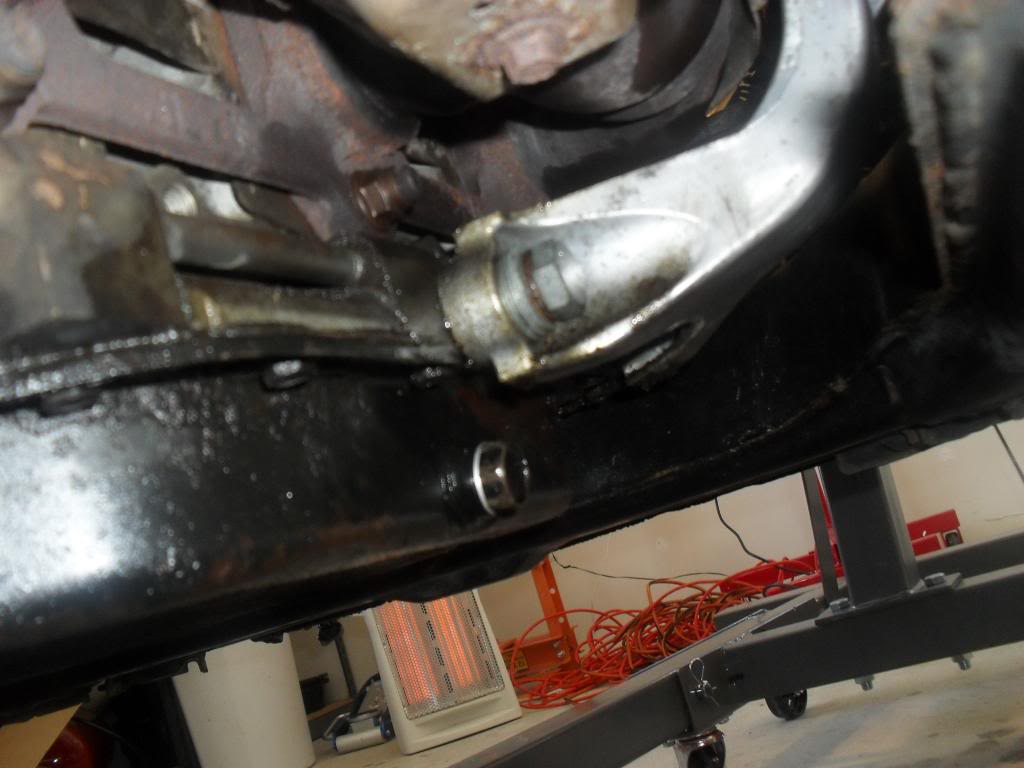
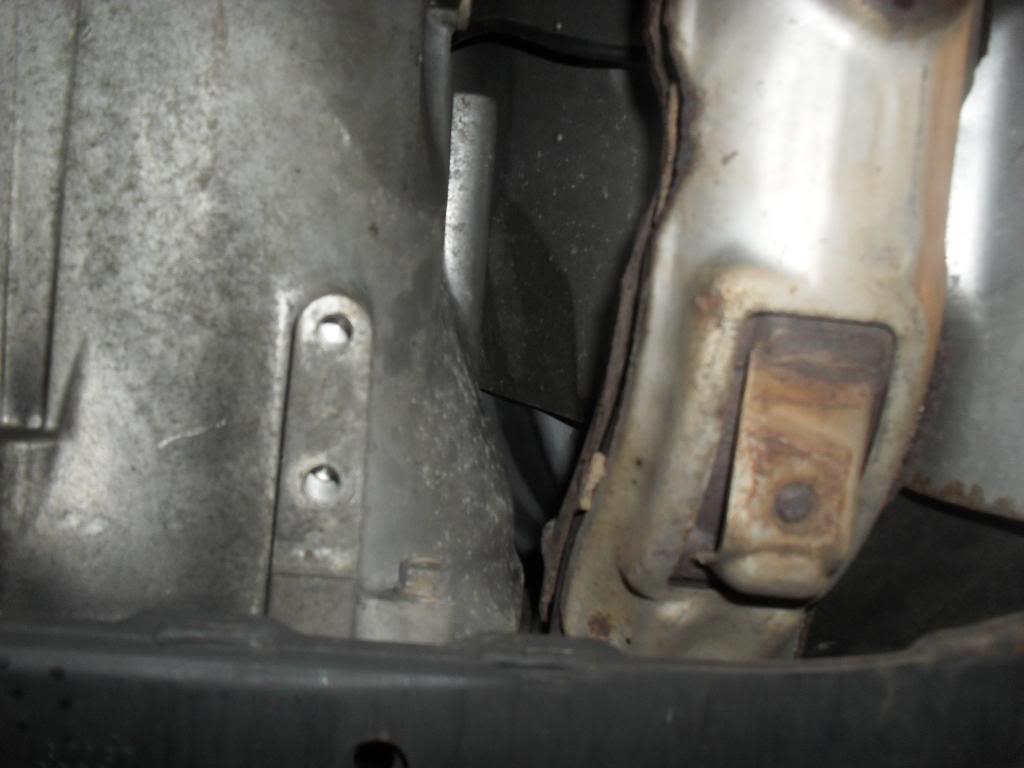
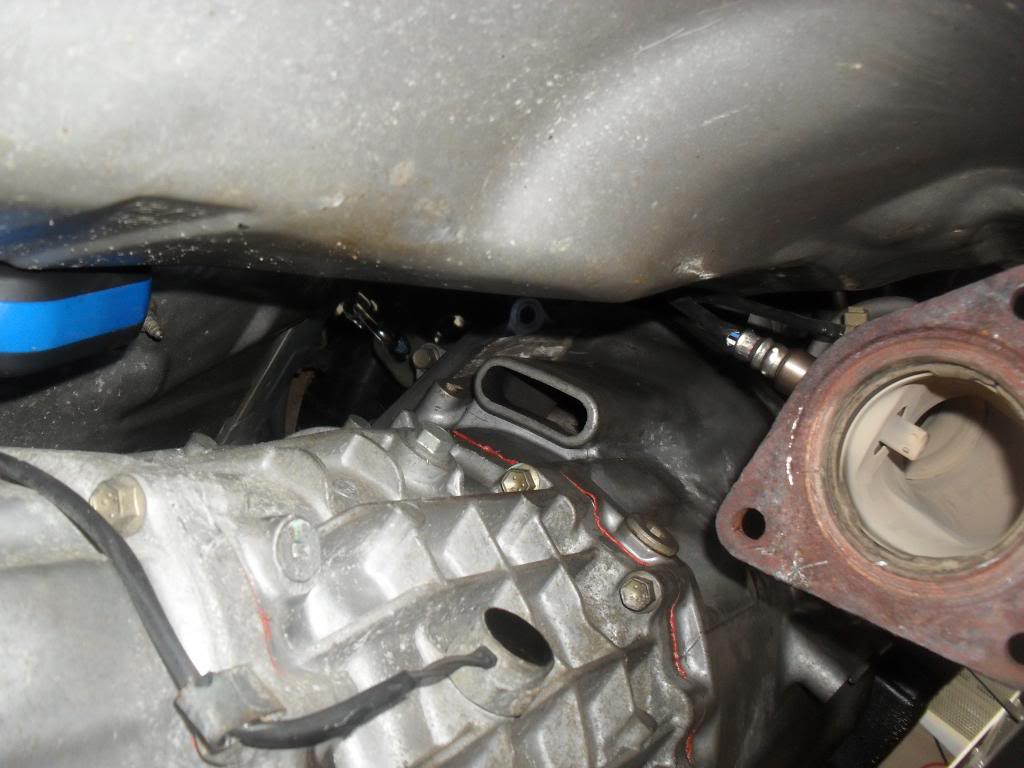
Throughout the process of preparing to remove the engine I made a few interesting discoveries. The first pic is the passenger side motor mount bracket. Previous owner had the motor mounts replaced by dealer last year. It was hard to get a good pic of it but it looks like the dealer used a bolt that was too long and had to use 3 large washers to shim it. This bolt was approx. 1cm or so longer than the corresponding bolt from the driver side bracket. The next pic is where I believe there should be a transmission to exhaust brace that has magically evaporated into thin air.
asdf
The car looked in pretty good shape externally. Despite spending its whole life in WI and IL there really was no rust at all, the passenger front fender was banged up pretty good from when the seller tried to flee his GF in a hurry, some scrapes on the rear bumper but nothing horrible. It had 100k miles and the guy selling it was the second owner. He used Castol 5w-20 unfortunately and was unsure about the previous owner. The car was branded by Mazda so since he couldn't get a free reman he wanted out. The engine did actually start after about 8-10 seconds of cranking. It would stall immediately if you let the RPM's drop below 1k. The clutch was shot, but cruising around and on the highway it ran surprisingly well. So a day after discovering it, I finally owned a piece of rotary history!
So here's the plan: Rebuild the engine - New housings no matter what, all new seals/gaskets, if irons are still ok and within spec, will get them lapped, possibly ported along with LIM and reuse them. If more than one iron and/or rotor are FUBAR, I may be giving Mazmart a call. Use thermal bybass pellet, Mazmart remedy water pump and oil pressure mod. BHR ignition. Upgraded starter. Fuel injectors flow tested. New OMP lines. Racing beat oil cooler lines. Oil temp and water temp gauges. New clutch. Racing Beat ECU flash. Catless Midpipe. New radiator/hoses. Probably a bunch of other little things I can't remember right now but that's the jist of it.
Let me add that prior to jumping into this project I have been reading, researching, and searching etc. for months if not years. So I may be wrong but I feel I've done my homework, I've got every book/manual/dvd/tool/ one could possible need to rebuild this thing short of a lapping machine. I'm no ace mechanic but I've been wrenching on cars for 10 years, mostly Mazda, but no rotary. Never rebuilt an engine but everybody has there first, right? So I thought I thought I'd start my first build thread to document my first rotary rebuild and, whether I succeed or fail miserably, hopefully along the way I'll gain some useful insight and guidance from the experienced guys and give a little encouragement to the guys in my shoes 6 months ago.
Before I get started I'd like to thank RotaryResurrection for his threads on engine removal and teardown. Made the whole process incredibly easy.
First day with the car. Driving it home was interesting and pretty damn fun. Nothing like the funny looks you get at a stop light while blipping the throttle to keep her going, bwa bwa bwaa bwaa bwaa bwaaaa!
First order of business was to remove some dead weight. This beast weighed in at over 50lbs! WTF! All I have to say is why...WHY?!
As the days of researching went by I had to find little jobs to tide me over. Started by fixing the fishbowls.
Next order of business was to remove the wiring for the sub and remove the entire aftermarket alarm system that was acting up. Previous owner paid almost $200 to have this system installed. It was done fairly well and was a huge pain in the *** to disconnect all the taps and connections made to the OEM harness but managed to get it out with no damage done.
Here is the damage that the previous owner inflicted while trying to flee his underground parking spot quickly after a fight with his girlfriend...With time on my side I was able to wait around on the forum until one of the same color became available. Color looks pretty damn close, we'll see what it looks like in the sun someday.
The car sat for a couple months like this while I gathered as much knowledge and tools as possible. Then the fun began!
So I guess I was wrong about there being no rust...Still not bad for 9 years of WI/IL weather.
In order to try to keep everything as organized as possible I devised a pretty simple system of color coded electrical tape to help me remember what connects with what and where. I also put each individual parts hardware in a labeled freezer bag. By this point I already had about 30 bags full of bolts/brackets etc. I ended up with over 100...
Throughout the process of preparing to remove the engine I made a few interesting discoveries. The first pic is the passenger side motor mount bracket. Previous owner had the motor mounts replaced by dealer last year. It was hard to get a good pic of it but it looks like the dealer used a bolt that was too long and had to use 3 large washers to shim it. This bolt was approx. 1cm or so longer than the corresponding bolt from the driver side bracket. The next pic is where I believe there should be a transmission to exhaust brace that has magically evaporated into thin air.
asdf
 03-27-2013, 02:15 AM
#2
Listen...you smell that?
Thread Starter
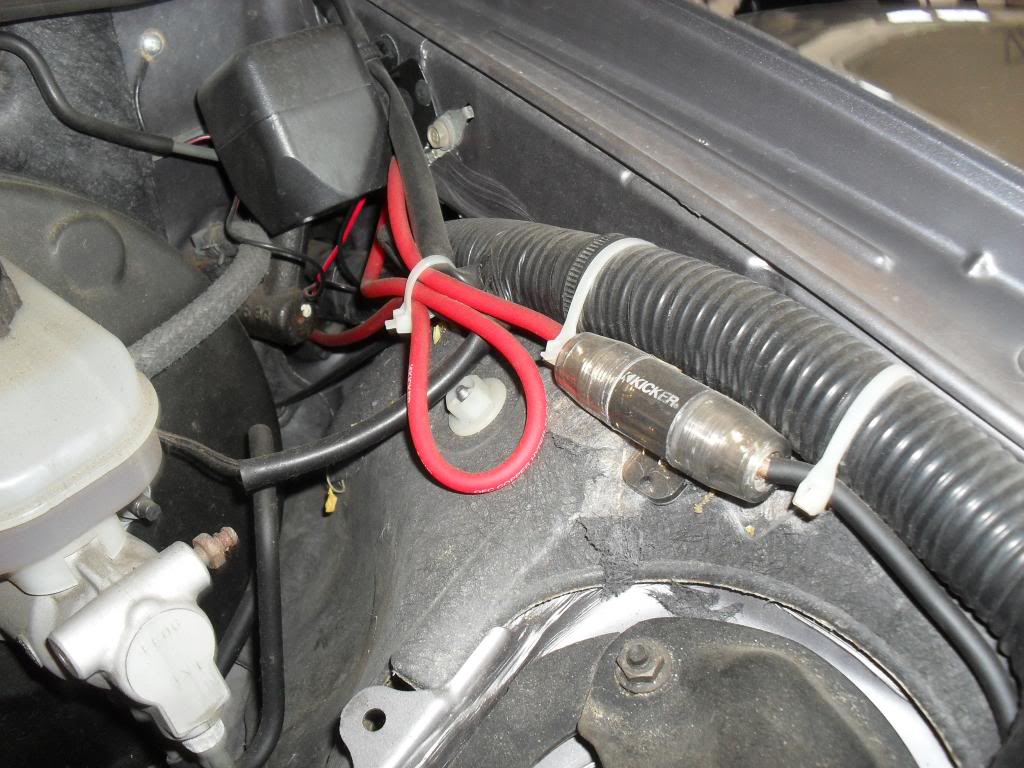
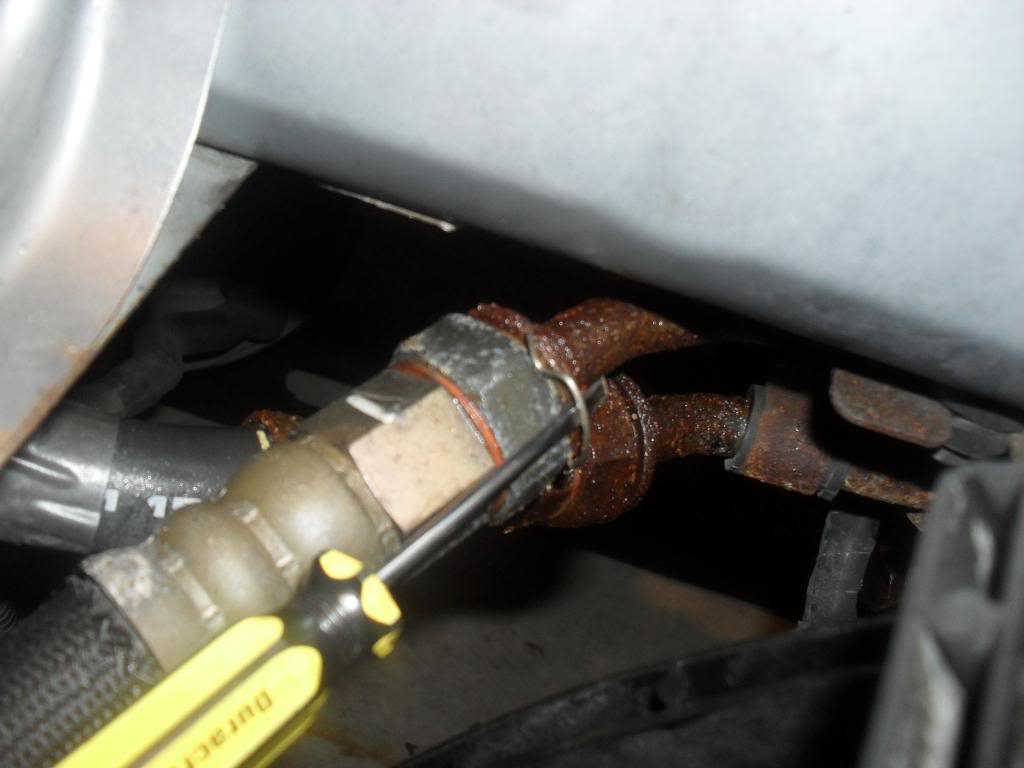
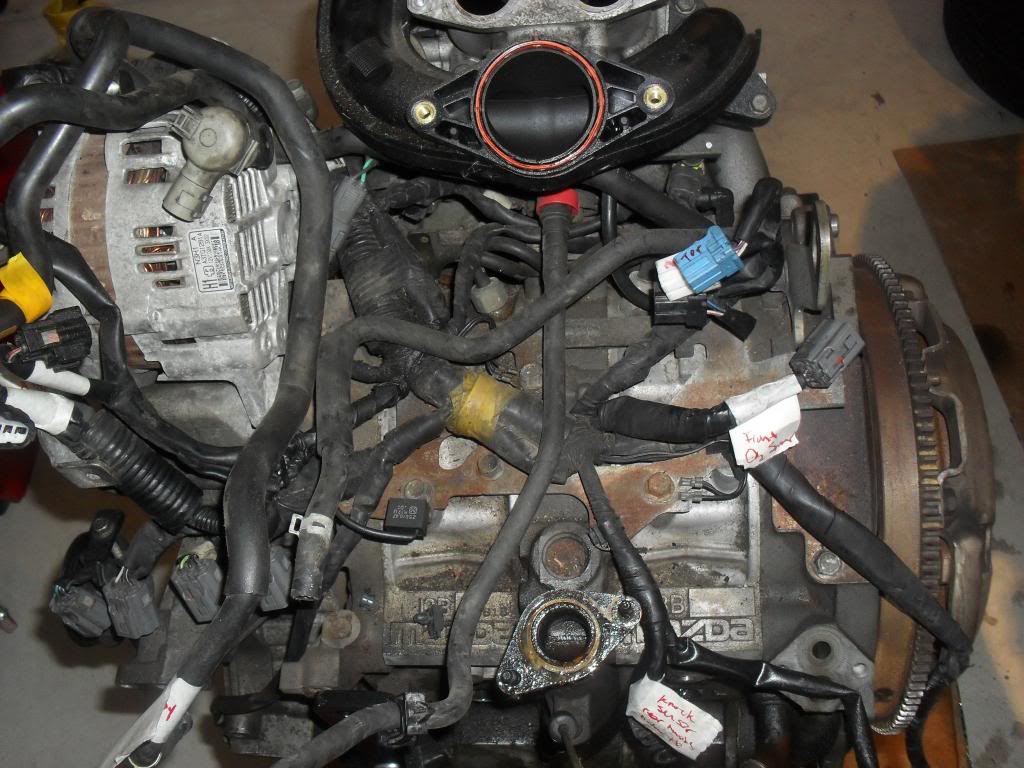
THe oil cooler lines were heavily corroded and nearly stopped me in my tracks. Luckily I was able to disconnect the Oil cooler to front cover line and the line to the rear at the connection just in front of the radiator. While a bit pricey I think replacing these fugly's with RB's set would be a good idea. I like the idea of having a few less possible failure points.
Pure nastiness
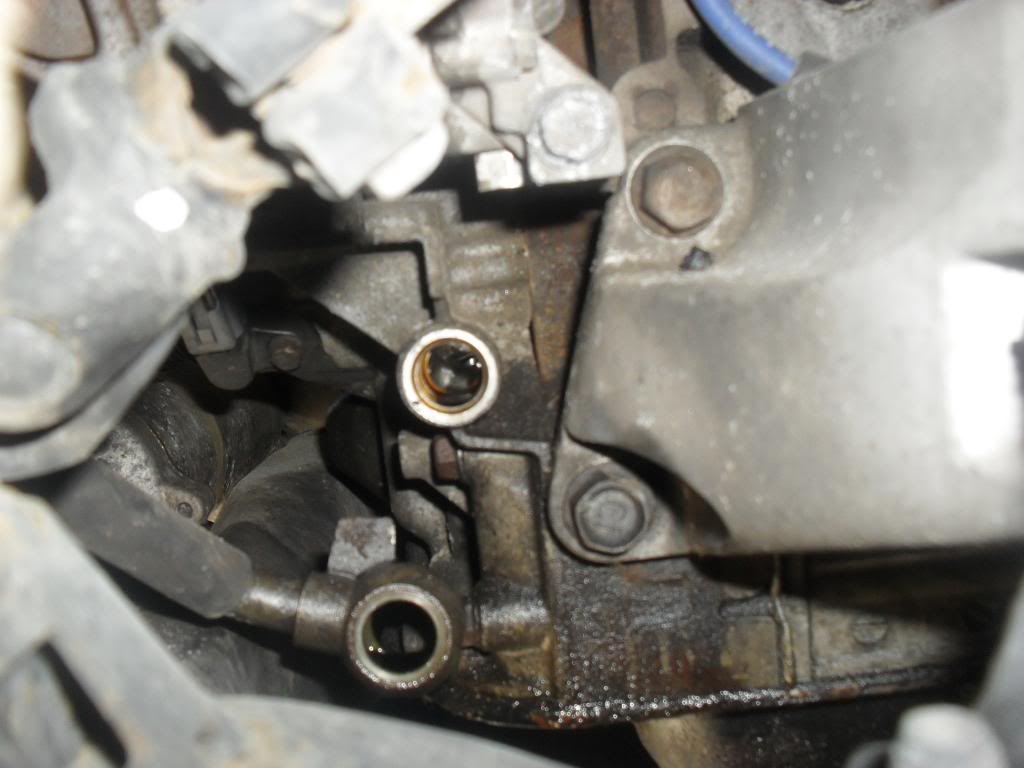
Basically every few days for about a month I would find an hour or two of free time and methodically remove a part, take pics, bag the hardware and label it, and repeat. I felt like a magician pulling that impossibly long rainbow colored ribbon out of his mouth at times. No matter how much I removed it seemed like there was always a lot more to come out.
Getting at the bellhousing bolts was a major pain in the ***. I ended up removing the cat, all three crossmembers, and had to use what I swear seemed like 4ft of extensions and a universal joint to get at the top two bolts. Thanks Mazda.
Pure nastiness
Basically every few days for about a month I would find an hour or two of free time and methodically remove a part, take pics, bag the hardware and label it, and repeat. I felt like a magician pulling that impossibly long rainbow colored ribbon out of his mouth at times. No matter how much I removed it seemed like there was always a lot more to come out.
Getting at the bellhousing bolts was a major pain in the ***. I ended up removing the cat, all three crossmembers, and had to use what I swear seemed like 4ft of extensions and a universal joint to get at the top two bolts. Thanks Mazda.
Last edited by Smutterbutter; 03-27-2013 at 02:43 PM.
 03-27-2013, 02:49 PM
#5
Listen...you smell that?
Thread Starter
Thank you very much, yeah what's in this thread is about 1% of the total pics I took. Basically every single step I have a pic of, hopefully it pays off when its time to piece everything back together!
03-27-2013, 03:08 PM
#6
Listen...you smell that?
Thread Starter
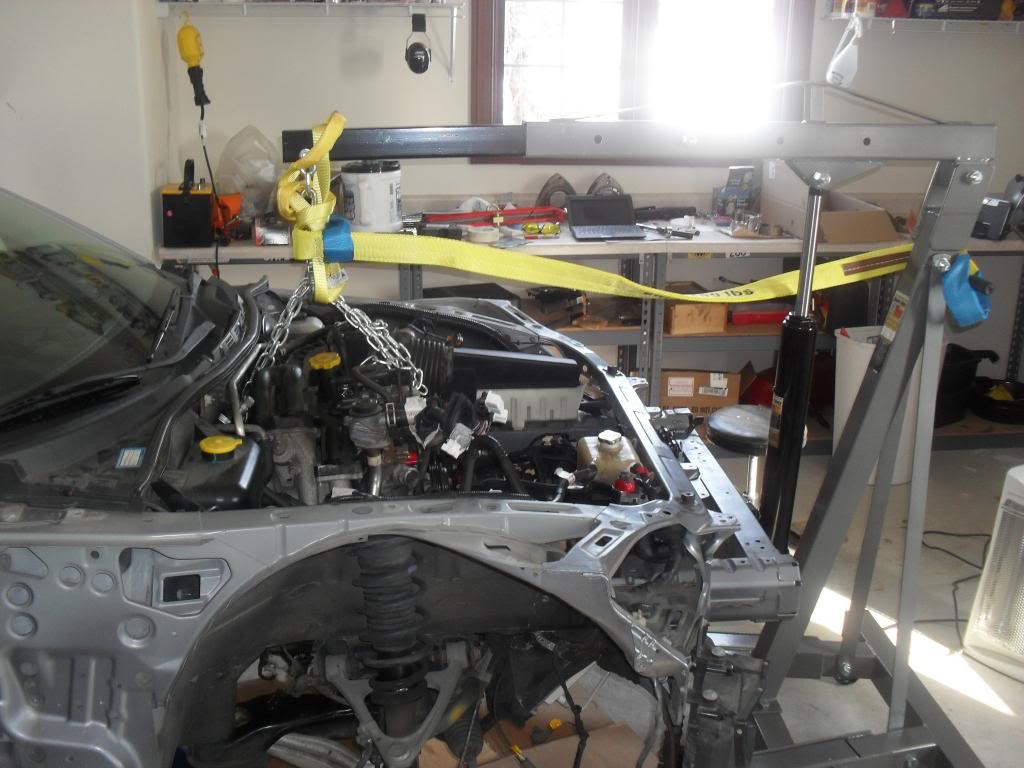
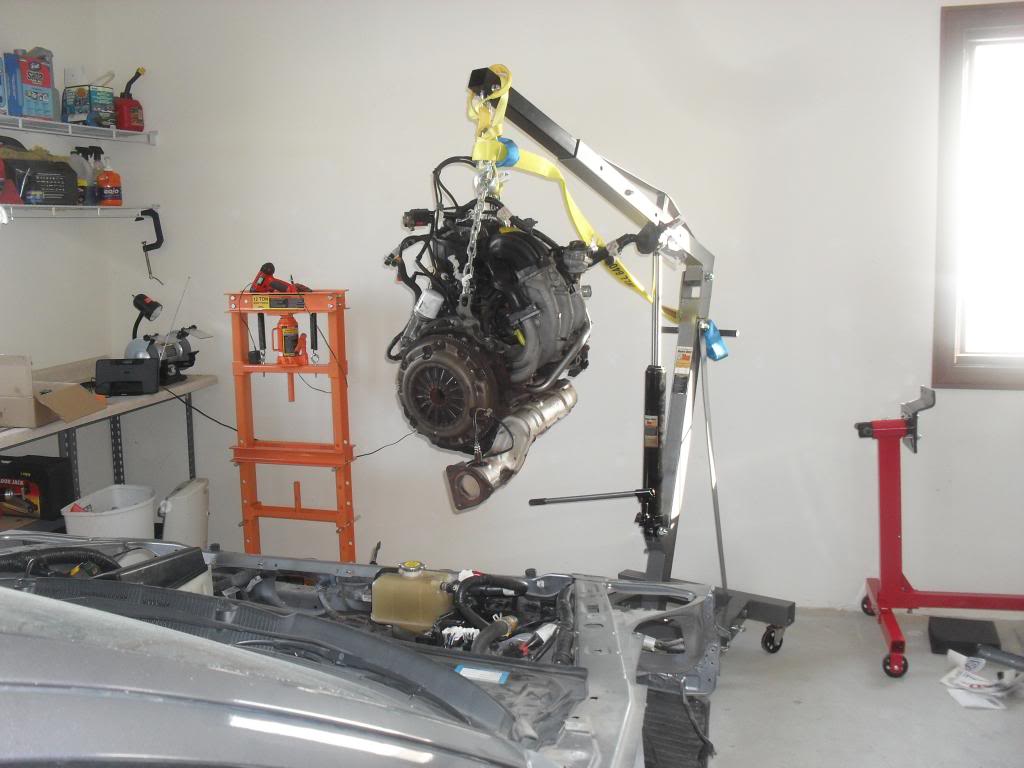
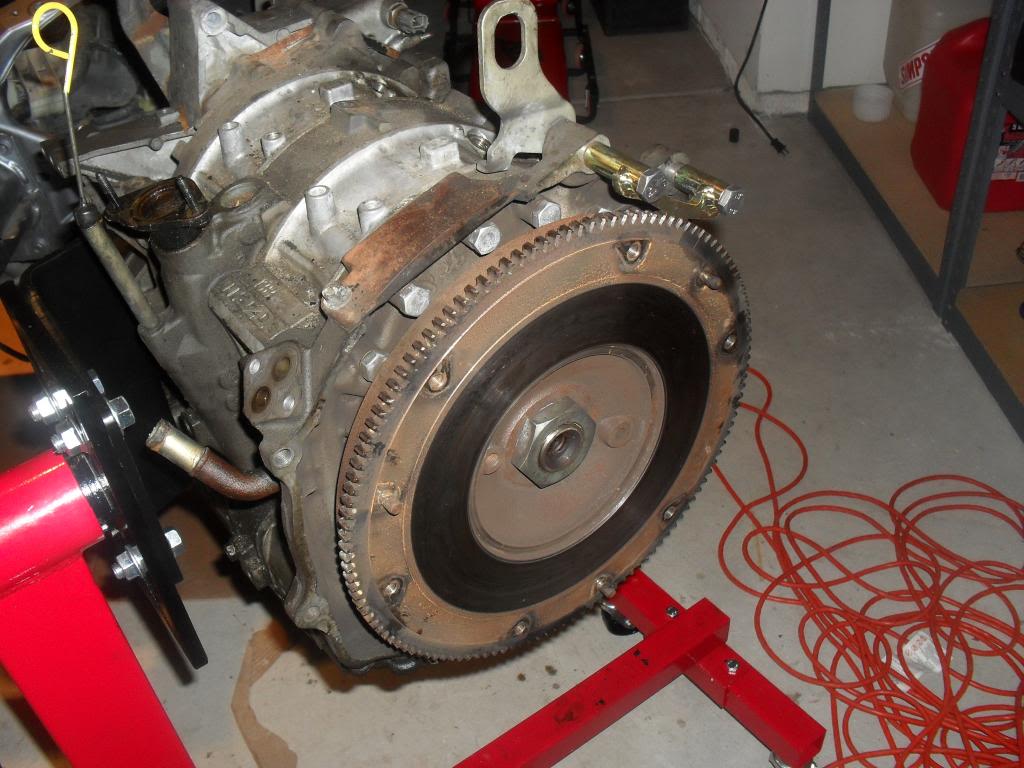
Took me about a month but finally was able to start lifting this beast out. Have to admit this was my first time pulling a motor and as it was coming out I was giddy as hell, laughing out loud, even let out a few whooots. Some of my friends question how this can possible be that much fun. If they only knew...
The pulling process:
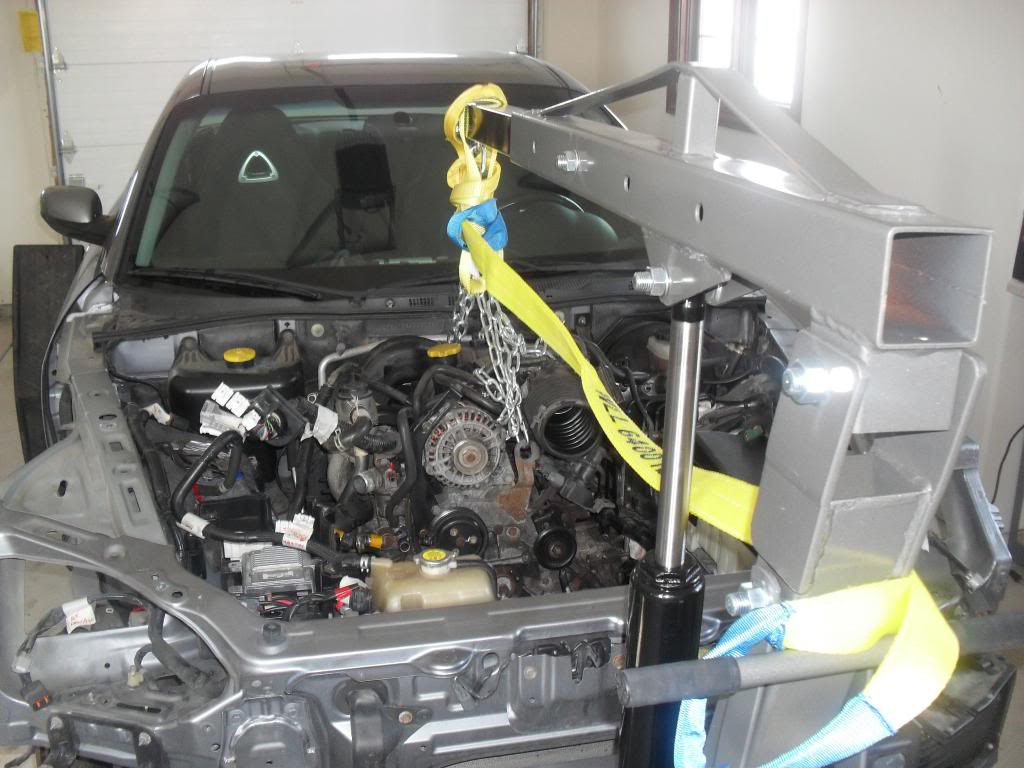
As you can see the clearance on the driver side is tight. I left the AC compressor hanging on the steering rack and ziptied it as far to the outside as I could. There is a brake line that travels just above the rear cover along the firewall that I started to hit on the way out. I was able to just relocate it to the upper most slot of its plastic bracket.
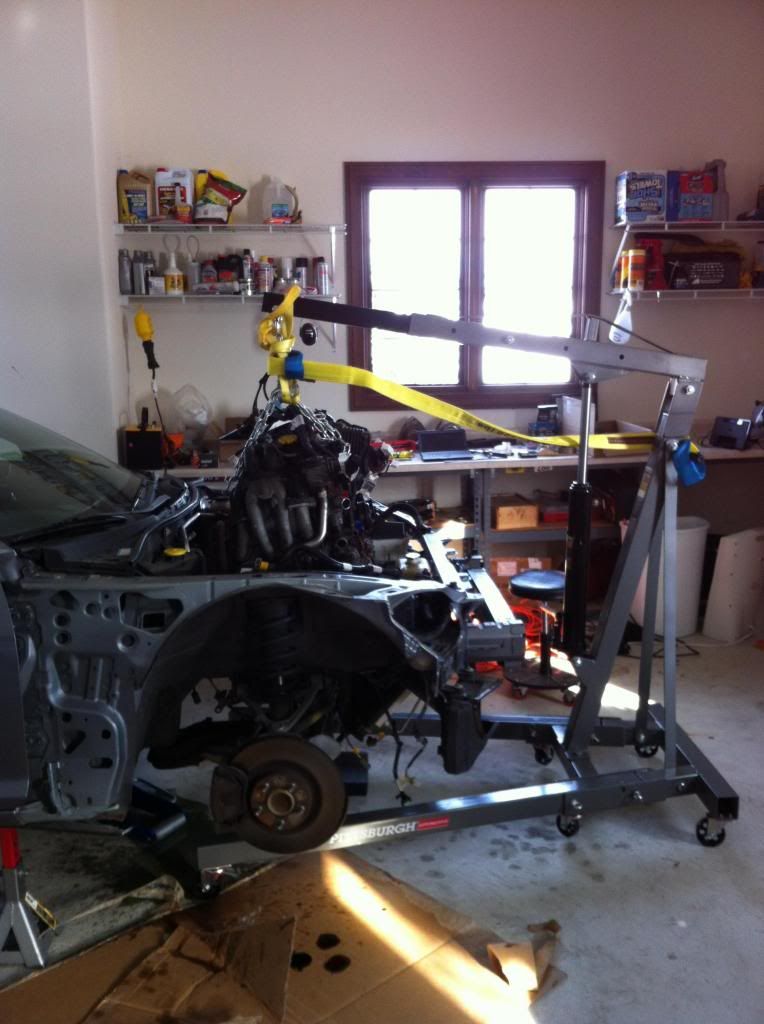
(Angels Singing)

Victory!!
The pulling process:
As you can see the clearance on the driver side is tight. I left the AC compressor hanging on the steering rack and ziptied it as far to the outside as I could. There is a brake line that travels just above the rear cover along the firewall that I started to hit on the way out. I was able to just relocate it to the upper most slot of its plastic bracket.
(Angels Singing)
Victory!!
 03-28-2013, 08:19 PM
#8
Listen...you smell that?
Thread Starter
Ask and ye shall receive!
Header came off fairly easily, a couple nuts we're pretty much fused to the stud and came out together
Engine harness labeled as best I could, just a few parts left to remove 'til the real fun starts...
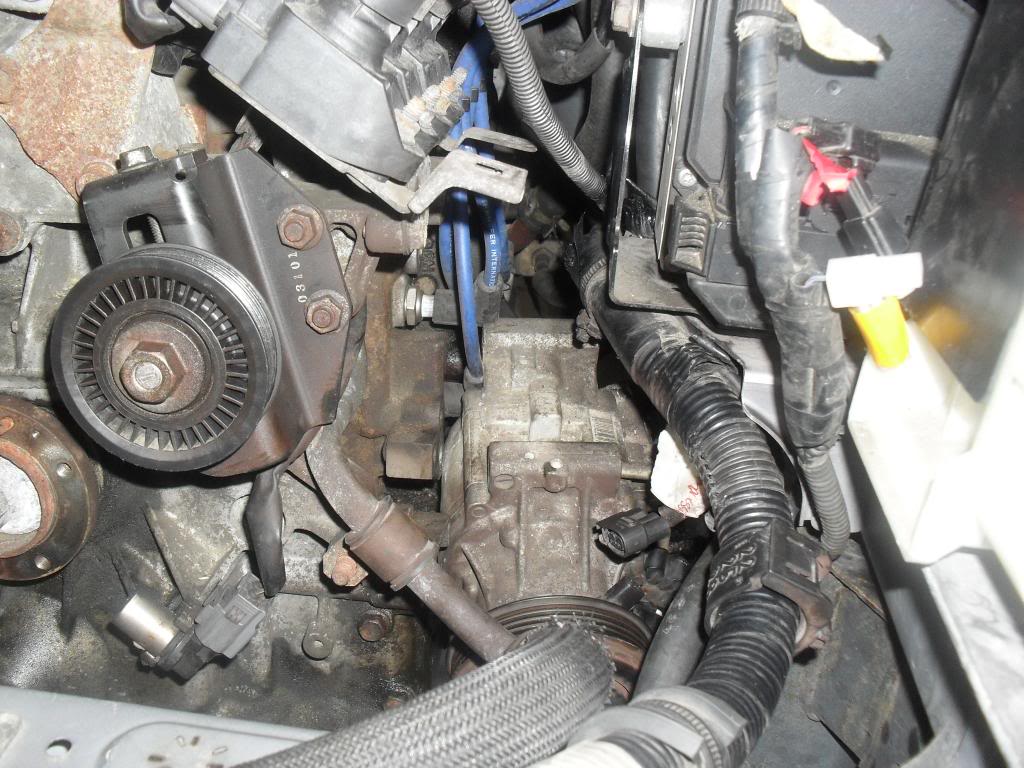
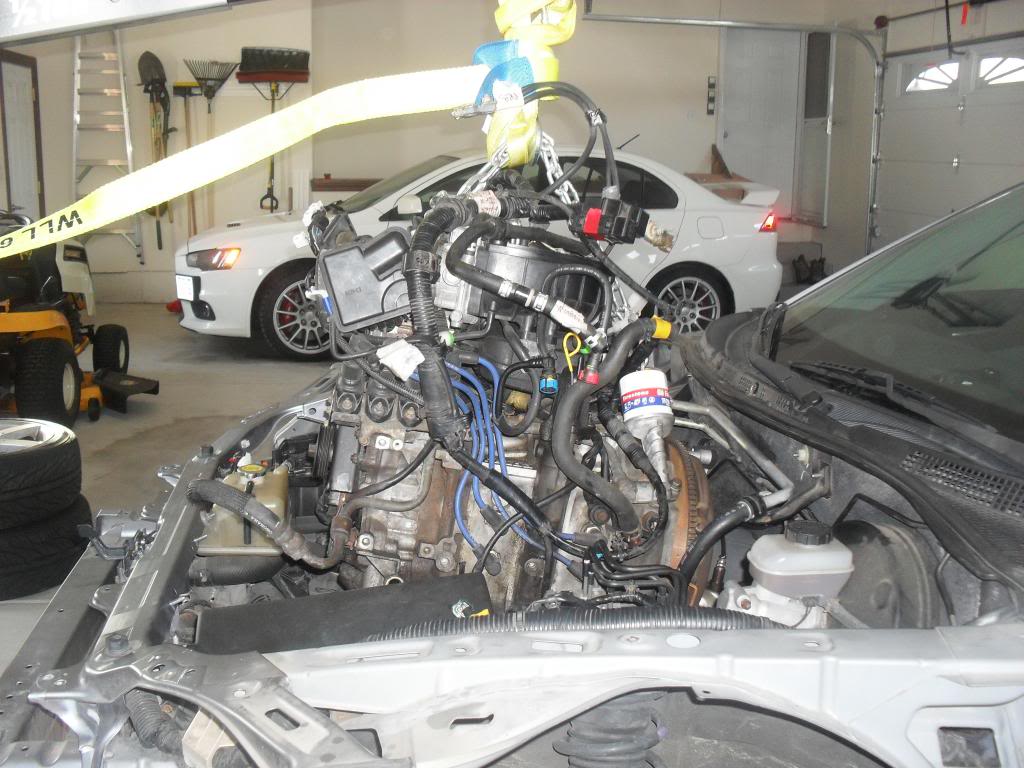
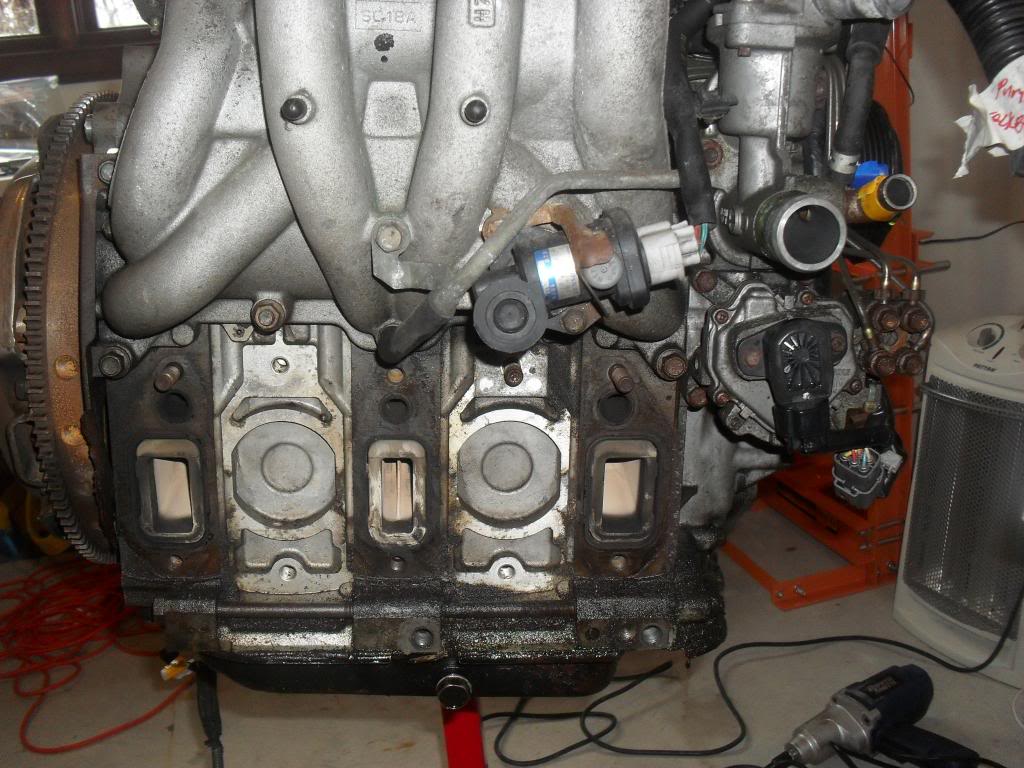
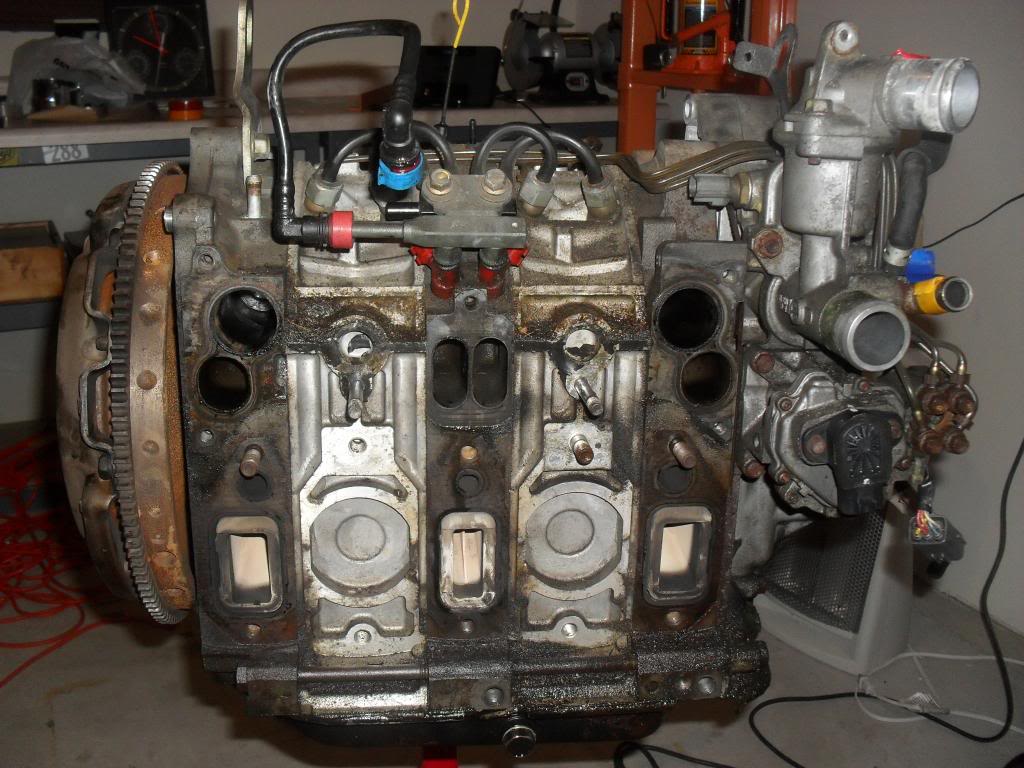
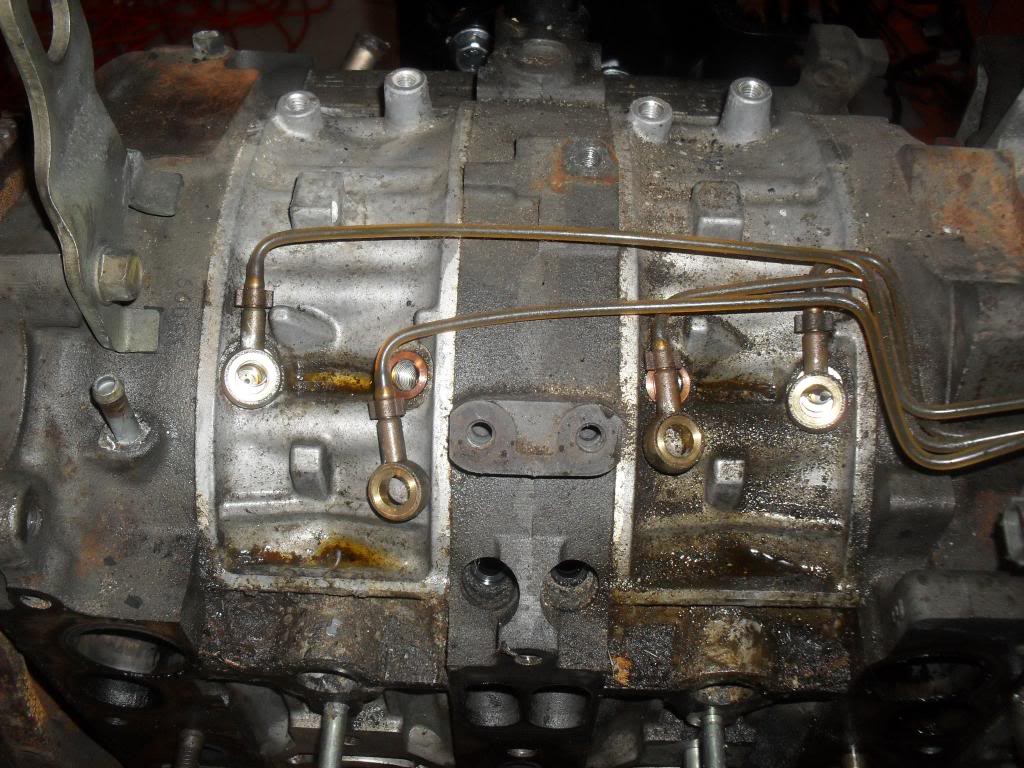
This shot made me wonder "Did they really have to put the IM right above the exhaust?" It is what it is I guess. Still a good view of the Fuel rail, injectors, OMP and lines. This engine was filthy, literally a half inch of sediment in places.
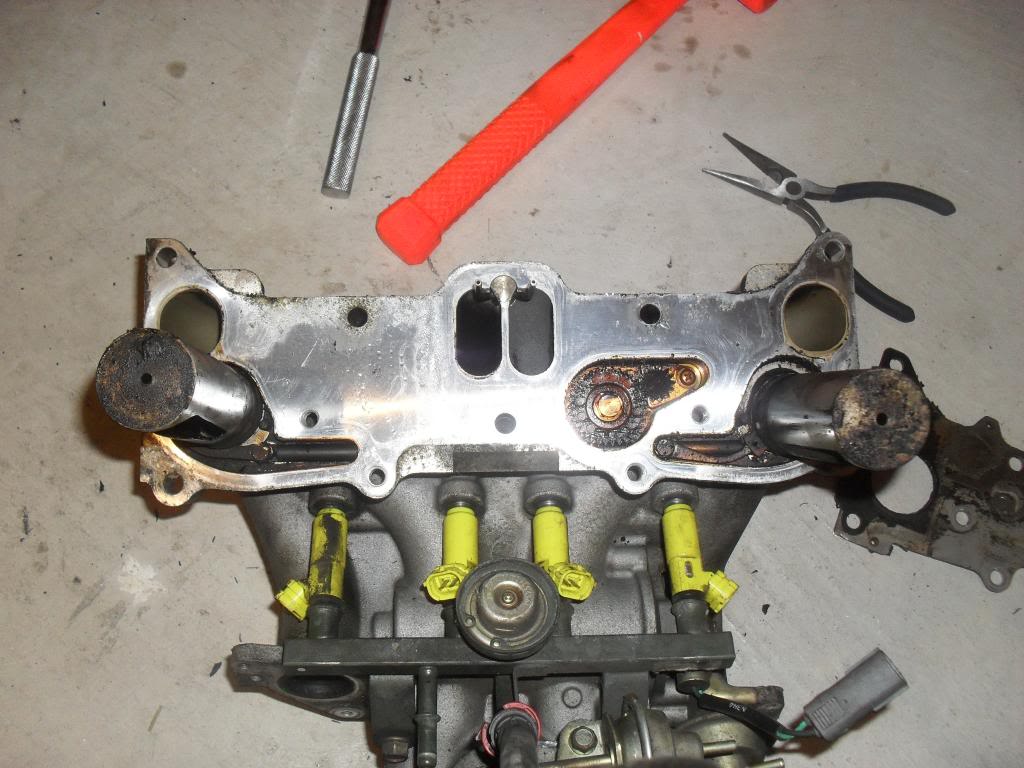
I knew the sleeves of the LIM could get quite stuck with carbon and you may have to tug a little to slide it out but at first I couldn't get this thing to budge. I was just about ready to start beating it with that orange deadblow in the pick until I realized I had forgotton to loosen that center bolt...patience my dear Watson.
These lines were brittle has hell, two of them broke as I removed them, planning to replace all of them anyway, injectors will either be flow benched or replaced
Oil pan off
Other than the condition of the internals, removing the flywheel nut was one of the things I was most worried about it stopping me in my tracks. I do not have a compressor or air tools so all I have to rely on is my POS "PowerSmith" electric impact wrench. Its rated at a whopping 220ft/lbs of torque! When one of my buddies found out the nut was probably torqued to around 350ft/lbs he was giving me an incredible amount of **** for attempting this without air tools and that my puny little powersmith would never be able to even wiggle that nut. I have to admit I was pretty skeptical but it was all I had. I recorded the event "just in case" I was successful and then would have proof. Gotta say I was pretty happy with the results.
Header came off fairly easily, a couple nuts we're pretty much fused to the stud and came out together
Engine harness labeled as best I could, just a few parts left to remove 'til the real fun starts...
This shot made me wonder "Did they really have to put the IM right above the exhaust?" It is what it is I guess. Still a good view of the Fuel rail, injectors, OMP and lines. This engine was filthy, literally a half inch of sediment in places.
I knew the sleeves of the LIM could get quite stuck with carbon and you may have to tug a little to slide it out but at first I couldn't get this thing to budge. I was just about ready to start beating it with that orange deadblow in the pick until I realized I had forgotton to loosen that center bolt...patience my dear Watson.
These lines were brittle has hell, two of them broke as I removed them, planning to replace all of them anyway, injectors will either be flow benched or replaced
Oil pan off
Other than the condition of the internals, removing the flywheel nut was one of the things I was most worried about it stopping me in my tracks. I do not have a compressor or air tools so all I have to rely on is my POS "PowerSmith" electric impact wrench. Its rated at a whopping 220ft/lbs of torque! When one of my buddies found out the nut was probably torqued to around 350ft/lbs he was giving me an incredible amount of **** for attempting this without air tools and that my puny little powersmith would never be able to even wiggle that nut. I have to admit I was pretty skeptical but it was all I had. I recorded the event "just in case" I was successful and then would have proof. Gotta say I was pretty happy with the results.
Last edited by Smutterbutter; 03-28-2013 at 08:48 PM.

 03-28-2013, 08:29 PM
#10
Listen...you smell that?
Thread Starter
03-28-2013, 08:58 PM
#11
Listen...you smell that?
Thread Starter
So just after I sent my friend that video and several in yo face remarks, I was feeling rather confident, flipped the engine over and went at the main pulley bolt fully expecting to zip that thing right off. Long story short, not only did it not zip right off, I ended up having to take it to the son in law of the same guy I had just taunted. He owns a garage and ultimately had to torch in for a few minutes before his monster impact could get it out. It was a humbling experience but I was more pumped that I could continue making progress.
03-29-2013, 07:15 PM
#12
Listen...you smell that?
Thread Starter
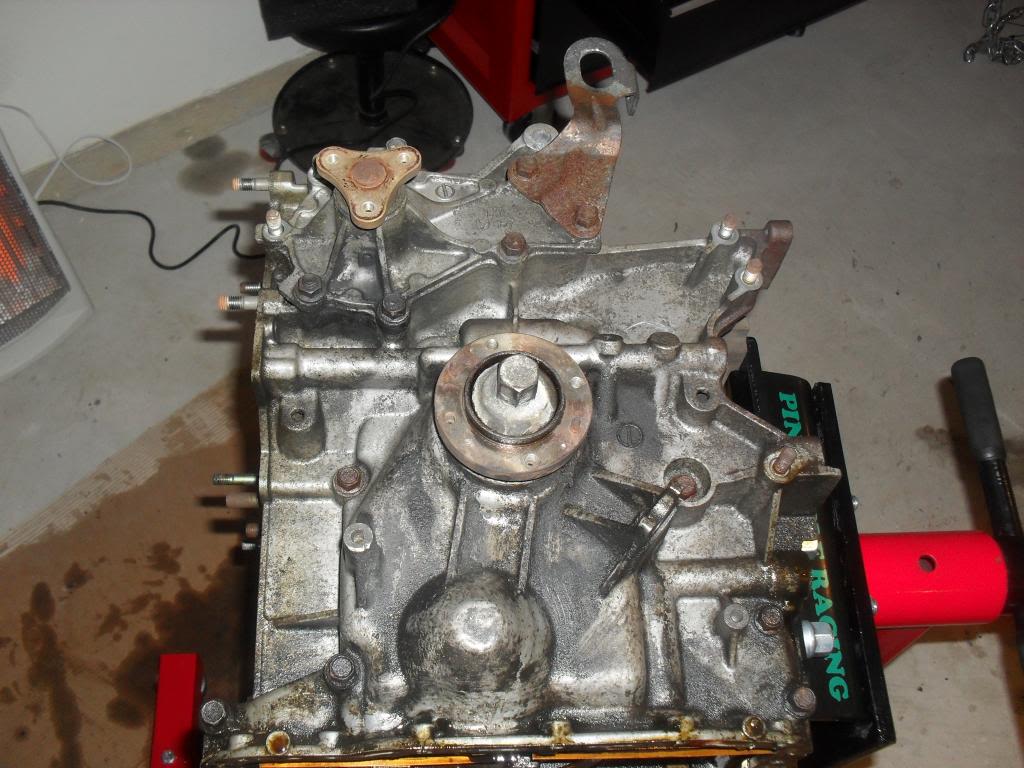
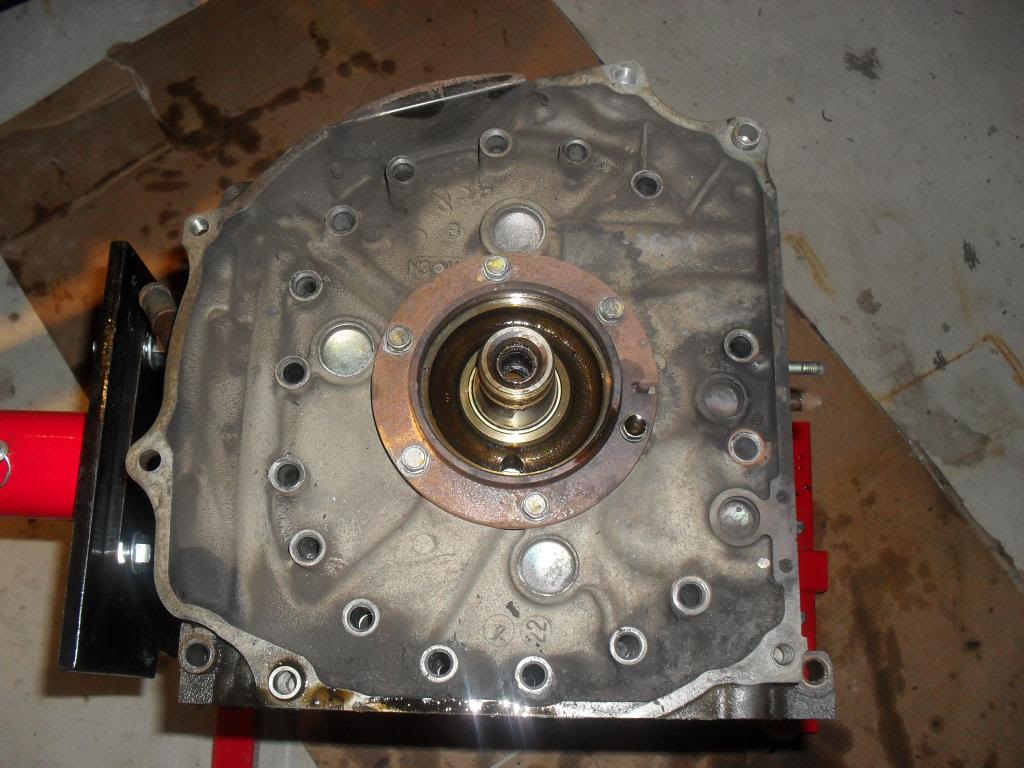
Front cover removed. Oil pump assembly looked to be in pretty good shape still. Front cover gasket had a little gaposis going on, not sure if that means anything but it was definitely broken prior to removing the cover.
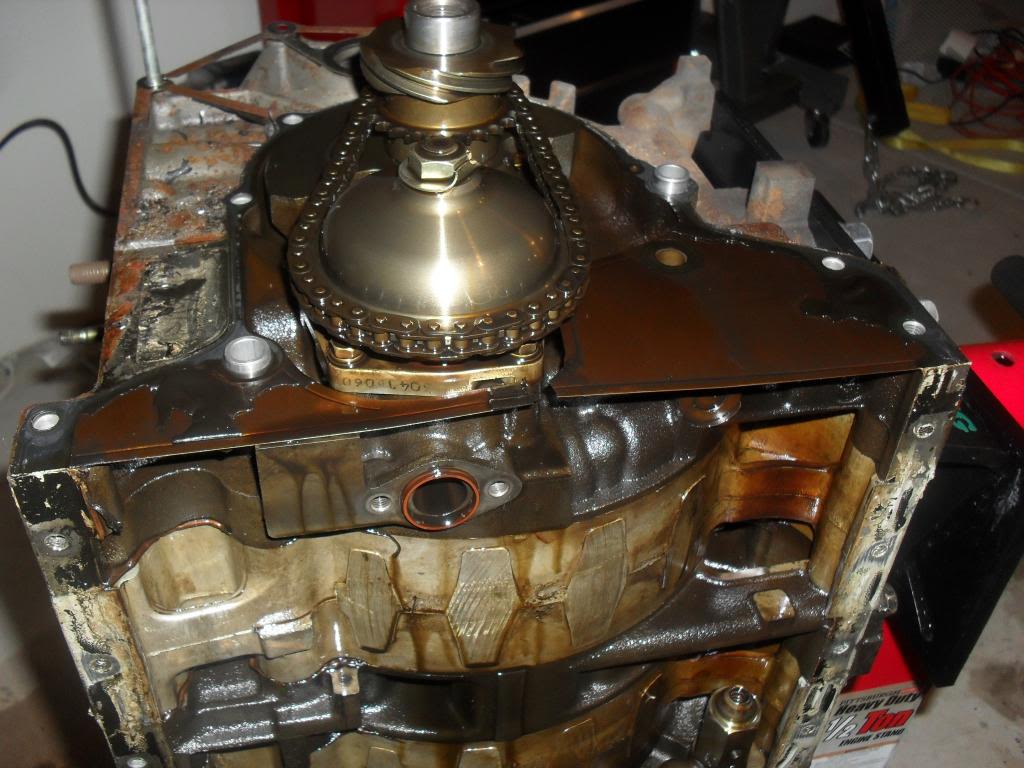
Most of the front end assembly was in good shape. The needle bearings and the thrust plate however had some pretty good wear so they'll be replaced, couldn't get a decent pic of the wear.
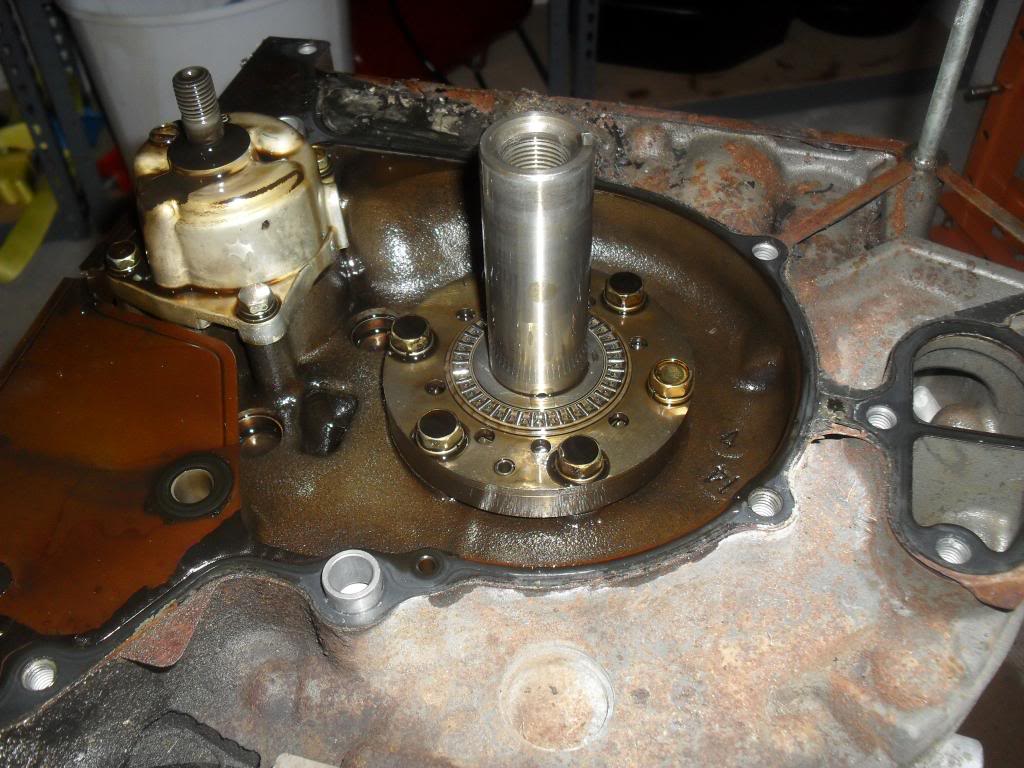
Most of the front end assembly was in good shape. The needle bearings and the thrust plate however had some pretty good wear so they'll be replaced, couldn't get a decent pic of the wear.
03-29-2013, 07:22 PM
#13
Listen...you smell that?
Thread Starter
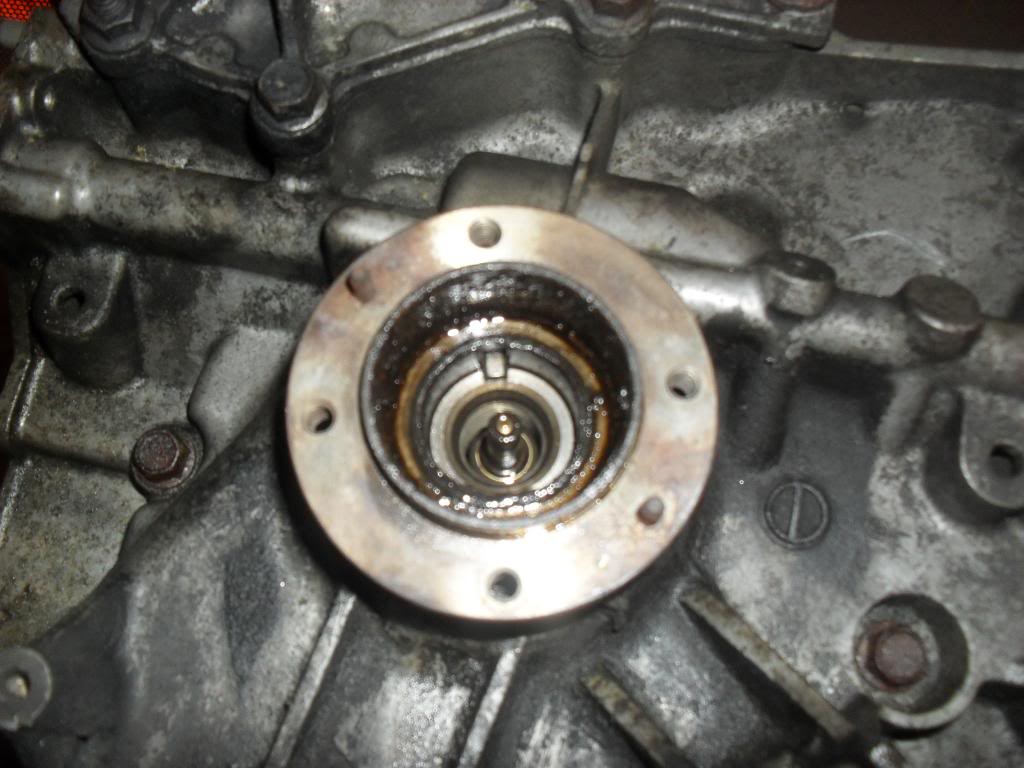
Maybe somebody can weigh in on what is normal to see after pulling the pilot bearing on a 100k motor. This one came out with some effort and there was some pretty significant, oily, gummy, crud within the E-shaft. Didn't look pretty.
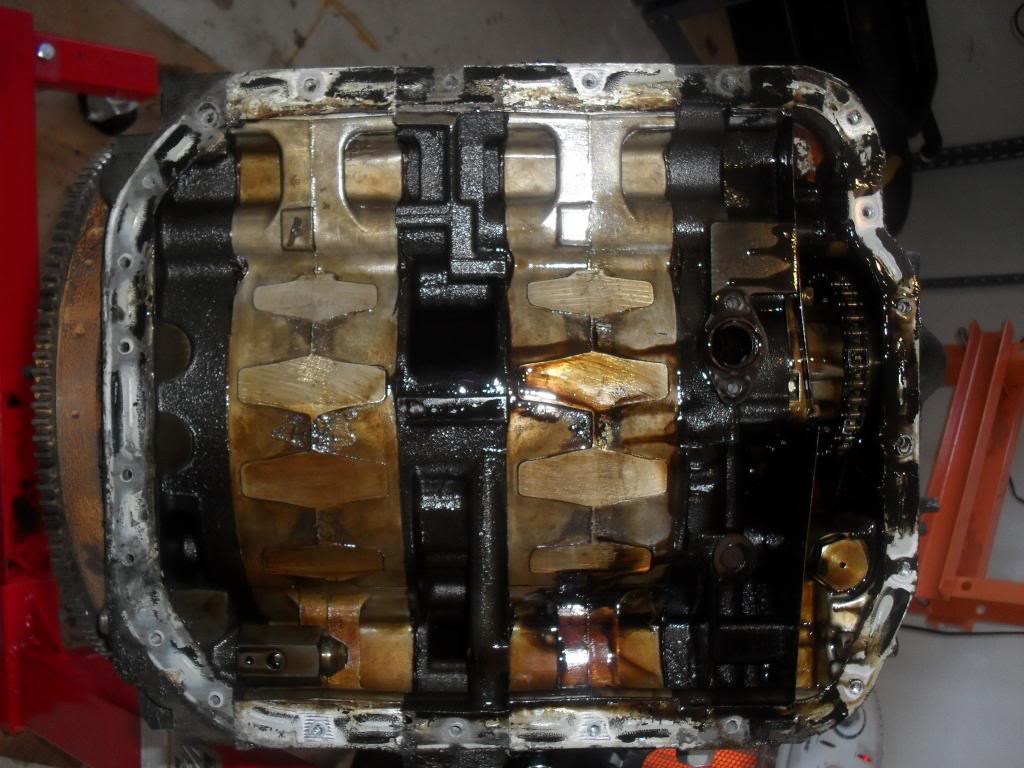
Finally able to tap this keg! Rear cover off, here's a better view of that black crud inside the eshaft. Also if you look carefully at the rear housing you begin to appreciate the destruction that was going on inside...
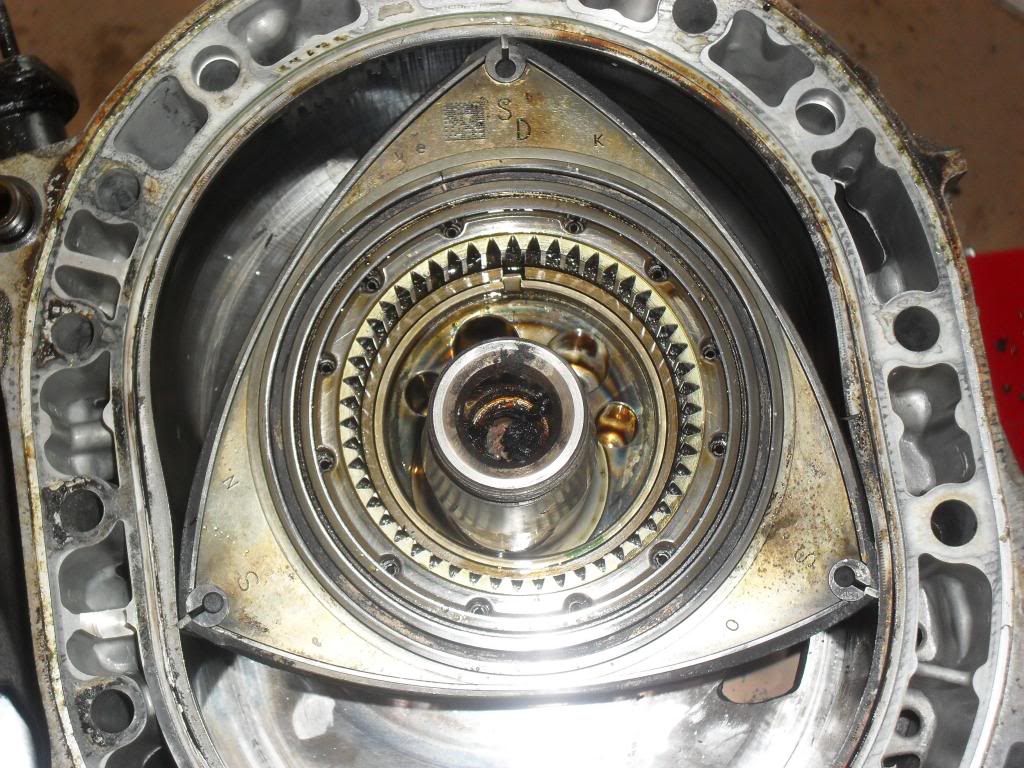
Finally able to tap this keg! Rear cover off, here's a better view of that black crud inside the eshaft. Also if you look carefully at the rear housing you begin to appreciate the destruction that was going on inside...
03-29-2013, 07:27 PM
#14
Listen...you smell that?
Thread Starter
Here's a better shot of the severe flaking going on the combustion surface of the rear housing. Me thinks that's a few mm's past acceptable to be reused. Not surprised at all.
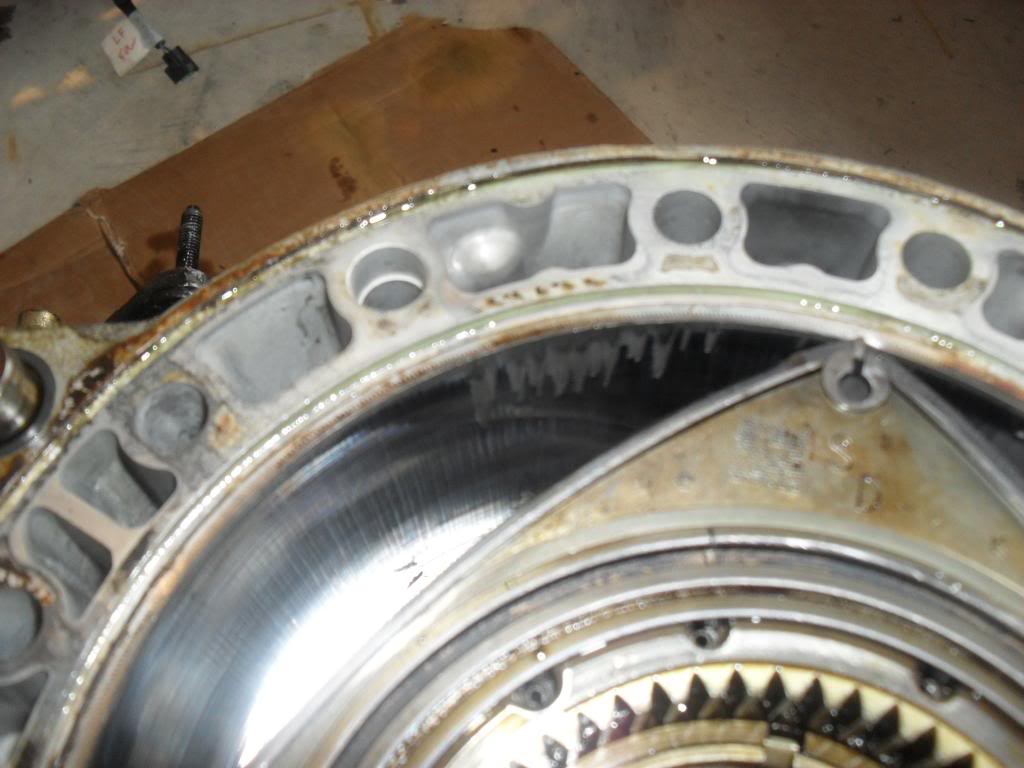
Some major chatter marks as well. Still looking at the rear housing my the way.
Some major chatter marks as well. Still looking at the rear housing my the way.
 03-29-2013, 07:41 PM
#16
Listen...you smell that?
Thread Starter
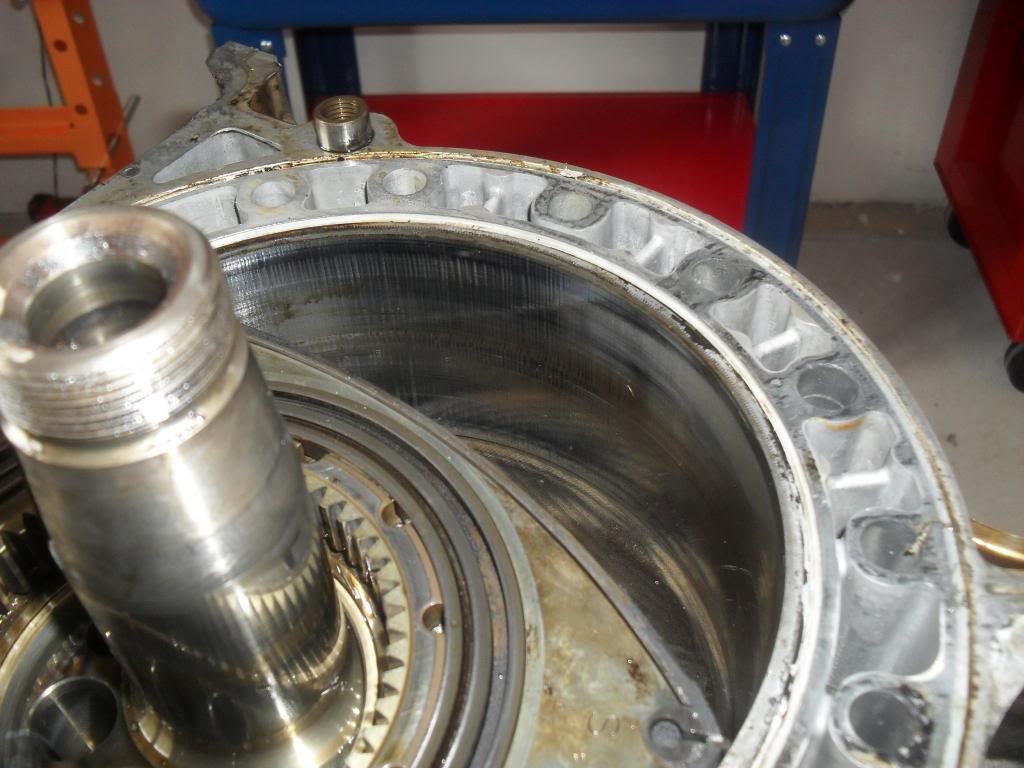
Rear rotor removed. More severe flaking, yikes. Also noticing some discoloration on the eshaft.
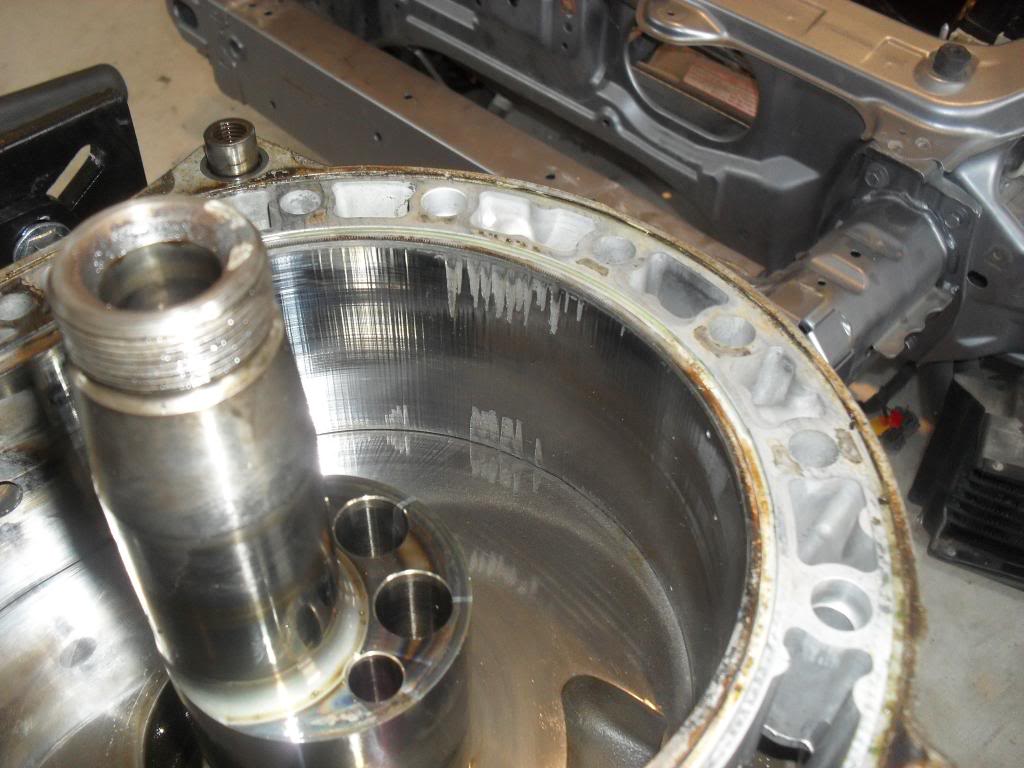
More carnage! All three corner seals on the front face of the rear rotor were cracked. All apex and side seals appeared ok.
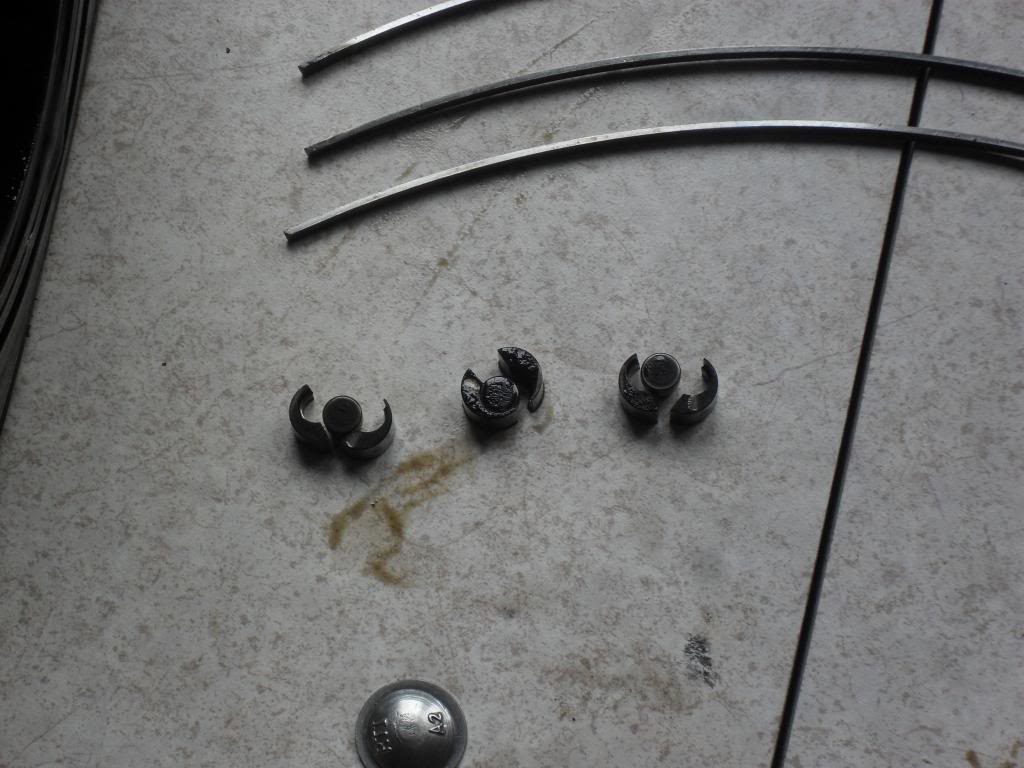
More carnage! All three corner seals on the front face of the rear rotor were cracked. All apex and side seals appeared ok.

 03-30-2013, 08:22 AM
#19
Listen...you smell that?
Thread Starter
Its normal for a rotary engine to crank for 15-20 sec before sputtering to life right? I've tried numerous times to get the compression test results from the dealer but they keep saying, yeah yeah no problem we'll call you right back and mail them to you, then days go by an nothing. I just thought it'd be interesting to see if the results of the specific chambers correlated to the findings in the engine. I'll keep bugging them for those results.
03-30-2013, 10:08 AM
#20

the "discoloration" u speak of on the E-shaft is NOT what you think it is, all e-shaft came out of the factory "heat treated" so they all look like that. 90% of the time it's re-usable, u should measure it when u put it on v-blocks to see if it's straight (within spec), the engine manual will tell u the spec and where to measure.
the rotor housing are trashed
so u can pretty much forget about re-using the apex seals.
as for the rest, measure it, especially the apex seal grooves.
the rotor housing are trashed
so u can pretty much forget about re-using the apex seals.
as for the rest, measure it, especially the apex seal grooves.
Last edited by nycgps; 03-30-2013 at 10:10 AM.
03-30-2013, 12:22 PM
#21
Listen...you smell that?
Thread Starter
For some reason I forgot to order the V blocks when I bought a bunch of tools and engine stand adapter. Gonna do that today.
That's a little comforting about the ccoloration on the eshaft. I've seen it in other pics but never as pronounced as it looked on this one. Any thoughts about the black sludge behind the pilot bearing?
That's a little comforting about the ccoloration on the eshaft. I've seen it in other pics but never as pronounced as it looked on this one. Any thoughts about the black sludge behind the pilot bearing?
03-30-2013, 01:55 PM
#22
you engine reminds me of a 12A, i haven't seen peeled housings like that on a 13B ever, so lucky you. i have a theory the peeling was/is caused by a marginal cooling system, so it doesn't overheat, but it chronically runs hot.
you should also carefully inspect all the metering lines and injectors, or just replace
03-30-2013, 08:35 PM
#23
Listen...you smell that?
Thread Starter
A couple of the OMP lines were so brittle they actually cracked as I removed them, definitely going to replace more things than not with this engine I'm thinking.
03-30-2013, 08:53 PM
#25
For some reason I forgot to order the V blocks when I bought a bunch of tools and engine stand adapter. Gonna do that today.
That's a little comforting about the ccoloration on the eshaft. I've seen it in other pics but never as pronounced as it looked on this one. Any thoughts about the black sludge behind the pilot bearing?
That's a little comforting about the ccoloration on the eshaft. I've seen it in other pics but never as pronounced as it looked on this one. Any thoughts about the black sludge behind the pilot bearing?
those lines breaks so easily, but they last at least 100K miles (if u never touch them) so just get new ones. oh speaking of that, makes SURE they ship u the right part, cuz when I ordered mine, the warehouse got me the wrong OMP lines (the part number sticker is right), didn't pay attention to the line itself, when I Was about to install it ... I was like mMMMmmMMmmm, and I gotta wait another week for the right one to come.