


Greddy turbo install help


jump...
Joined: May 2004
Posts: 122
Likes: 0
From: Croatia
In Wednesday i will install the turbo. I will get access to my friends shop with lift and most of necessary tolls. In Wednesday here is public holiday so all the stores will be closed, so i have to buy all the stuff needed for installation before. I know i have to buy aluminium tape, teflon tape, silicone sealant, i have to weld the BOV flange to the pipe. Did any one else needed some other things for the installation. Any comment would be helpfull.

Registered
Joined: Aug 2004
Posts: 1,294
Likes: 0
From: Virginia/Maryland
Adrian, are you saying you had the oil metering pump and jet air fuel lines reversed? So that the line with the white coloring should go to behind the filter and the yellow striped line should go onto the intake pipe?

Thread Starter
Ex- member.
Joined: Jan 2004
Posts: 1,694
Likes: 1
From: Austin, TX
Originally Posted by rkostolni
Adrian, are you saying you had the oil metering pump and jet air fuel lines reversed? So that the line with the white coloring should go to behind the filter and the yellow striped line should go onto the intake pipe?
Yes, updated the hose pic.
Registered
Joined: Aug 2004
Posts: 1,294
Likes: 0
From: Virginia/Maryland
While on the subject of the jet air fuel mixing hose, does anyone know exactly what it does? Myne has started making kind of a high pitched squeeling noise lately. It's kind of annoying.
Registered
Joined: Aug 2004
Posts: 1,294
Likes: 0
From: Virginia/Maryland
What about this check valve for the jet air line. It seems like it meets our needs pretty well and at only $1.18
http://www.usplastic.com/catalog/pro...duct%5Fid=7243
Here's a metal valve that might be a bit more durable, but also a bit more expensive.
http://www.mcmaster.com/
part#7775K61
http://www.usplastic.com/catalog/pro...duct%5Fid=7243
Here's a metal valve that might be a bit more durable, but also a bit more expensive.
http://www.mcmaster.com/
part#7775K61
Last edited by rkostolni; Jun 20, 2005 at 08:40 AM.
Thread Starter
Ex- member.
Joined: Jan 2004
Posts: 1,694
Likes: 1
From: Austin, TX
Originally Posted by rkostolni
What about this check valve for the jet air line. It seems like it meets our needs pretty well and at only $1.18
Originally Posted by rkostolni
While on the subject of the jet air fuel mixing hose, does anyone know exactly what it does? Myne has started making kind of a high pitched squeeling noise lately. It's kind of annoying.
WHINE OR SQUEAL NOISE FROM ENGINE AT IDLE
Applicable Models
Model Starting S/N Ending S/N
2004 RX8 00000000 ZZZZZZZZ
Some customers may complain of a high-pitched whine or squeal noise fromthe engine at an idle. The noise can be eliminated by raising the engineRPM slightly above idle. This is most likely caused by the primary port jet air nozzles and / or the metering oil pump air ports. The jet air nozzles are located in the primary port of each rotor. The jet air flow is acheived by using air flow from an area prior to the throttle plate. The metering oil injection nozzles also use this airflow prior to the throttle plate to assist oil flow into the engine.
This creates a metered vacuum leak into the engine and may cause a high pitched whine at idle. This noise is considered to be a normal characteristic of the RENESIS rotary engine. Use the procedure outlined in the repair instructions to confirm noise is from the jet air or metering oil pump nozzles.
1.Confirm noise.
2.Remove engine cover.
3.Locate both air supply hoses for jet air nozzles and metering oil pump nozzles. Hoses are attached to the air duct located between the MAF and throttle body. Disregard hose that attaches to the oil filler tube
4.Confirm noise is caused by jet air or metering oil pump nozzles by temporarily pinching off air supply hoses using pliers.
5.No repairs should be attempted if noise is reduced or eliminated.
--------------------------------------------------------------------------------
Thread Starter
Ex- member.
Joined: Jan 2004
Posts: 1,694
Likes: 1
From: Austin, TX
Originally Posted by dodo_croatia
In Wednesday i will install the turbo. I will get access to my friends shop with lift and most of necessary tolls. In Wednesday here is public holiday so all the stores will be closed, so i have to buy all the stuff needed for installation before. I know i have to buy aluminium tape, <a style='text-decoration: none; border-bottom: 3px double;' href="http://www.serverlogic3.com/lm/rtl3.asp?si=22&k=teflon%20tape" onmouseover="window.status='teflon tape'; return true;" onmouseout="window.status=''; return true;">teflon tape</a>, silicone sealant, i have to weld the BOV flange to the pipe. Did any one else needed some other things for the installation. Any comment would be helpfull.
That sounds about right.
Make sure that all the parts are in the kit. Go thru the parts list and count all the nuts/bolts too. Fanman had 1 pipe missing from his kit, I was missing 2 10mm nuts.
Proper tools is a must....
You'll need a deep 24mm socket to get the oil pressure switch off/on.
Use a penetrating oil to get the rusted bolts off.
Don't forget 4-5qts of oil.

Post if you have problems.
Registered
Joined: Aug 2004
Posts: 1,294
Likes: 0
From: Virginia/Maryland
Here's some comments from my install for those thinking or about to do it themselves:
I did the install on jackstands in a garage. I don't see that it was that much more difficult on jackstands than on a lift provided you jack up the car sufficiently. I have a 21" jack, so I could really get it up there. The install is a lot of work, but very doable if you just follow directions and seek help on here when you get stuck.
The most difficult part in my opinion was the oil lines at then engine and at the turbo. You will need a short 14mm wrench to tighten the oil line at the turbo, I cut a normal wrench in half with a dremel. Make sure to tighten the oil line down and use teflon so you don't end up as I did with an oil leak and then a flooded engine because you turned it off still cold.
Also to get to the oil sensor at the engine I recommend removing both the clutch line bracket and the rubber line that's in the way. It is a coolant line so watch out, alot of stuff will come out! To remove the oil pressure sensor I used a 24mm deep socket and a pair of vice grips since a socket wrench would not fit in there. It's slow, but it works. Do not get the oil pressure sensor socket from autozone, it is just slightly too large.
You do need to remove the front O2 sensor but not the back one. You also don't need to completely remove the cat, just disconnect it from the exhaust manifold and support it with something.
I also did not have to completely remove the engine bracket, just take the bolts out and you can move it around as you need to.
Make sure to remove the passenger wheel, this provides an access hole to get to the turbo area.
In the end, I love it. I am sooo glad I decided to do it. The car is much more fun to drive now, and I'm still only making 5psi. I'm hoping once I install the check valve I'll be up to 7. One thing I did notice is the air in front of the airinx is very hot! I'm going to try to reinstall the VFAD tube in front of the bumper, but without the flap, to try to direct more cold air in there and then fit the old intake box, maybe with some plexi, around the airinx to keep out hot engine air.
I would like to say thank you to Adrian, Jeff and everyone else on this board who helped along the way! I couldn't have pulled it off without all of the pics and answers. I really appreciate it! I didn't do the install myself to save money, but because I wanted to learn, which I definitely did!
I did the install on jackstands in a garage. I don't see that it was that much more difficult on jackstands than on a lift provided you jack up the car sufficiently. I have a 21" jack, so I could really get it up there. The install is a lot of work, but very doable if you just follow directions and seek help on here when you get stuck.
The most difficult part in my opinion was the oil lines at then engine and at the turbo. You will need a short 14mm wrench to tighten the oil line at the turbo, I cut a normal wrench in half with a dremel. Make sure to tighten the oil line down and use teflon so you don't end up as I did with an oil leak and then a flooded engine because you turned it off still cold.
Also to get to the oil sensor at the engine I recommend removing both the clutch line bracket and the rubber line that's in the way. It is a coolant line so watch out, alot of stuff will come out! To remove the oil pressure sensor I used a 24mm deep socket and a pair of vice grips since a socket wrench would not fit in there. It's slow, but it works. Do not get the oil pressure sensor socket from autozone, it is just slightly too large.
You do need to remove the front O2 sensor but not the back one. You also don't need to completely remove the cat, just disconnect it from the exhaust manifold and support it with something.
I also did not have to completely remove the engine bracket, just take the bolts out and you can move it around as you need to.
Make sure to remove the passenger wheel, this provides an access hole to get to the turbo area.
In the end, I love it. I am sooo glad I decided to do it. The car is much more fun to drive now, and I'm still only making 5psi. I'm hoping once I install the check valve I'll be up to 7. One thing I did notice is the air in front of the airinx is very hot! I'm going to try to reinstall the VFAD tube in front of the bumper, but without the flap, to try to direct more cold air in there and then fit the old intake box, maybe with some plexi, around the airinx to keep out hot engine air.
I would like to say thank you to Adrian, Jeff and everyone else on this board who helped along the way! I couldn't have pulled it off without all of the pics and answers. I really appreciate it! I didn't do the install myself to save money, but because I wanted to learn, which I definitely did!
Last edited by rkostolni; Jun 20, 2005 at 05:03 PM.
jump...
Joined: May 2004
Posts: 122
Likes: 0
From: Croatia
Originally Posted by GrRx8MaZdA
can someone give me a working link to download all the instructions??both links i ve found on the club,are down...please i need instructions fast...

Turbo'd 5
Joined: Jun 2004
Posts: 531
Likes: 0
From: Dalton, GA
Alright I'm really frustrated now. I just installed my turbo last week and it ran alright with the exception of a ruff acceleration, but now I fried an ignition coil for some reason. I removed the dongle before the coil burnt up but it ran like crap after that too. I'm not sure what I'm going to do now. My new coil will be here tomarrow and I'm going to install the check valve thing to see if that helps. My BOV will be here this week and I'm wanting to get it dyno tuned asap. What else could I do to make this thing run better? I'm thinking about going to a stage colder plugs since this coil went bad and everything. How can you tell if your plugs become fowled?
Thanks,
Jamie
Thanks,
Jamie

Originally Posted by Spyder_doo
How can you tell if your plugs become fowled?
Other then roughness in the idle and stumbling, I'd say the best check is to simply pull them and take a look.


Turbo'd 5
Joined: Jun 2004
Posts: 531
Likes: 0
From: Dalton, GA
Yeah I know I can take them out and look at them but I was wondering what kind of problems it would cause. I have a feeling that at least one of them are but I plan on getting the colder plugs. Does anyone have these plugs and will they help when I increase the boost? I've heard mixed ideas about them so just wanting to see what everyone here thinks about them.
Jamie
Jamie

90% Carbon-100% Power
Joined: Apr 2004
Posts: 1,706
Likes: 0
From: Thessaloniki,GREECE
Anyone have english instructions on how to install the greddy oil pan???I ve got the japan installation instruction and can't read a word....please help me...
Saturday i am going for the installation
Saturday i am going for the installation
Thread Starter
Ex- member.
Joined: Jan 2004
Posts: 1,694
Likes: 1
From: Austin, TX
Originally Posted by GrRx8MaZdA
Anyone have english instructions on how to install the greddy oil pan???I ve got the japan installation instruction and can't read a word....please help me...
Saturday i am going for the installation
Saturday i am going for the installation
It's pretty easy. I only had the japanese instructions too.
There's a small indention in the oilpan (on the rear driver side) where you can wedge a screw driver and pry the silicon loose. Still had a good amount of oil after it was drained, maybe 1qt, so have something to catch that. Then shave off the loose silicon with a razor blade to make a smooth surface. Take out the parts from the old, put into the new pan, hitemp silicon around the edges and reinstall.
Careful with leaks. I found a small leak a week later and fixed it.
Posts here and here.
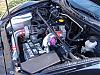
Pic of the new pan with all the stuff from the old pan.

Last edited by adrian-1; Jun 29, 2005 at 06:23 AM.
Registered User
Joined: Mar 2005
Posts: 531
Likes: 1
From: Topsail Island, NC
I am in the process of doing the install as we speak, but I am a little stuck. The rear engine mount is disconnected, how does it come out, I can't seem to get it out even though all bolts are out. Any tipps? Thanks so much guys!
Chris
Chris
Thread Starter
Ex- member.
Joined: Jan 2004
Posts: 1,694
Likes: 1
From: Austin, TX
You need to raise the engine alittle using a transmission jack (or floor jack if your not that high off the ground). It's wedged in there so raising/lowering the engine will get it out.
Picture below of the transmission jack.
Leave the jack holding the engine until your done putting in the exhaust manifold and turbo and have reinstalled the engine mount rubber and bolts.
Picture below of the transmission jack.
Leave the jack holding the engine until your done putting in the exhaust manifold and turbo and have reinstalled the engine mount rubber and bolts.
Last edited by adrian-1; Jul 2, 2005 at 07:12 PM.