20B must go on


 12-26-2008, 02:30 PM
#154
Unregistered User
Thread Starter

Join Date: Apr 2006
Posts: 824
Likes: 0
Received 0 Likes
on
0 Posts
haha thanks... i guess. 
okay i have some free time, and it's warm enough with my new dish heater. i'll get cracking on this again. probably mount two 044's in parallel next to the transmission.
next is..... getting those darn oil metering injectors. so i can mount the manifold to the engine and start mounting stuff up.
since scott took all my oem mounting stuff, i must ask... is there any special way i need to mount the oem ecu? i know it originally had some cooling/vented plastic pad, but i don't know whether that's necessary or not. i was also thinking of just making an alum box in the original ecu location, stacking the OEM ecu and Haltech ECU together with that vented oem plastic pad in between, then making the box air tight. i currently don't have any good idea how to address the ecu cooling other than this idea. any ideas would be much appreciated.

 12-30-2008, 09:25 PM
#159
Unregistered User
Thread Starter
Join Date: Apr 2006
Posts: 824
Likes: 0
Received 0 Likes
on
0 Posts
help me find TDC for 20b
hey guys, need some help finding TDC and setting up the CAS accordingly before firing engine.
some photos i took when I took off the transmission:
http://www.rx7club.com/attachment.ph...8&d=1230693406
http://www.rx7club.com/attachment.ph...0&d=1230693406
http://www.rx7club.com/attachment.ph...9&d=1230693406
there are NO markings anywhere. and I really rather not open up the front cover unless absolutely necessary.
thanks much!
thanks for the info dan.
12-31-2008, 07:19 AM
#160
Registered

hey guys, need some help finding TDC and setting up the CAS accordingly before firing engine.
some photos i took when I took off the transmission:
http://www.rx7club.com/attachment.ph...8&d=1230693406
http://www.rx7club.com/attachment.ph...0&d=1230693406
http://www.rx7club.com/attachment.ph...9&d=1230693406
there are NO markings anywhere. and I really rather not open up the front cover unless absolutely necessary.
thanks much!
thanks for the info dan.
some photos i took when I took off the transmission:
http://www.rx7club.com/attachment.ph...8&d=1230693406
http://www.rx7club.com/attachment.ph...0&d=1230693406
http://www.rx7club.com/attachment.ph...9&d=1230693406
there are NO markings anywhere. and I really rather not open up the front cover unless absolutely necessary.
thanks much!
thanks for the info dan.
Hope that helps....
12-31-2008, 09:33 AM
#161

the oem computer does get hot--but it is built for it--also the electric power steering unit is under the oem pcm and it too gets warm. We used to seal it all up when we were running canzoomers piggyback and the int x with no problems. The air supply thing is needed and you can actually ventilate the plastic air collector that separates the pcm from the power steering electronics. I dont know about the reflective heat from that monster you have in there so some shielding may be in order. It is normal for the oem pcm to get so hot that you can hardy hold your hand on it.
OD
OD
12-31-2008, 09:57 PM
#162
Administrator

Its right for a 2 rotor because the rotors are 180 from each other so that position of the rear puts the front 180 opposite which is TDC for that rotor.
However the 3 rotor rotors are 120 off from the one in front of it so 0 120 and 240 respectively. there is a way to do it thru the plug holes . ive posted that in his other thread. no time to re-type now or paste- i have to go play candyland
01-01-2009, 03:04 PM
#163
Unregistered User
Thread Starter
Join Date: Apr 2006
Posts: 824
Likes: 0
Received 0 Likes
on
0 Posts
thanks zoom and jeff.
learning curve is quite steep. 2 days ago, i wanted to just crank it without thinking about timing.
anything else i should be doing before firing up the engine?
one thing i'm really worried about is that all the holes have tons of fine dirt inside from being open to the air. i'm just going to use some q-tips to get as much dirt as i can with brake cleaner, but whatever's in the rotor housing, i'm hoping would be fine enough to not cause any damage. i'll also run fuels with engine off for awhile, empty out the fuel tank, then refuel with fresh fuel to clean out the fuel lines. as for water line, i'm going to just flush it with my ewp.
01-01-2009, 03:13 PM
#164
Unregistered User
Thread Starter
Join Date: Apr 2006
Posts: 824
Likes: 0
Received 0 Likes
on
0 Posts
as for looking through spark plug holes to get the TDC, it makes sense to me. but how would i know if i'm looking at the right rotor surface?
i also read that once the rotor is approximately config #B above, i can use the pulley bolt alignment to get the exact TDC. is that reliable?
i just want to get away with taking out the main crank bolt if possible
i also read that once the rotor is approximately config #B above, i can use the pulley bolt alignment to get the exact TDC. is that reliable?
i just want to get away with taking out the main crank bolt if possible
01-01-2009, 03:41 PM
#165
Have yo wired up the haltech yet? What are you using as a trigger wheel?
As for the dust...I would put some solvent like seafoam or something...and run it around and spray it out the plug holes...and then add a big sguirt of ATF or 2 stroke oil to get the compression back.....
As for the dust...I would put some solvent like seafoam or something...and run it around and spray it out the plug holes...and then add a big sguirt of ATF or 2 stroke oil to get the compression back.....
 01-01-2009, 04:49 PM
#167
Unregistered User
Thread Starter
Join Date: Apr 2006
Posts: 824
Likes: 0
Received 0 Likes
on
0 Posts
hehe that'd be the hardest route joel.
i'm using rx7 CAS to run haltech and rx8 crank wheel to run power steering and tach. it's how joel and PR guys are doing it.
btw joel, when you have time, would you post some photos of the fuel module itself? i'm using stock fuel-send-line as return and got rid of the stock return line. so all the fuel is returning back to the driverside tank. i hope that's right.
01-01-2009, 07:39 PM
#168
SR Dubbed Rx8

Join Date: Aug 2007
Location: Jacksonville FL.
Posts: 596
Likes: 0
Received 0 Likes
on
0 Posts
thats what im doing im just using the stock vapor return line as a feed line with an hardline adapters at the end of the stock aluminum sections. i will snap a pic of mine tomorow for you i have it all out right now anyway. I will also show you how i by passed the stock fpr. i still dont know what im doing about the level sending unit.
01-02-2009, 05:09 PM
#169
Unregistered User
Thread Starter
Join Date: Apr 2006
Posts: 824
Likes: 0
Received 0 Likes
on
0 Posts
fuel pumps mounted.
two bosch 044's in parellel. taking out the stock fuel pump.
still not a clue how modify the stock fuel module... will post my proposed idea below.
still not a clue how modify the stock fuel module... will post my proposed idea below.
01-02-2009, 05:23 PM
#170
Unregistered User
Thread Starter
Join Date: Apr 2006
Posts: 824
Likes: 0
Received 0 Likes
on
0 Posts
some examples of mazsport scott's work
"custom" paint job (it's definitely one of a kind):

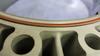
$2000 lower intake manifold intake that'll leak at idle.
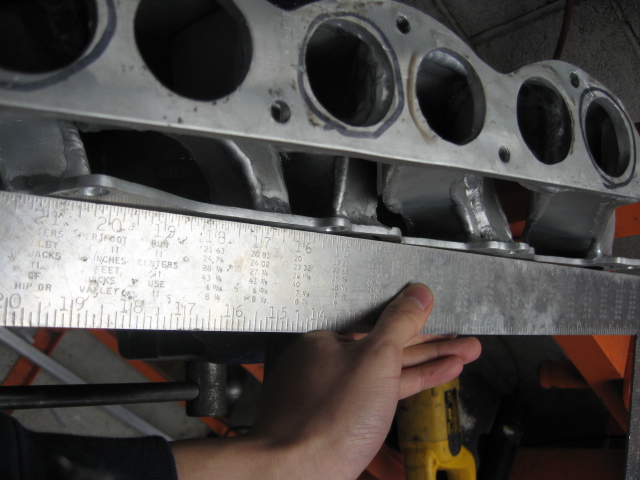
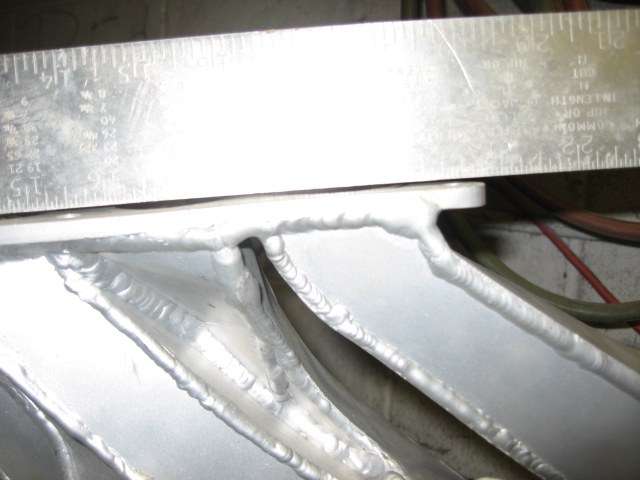
at least these are fixable. I'm taking the intake manifold to a huge belt sander to even out all those bent mating surfaces. I'm also repainting the block.
$2000 lower intake manifold intake that'll leak at idle.
at least these are fixable. I'm taking the intake manifold to a huge belt sander to even out all those bent mating surfaces. I'm also repainting the block.
Last edited by stickmantijuana; 01-02-2009 at 05:25 PM.
01-02-2009, 05:36 PM
#171

shouldn't you use a mill to flatten the surfaces? it would be difficult to clamp it to a mill but you could get the surfaces perfect in one pass (dependent on the amount of variation) and it would be flat. a belt sander wouldn't necessarily get the surface true and the finish might not be good either.
01-02-2009, 05:43 PM
#172
Unregistered User
Thread Starter
Join Date: Apr 2006
Posts: 824
Likes: 0
Received 0 Likes
on
0 Posts
my fuel module modification idea for return fuel. please feel free to comment whether it'll work or not. idea is to leave the venturi valve as-is from stock. only difference would be instead of having stock pump pump directly into the fuel filter housing, I'm having inline pump sucking fuel out of the fuel filter housing. also any ideas on how to get rid of air bubbles in the fuel would be much appreciated.
btw, what's a mill? I have easy access to belt sander. when i typed in "mill" in google, i got a windmill
btw, what's a mill? I have easy access to belt sander. when i typed in "mill" in google, i got a windmill
Last edited by stickmantijuana; 01-02-2009 at 05:46 PM.
01-02-2009, 05:46 PM
#173
Rotary wanabee
iTrader: (1)

Join Date: Jul 2007
Location: Long Island, NY
Posts: 1,978
Likes: 0
Received 0 Likes
on
0 Posts
Most welding / machine ships should have a mill that you could use... clean up that baby a little bit... maybe either polish or powder coat with high temp paint as well?
one example of milling....
http://www.youtube.com/watch?v=Wk2VYwCIcZE
one example of milling....
http://www.youtube.com/watch?v=Wk2VYwCIcZE
01-02-2009, 05:49 PM
#174
Fuel return needs to flow into the hose for the venturi.....otherwise you will get no transfer.
Why would you leave the fuel filter in there? Just take it out...and put a screen pickup tube in there...it has to be in close proximity to the bottom of the tank or it won't pickup fuel when low...you need to rethink the pickup thing...or drive with 1/2 tank all the time
Why would you leave the fuel filter in there? Just take it out...and put a screen pickup tube in there...it has to be in close proximity to the bottom of the tank or it won't pickup fuel when low...you need to rethink the pickup thing...or drive with 1/2 tank all the time
01-02-2009, 05:51 PM
#175
Unregistered User
Thread Starter
Join Date: Apr 2006
Posts: 824
Likes: 0
Received 0 Likes
on
0 Posts
ah I see... the area is huge though. i just want it to be flat... besides that looks quite expensive. belt sander i'll be borrowing will be free. and for gasket, i'll be using mazda gasket and some squeeze on gasket for the coarse grooves left by sanding.
as for coating, i'll probably end up ceramic coating everything later. i just can't afford them right now.
as for coating, i'll probably end up ceramic coating everything later. i just can't afford them right now.