
Custom gauge pod


Is this title ok?
Joined: Jan 2003
Posts: 300
Likes: 2
From: El Monte, CA
I don't have the pic at the moment, need to take some when I have a chance.
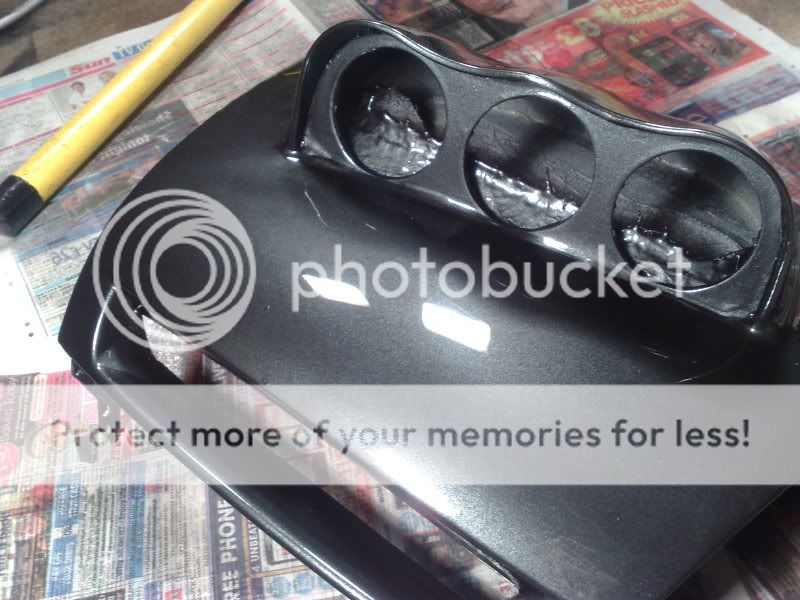
This is the only pic I have viewing from a little top angle after wet sanding:
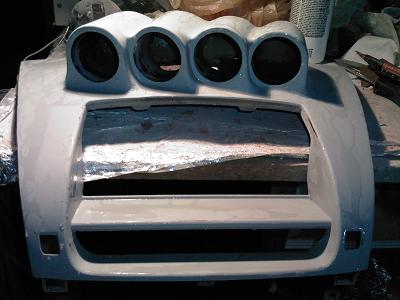
Molding from pvc pipe
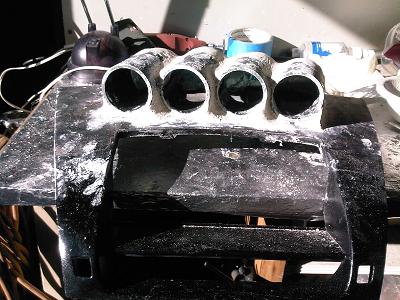
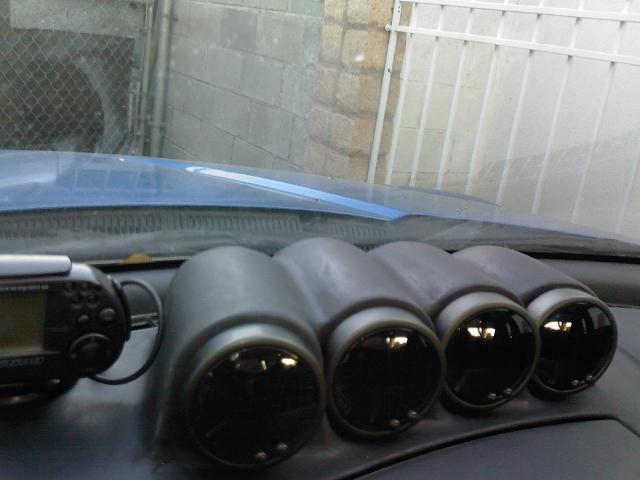
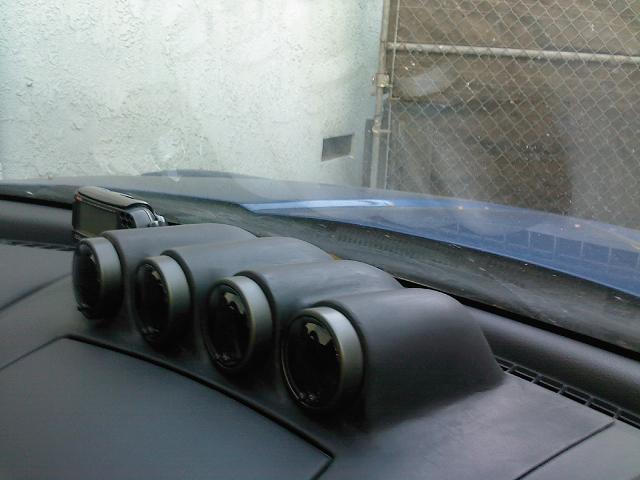
I had considered CraigRX8's route of using existing premade universal pod, but I need 4 gauges and buying 4 single universal pod would be too expensive if I have to redo.
For those that considering this custom route, if you happen to buy those gauges that included the universal mount, that is the best way to go. I didn't find out until I purchase my gauges so I have 4 spares that I might be considering redoing a new version in the far future.
This is the only pic I have viewing from a little top angle after wet sanding:
Molding from pvc pipe
I had considered CraigRX8's route of using existing premade universal pod, but I need 4 gauges and buying 4 single universal pod would be too expensive if I have to redo.
For those that considering this custom route, if you happen to buy those gauges that included the universal mount, that is the best way to go. I didn't find out until I purchase my gauges so I have 4 spares that I might be considering redoing a new version in the far future.
Is this title ok?
Joined: Jan 2003
Posts: 300
Likes: 2
From: El Monte, CA

Thread Starter
CraigRX8
Joined: Dec 2007
Posts: 259
Likes: 0
From: Belfast, northern ireland
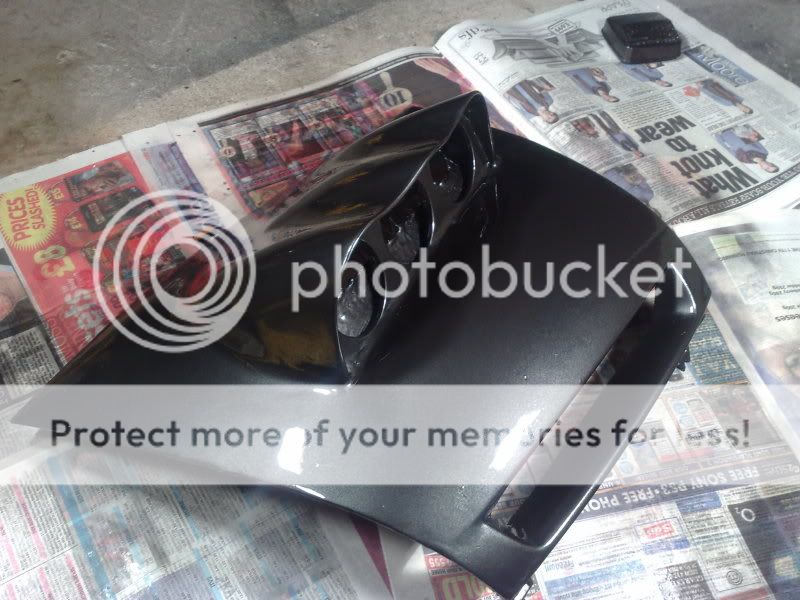
got clearcoat on. theres some tiny bits of grit in base coat. maybe two or three small bits. to be honest i wasnt expecting it to be perfect, i painted it in my driveway basically. so ill probably redo it at somepoint.
So i got the lacquer on. any advice on how long i should wait before flattening it and advice on rubbing it down, as theres alot of small bits hard to get into like the lips of the pod itself
thanks
pics


http://s194.photobucket.com/albums/z...0122008014.flv
there ya go not perfect but not bad for a first go.
So i got the lacquer on. any advice on how long i should wait before flattening it and advice on rubbing it down, as theres alot of small bits hard to get into like the lips of the pod itself
thanks
pics
http://s194.photobucket.com/albums/z...0122008014.flv
there ya go not perfect but not bad for a first go.

Sucks about the specks. I'd probably live with it though. No way in hell I'd attempt to go back to sanding now. No way you'll get the finish you have now without a ton of extra work. Doesn't look too shabby though! Good work!
I'd probably live with it though. No way in hell I'd attempt to go back to sanding now. No way you'll get the finish you have now without a ton of extra work. Doesn't look too shabby though! Good work!
Is this title ok?
Joined: Jan 2003
Posts: 300
Likes: 2
From: El Monte, CA
I too had those debris problem before when I first spraying outdoor.To be safe I would wait 24 hrs before sanding, and don't forget to use at least 500 Grit of wet sand paper with lots of water and go up from there up to 1000+ grit to get it perfectly smooth, you'll know when you run your finger over it.
Since you already on your clear coast, you might need strip it and redo it over again or do another layer of base then clear.
When you do the final coasting (base or clear) make sure you paint in area with NO wind to avoid debris stick to your paint and do several light coast until covered; wait several minutes between coast if you have to.
Is this title ok?
Joined: Jan 2003
Posts: 300
Likes: 2
From: El Monte, CA

Thread
Thread Starter
Forum
Replies
Last Post
05rx8mazda
RX-8 Parts For Sale/Wanted
18
Nov 28, 2015 09:42 AM