When you click on links to various merchants on this site and make a purchase, this can result in this site earning a commission. Affiliate programs and affiliations include, but are not limited to, the eBay Partner Network.
Equinox92, I am really enjoying following your ventures. After a 20 hiatus from the rotary world I returned last September and have been trying to figure out where I want to go with my 8. I left the RX and went Subaru ('03 WRX) because of frustration (mostly gear box related) with my second FC. I considered an RX8 when they first came out, but heard through the grapevine that they had iffy transmissions and looked elsewhere, hence the Suby (which have their own issues). But I live in the Northwest and the little rally blaster is better suited. I only have 3 tracks kinda sorta near me, The Ridge (Shelton WA), Pacific Raceways (Kent WA), and Portland. The next nearest would be Spokane (about 5 hours away). So, that limits me and there isn't nearly the infrastructure for like out your way. I had roughly worked out going the same route as you, maximize handling over out right power, it was the same with my FC's. So, much fun. Sad I sold them.
I do have a couple of questions though. first is about the wing. I know you said you weren't big brain on aero. Was wondering if you considered something like a Wicker bill, or if you know anyone running one and satisfied with the downforce? I've had big wings (my WRX has a carbon S202 replica) and I kind of like how the Wicker bills look. I remember several years ago NASCAR went to wings and the drivers complained about less stability at speed.
trackjunkie makes an interesting point. I also remember many times the drag discussion about truck tailgates coming up going back to the 90's (at least). I even think Mythbusters did a bit on it. It would make sense on the underside as well of a car as well. My limited knowledge of aero would tell me you want the smoothest airflow around the car possible.
As pertains to street-based cars on racetracks (eg time attack and road racing), for the most part cars are front downforce limited. This means that you can have an amazing wing, with the most downforce, and all that means is that it makes the car understeer, terminally. Especially with something like a 9 Lives Racing wing (I don't remember what he has, but that's just an example), where people end up running at 0 or 1 degree angle of attack because the car has too much rear downforce.
The wicker, also called a gurney flap, is an effective device to add downforce at the expense of drag. They do look cool, but unless you've done testing and need more downforce, you likely don't need the wicker. The more front downforce you can make (air dam, undertray, splitter, splitter with ramps, hood vents, fender vents, etc), the more you can utilize rear downforce and increase the wing angle or try different wicker heights.
Signed,
Aero design engineer who works on racecars
Last edited by Tacit.Blue82; 07-11-2023 at 09:34 AM.
Equinox92, I am really enjoying following your ventures. After a 20 hiatus from the rotary world I returned last September and have been trying to figure out where I want to go with my 8. I left the RX and went Subaru ('03 WRX) because of frustration (mostly gear box related) with my second FC. I considered an RX8 when they first came out, but heard through the grapevine that they had iffy transmissions and looked elsewhere, hence the Suby (which have their own issues). But I live in the Northwest and the little rally blaster is better suited. I only have 3 tracks kinda sorta near me, The Ridge (Shelton WA), Pacific Raceways (Kent WA), and Portland. The next nearest would be Spokane (about 5 hours away). So, that limits me and there isn't nearly the infrastructure for like out your way. I had roughly worked out going the same route as you, maximize handling over out right power, it was the same with my FC's. So, much fun. Sad I sold them.
I do have a couple of questions though. first is about the wing. I know you said you weren't big brain on aero. Was wondering if you considered something like a Wicker bill, or if you know anyone running one and satisfied with the downforce? I've had big wings (my WRX has a carbon S202 replica) and I kind of like how the Wicker bills look. I remember several years ago NASCAR went to wings and the drivers complained about less stability at speed.
trackjunkie makes an interesting point. I also remember many times the drag discussion about truck tailgates coming up going back to the 90's (at least). I even think Mythbusters did a bit on it. It would make sense on the underside as well of a car as well. My limited knowledge of aero would tell me you want the smoothest airflow around the car possible.
Anyway, keep the rubber on the road.
tl;dr I am satisfied with the rear downforce of the car. Much like Tacit said, running at 0 angle of attack and the back end is plenty okay. I am limited to what I can do in the front, and with the rear bumper based on class rules, so I am sure there is a better way to get more front downforce without those rules in place. The front lip is super helpful as is and am amazed what it can do after my turn to turn comparison before the old one fell off haha.
Boy howdy it's been a really busy month... this update was actually done in July, but here I am just being able to get to everything.
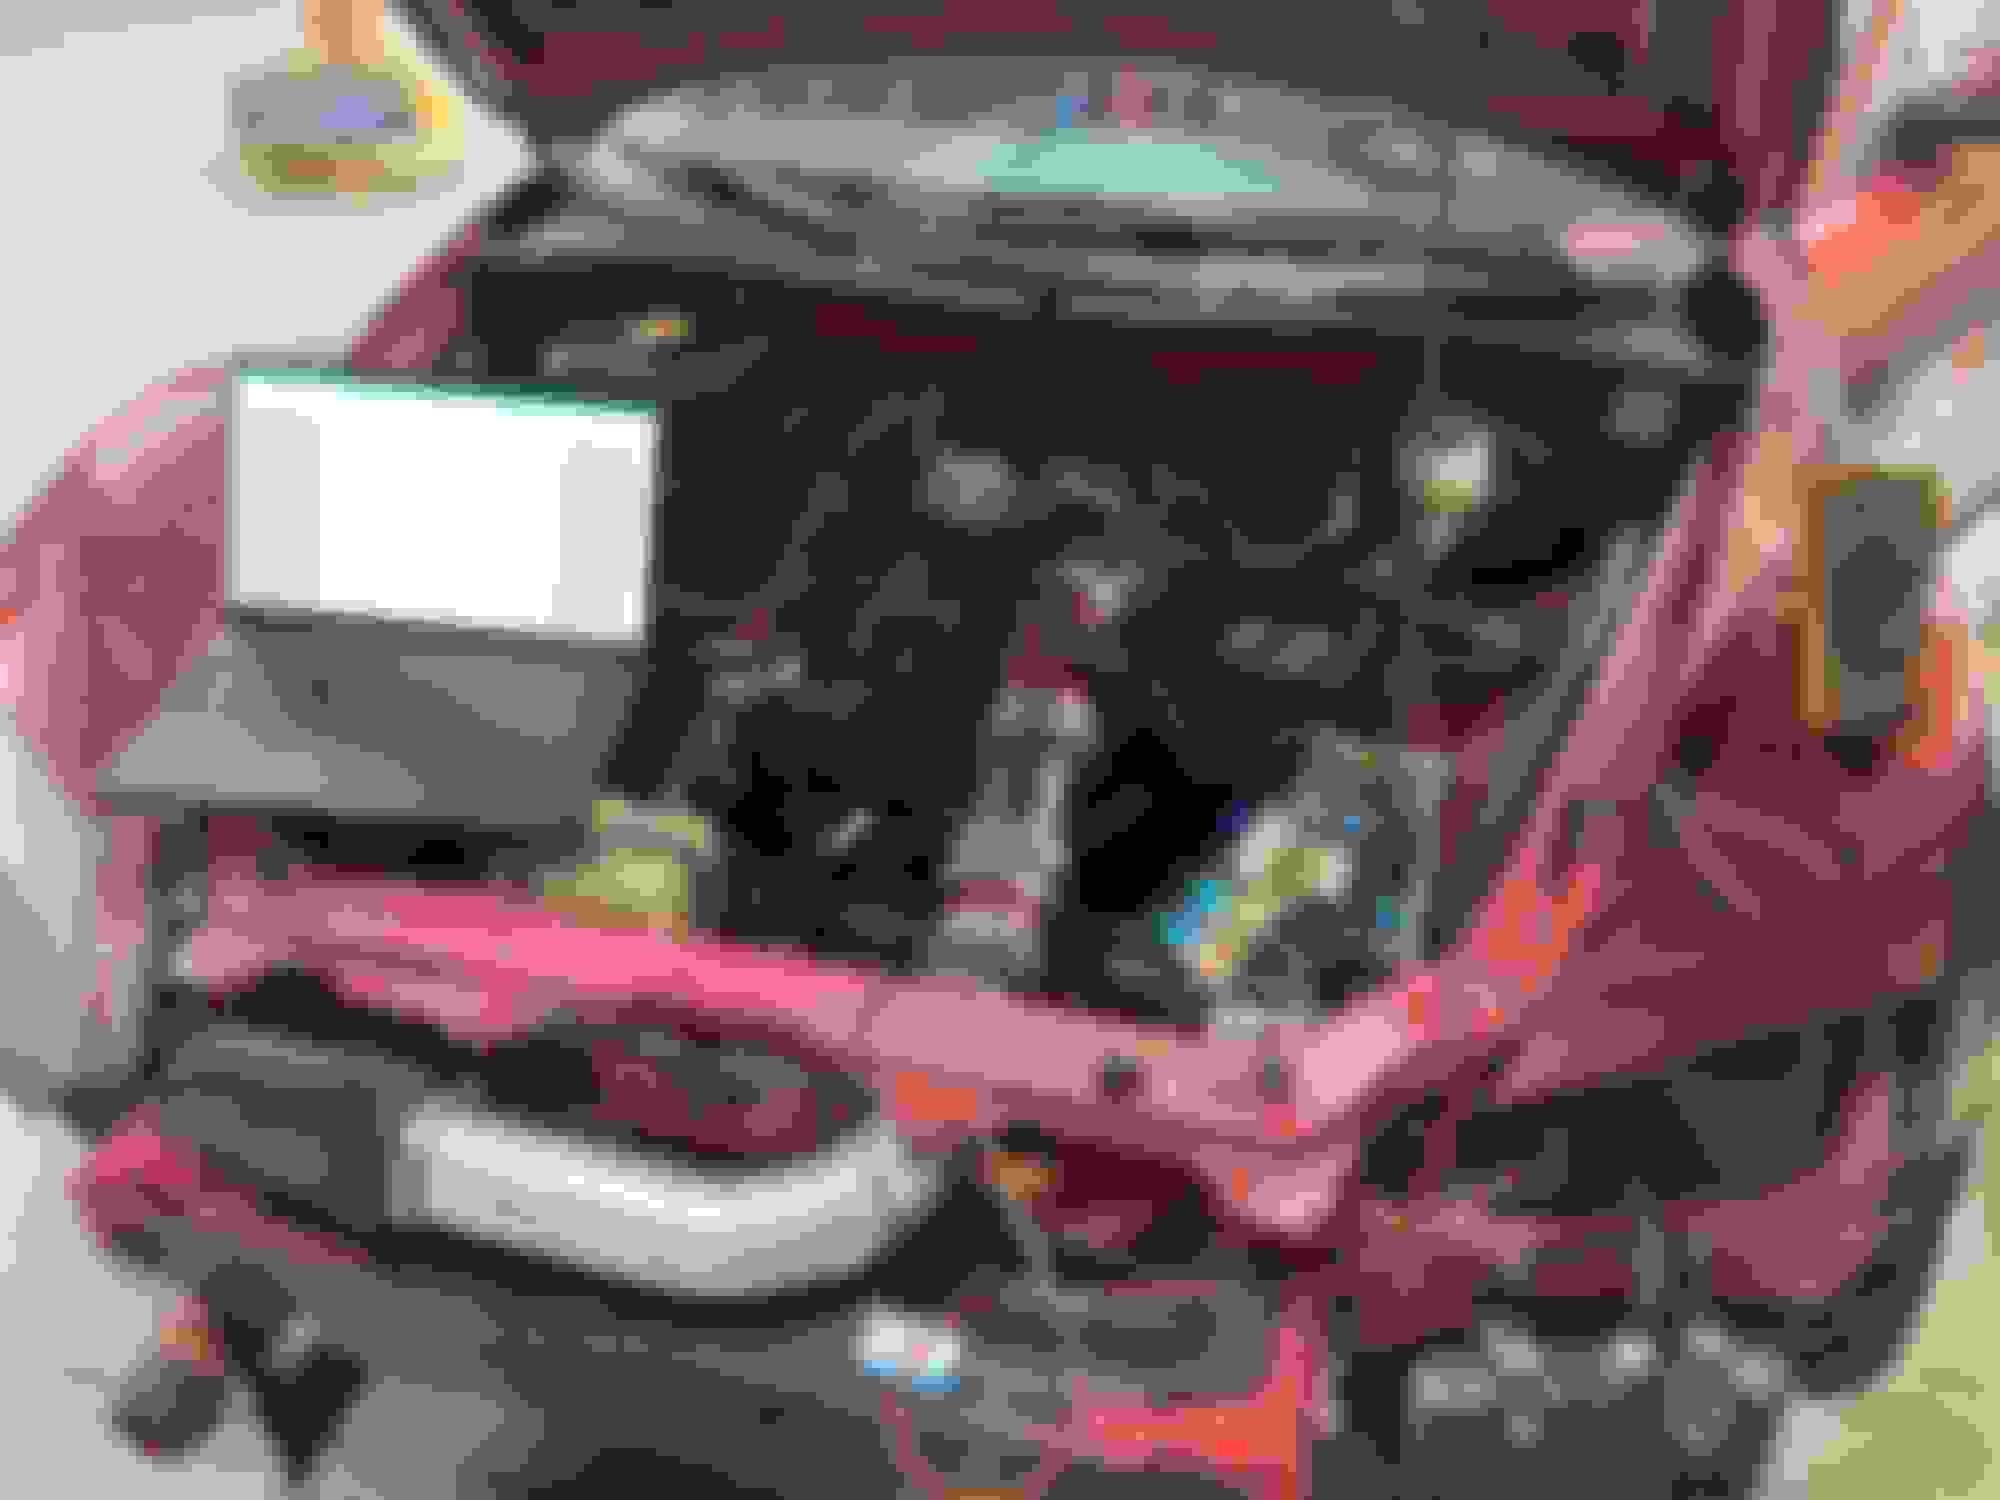
After dealing with crazy fuel cut once again at Autobahn, I decided enough was enough and that it was time to get a surge tank involved. The easy choice was the Radium FST with the integrated FPR as it would be a self contained unit that could run to the fuel rail using the OEM send line. The FST had plug and play components for an AEM 450, so I just went with that even though it's massively oversized for the application.
The idea was pretty simple. Use the OEM fuel pump wiring to run the surge tank pump, and use the OEM pump bypassing the FPR and filter in the in-tank sender as the lift pump. Add an inline fuel filter to the rail, and run a return line to the tank and job is done.
I think I ended up making everything more complicated than it needed to be, and I still have some work to do, but I ran into a deadline... and then another deadline... so here I will just outline what was done, and dive into what I am going to do in the near future to fix the shortcomings of this setup.
Design considerations: I wanted to use as little aftermarket hose as possible, and still have a usable trunk to pack tools and such in, so that left me with putting the tank where the left side passenger seat would be. I wouldn't mind moving this to the trunk area once I have my own tow vehicle. I also wanted easy wiring, so being able to be close to the OEM fuel pump connector was perfect. Anyways, on to more fun stuff.
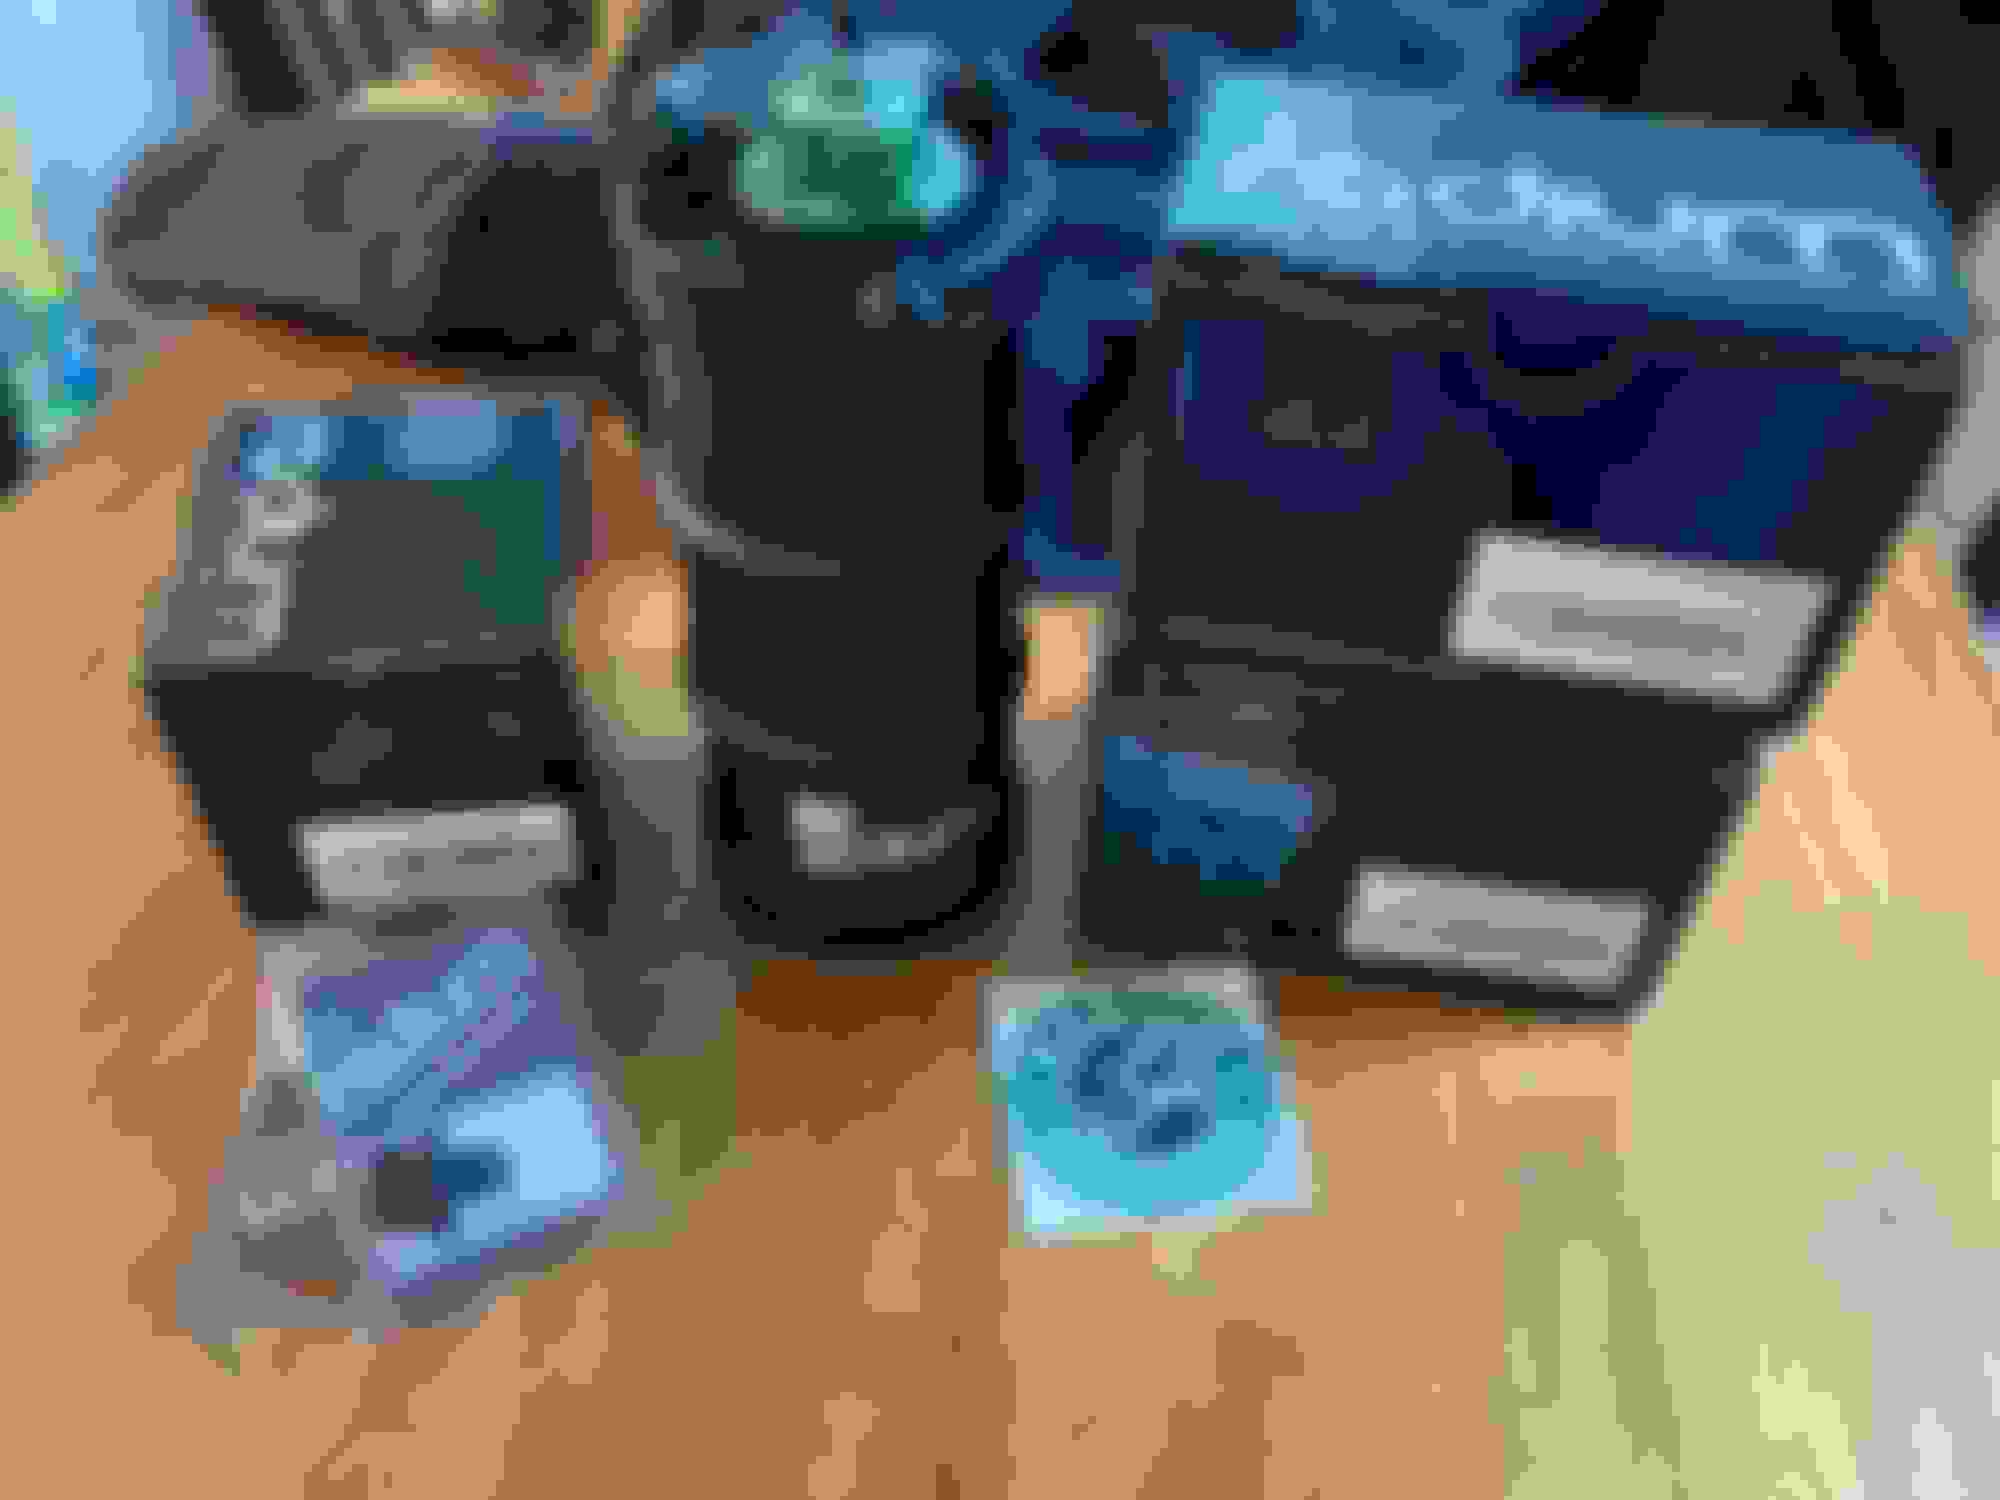
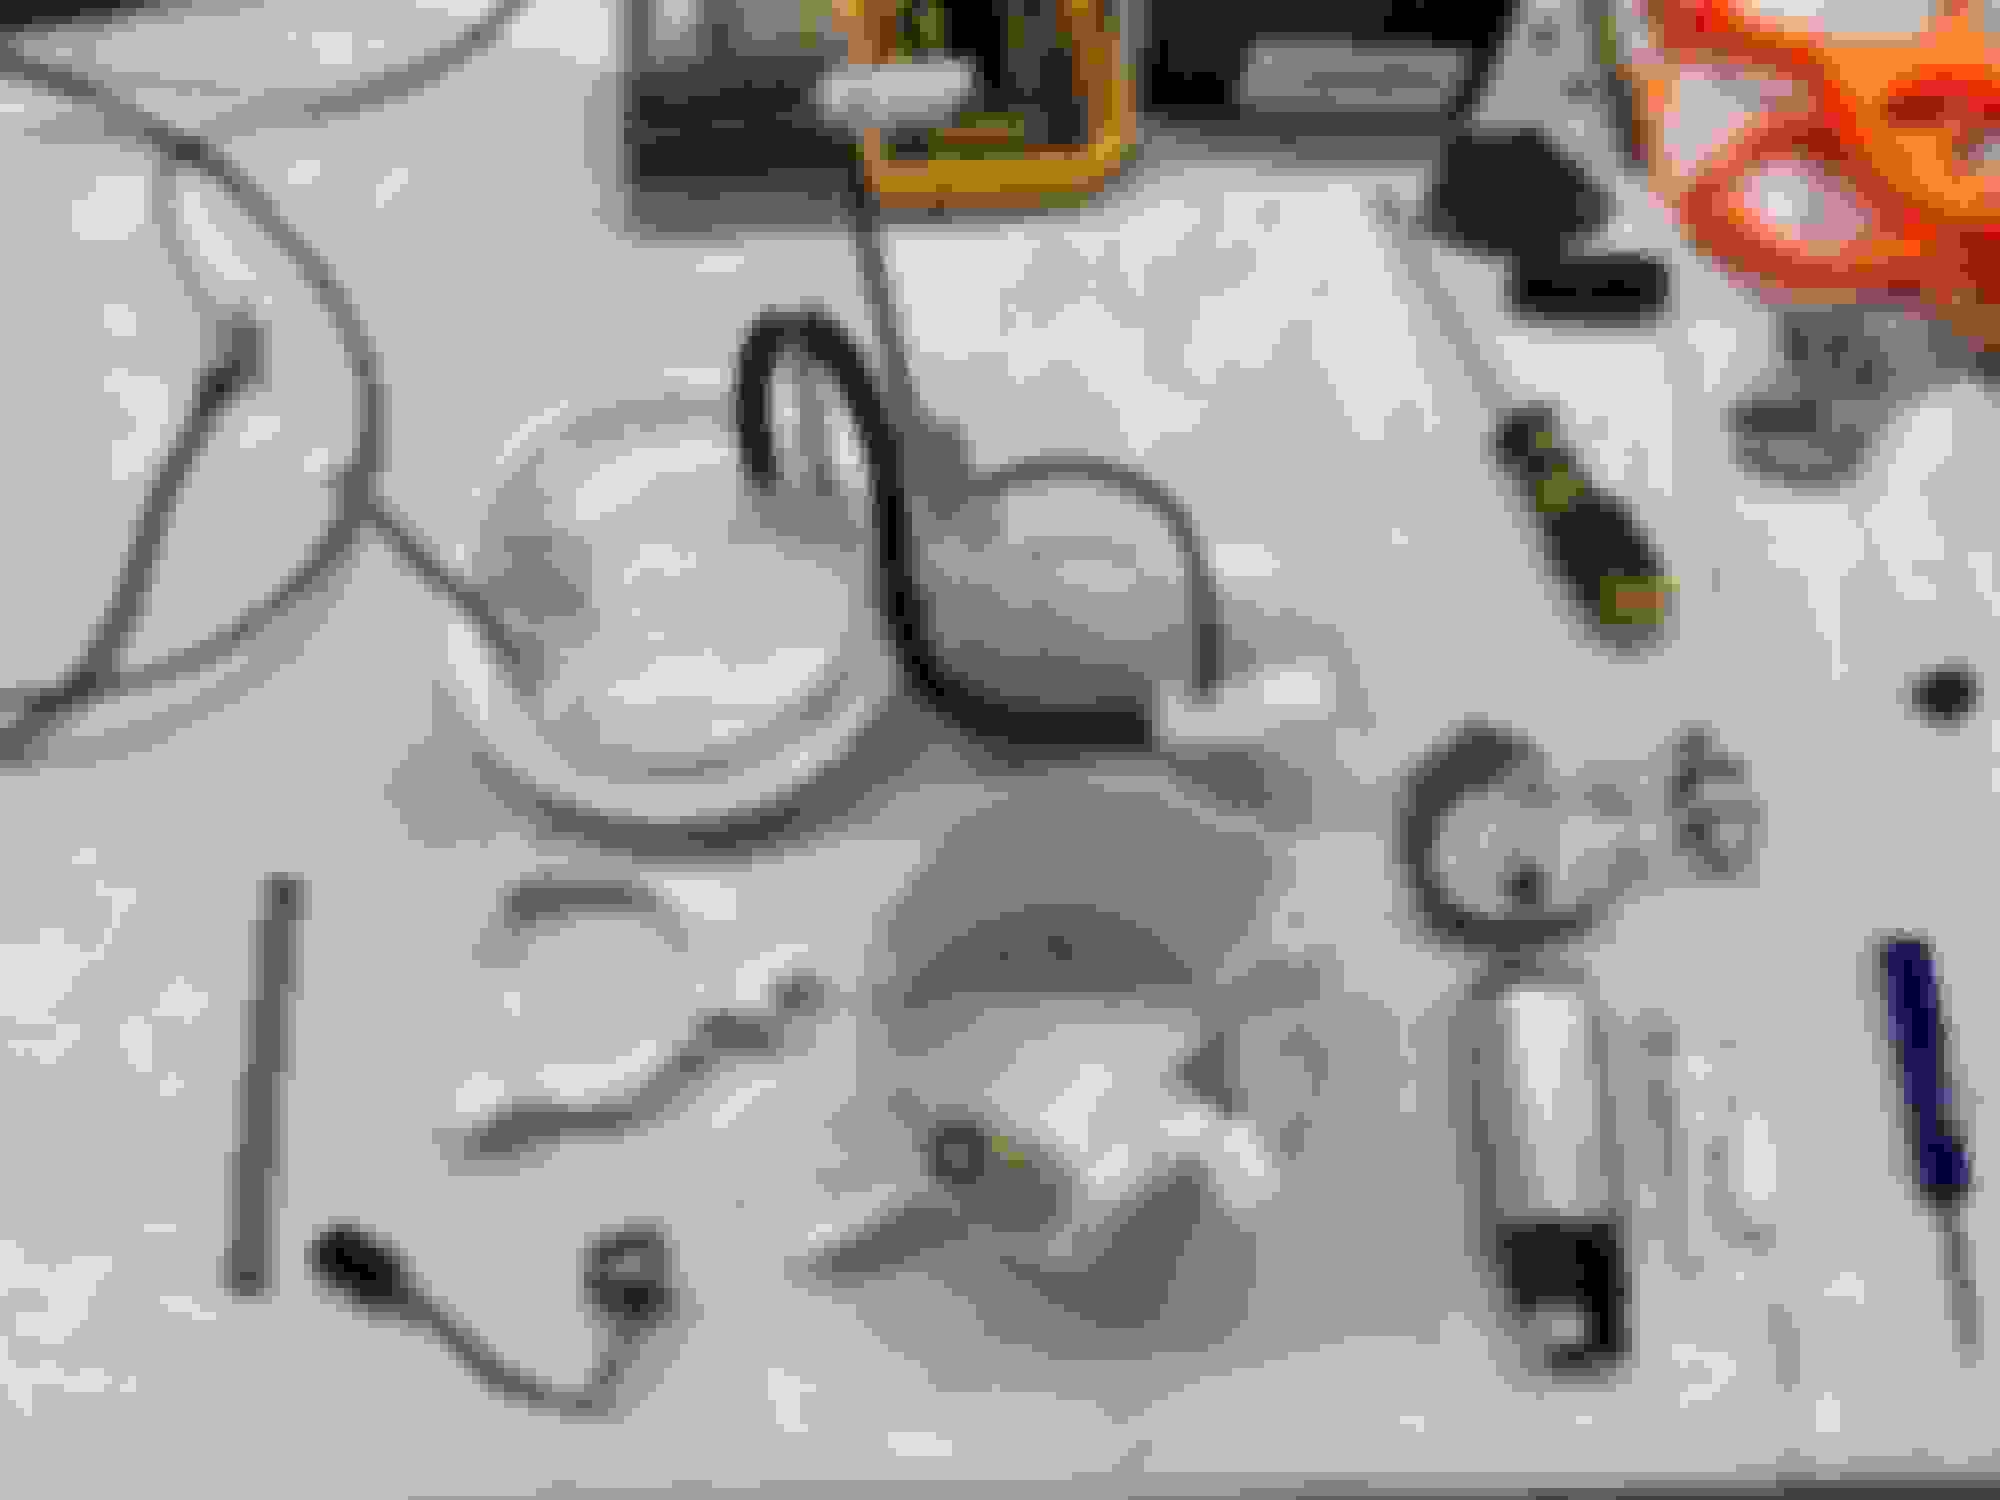
All the goods:
In addition to the Radium FST I also grabbed a Radium inline fuel filter and pressure gauge. I know you can do this cheaper, but this was the easy button as I knew I was going to be butting up against a deadline of having the car ready for Mid Ohio (F O R E S H A D O W I N G).
The first order of business was to get the AEM pump wired and mounted into the tank. Once that was sorted, I shouldn't even need to open it ever again.
Few things I didn't really like: The Radium kit comes with solid core wires that are far too long for the application so I had to just bundle them up, which was pretty annoying. I will go back someday and crimp my own wiring that matches the correct length. Also, the main top O ring is REALLY easy to pinch as it is retained on the top and not the tank side so when you go to put the top on the o ring just falls. Care is needed, would have been nice to see a retainer on the tank side. A bulkhead connector instead of screw on posts would be nice too. As usual, I'm probably just being picky and overall the unit is very high quality as far as aftermarket parts go and I have no regrets.
Next was the mock up of where to put the damn thing. I sort of planned this out as it dictated which mount I got. The best solution that met my needs was to mount it on the rear trans tunnel with a small bracket. I mocked it up with some spare alumalite pieces.
I grabbed some steel from McMaster and recruited the help of my buddy. I welded up the bracket, he welded it to the chassis. We had to be quite careful to not melt the fuel tank behind the sheet metal. I think this was massive overkill, but I didn't want the tank to move at all when it was full of fuel at 1.5G in a corner. Some M6 rivenuts were used to affix the FST to the plate.
My goal was to paint everything up once it was in place.. which still has yet to be done -_-
From here on out it was just playing with fittings and wiring. I decided to run the OEM pump as an OEM pump using the two speeds. It shouldn't really matter if the lift pump ran at low or high speed, but the easiest solution was to do nothing, so nothing was done. To get the AEM pump it's power, it required a 20A circuit. Luckily, I already had fuses and wiring read to go from the now removed seat heater circuit. I went back to the harness and copper I had pulled out of the car and grabbed the wires I had removed. Luckily I didn't cut anything, so I just popped the pin into the connector where it used to reside, and ran the properly sized wire to the back of the car. I then spliced into the fuel pump ECU trigger and ran it to the seat heater relay so it would activate when the fuel pump was needed. Connected the end circuit to a Deutch connector with the appropriate current rating, and jumped into a rear ground. Easiest wiring ever!
Next up was trying to get the mess of AN fittings and adapters to get the fuel system plumbed up to the tank. This is where I really screwed myself for my timeline and designed myself into some corners.
My idea was to just cut out the filter in the sender unit, and jump the pump to exit to the surge tank, cut a hole for a return line, use an AN bulkhead and run it to the OEM jet pump to pull fuel from the other side of the tank. Easy right? Well... I learned that there is a hell of a lot less room in the OEM sender than you would think.
I ended up also needing a 90 degree AN bulkhead for the return... the OEM jet pump plumbing just wasn't doing to work... and the corrugated fuel line was too big to collapse when the sender was pushed into the tank... so I just kept cutting up the sender to make room for the aftermarket jet pump.. all of which was the night before the car needed to be on a trailer for Mid Ohio.
tl;dr the sender is an absolute mess, the fuel ring doesn't seem to seal correctly, and needs to get redone.
I thought about just removing the fuel cup, as the surge tank would be the thing to keep fuel at the pump... but if you can't lift any fuel from the tank.. you also don't get fuel in the surge tank. Not sure.. I think I overcomplicated it, and a hanger with a pump and a siphon jet may be the answer. Hell, just adding a secondary pump on the other side of the tank may also negate the need for all this clap trap. Will reassess later.
On the tank to sender side of things, in parallel with the clusterfuck that was the lift pump, I ordered PTFE lined -6 AN line only to realize the week of Mid Ohio that I had to buy fittings for PTFE lined tube specifically. So I overnighted the only fittings I could get overnight, and unfortunately the 180s were the cheapest of the cheap fittings from Amazon. Everything else was good stuff and went on as expected. Upon making the lines with the cheapest fittings ever, I blew the threads out without even reefing on it.
PANIC
Expensively overnighted from Fragola fittings and continued on everything else now with a strict deadline approaching.
Originally I had planned to use the nylon hose fitting, just cut down a bit to run the FST fuel line to the rail, however the more I tried to work with the nylon line, the more I wanted to jump off a cliff. I ended up just cutting the flange off, and using an inline AN to hardpipe fitting.
With that in, I made a jumper hose so that if this failed entirely, I could go back to the OEM S1 sender I had, but kept soldiering on doing late nights after work getting this cluster sorted.
Luckily, everything was pretty straight forward after that, and I got everything plumbed up without leaks, set the fuel pressure, and I was off to the races, literally.
You'll also see I 3D printed a bracket to hold the fuel filter, as I think my mounting of it was less than stellar and I needed something to constrain it from rattling the fitting loose. Happy to say this took basically no time at all and in a few iterations I was able to print a piece of out ABS that works great.
My other goal was to create a printed adapter to the fuel sender cover and a "comb" to pop the AN hose into, but I ran out of time. Oh well, time for that later. I also would like to create a small box over the pressurized fuel lines in order to prevent any sort of splashing if the line begins to leak. Safety is definitely lacking here and I don't like it but the car started for the first time at 11PM the day before we left, so it sort of was what it was.
Results (more on these in a later post): After driving at Mid Ohio I was able to run the fuel tank down to 3% fuel, and likely until it ran dry. This was amazing as before, even at 55% tank at the start of a session I would be fuel cutting. I was starting my tank with way less fuel and had way more confidence fueling was on point. 10/10 mod... just need to fix the shortcoming of my own design. More on this when I have time to revisit.
Gridlife Mid Ohio Meet - Mid Ohio Sports Car Course - August 4-6, 2023
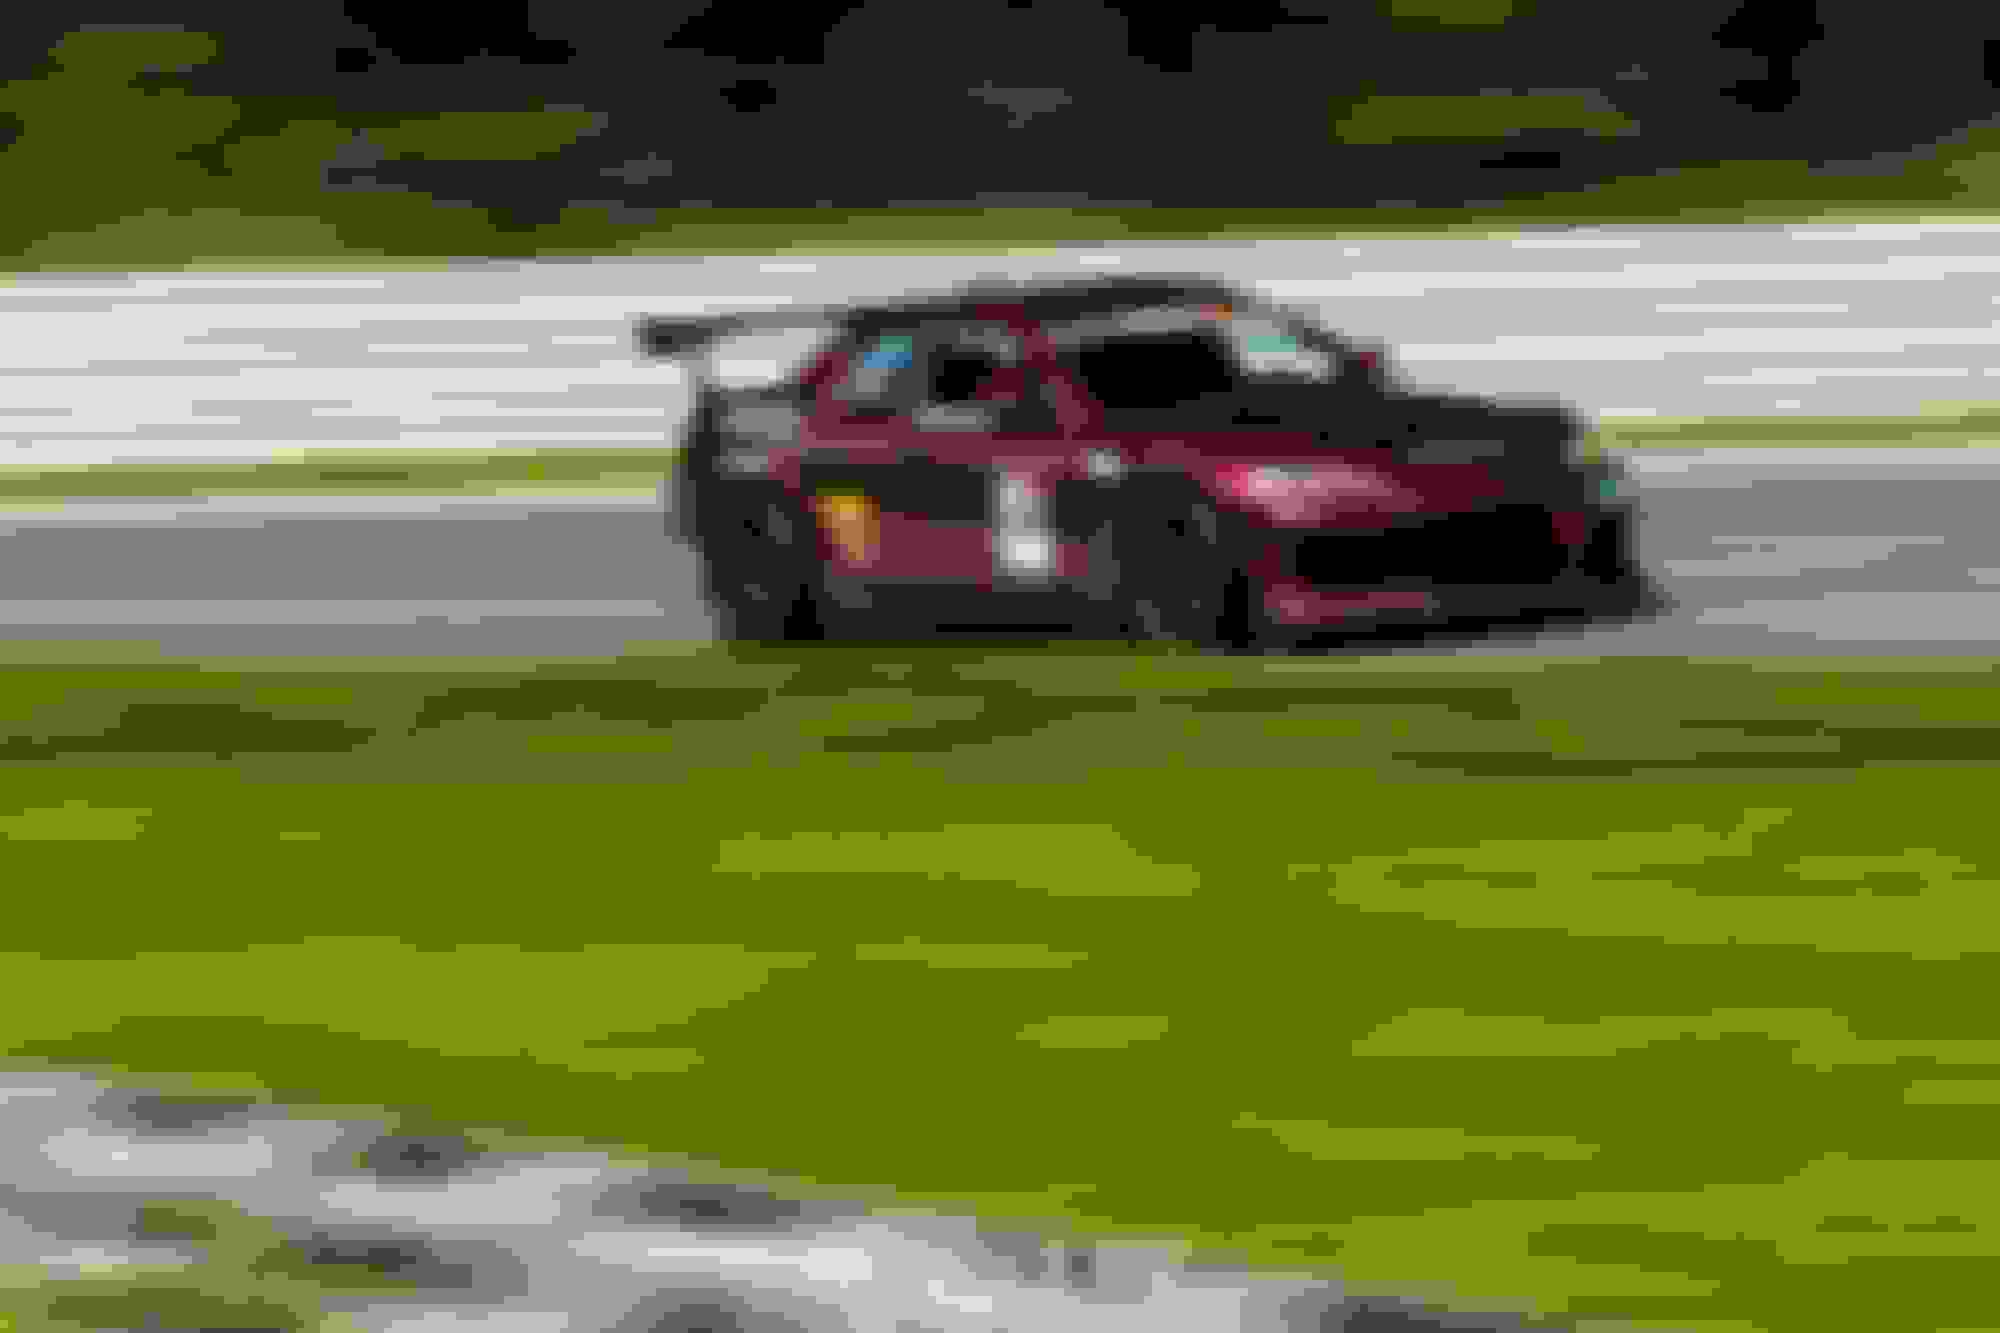
Only another month late on updating about Mid Ohio! If you read the last post about the fuel surge tank, you'll know it was a struggle to get to the event just because of my own dumb doing. Either way, buddies and I all loaded up to go out to Ohio to see who would be the first one to land their car in China Beach. Last year at the end of this event I remember struggling to figure out how to make the car go faster, so my goals for the event were to simply not do that, and to also test out the new surge tank. Coming into this event I had more rear gear, more aero, and more experience so I was excited to see what the car could do.
It's been a month.. so I am struggling to remember the trials and tribulations of the specific sessions.. but what I do remember is the fun of doing 1 lap and having the car turn off and not turn back on the first session out! When driving down the back straight, right before I grabbed 5th gear and the car just shut off. Initially I thought it had something to do with fuel cut as I've run into this before at Mid Ohio, and the fuel surge tank and setup had exactly 0 drive time on it prior to getting on track this session. I did smell some fuel coming out of the keyhole as well, so I figured something was not happy in the fuel system. I coasted down the straight, up some hills, and then tried to pull off into a cutout. The fuel pump wasn't priming as I tried to get the thing to restart, and eventually I had to get towed back to the pits.
As I rolled the car over to my spot, my friend's and I jumped in to figure out what was up, with my head focused on the fueling system. Upon checking continuity of wiring, and noticing a bit of fuel weeping from the sender ring, we were left scratching our heads a bit until I noticed a bunch of fuzzy stuff in the engine bay, and my friend pointed out the lack of alternator belt. Oh. OHHHHH! The alternator belt decided that it wanted to return to it's home planet, and broke off at 9500RPM, taking out the OMP connector with it. The insulation on the wiring had been ripped off, and the actuator battery wire had become one with the grounding wire and blew a main engine actuator fuse. Bingo. We got to work resleeving the wiring, and with the aid of a fellow Club TR and Unlimited competitors were able to get a new belt, and the wiring sorted (I still owe you an alt belt Dallas!). The new belt came from Dallas' spare RX-8 that still had the stock engine in it. Literally cannot thank him enough.
Carrying on, it was just your standard track battle weekend. A lot of the competition got WAY faster, and the lack of power compared to the rest of the field was extremely noticeable as I was falling more towards to back of the pack than I usually would. Tires were also falling off as I began to have a lot of understeer in corners, but all in all I was able to get a personal best, and more importantly didn't leave the track not knowing where more time could be had. There was a LOT of time left with the new car, and I think a fresh set of tires, fresh brakes (yeah, guess who forgot to get new pads in the midst of the surge tank garbage) and a fresh driver who wasn't already exhausted just to get to the track could have done better. This is the fight you have to do correctly in order to do well at racing at this level though, and I think we did extremely well given those circumstances.
Competition aside, the most fun I had during the weekend was during the drift/grip taxi sessions where my dad and little brother came out to the track! My dad was on his way back from picking up a new car about 20 miles from the track, and this forced m little brother to come out to the track for the first time ever as well! I really wanted to take my dad for a lap around Mid Ohio, as when I was ~10-11 years old, we had gone to Mid Ohio for an old ALMS race. We just watched cars back then, but now I was able to take my dad for a spin around a track I never thought I'd ever get to race on. To add to that, I got to take my little brother out for some laps and he had never been on a race track before! Such a treat to be able to share this with the people that got me into racing, and to give the perspective of what I get to do on the weekends.
Here is my fastest lap, a 1:43.2, which was a .3 second improvement from last year. I was able to not brake for T1 which gave me .8 seconds from last year.. but didn't manage to put it all together in the weekend. Either way, like I mentioned I am super stoked with the time and can't wait to go back to get more time too.
damn i saw this rolling through the pits and really wanted to try and come check it out but it seemed like i was suiting up every time you were heading off.
Gridlife Circuit Legends - Lime Rock Park - August 18-20, 2023
It's been another few weeks but I am finally catching up on this one. Going out to Lime Rock was on the bucket list of racing things to do. Not for the track specifically, but I've never traveled so far to go racing, and I have never raced at a track with any actual elevation around it. The goal was to travel far and drive my car in a "far away land". I went into this event thinking this would be the one time I push hard and go far to a race track, but after coming back home and everything was said and done, it just made me want to do this more often. The event was absolutely the best event I've ever been to ever.
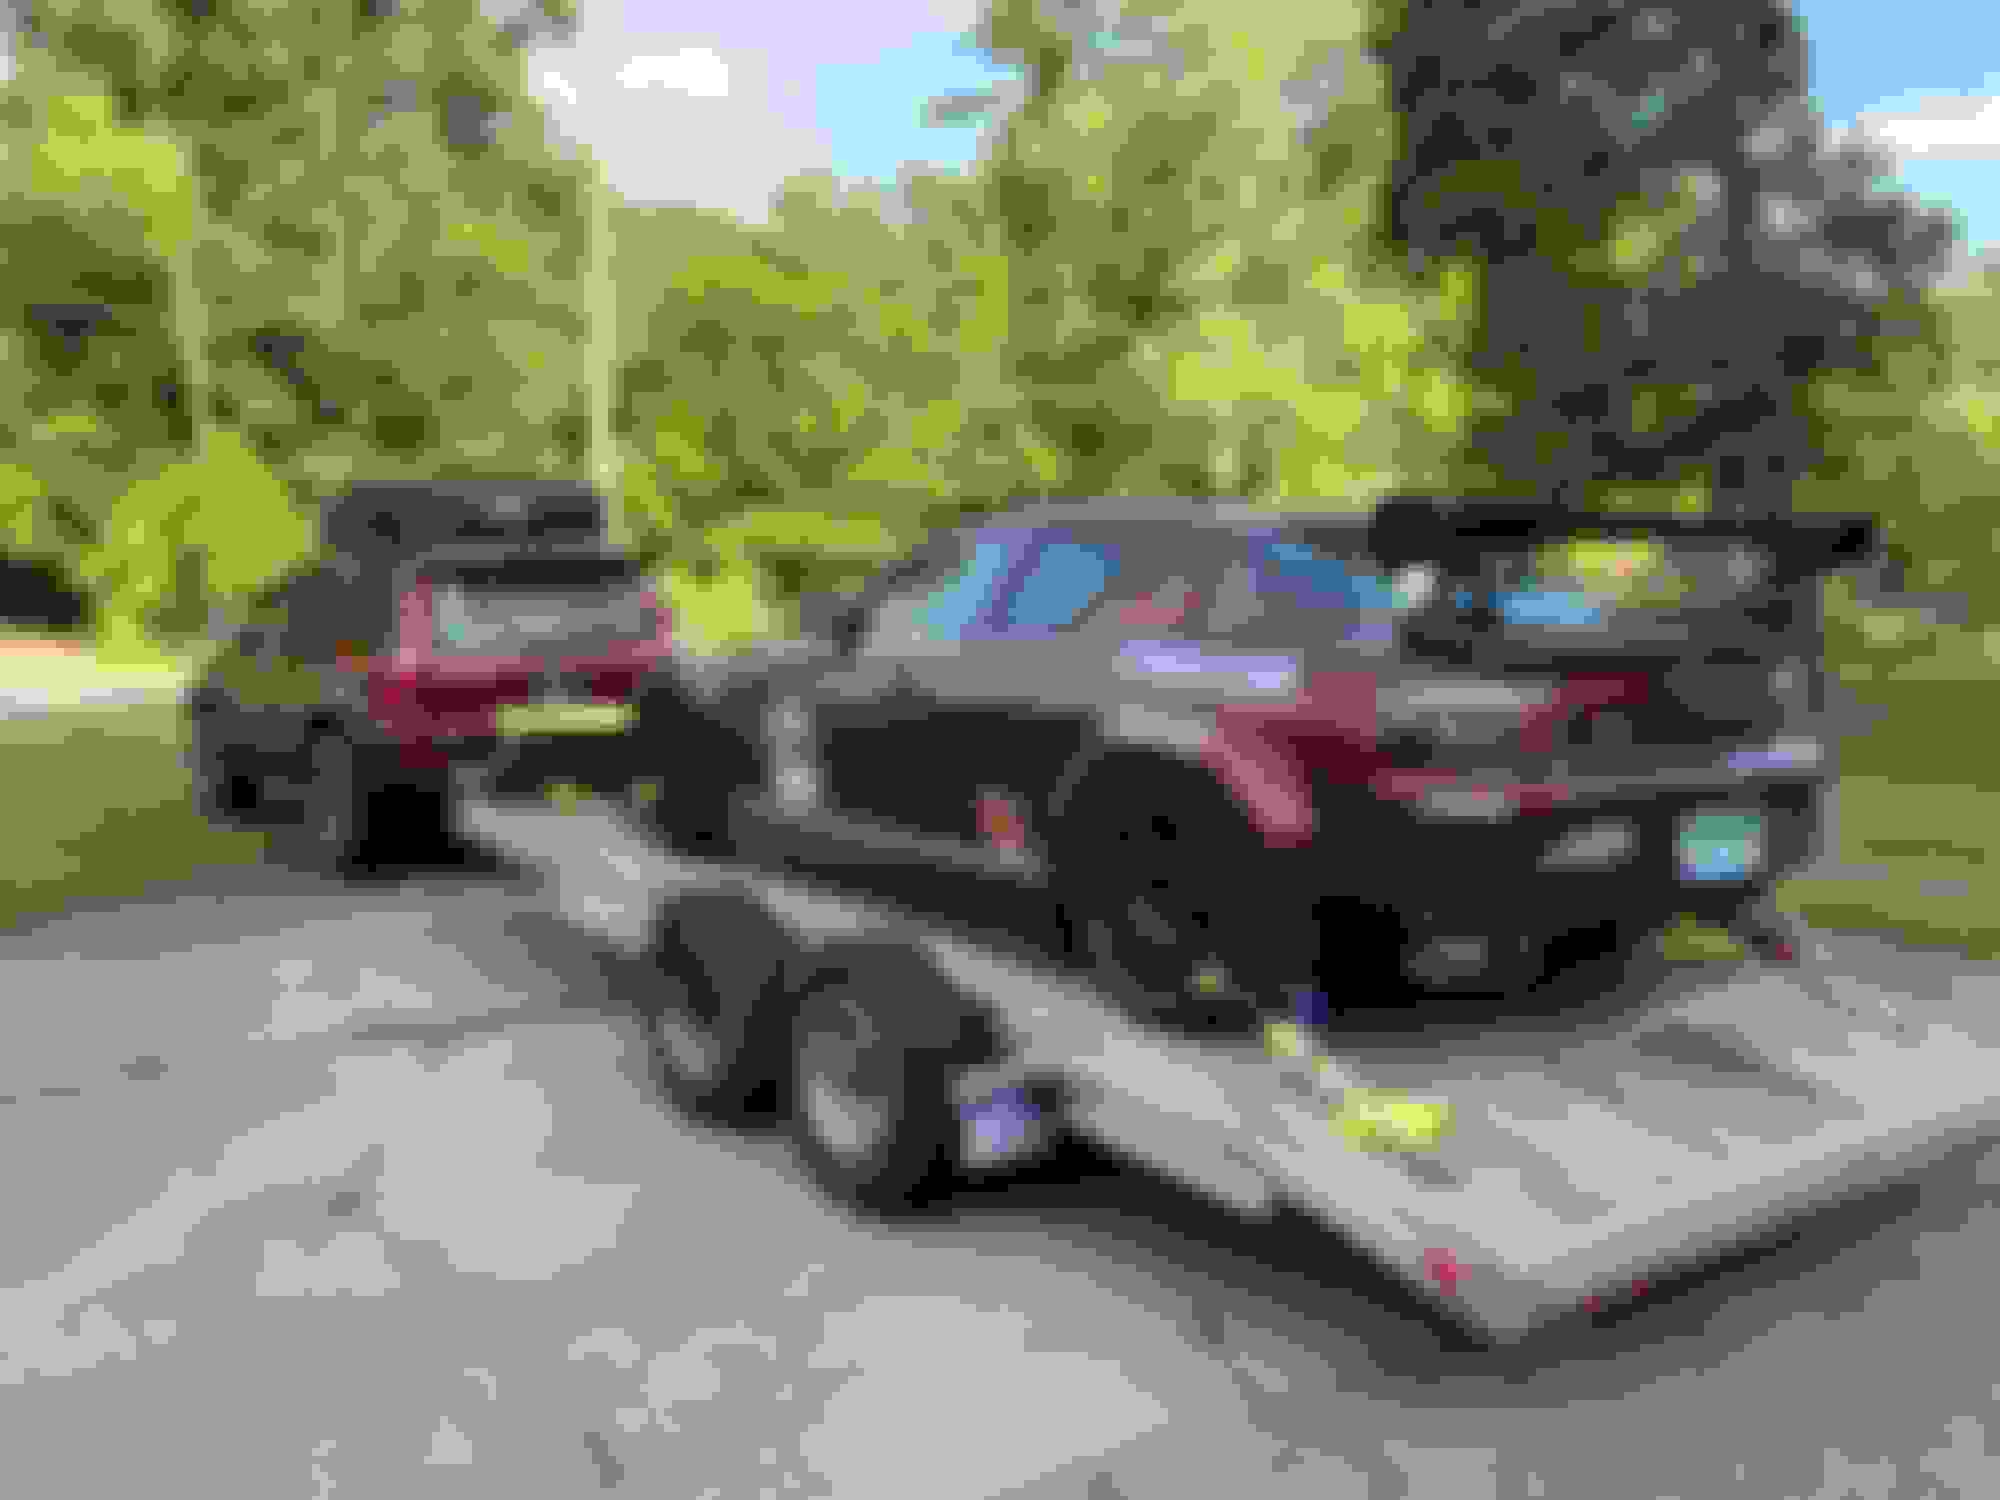
Gearing up, I had a fresh set of tires thrown on as one of mine decided it wants to throw a chunk out and be down to the cords at Mid O... thanks Falken , and that was about all I had time to do since this event was basically right after Mid O. We loaded everything up, and rolled out with the crew on Thursday morning, really hoping we could get to the track before it was dark. We had planned for a 10 hour drive, 12 with stops and such. My buddy who was hauling the truck had been working nights, so I didn't want to stress him out by leaving super early, so we got going around 9AM. It was gonna be tight to be there wit light.
The drive was kind of a pain, random rain, lots of traffic in cities, and we took a route (the wrong one) that jetted us north to avoid a parkway that didn't allow trailers on it.. so we got there and it was wet, dark, raining, and for me a completely new venue and I had no idea where to setup shop. Note to self, leave earlier. We got the car sorted, off the trailer, and managed to scrounge up some food for dinner. We setup some tents just in the grass in front of a service building and knew it was going to be an issue for later us. We were setup in the B paddock, which.. if you have never been to Lime Rock, the paddocks are basically in a big bowl and you're surrounded by steep hills and asphalt. Super rad, except when it's pitch black and you need to setup a tent somewhere.
Morning came, they told us to move our stuff (we did and everyone was kind about it), and then it came time to go racing. New track, slightly wet, and every time I drove the track in a simulator, I smashed the wall at the top of the hill. During the driver's meeting, I'd say ~80% of the people had not been to the track before, which set me at ease a bit as this now became a team sport while we all figured out where to go. Before we were out, I was able to experience the venue a bit more. There was fog rolling off the mountains, and the sun coming up was absolutely beautiful once the clouds cleared. That feeling faded as nervousness set in. It's wet. I don't know the line. I definitely don't know the wet line. How much gas do I run? And then I looked at the entry list and saw, for the first time ever, another RX-8 in Club TR. Time to make a friend.
I wondered on over to find the other RX-8's spot, and chatted with the fellow racer a bit. He had been here a bunch, gave me some expectations of pace and what to do. Awesome.
I also just found the ONE GUY I needed to beat for the weekend, hahaha! I'm usually not competitive at all.. but this was a pretty good comparison to make so I needed to be alpha Club TR rotary.
Hopped in the car for the first session, and it had dried up a tad. There was plenty of grip, but I was also going quite slow. I think I did a 1:05, which was about on pace with everyone else who had never been to this track before. The track was absolutely amazing. It flows nice, it's a lot of momentum to keep up, and the scenery, and hills, and staff, and everyone putting the event on just had a HUGE smile on their faces. Talking to other competitors was amazing as everyone had new sets of experience to want to chat about. I couldn't wait to start dialing in speed.
In between sessions was basically just relaxing as the only thing to think about was just getting more time on track. No trying to figure out where to make a tenth, when I knew there were seconds, and nothing about the car had changed since Mid O, so it was just easy to enjoy the off track experience as well. Watching GLTC races from the hills, and looking DOWN on cars running through the fake straight was something I never thought was possible at a race course. Watching drifters with a mountainside background was wonderful, and the weather had shaped up to be literally perfect.
I ended Friday with 1:02.9 and was finally understanding what to do. I made some quick changes in between a session as well to try to get the car in even better shape. Softened up the rear dampers as there was a bump right at a shift point that was causing a bit of looseness in the fake straight, and added 2 degrees to the rear wing to try and get the back end a bit happier over the hill. Both adjustments worked GREAT. I hadn't been at a track that really required more rear grip, but over the huge hill at Lime Rock sure seemed to want to bring that rear inner tire up.
After the day, one of the popular youtuber people was putting on a "pizza party". Apparently it was $115 to buy a ticket... the ****... But it turned out that crew and drivers were only 20 bucks a head.. and they had local pizza and and "open bar". We decided to go. I REALLY don't pay attention to any automotive youtube, and certainly don't care about any of the celebs or people that go nuts for them.. but boy howdy was this event awful. The scenery was nice as it was right on top of the hill in T1, and Lime Rock provided some fantastic beer.. but.. If I had paid $115 for it, I'd really want to reconsider my goals. Also, the open bar ran out of drinks like 15 minutes in, and I sat in the grass because there were like 2 tables. Regardless, it was dinner.
After that, we wanted to go walk the track, and boy oh boy did we. It was an awesome track to walk, and as always, got to learn some things about it. Total aside, scooters at Lime Rock is an absolute must.
The sun set, and we kept the party up in the arcade tent at the top of the hill before the fake straight. It was an absolutely awesome central gathering point for drivers and visitors alike. Plus fancy lights, racing sims, and beer and pretzels on tap made it great. Called it a fairly early night and went to bed feeling nothing but excitement for Saturday. It was going to be sunny, and a bit cooler in the morning. We moved our campsite to the spectator area and had a nice enclave surrounded by support Toyotas and tents.
Woke up to sunshine and fog in the mountains and immediately went on track. This time I was adding speed. Picked up two tenths, and also had a hell of a close call when a GTI spun out in front of me and we had a LOT of traffic coming in hot..
I knew that as soon as that car spun, I needed to look where everyone else was going. I was already planning to point the Mustang by after we got over the crest, so he was already on my bumper and I knew it.
I had no idea the S2k and LMP360 were so hot behind them as well. Glad everyone got out unscathed. This was on lap 2 if I remember right, so warmup was still in full effect.
Moving on from there, I did a 1:02.0, which would be my best time of the weekend. It was awesome because that made me seconds faster than the other RX-8, and the fastest rotary car on track of the whole weekend (including lots of turbo 13Bs, and 3 rotors!). Felt extremely accomplished for the first time at a new track in 3 years.
I was struggling to figure out the downshift in T1, and get the wasted corner correctly, so I am positive there is a lot more speed at this track with this car. sub 1 minute for sure, we just didn't have a lot of time to try. The track takes a lot of ***** to do flatout like you need to do.
Off track on Saturday was another sight to behold.. the crowd had gathered and the concourse was in full effect. I've never seen so many awesome JDM cars in one spot! I was also able to take my first ever ride in a drift car. A fellow Detroit guy gave me a ride in his Mustang, and I was surprised at the speeds, all that to say, it makes a lot of sense how those drift cars can go so sideways and control it when they are going so SLOW! I knew this after chasing drift cars, but it was another thing to see it in person. Tons of fun, but living on the edge of my seat! Id' recommend everyone hop in a drift car at Lime Rock. Feeling like you're in a canyon being basted by tire smoke of the car 2 feet from is something I will remember forever.
Off track is was just a huge karaoke party at dusk! 10/10, can't say more awesome things about the event and the afterglow of traveling home and having to go back to work hit hard.
Go to this event next year. It's worth however far you're traveling from.
The Lime Rock staff, and management welcomed us with open arms, and made a really nice speech about how WE are the future of this race track, and to hear that being embraced by a community with such heritage made me feel like I was doing something important and properly carrying on the legend that is Lime Rock Park. It was refreshing to hear the older folks welcoming the younger bunch that we are, where usually they try to gatekeep and kick younger generations out. It certainty is that way at some local tracks here where the first things out of managements mouths are "I will kick you out so fast if you disobey these 450 rules!". Like I mentioned before, I never saw so many smiling faces from everyone from the ages of 8 to 80. There were thumbs ups and friendly people trying to help you at every corner, and I will definitely be back at Lime Rock Park, even if the traffic is bad on the way out there. Thank you for letting us lay rubber down!
As far as results, I placed upper mid pack which makes sense as a track that favors momentum instead of horsepower lends itself kindly to RX-8s... results aren't up on Gridlife's website, so I'll edit this when I see them.
Adding this as an addendum to my fuel sender/surge tank post since this is still ongoing... buuuut... I've made a needed improvement to the lift pump situation.
I decided that going back to as stock as possible was going to be beneficial just to run a lift pump.. and because I chopped up my S2 sender, I needed to get some replacement parts. NC Miata stuff looked quite similar, and is much cheaper than trying to find S2 stuff, so I bought a sender and compared parts..
I knew the top plate was going to be different, but that was no worried because I had the one from my S2. I was hoping the fuel cups were going to be more similar, but unfortunately the NC stuff is quite larger.
What was the same though, was the pump housing/FPR/filter. I just had to use the S2 sender mount to throw it in the cup. This was okay, as I was just going to keep the pressure regulator in (shouldn't ever hit that pressure), and worst case throw in a pressure valve delete piece. Having the stock mount allowed me to mount the sender pickup lower, and gain back the few inches of bend radius I needed to get the top plate to compress enough in the tank... and hopefully stop my leaking at the tank.
I did this by getting some new flexible hose and running to to the lower send line to the top part. By the way.. this hose OD is larger than the OEM stuff, and really makes a difference in the bend radius you can get. The OEM hose is 8mm ID and 9mm OD, from my measurements, and every hose I tried to find has always been larger on the OD even though it says it's not. DUMB. Likely a metric vs imperial measurement. Would really like the smaller hose to gain more bend and room, but haven't found a source just yet.
I also tossed back in my Radium venturi with an added on 90 degree fitting to make it a bit easier to run the siphon hose to it, as well as added a duck bill valve to the end return line just to stop some of the aeration of return fuel (you could hear it in car, and was quite loud). Added some more bendy hose to that, and stuffed it in the unit. The top seemed to compress a lot more, and when installed with ~ 3/4 tank filled doesn't leak. I think the problem is fixed, though I'd still like to get my hands on a new S2 sender cup and top bit to redo some stuff better with the information I have now.
That's all! Not much more coming in the winter, but we will see where it takes me..
With the car easily moveable I was able to get it on my (newly installed, acquired for free!) second lift to undergo some projects on it that are gonna take some time with the car in pieces.
Also got myself a tire machine and balancer! Easy peasy race tire swaps are the best! Or more realistically, everyone and their brother wanting to put snow tires on their daily...
Today the RX-8 just got a boring tire rod swap. Was getting tired of rusty threads doing alignments, and the outers were blown out anyways.
Hoping I can keep my time and motivation Venn diagram in that center section through the winter months, less boring stuff to come in the next few months.
That was a great lap! I believe there's more in there if you brake less for T8 (leading to Thunder Valley) and use 4th gear. We ran the club course and ran 1:43.3 in my endurance racing RX-8. I was using 3rd in the same location, but a much faster driver in my car told me to use 4th and use A LOT less brake. Looks like you run the RT660's?
Dude, running that surge tank in the cabin is NOT OK. I can't believe that passed tech. You need a metal firewall between the cabin and any fuel stuff or it needs to be enclosed in a metal box. Sometimes SS braided fuel hose is allowed in the cabin, but that's about it.
Source: tech steward and someone building/racing cars for 20 years.
Been reading your posts and I have learnt a lot. I am also buildng a track focused RX-8, barelly starting. SInce you have already lots of experience racing with one, do you have any suggestions to do to the car? It's still basically stock.
Also, would you recommend deleting the ABS? Want to get rid of it and make brand new lines from pump, with brake bias and evetything, but heard the car without ABS becomes a bit unstable on braking?
Whoa. It's been a bit. Been extremely busy with work the past few months, and am finally kicking my *** in gear to get stuff ready for the upcoming season. Was able to finally nail down this portion of the brake upgrade I have been working on/off/on since December.
I should start this off by saying a few things: The OEM brakes on the RX8 are fantastic, have been fantastic for me, and will always be fantastic. Upgrading them is costly for very little benefit to most people, including myself. The only things I am setting out to achieve are related to weight loss, and serviceability, and to also to do a project that encompasses a few things I've been trying to do for years. This upgrade path is likely stupid, and shouldn't ever be done unless you genuinely want to accept that you may be worse off than when you started.
Okay, with that disclaimer out of the way, let's get into it.
The only issue I've ever had with my brakes has stemmed around how seals are not up to the track task, and I was growing tired of swapping calipers and boots out. In the back of my head the idea of swapping calipers out has been there, but the choices for an easy swap in my opinion were fairly lackluster. Racing Brake option seemed to give not a whole lot of info and while I am sure they work great, I personally had never heard of them and wanted to steer clear. The Willwood upgrades seemed like more of a downgrade, plus I've never been a fan of the weight/sizing of them... still a great option to stay using 17in wheels... but I had 18s. Expensive kits from Japan seemed to just be rebranded stuff with no service parts easily found, and everyone I talked to via email/etc said "oh yeah we can totally make these for you", and then wanted to spec an out of date caliper that was heavier than current offerings from AP Racing.
I chose the AP Racing stuff for a few reasons: Motorsports prowess, weight, ease of service parts, loads of distributors, and fantastic customer documentation. I know they work, and the company seems to really care about the stuff they produce.
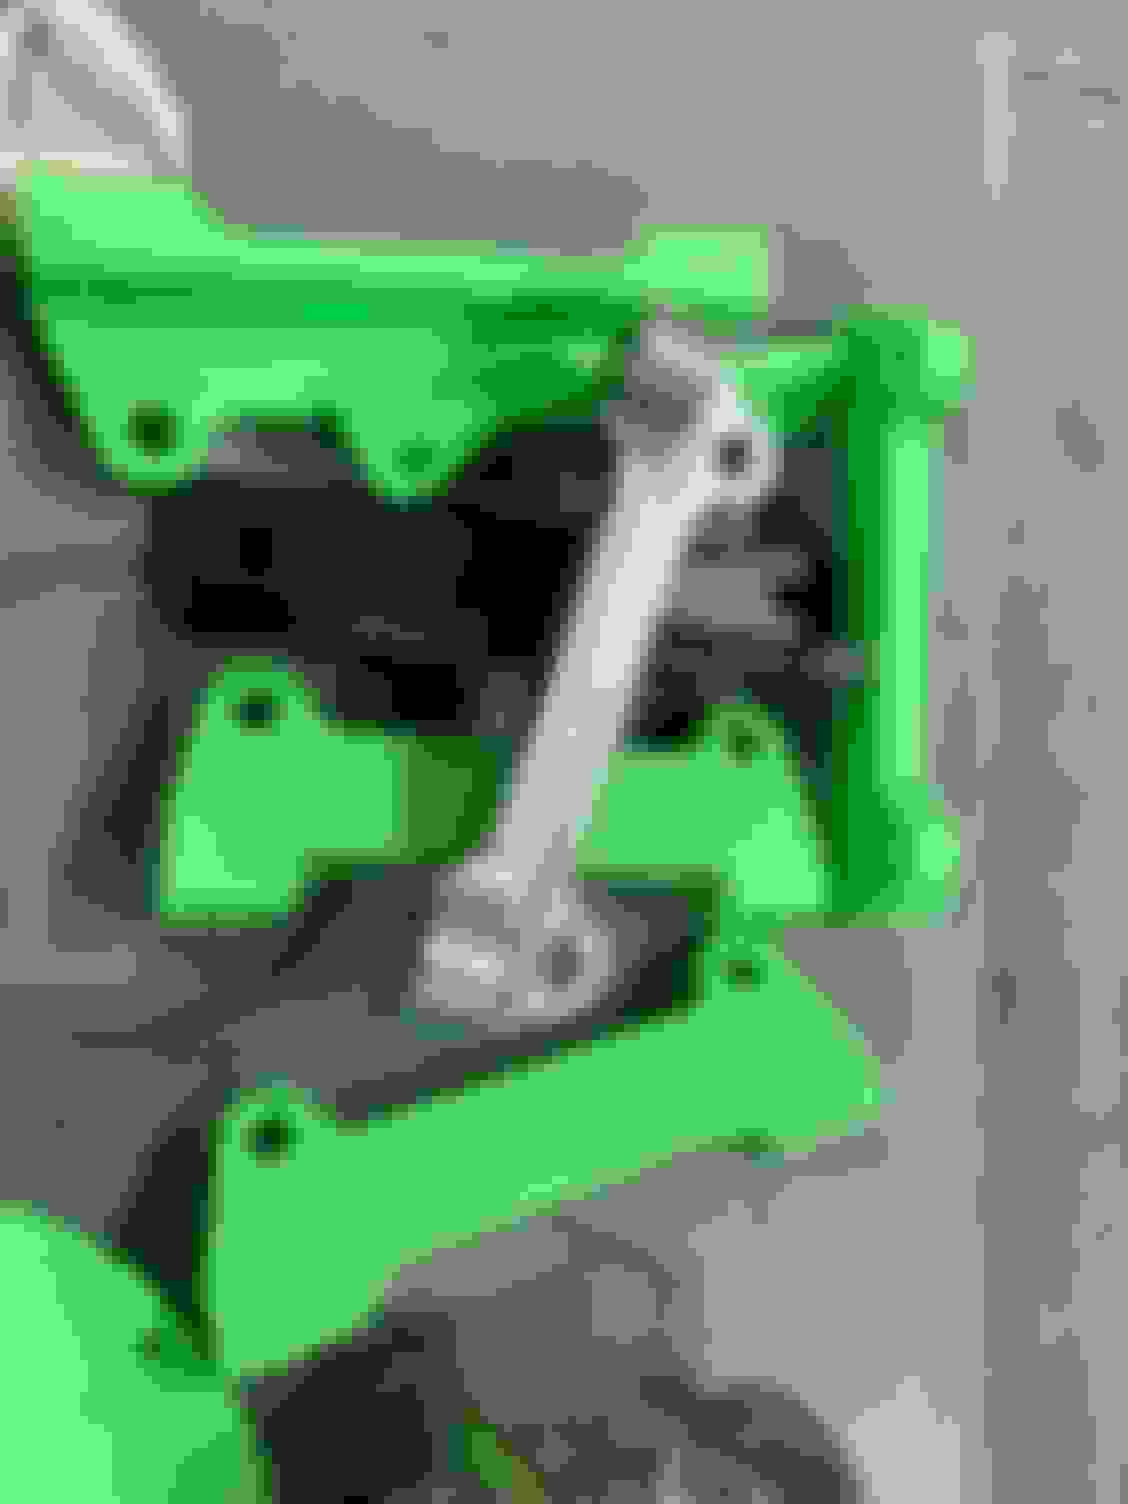
I chose to make my own brackets and hats, because it was a project that was going to allow me to start to make use of CNC'd parts, and start going down a rabbit hole that I've avoided for so long, simply because it was an area I lacked expertise in: Making functional metal parts!
Looking back, my process was overkill, but that's due to lack of understand how simple some of this is... but I think this process was super fun, and also has allowed me to be able to host all of my part files online for anyone to use/produce/export/etc. I wanted this to be a slight service back to the community, as I would never intend to sell this stuff, but it seems like there's a use case for these parts.
Okay, enough boring bits. On to what has been done!
So, the project started off by me really wanting to get a knuckle into CAD so I could mate everything up in computer-land so I could 3D print parts to confirm fitment before spending tons of money, and waiting long lead times for CNC'd parts that wouldn't fit. Luckily for me, I know a guy with a real fancy 3D scanner that would be perfect for the task. I have/had very limited 3D scanning experience, but I had enough to know it wasn't as simple as just moving a baton over an object and having reference geometry.
My friend and I started to play with the scanner, and the first thing we figured out, was that using the surface you are scanning to keep the mesh aligned in 3D space is awful. We then figured out how to create a global point network, for lack of what the actual term is, using the retroreflectors (little stick dots on everything) to first scan the 3D space that the scanner would then be able to use to track it's position. With that in place, scanning the objects became super simple, and the scanner never lots it's place in 3D space.
I think we tried to scan way too much, with too much detail as the exported 3D object file was basically enough to make my software and computer crash after 30 minutes of importing, so I had to cut the objects down, and turn down the resolution just to get the relative positions of the brake mounting to the hub surface into CAD.
With that all in CAD, I could then start to create a rotor hat and bracket that suited my needs.
Choosing the rotor was sort of a pain, and I went through a couple different iterations of design and rotor choice. The only important thing to remember is that your hat spacing determines your bracket spacing, or vice versa.
I chose to mimick the stock rotor positioning as much as possible, just because I knew it was a design that worked. I then modified the rotor hat to meet AP Racing's design criteria with their bobbins and desired rotor float. I also created a very liberal caliper profile from AP Racing's sheets on the CP9200 to make sure everything would clear.
Below is a screenshot from sometime during the development of the brackets and hat
So on to rotor choices and caliper choices: Why?
I settled on a 330x28mm rotor CP3580-2900G8. I wasn't really looking to increase the rotor size at all, but the 330mm rotor seems to be an extremely common rotor size, would allow me to use a D50 pad (close enough to the same size as OEM) that came in the Carbotech XP12 compound I know I liked. It also was only slightly bigger than the OEM rotor, and weigh significantly less. The G8 (slotted) was just a circumstance of available parts, haha.
This rotor was a perfect pairing with the CP9200 caliper as the size was perfect. The caliper (with the rotor) let me use the pad I wanted to, weighed almost nothing, and... was red! The only things that I wasn't 100% on of the caliper were the piston sizes. I did a bunch of calc to try to figure out if I would need to mess with the hydraulics (all while also planning on a rear upgrade, more on that later). With 2x 38.1mm and 2x41.3mm pistons, the piston surface area was ~50% larger than stock, it wasn't super ideal for pairing... and quite honestly I am still assuming I will need to increase my master cylinder size. We will see how spongy the pedal is... I expect it to be bad and don't have a good upgrade path just yet.
This difference between the factory and OEM caliper sizing led me down the path of "To ABS or to not ABS". The obvious answer is "not to ABS". I did some math and almost pulled the trigger on a boosterless adjustable balance bar setup, but deep down I really liked the thought of playing nice with the ABS. The DSC ABS on the car really isn't setup for motorsports (this is my opinion, not a fact) with it's diagonal split, and when changing only one of the two things in the circuit surely can't be great. ABS shouldn't be TOO TOO terrible, and I don't rely on the ABS to stop the car ever. I was/am worried the EBD will be pretty shitty, but I had already changed pads out in the rear, thus completely throwing the bias out the window anyways... so worst case we will see how bad I make this car feel and then get rid of it all.
Speaking of things I am terrified of: Brake parts exploding! I had no idea what a reasonable thickness of material was, but AP Racing's guidelines for design sort of keep you out of trouble.. and by doing the worlds most LEAST engineer-like benchmark of other people's brackets and materials, I came to the conclusion that mine SHOULD be fine. the smallest thickness of the rotor hats is (iirc, I don't have the drawings in front of me to be honest) 6.2mm, which is still larger than the lowest of the AP Racing spec. Doing some hand calcs with some designs with my aerospace engineer of a brother also helped me keep my mind as ease.
For the brackets, I went with a 6061-T6 aluminum, and for the hats a 7075-T6 just for some headroom. I even went so far as to type 3 hardcoat it, with the theory being it'll help with wear as the metal expands and contracts while sliding on the bobbins. Good enough for an AR-15, good enough for brakes! I used all AP Racing brake hardware as well.
Then came the design part. Lots of 3D printing and ordering of a caliper! I have no idea what level of design revision these photos are on, but I promise I have a whole box full of useless 3D prints.
And yes, I did download bolt STEP files from McMaster and printed out bolts. You wouldn't download a bolt....
Once things were mostly aligned I sent the files out to get CNC'd. I also ordered some pads, and per SpeedFreaks USA, I was able to get an even more common part number for the calipers. The only caveat was that I did need to grind down the outers on the pads like .5mm for them to fit.
I decided to tap the holes myself, mostly because I couldn't be assed to actually make a drawing the specified the threads. I did learn though, that I messed up the hole size on the knuckle mount portion. Luckily, it was just the hole being too small, so I got the right size drill and cut it out by hand. I did update the 3D files to reflect this.
I test fitted everything up, and it was BANG on. AWESOME!
You may have also noticed that the brackets were as machined. This was done on purpose, because I really wanted to try out at home anodizing. I had the perfect power supply for it, as well as my exact surface area in SolidWorks, so let's do it!
In between the time I got my parts in the mail, and was able to get them anodized, I had to pause for a month to go up north in Michigan for Winter Test for work. While I loved working on those cars, and writing software to make stuff work better in the snow, I was WAY more excited to get these parts in the acid bath. To do this, I grabbed battery acid from AutoZone, and some annodizing dye from the internets. Mixed it up, did the calcs, bing bang boom, they are red now!
EXTREMELY happy with how these came out, though I likely won't be doing anymore anodizing for small parts like this myself. It's way more time/cost effective to just have the usual scumbags do it themselves. Really happy I know have the parts and knowledge to do this now though!
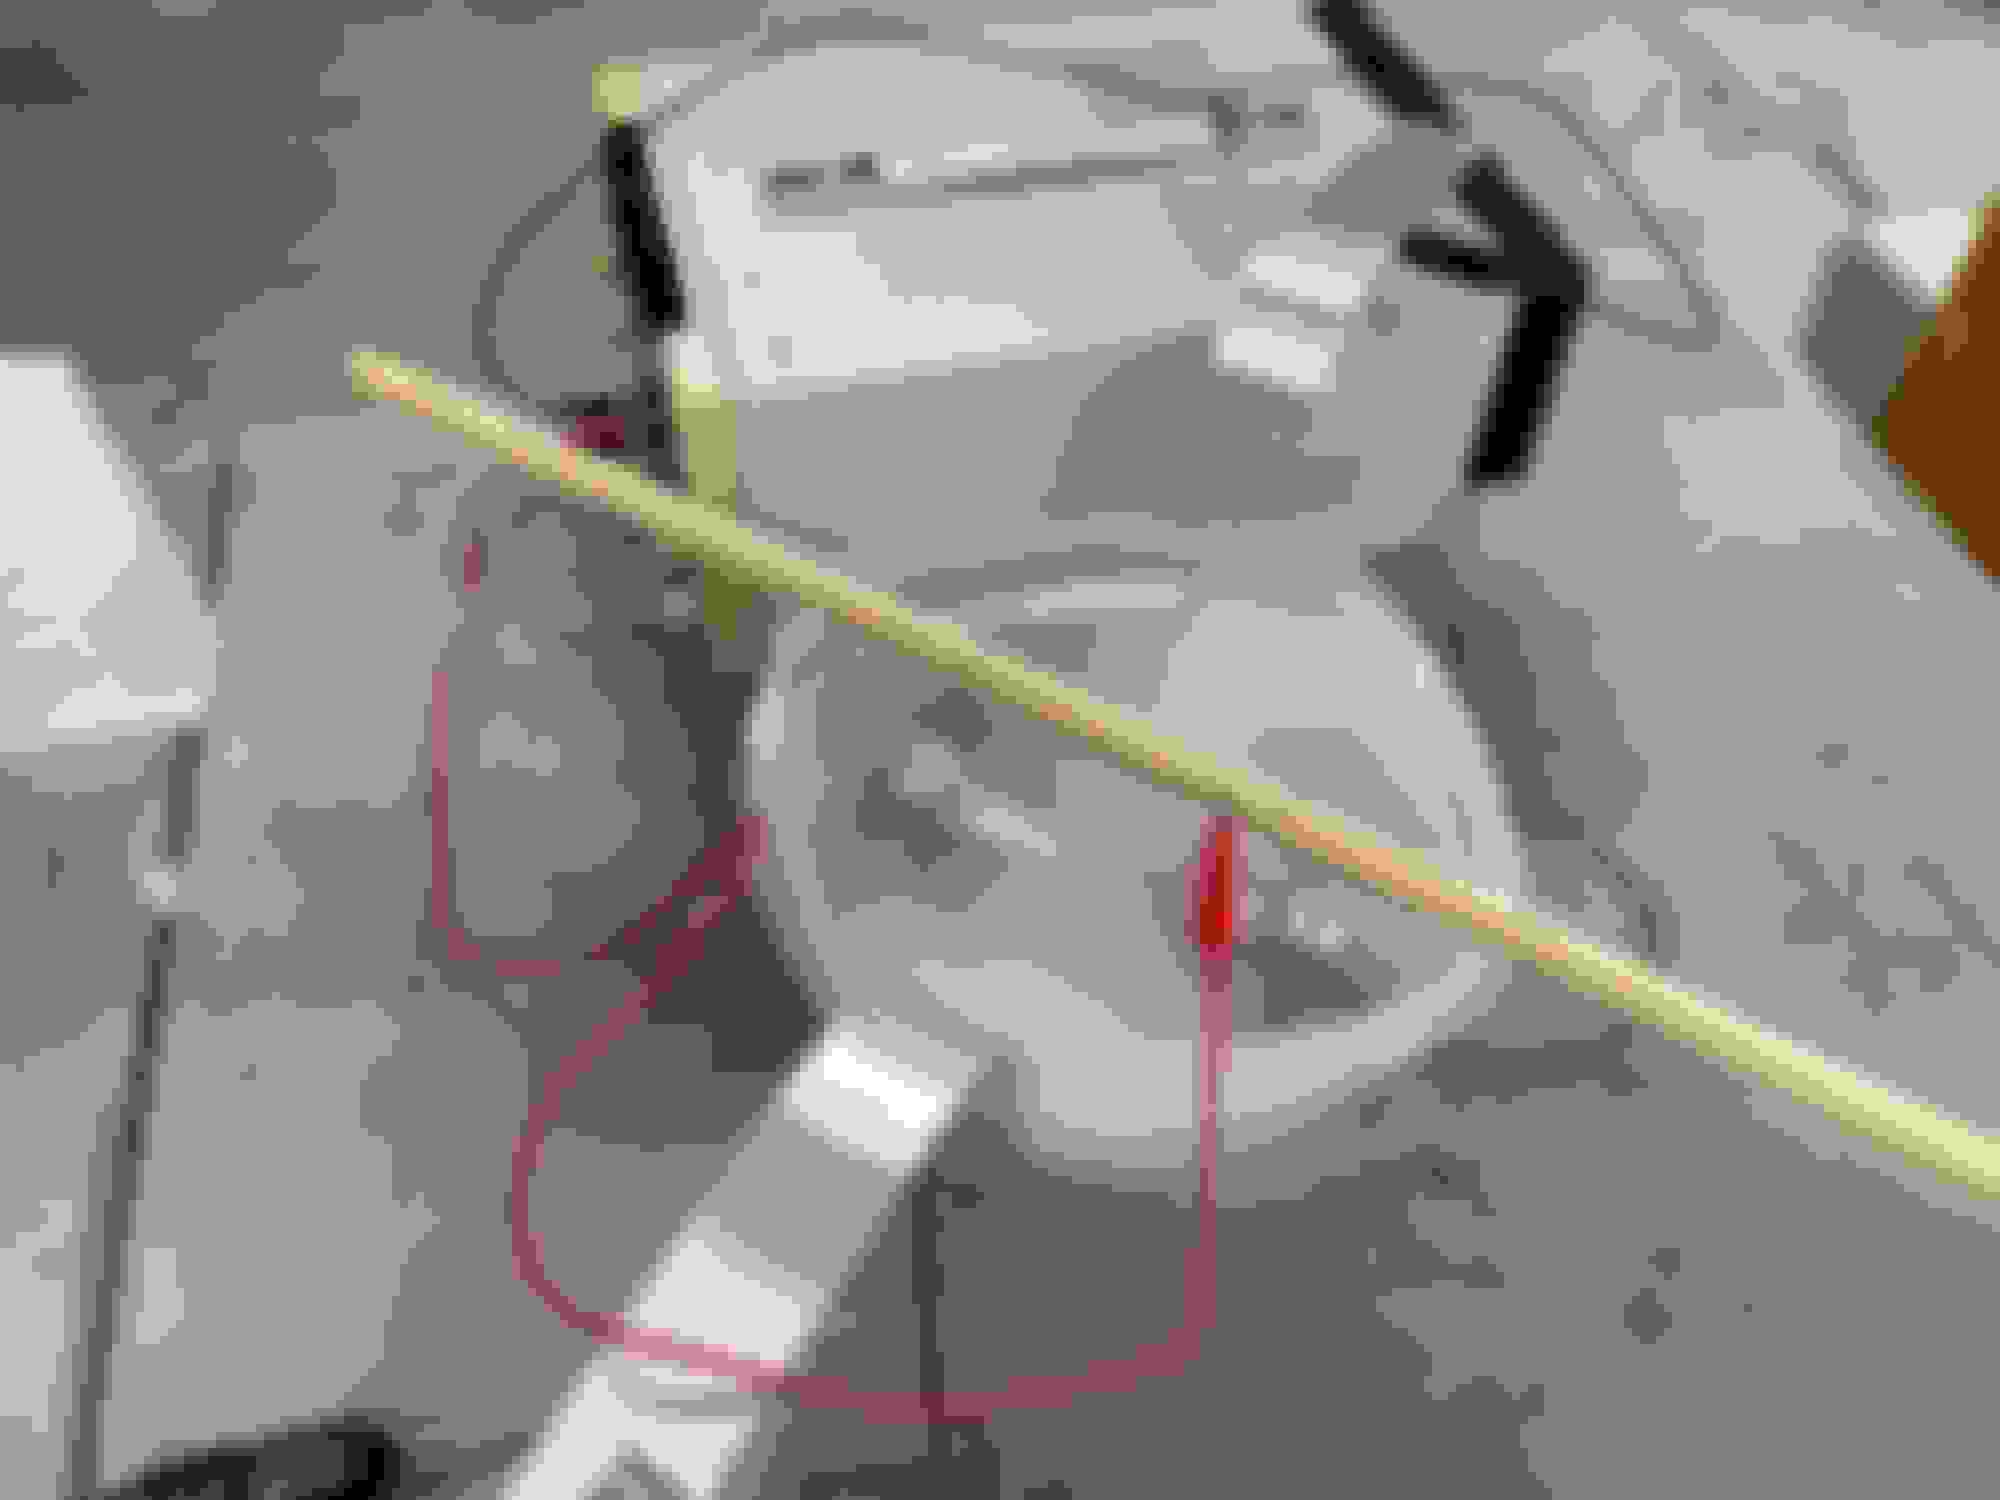
Bolt everything up and getting it plumed in hydraulically was a whole thing as well.
I tried to get some custom lines made by Pegasus, but they not longer stocked some items. I also bought the wrong adapters like twice... doh.
I settled on just doing the -4AN adapters, and some 21in stainless hoses. Easy peasy. I will have some better mounting hardware than zipties here in a bit
The brakes bled up perfectly, and the pedal feels only SLIGHTLY more squishy just from a static, non boosted test press. Will report back on more of the hydraulics stuff as it comes my way.
So what's the total weight change? Well... less than I had hoped. Though if my broken old Walmart people scale is to be trusted, which isn't not, it's still in the ballpark of what I was after.
A loss of 8lbs per corner in unsprung mass, while also increasing rotor size and thickness is GREAT! Pad surface area should be effectively the same as well.
I think I may get a better scale and double check, as my estimates had me closer to 10lbs.. but like I said.. I am stoked regardless.
And hey, maybe I should have put this at the top.. but rewards for those who stay with me....
I have, as typical, hosted all of my 3D files for the bracket, hat, and 3D scan + the BOM of all the parts I used on github right here: https://github.com/equinox311/RX8_AP_Kit
Go make your own if you think you want it!
That's all, will report back on all of the things left to address later.
Dude, running that surge tank in the cabin is NOT OK. I can't believe that passed tech. You need a metal firewall between the cabin and any fuel stuff or it needs to be enclosed in a metal box. Sometimes SS braided fuel hose is allowed in the cabin, but that's about it.
Source: tech steward and someone building/racing cars for 20 years.
It's definitely less than ideal. Effort is being put to move it/put up a firewall currently.
I should at least note that there is very little in the way of high pressure lines where they can spray on the driver if they fail.. but yeah. There needs to be a firewall/block.
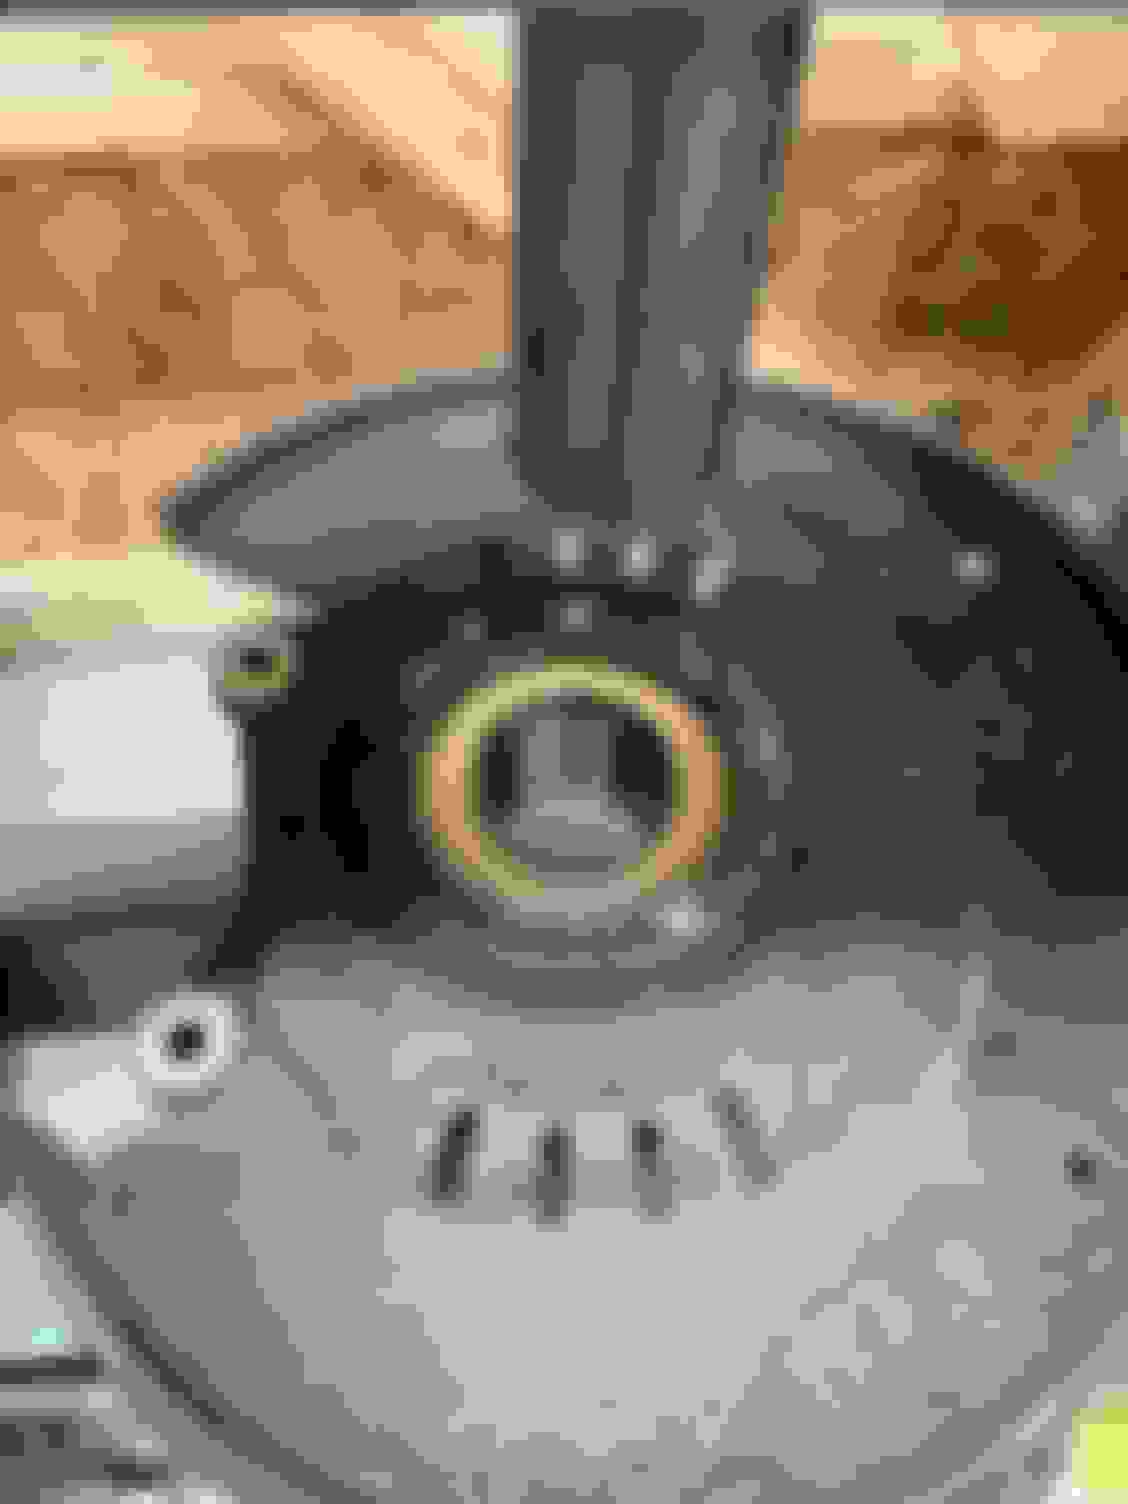
Easy peasy upgrade as the Weds needed some longer studs after not feeling too comfortable on the stock studs.
This was also a good time to replace the rear wheel bearings with some Timken units, and get to use my press on my car's wheel bearings for the first time.
Simple swap, only thing I'll say is that the cheapest snap ring pliers from Lowe's, really aren't the tool for the job.. but.. by compressing the snap ring in my vice and using some surgical like steady hands, it was fine.
Nice design work on the brakes, but I think you're glossing over the importance of getting the caliper piston sizing right. Its critical. Is there a reason AP couldn't work with you to find calipers with the right sized pistons? This is standard practice.
Nice design work on the brakes, but I think you're glossing over the importance of getting the caliper piston sizing right. Its critical. Is there a reason AP couldn't work with you to find calipers with the right sized pistons? This is standard practice.
If you're deviating from OEM components, there really isn't a way to just "find the right sized pistons". They don't custom make stuff to match OEM designs, and if they did it would be waaay to expensive to be practical to sell. You're increasing the hell out of the piston area almost always with a bigger brake kit, so this is normal. You also WANT the extra clamping force that comes with more piston area in a lot of applications, though the RX8 is a bad example of this because the stock brakes are properly good. RB, Willwood, all the usual suspects do this to an actually larger degree (at least from the info I can find online).
The AP calipers I chose were a balance between weight, cost effectiveness, and rotor sizing available. The piston area increased by 20%, which isn't too crazy. The tradeoff is just going to be pedal stroke amount, and pedal force required. Pedal stoke shouldn't run out with the current setup, which was been confirmed, and the force required should go down for the same clamping force at the rotor, which I do agree is not great. These two things combined is why people typically get a squishy pedal after upgrading brakes.
Given the fact that the RB and Willwood calipers form the usual suspect have a larger piston area than the AP calipers, I figure the pedal feel won't be crazy out of line compared to what everyone else loves to run today.
That also being said, I do have some larger bore master cylinders on the way to me right now to experiment with as I do expect the change in feel to be annoying, but I have held off on doing anything until I have my rear upgrade done as obviously all of the hydraulics will be effected because of that as well.
So yeah, tl;dr I assure you I did not gloss over the hydraulics, it's a whole system you need to change and play with and not just match one component too.
It's not custom, just gotta peruse the catalog. Stoptech has a ton of piston size options, ive worked with them before. Wilwood has quite a few. My point is that the less you deviate from factory sizing, the less ripple effect there is. Sure, you can put whatever you want on the car if you're willing to change everything out to match.
I skimmed the most recent few
If the piston area difference shifts the bias toward the rear chances are it will be an improvement on overall performance
It is nbd to fit different size masters in my cars with the dual master/bias bar setup as they use standard girling style. Then you also ditch the sketch abs and can set bias to ideal.
Also pay attention to the plumbing from brake master to the stock abs and such if you keep it. It is not plumbed front/rear but cross.
That motorsport abs setup I posted about on fb is legit
See you at rev up?
Last edited by dallasreed; 03-30-2024 at 07:25 PM.

 07-11-2023, 09:22 AM


 , and that was about all I had time to do since this event was basically right after Mid O. We loaded everything up, and rolled out with the crew on Thursday morning, really hoping we could get to the track before it was dark. We had planned for a 10 hour drive, 12 with stops and such. My buddy who was hauling the truck had been working nights, so I didn't want to stress him out by leaving super early, so we got going around 9AM. It was gonna be tight to be there wit light.