When you click on links to various merchants on this site and make a purchase, this can result in this site earning a commission. Affiliate programs and affiliations include, but are not limited to, the eBay Partner Network.
With our drain plugs, we need to tip the car a bit to get more oil out of the pan. Do you get more out with the extractor? No sure where in the pan the tube ends up when you put it in there.
I would think I get a little less out with the extractor than by removing the drain plug on a slightly tilted car, but it is not really a significant difference.
If ever I wanted proof that I’m not in the same league as the DIY thread creators this past week is confirmation.
My “vacation” started last Friday when the transmission removal commenced. Fortunately I had booked the time off to do a large block of maintenance. The drive home Thursday night was sketchy. Noise from the throw out bearing was increasing over 3 weeks and the Exedy replacement clutch kit had arrived the previous Saturday. Timing was excellent as the final hill to my house was the last trip that old clutch was able to complete.
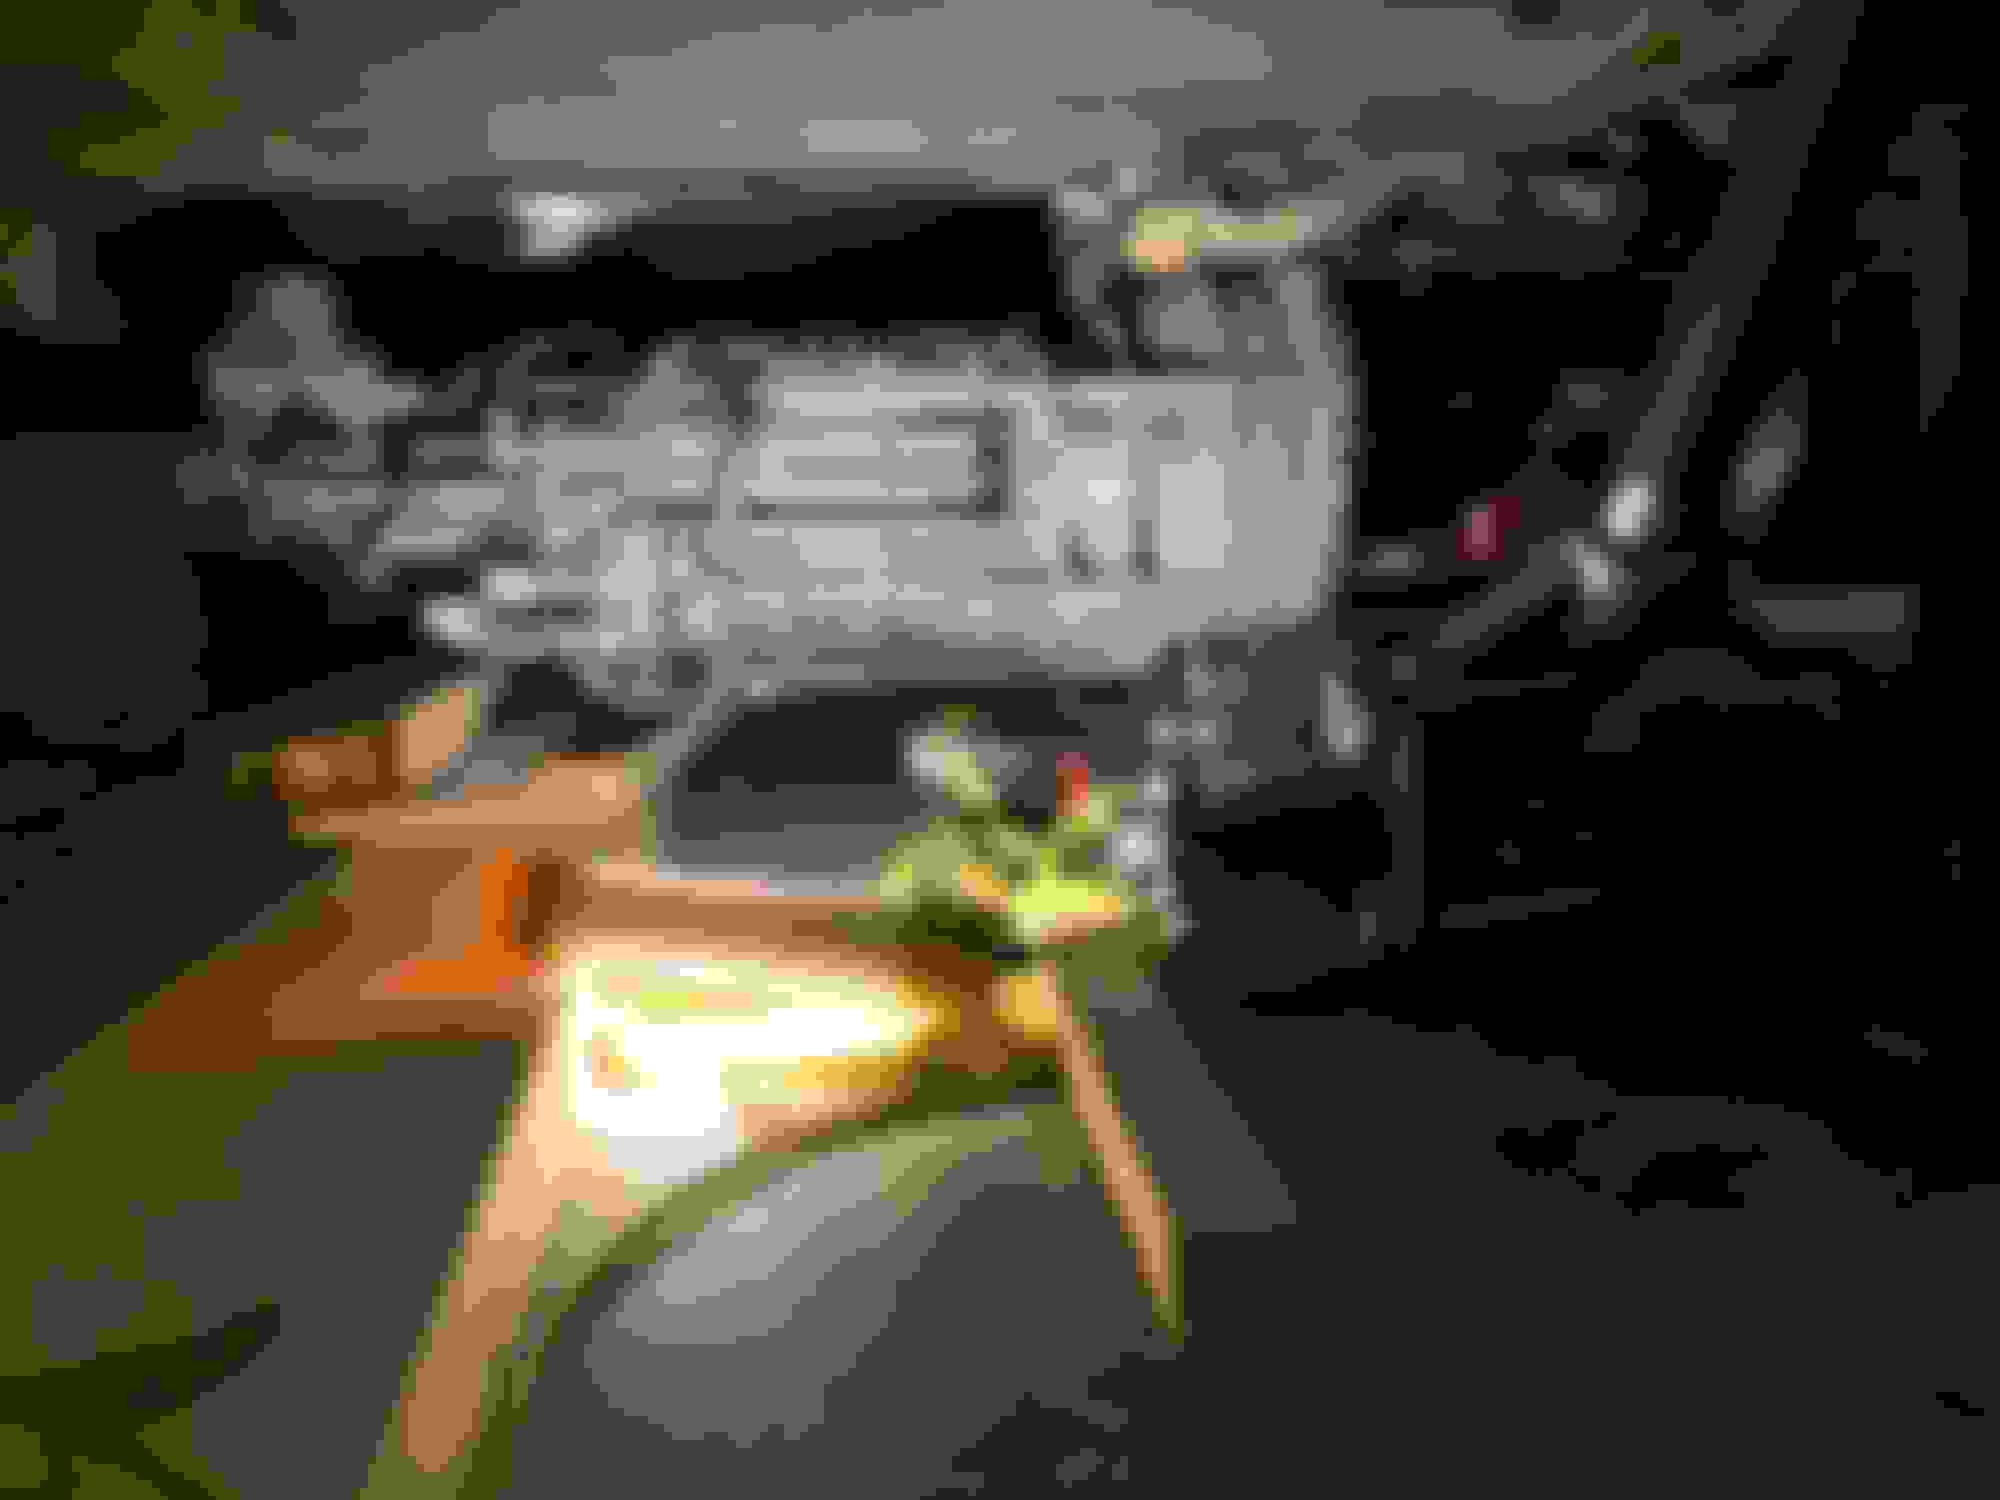
Saturday arrives and most of the preparation was done to remove the transmission from the car. Whomever designed the slave cylinder placement must have incredibly small hands. That monster took hours to remove with the limited access available below the car (more on this later). The arrival of Dodo23 made all the difference. We got the transmission out and placed gently upon my chest until I managed to worm my way from beneath it, an interesting feeling.
Up in the air , chaos to commence
Removal of the bearing from the shaft was stumping us both until a call to Danobre was made. How fortunate to have Yoda just down the hill from my house! We tried his inventive approach of pounding plumbing tape into the shaft void in the attempt to push the bearing out of its home. Partial success was made with the arrival of the seal portion of the bearing popping out but, the bearing refused to listen or move. Down the hill we went for a short visit/education with parting gifts of the proper bearing puller, insertion tool, and alignment tool (don’t worry Danobre, all shall be returned shortly). After cleaning out the plumber putty and tape mess the old bearing was removed and new one installed except, I was involved so the old seal was mushroomed by my Neanderthal methods. Another call and short trip down the hill and we had a fresh seal to install.
Cleaning the bell housing and shaft revealed the source of burnt plastic the past few weeks. There was very little remaining of the throw out bearing and the plastic seal debris needed the shop vacuum to remove. Again, timing of the replacement was excellent. For the purists out there please skip the next sentence. Using a light and metal straight edge, I decided to leave the flywheel in the car and not remove it for resurfacing. Very little wear/deformation could be seen. Not only do I have a highly sensitive butt dyno, I also have micrometer vision.
Plastic shards await the vacuum Attempts made to install met with failure New adapter plate - happiness Don’t try - no way radiator coming out This is the way (Mandalorian was right)
Several attempts were made to lift the transmission into place with my floor jack until, wisely, Dodo23 suggested we quit for the day and get a lifting adapter. A Sunday morning visit to Canadian Tire saw further depletion of my savings and another tool for the garage - a new transmission adapter plate for my floor jack. What a difference the proper tool can make. With our duo once again formed, the transmission was in the car smoothly. Reinstalling the PPF went well thanks again to Dodo23 and his experience.
Monday saw the completion of the transmission removal process with all the parts cleaned up prior to mounting. Too bad no one can see my shiny stainless exhaust.
Remember the monster referred to earlier - the slave cylinder? Well fortunately it was reticent to go back in place. To solve this I removed the UIM, gaining space to work. A side benefit is the solution of my vacuum leak over the past year. Fuel economy has really sucked lately and LTFT values were high suggesting a leak. The idiot (me) who previously removed the UIM put a short bolt where a long bolt was required so the intake wasn’t sealing properly.
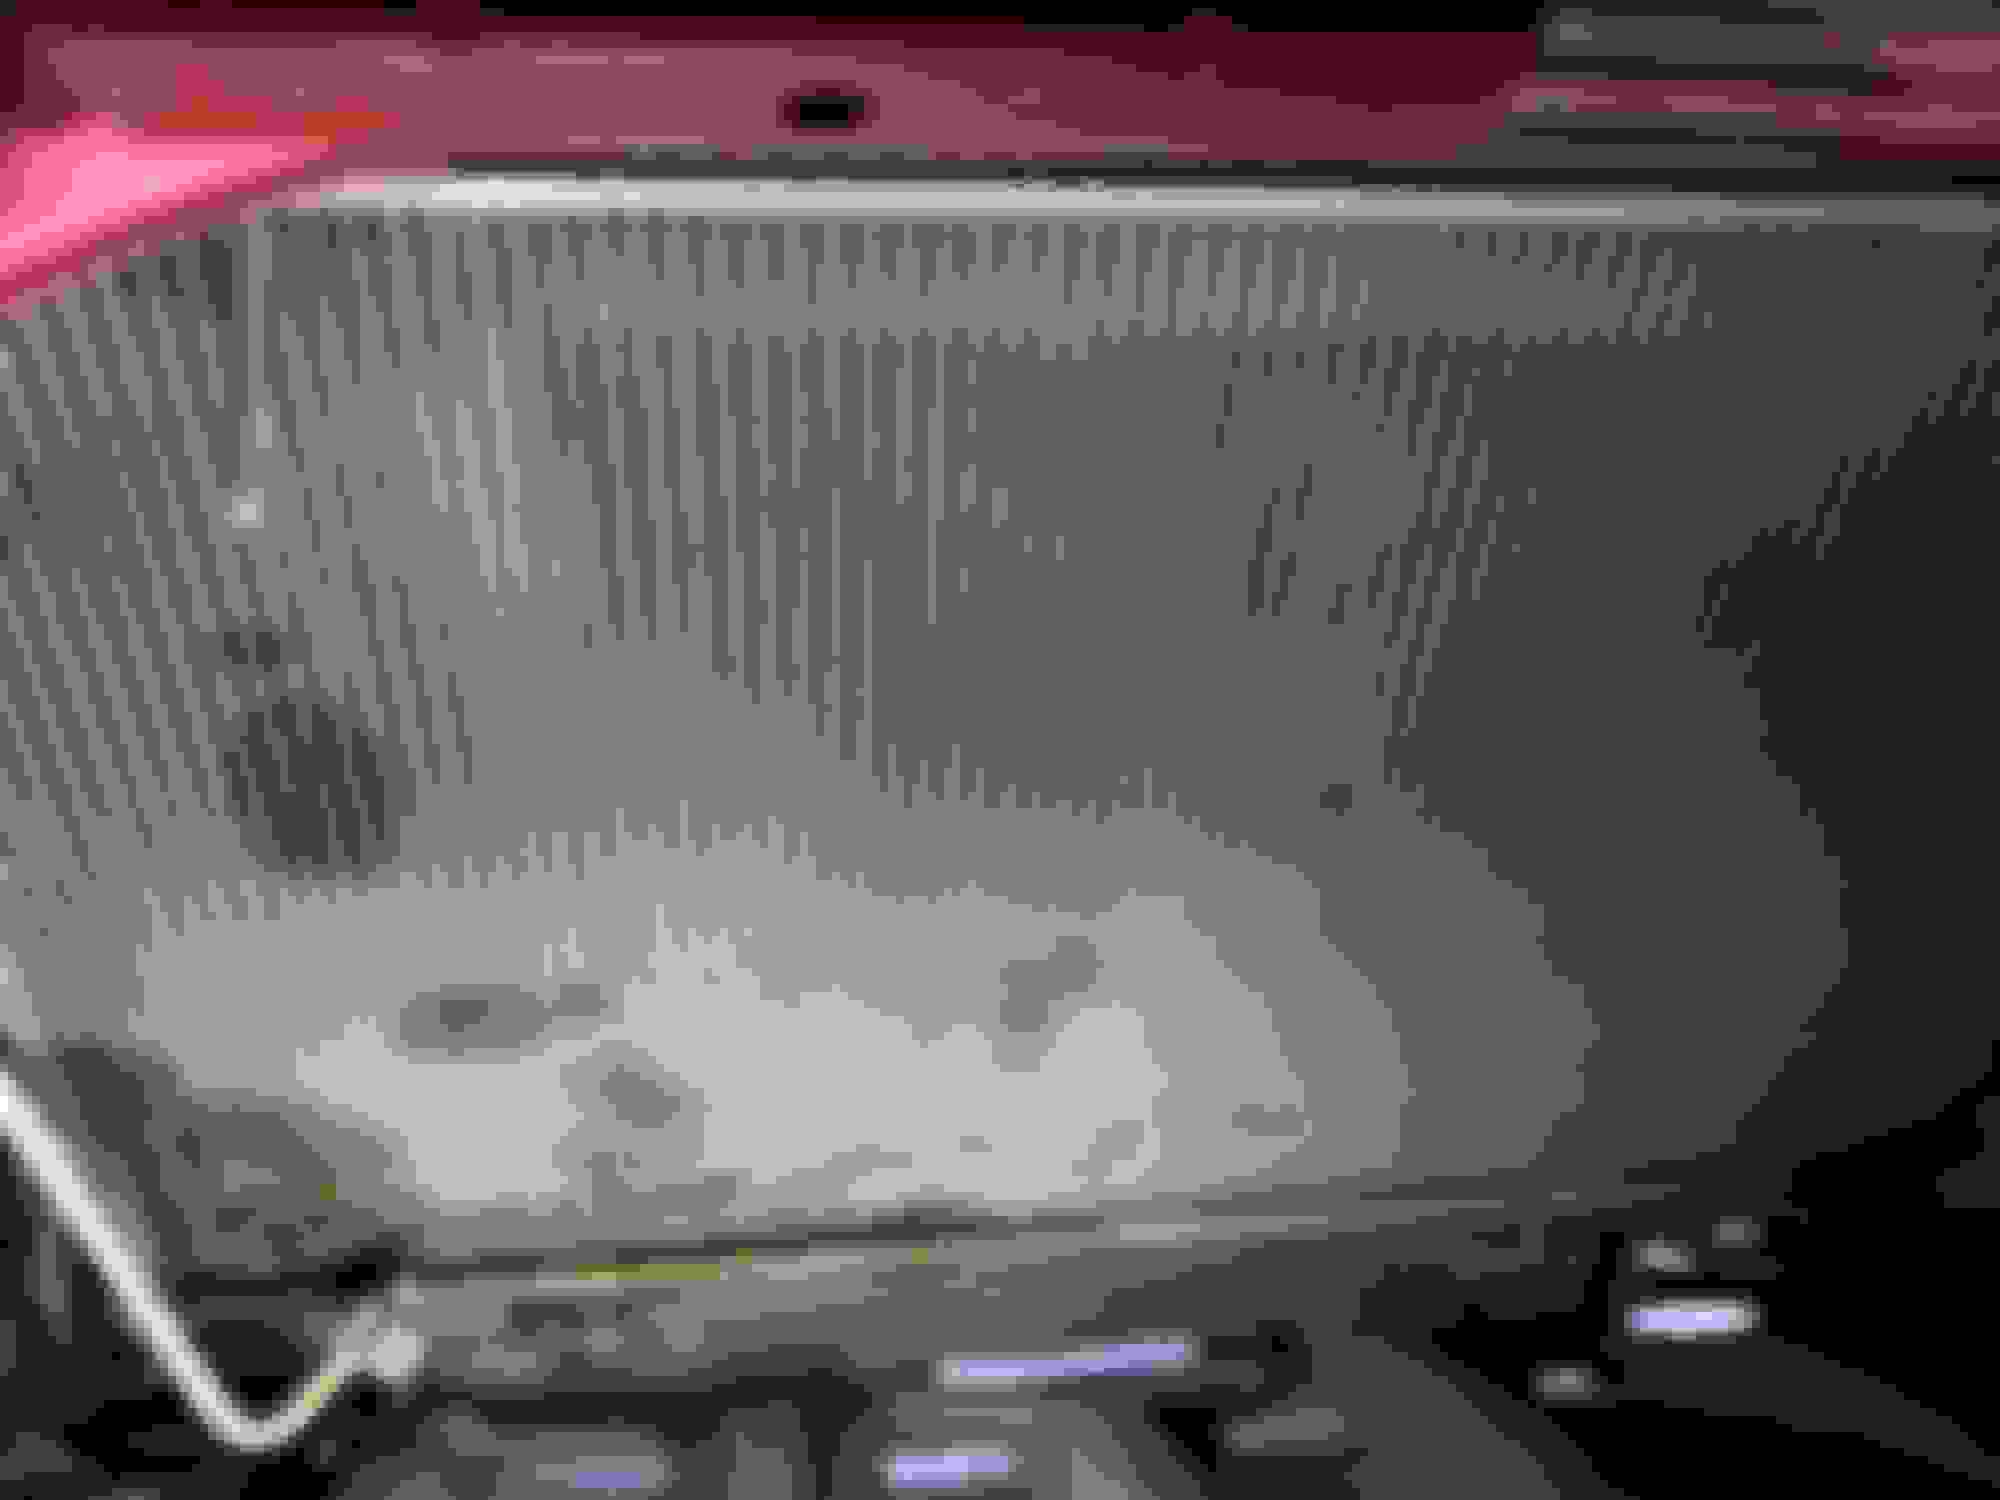
Now I got a wee bit cocky and decided that, since it was just after lunch Monday, there was plenty of time to remove the radiator and air conditioning condenser. Take my hard earned advice - there is no way to remove the radiator without taking off the bumper. At least I got to clean more parts.
Tuesday evening finally saw the removal of the radiator after the bumper was removed. A side note proving why I don’t have nice things. What I thought was a secure place for the nice shiny bumper proved to be precarious. The flower bed next to the driveway let me down and allowed the bumper to tumble to the pavement - nice scratch on the right side.
Wednesday proceeded just swimmingly until I tried installing the new Koyo radiator. Of course the weld beads made it too wide to fit so, after several hours of trying, out came the grinder to create space in the engine bay. Everything is hidden so my savagery is only known by this confession. By supper time the radiator was still not in the car and I had lost my “shirt”. Enter Dodo 23 once again after he called to check in on my progress. On his way home from work he stopped by and 40 minutes later the radiator was installed. Who knew the bracket holding the oil lines could be undone to allow space? Apparently not me since I looked at that damned thing for a couple hours without making the realization.
Thursday dawned with me supposed to be at work. My back decided Wednesday night that wasn’t going to happen. Funny how stress can go right into a particular muscle group. After another Advil in the morning I managed to get everything done by afternoon coffee. One last Homer Simpson moment remained before completing everything- when refilling the coolant it helps to hook up all the hoses, even the little one coming from the AST to the radiator top. The radiator held 15 PSI for 20 minutes without moving the needle.
On a separate note - I tested compression with old oil versus new oil in January. New oil brought the values up by about 50 PSI. More testing next oil change to get numbers on the same day to prove the findings.
I struggled just bleeding that damned slave.
When I couldn't get it bled, I paid someone to replace it.
I didn't even attempt to remove it.
After all the fun experienced with removing the slave cylinder I decided to not replace the rubber line with the shiny new stainless steel line. Will do it when the engine/transmission come out for the rebuild. Much easier when I can see everything and the line has to be disconnected anyway.
After all the fun experienced with removing the slave cylinder I decided to not replace the rubber line with the shiny new stainless steel line. Will do it when the engine/transmission come out for the rebuild. Much easier when I can see everything and the line has to be disconnected anyway.
Your dedication to this thread is seriously impressive. This car's life is more documented than some parents kids.
Your dedication to this thread is seriously impressive. This car's life is more documented than some parents kids.
You’ve made a good point. When my kids were young I was too exhausted to keep a record of life with them. An insane amount of photos but, not much written. Ive day books at work documenting actions from the early 90’s. All I can say is;”Oops”; and very glad for my wife (source of family history). Time for pen and paper now.
Just took a look at the track you are on (like the photo by the way) and am jealous. Actual runoff areas that don’t end immediately in a concrete wall.
Im still in newbie status with VersaTune and found their forum has good info. I want to understand more the relationship between throttle map and oil injection rate. I applied the changes to the throttle map in the attempt to make it a more linear response. Now I’m wondering if that changed oil injection rate. I’m using their increased oil injection canned tune changes. Hoping the oil rate is coming from load.
After changing the fan trigger temperatures my car ran much cooler on the limited track days I did and in the summer heat wave that we normally don’t experience here. With the new radiator my wallet hopes it’s even better. First track day this year is mid June so I’ll find out if it was money well spent.
On Friday morning as I was trying to leave for the dentist plans were changed by the discovery of the clutch pedal firmly planted on the floor. Fortunately I had already ordered the master and slave cylinder along with a stainless flexible line. The fun part was doing all the work with bruised ribs after a fall at work a week ago Thursday.
I’ve heard horror stories about bleeding the brake fluid out of the slave cylinder. It seems this issue has been dodged. I pulled two refills of the brake fluid reservoir out of the slave bleeder nipple with my vacuum bleeder pump. The test drive today was good and I might have solved more of the LTFT issues along the way.
When I removed the UIM to get access to the slave cylinder I think a vacuum line was loosely attached (if at all) on the rear underside of the UIM. After everything was reinstalled the car runs much better. My OBD2 scanner is showing STFT dropping after a short drive so my hope is a few more drive cycles will show Hephaestus has indeed smiled upon me.
 10-01-2023, 08:15 AM