
gregs turbo install pictures


Rotary eXperimental-8
Joined: Nov 2003
Posts: 1,830
Likes: 0
From: Gander, Newfoundland, Canada
Nice pics, gregs! I'll be following your progress and hopefully you won't have anymore hiccups in your build. Do you know where that mazdaspeed sign came from? I like it.
i got that from my work, i work at my local mazda dealership. when i work on the car with the garage open its a pretty big distraction i always get cars that drive by really slow and just look or a thumbs up if im looking outside
update:
tonight i was able to finally get all my t bolt clamps to correctly it took several attempts at my local pipe store to get the correct sizing on the clamps due to different thickness on all the black silicone atp couplers & i just realized theres a pretty big difference between different manufactures of the t bolt clamps even though they are listed as the same measurement...these darn clamps can get pricey once they start to add up!
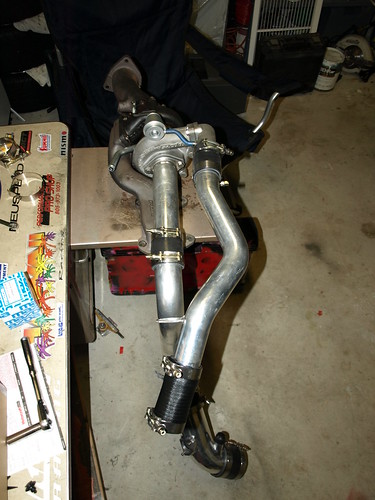
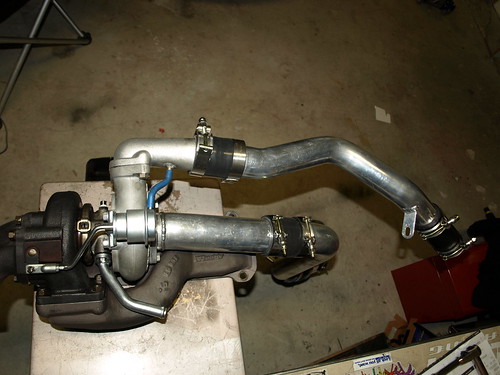
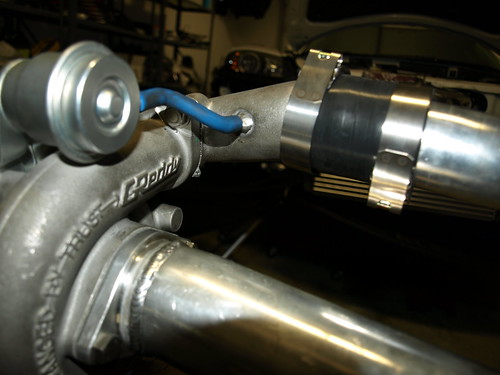
upclose shot of my modified wastegate signal source
Hopefully tomorrow i can sneak away from the family for about an hour to atleast remove the stock exhaust manifold & part of the exhaust
tonight i was able to finally get all my t bolt clamps to correctly it took several attempts at my local pipe store to get the correct sizing on the clamps due to different thickness on all the black silicone atp couplers & i just realized theres a pretty big difference between different manufactures of the t bolt clamps even though they are listed as the same measurement...these darn clamps can get pricey once they start to add up!
upclose shot of my modified wastegate signal source
Hopefully tomorrow i can sneak away from the family for about an hour to atleast remove the stock exhaust manifold & part of the exhaust


Nice pics man! I am planning on doing the greddy install myself and just wondering if you are having any "stupid" problems that you are running into. Have you had to cut or modify anything?? I am doing this in a 1 car garage also so I know its going to be tight so I just wannt make sure its not going to require major modifications. Thanks!
i wish i had these pictures as a refrence when i installed the turbo kit the first time, this time around im going to remove both engine mounts as kane has recommended so theres a bit more clearance last time i had a heck of a time squeazing the turbo on the manifold
Nice pics man! I am planning on doing the greddy install myself and just wondering if you are having any "stupid" problems that you are running into. Have you had to cut or modify anything?? I am doing this in a 1 car garage also so I know its going to be tight so I just wannt make sure its not going to require major modifications. Thanks!
working on the ground is very tight, only modifications i can think of is cutting the lower fenderwell cover to fit the ic piping on both sides, and read the greddy instructions very well they can make the install soo much easier

Nice pics man! I am planning on doing the greddy install myself and just wondering if you are having any "stupid" problems that you are running into. Have you had to cut or modify anything?? I am doing this in a 1 car garage also so I know its going to be tight so I just wannt make sure its not going to require major modifications. Thanks!

is it fun? not really.

it can be done in a one car garage just fine, just make sure you organize all the small parts that you remove, like bolts and plastic rivets and such....also keep your tools organized, I can't emphasize that enough! I lost so many tools during the process and had to waste time finding them.
as for modifications, the only thing you have to modify is the fenderwell plastic and undertray. Easily done in a one car garage.
gregs: good call on the sandwich plate for the oil pressure....that worked out great for me
 but what strut bar is that? looks good

update
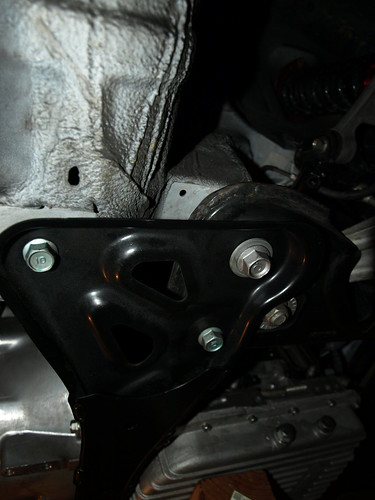
so i got the exhaust manifold off but i have a quick question hopefully someone can help me, before i attempt to place the turbo and manifold on the car i wanted to know if i can remove this brace??? im hoping it will not interupt my front end alignment settings?

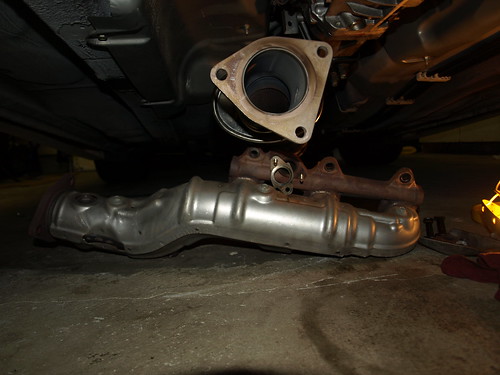
Here is a picture of the stock exhaust manifold holding up my mazsport midpipe up
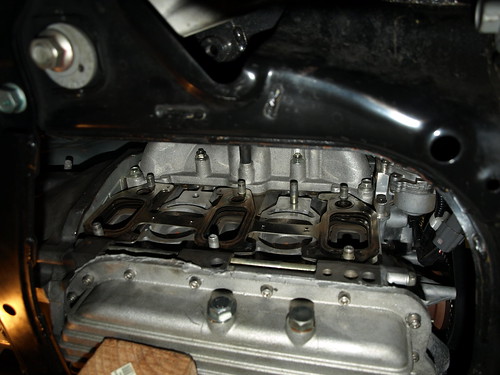
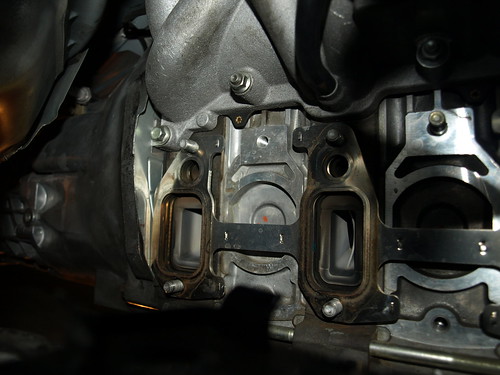
Some other pictures i took while the stock manifold is out
so i got the exhaust manifold off but i have a quick question hopefully someone can help me, before i attempt to place the turbo and manifold on the car i wanted to know if i can remove this brace??? im hoping it will not interupt my front end alignment settings?
Here is a picture of the stock exhaust manifold holding up my mazsport midpipe up
Some other pictures i took while the stock manifold is out


Hell yeah - you have to remove that brace.
It will cause no alignment harm.
I also recommend removing the oil sending unit; and both motor mounts to fit the turbo in there with plenty of space to work.
It will cause no alignment harm.
I also recommend removing the oil sending unit; and both motor mounts to fit the turbo in there with plenty of space to work.
Last edited by Kane; Nov 29, 2008 at 10:53 PM.
Nah; adjustable wrench and it is off; you have to anyway to install the oil sending line; might as well drop it and the mounts; to make installing the snail easier.... IMO.
I have big hands; and am Clumsy....
I have big hands; and am Clumsy....
kool ill take a crack at it rite now, i cant believe i managed to squeeze everything in there without removing anything but then again i remember cursing quite a bit
thanks again kane!
thanks again kane!
well i havent given an update in a while i just finished the install last night and it looks like i have some bugs to work out, car is drivable after 3k goes into boost faily smooth and afr is in the lower 11's at WOT but after driving the car for a few min the car will stall when coming to a stop after restarting the car still will not idle on its own only way i can keep the car running is by keeping the rpm above 3,000 rpm...sigh