
Smutterbutter Build


Thread Starter
Listen...you smell that?
Joined: Sep 2012
Posts: 228
Likes: 2
From: Pewaukee, WI
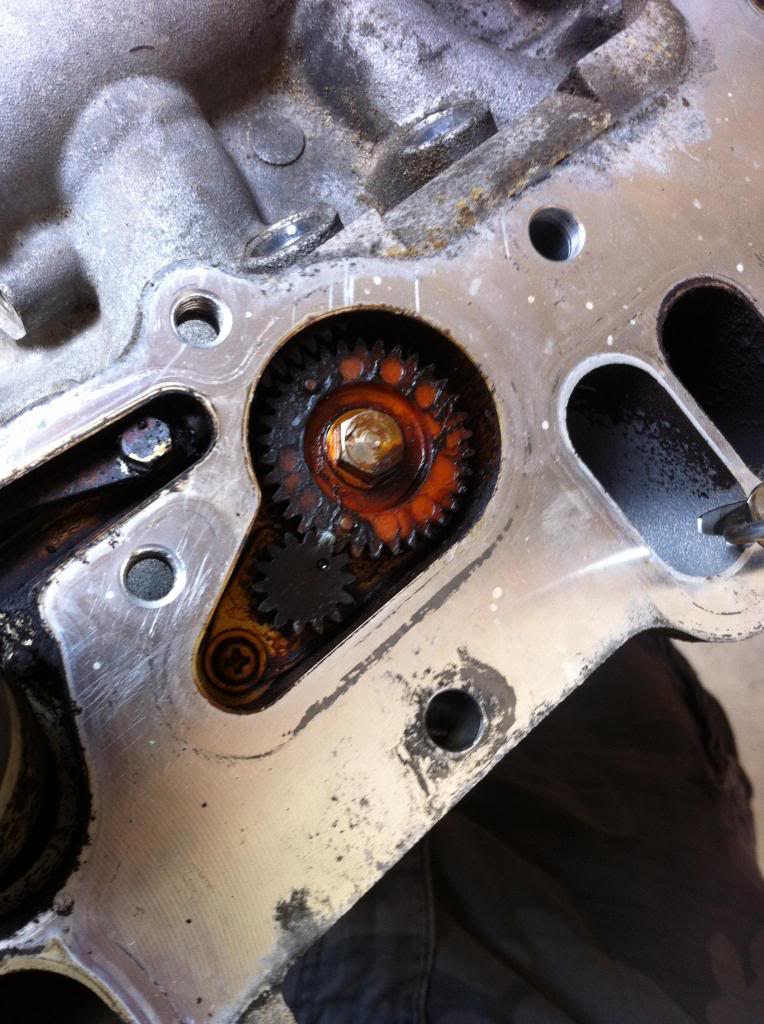
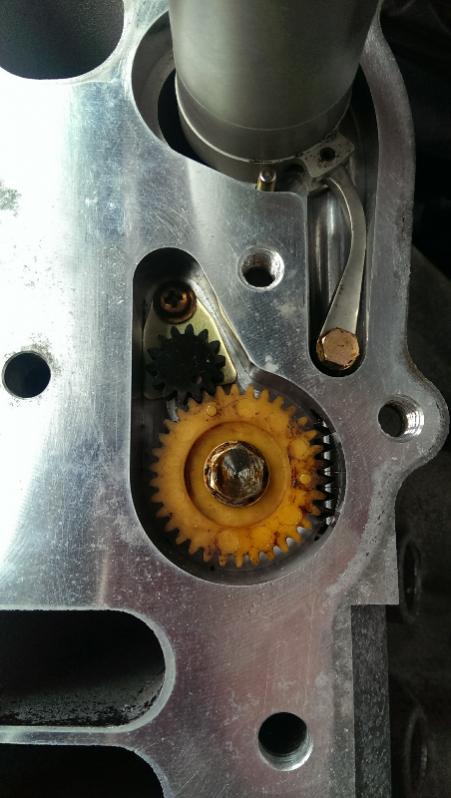
This is the best pic of the APV gears I could find. The thing was seriously gummed up with carbon. Took a few cans of carb cleaner to clean out the whole LIM. Hopefully I can put this thing back together correctly when the time comes. I didn't see anything about disassembling the LIM in the FSM, if anybody can guide me or instruct me how to do so I'd appreciate it. I took lots of pics of the positions of the gears, valves, etc. prior to taking them apart, that may be enough.
Last edited by Smutterbutter; Jan 18, 2014 at 08:06 PM.
I have a couple pages on this in my build thread I had to pull it all apart when I got my LIM coated. It's actually pretty straightforward. Only thing you have to make sure is when you reassemble the APV gears the position magnet needs to be at 1 o'clock when the values are in the nutral position (valves closed). Also he careful with the 7mm bolts in the arms for tha valves themselves I have heard of them breaking.
It's covered in page 2-6 in my thread. Specifically post 144 page 6 covers the magnet position. Other than that it only assembles one way.
It's covered in page 2-6 in my thread. Specifically post 144 page 6 covers the magnet position. Other than that it only assembles one way.
Last edited by Carbon8; Jan 18, 2014 at 08:44 PM.
Thread Starter
Listen...you smell that?
Joined: Sep 2012
Posts: 228
Likes: 2
From: Pewaukee, WI
Jesus its been a while...so the polar vortex and the fact that my garage isn't heated pretty much kept me from accomplishing much of anything for the last 6 months. It has allowed be lots of time to sit down and figure out exactly what I need to replace new, buy used, or reuse. The list of things to buy new is a little larger than I was hoping but I'm not one to skimp. I did find a better set of rotors and a oem cat and another upgraded starter to name a few things.
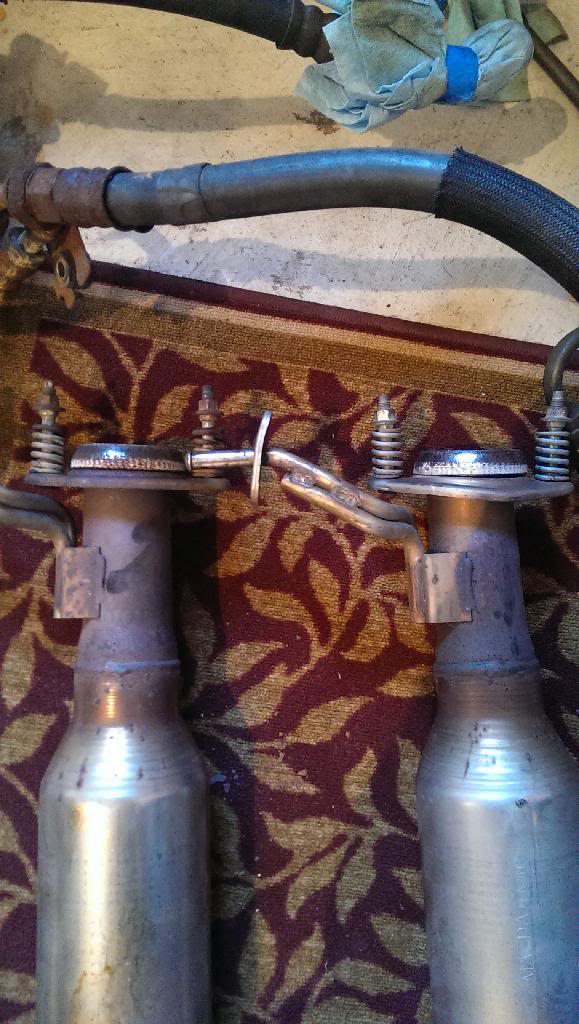
Finally assembled the set of oem oil coolers I got from Carbon8. Compared to my crusty ones that have been through more than a few WI winters these look like they're brand new!
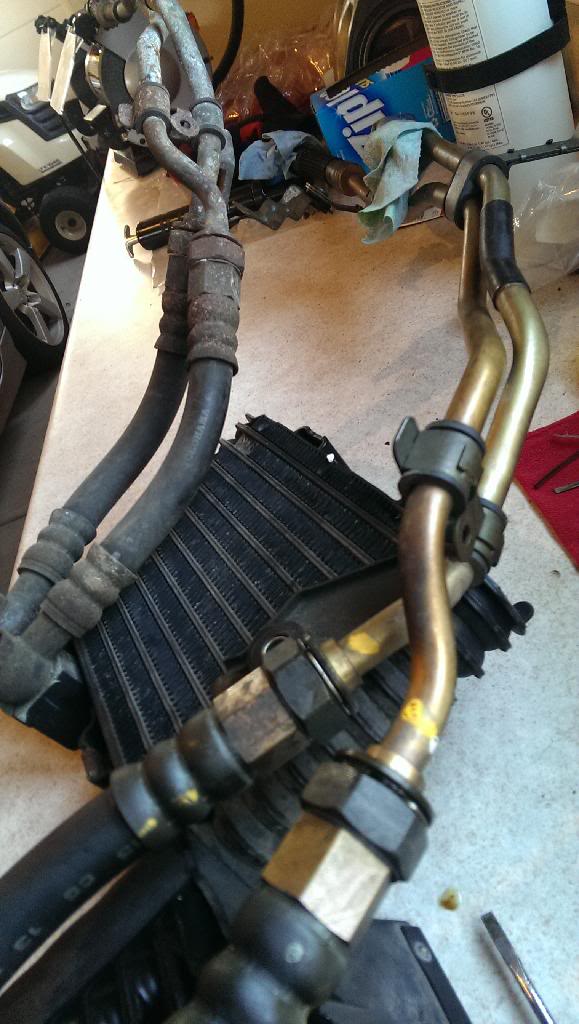
Finally assembled the set of oem oil coolers I got from Carbon8. Compared to my crusty ones that have been through more than a few WI winters these look like they're brand new!
Thread Starter
Listen...you smell that?
Joined: Sep 2012
Posts: 228
Likes: 2
From: Pewaukee, WI
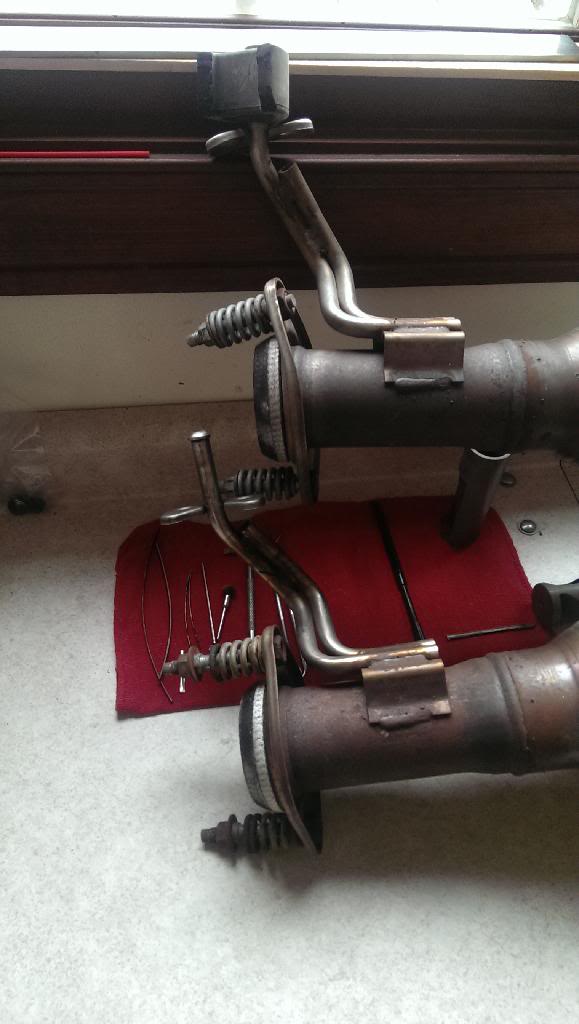
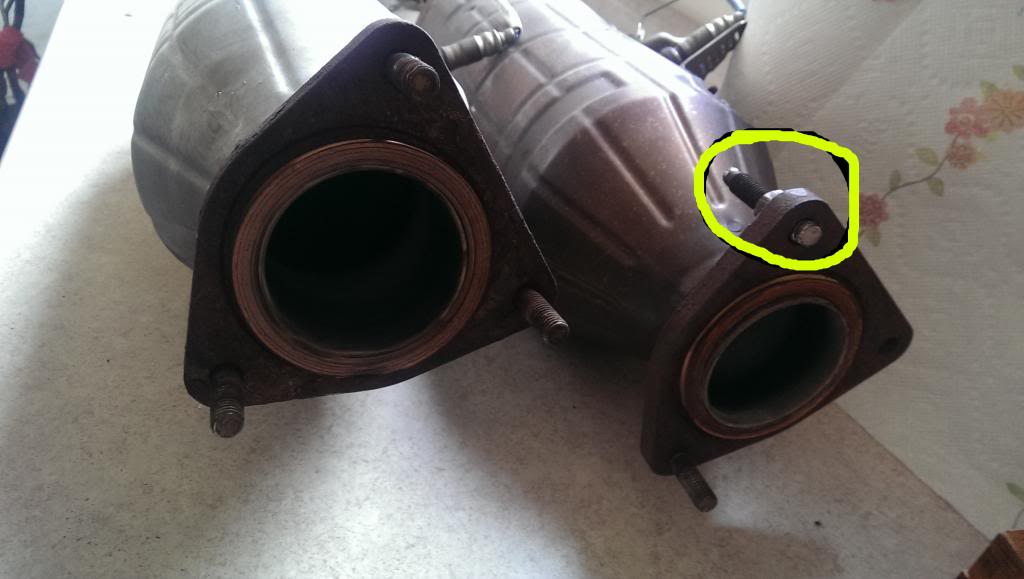
The cat I got off ebay was from a 2009, from what I could tell it's exactly the same as my S1 although the element seems a little larger to the naked eye. Unfortunately, one flange was badly bent when I received it, after a little love from large blunt object I think I got it just about back to where it should be.
BEFORE
AFTER
BEFORE
AFTER
Thread Starter
Listen...you smell that?
Joined: Sep 2012
Posts: 228
Likes: 2
From: Pewaukee, WI
The other issue with the "new" cat was on the end with the three studs one of the studs was sheared off and crossthreaded through a nut that was welded to the flange. My original cat from an S1 didn't have this nut welded on. So I just buzzed that thing of with my dremel, just have to replace the studs.
I was thinking since I have two cats now I'd gut the original one, use that for when I first fire up the car after the rebuild, burn off all that vasoline and assembly lube and then through the good cat on when I know its running right.
I was thinking since I have two cats now I'd gut the original one, use that for when I first fire up the car after the rebuild, burn off all that vasoline and assembly lube and then through the good cat on when I know its running right.

Driving my unreliable rx8
Joined: Oct 2012
Posts: 2,051
Likes: 7
From: Alvarado, Tx
I have a couple pages on this in my build thread I had to pull it all apart when I got my LIM coated. It's actually pretty straightforward. Only thing you have to make sure is when you reassemble the APV gears the position magnet needs to be at 1 o'clock when the values are in the nutral position (valves closed). Also he careful with the 7mm bolts in the arms for tha valves themselves I have heard of them breaking.
It's covered in page 2-6 in my thread. Specifically post 144 page 6 covers the magnet position. Other than that it only assembles one way.
It's covered in page 2-6 in my thread. Specifically post 144 page 6 covers the magnet position. Other than that it only assembles one way.
That's a good idea on useing the gutted cat for first startup.
Last edited by logalinipoo; Apr 27, 2014 at 12:51 AM.
Thread Starter
Listen...you smell that?
Joined: Sep 2012
Posts: 228
Likes: 2
From: Pewaukee, WI
I could tell when disassembling the LIM I was gonna need LOTS of pics to help me get it back together right. I'll have to look back to see what I have as far as the position of the valves and the correlating position of the gear. I still need to give everything one last good cleaning too.
Found this video by a member. Does a pretty good job at showing how to test all the valves, something I haven't done yet either. Wish he went through how to reassemble the APV bits...
Found this video by a member. Does a pretty good job at showing how to test all the valves, something I haven't done yet either. Wish he went through how to reassemble the APV bits...

Thread Starter
Listen...you smell that?
Joined: Sep 2012
Posts: 228
Likes: 2
From: Pewaukee, WI
Thanks Team for the diagram, definitely helpful, but I was hoping for something that describes in detail how to set up the APV apparatus. I don't think I'll need it but it would help ease the fear of getting it wrong and having to take the engine out again...
Thread Starter
Listen...you smell that?
Joined: Sep 2012
Posts: 228
Likes: 2
From: Pewaukee, WI
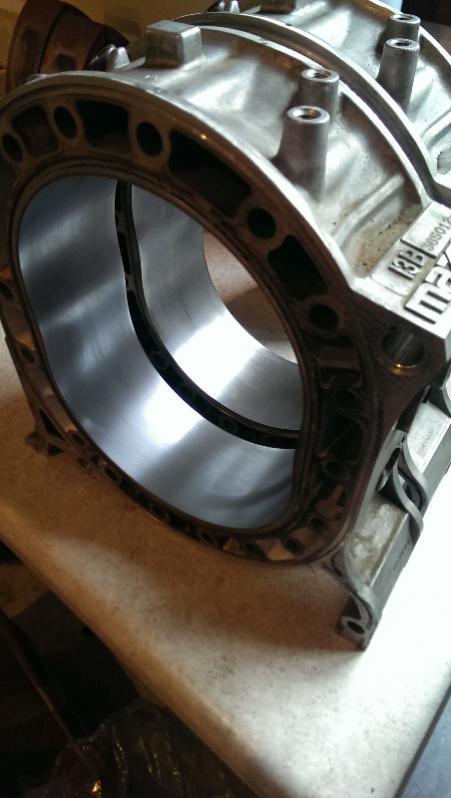
Just saw some really good looking rotor housings go for about $450 on ebay. I bailed on them only because one of the housings had a couple casting defects in the inner and outer water seal grooves. In hindsight, they probably would've worked fine, they already made it 17,000 miles, although I don't know why that motor was removed either. Sticking to my guns and going with brand new rotor housings unless a crazy deal on almost mint used ones come along. Too bad using S2 housings isn't "bolt on", starting to see a lot of them for sale with relatively low mileage too.
Thread Starter
Listen...you smell that?
Joined: Sep 2012
Posts: 228
Likes: 2
From: Pewaukee, WI
I sense some sarcasm...in my defense other than the extra oil injector port, which can easily be plugged, I had a hard time determining if the oil pan would jive with the newer housing. I even called mazdaspeed directly and they didn't give me a straight answer. From all my searching I concluded that while it could work, I'd rather not deal with an unused oil injector port and have to mess with tapping new holes to attach the oil pan.


Thread Starter
Listen...you smell that?
Joined: Sep 2012
Posts: 228
Likes: 2
From: Pewaukee, WI
Haha! Hard to tell sometimes here...
Agreed, it took almost a year of searching several times a day to come across these. In this case good things do come to those who wait, they are in excellent shape.
I decided against using the set of irons I had resurfaced. Back then I convinced myself that nitride layer wouldn't matter for my purposes. I've since changed my mind, again . I picked up a front and rear iron from the same guy I bought the rotor housings that are also in superb condition. Just need to find a good middle iron ASAP. Everything from mazdaspeed gets here wednesday!
Agreed, it took almost a year of searching several times a day to come across these. In this case good things do come to those who wait, they are in excellent shape.
I decided against using the set of irons I had resurfaced. Back then I convinced myself that nitride layer wouldn't matter for my purposes. I've since changed my mind, again
. I picked up a front and rear iron from the same guy I bought the rotor housings that are also in superb condition. Just need to find a good middle iron ASAP. Everything from mazdaspeed gets here wednesday!
Thread Starter
Listen...you smell that?
Joined: Sep 2012
Posts: 228
Likes: 2
From: Pewaukee, WI
And that is exactly why I've changed my mind about 8 times regarding whether to use resurfaced irons or not. There are good arguments for and against it that all make sense and its easy, at least for me it was, to convince yourself either way.
Thread Starter
Listen...you smell that?
Joined: Sep 2012
Posts: 228
Likes: 2
From: Pewaukee, WI
UPDATE!
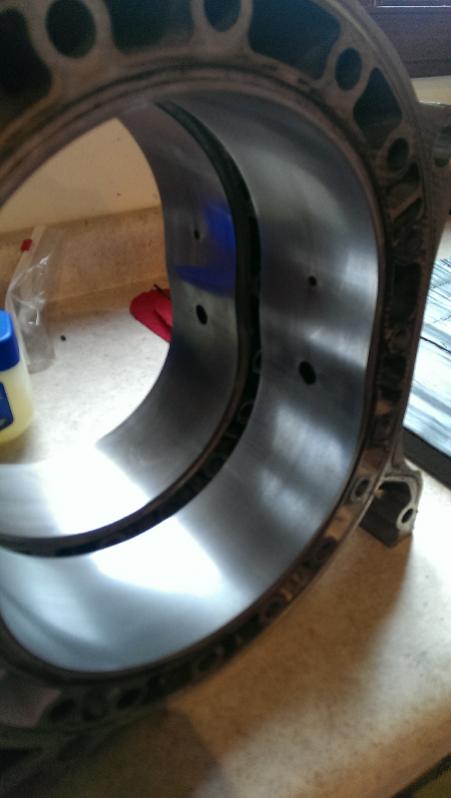
I have everything I need to finally start putting this beast together BUT I'm second guessing whether or not to use the rotors I have. The ones I was planning to use were low mileage rotors off ebay that were in excellent condition until the asshat that sold them shipped them, and I **** you not, in a USPS flat rate box with 1 layer of bubble wrap between them! The set of rotors I have left came from the engine with 75k miles and significant damage to one of the rotor (rear?) bearings. I don't think it spun the bearing and the bearing surface on the rotor looks ok but still...
What has be second guessing them is the fair amount of a "lip" that has formed on the trailing side of each apex seal groove. Clearances were ok, but the FSM/engine manual don't specifically describe it.
So for now I'm gonna hold off, search for used rotors, and start saving for new one$
Thread Starter
Listen...you smell that?
Joined: Sep 2012
Posts: 228
Likes: 2
From: Pewaukee, WI
It's a long story and I definitely lost some faith in ebay after all was said and done. In the end I got $50 from USPS for my troubles and 2 worthless rotors.
I guess if someone wanted to cut them up and use them as a jig to set side seal clearance that might be all there good for.
I guess if someone wanted to cut them up and use them as a jig to set side seal clearance that might be all there good for.
Driving my unreliable rx8
Joined: Oct 2012
Posts: 2,051
Likes: 7
From: Alvarado, Tx
Well that sucks. I've never had trouble like that with them, but one thing I do is add in the noted That I expect the item to be insured for the full purchase price. That's also why I pay people the extra 3% to cover fees and never gift people money through paypal.
Thread Starter
Listen...you smell that?
Joined: Sep 2012
Posts: 228
Likes: 2
From: Pewaukee, WI
It was a lesson learned. I never had any trouble like that before. Requesting insurance is something I'm going to start doing as well. Hell, I may even offer a bonus if they can package something well enough that it can actually get to me unharmed! Doesn't seem like too much to ask...
Side note, I've had multiple items (different sellers) that showed up damaged to some degree, all delivered via USPS. Everything I've received from FedEx or UPS has been fine. Maybe there's some very disgruntled postmen around here?
Side note, I've had multiple items (different sellers) that showed up damaged to some degree, all delivered via USPS. Everything I've received from FedEx or UPS has been fine. Maybe there's some very disgruntled postmen around here?
Thread Starter
Listen...you smell that?
Joined: Sep 2012
Posts: 228
Likes: 2
From: Pewaukee, WI
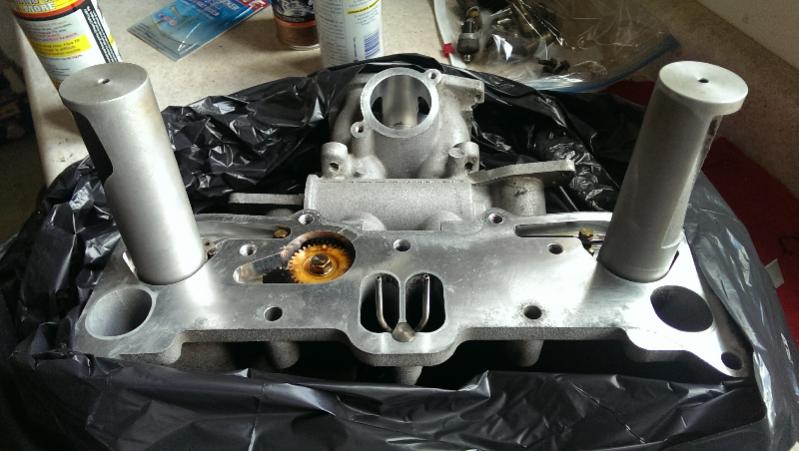
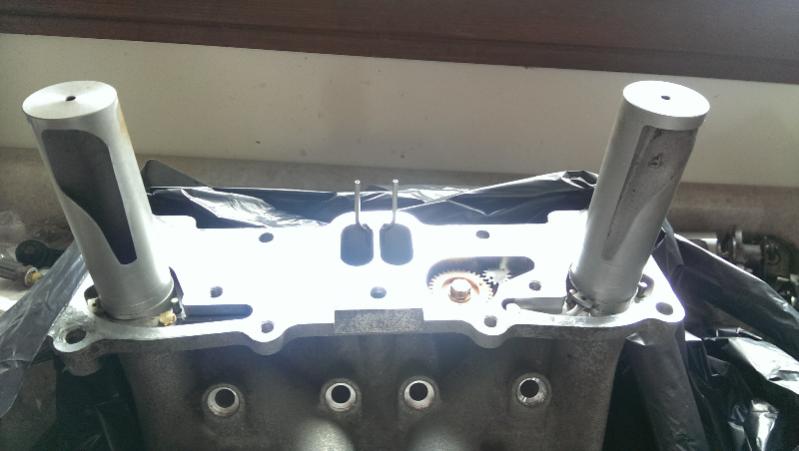
Pretty sure I've got the LIM assembly back together as it should be. I was a little worried about getting everything lined up right but in the end it seems there's only one way you can actually do it. The APV actuator only goes on one way and I've got the gears lined up...am I missing anything?
Driving my unreliable rx8
Joined: Oct 2012
Posts: 2,051
Likes: 7
From: Alvarado, Tx
Make sure the valves are closed and the external gear is set just right. The adjustments on the external gear with the magnet are large compared to the internal one having a small movement range.
It can be corrected while in the car but is extremely painful.
It can be corrected while in the car but is extremely painful.

