When you click on links to various merchants on this site and make a purchase, this can result in this site earning a commission. Affiliate programs and affiliations include, but are not limited to, the eBay Partner Network.
Progress update: Engine prep & re-installation into the engine bay...
I know this is old hat for some, but since I could find no good best practice detail for re-installing the engine... I'll provide what worked well for me.
First time engine re-install...multiple unsuccessful attempts mating the engine to the trans while suspended from the crane. I found the engine too heavy while suspended to have good precision & range of motion to "level & mate" to the trans. (unless perhaps you have a few other pairs of hands. I did not) Worked at it this way too long...
Slept on it... & thought to use the crane only to position the engine in the bay onto a dolly, which would level & provide lateral movement of the engine. Then used a floor jack to adjust the height of the trans to "mate" the two. Worked perfectly...mated in ~ 5 min. by this method.
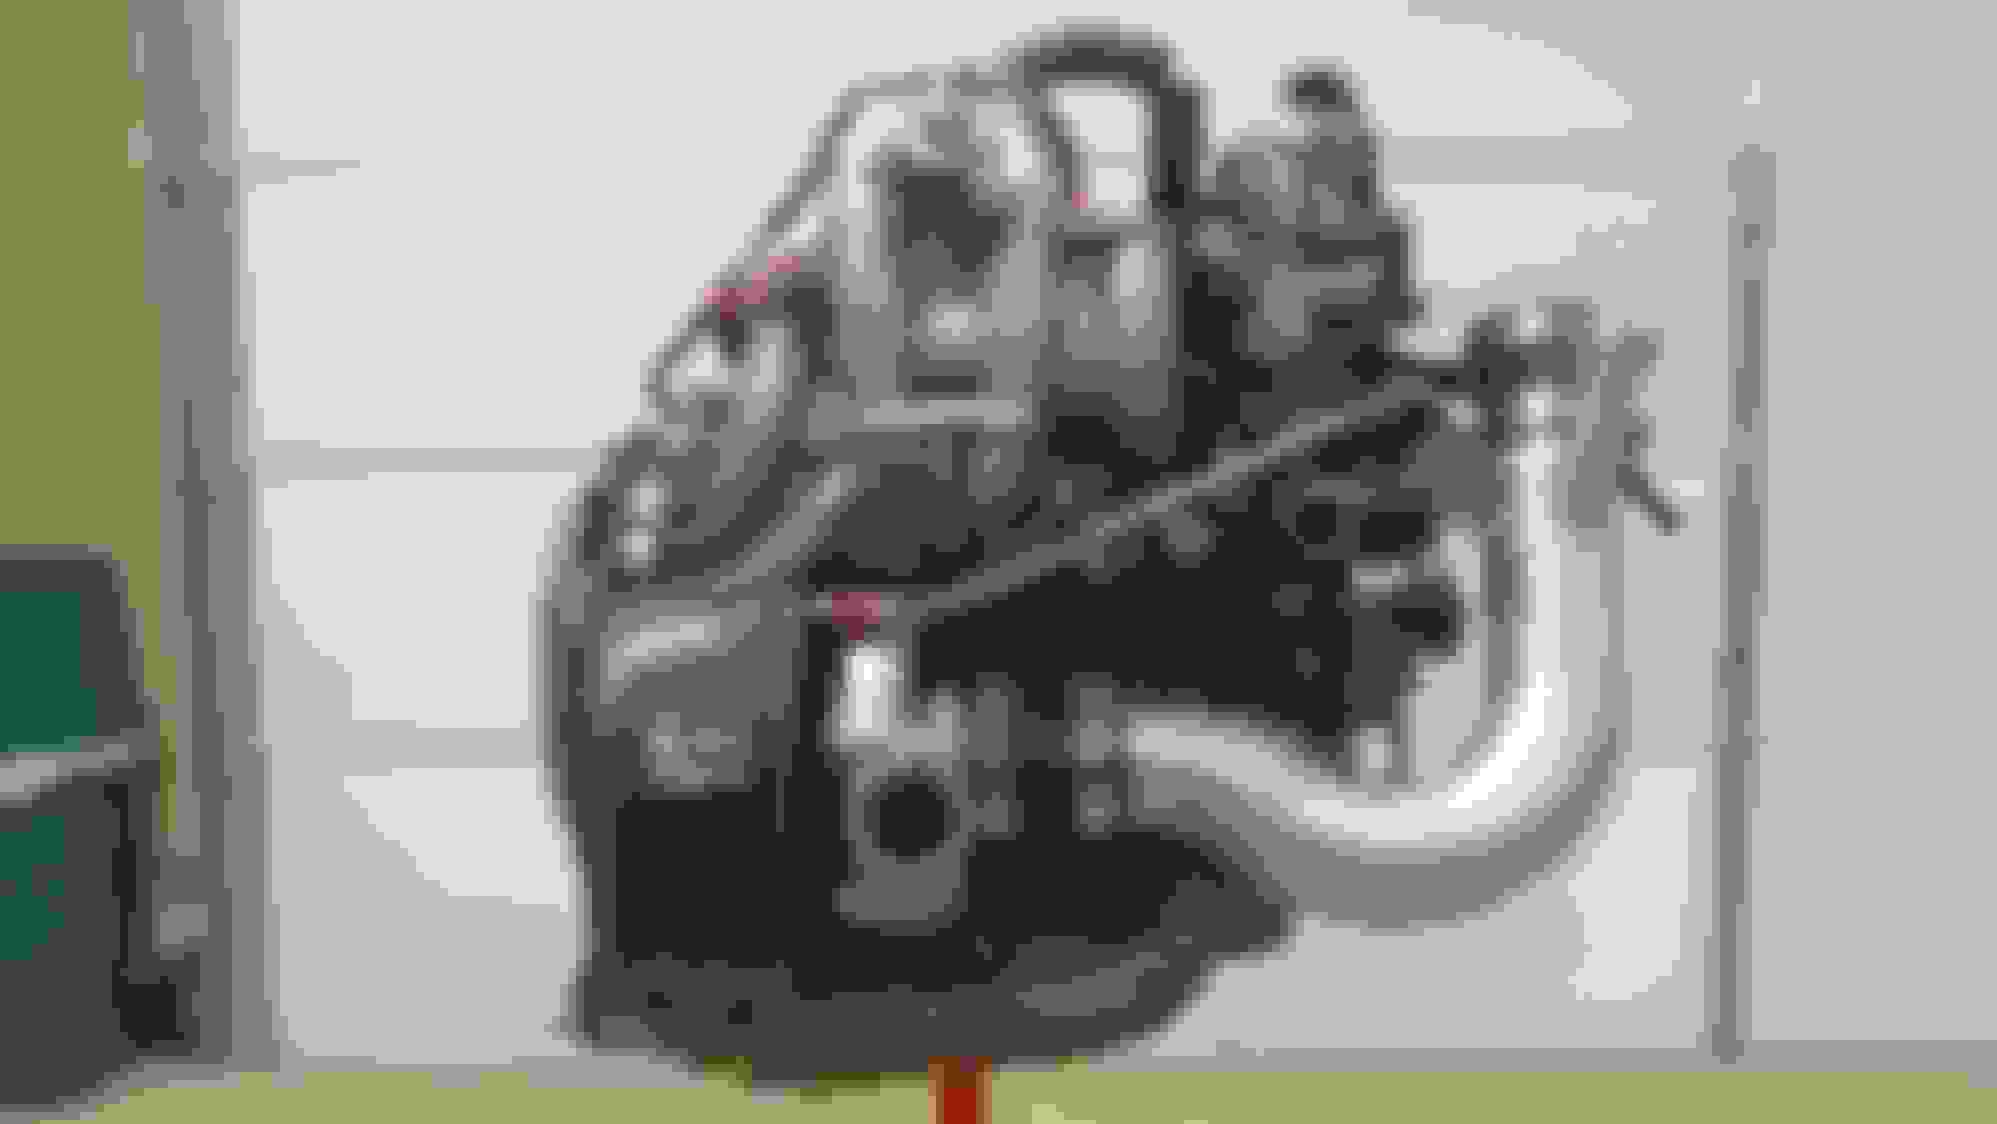
Thermal cover delivered & installed. Engine ready for re-install.
Trans bell housing on flr jack for adjust-ability
Dolly used to level and "mate" the engine to the trans...
...going in.
I
I
V
Engine on dolly (built up a bit) ...and trans on flr jack for leveling to proper height...
Mission accomplished: engine re-installed, mated & bolted up to the trans.
Great you got it in ok but bummer it took so long.
Too late now ...but i've done this a lot of times............
1/Jack geabox up as high as it will go ..then let it down maybe 10mm
2/Set engine at approx. same angle as gearbox by adjusting where you lift it from .
3/lift engine into hole lower then push rearward , lower more and push rearward etc etc
4/when at same height,angle and within 2" of each other ...slide her right in there .
Brett, Thanks. I know I c/h asked... but it was a learning experience I won't soon forget.
I found it challenging hanging the engine at the just the right angle, and based on the position of the hangers it twisted as well. Once sat on the dolly & leveled... piece of cake.
Holiday's over and work is a beast right now . So, it'll likely be a couple of weeks before she's running again. Based on porting & a sealed e-mani I'm anticipating >10-15% improved spool and torque across the range.
Getting the engine and transmission together without damaging the pilot bearing is so hard using this method. I have been lucky a few times with everything going together. I have also struggled for hours only to take it all back out again so I feel your pain. You haven't lived until you installed an engine with a jack, hoist, and wood blocks....
Getting the engine and transmission together without damaging the pilot bearing is so hard using this method. I have been lucky a few times with everything going together. I have also struggled for hours only to take it all back out again so I feel your pain. You haven't lived until you installed an engine with a jack, hoist, and wood blocks....
Small, but important update: I'll just call this "head-space"
Went out to make some progress on the build not in a good "head-space", i.e. not thinking clearly, creatively, patiently. Lesson learned. Task was simple: re-attach oil coolers feed & return lines to the timing cover and oil filter mount, respectively. Result:
- Stripped the oil filter pedestal banjo bolt threads
- Had to remove the filter mount (the rear bolt is a bear to reach)
- Re-tapped the threads (note; It's a 18x1.5mm thread size for anyone interested)
- Re-mounted the pedestal
- ~ A week later finally finished reattaching the oil cooler lines
Also reattached the AC compressor
Perhaps not an issue for experienced mechanics, but for novices, e.g. myself, avoid wrenching when not "clear". Some finished pics.
The culprit oil mount banjo bolt threads. Difficult positioning of rear mount bolt (sandwiched in a tight space & under the hard black trans line)
Oil cooler return line finally in....after another trip to Lowes to replace the front M8x1.25 mounting bolt which began acting squirrely.
AC compressor in... and oil coolers feed line on the right.
Progress update: Installed...
- Oil fill reservoir w/ Intake valve solenoid connectors
- UIM w/ vac & charge hoses terminated at rear
- Modified compressor intake section
...(This was a good idea to shorten..., but I s/h beaded the cut end as I ultimately did later in post #566)
- Motor mounts
- Oil pick up & pan
Oil fill reservoir w/ LIM intake valve solenoid connectors
UIM.......(w/ vac & charge hoses terminated at rear)
Cut 1/4" off compressor intake section. Crazy simplified installation. Unconcerned about the clamping nubs...when installed, space is so tight...it's not going anywhere.
Passenger side motor mount w/ compressor intake fitted
Looks good man, just a quick thought (hard to tell from the angle of the picture), but will you be able to fit your strut brace back on with the oil filter and catch can located there?
Looks good man, just a quick thought (hard to tell from the angle of the picture), but will you be able to fit your strut brace back on with the oil filter and catch can located there?
RMRx - Thanks! Good eye...but yes the brace just fits between the filter & catch can.
edit: couple pics from install:
Strut brace positioning...fits between the filter and catch can.
Progress Update:
Well, push started her, and drove around the block keeping ~3k rpm to keep from dying. ~7-10 min in I saw steam from the engine bay (the hood was off), and coolant temp rose rapidly, hit 230 for 1-2 sec and dropped. I immediately turned off the engine, and pulled over. Allowed it to cool ~15min, added coolant, push started again and drove back to the house...~a block.
I presumed the coolant hose on the rear iron had come off based on where I saw steam. So pulled the UIM & oil filler reservoir, and found the coolant hose secure. Hmm... Searched for other sources of coolant leak, and found none. Reassembled everything, refilled temporarily w/water, and immediately saw the problem: water running from sm port on bottom of trans bell housing. So, clearly its a coolant issue w/in the engine.
After some thought ... I suspect a cracked front iron. Through various research I understood that the irons could sustain torque well beyond 50 ftlb. Therefore, I torqued to ~46 ftlb. However, when torquing one stud I felt a "release". I think now that m/h been my front iron giving way. Good decision to purchase studs, poor decision to torque into the 40s ftlbs.
So, the engines coming out again, to inspect, validate & correct the problem. Disappointed, but not discouraged... learning a lot...more to come.
They warn you when installing the studs that an iron can crack with the higher torque numbers. That really sucks.
I run 30 ft/lbs on the stock bolts then give everyone of them an extra 1-2 ft/lbs to convince myself my motor is stronger....
If you want a free front plate with 100k miles on it let me know and I will send it to your for shipping costs only. It just sits in the corner collecting dust. Never been modified... I can send pics if you like.
Damn ...I know that feeling too well . At least you are learning heaps as you go.
Brettus, Yeah...tough h/b so close. But I have learned so much..., have outfitted my "home shop", and am hoping I can reuse most of the consumables, e.g. rotor & water seals, etc.
I guess I'm a cat guy... She's definitely making me work for it...
Jack: Greg, how come you don't like cats? Greg: I don't not like cats. I-I just-- I just prefer dogs. I mean, I'm just more of a dog kind of, you know--Come home, wagging their little tails, happy to see you kind of-- Jack: You need that assurance? You prefer an emotionally shallow animal? Greg: I-- Jack: You see, Greg, when you yell at a dog, his tail will go between his legs and cover his genitals, his ears will go down. A dog is very easy to break, but cats make you work for their affection. They don't sell out the way dogs do.
- Meet the Parents
J'king...I'm actually a dog guy. We love our vizsla, Koda.


 I found the engine too heavy while suspended to have good precision & range of motion to "level & mate" to the trans. (unless perhaps you have a few other pairs of hands. I did not) Worked at it this way too long...
 & thought to use the crane only to position the engine in the bay onto a dolly, which would level & provide lateral movement of the engine. Then used a floor jack to adjust the height of the trans to "mate" the two. Worked perfectly...mated in ~ 5 min. by this method.


 . So, it'll likely be a couple of weeks before she's running again. Based on porting & a sealed e-mani I'm anticipating >10-15% improved spool and torque across the range.


 Truth...


 Unconcerned about the clamping nubs...when installed, space is so tight...it's not going anywhere.


 She's definitely making me work for it...