
Carbon8 Build


Perhaps take a look over at Goodwin Racing for some of the suspension bits on the RX8 there. They have some really nice Ohlins packages as well as the polyurethane bushings you were mentioning for your suspension upgrade. I have got quite a bit from them and it all has been good so far. Just throwing options out there.
Been busy this week, a lot of traveling.
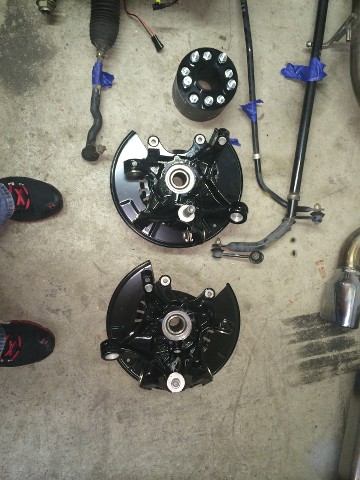
Here's all I have managed so far, working this week getting the OE bushings out. Decided to expand my garage capabilities and invested in a 12 ton shop press and bushing plate kit after I realized the rental kits just really wont work for a lot of these parts , also finally picked up an engine stand (which I should have done a long time ago)
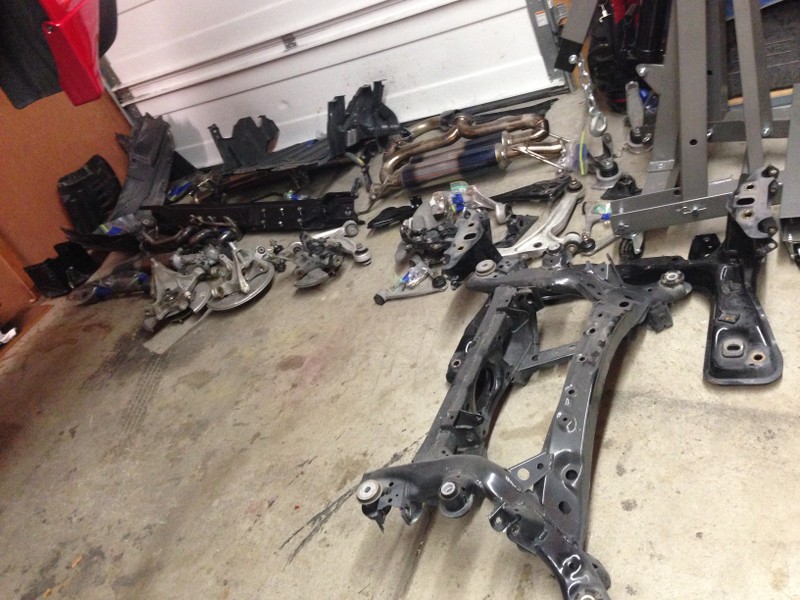
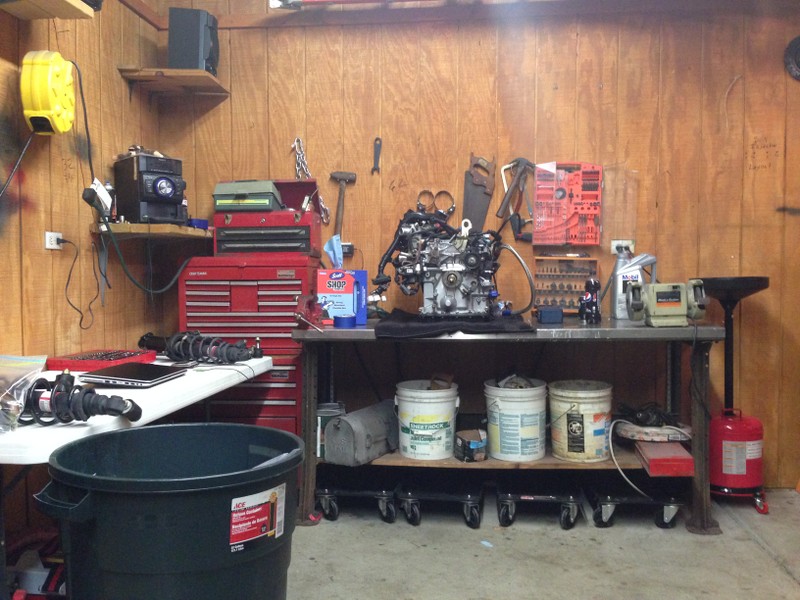
Here's all I have managed so far, working this week getting the OE bushings out. Decided to expand my garage capabilities and invested in a 12 ton shop press and bushing plate kit after I realized the rental kits just really wont work for a lot of these parts , also finally picked up an engine stand (which I should have done a long time ago)
Also if someone could help shed some light on a couple things
Firstly, I have found new bushings for the lower control arms regarding the subframe mount point, I can't find anything regarding the bushing used on the coil-overs any recommendations?
The Front Subframe has metal insert tubes used for alignment, I have not looked closely enough yet but does anyone know are they removalbale and resuable? Or do I need to buy new?
And Lastly, I was going to coat my current PPF, but I found that SR motorsports sells a light weight PPF about 15 lbs in weight savings and it seems easy to handle. Anyone that's been around longer than me seen anyone use one of these, Good or bad? I Know SR motorsports prices are outrageous and people really don't talk about them much more than that. (Link Below)
Mazda RX8 Suspension Parts and Accessories. Mazda ICR Pro RX-8 Performance Parts.

The factory PPF is 31 lbs. Cutting the weight in half and maintaining rigidity is a tall order without using an exotic material
And then there is past history too Mazdaspeed PPF from Shane Racing/SR - RX7Club.com
The ball joints wear out before the bushings. You should buy new arms or leave them alone.
And then there is past history too Mazdaspeed PPF from Shane Racing/SR - RX7Club.com
The ball joints wear out before the bushings. You should buy new arms or leave them alone.
Thanks for the link team!
As far as the lower A-arms, I may just try to mask them and bake and hope for the best. If that fails I can source universal or get a used set of arms from a part out and swap those. No reason as long as you remove them properly that they can't be reused as long as they are in good shape.
Coating bake temp is 200C polyurethane melt point is 240C so I may be able to get away with it.
Finally finished up my budget for this build leg, everything except the bushings which I know to expect. All in all much less than I expected unfortunately I wont have the time to get into some aspects but I figure this will just be a suspension and chassis only focus, then work on finishing up my tune in the spring and be ready to add more next year.
Finally settled on
BC BR Coilovers 8K/6K
Progressive Tech Sway
PowerGrid Links
MS Strut Support F/R
OE Rear Arms w/ new bushings
Parts go for coating on Saturday, will order the needed parts next week then try to get as much back together before March as I am leaving again.
Who are most people using nowadays to get their injectors flow rated and cleaned?

Had them on my Speed 6 and never had a problem, they give good adjustment and have an aggressive spring rate.
Are you referring junk as in quality or performance, aren't they also one of the only kits to use pillowball mounts without additional parts?
I don't see the need to go for something as extreme as the cusco's, nor do I want the Powertrix. What would you replace them with?
Are you referring junk as in quality or performance, aren't they also one of the only kits to use pillowball mounts without additional parts?
I don't see the need to go for something as extreme as the cusco's, nor do I want the Powertrix. What would you replace them with?
Finally normalized my compression readings as well
Front

Rear
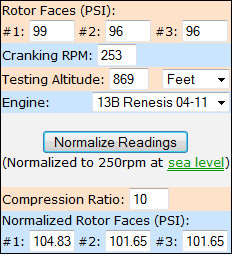
Given the comparison testing done between the different testers vs a Mazda OE tester and the conclusion that the TR-01 is approx 10PSI on average lower than the Mazda tester the above readings can add an approx additional 10PSI to which accounts for an average of 120PSI front and 110PSI rear I think it is safe to say that I do not have a compression issue.
Also as my engine is basically new it is arguable that those numbers are likely to go up as everything gets broken in more.
Front
Rear
Given the comparison testing done between the different testers vs a Mazda OE tester and the conclusion that the TR-01 is approx 10PSI on average lower than the Mazda tester the above readings can add an approx additional 10PSI to which accounts for an average of 120PSI front and 110PSI rear I think it is safe to say that I do not have a compression issue.
Also as my engine is basically new it is arguable that those numbers are likely to go up as everything gets broken in more.
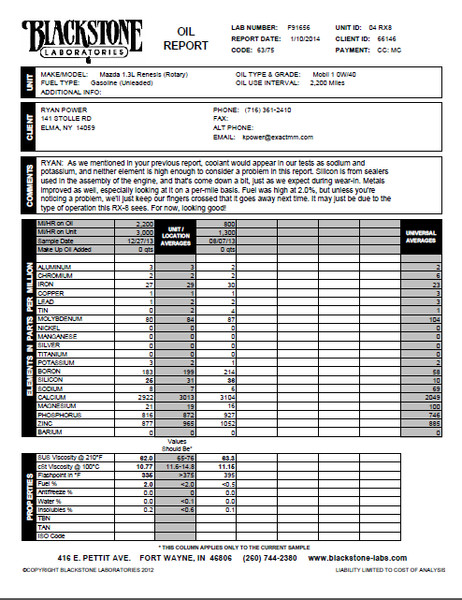
I also have my latest oil sample test from blackstone, fuel was slightly high but still within acceptable range. Other than that everything is looking great for break in wear
Had them on my Speed 6 and never had a problem, they give good adjustment and have an aggressive spring rate.
Are you referring junk as in quality or performance, aren't they also one of the only kits to use pillowball mounts without additional parts?
I don't see the need to go for something as extreme as the cusco's, nor do I want the Powertrix. What would you replace them with?
Are you referring junk as in quality or performance, aren't they also one of the only kits to use pillowball mounts without additional parts?
I don't see the need to go for something as extreme as the cusco's, nor do I want the Powertrix. What would you replace them with?
You don't have to go extreme but at least go with something proven by the tracks that is easily rebuildable and upgradable like the Bilstein PSS9's.

After reviewing the cost to benefit, and determining 2 of my ball joints are not within spec and needed to be replaced I decided to just upgrade to a complete set of MRS rear arms. Not something I had planned but the cost would have been exactly the same after the bushings, boots, nuts, grease, time etc....
Ordered a my coil-overs to, BC BR getting re-valved and springed to 10K/8K. Located a local shop who will be doing a dyno plot test for me on all four coil-overs and we will see if the cheap stuff gets as bad of a name as everyone thinks, as long as they perform on par or slightly better than stock 'all I am after anyways. Will post that up once I get it. Looking at 3-4 weeks out tho.
Also realized after struggling for a week removing bushings, their is a much simpler approach. All about having the right tools I suppose. Everything except the LCA are ready to go, now just waiting on my MRS arms and my sways to come in to take them all for coating. Them some engine work and cleaning is in order, hoping to get some assembly done before I take off for the spring.
Well this build turned into a vicious cycle, finally got everything I could possible think of off to my coater. I mean vicious cycle as in my coat list started small and just kept growing and growing. Only thing I was not able to add was the TB, mainly because I am not keen on taking it apart and because it has plastic molded into the aluminum. So that will sit for another time.
On other subject Coil-overs come in Monday and I am dropping them off Tuesday to get dyno plot tested so we will see if average coils perform better or worse than what everyone thinks.
Also if anyone could care to venture a guess on how I managed to get a small amount of oil into my APV ports on the LIM where the UIM bolts? I have had a catch can since day one so I do not see how thats possible. Seems like very little around where the rubber seal meets the LIM???
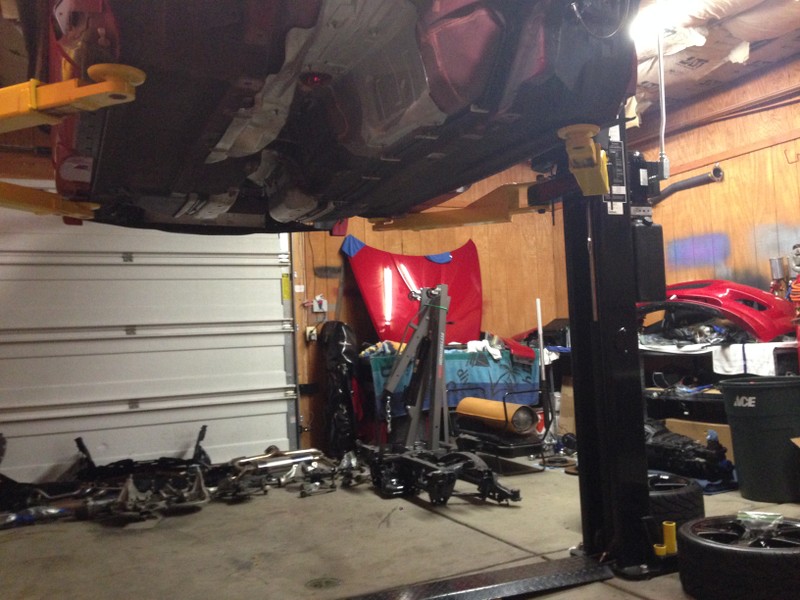
Getting a lot of parts in and back starting next week, will post more pics when I start putting it all back together.
On other subject Coil-overs come in Monday and I am dropping them off Tuesday to get dyno plot tested so we will see if average coils perform better or worse than what everyone thinks.
Also if anyone could care to venture a guess on how I managed to get a small amount of oil into my APV ports on the LIM where the UIM bolts? I have had a catch can since day one so I do not see how thats possible. Seems like very little around where the rubber seal meets the LIM???
Getting a lot of parts in and back starting next week, will post more pics when I start putting it all back together.
Updated first post to more accurately detail thread and hopefully allow better navigation.
Just starting to get parts back, will update with some assembly later this week or next.
During cleaning I noticed that I must have over tightened my intake clamps as I deformed the AEM intake and it is not perfectly circular anymore and has one side crushed in, going to try and straighten it with an exhaust expander. Wonder if this would cause my misfire issue
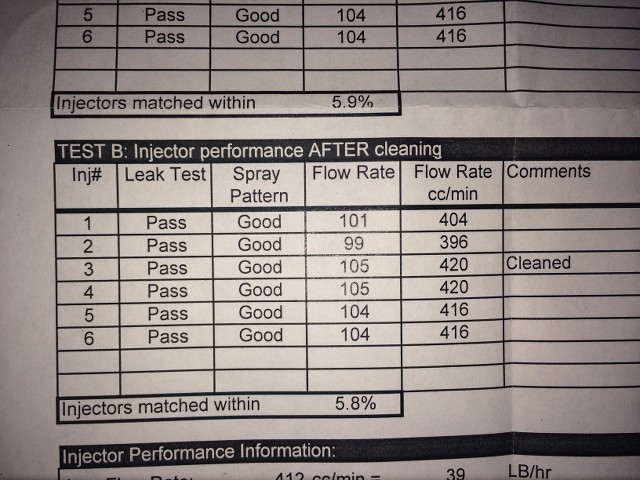
Had my injectors flown and cleaned at "fuel injector clinic", found one yellow was out of tolerance and had it cleaned up. Now they are all within 1% tolerance of each other, although the red's are flowing almost the same as the yellows. 400cc/min vs 420cc/min.
Regardless have a good starting point for scaling now.
Regardless have a good starting point for scaling now.
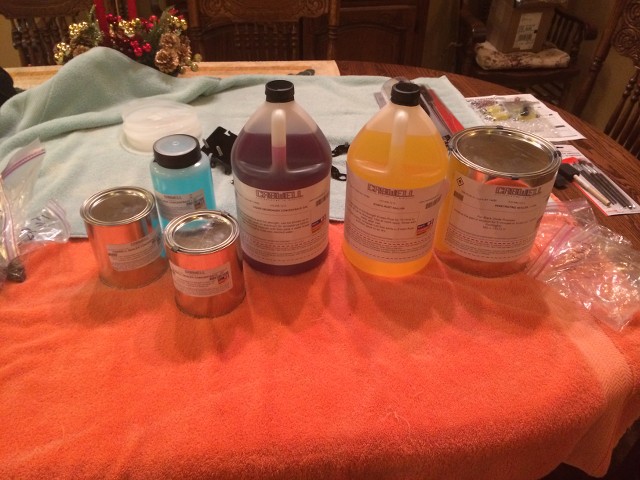
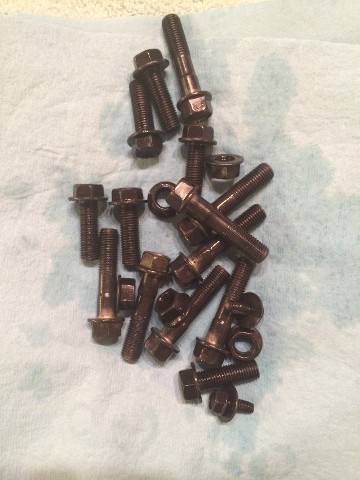
Intro (Cadmium vs Zinc vs Black Oxide)
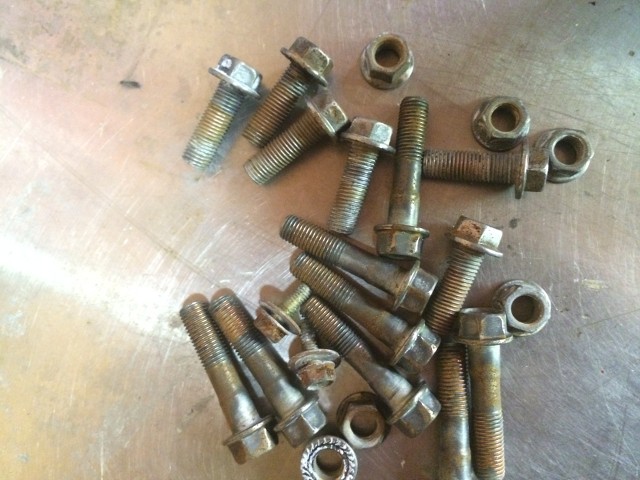
If your like me and are meticulous about your car, only to find that 10+ years on the road has not been so kind to your nuts and bolts then I have found a viable option to easily restore them.
Mazda originally built the Rx8 using all cadmium coated hardware (the gold coating) they have then since over the last decade switched over to zinc coated hardware. If you ever noticed your replacement bolts are silver and not gold.
Both are great coatings, the only draw back on cadmium is that it is designed to fail. Cadmium coating is designed to take the corrosion to protect the steel bolt by first corroding itself. This is a process and some of your current hardware may already show signs of this. Only drawback is once the cadmium corrodes it leaves the steel fastener helpless against the elements. Hence the switch to zinc which is designed to prohibit corrosion altogether.
Now both cadmium and zinc platting is done using an electrical charge etc.... so it is not a viable option to set up at home just to do a couple hundred bolts. The investment is to large, it would be cheaper just to by all new OE replacements.
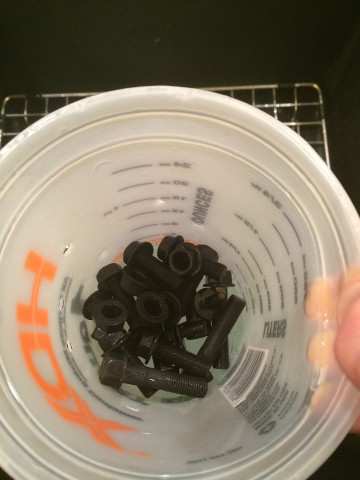
Because of that I stumbled upon a black oxide plating process which can be done cold and requires very little investment and experience. Now black oxide is a chemically induced controlled corrosion plating process. The platting solution oxidizes the steel leaving it a black to a dark brown/grey appearance state. Now because you are corroding the metal during the plating process black oxide coating is not ideal for automotive fasteners that will see much elemental abuse, unless it is sealed in which case it will hold a substantial rust prohibition.
Now even with the sealant, I do not strongly urge this plating process on anyone that daily drives their car in a climate that requires road salt. Being that my car never sees those conditions I decided to give this process a shot and see how it works.
What You Will Need
- Wire wheel ( I used a bench grinder with a brass wheel)
- Gloves
- Steel Wool (000 Grade)
- 6 Buckets 2qt or bigger
- 5 Baskets (Large enough to hold hardware but small enough to fit inside the buckets)
- Towels
- De-greaser (Liquid Degreaser Concentrate - Caswell Inc)
- Rust Remover (Evapo-Rust Rust Remover - Restoration Aids - Caswell Inc)
Black Oxide Platting Kit ( I got mine from CasWell Plating, I ordered the 2.5 gallon kit and have enough left over to make 2-3 more platting sessions)
Black Oxide Kits - Metal Finishing Solutions - Caswell Inc
The kit only comes with the penetrating sealer (Basically WD40) you will want the CasWell Sealer as well
Caswell Sealer - 1 Quart - Black Oxide Kits - Metal Finishing Solutions - Caswell Inc
All in all it ran me $400, which seems like a lot but I have enough supplies to do every nut and bolt on 4-5 cars if I need to. Also the solutions have a shelf life of 10 years as long as they are covered and in a climate controlled environment.
Process
Step 1-Cleaning
Start with your rusted/dirty hardware and using the wirewheel clean all debree off the parts. Now is using a bench grinder wear gloves and eye wear and for the love of god use vice grips!!! I don't know how many times I have seen hardware become a projectile because someone used their fingers.
Step 2-Prep
Now that the hardware is free of physical contaminates it is time to prep the pieces for coating. In this stage you will need to place the parts in the basket and place the basket in the rust removing solvent. You can leave the part in as long as needed, even over night if it is really bad still.
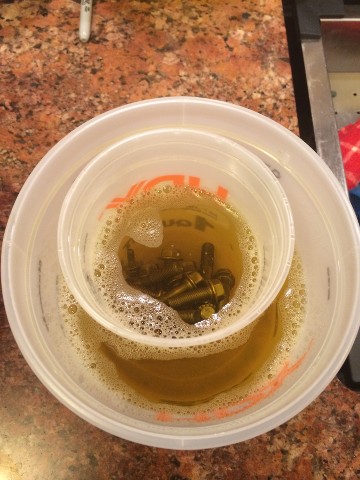
Take the basket out of the solvent and rinse it using tap water, you will then immediately place the rinsed parts into the degreaser for 5-10 minutes.
Again rinse the hardware after taking it out of the solvent and notice if the water is beading off of the pieces and flowing smoothly to determine that the parts are contaminant free.
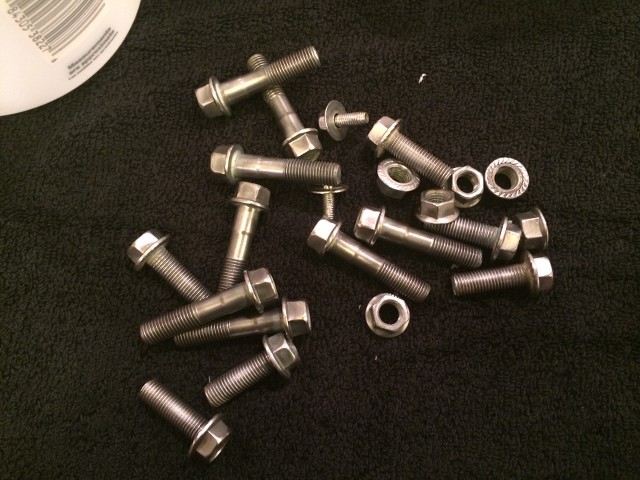
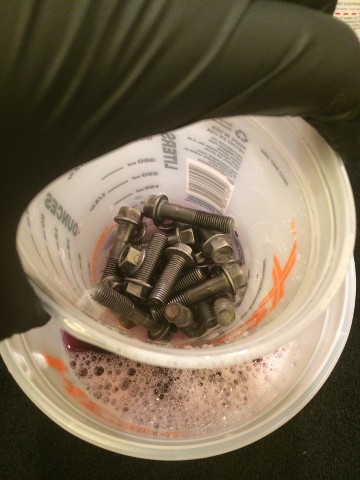
Step 3-Black Oxide Platting
Now that the parts are properly cleaned and prepped they are ready to be dipped into the oxide concentrate. Leave the parts in the oxide for 2 minutes, then remove and rinse. Once rinsed lay the parts out on a towel and place the basket back into the oxide solution. Now take your steel wool and scuff and pieces that do not have even coverage. after they are all scuffed place them back into the oxide solution for another 3 minutes, rinse and lay on a towel when complete.
****Do not leave parts in solution for more than 5 minutes****
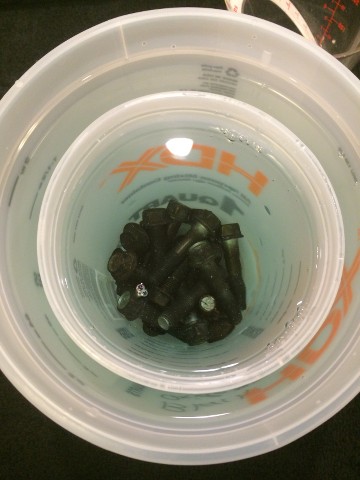
Step 4-Sealing
Now that the parts are coated and have dried they can be sealed. This process is the same as the rest, place the parts in a basket and into the CasWell Sealer first. This process is a dipping only 2-3 dips to ensure an even coat the parts do not need to sit in the sealer. Lay the parts out on a towel again to dry (10 Minutes). Once they are dry you can then repeat this process for the penetrating sealer.
The penetrating sealer is an oil, and as such will take days to fully dry.
Notes
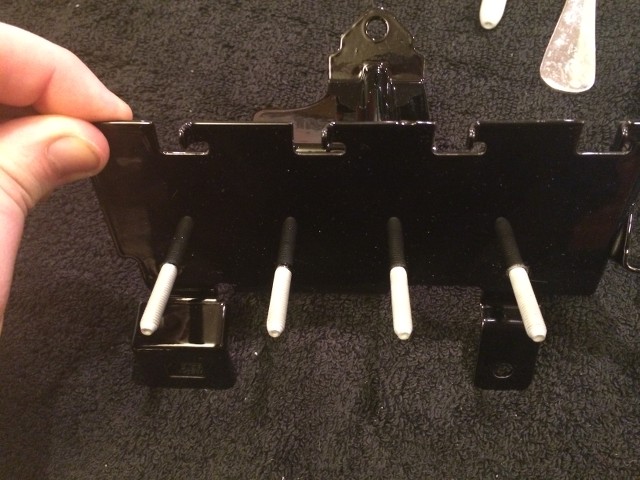
This process can be adapted using brushes, sponges and towel to coat studs that are attached to a coated piece. For instance I did the studs on my coil bracket. The solutions will not degreade of damage existing coatings. So it can be applied easily with a brush and then wipped away without concern at the end.
Last edited by Carbon8; Mar 26, 2014 at 02:26 AM.
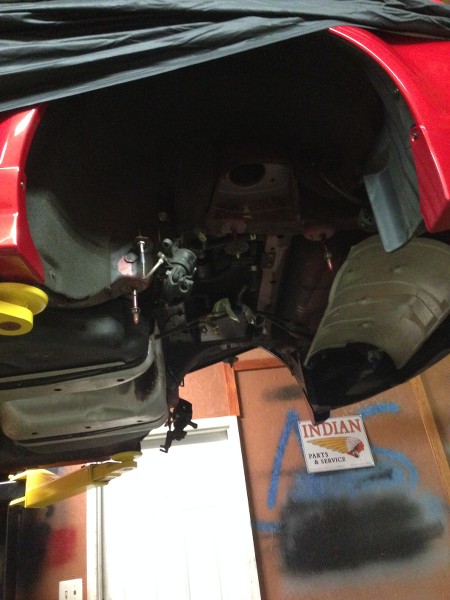
Received all but a couple parts back from coating (Unfortunately split my LIM drilling out a stripped bolt, so I had to source another one and it is off at coating now)

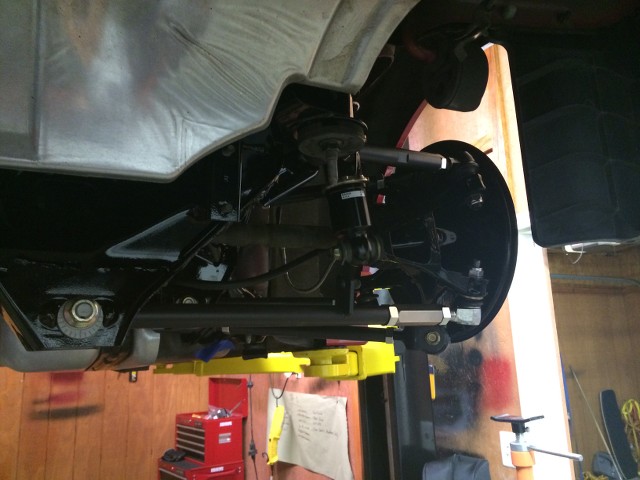
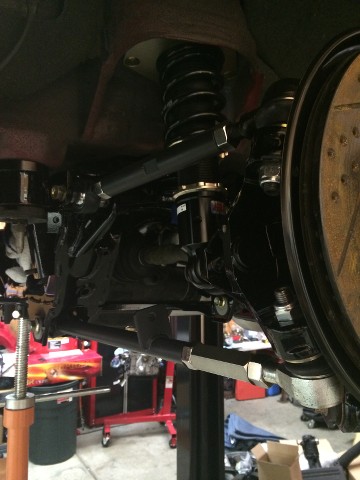
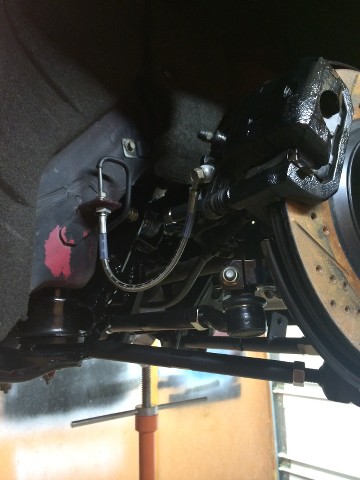
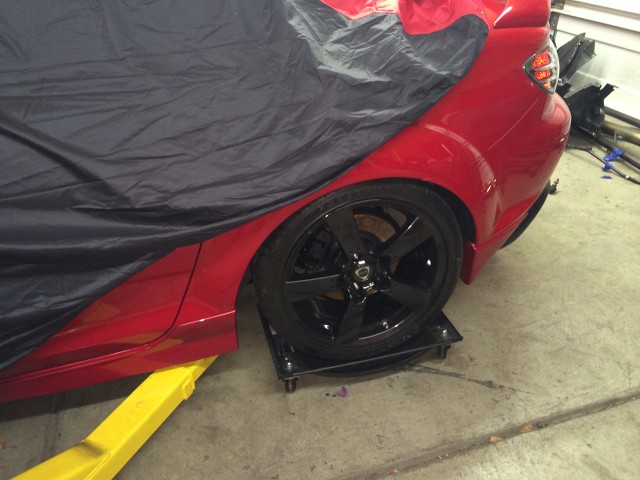
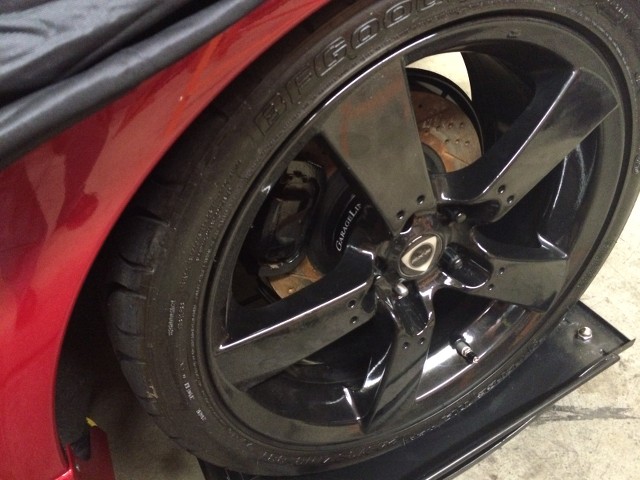
Was able to get the entire rear end back together and a rough alignment made, will be getting an entire alignment and corner balance done once the car is back on the road and I get a rough ride height dialed in. All in all everything is going together nicely.
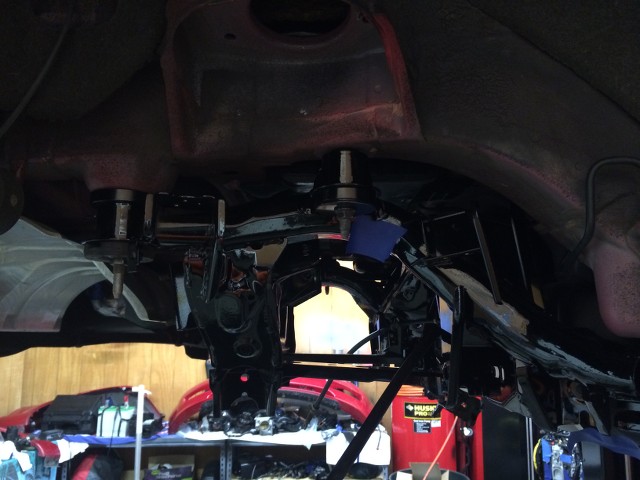


Also did some minor engine bay modifications, was not feeling the clashing colors of the piping and some other componentry to be updated later


Was able to get the entire rear end back together and a rough alignment made, will be getting an entire alignment and corner balance done once the car is back on the road and I get a rough ride height dialed in. All in all everything is going together nicely.
Also did some minor engine bay modifications, was not feeling the clashing colors of the piping and some other componentry to be updated later
Last edited by Carbon8; Mar 26, 2014 at 02:45 AM.

