
DIY: RB Gauge Pod + Nordskog Digital Gauges


Thread Starter
Administrator
iTrader: (7)
Joined: Mar 2004
Posts: 22,638
Likes: 3,505
From: The Dark Side
DIY: RB Gauge Pod + Nordskog Digital Gauges
I've always liked the idea of the Racing Beat Gauge pod but I never truly cared for the gauges that come with it. After some research and help from a forum member, I decided on trying out the Nordskog Street Digital's. The bonus to using the digital gauges is it eliminates the need to run Stainless steel lines (of hot fluids) into the back of the gauge pod. A leak there would be really bad.
If you're thinking of going this route, here's what you'll need.
- Racing Beat Pod ($115 + shipping)
- Water Temperature Gauge $66
- Oil Pressure Gauge ($66)
- Oil Temperature Gauge($66)
- Racing Beat Oil Pressure and Temperature Sensor Adaptor ($64)
- Racing Beat Water Temperature Sensor Adapter ($29)
- Nordskog Pressure Sending Unit ($36)
- Nordskog Temperature Sending Unit ($16 x 2)
Update on Nordskog As of 9/15/2009, Nordskog has ceased operations indefinitely so you will no longer be able to buy these gauges. All you have to do is substitute another gauge manufacturer and follow the instructions below and you should be all set.
Other Misc items:
- Wire cutters
- hose clams
- teflon tape
- grounding clamp for oil pressure sender
- electrical wiring
- zip ties
- soldering gun (optional)
- flex guard (optional)
- Racing Beat Installation instructions. Most of these instructions are still relevant even though we're running the wires through a different area.
- Oil Filter
- 4 quarts of 5w-20
- Standard tools: ratchet set, screwdriver, exacto knife
-Vampire clips
- box of end connectors (male and female)
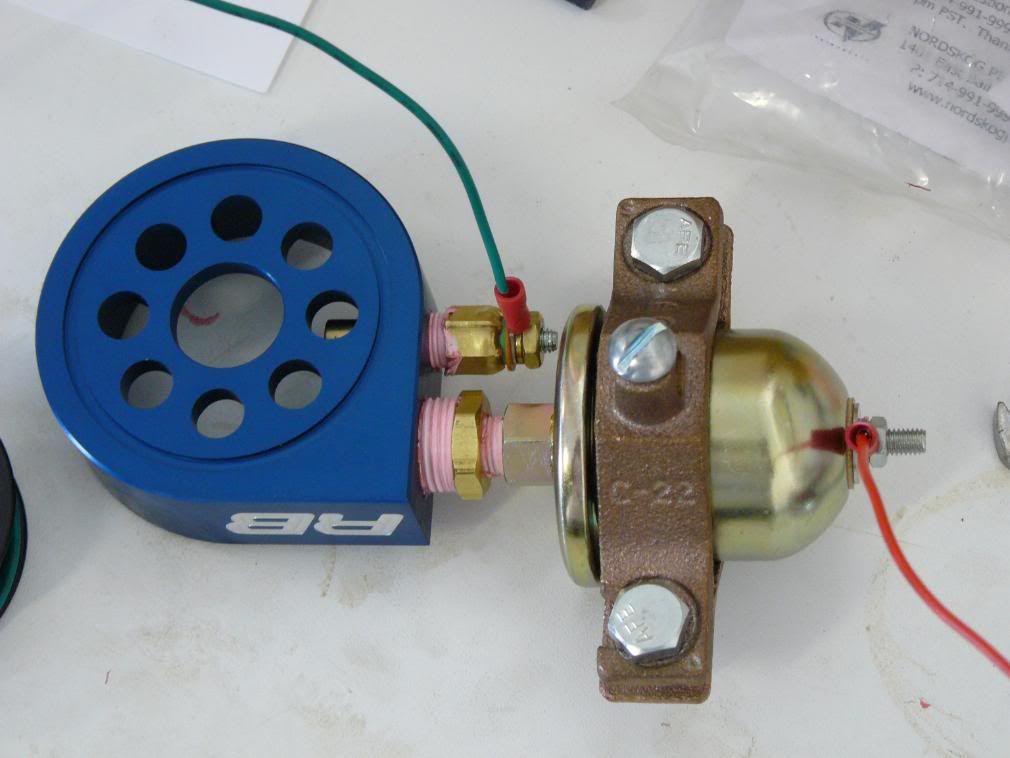
When you're ready to begin, you should have a countertop that looks similar to this:

Pre-assemble everything. The area around the oil filter is VERY compact and you will not have room to maneuver.
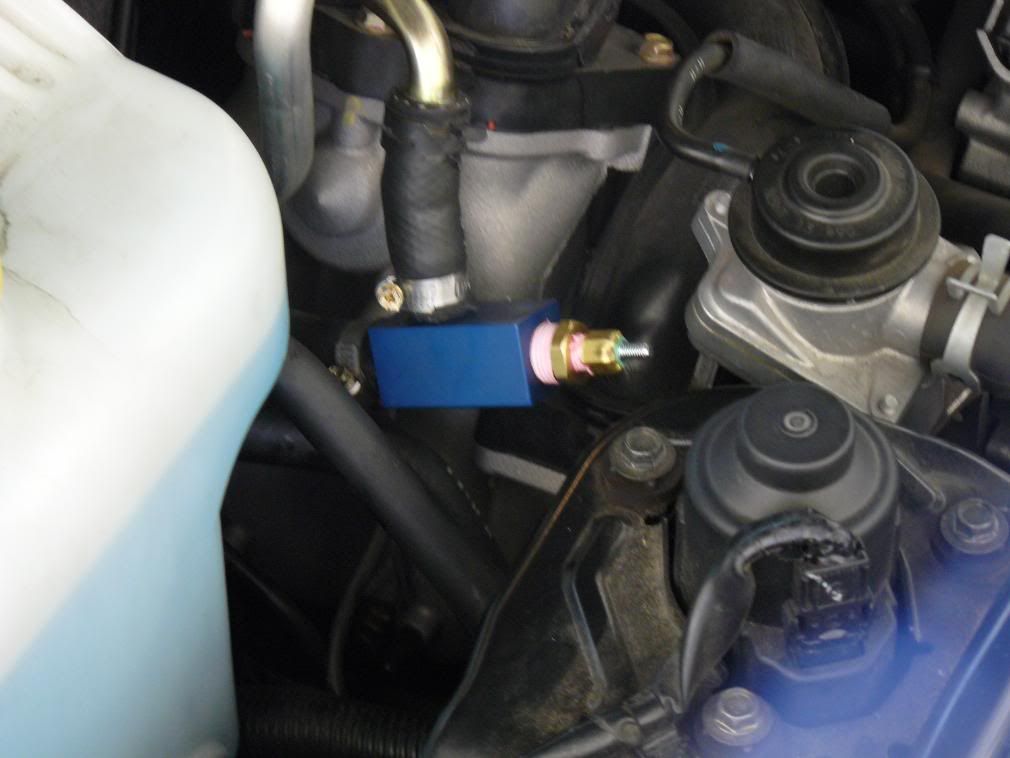
Follow the Racing Beat instructions for installing the Water Temperature Adapter. Since these wires have to run across the entire engine bay in order to get into the cabin of the vehicle, I used some flex guard to hide the wires. (2nd pictures) Your finished product will look like:
Follow Racing Beat instruction on installing the Oil Adapter. You will want to do an oil change on your car at this point. Finished product will look like: (excuse the crappy picture)
Now it's time to ground everything and start running some wires. Thanks to forum member Elf for doing the legwork on this one. (borrowed from his thread)
Please excuse the dirty engine bay ... didn't get a chance to clean it before the pics were taken.
Requirements:
* Exacto knife
* Being a contortionist and double-jointed helps a lot working underneath the dash and steering wheel
Water temp sending unit:
Body of sending unit grounded with hose clamp and wire to the chassis

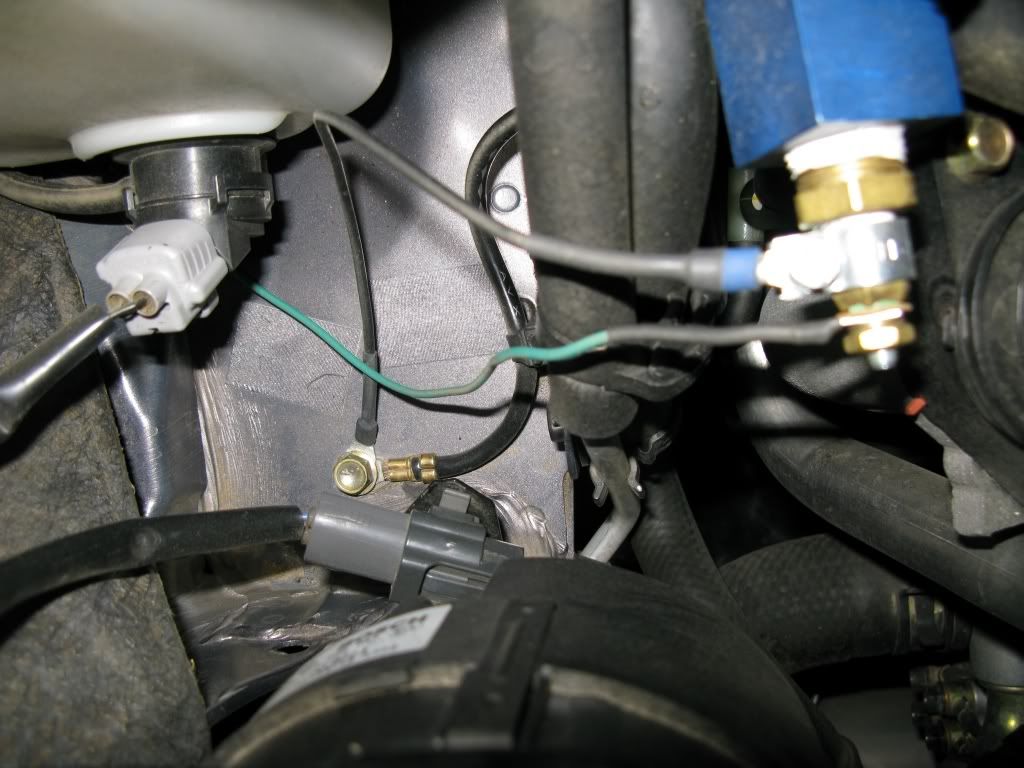
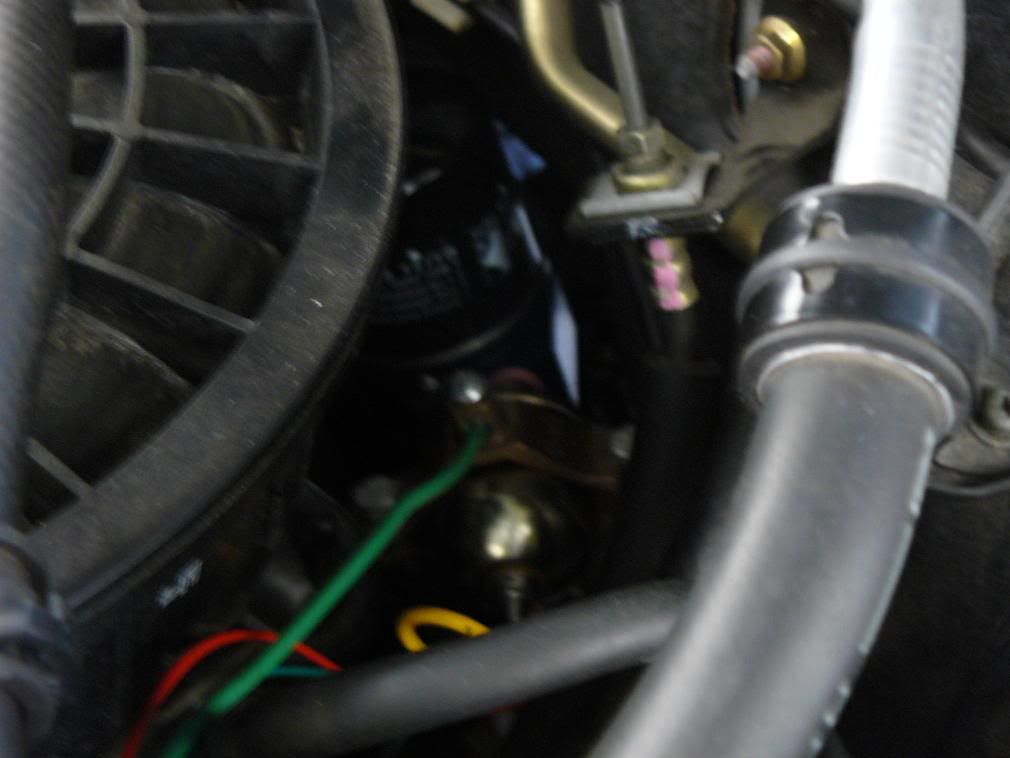
Oil pressure and temperature sending unit:
Body of the oil pressure sending unit grounded with a larger hose clamp and wire; body of the oil temperature sending unit can be seen above (behind) and to the right of the large oil pressure sending unit. It was grounded the same way as the water temp sending unit. Just a side note: it's best to connect and tighten ALL the sending units and wires to the RB oil adapter before you install the adapter --- you won't have very much room to turn wrenches down there once it's installed.

Both the grounding wires of the oil pressure and temp sending units were attached here (near the brake master cylinder and hood hinge area)

Routing wires from the cabin to the engine bay:
Access to the engine bay can be made through the large rubber grommet just above and to the right of the clutch pedal. This grommet already supplies a large bundle of wires to the engine bay, but by cutting a slit in the grommet, in the trough surrounding the existing wire bundle, you can push your wires through to the engine bay. They'll exit just below the master brake cylinder.
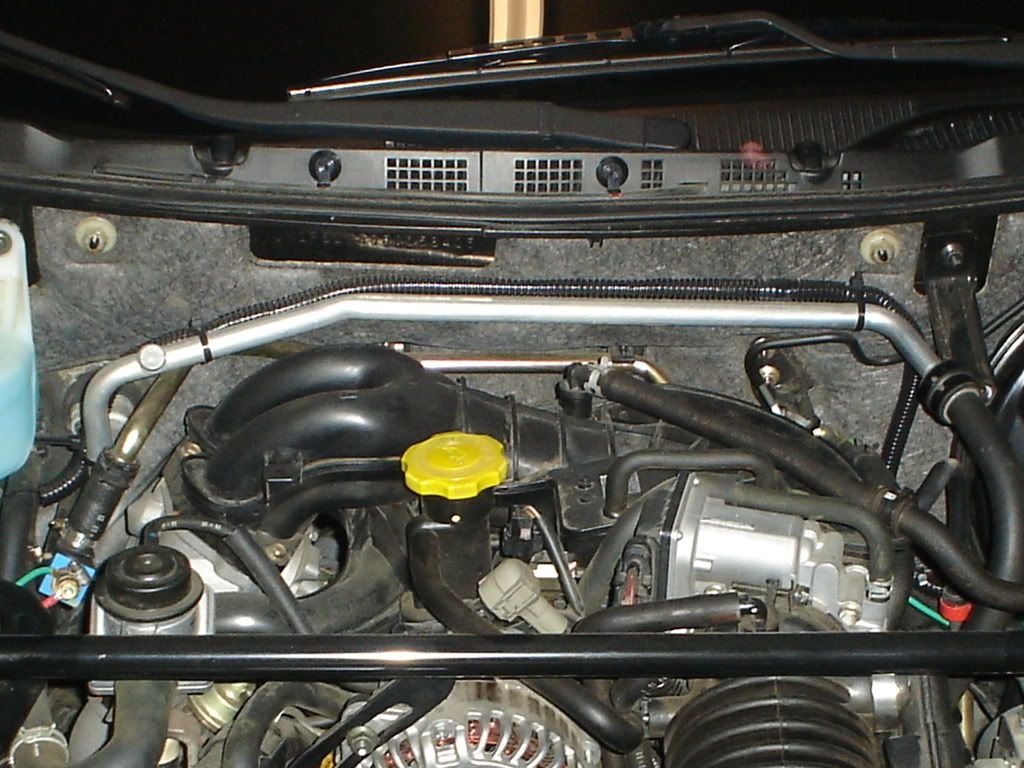
Rubber grommet is just behind the brake pedal in this picture
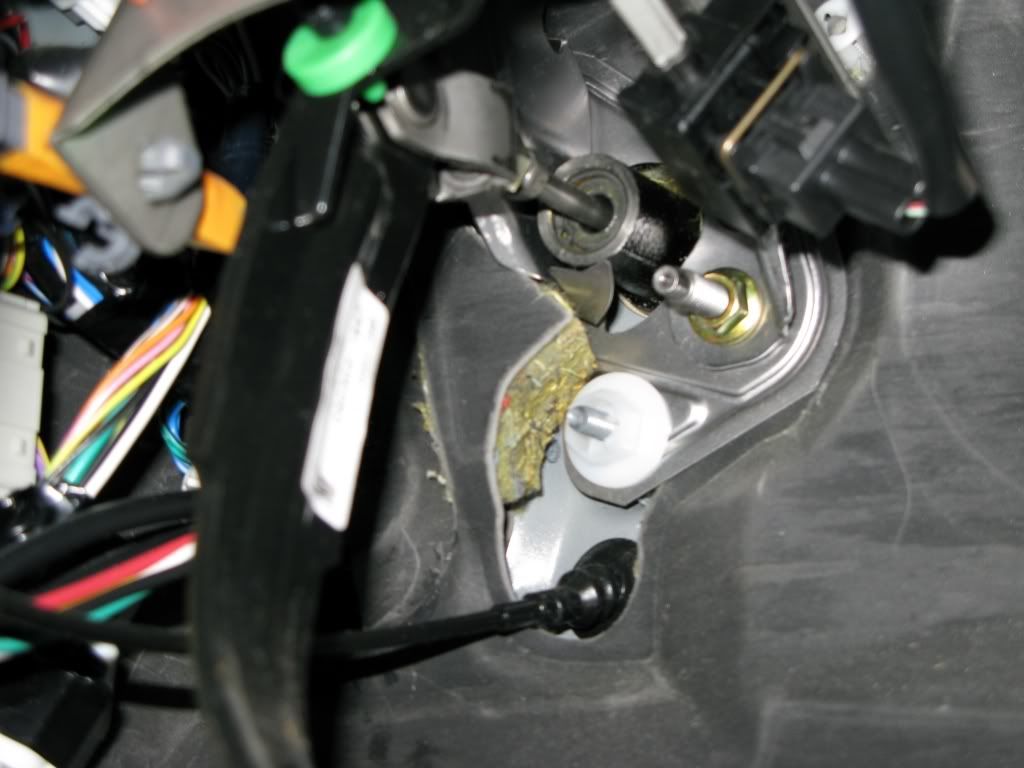
Close-up of the grommet. Note that there's kind of a rubber flap that straddles and covers the large wire bundle --- this can be lifted up and out of the way for better access to the grommet. You can see the wires (six 18-gauge wires and two larger black wires for the Tein EDFC) that I fed through just inside the rubber-like flap that covers the grommet. I used the Exacto knife to cut a 0.5 inch (approx.) slit in the trough for the wires. I tried resealing that section with silicone sealant, but it got a little messy (and probably not necessary anyway).

The rubber grommet is difficult to get to and running wires through is just as much fun. One trick I used here was to puncture a small hole using a sharp knife and then wedge a long socket into the grommet. This will allow a passage way for you to run all the wires.
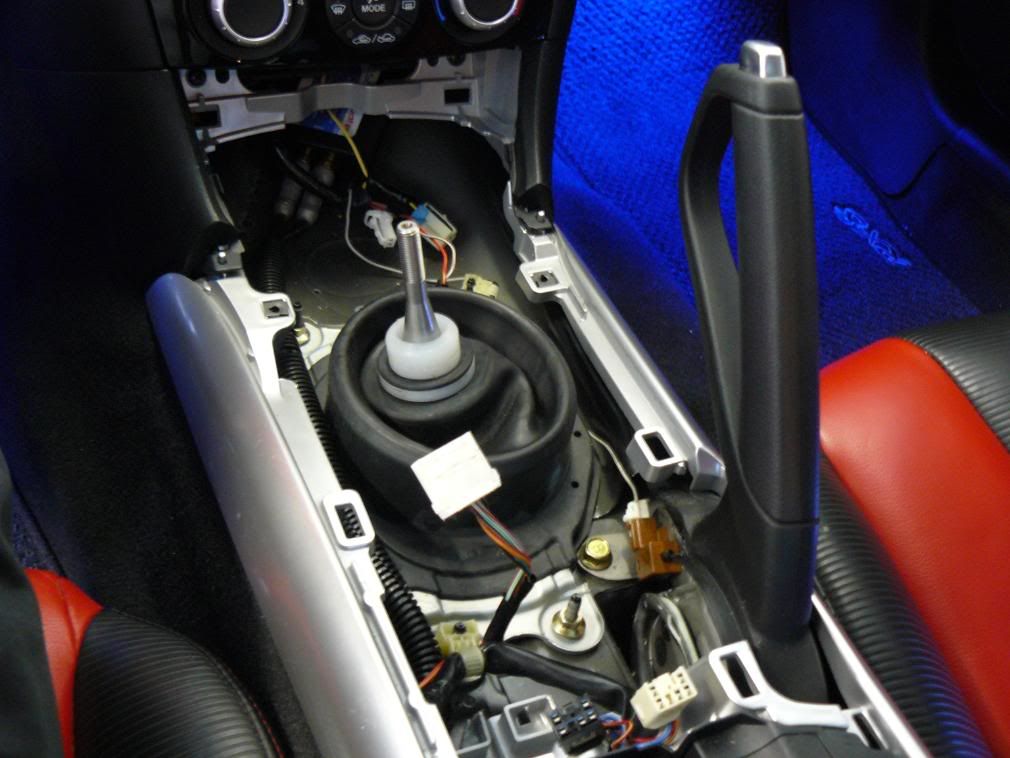
Once you have the wires through the gromet, remove the socket and seal with silicone. The wires will then be run underneath the steering column and towards the back of the center dash. You'll need a few zip ties here so you don't have any wires hanging loose that could eventually get caught on something.
Here is where the soldering gun came in handy for me.
Instead of running 3 grounds (one per gauge) and tapping 3 wires off of the power source, I ran ONE wire, and soldered 3 small wires off of the source. A screw on wire tap would accomplish this same goal, its up to you which route you want to take.
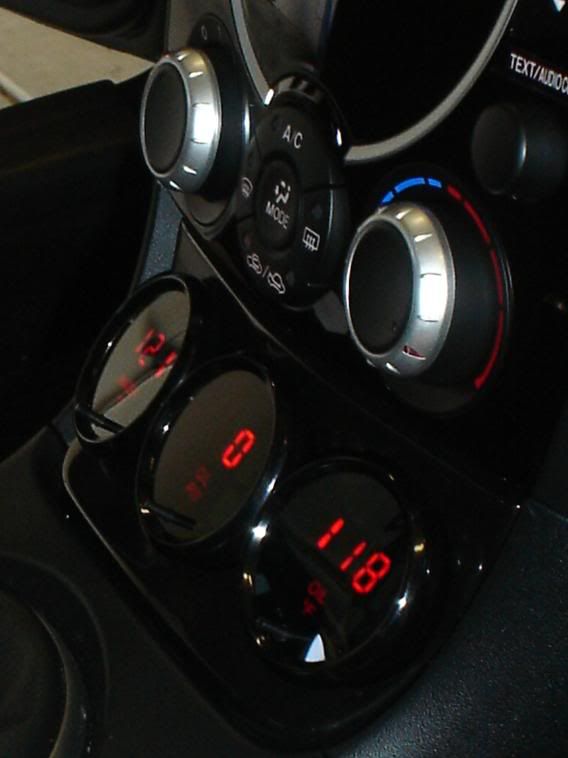
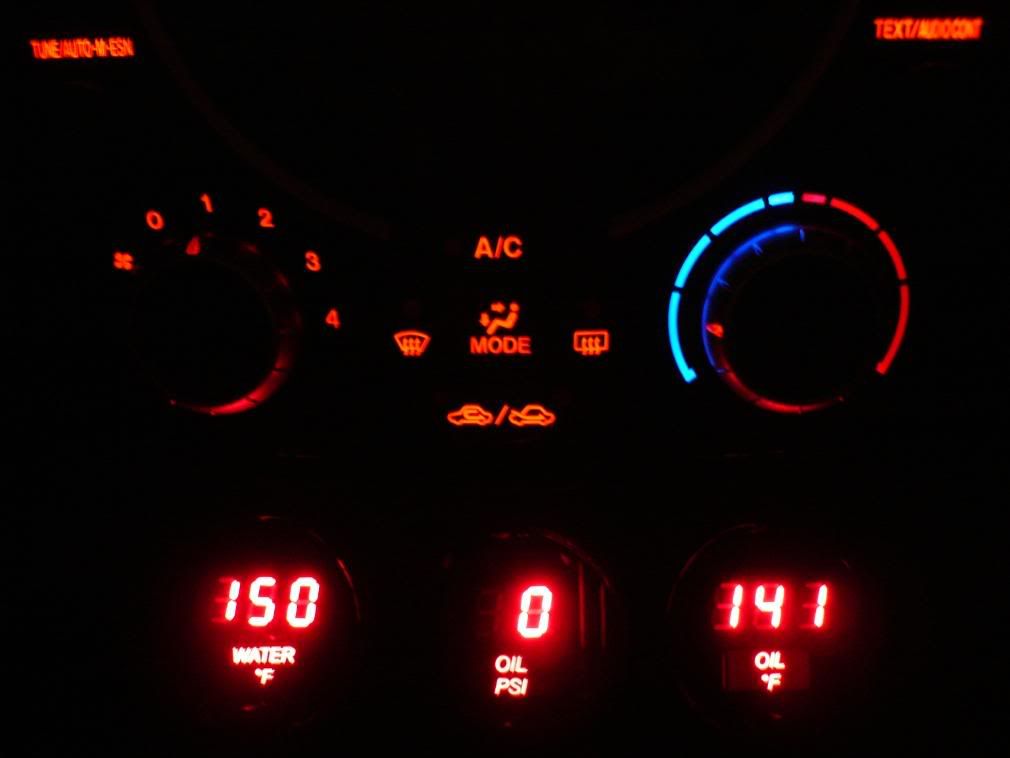
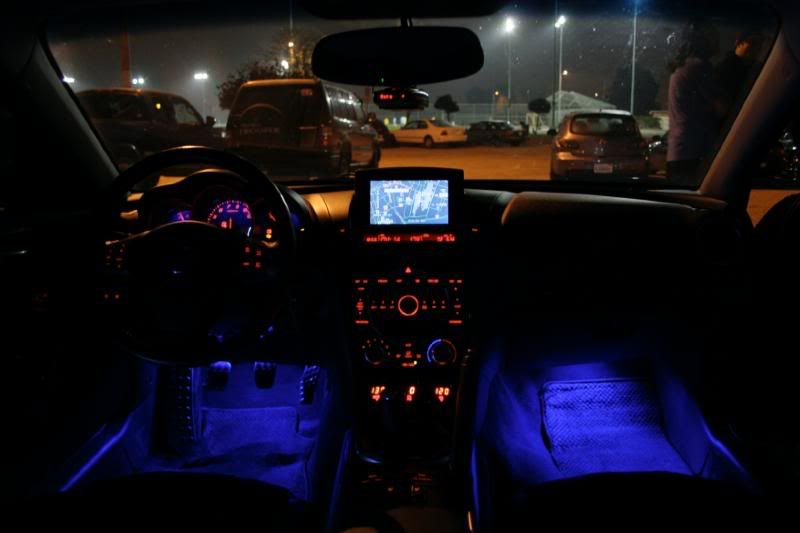
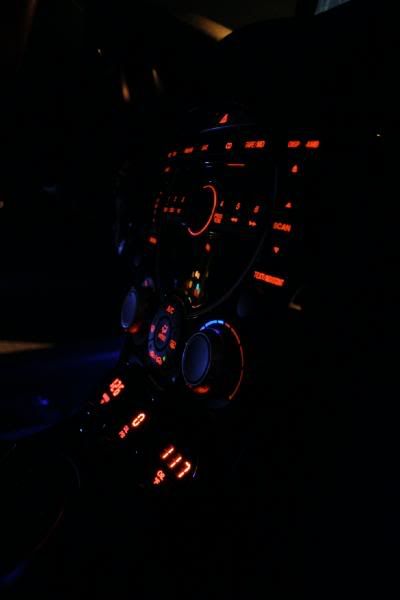
The Nordskog gauge instruction will walk you the rest of the way as far as wiring the gauges. The Racing Beat instructions will once again come in handy for tapping into the light that used to be in your cigarette lighter compartment. This will allow the gauges to dim by 50% when you turn on the lights. Remember to pay close attention as to which wire goes where. If everything is connected properly it should look something like:

Thanks to forum member Newcastle for assisting in the installation. We actually installed this mod on both of our cars.
Side note: this is not a HARD mod to install, it will just require some patience, some general mechanical skills, and lots of time. Set aside a 3-4 hours on a weekend and I'm sure you'll find that your time was well worth it.
If there's pictures of anything else you need just let me know and I'll either post them right up or go out to the garage and take them.
If you're thinking of going this route, here's what you'll need.
- Racing Beat Pod ($115 + shipping)
- Water Temperature Gauge $66
- Oil Pressure Gauge ($66)
- Oil Temperature Gauge($66)
- Racing Beat Oil Pressure and Temperature Sensor Adaptor ($64)
- Racing Beat Water Temperature Sensor Adapter ($29)
- Nordskog Pressure Sending Unit ($36)
- Nordskog Temperature Sending Unit ($16 x 2)
Update on Nordskog As of 9/15/2009, Nordskog has ceased operations indefinitely so you will no longer be able to buy these gauges. All you have to do is substitute another gauge manufacturer and follow the instructions below and you should be all set.
Other Misc items:
- Wire cutters
- hose clams
- teflon tape
- grounding clamp for oil pressure sender
- electrical wiring
- zip ties
- soldering gun (optional)
- flex guard (optional)
- Racing Beat Installation instructions. Most of these instructions are still relevant even though we're running the wires through a different area.
- Oil Filter
- 4 quarts of 5w-20
- Standard tools: ratchet set, screwdriver, exacto knife
-Vampire clips
- box of end connectors (male and female)
When you're ready to begin, you should have a countertop that looks similar to this:
Pre-assemble everything. The area around the oil filter is VERY compact and you will not have room to maneuver.
Follow the Racing Beat instructions for installing the Water Temperature Adapter. Since these wires have to run across the entire engine bay in order to get into the cabin of the vehicle, I used some flex guard to hide the wires. (2nd pictures) Your finished product will look like:
Follow Racing Beat instruction on installing the Oil Adapter. You will want to do an oil change on your car at this point. Finished product will look like: (excuse the crappy picture)
Now it's time to ground everything and start running some wires. Thanks to forum member Elf for doing the legwork on this one. (borrowed from his thread)
Please excuse the dirty engine bay ... didn't get a chance to clean it before the pics were taken.
Requirements:
* Exacto knife
* Being a contortionist and double-jointed helps a lot working underneath the dash and steering wheel
Water temp sending unit:
Body of sending unit grounded with hose clamp and wire to the chassis
Oil pressure and temperature sending unit:
Body of the oil pressure sending unit grounded with a larger hose clamp and wire; body of the oil temperature sending unit can be seen above (behind) and to the right of the large oil pressure sending unit. It was grounded the same way as the water temp sending unit. Just a side note: it's best to connect and tighten ALL the sending units and wires to the RB oil adapter before you install the adapter --- you won't have very much room to turn wrenches down there once it's installed.
Both the grounding wires of the oil pressure and temp sending units were attached here (near the brake master cylinder and hood hinge area)
Routing wires from the cabin to the engine bay:
Access to the engine bay can be made through the large rubber grommet just above and to the right of the clutch pedal. This grommet already supplies a large bundle of wires to the engine bay, but by cutting a slit in the grommet, in the trough surrounding the existing wire bundle, you can push your wires through to the engine bay. They'll exit just below the master brake cylinder.
Rubber grommet is just behind the brake pedal in this picture
Close-up of the grommet. Note that there's kind of a rubber flap that straddles and covers the large wire bundle --- this can be lifted up and out of the way for better access to the grommet. You can see the wires (six 18-gauge wires and two larger black wires for the Tein EDFC) that I fed through just inside the rubber-like flap that covers the grommet. I used the Exacto knife to cut a 0.5 inch (approx.) slit in the trough for the wires. I tried resealing that section with silicone sealant, but it got a little messy (and probably not necessary anyway).
The rubber grommet is difficult to get to and running wires through is just as much fun. One trick I used here was to puncture a small hole using a sharp knife and then wedge a long socket into the grommet. This will allow a passage way for you to run all the wires.
Once you have the wires through the gromet, remove the socket and seal with silicone. The wires will then be run underneath the steering column and towards the back of the center dash. You'll need a few zip ties here so you don't have any wires hanging loose that could eventually get caught on something.
Here is where the soldering gun came in handy for me.
Instead of running 3 grounds (one per gauge) and tapping 3 wires off of the power source, I ran ONE wire, and soldered 3 small wires off of the source. A screw on wire tap would accomplish this same goal, its up to you which route you want to take.
The Nordskog gauge instruction will walk you the rest of the way as far as wiring the gauges. The Racing Beat instructions will once again come in handy for tapping into the light that used to be in your cigarette lighter compartment. This will allow the gauges to dim by 50% when you turn on the lights. Remember to pay close attention as to which wire goes where. If everything is connected properly it should look something like:
Thanks to forum member Newcastle for assisting in the installation. We actually installed this mod on both of our cars.
Side note: this is not a HARD mod to install, it will just require some patience, some general mechanical skills, and lots of time. Set aside a 3-4 hours on a weekend and I'm sure you'll find that your time was well worth it.
If there's pictures of anything else you need just let me know and I'll either post them right up or go out to the garage and take them.
Last edited by Jedi54; Jun 27, 2011 at 12:45 PM.


Registered
Joined: Jun 2007
Posts: 123
Likes: 0
From: Jessup, MD
Very nice! Seems like a great solution. Sticky this for sure.
I was curious after you coolant has warmed up how much longer does it generally take for the oil to warm up? I am just curious how long after my coolant needle reaches its max can I really run her hard.
I was curious after you coolant has warmed up how much longer does it generally take for the oil to warm up? I am just curious how long after my coolant needle reaches its max can I really run her hard.
Thread Starter
Administrator
iTrader: (7)
Joined: Mar 2004
Posts: 22,638
Likes: 3,505
From: The Dark Side
Thanks everyone! Glad to see you guys like my work and the requests for a sticky are a great compliment. Maybe the mods will listen and grant this a sticky. 
RX8: I am running the High flow pump from Mazmart so my coolant temps change a little faster then with the OEM. At highway cruising speeds the temperature of the water is approx. 182 degrees. Usually a minute or two after that the oil has settled somewhere in the 165-170 range and you can start driving agressively.
RX8: I am running the High flow pump from Mazmart so my coolant temps change a little faster then with the OEM. At highway cruising speeds the temperature of the water is approx. 182 degrees. Usually a minute or two after that the oil has settled somewhere in the 165-170 range and you can start driving agressively.
Last edited by Jedi54; Dec 25, 2007 at 04:25 PM.
Thread Starter
Administrator
iTrader: (7)
Joined: Mar 2004
Posts: 22,638
Likes: 3,505
From: The Dark Side
Oh, I forgot to mention one of the best features of these Nordskog gauges. All the gauges have a recall button (little black thing at the bottom)
You can recall the highest reading since the last time your car was turned on. The oil pressure gauge will tell you the lowest AND highest pressure it's logged.
You can recall the highest reading since the last time your car was turned on. The oil pressure gauge will tell you the lowest AND highest pressure it's logged.
Last edited by Jedi54; Dec 25, 2007 at 07:27 PM.
Pettit fangurl <3
Joined: Mar 2005
Posts: 5,386
Likes: 0
From: Aston, PA
and.........another advantage is that they are digital...my wideband is digital...wish i could have afforded to get the boost and water temp in digital...
if youve got cash to throw around, nexus is the way to go....
youve got an excellent set up jorge..
if youve got cash to throw around, nexus is the way to go....
youve got an excellent set up jorge..


the more things change
Joined: Dec 2004
Posts: 602
Likes: 1
From: Los Angeles
jedi i remember alot of things you said you bought, but i did not know you bought out radio shack...
ok sorry i forgot, this was a two car deal..
ok sorry i forgot, this was a two car deal..
Last edited by scremn8; Dec 26, 2007 at 09:25 AM.

Thread Starter
Administrator
iTrader: (7)
Joined: Mar 2004
Posts: 22,638
Likes: 3,505
From: The Dark Side


if you mean cons of electrical versus mechanical, they run off the 12 Volt power. if your electrical system goes haywire it can affect your readings. but electrical gauges now-a-days are pretty reliable.


Thread Starter
Administrator
iTrader: (7)
Joined: Mar 2004
Posts: 22,638
Likes: 3,505
From: The Dark Side
The RB pod can be purchased sepeately for $96
At the end of the project you pretty much break even going digital (and buying the parts yourself) Full RB kit = $450.
I thought about selling the guages but I didn't figure there was much of a market for them
Last edited by Jedi54; Dec 26, 2007 at 05:10 PM.