
Custom CarPC, sub, amp rack install


Thread Starter
Registered User
Joined: May 2009
Posts: 23
Likes: 0
From: Redmond, WA
Custom CarPC, sub, amp rack install
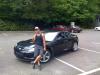
Seems like this section of the forums gets fairly stagnant as of lately and since i recently finished my custom CarPC, faceplate, amp rack, and sub box install i figured i would post up some pics.
Some specs:
Case: custom Plexiglas
Mobo: Intel D945GCLF2D
HD: Seagate Barracuda 80gb
Chip: Intel atom 330
Ram: Super Talent 1gb DDR2 667
Screen: Lilliput EBY701 Enhanced drop in from Mo So Co(http://store.mo-co-so.com/enhanceddr...nel-p-201.html)
Pics:


Some specs:
Case: custom Plexiglas
Mobo: Intel D945GCLF2D
HD: Seagate Barracuda 80gb
Chip: Intel atom 330
Ram: Super Talent 1gb DDR2 667
Screen: Lilliput EBY701 Enhanced drop in from Mo So Co(http://store.mo-co-so.com/enhanceddr...nel-p-201.html)
Pics:


Registered User
Joined: Sep 2006
Posts: 453
Likes: 0
Thread Starter
Registered User
Joined: May 2009
Posts: 23
Likes: 0
From: Redmond, WA
The placement for the sub was a pain in the ya. I do not have many fab pics but ill re-post some of the ones i have.
The idea behind the placement was, as bad as it sounds, i wanted to be able to fit my golf clubs in the trunk still Im guessing that hobby will go away soon since i suck at it and RX8's insipre you to spend all your money on them.
The sub bolts in where the old bose amp went(4 bolts) from the inside of the sub. There are two bolts on the outside wings of the sub for extra support. Looking back at it i didn't need to bolt the outside wings since the thing is so light anyway and the only weight is concentrated where the sub mounts up but overkill is always a good thing.
Once bolted i used a decent grade liquid gasket to seal up where the bolts go through on the inside of the box to ensure there were no air leaks but it would allow me to remove the sealant later if needed to unmount the box. I also coated the inside of the box with spray sound deaden material/undercoating for a solid sounding box.
I did the usual construction method:
1. built a wood frame
2. put down some cloth down/fiber glass cloth/fiberglass matt one at a time and
soaked it with resin
3. some bondo/body filler
4. undercoated the inside
5. About 15 layers of paint and alot sanding/fiting tests
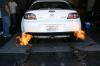
Here are some fabrication pics durning the process, unfortunately i did not get any of the wood frame it would have shown how the box fits in that area the best.


Sorry for the cellphone quality pics :/
Btw i like the accessories you have going with your PC WarmFreedom, is that a fusion brain for the steering wheel controls?
The idea behind the placement was, as bad as it sounds, i wanted to be able to fit my golf clubs in the trunk still
Im guessing that hobby will go away soon since i suck at it and RX8's insipre you to spend all your money on them.The sub bolts in where the old bose amp went(4 bolts) from the inside of the sub. There are two bolts on the outside wings of the sub for extra support. Looking back at it i didn't need to bolt the outside wings since the thing is so light anyway and the only weight is concentrated where the sub mounts up but overkill is always a good thing.
Once bolted i used a decent grade liquid gasket to seal up where the bolts go through on the inside of the box to ensure there were no air leaks but it would allow me to remove the sealant later if needed to unmount the box. I also coated the inside of the box with spray sound deaden material/undercoating for a solid sounding box.
I did the usual construction method:
1. built a wood frame
2. put down some cloth down/fiber glass cloth/fiberglass matt one at a time and
soaked it with resin
3. some bondo/body filler
4. undercoated the inside
5. About 15 layers of paint and alot sanding/fiting tests
Here are some fabrication pics durning the process, unfortunately i did not get any of the wood frame it would have shown how the box fits in that area the best.
Sorry for the cellphone quality pics :/
Btw i like the accessories you have going with your PC WarmFreedom, is that a fusion brain for the steering wheel controls?
Last edited by RX8CW; Sep 21, 2009 at 08:27 PM.
The placement for the sub was a pain in the ya. I do not have many fab pics but ill re-post some of the ones i have.
The idea behind the placement was, as bad as it sounds, i wanted to be able to fit my golf clubs in the trunk still Im guessing that hobby will go away soon since i suck at it and RX8's insipre you to spend all your money on them.
The idea behind the placement was, as bad as it sounds, i wanted to be able to fit my golf clubs in the trunk still
Im guessing that hobby will go away soon since i suck at it and RX8's insipre you to spend all your money on them.HAHA, that's the same reason I was interested. I like to keep my golf clubs in the trunk, and I still play lacrosse and need to use the pass through to fit my long pole. Is this your first box? Difficulty level (of the guts/frame, aside from cosmetic)? Approx cost?
Thanks man, looks really good.

That looks reallllly good, very nice.
I've been planning on re-doing my previous carpc, but this time use the Metra as you did for the LCD mounting. I just quite haven't figured out the sound part. Exactly how is sound getting from the PC out? Through to the amp?
How would you suggest I do it if I wanted to keep the stock Bose setup?
I've been planning on re-doing my previous carpc, but this time use the Metra as you did for the LCD mounting. I just quite haven't figured out the sound part. Exactly how is sound getting from the PC out? Through to the amp?
How would you suggest I do it if I wanted to keep the stock Bose setup?
Last edited by alz0rz; Sep 22, 2009 at 09:56 PM.
Thread Starter
Registered User
Joined: May 2009
Posts: 23
Likes: 0
From: Redmond, WA
The lcd bezel was custom as well, the metra kit was too flat and plain for me( not trying to bash it, its a nice kit). I wanted more shape to the bezel so i molded it from the original bezel and went from there.
For sound i decided to use a 7.1 pci sound card and three of these, two of them go to the amp inputs on the 4 channel amp(visible in the pics) the other goes to the sub amp under the rack.
For the stock stereo integration you could use something like this and the use one of the 1/8 jack to RCA plugs to get your sound from the car pc to the stock stereo. There may be better sounding options out there, im not sure what they are however.
For mounting you could put it where the nav screen normally is, there was a custom dash nav cover(cant find the pic) someone did around here that was sweet! If i were to mount it in the nav location i would go that way.
My first carpc I integrated the LCD into the factory nav hood. Reason I did that was 1) because I really liked the OEM look (motorized) 2) I just used an ordinary aux input to the carpc, didn't have to deal with replacing the HU to get sound to the pc.
I wanted to do things a bit different this time around such as getting the LCD in the Metra kit like you did. And also with the advent of the Metra taking over all the A/C controls I could get rid of the OEM radio altogether..
I wanted to do things a bit different this time around such as getting the LCD in the Metra kit like you did. And also with the advent of the Metra taking over all the A/C controls I could get rid of the OEM radio altogether..
Last edited by alz0rz; Sep 23, 2009 at 12:19 AM.

VERY well done.
Couple points to improve on. First and foremost, although I'm sure you'll never do it, work on the finish of the dash piece. I love the buttons and USB port. I'm sure it was a ton of work. But the finish is still grainy and still looks homemade. Second, loom up your wiring. Both inside the PC case and along the amp. Makes a big difference. Third, what is in the corners of your amp/PC rack? Is that a screw/bolt going through the rack to hold it in place? Do what you can to help them blend in. Even painting the screw/bolt head black would help. Lastly, if you're not going to use the Mazda roadside kit, remove the holding strap. Just adds to the clutter of amp wiring.
Again, the install is beautiful. Well above average. Just some points to improve on that I noticed rather quickly.
Thread Starter
Registered User
Joined: May 2009
Posts: 23
Likes: 0
From: Redmond, WA
Thanks Firebirdude  finally some ideas on how it could improve, i was trying to figure out the next project/piece to occupy my time with but improvements can do that too. On a side note i was thinking of redoing the center rear spearker deck piece and molding in a webcam. Any ideas on what the best webcam/usb camera would be for recording some twisties?
The dash piece is coming out when i get a free weekend with 70+ degree weather. I had it all painted up and looking nice without a hint of orange peel before, then my lilliput screen started acting up. When i went to replace it some of the paint got messed up on the faceplate I then repainted it without doing a final wet sand and ended up with a sub par paint job with the orange peel. So when i get that nice/free weekend ill be taking it back out, wetsanding it down, and hopefully getting a nice finish this time around.
Im taking care of the wiring around/under the amp rack today, ive been in there messing with the lowpass filter on the sub amp so i had not finallized that wiring.
For the CPU wiring got any suggestions on what to use in there to wrap those up?
For the screws that your seeing im going to try and tuck them under the trunk liner that is covering the amp rack, if not ill paint them black.
And roadside tire kit strap gone... check.
Again any improvements are welcome, it gives me work to keep my time occupied(which i like).
finally some ideas on how it could improve, i was trying to figure out the next project/piece to occupy my time with but improvements can do that too. On a side note i was thinking of redoing the center rear spearker deck piece and molding in a webcam. Any ideas on what the best webcam/usb camera would be for recording some twisties?The dash piece is coming out when i get a free weekend with 70+ degree weather. I had it all painted up and looking nice without a hint of orange peel before, then my lilliput screen started acting up. When i went to replace it some of the paint got messed up on the faceplate
I then repainted it without doing a final wet sand and ended up with a sub par paint job with the orange peel. So when i get that nice/free weekend ill be taking it back out, wetsanding it down, and hopefully getting a nice finish this time around.Im taking care of the wiring around/under the amp rack today, ive been in there messing with the lowpass filter on the sub amp so i had not finallized that wiring.
For the CPU wiring got any suggestions on what to use in there to wrap those up?
For the screws that your seeing im going to try and tuck them under the trunk liner that is covering the amp rack, if not ill paint them black.
And roadside tire kit strap gone... check.
Again any improvements are welcome, it gives me work to keep my time occupied(which i like).


I assume you fabricated the faceplate yourself? You just mentioned custom, though I'm guessing you did.
Any chance you would be willing to fab up 1 or more additional faceplates for a fee? I've been planning my CarPC for a while now, and the Nav hood was my best option, but utterly impossible to find. This is a very very good runner up.
Awesome job on everything!
Any chance you would be willing to fab up 1 or more additional faceplates for a fee?
I've been planning my CarPC for a while now, and the Nav hood was my best option, but utterly impossible to find. This is a very very good runner up.Awesome job on everything!

Thread
Thread Starter
Forum
Replies
Last Post
AMOC
SE RX-8 Forum
1
Sep 9, 2015 05:14 AM