


2005 RX8 - LS1/T56 Swap


Thread Starter
Pistons Please
Joined: Sep 2013
Posts: 314
Likes: 13
From: Wasaga Beach, Ontario
Thanks. 1.75" tube should be pretty good. I did a lot of structural work at uni over 35 years ago Triangles are your best friend; anything else is inefficient and a potential weak point.
IMO Mazda's collapsible turrets and crash bar are a pretty good design for their intended purpose, contributing to the RX8's sound 30,000 Nm per degree stiffness. My starting points to improve rigidity are bracing between the 2 suspension turrets (not some namby-pamby aluminium bar hinged on turret extensions) and bracing between the A frame and suspension turrets (ie fender braces); stiffening at the front is behind those 2 in priority, particularly as the chassis rail isn't very tall so bracing on the collapsible turrets is relatively inefficient.
I may yet follow you in redoing the front end. I've come up with at least a dozen different designs for fitting the cooling systems (notably the rad, intercooler, oil coolers and all ducting), airbox and turbo to get the best balance of performance, space, work and cost, but nothing quite gels. Getting rid of the collapsible turrets would free up space for the inlet tube/snorkel to the airbox, solving the main issue for my favoured design, and if I'm doing that then I may as well look at the front structure as a whole . . . . . . . .
IMO Mazda's collapsible turrets and crash bar are a pretty good design for their intended purpose, contributing to the RX8's sound 30,000 Nm per degree stiffness. My starting points to improve rigidity are bracing between the 2 suspension turrets (not some namby-pamby aluminium bar hinged on turret extensions) and bracing between the A frame and suspension turrets (ie fender braces); stiffening at the front is behind those 2 in priority, particularly as the chassis rail isn't very tall so bracing on the collapsible turrets is relatively inefficient.
I may yet follow you in redoing the front end. I've come up with at least a dozen different designs for fitting the cooling systems (notably the rad, intercooler, oil coolers and all ducting), airbox and turbo to get the best balance of performance, space, work and cost, but nothing quite gels. Getting rid of the collapsible turrets would free up space for the inlet tube/snorkel to the airbox, solving the main issue for my favoured design, and if I'm doing that then I may as well look at the front structure as a whole . . . . . . . .
 I did a little bit of structure work in college in our "Applied Engineering" courses, but most of school was CAD and automotive design principles, which have mostly slipped from my mind thanks to beer, parties and females that consumed alot of my college days LOL
I definitely agree with you on the sound design mazda had on the front end of it. Overall it is good, and I was a little sad to have to alter it, and am still crossing my fingers I am happy with the outcome. The removal of the bar surely gives a huge amount of space to use the whole grille. I was hoping to be able to bring air in the grille, through the rad and exit the hood in a similar fashion to something like this:
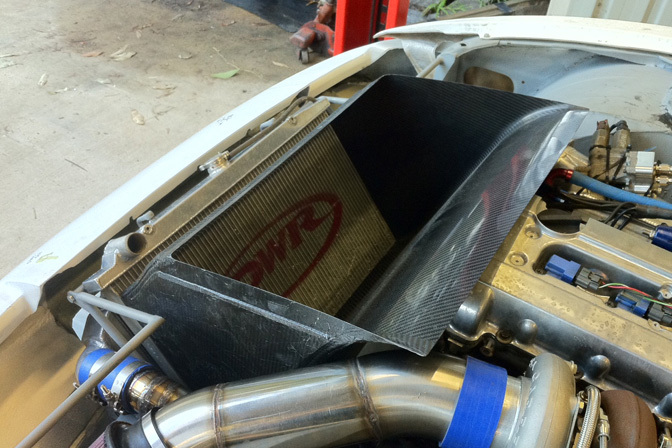
The only issue is 1. The LS has a unfavorable throttle body location for such a system, which I had thought maybe I could cross the intake through it and make ducting that kinda split out to the side, but then I would need to be lookign to relocate the fuse box, which is possible, but alot of effort that I am not entirely sure is worth it. Lastly, I would be a little concerned the opening couldnt be far enough up the hood to be out of a higher pressure airflow zone. Last thing I want is to put all the effort in, and it creates bad airflow on the front end of the car.
I think maybe the answer is some ducting to vent the air to the top of the bay, and then run an extractor hood that will let it flow out. Thoughts?
In regards to the rigidity of the front end, you may be surprised about how much the front end of the car flexes infront of the strut towers. When I hooked a crane on to lift the front end to drop the motor out the bottom, the frame horns will flex almost 0.5" up before the rest of the chassis follows. I know its a pretty much impossible to recreate in driving conditions kind of force, but it surprised me to see how flimsy it was. I think the tubular front section should stiffen that a fair bit by connecting into the rails that the fender bolts to.
Managed to get a little work done last night, I am officially fully stocked and ready for to work my *** off over the weekend and make a serious dent in what I have left to do.
Finished up my coolant container setup last night. I still need to put the fittings onto the lines where they hit the rad and engine, but I will do that after I have finished mounting those parts so I dont make anything too short. I had to do an aluminum hard line in one section where I needed to connect 2 fittings in awkward positions. I am not really happy that I had to do it, mostly cause aluminum tube is really ******* hard to bend without kinking it. Otherwise I am happy with the outcome! Loving all the braided lines in the engine bay of this thing!

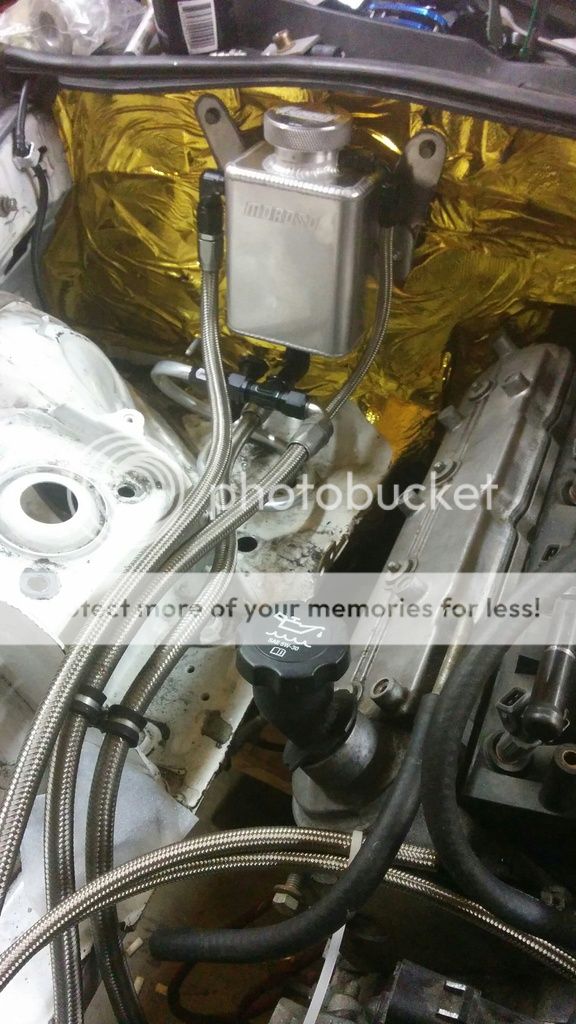
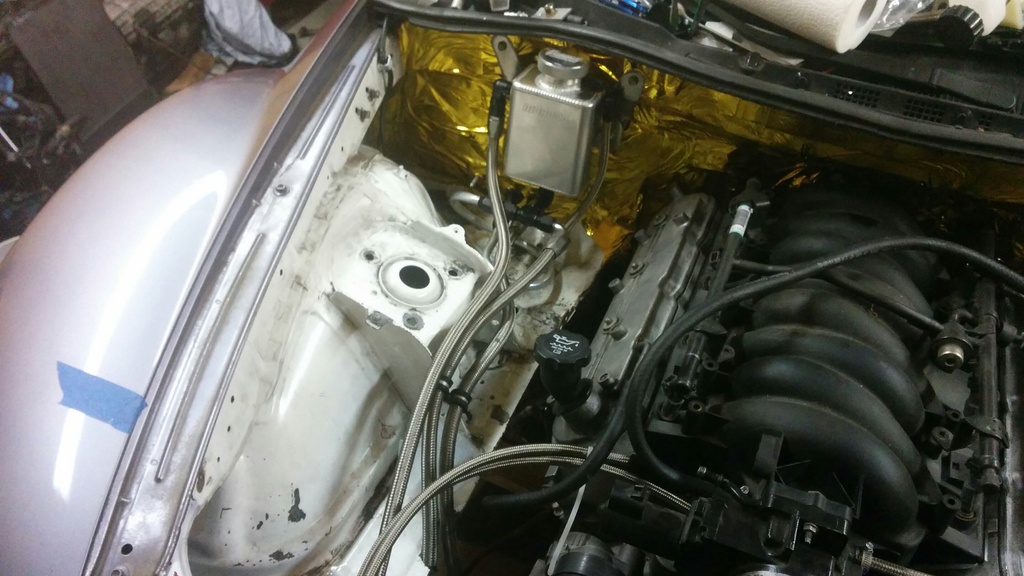
Also started a little project yesterday of making some carbon skinned windsheild drip trays! Really unsure about how these will come out, I had a spare set from my parts car so if I end up ruining them its not the end of the world lol.
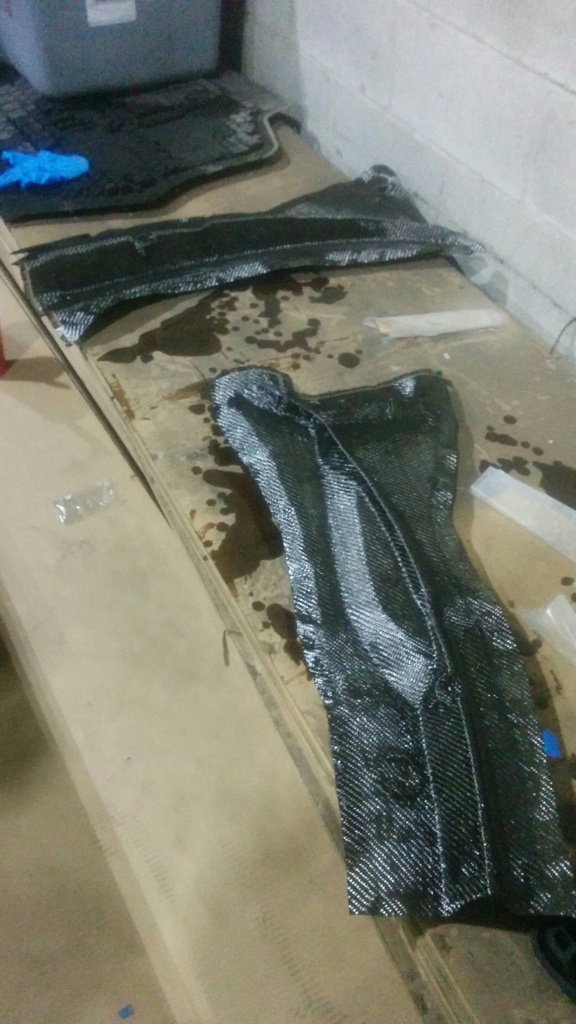
Much more updates to follow over the weekend as I make progress on everything else!

In the mean time, heres a few pics a good friend of mine shot a couple weeks ago!


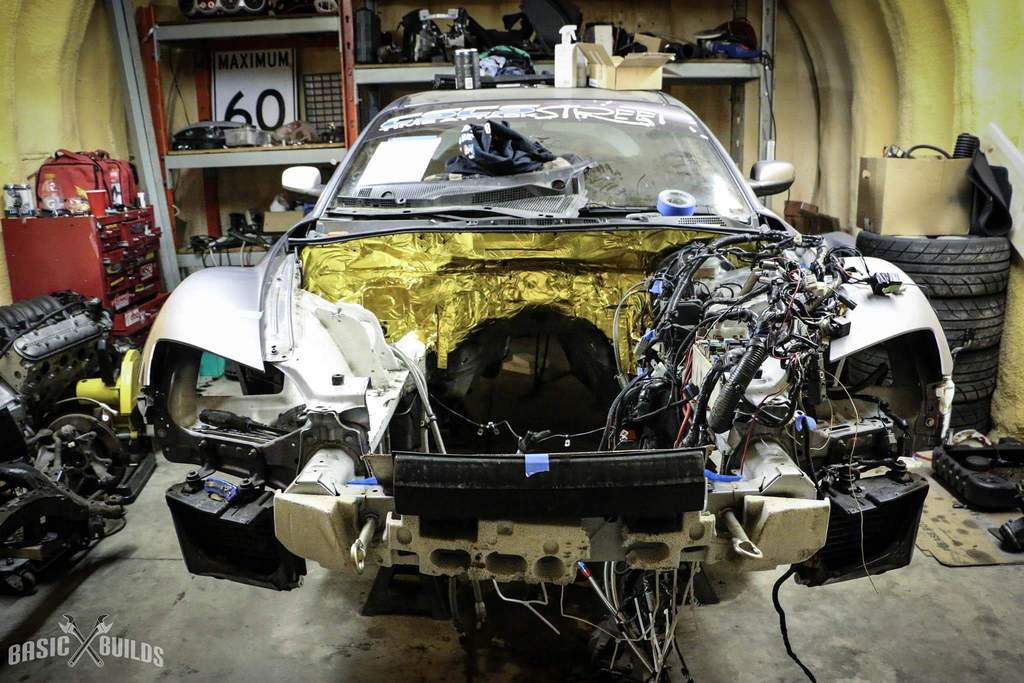
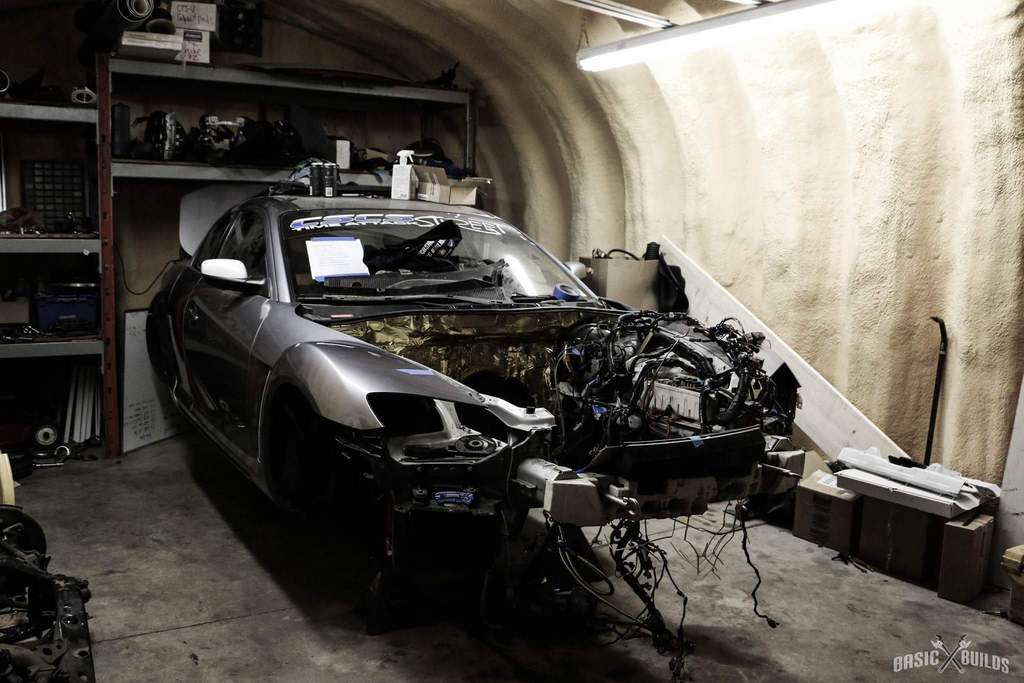
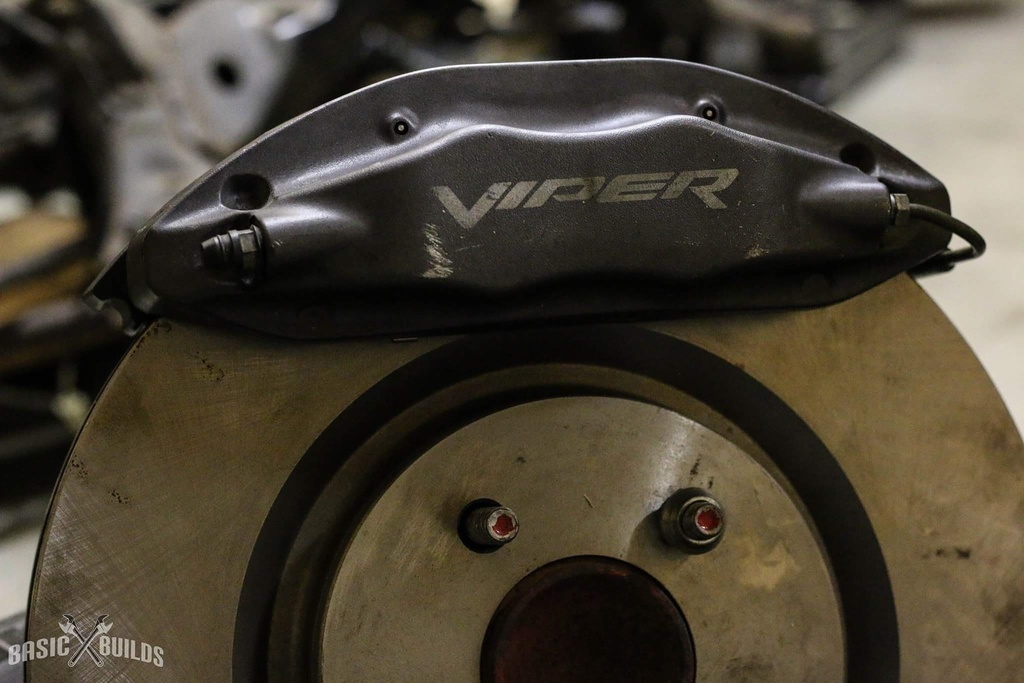
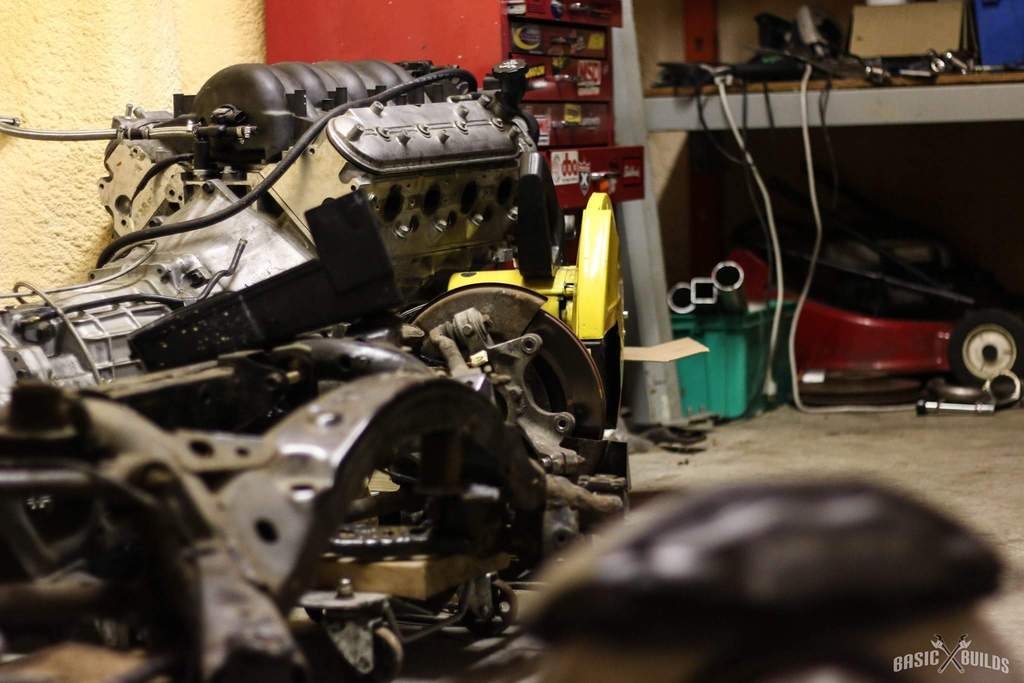

Registered
Joined: Jan 2010
Posts: 304
Likes: 5
From: On some other planet or Surrey, UK
Read my thread on aerodynamics for turbo & supercharged RX8s on the Rotary Swap Forum here. The bits I've done so far should give you more than enough info.
The front end's bending you saw is very much what I'd expect and fits in with my assessment that any improvements in stiffness there is a low priority for stiffening my body. As I see it, the chassis and bodywork are designed for maximizing the 2 main functions of handling and crash safety within an acceptable balance of cost, size and weight. Handling demands a stiff body for loads at the 4 wheel hubs where a stiff structure between the hub mountings is essential; the impact of stiffness ahead of the front axles and behind the rear axles decreases rapidly with distance from the axles (deformation is proportional to the square of the length). Crash safety demands a rigid structure around the occupants, matching the requirements for handling, and deformable energy-absorbing areas ahead of and behind this. Consequently, front ends ahead of the axle are designed to bend and crumple, particularly the parts ahead of the engine.
Ultra Racing have a good description of stiffening a chassis here.
The front end's bending you saw is very much what I'd expect and fits in with my assessment that any improvements in stiffness there is a low priority for stiffening my body. As I see it, the chassis and bodywork are designed for maximizing the 2 main functions of handling and crash safety within an acceptable balance of cost, size and weight. Handling demands a stiff body for loads at the 4 wheel hubs where a stiff structure between the hub mountings is essential; the impact of stiffness ahead of the front axles and behind the rear axles decreases rapidly with distance from the axles (deformation is proportional to the square of the length). Crash safety demands a rigid structure around the occupants, matching the requirements for handling, and deformable energy-absorbing areas ahead of and behind this. Consequently, front ends ahead of the axle are designed to bend and crumple, particularly the parts ahead of the engine.
Ultra Racing have a good description of stiffening a chassis here.
Thread Starter
Pistons Please
Joined: Sep 2013
Posts: 314
Likes: 13
From: Wasaga Beach, Ontario
Read my thread on aerodynamics for turbo & supercharged RX8s on the Rotary Swap Forum here. The bits I've done so far should give you more than enough info.
The front end's bending you saw is very much what I'd expect and fits in with my assessment that any improvements in stiffness there is a low priority for stiffening my body. As I see it, the chassis and bodywork are designed for maximizing the 2 main functions of handling and crash safety within an acceptable balance of cost, size and weight. Handling demands a stiff body for loads at the 4 wheel hubs where a stiff structure between the hub mountings is essential; the impact of stiffness ahead of the front axles and behind the rear axles decreases rapidly with distance from the axles (deformation is proportional to the square of the length). Crash safety demands a rigid structure around the occupants, matching the requirements for handling, and deformable energy-absorbing areas ahead of and behind this. Consequently, front ends ahead of the axle are designed to bend and crumple, particularly the parts ahead of the engine.
Ultra Racing have a good description of stiffening a chassis here.
The front end's bending you saw is very much what I'd expect and fits in with my assessment that any improvements in stiffness there is a low priority for stiffening my body. As I see it, the chassis and bodywork are designed for maximizing the 2 main functions of handling and crash safety within an acceptable balance of cost, size and weight. Handling demands a stiff body for loads at the 4 wheel hubs where a stiff structure between the hub mountings is essential; the impact of stiffness ahead of the front axles and behind the rear axles decreases rapidly with distance from the axles (deformation is proportional to the square of the length). Crash safety demands a rigid structure around the occupants, matching the requirements for handling, and deformable energy-absorbing areas ahead of and behind this. Consequently, front ends ahead of the axle are designed to bend and crumple, particularly the parts ahead of the engine.
Ultra Racing have a good description of stiffening a chassis here.
So for an update on the weekends work:
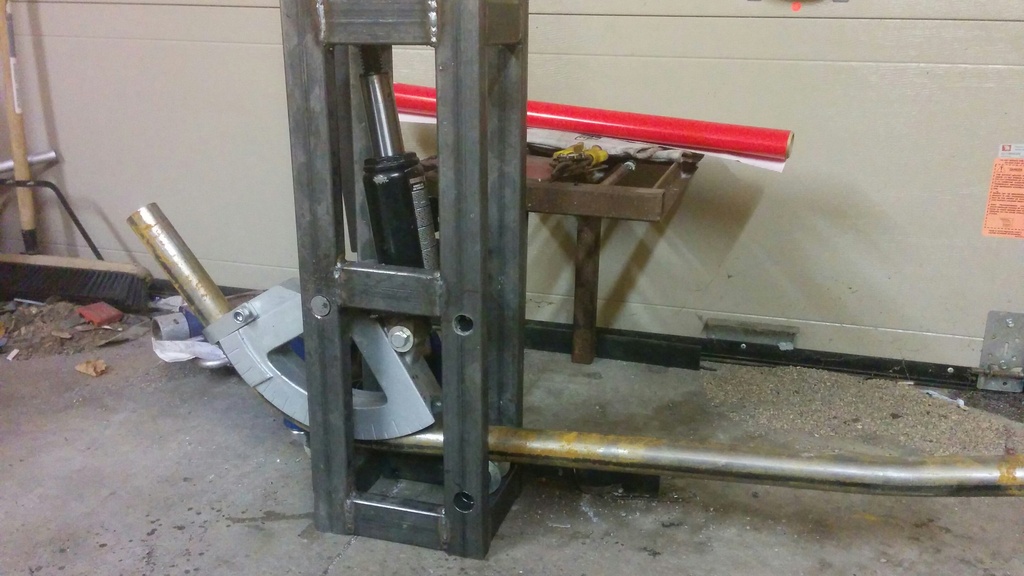
I had hoped to get a little more done like always, but my first hurdle I had to cross on the weekend was getting my tube bender fabricated, which was going great up until I needed a 1" hole saw, the first one I got from Home Depot melted its teeth off the second I touched it, so I had to go get some of the more expensive ones that did manage to make it through after a rather eventful battle, and a couple burned out drills lol.
The outcome wont win any awards for being a pretty piece, but it does work excellent!
So I wanted to focus mostly on the bash bar/front structure of the car over the weekend. I made a ton of progress on it, and am learning a huge amount as I go.
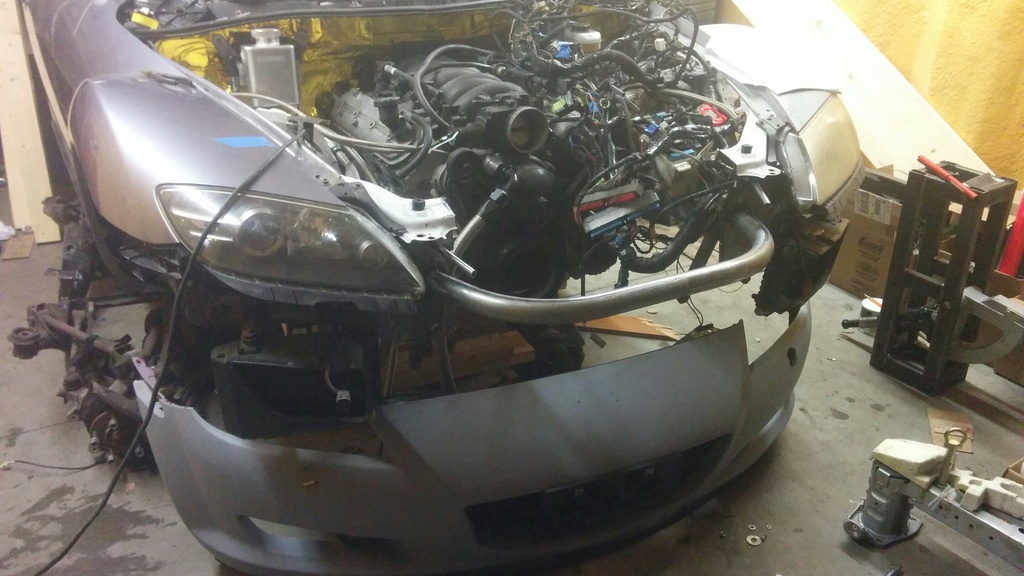
This is my very first attempt at making tube structure, and it is merely tacked together at this point to confirm my shapes of everything, and I will need to disassemble it to notch the pipe more so everything fits flush before getting welded.
I had thought about doing 1 big bar that reached across to beneath each headlight, but then I was concerned that I was going to have trouble bending 1 big bar in my first attempt wtih the bender and would end up ruining a bunch of material. I also wanted the strongest section to be between the frame horn's as there is really no strength out beside the headlights.
This is the first section I made up to go into the center.
From there I moved on to figuring out the side bar's. This is what I came up with, it seems to fit quite well, and I believe will offer all the strength needed, as this area probably wasnt necessary to brace.
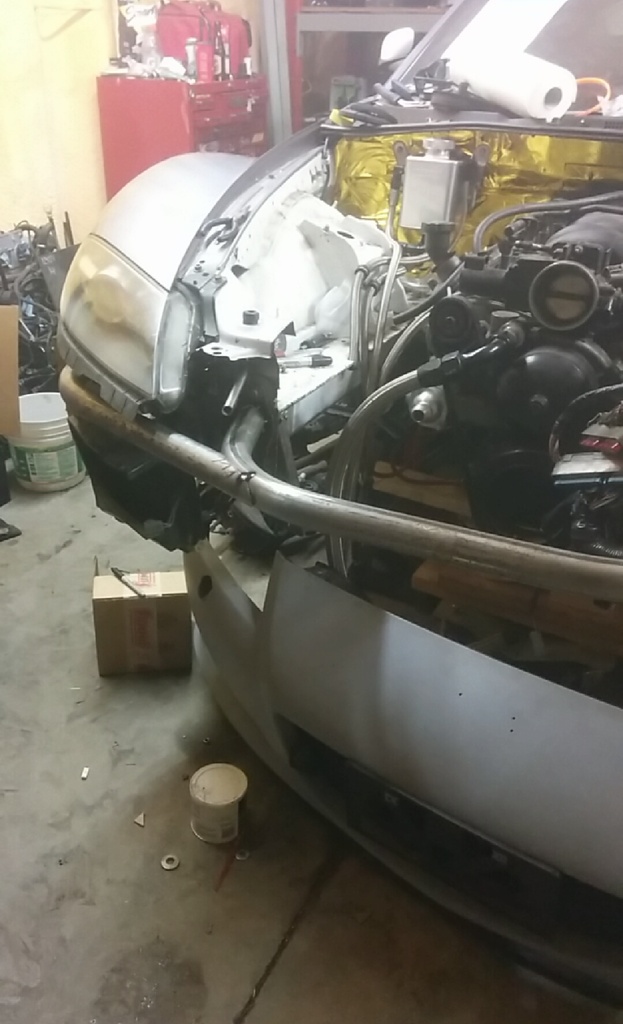
As I noted, still needs to be notched and fitted properly.
I removed the sections on the stock crash bar that the bumper bolts to, as those will be reused. I then fired up the plasma to remove some of the rad support bar, this fits flush around the headlights and I will make a little bracket to mount the headlight/fender fastener area to the bar that runs into the fender rail.
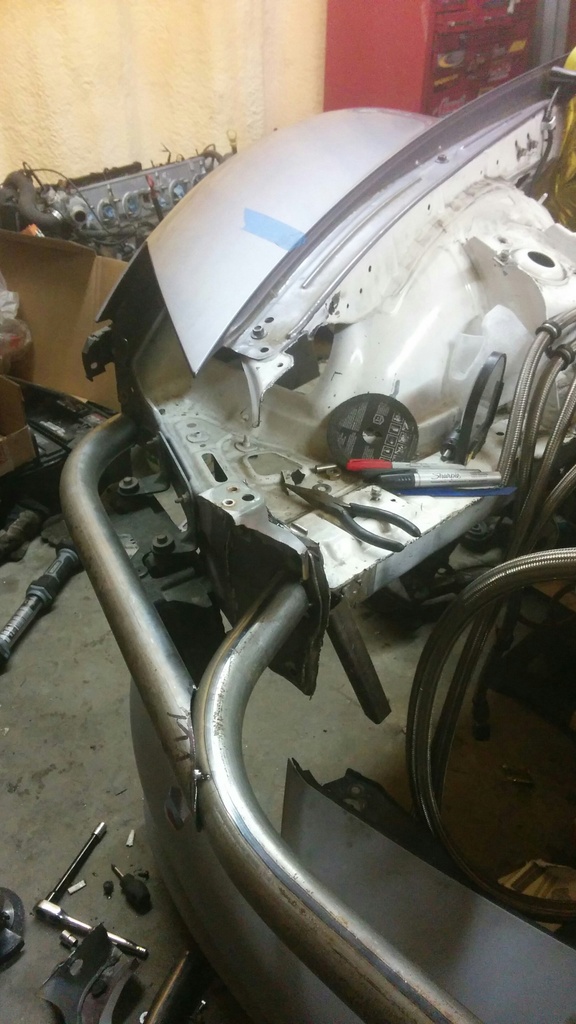
Then I started working with the bar that will run up into the fender. This was a little complex for me to solve, being a little more elaborate in shape and needing to do more math to figure out where the die needs to be positioned on the pipe to have my bend end up where I want it.
Up in the rail I will be making a 12g plate section that the bar fits into and the section will fit tight into that rail to adapt it from the square stamped section to the tube. I believe this bar should assist in rigidity of the front end of the car.
again, not perfect, but I am getting better as I go.
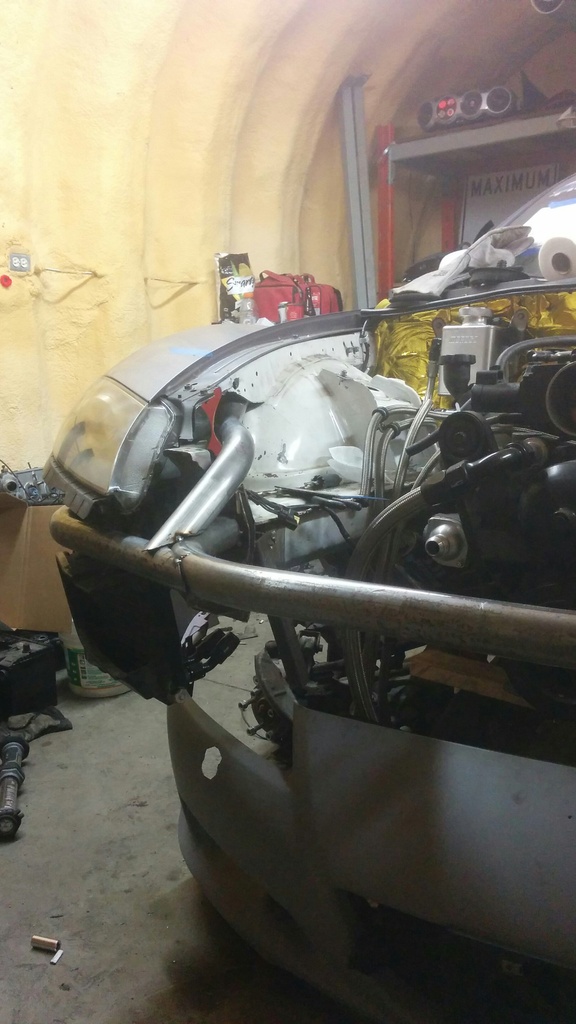
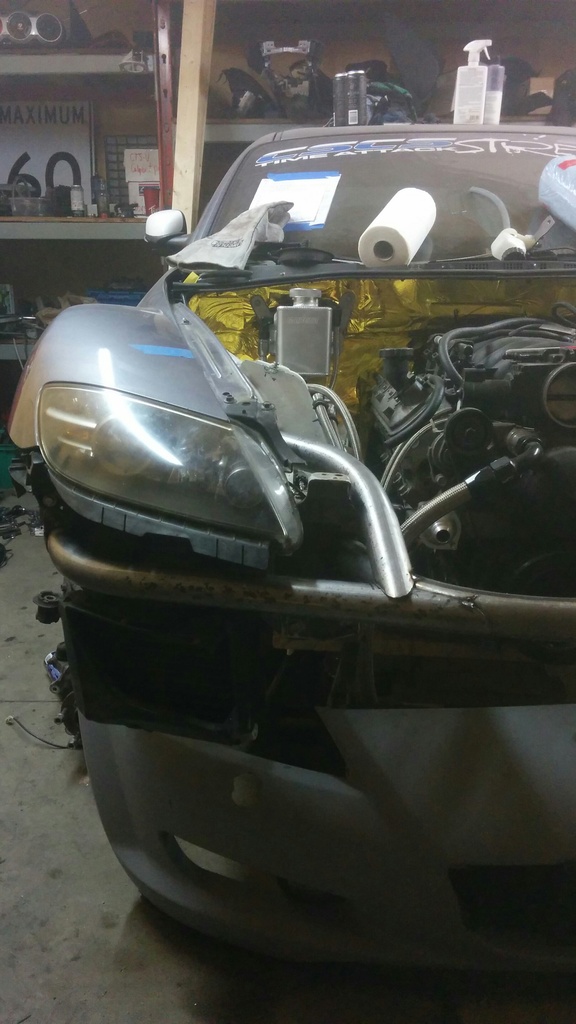
I test fit the bumper and the bars fit beautifully behind it. I am going to put some roll bar padding on the front of the bar so the bumper rests onto foam rather the vibrating against the metal bar.
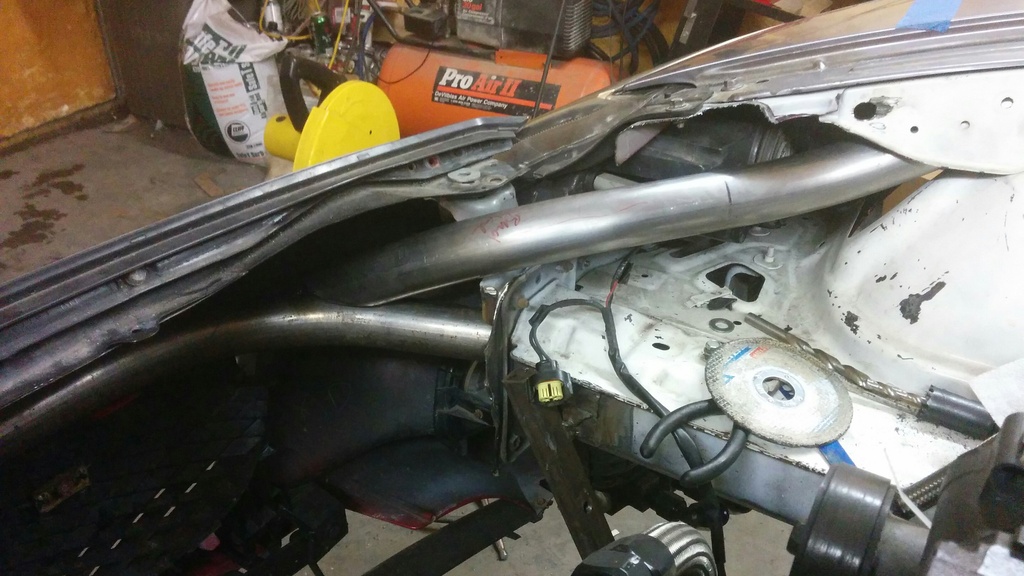
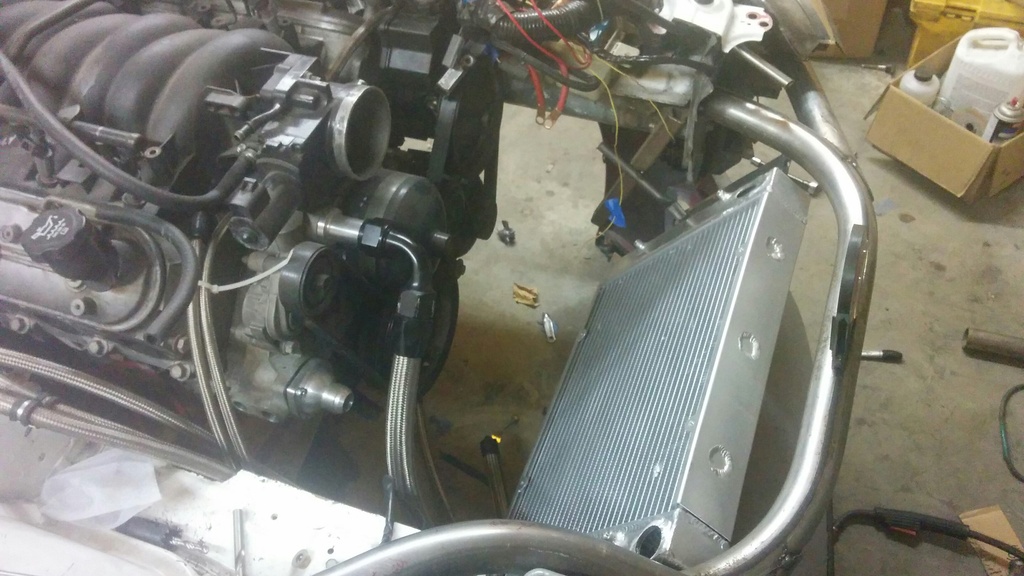
So with the one side mocked up, I decided to do a mockup with the radiator to measure out the tubes that will come down and meet its bracket. Its using thin tube right now to hold it in place so I can measure and notch 2 vertical bar's that will have flange brackets on the base of them for the rad to bolt to.
I was probably getting a bit ahead of myself here but if something needed to change, it was better to know now.
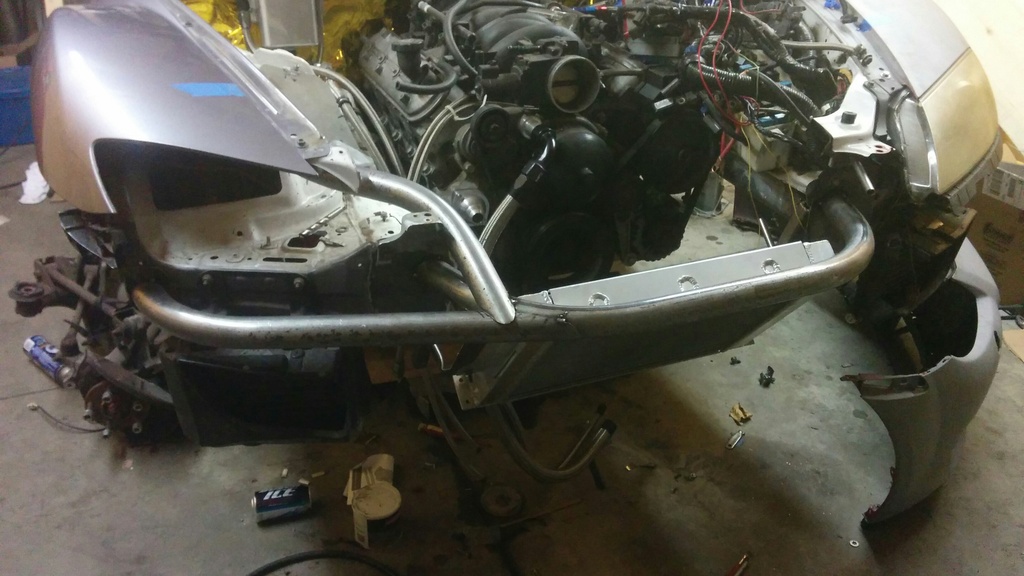
Another shot for an idea of the fit of it. The rad is back enough from the bumper that I can duct air into it well.
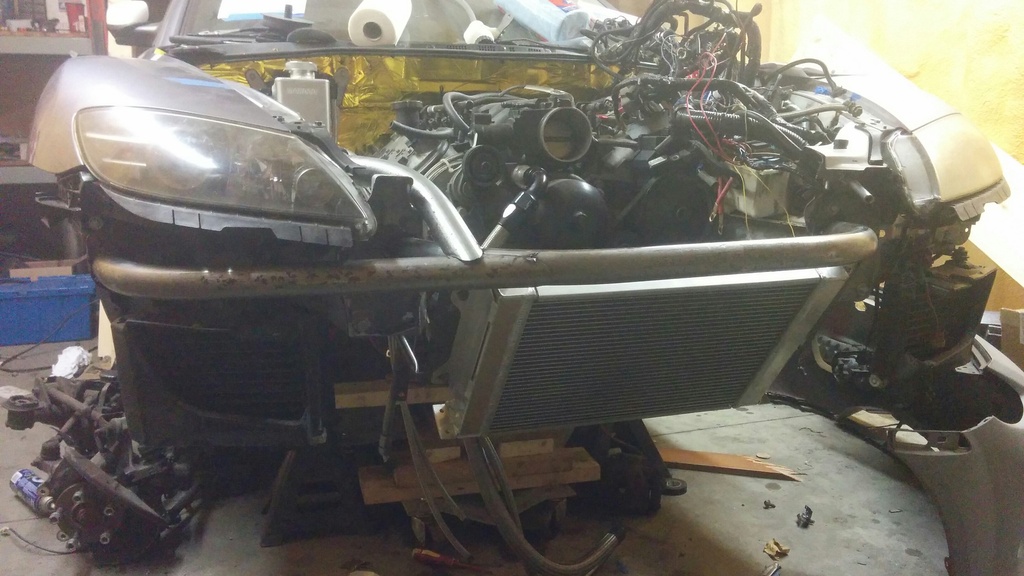 I then fit the second extension out to under the headlight on the drivers side. Again, just tacked in place and needs more massaging work.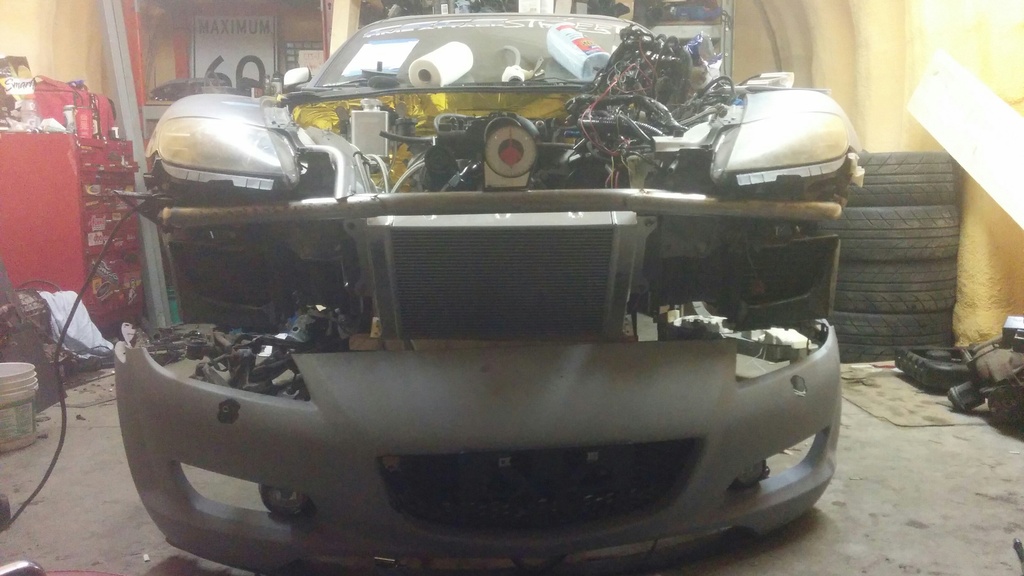
I am pretty happy with the outcome so far!
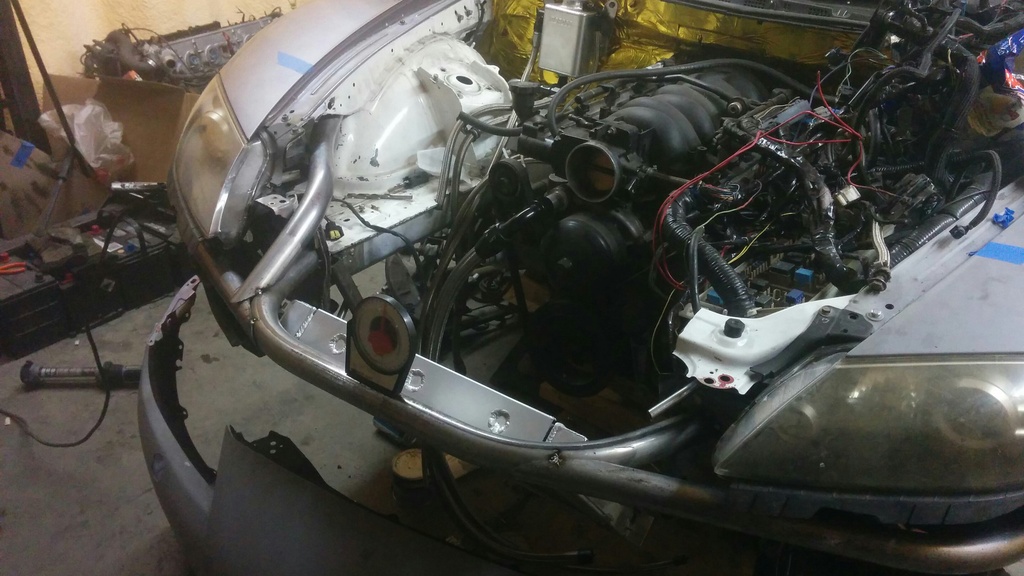
I ran out of tube over the weekend, so I wasnt able to make the second extension to meet up into the drivers side fender rail, nor was I able to make little kicker braces that will extend from the bar leaving the frame horns to the bottom of the plate that meets them which will help for strength in the event of an accident.
So this is about how I ended the weekend. I am hoping to pick up more tube today so I can work on the other side fender brace tonight, and also the radiator mounting. Id be hard pressed to say its 40% complete at this point, alot to go but I am pretty happy with how its progressing especially for my first attempt!
Hoping to increase my confidence with using the bender so I can move to making a roll bar for it by spring.
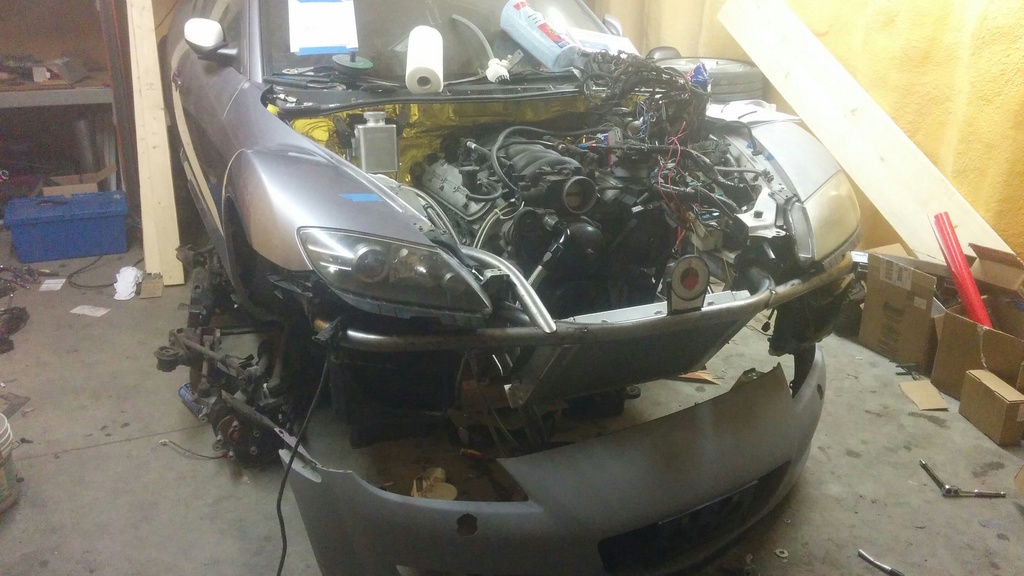
Heres an idea for how much space I have infront of the engine to work with air ducting out the hood. What do you think Ian?
If I wanted to boost it, id have tons of space for activities! But I dont want the front end weight so its staying N/A for now

Registered
Joined: Jul 2012
Posts: 39
Likes: 0
From: Melbourne, Australia
If I had the ability to do 5% of what you do, I'd be a happy man my friend. This thread is a solid inspiration to get my project going!
With regards to the weight added by the turbo's, have you considered a rear mount turbo?
With regards to the weight added by the turbo's, have you considered a rear mount turbo?
Thread Starter
Pistons Please
Joined: Sep 2013
Posts: 314
Likes: 13
From: Wasaga Beach, Ontario
Glad I can be some motivation to get yours rolling!! I have thought a bunch about every different way I can think of to do a turbo setup with the least penalty, but I cant find a balance I am happy with.
The #1 thing I need to worry about is balance, and throttle response, especially for my home track where a slow spool up would result in 60% of the track being in bad spots of the powerband.
The main issue with the rear mount is spool time, as they are rather sluggish to pressurize all of the tubes they deal with, and the other issue is I am not sure how I could run a charge pipe up without it being heated by the exhaust as there is not a lot of space to work with.
I think the only way I could achieve the spool times I would like would be a setup such as a turbo on the small side, say a T67, and run it with dual wastegates so I have alot of waste flow for higher RPM to keep boost creep away and keep from choking the motor. I believe that would give me rather fast spool times, and likely be acceptable for my application, but the big trade off for that setup is 70+ lb of weight added infront of the front axle center line, which is where I want it least.
Ive gone through cost comparisons and everything, and I think based on what I want out of the car, my best bet is to stay N/A. The money I would invest in a good quality turbo build, I could build a reasonably comparable in cost 7.0L engine, which is not too tough to squeeze 600whp out of while staying N/A. That is a long way down the road for me as I am already in way over my head cost wise with this so far LOL.
Its been a hectic week for me, so I havent got as much completed as I would have liked to, but such is life I suppose lol.
I did managed to get the engine mounts tacked together and sitting in the car, also got my heater hoses and radiator feeds finished! Waiting for my buddy to finally TIG the fittings onto my rad, we keep hitting hiccups as we try to get our new TIG welded up and running, hopefully this weekend I can FINALLY get the ******* on there.
Heres a few shots of how she is looking right now
 There should be some hose seperators arriving this week which will clean up the routing of the lines!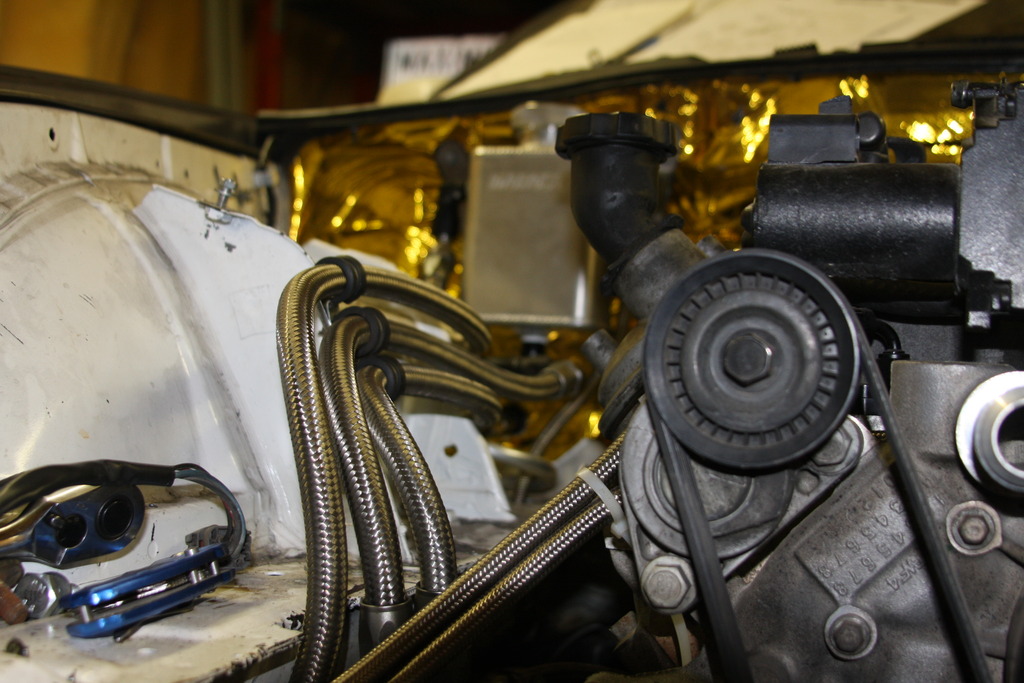
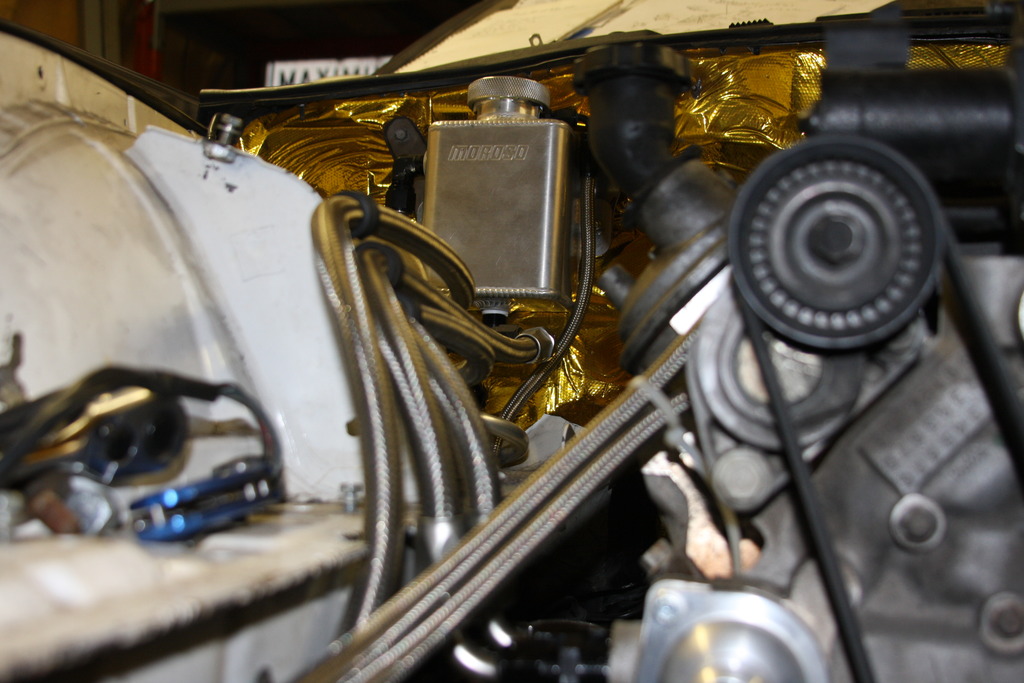
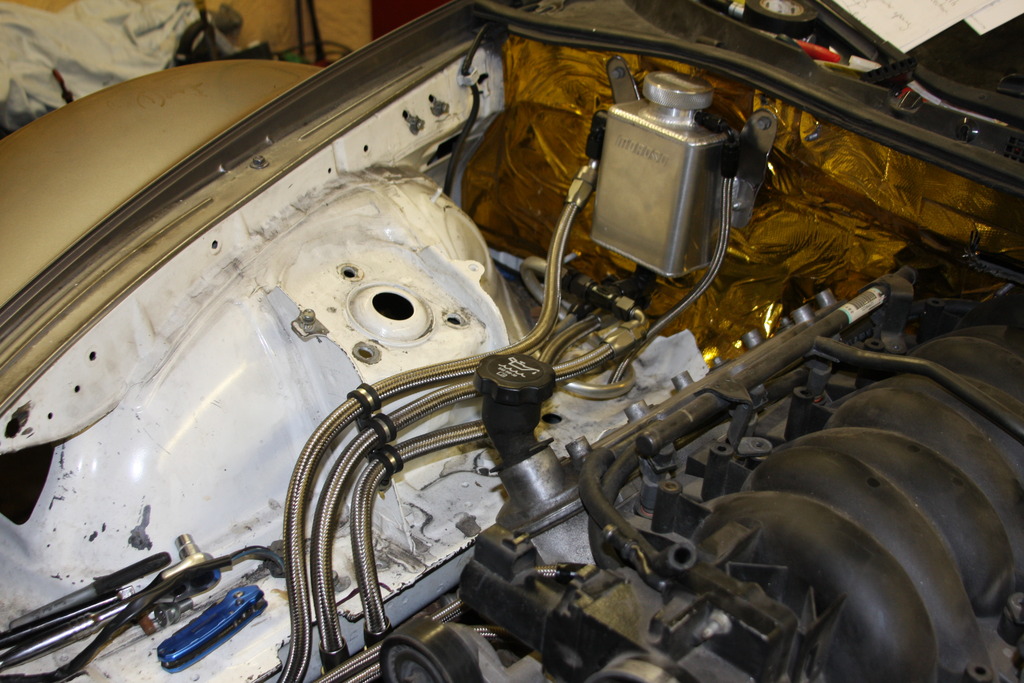
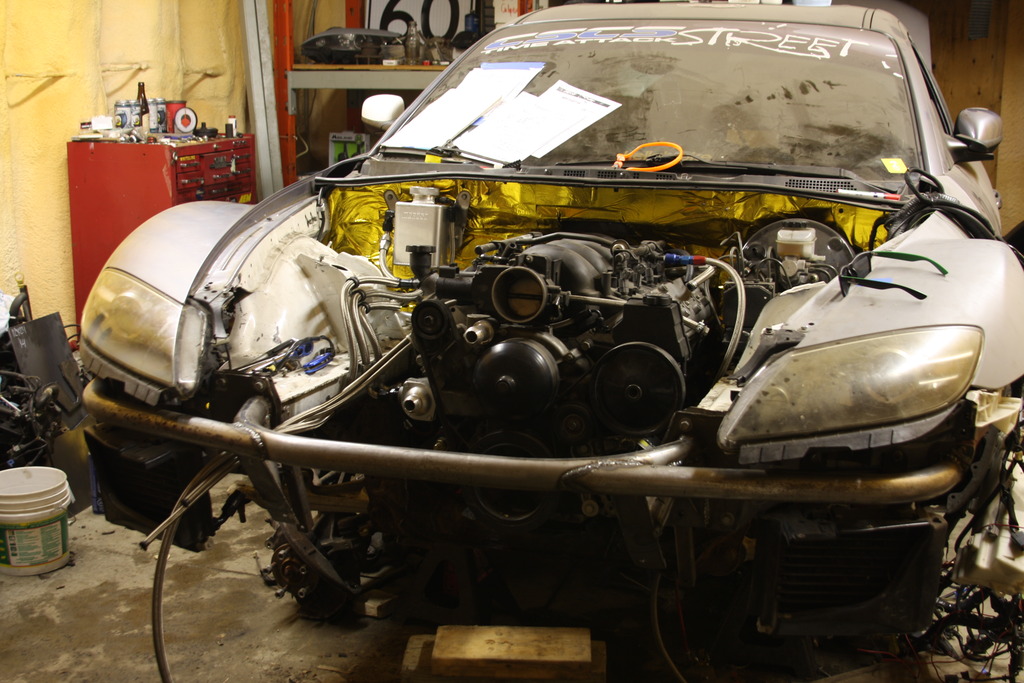
Very excited about how the braided lines are coming out!
On another note of a project we are working on, tonight we will be doing testing on our CAN Gateway module that will be making the RX8 cluster function in its entirety as factory! I will update further along, once we complete testing tonight, we are going to be working with a buddy of mines RX8 on the weekend to confirm that our part that will make EPS work WITHOUT retaining the factory PCM, is also good to go! We are very very excited on our progress with this, I will be uploading video of our testing this week!
From there, once all testing is finished, we will be moving onto making up a plastic housing to put the boards into, and we are aiming to have this on the market, ready for shipping by the end of April 2016!


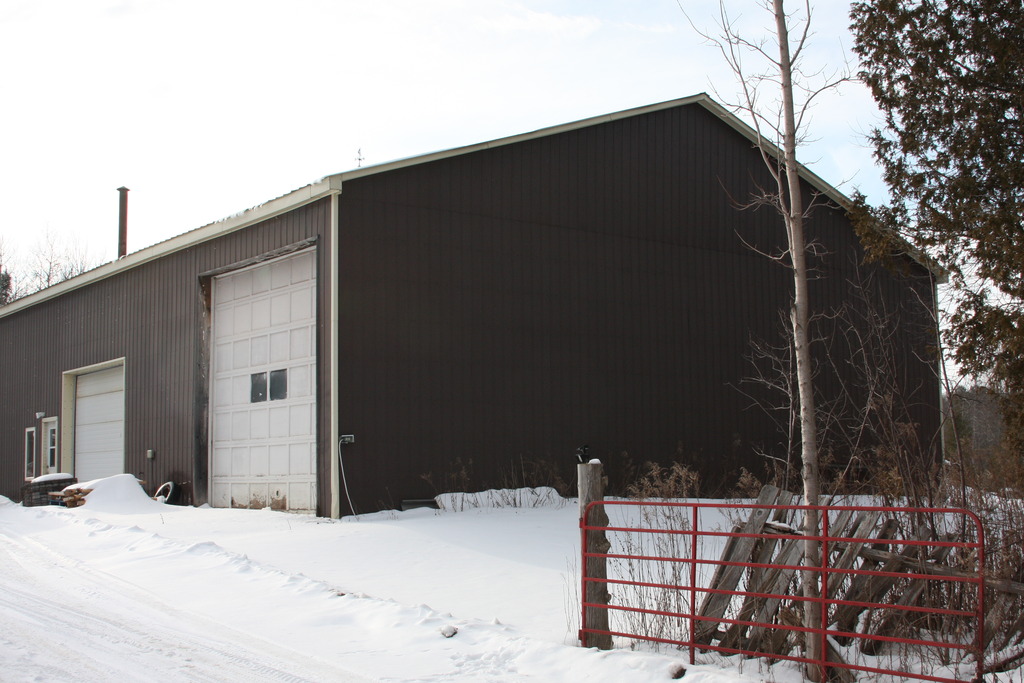
So this is a big life step for me that I am both insanely excited, and pants shittingly terrified about, but I have officially signed the lease on my first commercial unit, and over the next month or so I am going to be tooling up, setting up and getting prepared to start my own business, and finally make good on all of the swap offerings I have been planning over the past year or so!
I get the keys on February 15th to being my cleanup in it. I need to wash and paint the floors, do some clean up on the walls, update lighting, tighten up any gaps that will leak heat etc. Then by the end of February I will have my RX8 in and back on the surgery table!

Life After 8K RPM....
Joined: Aug 2013
Posts: 617
Likes: 1
From: Toronto
Looks pretty good so far. The best part is you are doing it pretty much all by yourself :-)
Damn! I wish I had gone to engineering school instead of business school lol
I'd love to see the final product :-)
All the best and keep us posted.
Cheers,
Khurram
Damn! I wish I had gone to engineering school instead of business school lol
I'd love to see the final product :-)
All the best and keep us posted.
Cheers,
Khurram


What am I doing here?
Joined: Mar 2006
Posts: 3,606
Likes: 652
From: 2017 Miata RF Launch Edition
On another note of a project we are working on, tonight we will be doing testing on our CAN Gateway module that will be making the RX8 cluster function in its entirety as factory! I will update further along, once we complete testing tonight, we are going to be working with a buddy of mines RX8 on the weekend to confirm that our part that will make EPS work WITHOUT retaining the factory PCM, is also good to go! We are very very excited on our progress with this, I will be uploading video of our testing this week!
From there, once all testing is finished, we will be moving onto making up a plastic housing to put the boards into, and we are aiming to have this on the market, ready for shipping by the end of April 2016!
From there, once all testing is finished, we will be moving onto making up a plastic housing to put the boards into, and we are aiming to have this on the market, ready for shipping by the end of April 2016!
Thread Starter
Pistons Please
Joined: Sep 2013
Posts: 314
Likes: 13
From: Wasaga Beach, Ontario
My god guys,
Cant believe its been a month since I updated this
Unfortunately, I dont have any major updates at this time other then the shift into the new shop has been completed and I am finally getting back to work!
We are working on turning the shop into a service center/fab facility so I have been crazy busy trying to source some new tooling, organize some stuff to come in from across the pond, and a customer RX8 is in the shop for its LS swap to be completed!
Gotta get my *** in gear ASAP so I can have this thing making noise this summer!!
My brother has been making great progress on the module, and has been developing a specific board to use in it. He has strayed completely away from anything arduino based and has been using a different system that he has a much deeper level of ability to work with. Unfortunately that all I know as I am the builder, he is the computer guy haha! :p
More updates to follow. Got a little australian shepherd puppy in February and she has developed an appetite for my Nexus 5's. Looks like I need a third now.. lol. Then can get back to uploading pics!
Cant believe its been a month since I updated this
Unfortunately, I dont have any major updates at this time other then the shift into the new shop has been completed and I am finally getting back to work!
We are working on turning the shop into a service center/fab facility so I have been crazy busy trying to source some new tooling, organize some stuff to come in from across the pond, and a customer RX8 is in the shop for its LS swap to be completed!
Gotta get my *** in gear ASAP so I can have this thing making noise this summer!!
My brother has been making great progress on the module, and has been developing a specific board to use in it. He has strayed completely away from anything arduino based and has been using a different system that he has a much deeper level of ability to work with. Unfortunately that all I know as I am the builder, he is the computer guy haha! :p
More updates to follow. Got a little australian shepherd puppy in February and she has developed an appetite for my Nexus 5's. Looks like I need a third now.. lol. Then can get back to uploading pics!
Thread Starter
Pistons Please
Joined: Sep 2013
Posts: 314
Likes: 13
From: Wasaga Beach, Ontario
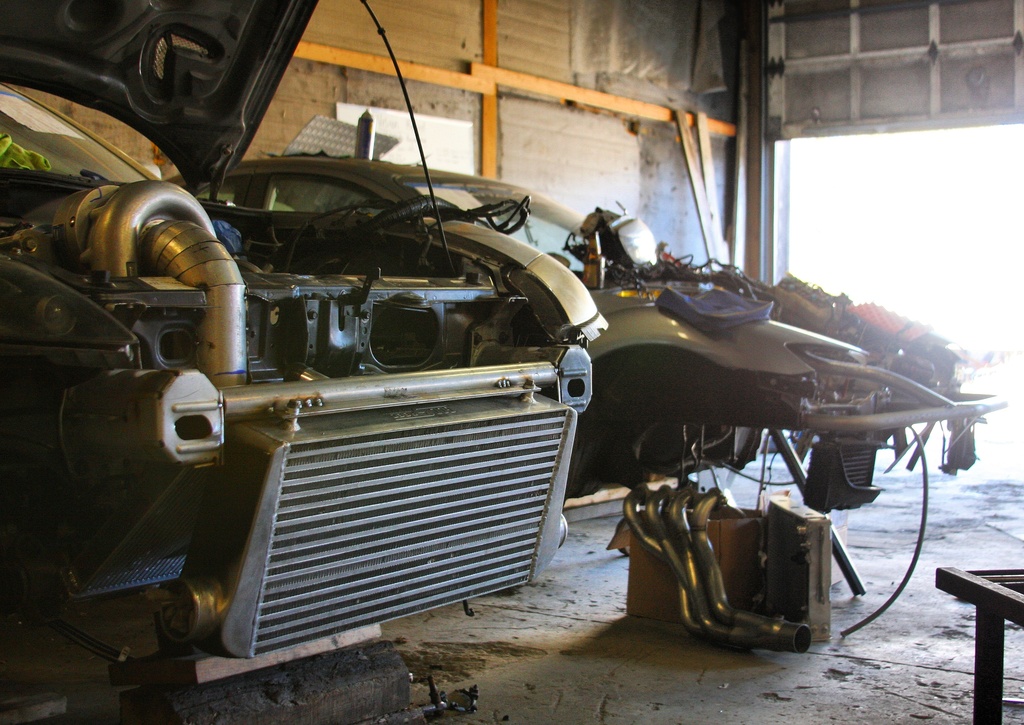
Feels almost a little sad to look at my RX8 being a coat rack for the past month, but I am working my *** off on a customer RX8 build that is by far a priority over mine. Seems like I havent been working, but I promise I am

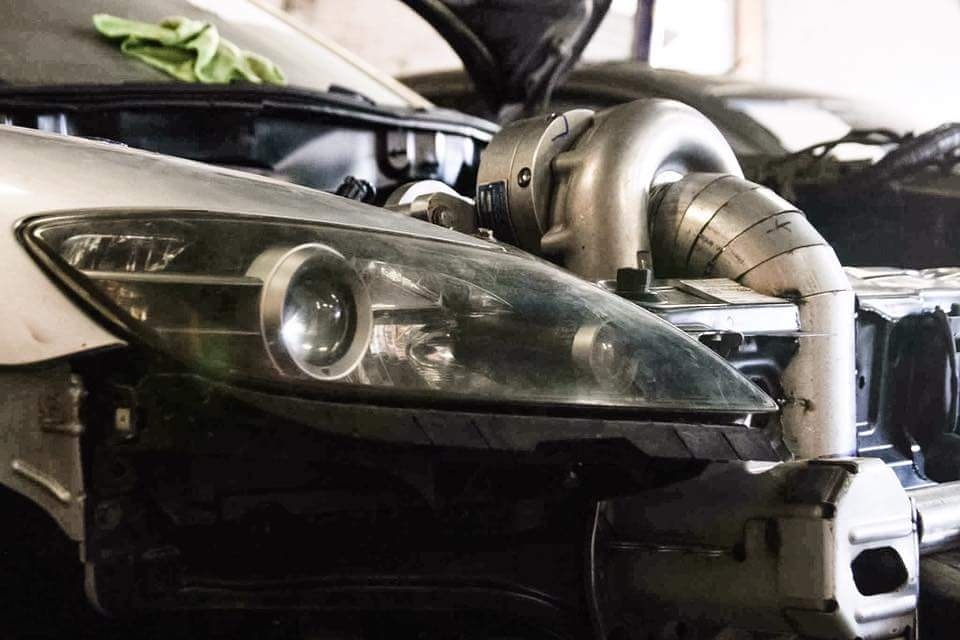
Bit to drool over in the mean time. Think this is the first centrifugal supercharged RX8 build?? Hood even closes
 This is in the early stages, lots of mockup parts visible here
This car has to be finished for April 9th, as that is when my import bond expires, then back onto mine! Will show some more pics when it is finished

New Member
Joined: Mar 2016
Posts: 1
Likes: 0
I have purchased a LS1 engine and transmission.
How much more in converson cost will I have to deal with until I can instal the engine an tranny, labor came out to $1300 , but I just need the cost of the conversion kit I need to make this work. And how much suspension work do I need done for this engine to work properly?

Registered
Joined: Mar 2014
Posts: 38
Likes: 1
From: Edmonton, AB
How much more in converson cost will I have to deal with until I can instal the engine an tranny, labor came out to $1300 , but I just need the cost of the conversion kit I need to make this work. And how much suspension work do I need done for this engine to work properly?

New Member
Joined: Jul 2014
Posts: 5
Likes: 0
It can be done cheap but you're asking to redo it.
I am the D1SC LS2 Rx8 owner that Sheldon is working with.
I believe majority of us are over 20k invested, myself included.
The cheapest we have seen on the group is around 7K for a junk yard build.
I am the D1SC LS2 Rx8 owner that Sheldon is working with.
I believe majority of us are over 20k invested, myself included.
The cheapest we have seen on the group is around 7K for a junk yard build.



Thread Starter
Pistons Please
Joined: Sep 2013
Posts: 314
Likes: 13
From: Wasaga Beach, Ontario
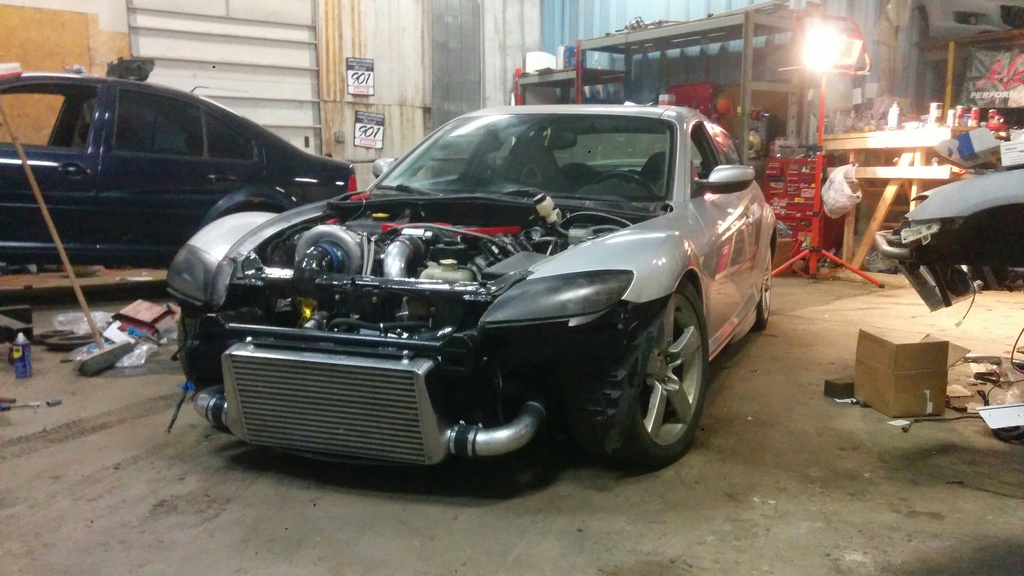
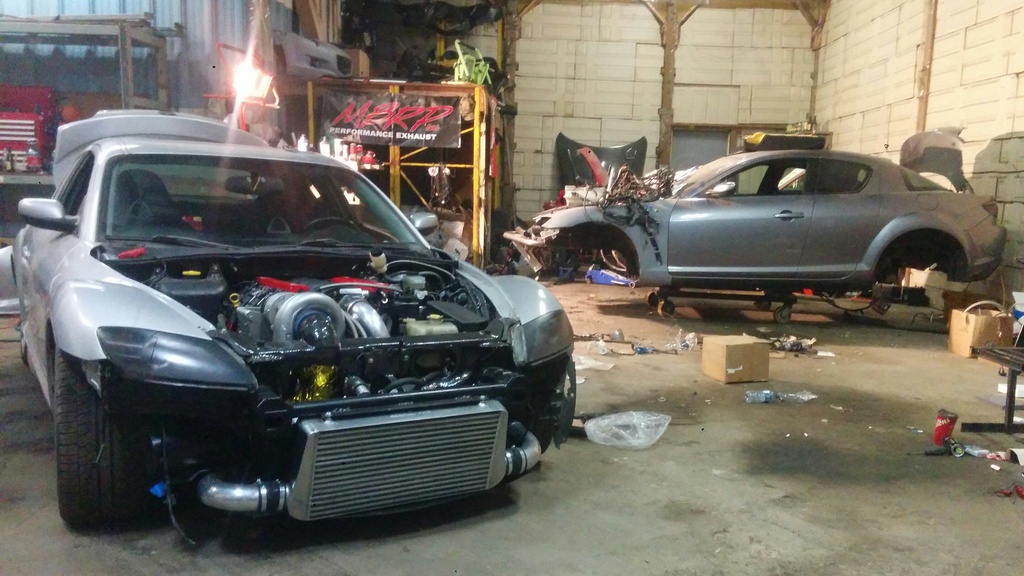
Couple shots of what Dakota's car looked like before it went state side over the weekend. Unfortunately I ran out of time on my import bond, and wasn't eligible for extension to finish testing and find all of the last issues. Managed to get 527 hours into it outside of my full time job over the 9 weeks I had it. It does run at least! and survived a little boot up the road and back to the shop!
Unfortunately, mine isn't likely to get far beyond the position its currently in this year, as I am pretty mentally & physically exhausted from working on these, and went broke during the past couple months from overhead costs. Gonna get my E30 fixed up so I can still do a little cruising this year and take a break from car building.
Unfortunately, mine isn't likely to get far beyond the position its currently in this year, as I am pretty mentally & physically exhausted from working on these, and went broke during the past couple months from overhead costs. Gonna get my E30 fixed up so I can still do a little cruising this year and take a break from car building.


Registered
Joined: Mar 2016
Posts: 11
Likes: 0
Need HELP ASAP!!!
First, i want to say sorry for stealing a thread, i cant post my own thread. i dont know why.
Any ways my question is, my Fuel Pump wont stay on when i turn my key forward. It throws fuel then it stops. I did an LS swap. I put in an old 1986 Chevy LS V8 350 5.7L motor. so its carbureted, not fuel injected. I just got finished putting everything the way it goes and noticed my fuel pump not staying on. Can Someone PLEASE HELP. im hoping to stay my car tomorrow.. I cant wait to hear my engines cam.
Any ways my question is, my Fuel Pump wont stay on when i turn my key forward. It throws fuel then it stops. I did an LS swap. I put in an old 1986 Chevy LS V8 350 5.7L motor. so its carbureted, not fuel injected. I just got finished putting everything the way it goes and noticed my fuel pump not staying on. Can Someone PLEASE HELP. im hoping to stay my car tomorrow.. I cant wait to hear my engines cam.



First, i want to say sorry for stealing a thread, i cant post my own thread. i dont know why.
Any ways my question is, my Fuel Pump wont stay on when i turn my key forward. It throws fuel then it stops. I did an LS swap. I put in an old 1986 Chevy LS V8 350 5.7L motor. so its carbureted, not fuel injected. I just got finished putting everything the way it goes and noticed my fuel pump not staying on. Can Someone PLEASE HELP. im hoping to stay my car tomorrow.. I cant wait to hear my engines cam.
Any ways my question is, my Fuel Pump wont stay on when i turn my key forward. It throws fuel then it stops. I did an LS swap. I put in an old 1986 Chevy LS V8 350 5.7L motor. so its carbureted, not fuel injected. I just got finished putting everything the way it goes and noticed my fuel pump not staying on. Can Someone PLEASE HELP. im hoping to stay my car tomorrow.. I cant wait to hear my engines cam.
Registered
Joined: Mar 2016
Posts: 11
Likes: 0

Registered
Joined: Mar 2016
Posts: 11
Likes: 0
i just tried posting a pic so you can see what im talking about.. its a '85 i believe.. i got it off a Rat Rod. anyways it says the picture is going to need approval before its posted.
Last edited by v8_rx8; Jul 1, 2016 at 12:25 AM. Reason: felt like i shouldnt put my personal info yet

