
2005 RX8 - LS1/T56 Swap


Thread Starter
Pistons Please
Joined: Sep 2013
Posts: 314
Likes: 13
From: Wasaga Beach, Ontario
2005 RX8 - LS/T56 [Updated: Now 1.8T stroker Audi 20V ]
Hey Guys,
Building a 2005 RX8 with 102,000km that I picked up on the cheap in toronto for $2800 and immediately ripped it apart for the swap. Well, ended up buying a few duramax's which turned out to be insanely expensive and the car sat for about a year bouncing between garages until I could finally get to it.
Anyways, that time has come. Originally was going to do a single front mount TC78 turbo LS1 setup, but after some thought about what I really wanted from the car, i ditched the turbo plans and decided on a N/A setup for weight and balance concerns. Picked up a T56 in need of some TLC for $400, and have enough parts laying in the garage to build a pretty potent LS1.
I am going to fabricate everything for this car as I have much more time then money lol, Starting this thread so I can log my progress and help anyone else if need be, not going to get too much into the plans for it as there is a decent amount of skepticism towards these builds. Heres to hoping I can finish it lol.
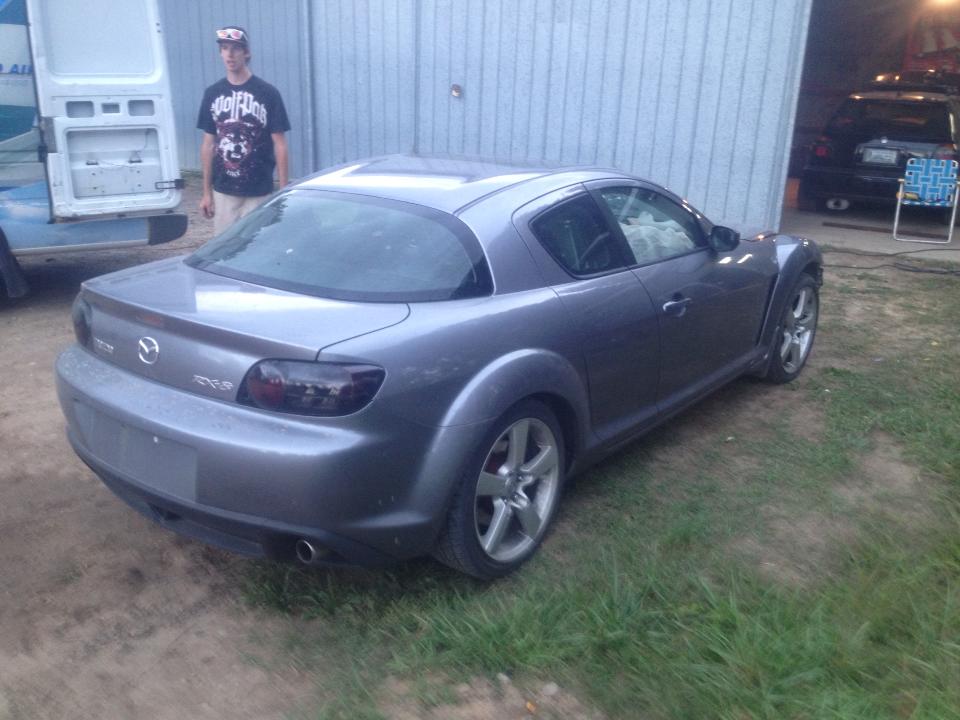
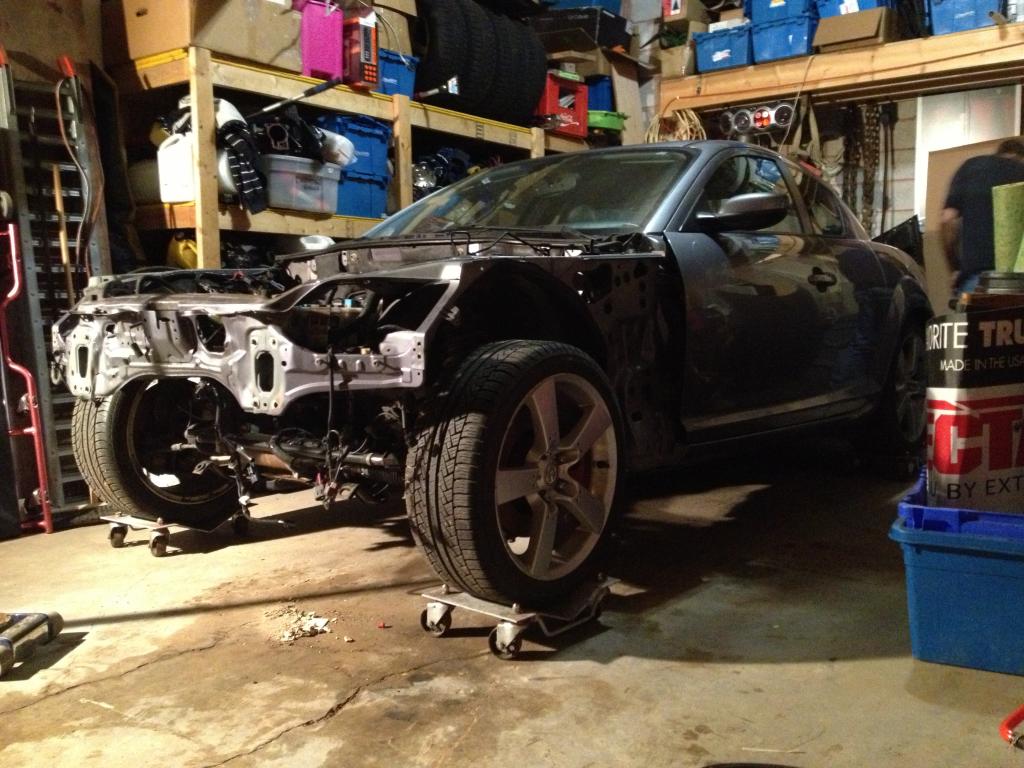
The victim:
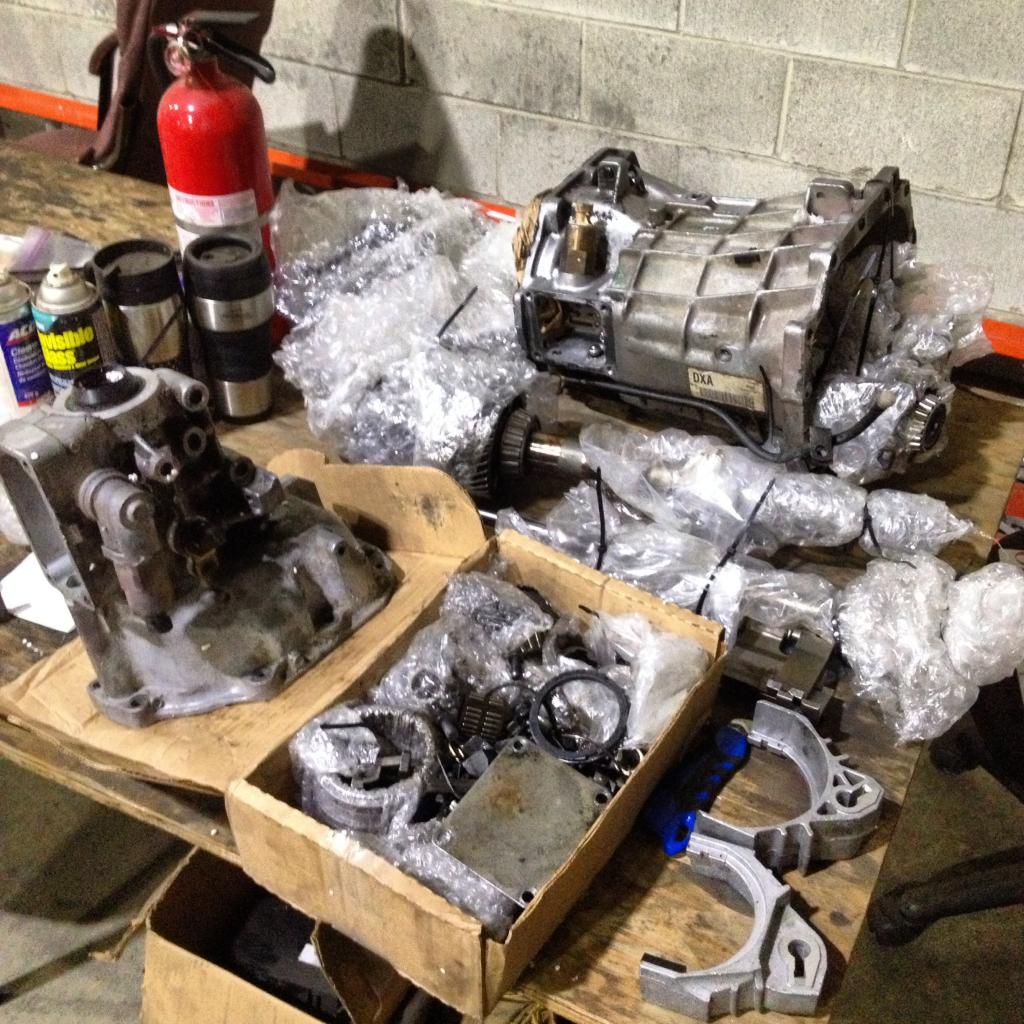
Pile of T56 guts, thankfully these are super easy to rebuild
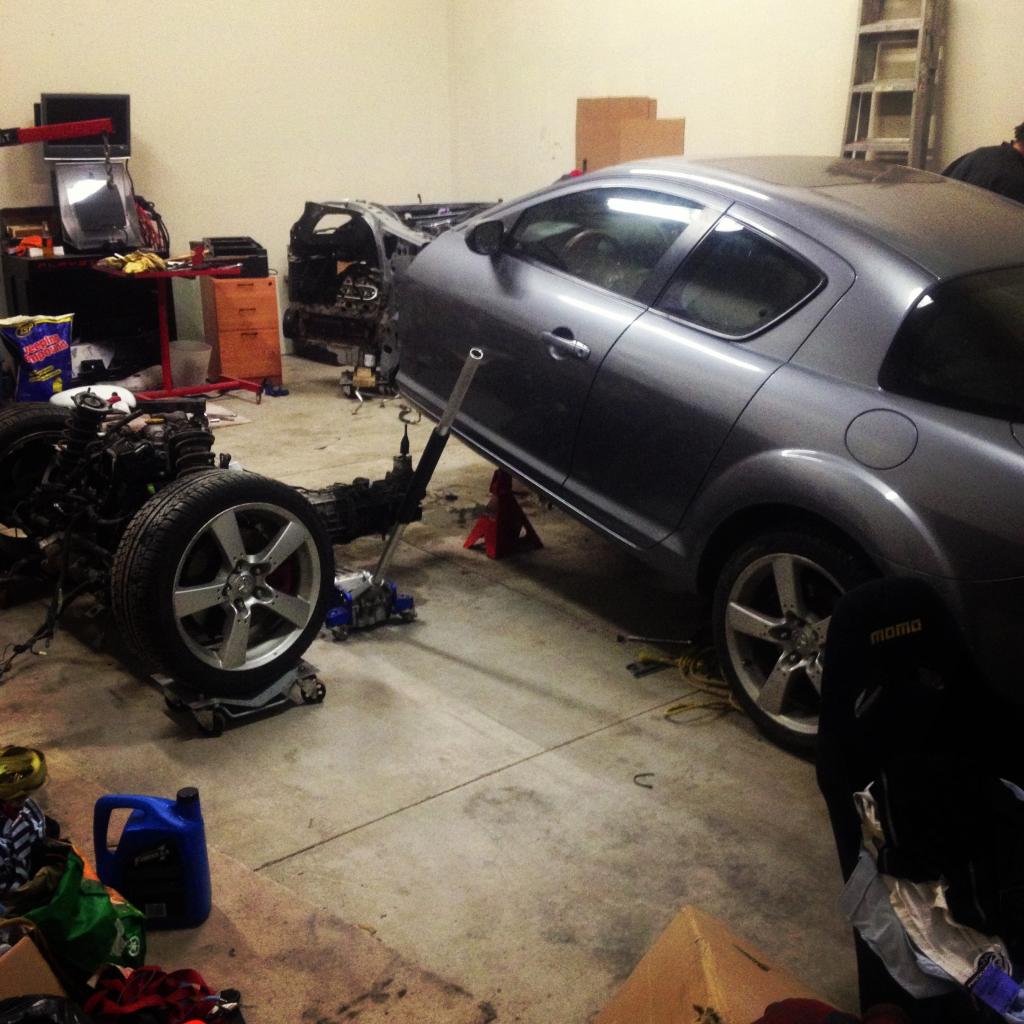
Spinning Dorito coming out
Moved back to the garage to begin work again
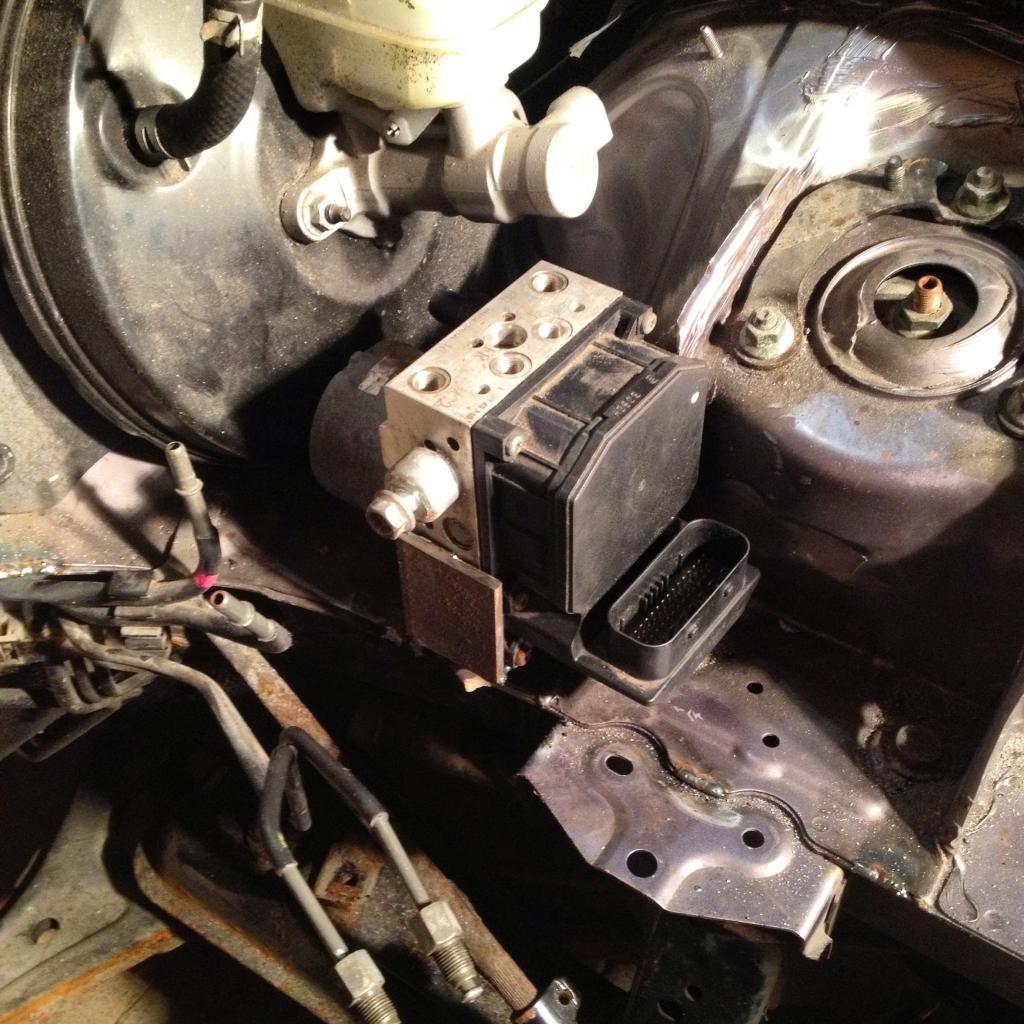
Modified the strut tower to tuck the ABS block in, theres a nice gusset thats hidden behind the ABS block in his picture. Bracket is made for mockup purposes and is ugly AF
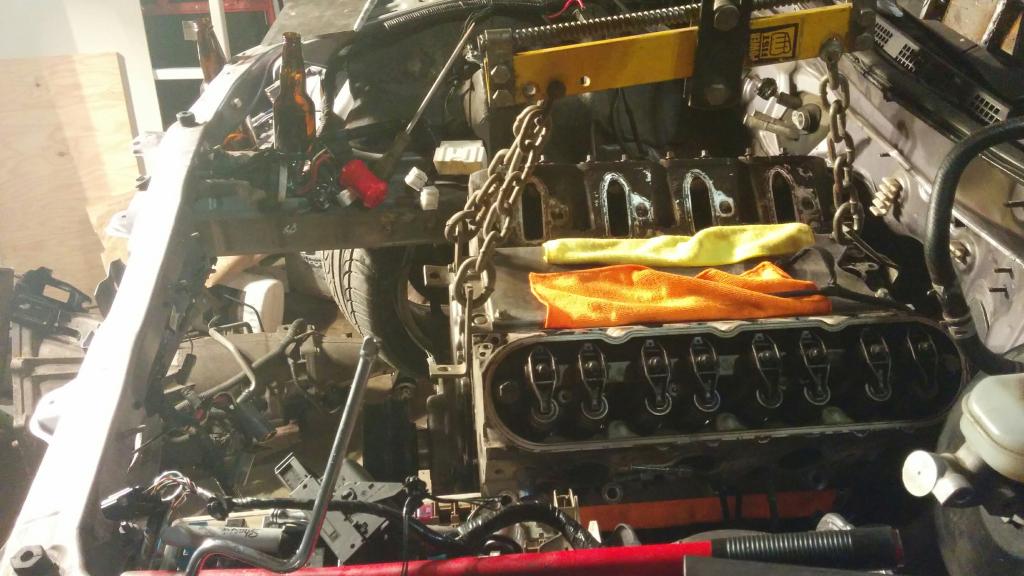
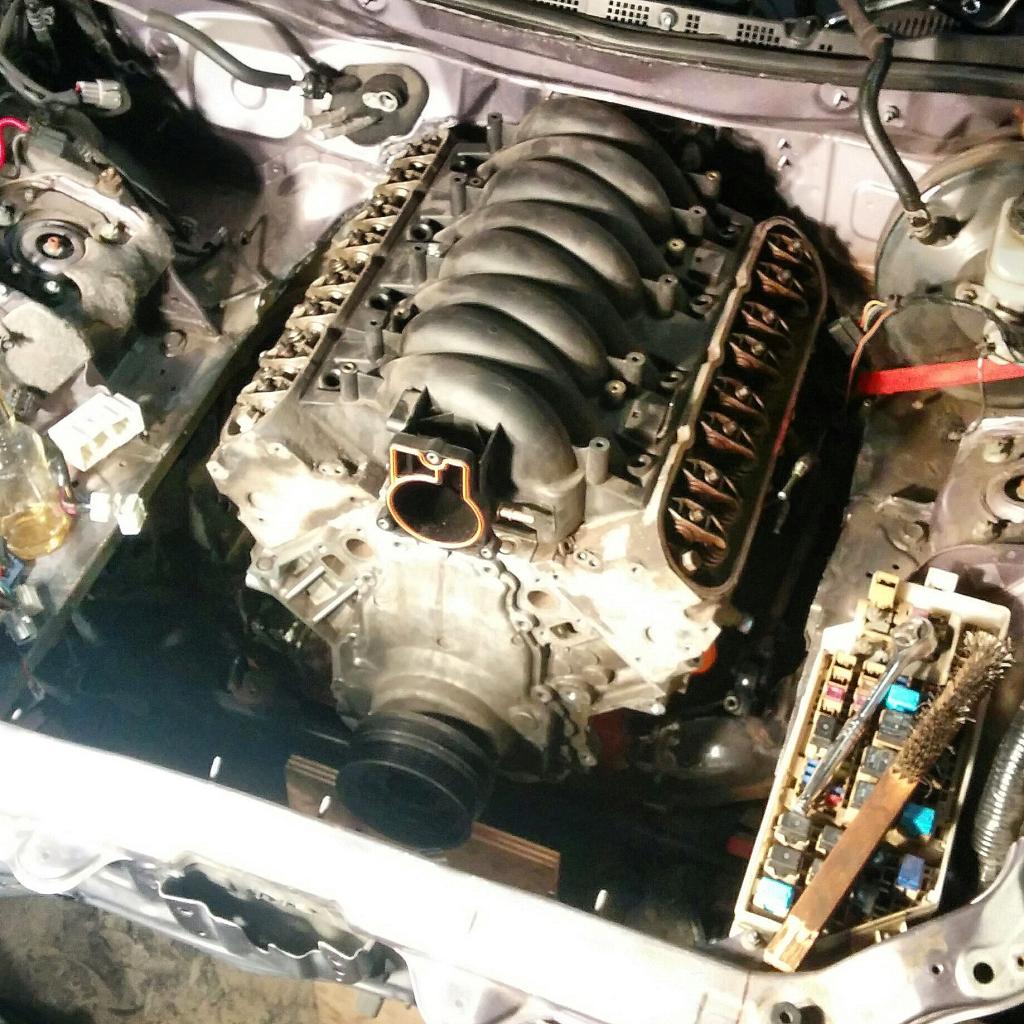
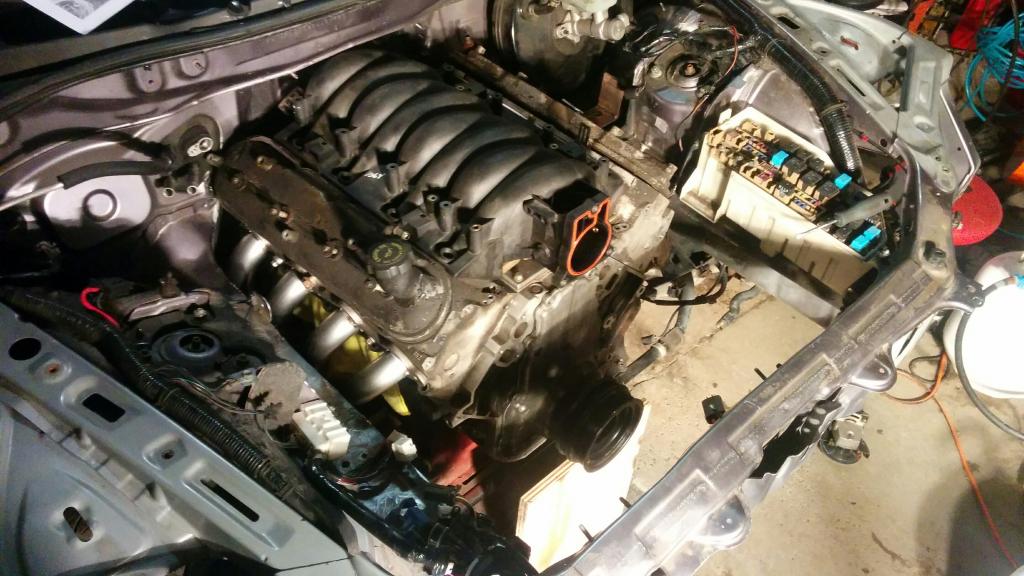
First test fit of the motor
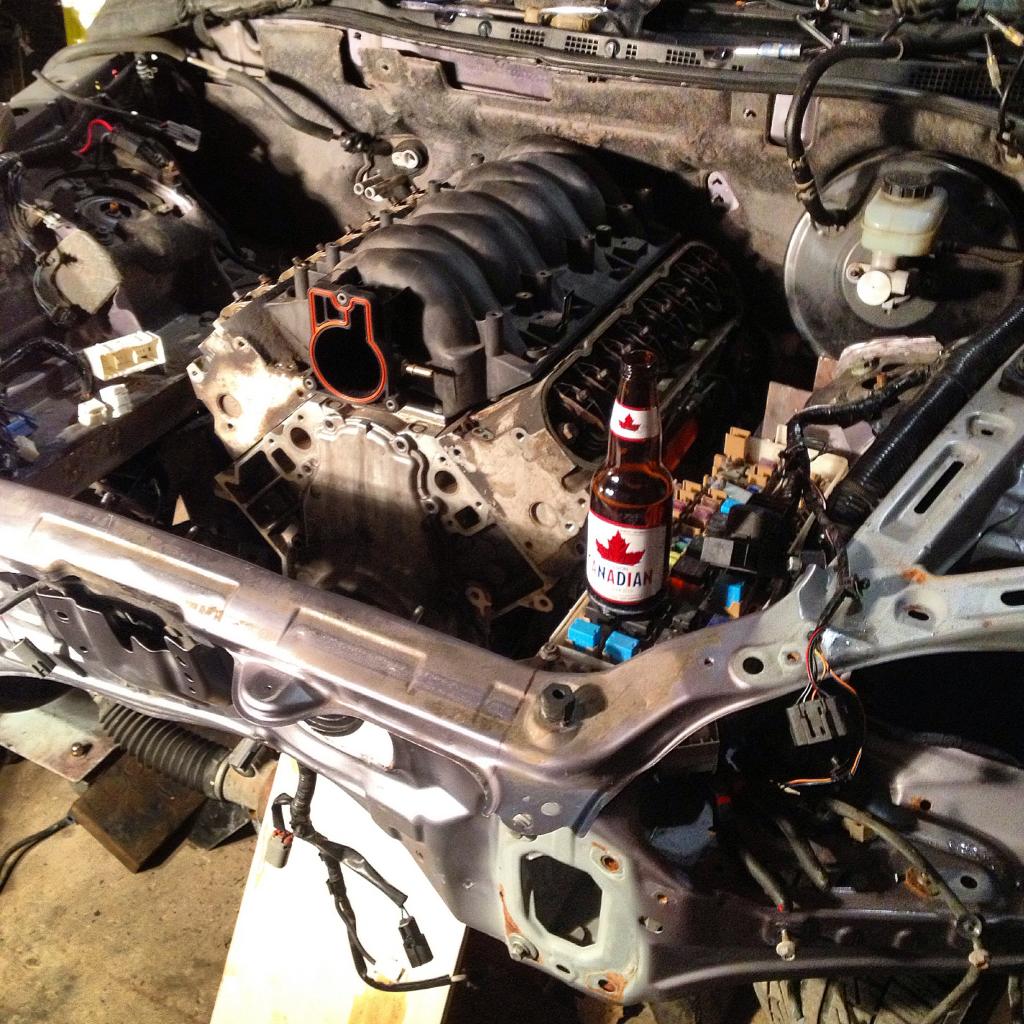
Keeping things moving smoothly
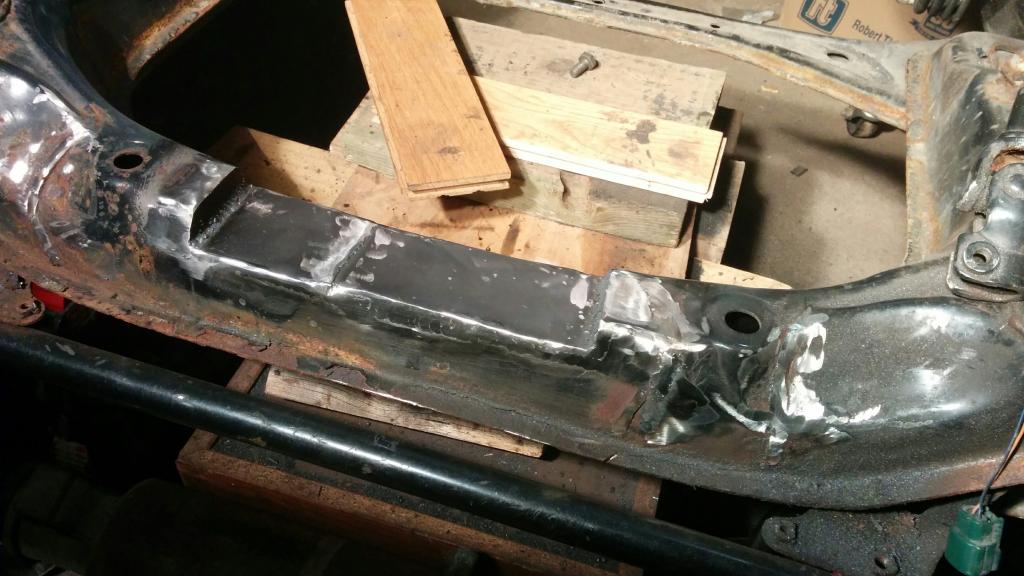
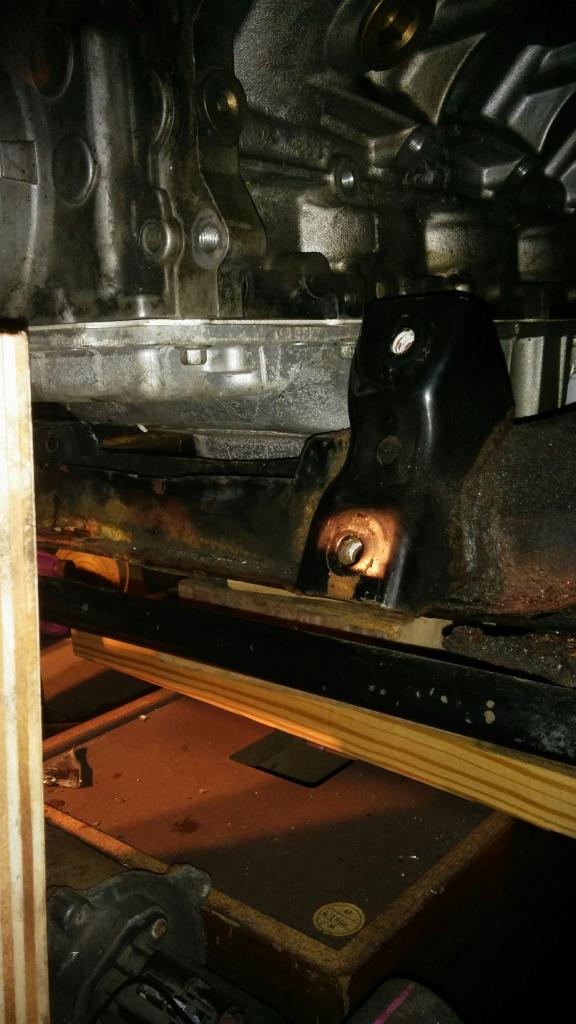
After some mocking up of where I wanted the motor to sit, I determined I would need to do a notch into the subframe. I will be using a hydraulic steering rack for it, and will be fabricating the mounts for that as soon as it arrives!
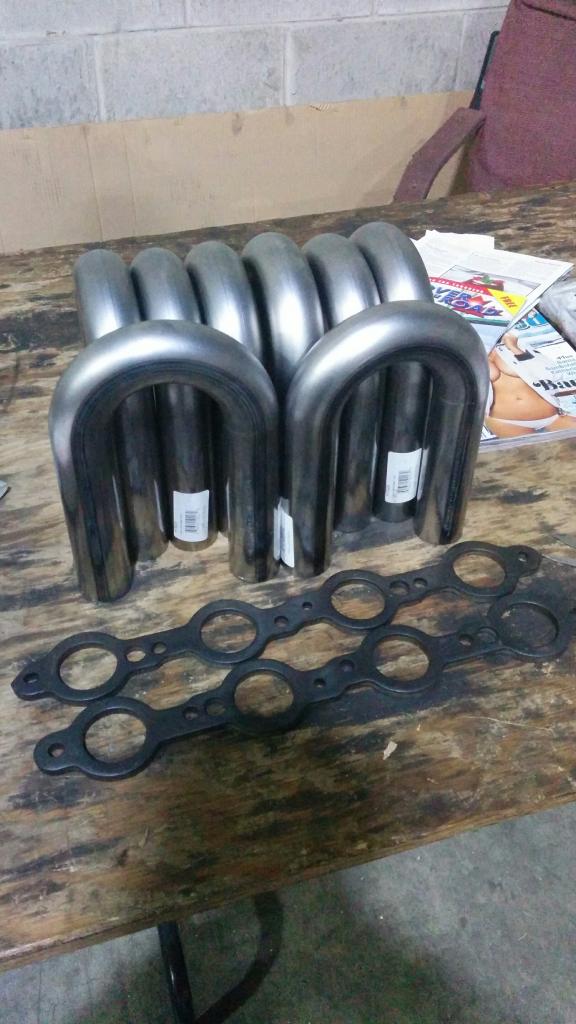
Some parts arrived for fabricating the long tube headers, still waiting for more bends and collectors
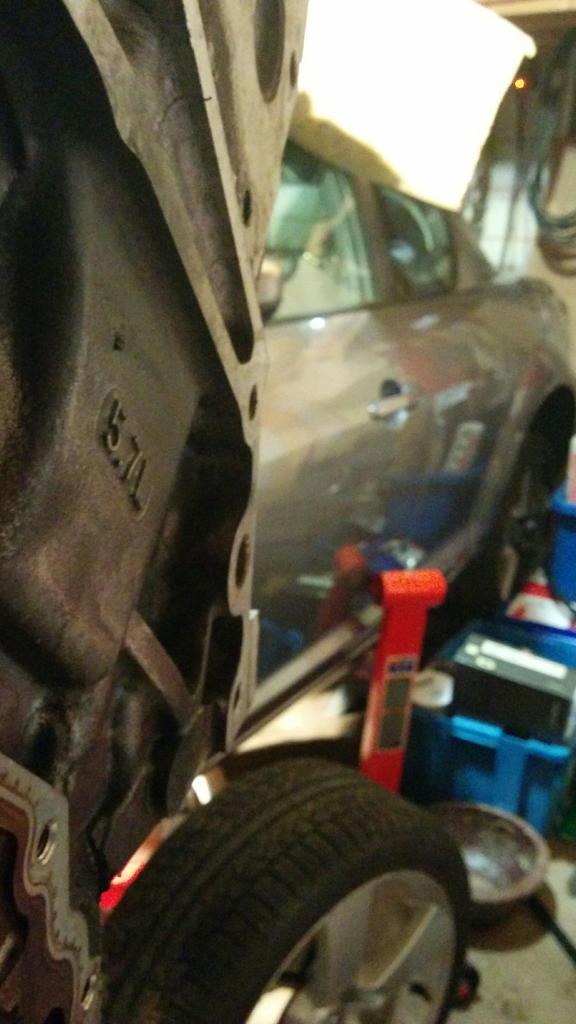
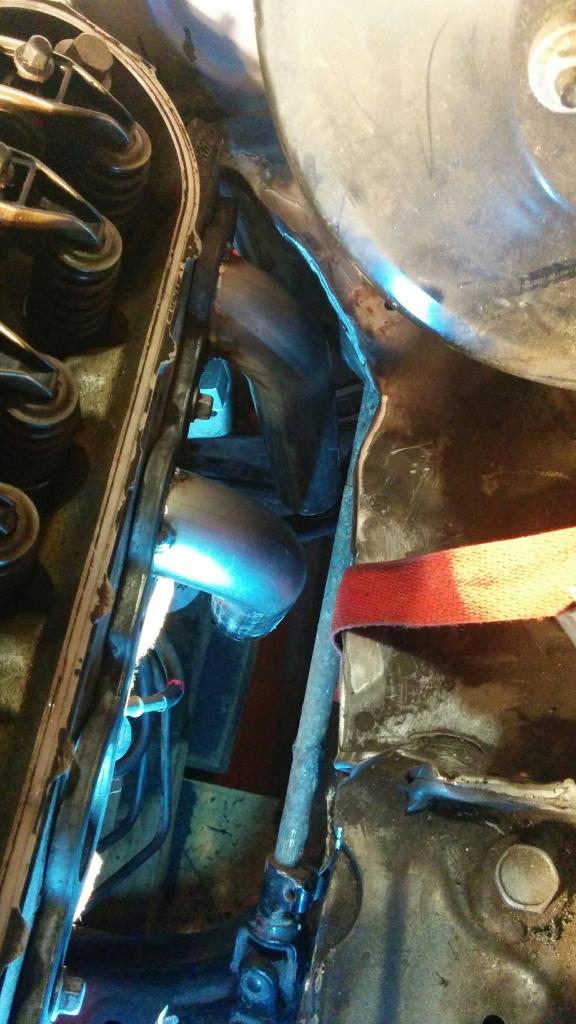
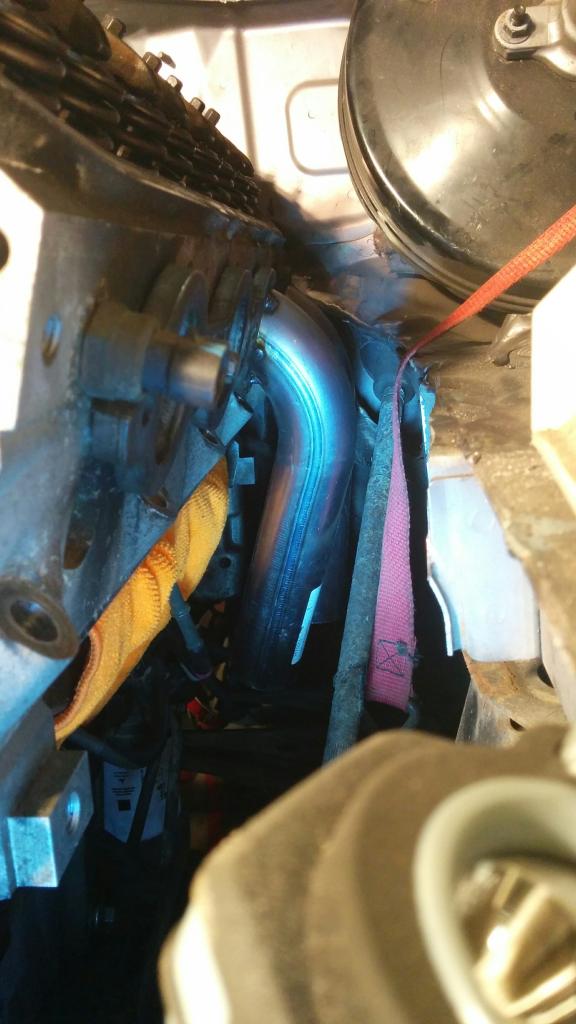
The back of the drivers side head is pretty damn tight in regards to exhaust exit, I cut out some of the frame lip at the back by the firewall, welded it and smoothed it out for header clearance.

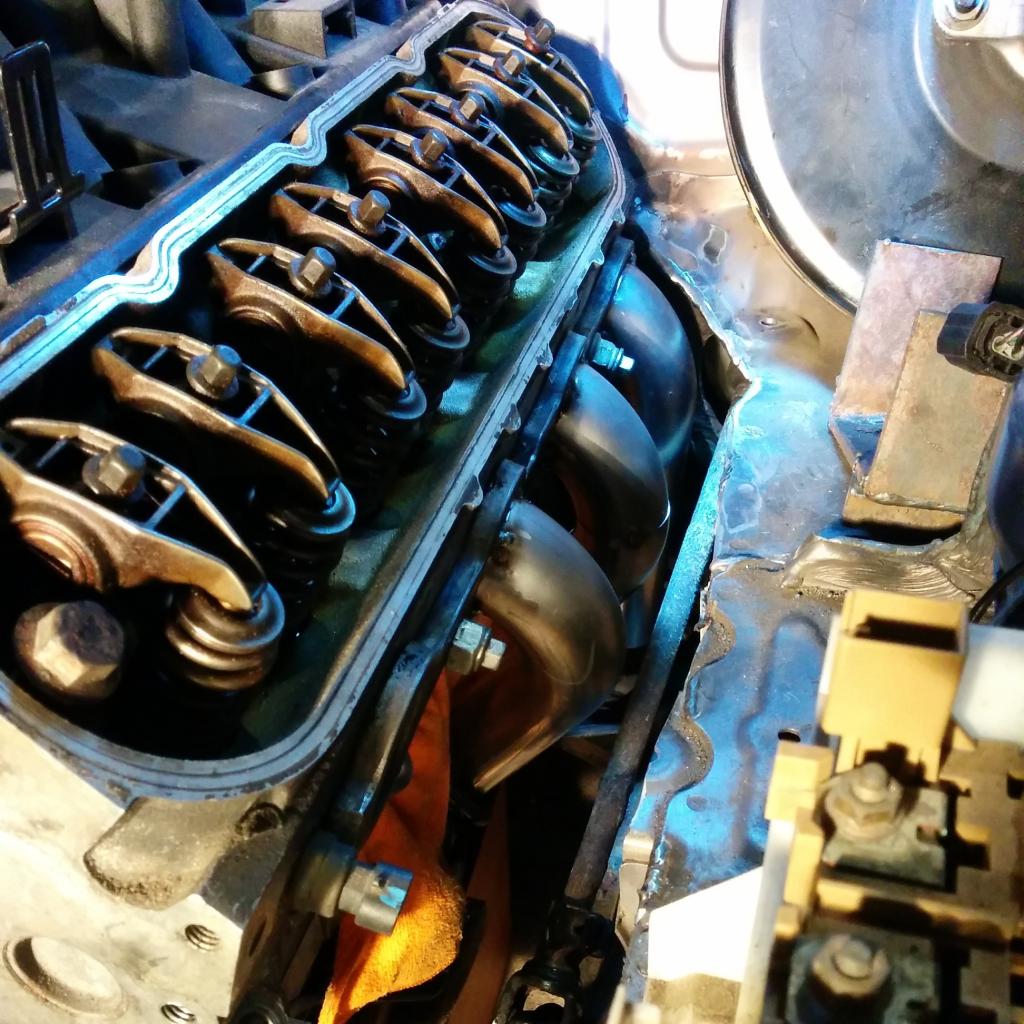
And idea of the motor positioning
Will continue to update this as I make progress, have been chipping away at it bit by bit after work, need to have it ready for when the snow melts at the end of april
Building a 2005 RX8 with 102,000km that I picked up on the cheap in toronto for $2800 and immediately ripped it apart for the swap. Well, ended up buying a few duramax's which turned out to be insanely expensive and the car sat for about a year bouncing between garages until I could finally get to it.
Anyways, that time has come. Originally was going to do a single front mount TC78 turbo LS1 setup, but after some thought about what I really wanted from the car, i ditched the turbo plans and decided on a N/A setup for weight and balance concerns. Picked up a T56 in need of some TLC for $400, and have enough parts laying in the garage to build a pretty potent LS1.
I am going to fabricate everything for this car as I have much more time then money lol, Starting this thread so I can log my progress and help anyone else if need be, not going to get too much into the plans for it as there is a decent amount of skepticism towards these builds. Heres to hoping I can finish it lol.
The victim:
Pile of T56 guts, thankfully these are super easy to rebuild
Spinning Dorito coming out
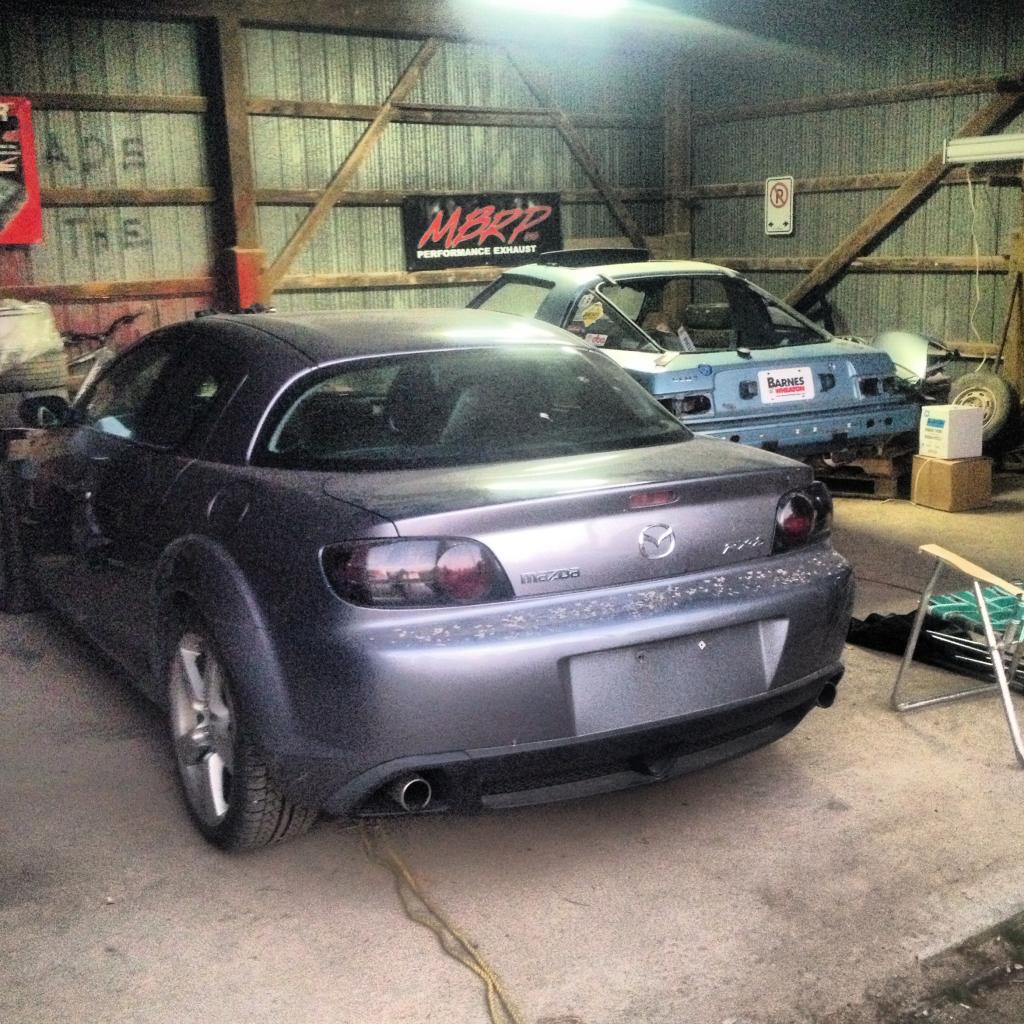
Moved back to the garage to begin work again
Modified the strut tower to tuck the ABS block in, theres a nice gusset thats hidden behind the ABS block in his picture. Bracket is made for mockup purposes and is ugly AF
First test fit of the motor
Keeping things moving smoothly
After some mocking up of where I wanted the motor to sit, I determined I would need to do a notch into the subframe. I will be using a hydraulic steering rack for it, and will be fabricating the mounts for that as soon as it arrives!
Some parts arrived for fabricating the long tube headers, still waiting for more bends and collectors
The back of the drivers side head is pretty damn tight in regards to exhaust exit, I cut out some of the frame lip at the back by the firewall, welded it and smoothed it out for header clearance.
And idea of the motor positioning
Will continue to update this as I make progress, have been chipping away at it bit by bit after work, need to have it ready for when the snow melts at the end of april
Last edited by Chezmanbespoke; Nov 14, 2016 at 08:22 AM.

Banned
Joined: Nov 2014
Posts: 350
Likes: 0
Great start to a build. Get ready. Lots of guys running stock motors will put in their two cents.......like it matters. Lol good idea on the ABS block. I should've spent more time on my ABS relocate. That placement will put it VERY close to a header primAry though. Mine is a bit high but very much out of the way. Also on the subframe notch. Would that place your pan below the subframe? Reason I ask is bc I have an f body pan and my pan is literally level with the subframe and I have half an inch between.
Thread Starter
Pistons Please
Joined: Sep 2013
Posts: 314
Likes: 13
From: Wasaga Beach, Ontario
Great start to a build. Get ready. Lots of guys running stock motors will put in their two cents.......like it matters. Lol good idea on the ABS block. I should've spent more time on my ABS relocate. That placement will put it VERY close to a header primAry though. Mine is a bit high but very much out of the way. Also on the subframe notch. Would that place your pan below the subframe? Reason I ask is bc I have an f body pan and my pan is literally level with the subframe and I have half an inch between.
It looks closer to the ABS block then it really is. With the motor sitting so low, the exhaust will drop down and out of the way fairly quickly from the port.
With an F-body pan, it does come out below the bottom of the subframe, I am planning to use the LS2 Corvette pan, which is a little bit shallower and would tuck just up below the subframe. The engine doesnt come deep into the notch, but just enough that it was a concern for me.

Thread Starter
Pistons Please
Joined: Sep 2013
Posts: 314
Likes: 13
From: Wasaga Beach, Ontario
The LS2 pan:

Have been chipping away a bit more at it, my mount bushings and steering rack will be in tomorrow, so I will have them saturday off our trucks. I have the motor sitting exactly where I want it, will be building the mounts for the engine and the steering rack over the weekend.
Have enough clearance around it, though it is fairly tight still. Started work on removing the fuel pump tonight but I have to get ahold of the tool to remove that ring.
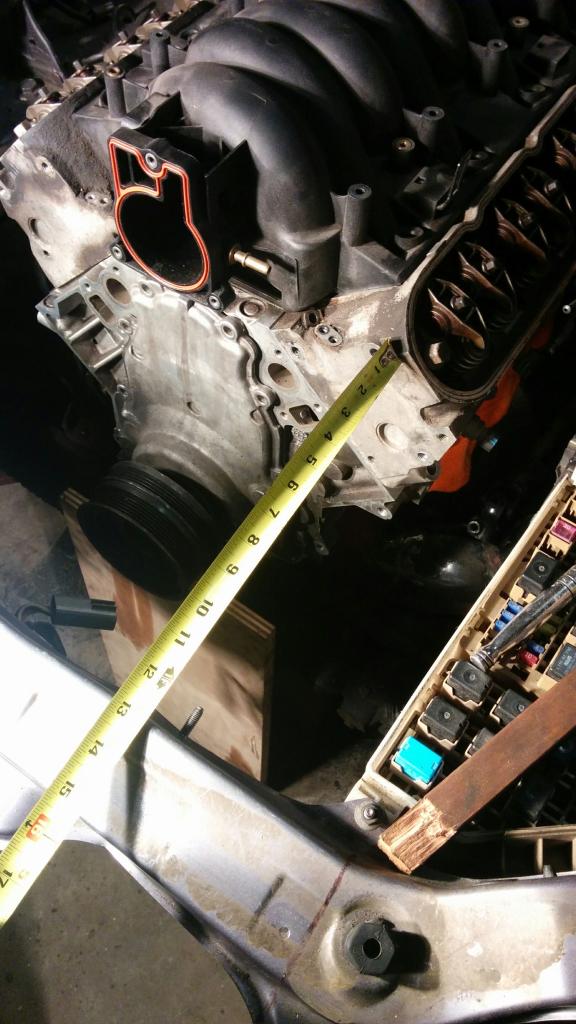
Heres a few shots from getting everything set, and measured so its ready for mounts.
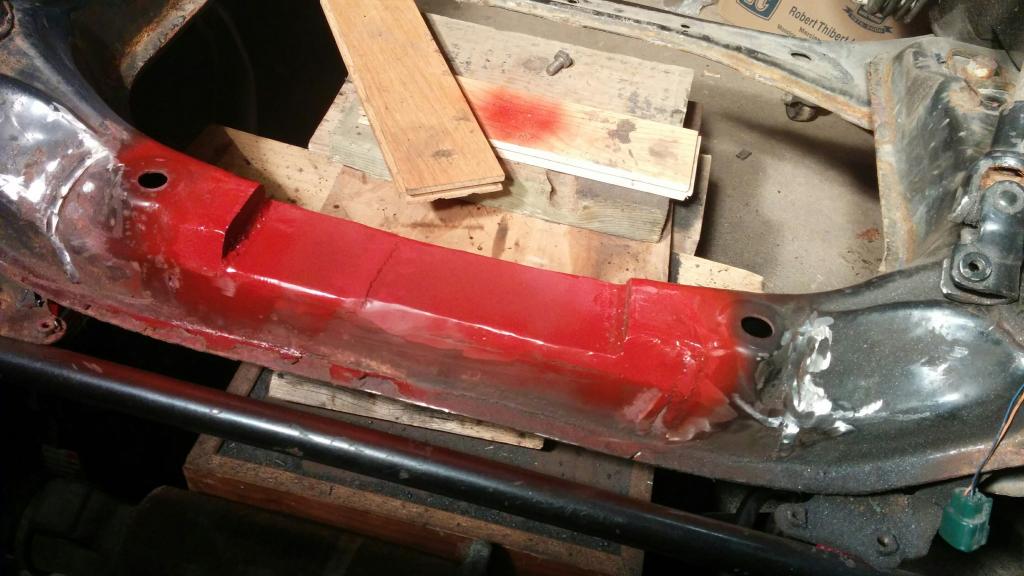
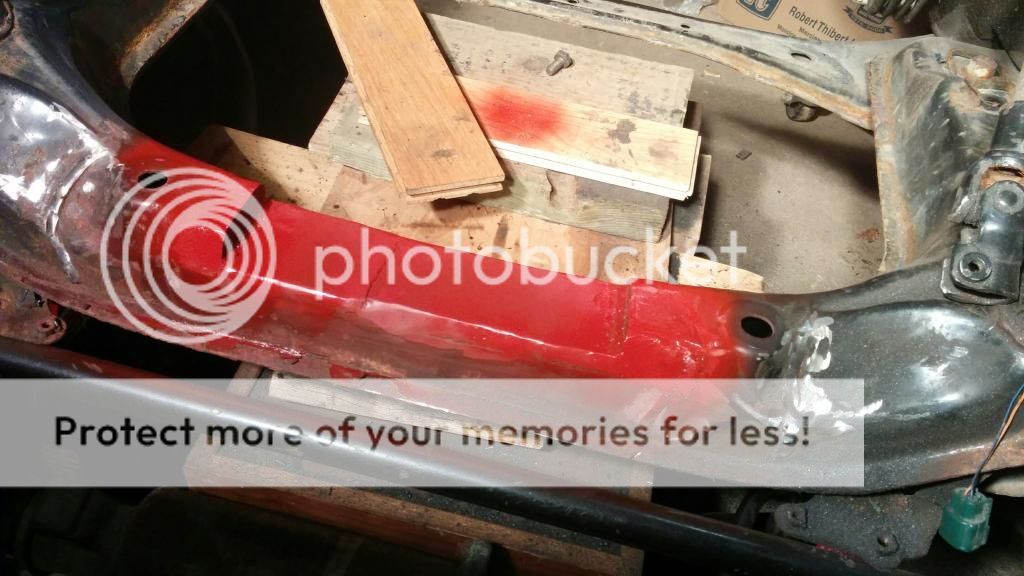
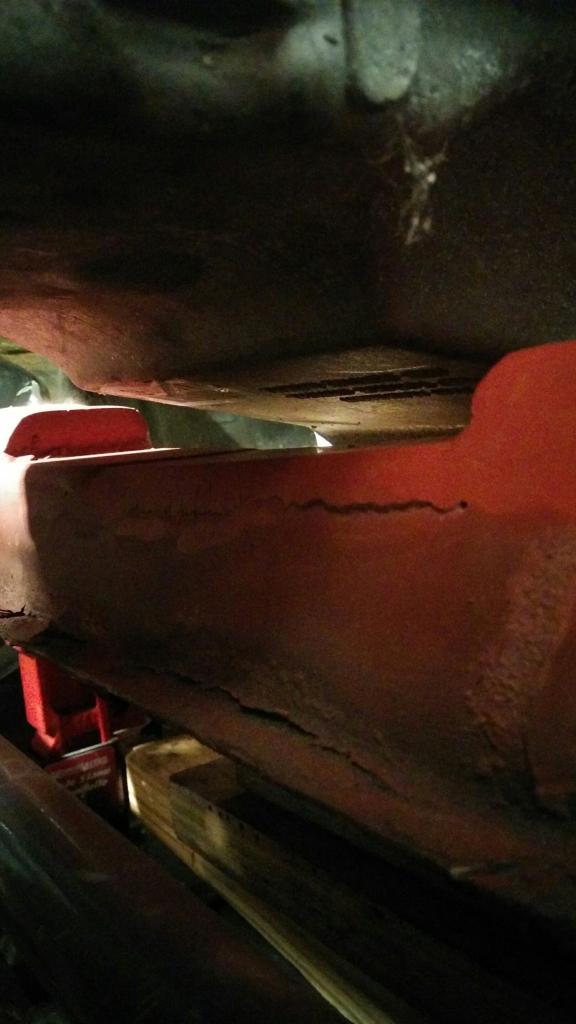
Closed up the notch in the subframe:
Soul mates

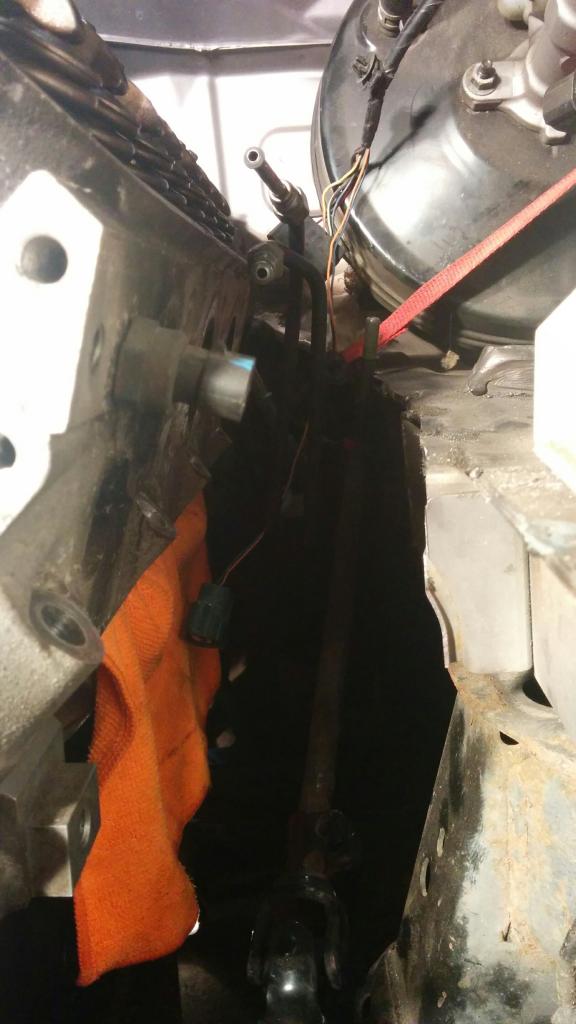
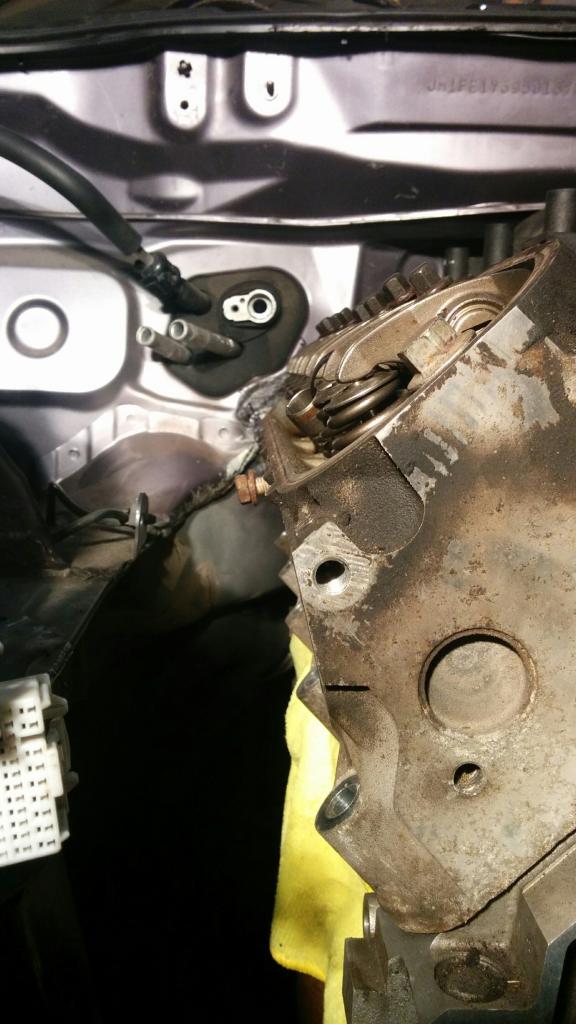
Engine positioning:
My rad support is a little tweaked, need to replace top section of it
Started to do a little work on the headers for it tonight, really excited to build these and I figure its either going to go excellent or be a total disaster
 I would like them to turn out well so I intend on spending alot of time to make them as beautiful as I can
  Working on the drivers side first as it is the tightest around the steering shaft, nothing too exciting yet, just have the first bend in, in 2 primary's, the rear one is a the tightest, but so far so good with excellent clearance from everything including ABS!
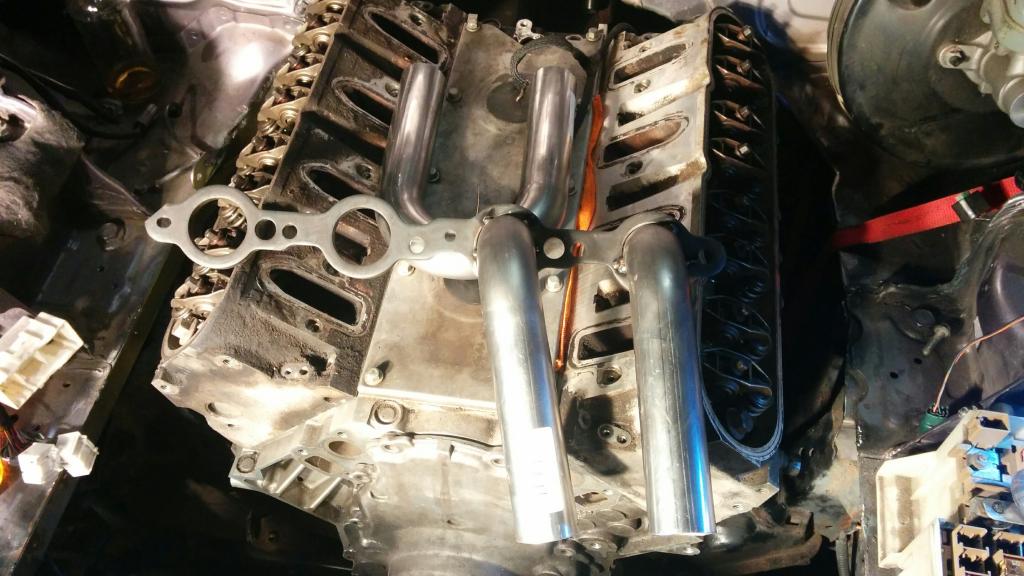
Tomorrow night I am planning to start doing a little work on my fuel system, and measure out the transmission crossmember so I can figure out how I would like to build it.
Saturday will be the big day when I can start work on the mounts for the engine and hydraulic steering rack

Last edited by Chezmanbespoke; Feb 18, 2015 at 07:14 AM.
Thread Starter
Pistons Please
Joined: Sep 2013
Posts: 314
Likes: 13
From: Wasaga Beach, Ontario
I should note this car is in a very rough copy state so to speak, once I have the parts I need to make set up, it will be disassembled for blasting, paint, cleaning of welds etc 
Banned
Joined: Nov 2014
Posts: 350
Likes: 0
I built that tool. Just got some 2" steel and bent it on my metal brake. Welded a 19mm nut and cut some slots. That tool is pricey.
I'd like to see what you do about the fuel pump. Mine came out great and I'm using a 320 lph AEM pump.
I'd like to see what you do about the fuel pump. Mine came out great and I'm using a 320 lph AEM pump.
Thread Starter
Pistons Please
Joined: Sep 2013
Posts: 314
Likes: 13
From: Wasaga Beach, Ontario
 ) , I plan on using a corvette filter reg at the very back, and a single 6AN braided line that will run up to the front from the filter.
 Have to spend a little more time staring at the fuel system setup so I can figure out what I would like to do with it, havent looked at it much yet.
Banned
Joined: Nov 2014
Posts: 350
Likes: 0
You can use the stock feed as the return and run through the siphon. However if you don't use the accordion style tube then it will kink. I had to use a brass t and cut/plug one to make it a 90. Pressure was still too high so I had to drill a hole in the plug. I kept stepping up the drilled hole until I got 56 psi.
Thread Starter
Pistons Please
Joined: Sep 2013
Posts: 314
Likes: 13
From: Wasaga Beach, Ontario
Had lots of bad luck this week at work, and it managed to trickle down to me with delays on getting my parts up to me for the weekend 
Fired up the heater in the garage to get a little work done today, Decided to do a little work on the headers, still an assload of work yet, but am out of the gate on getting them done! Starting to get excited about these, more or less doing them to prove to myself I can
Heres a few shots from some of the progress I made today.
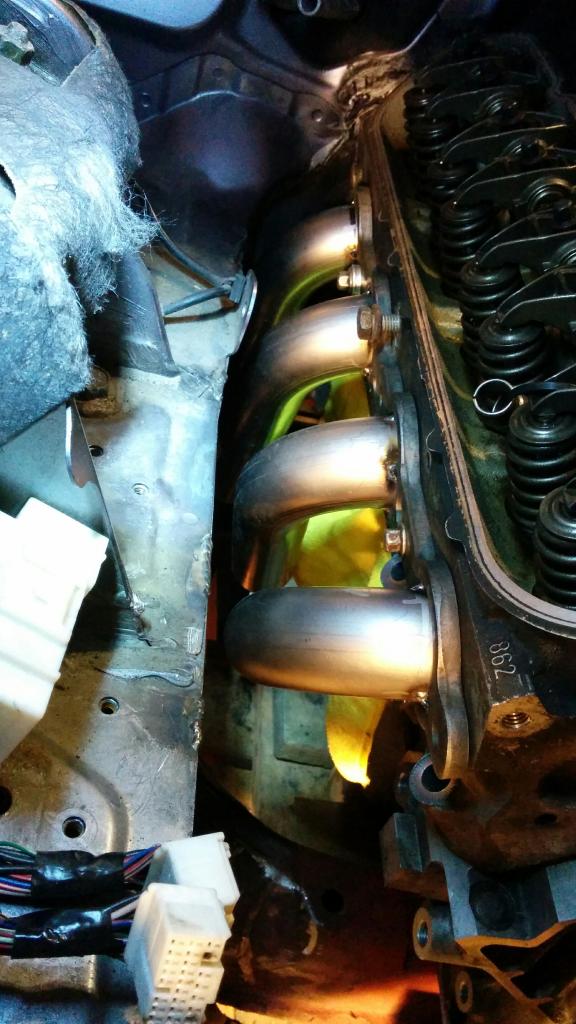
Drivers side header so far, Not much space over here having to work around the steering shaft. Still havent mounted my steering rack so I am as far as im willing to go until that is installed just in case I have less clearance with the steering shaft then I have in my mind right now.
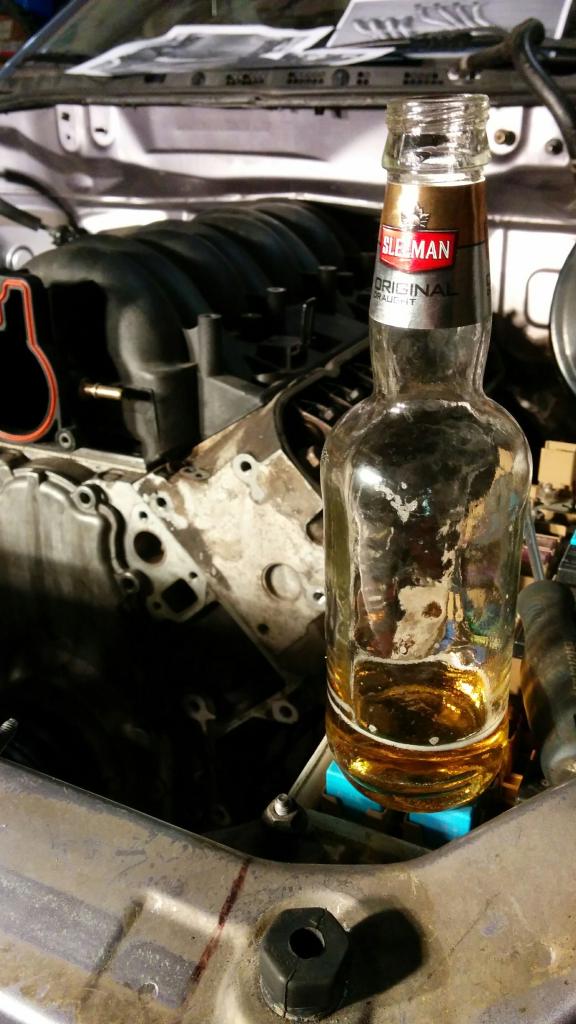
On tap today we have cheapo Sleeman Original draft because this car is starting to get expensive
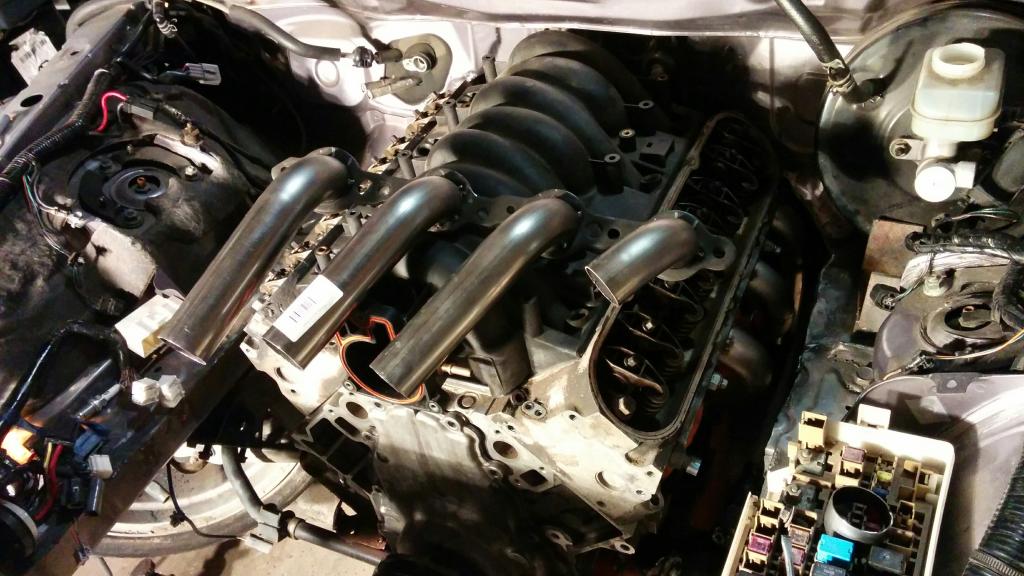
On the passenger side I have a fair bit more space to work with. Got the 4 primary's started so far
More progress to come!

Fired up the heater in the garage to get a little work done today, Decided to do a little work on the headers, still an assload of work yet, but am out of the gate on getting them done! Starting to get excited about these, more or less doing them to prove to myself I can
Heres a few shots from some of the progress I made today.
Drivers side header so far, Not much space over here having to work around the steering shaft. Still havent mounted my steering rack so I am as far as im willing to go until that is installed just in case I have less clearance with the steering shaft then I have in my mind right now.
On tap today we have cheapo Sleeman Original draft because this car is starting to get expensive
On the passenger side I have a fair bit more space to work with. Got the 4 primary's started so far
More progress to come!

Banned
Joined: Nov 2014
Posts: 350
Likes: 0
So im gauging the depth by the distance from the low pressure AC port to the valve cover face on the head. It looks a solid 1/2" to 1" lower than mine. Good job on the positioning. You are stuck sith the LS6 intake though with it that deep. I just put a fast 102 on mine and had to massage the cowl. Went too much and wipers got jammed up.

Banned
Joined: Nov 2014
Posts: 350
Likes: 0
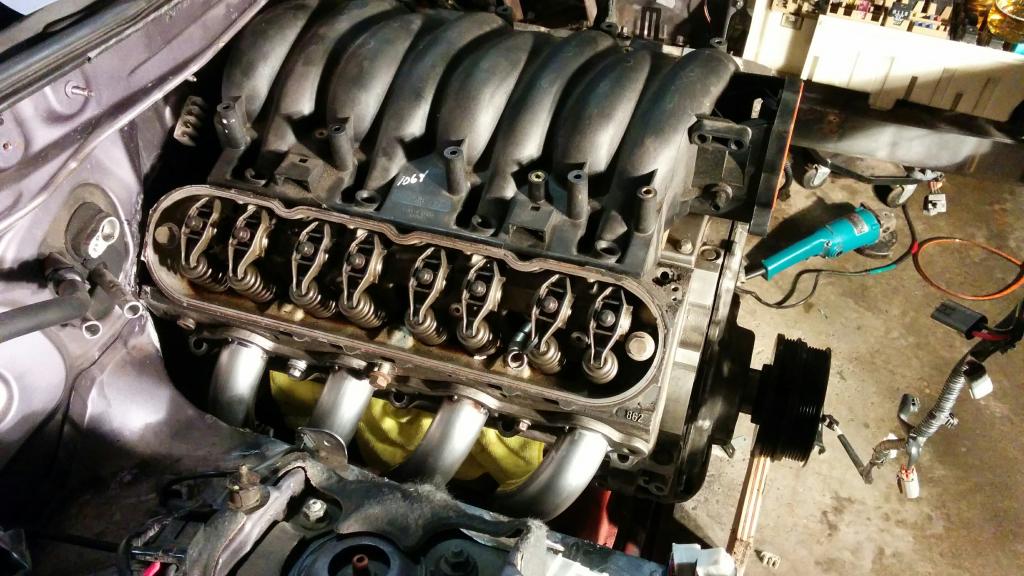
You have a head location sleeve dowel in your rocker valley. What are you gonna do for gauges? Hinson sells a SICK reluctor Kit that is machined by PowerBond. It's an underdrive pulley with a reluctor machined into it. Also have a nice billet bracket for the pickup.


Thread Starter
Pistons Please
Joined: Sep 2013
Posts: 314
Likes: 13
From: Wasaga Beach, Ontario
Gauges will be controlled with a CANbus module that my brother is writing the code for (Computer Science student), We have our module controlling the RX8 cluster in its entirety on the bench, just finishing up the translator in the code that will make the GM computer operate all the mazda systems, and eliminate the RX8 PCM. I wont give much more info on this until we finish & test it in this car.
 But to someone sitting inside this car, other then the exhaust note & V8 rumble, our goal is for no one to be able to tell its swapped.
 Once i finish all of the mounting & support parts, I will take the block to the machine shop to be machined so I can assemble the bottom end after. Will be doing a forged piston/rod 347ci setup (3.905bore), Have to rebuild my trans also, will be doing a viper mainshaft conversion in that.
Going to get some more work done on the fuel system today, and figure out how I am going to fabricate the transmission mounting & PPF delete.
Update with some more pictures this evening

I was just cautioning against relying on the work of a novice programmer. But this looks like a learning project for everyone involved, so carry on!
Thread Starter
Pistons Please
Joined: Sep 2013
Posts: 314
Likes: 13
From: Wasaga Beach, Ontario
Definitely being very careful for the coding, learning experience all around! My brother, despite being young is a extremely competent code monkey, he developed the software that is my work's (an air freight international trucking company) life line to operate, and in addition my father is a software developer so we have all of the right know how involved. 
Banned
Joined: Nov 2014
Posts: 350
Likes: 0
Very nice. When the CanBus is conquered then swaps will be much more plentiful. And that is what will win the hearts of the hardcore critics here. I just used the RX8 pcm with ECT, oil press, and tach. Works great. Complicated the wiring a bit but was pretty straight forward. I just disabled the lights in the dash that are unnecessary (a lot of them are) and wired in my own check engine light behind the OEM lens. So the light functions as normal in the OEM spot. I actually have the AC freezing cold and both the RX8 and GM PCMs coordinate fan operation.
Thread Starter
Pistons Please
Joined: Sep 2013
Posts: 314
Likes: 13
From: Wasaga Beach, Ontario
Very nice. When the CanBus is conquered then swaps will be much more plentiful. And that is what will win the hearts of the hardcore critics here. I just used the RX8 pcm with ECT, oil press, and tach. Works great. Complicated the wiring a bit but was pretty straight forward. I just disabled the lights in the dash that are unnecessary (a lot of them are) and wired in my own check engine light behind the OEM lens. So the light functions as normal in the OEM spot. I actually have the AC freezing cold and both the RX8 and GM PCMs coordinate fan operation.
Do you? I left the A/C off of this car, given there is only maybe 2 weeks of the year that temps get any where near 95-100f, I can open the sunroof and WOT

Havent been keeping up with my pictures the last couple nights, as havent had a buddy to snap any pics as I hold parts up for mock up, Just a 24 y/o handling the dirty work solo

Will snap some more tonight, need to finish welding up the engine mount plates tonight, hoping to have the sleeves for my poly bushings, and bolt sleeves for my steering rack this afternoon so I can get crackin tonight!
In the mean time, heres a couple pics of the way she sits now, get all excited ever time I walk into the garage and see this

These are old parts all slapped together to use for mockup, finished motor will be extra pretty
Mustang steering rack & poly bushings for engine mounts finally showed up

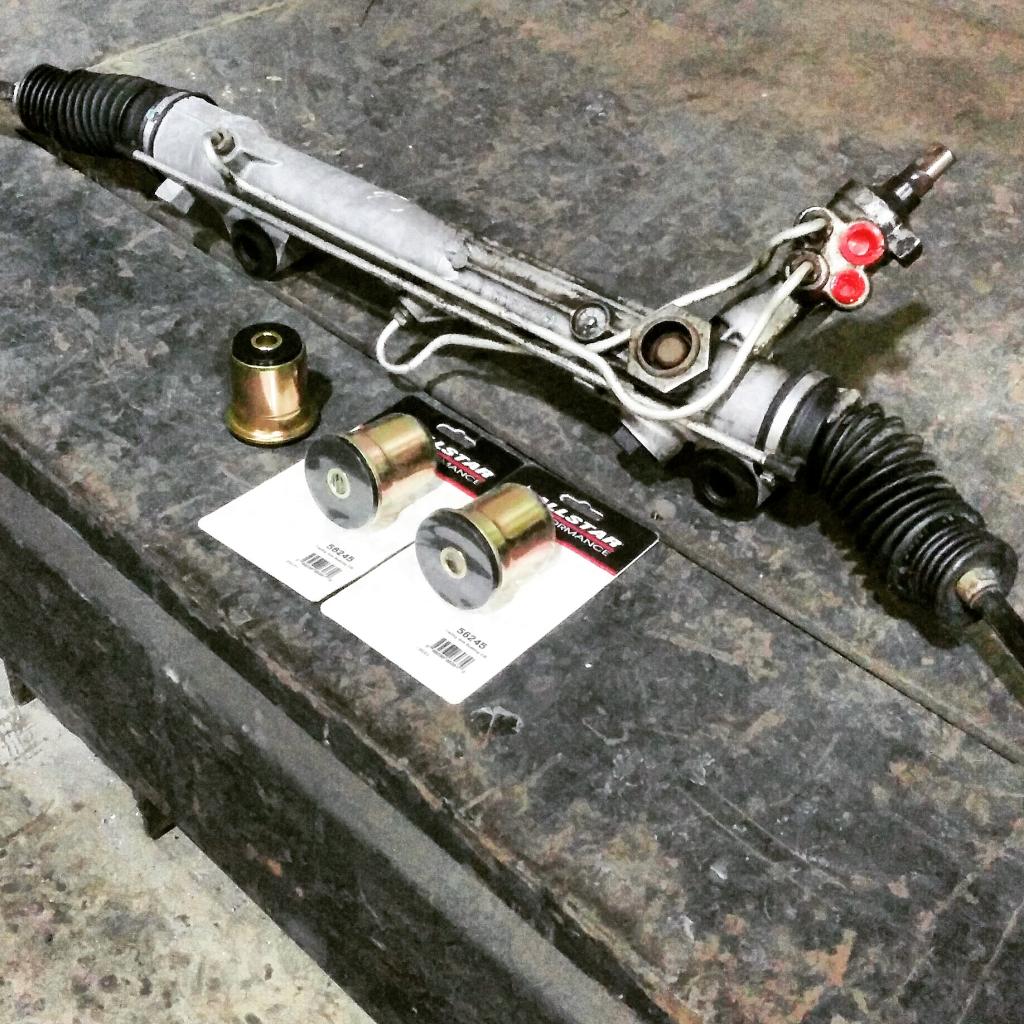
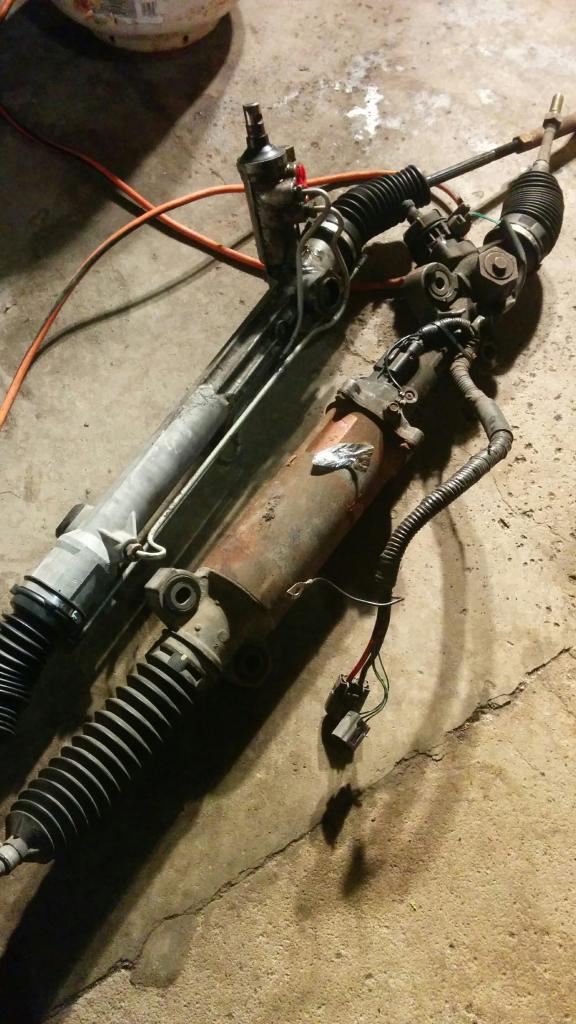
Comparison of steering racks, I will scale them in tonight with the pump and a couple litres of fluid to get an idea of weight comparison, the rack itself is wayyyyy lighter as expected
So far it looks like the mustang rack is a ******* excellent choice, Will be very easy to mount and lines up for steering shaft beautifully and more clearance to primary's then expected.
Going to work as much as I can tonight & tomorrow night after work, before I have to take off for the weekend to see wifey.
Will update this thread later tonight with some pics of progress with the mounts!