DIY: Tokico Adjustable Shock Install
 04-10-2006, 09:37 PM
#1

DIY: Tokico Adjustable Shock Install
This install assumes a basic understanding of mechanical principles and possession of typical tools including metric sockets, box wrenches, breaker bars, pry bars, pullers and other tools (air tools are helpful) as well as an adequate method to lift and support the vehicle.
I have pulled the spring assemblies a few times and have tried various short cuts and this is by far the most practical and easiest way to do the job.
Instructions are for the left (driver�s side on North American vehicles) and are the same for the right side, though mirrored.
Assembly is the reverse of disassembly unless otherwise noted.
FRONT:
1)Raise the vehicle and support adequately with jack stands. Remove the wheels.
2)Open the hood and remove the four 12mm nuts that hold the strut tower brace. Remove the brace.
3)Remove the nuts holding the brace mounting plate to the upper shock mounting block and remove the plate.
4)Loosen, but do NOT remove, the 17mm nut on the top of the shock piston rod.
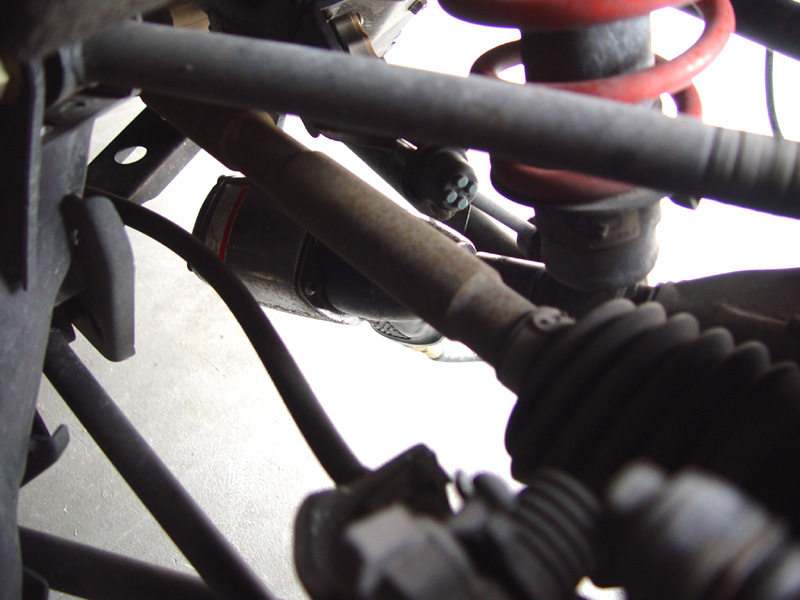
5)Remove the bolts holding the brake line and wheel speed sensor wires and move them out of the way.
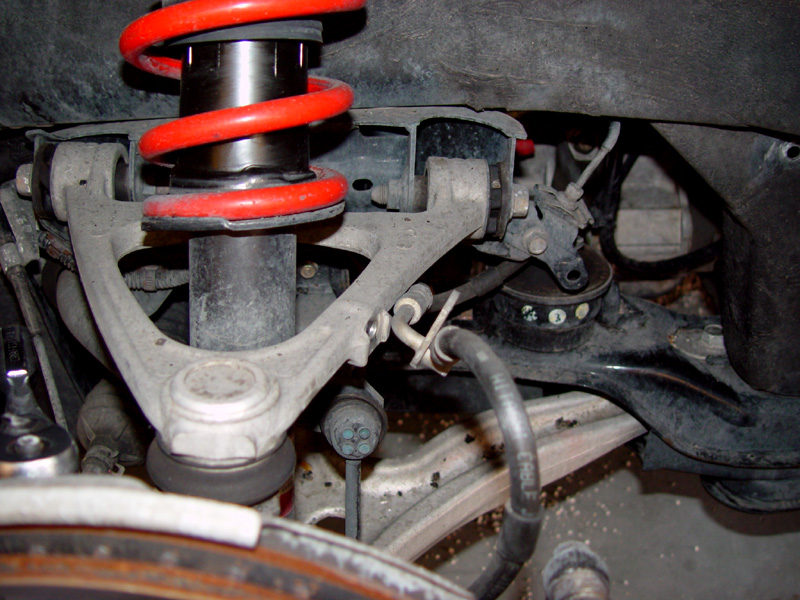
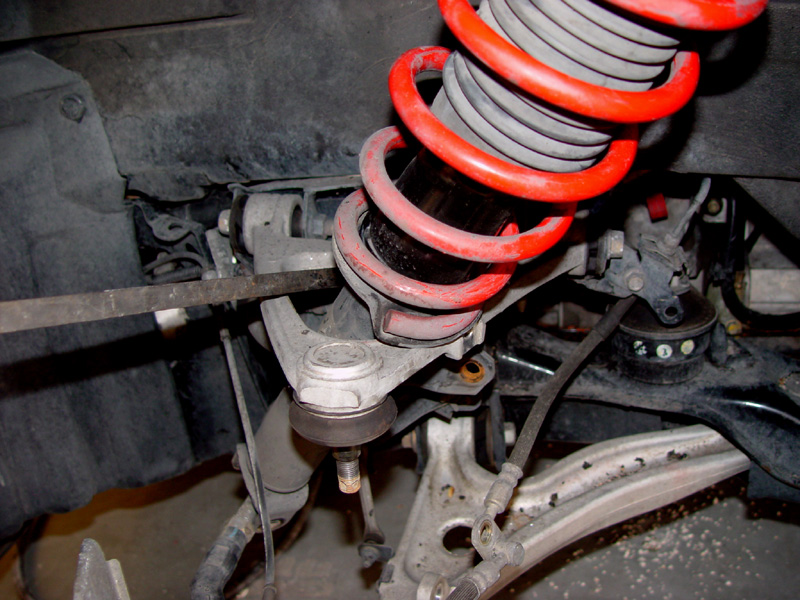
6)Place a floor jack under the lower ball joint and fully load the suspension by raising the jack until the point just before it starts to lift the vehicle off of the jack stands.
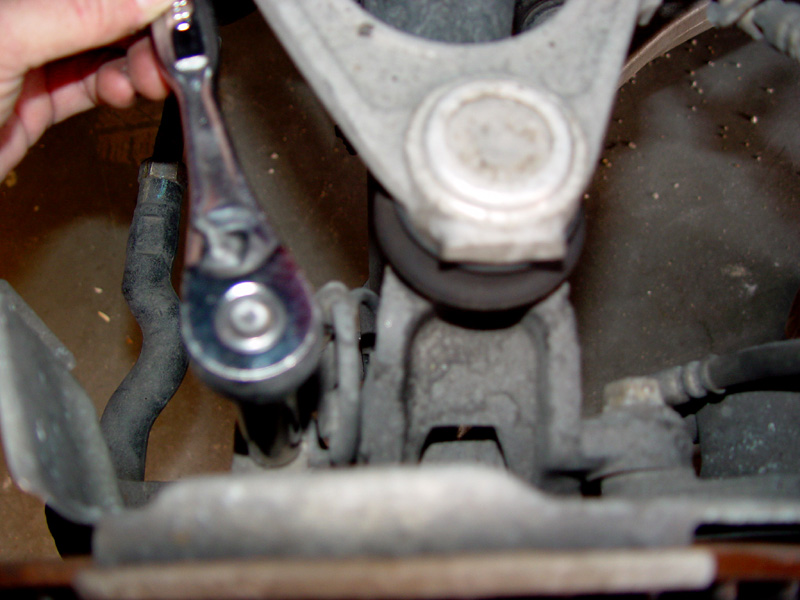
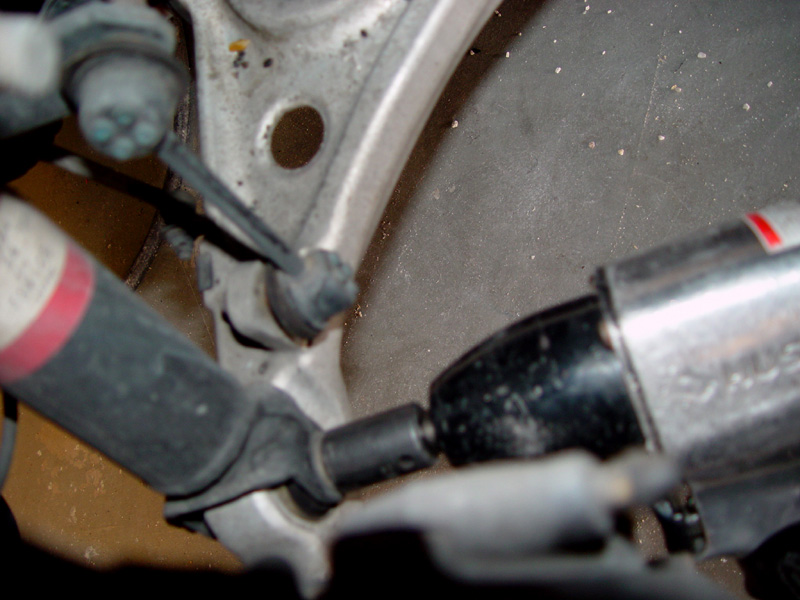
7)Remove the both nuts holding the stabilizer bar end-links.
8)Gradually release the floor jack until the end links are easy to remove as the tension is relaxed. Do NOT completely lower the floor jack.
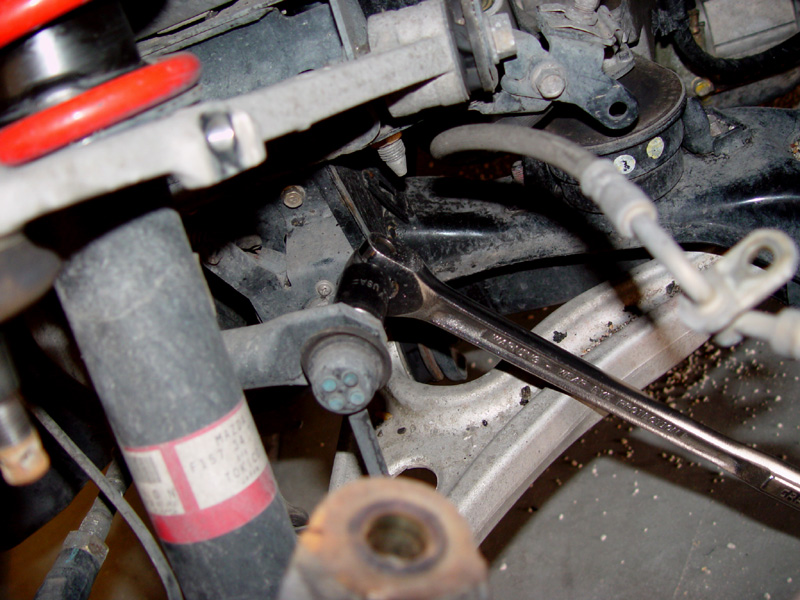
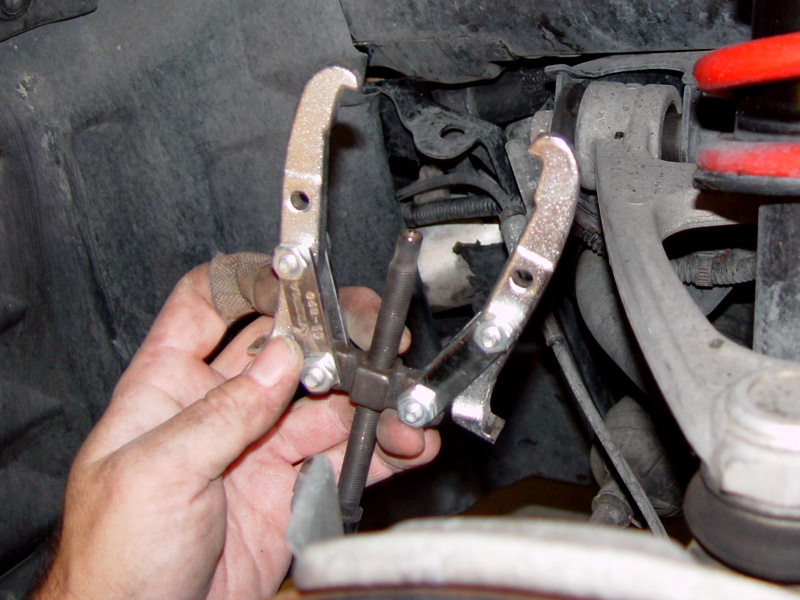
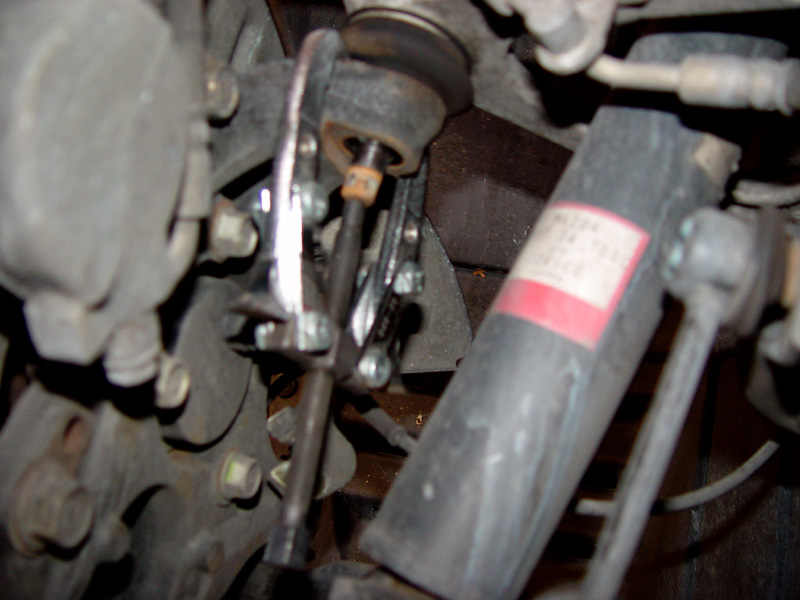
9)Pull the cotter pin holding the upper ball joint nut. Remove the upper ball joint nut.
10)Using a ball joint puller, remove the upper ball joint from the upper spindle arm. It will practically explode out of the mount, so be aware and keep your face/head away from the assembly as it comes apart. It will, at least, scare the crap out of you when it cuts loose with a massive snap/pop. If you forget the jack, it will travel quite a bit and possibly knock your hands off of your arms right at the wrists. I am not kidding. There is a lot of energy stored in that joint.
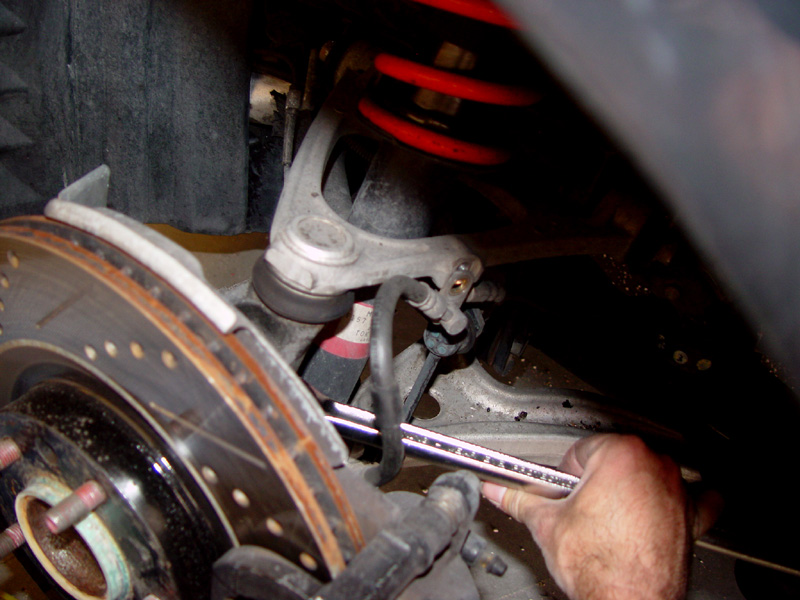
11)Remove the lower shock bolt.
12)Lower and remove the floor jack.
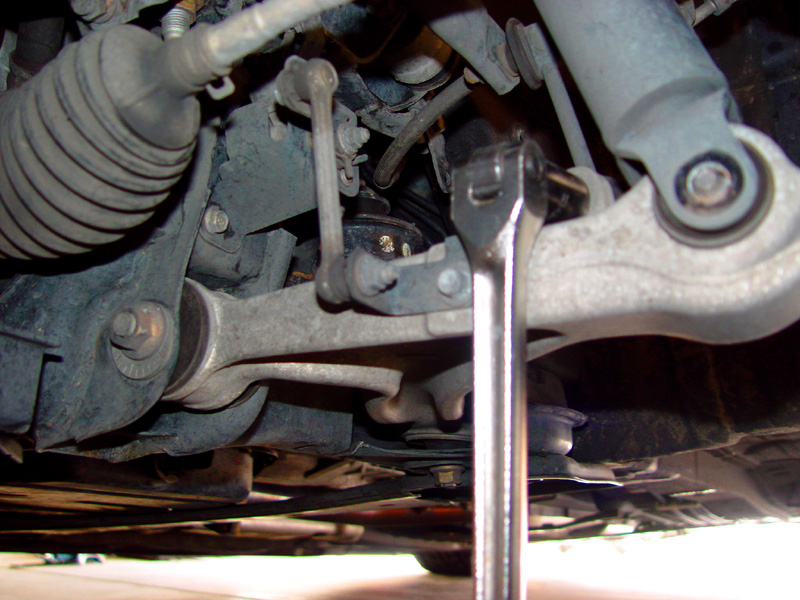
13)Using a pry bar, push down on the upper A-arm and pull the shock/spring out of the car. You will need to have the bottom of the tube clear the front sway bar.
14)Mount a spring compressor and compress the spring until it pulls away from the upper mounting block. Failure to do this may result in your decapitation.
15)Remove the 17mm nut from the top of the piston rod and disassemble the shock/spring assembly.
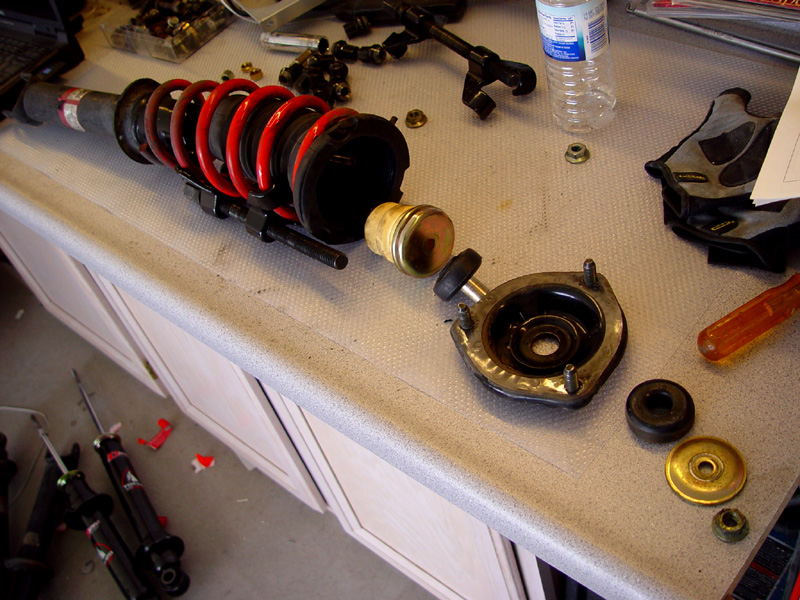
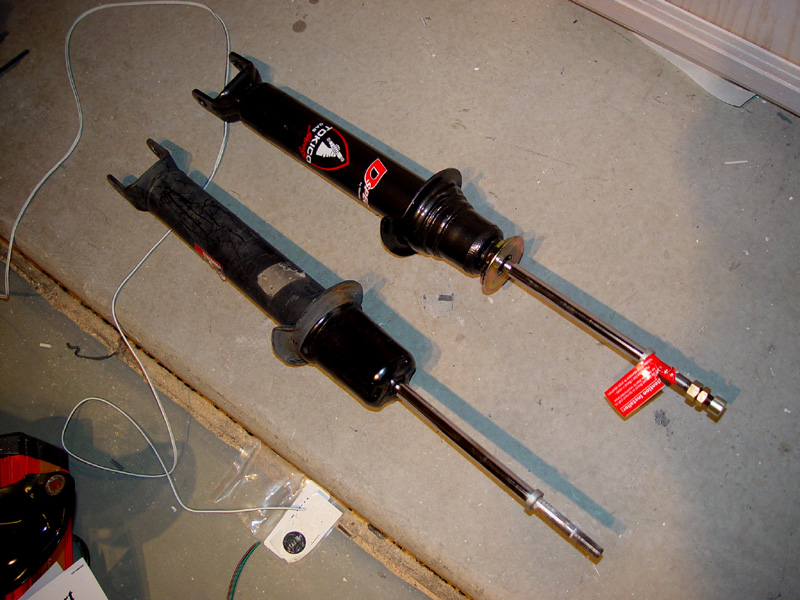
16)Reassemble the shock/spring assembly with the new shock and/or spring, noting the order of the parts and the orientation of the spring seats on the upper and lower seating points.
17)Reassemble the suspension in the reverse order of disassembly and tighten all nuts and bolts to the specifications in the shop manual using a good ratcheting torque wrench. When re-attaching the sway bar end-links, you will need to hold the backing of the threaded portions with a pair of pliers � I use a thin vice grip � or it will spin and never tighten. Be careful not to tear the dust boot.
I have pulled the spring assemblies a few times and have tried various short cuts and this is by far the most practical and easiest way to do the job.
Instructions are for the left (driver�s side on North American vehicles) and are the same for the right side, though mirrored.
Assembly is the reverse of disassembly unless otherwise noted.
FRONT:
1)Raise the vehicle and support adequately with jack stands. Remove the wheels.
2)Open the hood and remove the four 12mm nuts that hold the strut tower brace. Remove the brace.
3)Remove the nuts holding the brace mounting plate to the upper shock mounting block and remove the plate.
4)Loosen, but do NOT remove, the 17mm nut on the top of the shock piston rod.
5)Remove the bolts holding the brake line and wheel speed sensor wires and move them out of the way.
6)Place a floor jack under the lower ball joint and fully load the suspension by raising the jack until the point just before it starts to lift the vehicle off of the jack stands.
7)Remove the both nuts holding the stabilizer bar end-links.
8)Gradually release the floor jack until the end links are easy to remove as the tension is relaxed. Do NOT completely lower the floor jack.
9)Pull the cotter pin holding the upper ball joint nut. Remove the upper ball joint nut.
10)Using a ball joint puller, remove the upper ball joint from the upper spindle arm. It will practically explode out of the mount, so be aware and keep your face/head away from the assembly as it comes apart. It will, at least, scare the crap out of you when it cuts loose with a massive snap/pop. If you forget the jack, it will travel quite a bit and possibly knock your hands off of your arms right at the wrists. I am not kidding. There is a lot of energy stored in that joint.
11)Remove the lower shock bolt.
12)Lower and remove the floor jack.
13)Using a pry bar, push down on the upper A-arm and pull the shock/spring out of the car. You will need to have the bottom of the tube clear the front sway bar.
14)Mount a spring compressor and compress the spring until it pulls away from the upper mounting block. Failure to do this may result in your decapitation.
15)Remove the 17mm nut from the top of the piston rod and disassemble the shock/spring assembly.
16)Reassemble the shock/spring assembly with the new shock and/or spring, noting the order of the parts and the orientation of the spring seats on the upper and lower seating points.
17)Reassemble the suspension in the reverse order of disassembly and tighten all nuts and bolts to the specifications in the shop manual using a good ratcheting torque wrench. When re-attaching the sway bar end-links, you will need to hold the backing of the threaded portions with a pair of pliers � I use a thin vice grip � or it will spin and never tighten. Be careful not to tear the dust boot.
 04-10-2006, 09:39 PM
#2
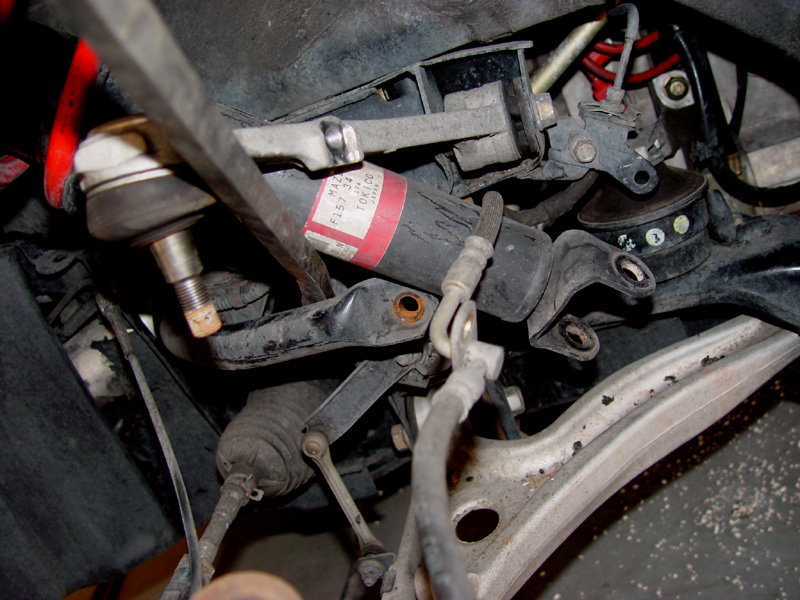
REAR:
1)Remove the trunk liner retaining clips and pull the carpeted trunk liner out on both sides.
2)Place a floor jack under the rear lateral link attachment point on the wheel spindle and raise the jack to load the suspension to the point just short of where the car begins to move on the jack stands.
3)Remove the nut hlding the top of the stabilizer end link to the rear stabilizer bar
4)Gradually release the floor jack until the end link is easy to move out of the stabilizer bar as the tension is relaxed. Do NOT completely lower the floor jack.
5)Remove the bolts holding the brake line and wheel speed sensor wires and move them out of the way.
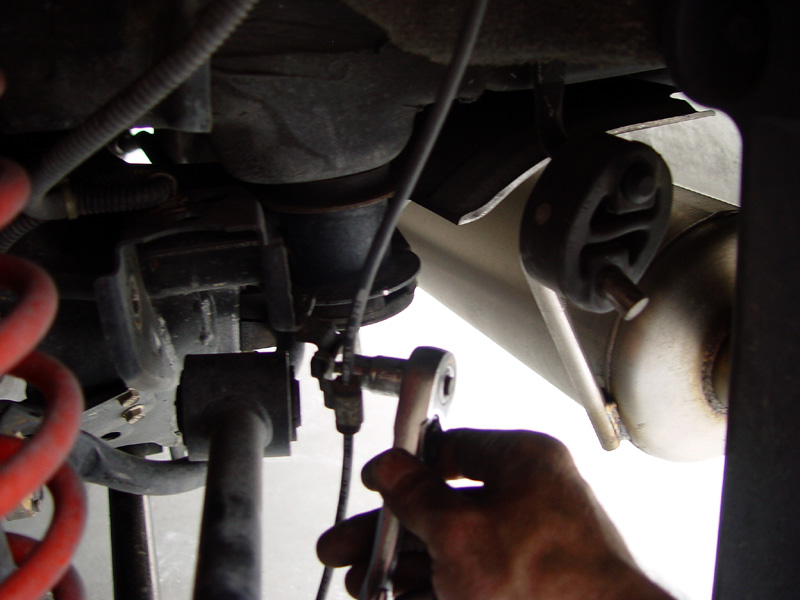
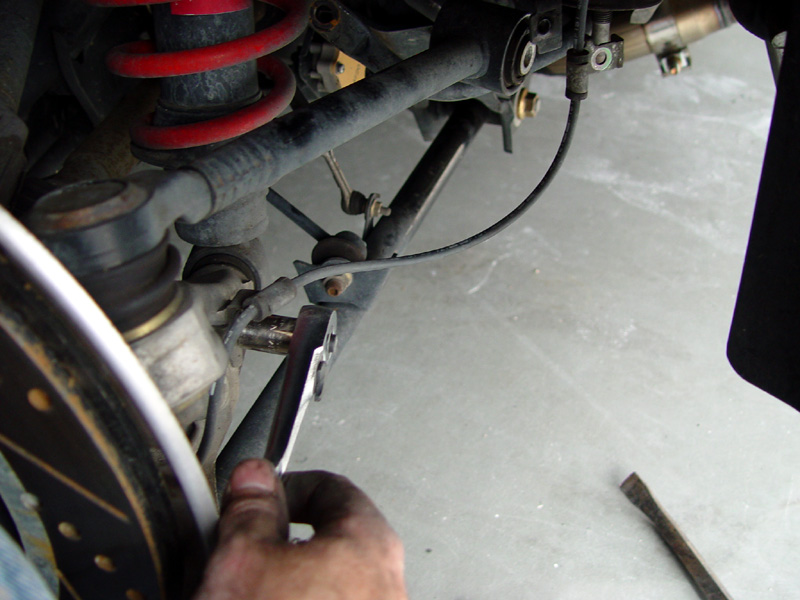
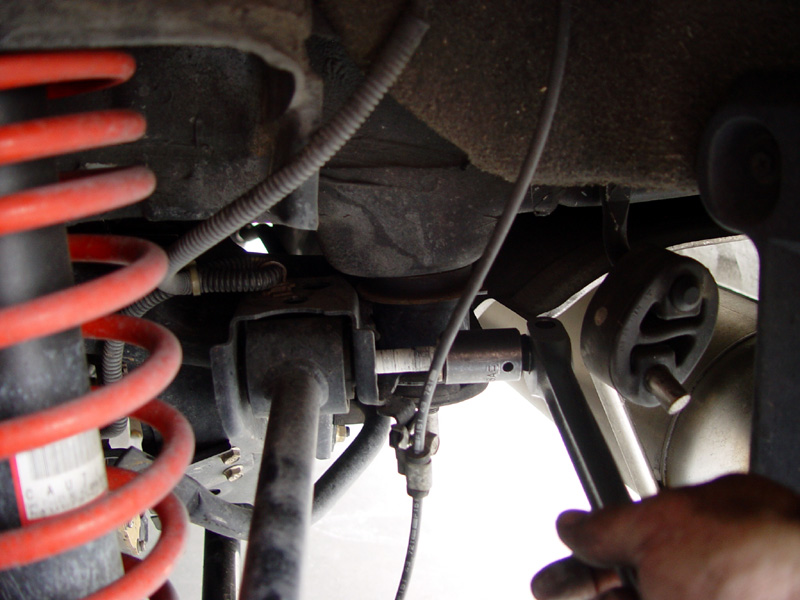
6)Remove the nut and bolt holding the rear lower trailing link to the fram of the car and move the trailing link itself out of the way.
7)Remove the lower shock bolt.
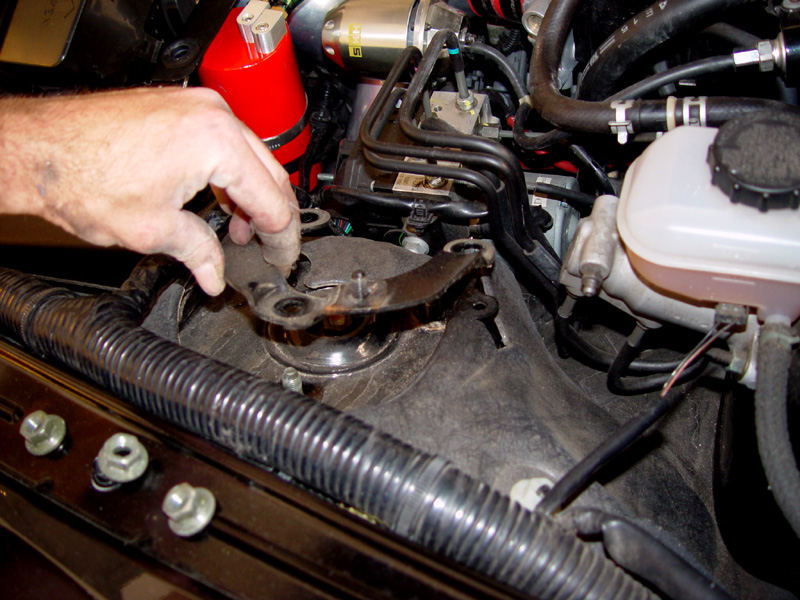
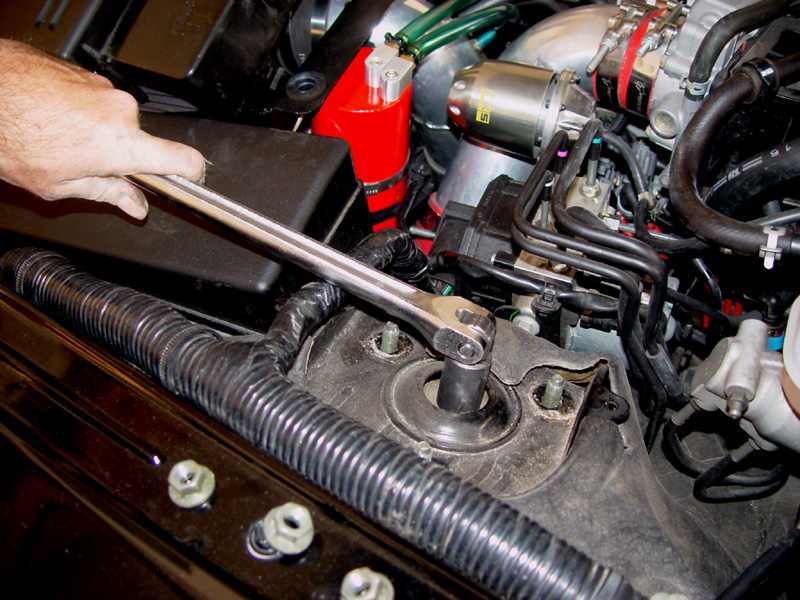
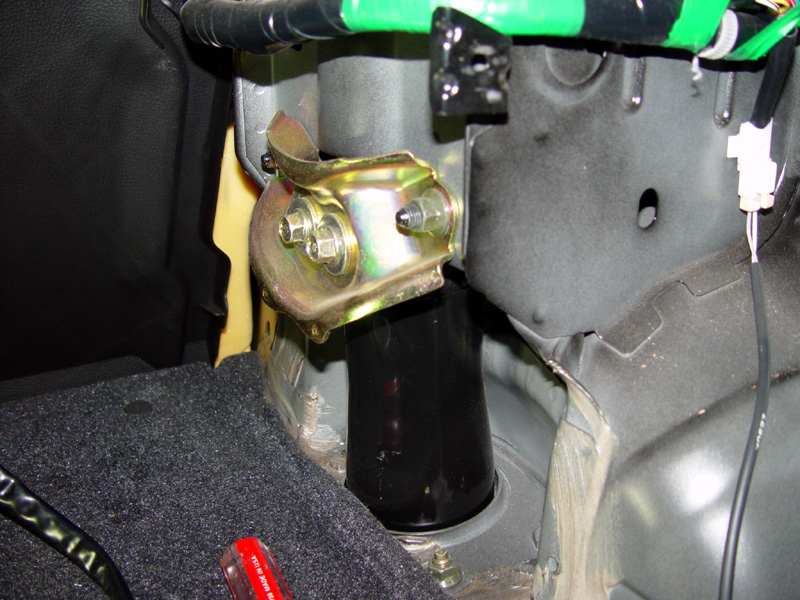
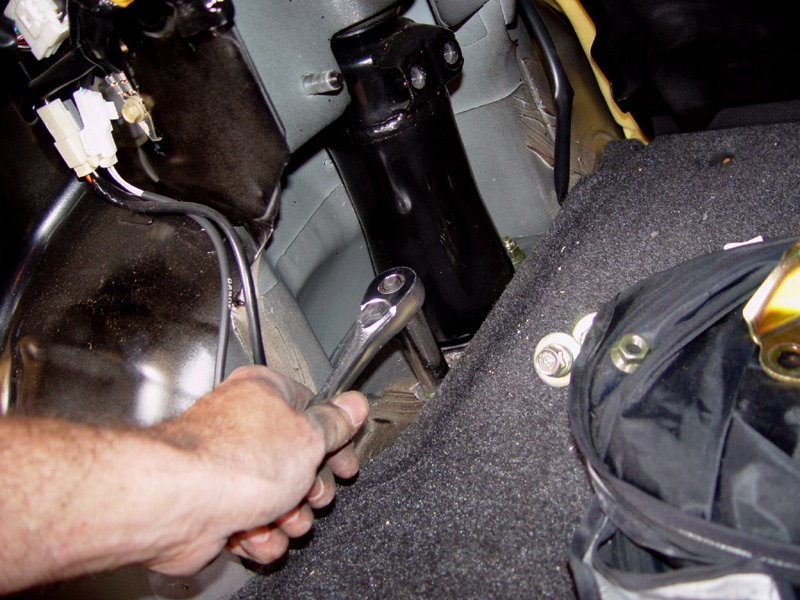
8)Remove the gold-colored mounting plate in the trunk from the upper shock mount by removing the four 17mm mounting bolts.

9)Remove the two 14mm upper shock mounting bolts from inside the trunk.
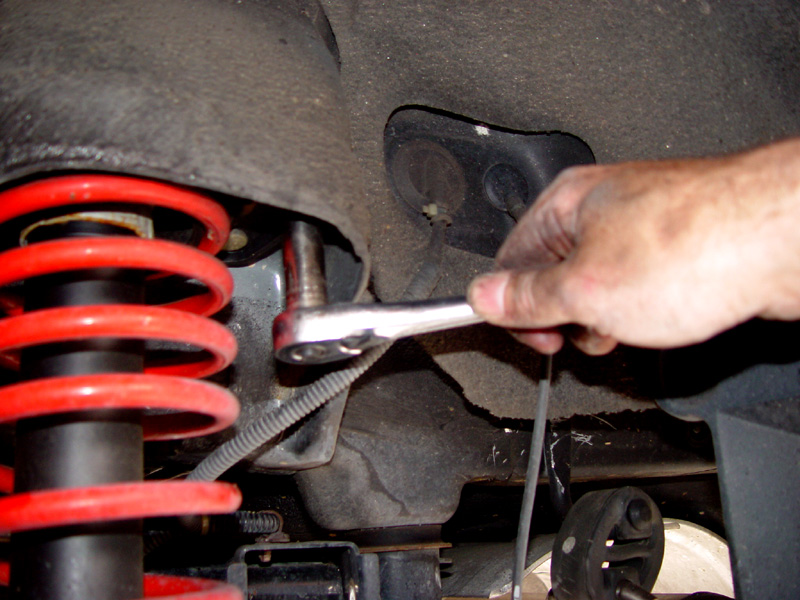
10)Remove the remaining 14mm upper shock mounting bolt from outside the car underneath the mounting point.
11)Lower and remove the floor jack.
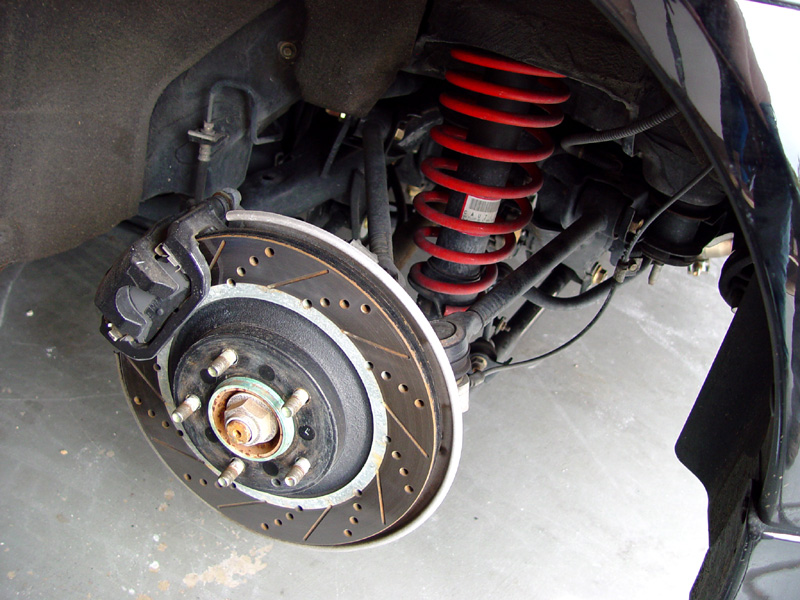
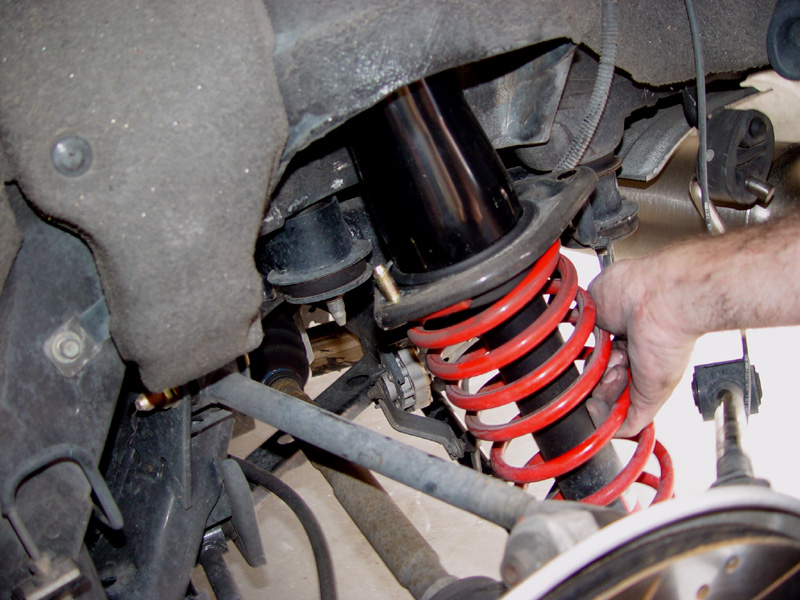
12)Pull the shock/spring assembly out of the car. You will need to have the bottom of the tube clear the rear sway bar.
13)Mount a spring compressor and compress the spring until it pulls away from the upper mounting block. If you were not decapitated while removing the front spring, you might be at this point if you fail to do this.
14)Remove the 17mm nut from the top of the piston rod and disassemble the shock/spring assembly.
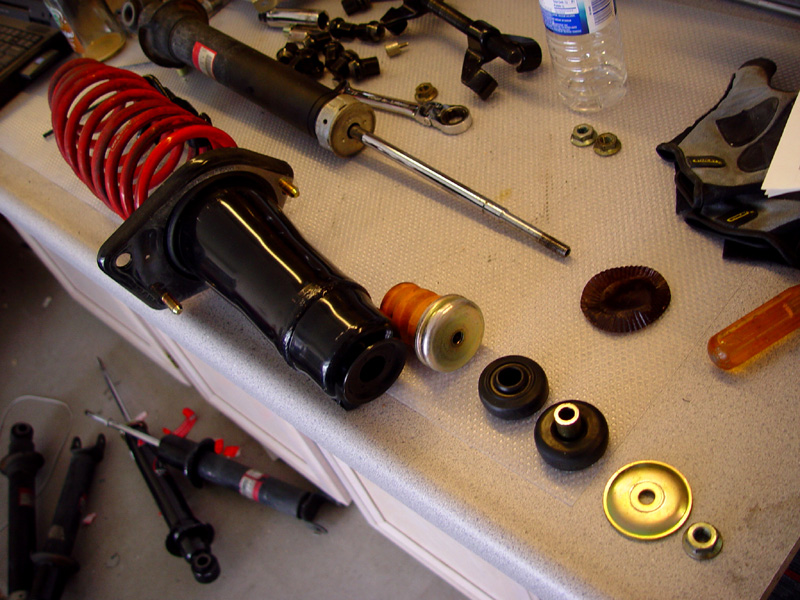
15)Reassemble the shock/spring assembly with the new shock and/or spring, noting the order of the parts and the orientation of the spring seats on the upper and lower seating points.
16)Reassemble the suspension in the reverse order of disassembly and tighten all nuts and bolts to the specifications in the shop manual using a good ratcheting torque wrench. When re-attaching the sway bar end-links, you will need to hold the backing of the threaded portions with a pair of pliers � I use a thin vice grip � or it will spin and never tighten. Be careful not to tear the dust boot.
Attached below are the pages from the FSM for the front and rear shocks, including torque specs and layout.
1)Remove the trunk liner retaining clips and pull the carpeted trunk liner out on both sides.
2)Place a floor jack under the rear lateral link attachment point on the wheel spindle and raise the jack to load the suspension to the point just short of where the car begins to move on the jack stands.
3)Remove the nut hlding the top of the stabilizer end link to the rear stabilizer bar
4)Gradually release the floor jack until the end link is easy to move out of the stabilizer bar as the tension is relaxed. Do NOT completely lower the floor jack.
5)Remove the bolts holding the brake line and wheel speed sensor wires and move them out of the way.
6)Remove the nut and bolt holding the rear lower trailing link to the fram of the car and move the trailing link itself out of the way.
7)Remove the lower shock bolt.
8)Remove the gold-colored mounting plate in the trunk from the upper shock mount by removing the four 17mm mounting bolts.
9)Remove the two 14mm upper shock mounting bolts from inside the trunk.
10)Remove the remaining 14mm upper shock mounting bolt from outside the car underneath the mounting point.
11)Lower and remove the floor jack.
12)Pull the shock/spring assembly out of the car. You will need to have the bottom of the tube clear the rear sway bar.
13)Mount a spring compressor and compress the spring until it pulls away from the upper mounting block. If you were not decapitated while removing the front spring, you might be at this point if you fail to do this.
14)Remove the 17mm nut from the top of the piston rod and disassemble the shock/spring assembly.
15)Reassemble the shock/spring assembly with the new shock and/or spring, noting the order of the parts and the orientation of the spring seats on the upper and lower seating points.
16)Reassemble the suspension in the reverse order of disassembly and tighten all nuts and bolts to the specifications in the shop manual using a good ratcheting torque wrench. When re-attaching the sway bar end-links, you will need to hold the backing of the threaded portions with a pair of pliers � I use a thin vice grip � or it will spin and never tighten. Be careful not to tear the dust boot.
Attached below are the pages from the FSM for the front and rear shocks, including torque specs and layout.
04-11-2006, 06:48 AM
#3
Registered

Join Date: Mar 2005
Location: Rochester Hills, MI
Posts: 301
Likes: 0
Received 0 Likes
on
0 Posts
Great write up and good that you included pictures.
I have a comment or two. Also, there is another DIY located at:
https://www.rx8club.com/series-i-do-yourself-forum-73/diy-lowering-springs-install-23403/
1) For the front, an alternative to using a ball joint puller and popping the ball joint would be to unbolt the upper control arm.
2) On the rear, make sure you remove the 10mm nut on the auto-leveling sensor located on the rear and swing it out of the way.
3) On the rear, I did not remove any brake lines. Just the sway bar links from the rear arm, unbolt the rear arm (at the alignment bolts) and swing it out of the way.
4) Please note that you need to pre-load the suspension BEFORE re-tightening the bolts for the shocks and control arms.....otherwise the car will not sit 'normal'.
Thanks again for your write up.
Alan
 04-11-2006, 02:24 PM
#5
I didn't remove the brake lines - just pulled the stays off for clearance.
Removing the A-arm main bolts will f*ck your alignment.
Pre-loading the suspension is a given - it is the only way to get the sway links back in!
I will be getting the RB extensions - I don't feel like cutting up the trunk.
Removing the A-arm main bolts will f*ck your alignment.
Pre-loading the suspension is a given - it is the only way to get the sway links back in!
I will be getting the RB extensions - I don't feel like cutting up the trunk.
04-11-2006, 02:39 PM
#6
Registered
Join Date: Mar 2005
Location: Rochester Hills, MI
Posts: 301
Likes: 0
Received 0 Likes
on
0 Posts
Maybe I'm wrong, but I believe that anytime you change shocks and/or springs your alignment will most likely be 'f*cked up and you should have one performed shortly after making the change.
Originally Posted by MazdaManiac
I didn't remove the brake lines - just pulled the stays off for clearance.
Removing the A-arm main bolts will f*ck your alignment.
Pre-loading the suspension is a given - it is the only way to get the sway links back in!
I will be getting the RB extensions - I don't feel like cutting up the trunk.
Removing the A-arm main bolts will f*ck your alignment.
Pre-loading the suspension is a given - it is the only way to get the sway links back in!
I will be getting the RB extensions - I don't feel like cutting up the trunk.
04-11-2006, 02:58 PM
#7
To some degree - if the geometry changes.
However, if you are just changing shocks and the ride height does not change, the alignment will still be whatever it was before the install, unless you pull and active pivot like the A-arm mounts, the lower trailing link or something similar.
Even then, it is hit or miss. You might get it back together perfectly. I would even say you probably will get it right.
You would have to get it really tweaked to be far enough off to change the toe or caster.
However, the A-arm is the most likely to screw you toe short of pulling the tie rod ends.

 , custom intake, red box ??
 04-12-2006, 08:53 AM
#11
Original Turbo 'd Auto !!
Just one thing to add.
The Stock Sway links have a 5mm hex hole in them. Use a Allen wrench to hold them from spinning when removing the nut. .
I not fond of using grips or pliers on threads anymore.
nice write up and pics Jeff.
Since I have Tein's I didn't need a spring compressor to remove them from the stock shocks.
They are "short" enought to remove easily. They still pop but no where neer like the stock springs!!!
*****Disclaimer*******
If someone does remove the springs without spring compressors and the proper safety equipment and get hurt. Shame on you. I didn't tell you to do It.
*****Disclaimer*******
 04-13-2006, 01:08 PM
#13
Originally Posted by 09Factor
The Stock Sway links have a 5mm hex hole in them. Use a Allen wrench to hold them from spinning when removing the nut. .
I not fond of using grips or pliers on threads anymore.
I not fond of using grips or pliers on threads anymore.
Originally Posted by 09Factor
Since I have Tein's I didn't need a spring compressor to remove them from the stock shocks.
They are "short" enought to remove easily. They still pop but no where neer like the stock springs!!!
They are "short" enought to remove easily. They still pop but no where neer like the stock springs!!!
 01-01-2007, 03:14 PM
#15
Peeping over the fence

Join Date: Oct 2006
Location: Natchez, MS
Posts: 524
Likes: 0
Received 0 Likes
on
0 Posts
A bunch of us bought the lowering springs on that special from Rishie, and this thread shows you what to do. I just want to say a few things about safety before some of the newbies attempt this job.
Folks, I can not stress enough the fact that you need a spring compressor. Get one at your local auto parts store. There is LOT of energy stored in the spring. When the nut comes off the end of the shock rod, it and all the pieces between it and the spring will become projectiles.
When you are pulling on wrenches to loosen bolts under the car, please do not jerk or pull hard enough to turn the jack stand over. An impact wrench will loosen those bolts with a lot less jerking of the car on the stands. What? You don't have jack stands? Go get a pair.
Last safety tip. When you are removing the parts to get the shocks out, you MUST have a jack under the hub to put pressure on the spring. If not, it can really ruin your day.
I know he covered all of these things in the thread, but for you novices, please be careful. We want you to be back here telling all of us how well the job went. We do not want your spouses typing for you because you lost a body part or worse.
01-01-2007, 03:24 PM
#16

You don't need to remove the ball joint on the front. As already said......the a-arm bolts work better. They also don't change the geometry and the alignment. The alignment changes if the ride height is different...cause of the change in height of the tie rod ends......effects the toe.
02-26-2007, 12:31 AM
#17
Registered

Join Date: May 2006
Location: Charlotte, NC
Posts: 528
Likes: 0
Received 0 Likes
on
0 Posts
Originally Posted by Wilson
A bunch of us bought the lowering springs on that special from Rishie, and this thread shows you what to do. I just want to say a few things about safety before some of the newbies attempt this job.
Folks, I can not stress enough the fact that you need a spring compressor. Get one at your local auto parts store. There is LOT of energy stored in the spring. When the nut comes off the end of the shock rod, it and all the pieces between it and the spring will become projectiles.
When you are pulling on wrenches to loosen bolts under the car, please do not jerk or pull hard enough to turn the jack stand over. An impact wrench will loosen those bolts with a lot less jerking of the car on the stands. What? You don't have jack stands? Go get a pair.
Last safety tip. When you are removing the parts to get the shocks out, you MUST have a jack under the hub to put pressure on the spring. If not, it can really ruin your day.
I know he covered all of these things in the thread, but for you novices, please be careful. We want you to be back here telling all of us how well the job went. We do not want your spouses typing for you because you lost a body part or worse.
Folks, I can not stress enough the fact that you need a spring compressor. Get one at your local auto parts store. There is LOT of energy stored in the spring. When the nut comes off the end of the shock rod, it and all the pieces between it and the spring will become projectiles.
When you are pulling on wrenches to loosen bolts under the car, please do not jerk or pull hard enough to turn the jack stand over. An impact wrench will loosen those bolts with a lot less jerking of the car on the stands. What? You don't have jack stands? Go get a pair.
Last safety tip. When you are removing the parts to get the shocks out, you MUST have a jack under the hub to put pressure on the spring. If not, it can really ruin your day.
I know he covered all of these things in the thread, but for you novices, please be careful. We want you to be back here telling all of us how well the job went. We do not want your spouses typing for you because you lost a body part or worse.
02-26-2007, 12:37 AM
#18
Originally Posted by OnRails
OK I am looking at doing this myself. I understand the danger of undoing the shock assembly and the need for a spring compressor. That part is obvious. It is not obvious to me why the jack is necessary and why this part is dangerous. If the car is off the ground where is potential energy being stored? Is the jack just cause you have to put tension in the assembly so that you can get the bolts out or what? I just want to understand what forces are at play so i can do this safely.
if the car is on jackstands. the stuff comes off... the only danger is if you do not have spring compressors. and you do that part off the car.
the diy is good.. for the rear i just unbolted the rear sway.... at the mounting / bushings...
beers
 02-26-2007, 03:03 AM
#19
Registered
Join Date: May 2006
Location: Charlotte, NC
Posts: 528
Likes: 0
Received 0 Likes
on
0 Posts
To be clear, I am wanting to know what is the point of this:
and this:
and how does that relate to this:
and this:
I need my hands.
6)Place a floor jack under the lower ball joint and fully load the suspension by raising the jack until the point just before it starts to lift the vehicle off of the jack stands
8)Gradually release the floor jack until the end links are easy to remove as the tension is relaxed. Do NOT completely lower the floor jack.
Last safety tip. When you are removing the parts to get the shocks out, you MUST have a jack under the hub to put pressure on the spring. If not, it can really ruin your day.
If you forget the jack, it will travel quite a bit and possibly knock your hands off of your arms right at the wrists. I am not kidding. There is a lot of energy stored in that joint.
Last edited by OnRails; 02-26-2007 at 03:14 AM.
02-26-2007, 10:25 AM
#20
Original Turbo 'd Auto !!
:
8)Gradually release the floor jack until the end links are easy to remove as the tension is relaxed. Do NOT completely lower the floor jack.
8)Gradually release the floor jack until the end links are easy to remove as the tension is relaxed. Do NOT completely lower the floor jack.
also if you DON'T have the jack under the hub when you remove the rear tie rod, the still compressed spring will shoot the hub down.
 03-02-2007, 04:15 PM
#24
Jeff....nice pictures....but you sure like doing things the hard way 
I have never pulled any of the front ball joints...the a-arm bolts are way easier....and there is no problem with doing it that way.
All that jacking around seems like a lot of work
I have never pulled any of the front ball joints...the a-arm bolts are way easier....and there is no problem with doing it that way.
All that jacking around
seems like a lot of work

