Hymee gets Supercharged (Part 2)
 08-24-2009, 12:55 AM
#1701
Registered User

Join Date: Jul 2007
Location: Canada ---> Australia
Posts: 686
Likes: 0
Received 0 Likes
on
0 Posts
gah...I'm moving to Brisbane in January...I'm supposed to be car-less for at least 4 years >_< this makes me want to buy an RX8 when I move out there...


 09-04-2009, 08:00 AM
#1709


 09-05-2009, 01:52 PM
#1712
is adjusting valve lash
Join Date: Sep 2007
Location: hollywooood!
Posts: 1,060
Likes: 0
Received 0 Likes
on
0 Posts
^^ can't do california? how come?
maybe shipping might be expensive, but i see i'm not the only US customer showing interest...
or did i get you wrong?
maybe shipping might be expensive, but i see i'm not the only US customer showing interest...
or did i get you wrong?
09-17-2009, 05:58 PM
#1714
You Dumbass!!!

Join Date: Feb 2008
Location: New York
Posts: 719
Likes: 0
Received 0 Likes
on
0 Posts
It was a joke, and a decent one IMHO.


 10-17-2009, 07:12 AM
#1717
Danny from ADE Automotive has just posted these pics (and story) about the first kit shipped. This is a special kit in that it uses a 2.8 litre twin-screw blower, and is being fitted to a RX-8 engine destined for an MX-5 NC track car. Read me next post for the other scoop...
Cheers,
Hymee.
The full thread can be read here: https://www.rx8club.com/australia-new-zealand-forum-37/renesis-nc-track-car-build-158121/page8/
Cheers,
Hymee.
...
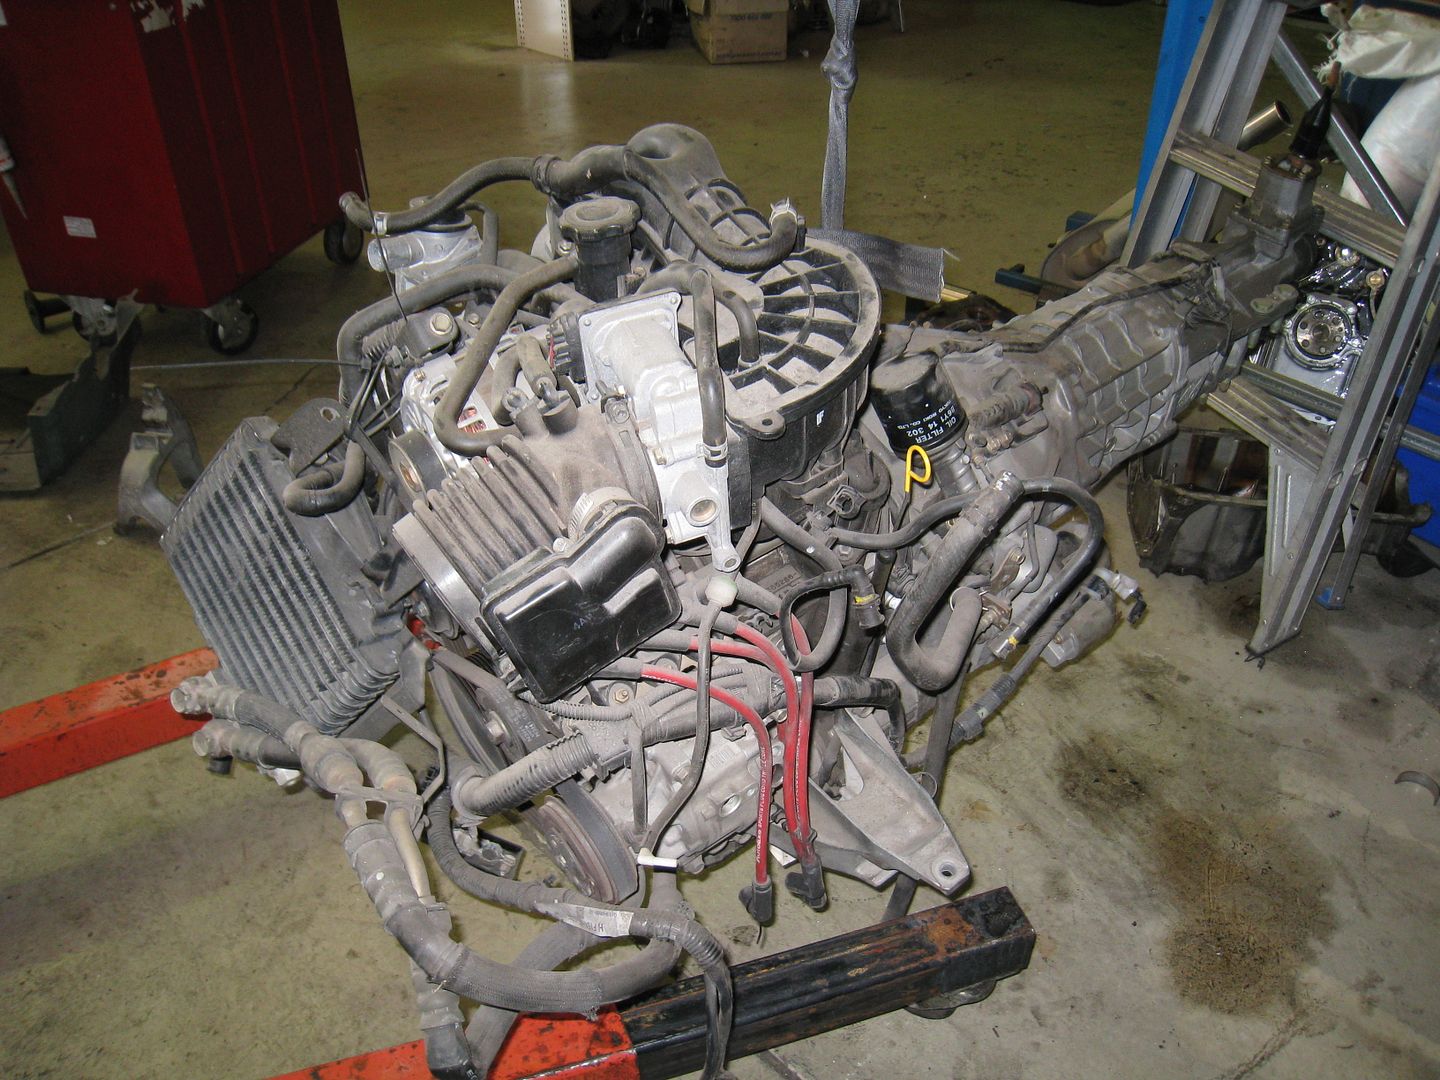
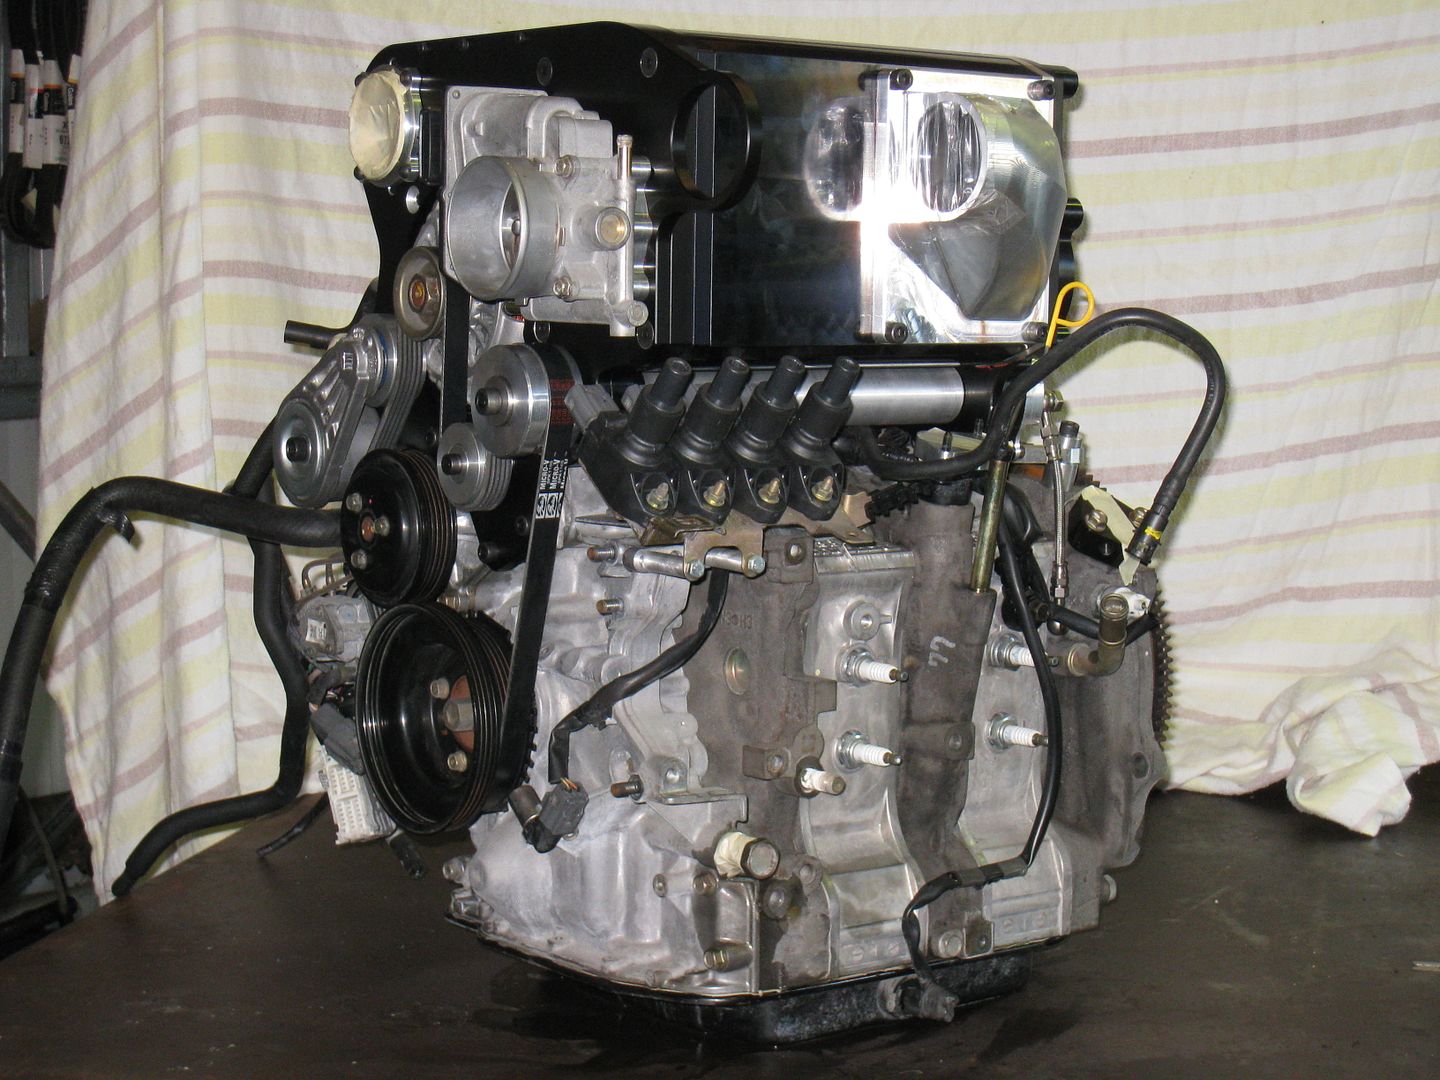
Today was indeed a "Milestone" for the Renesis NC project with the installation of the supercharger kit getting underway.
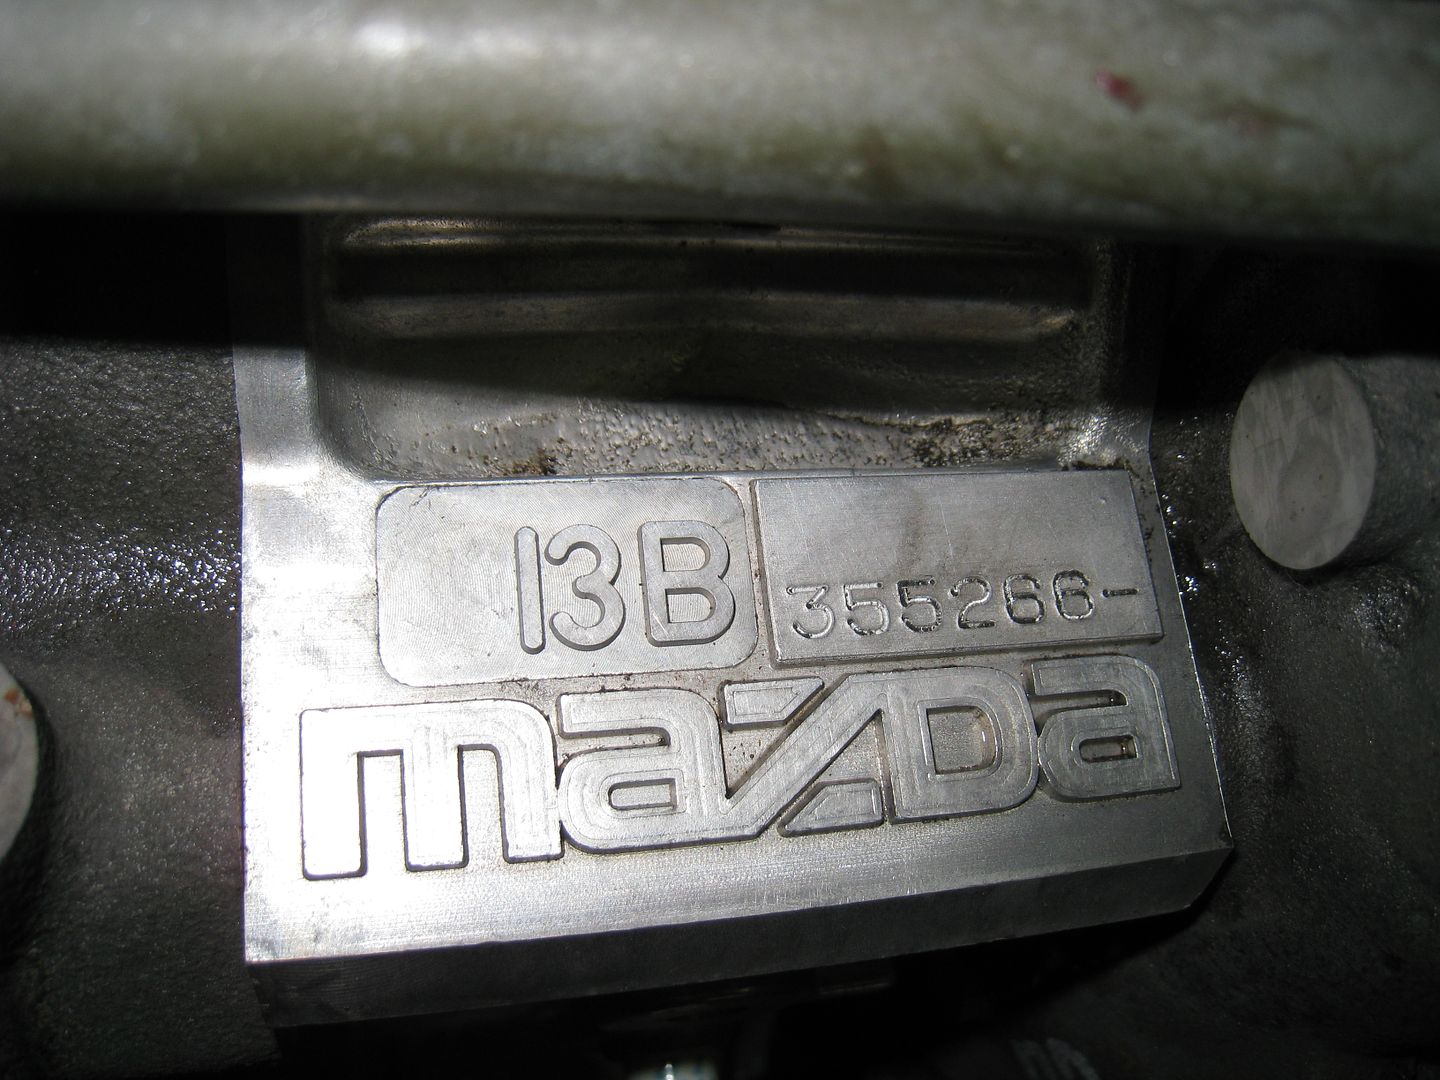
First up this morning was the removal of unnecessary components and cleaning of the engine in anticipation of the supercharger installation. The engine is from a FY 2005 JDM RX-8 and has 33,000km on it. It has been in storage for almost 12 months so it was pretty dusty. A quick hit with citrus cleaner and a pressure washer was exactly what was required as I couldn't let the engine detract from the awesomeness that was about to be bolted to it.
Upper section of inlet manifold including throttle body removed.

Removal of the oil filler neck and vacuum reservoir assembly. The vacuum reservoir and components will be reinstated at a later date.

After all the orifices were suitably protected the engine got washed and came up looking like it was on the Mazda production line awaiting fitment.
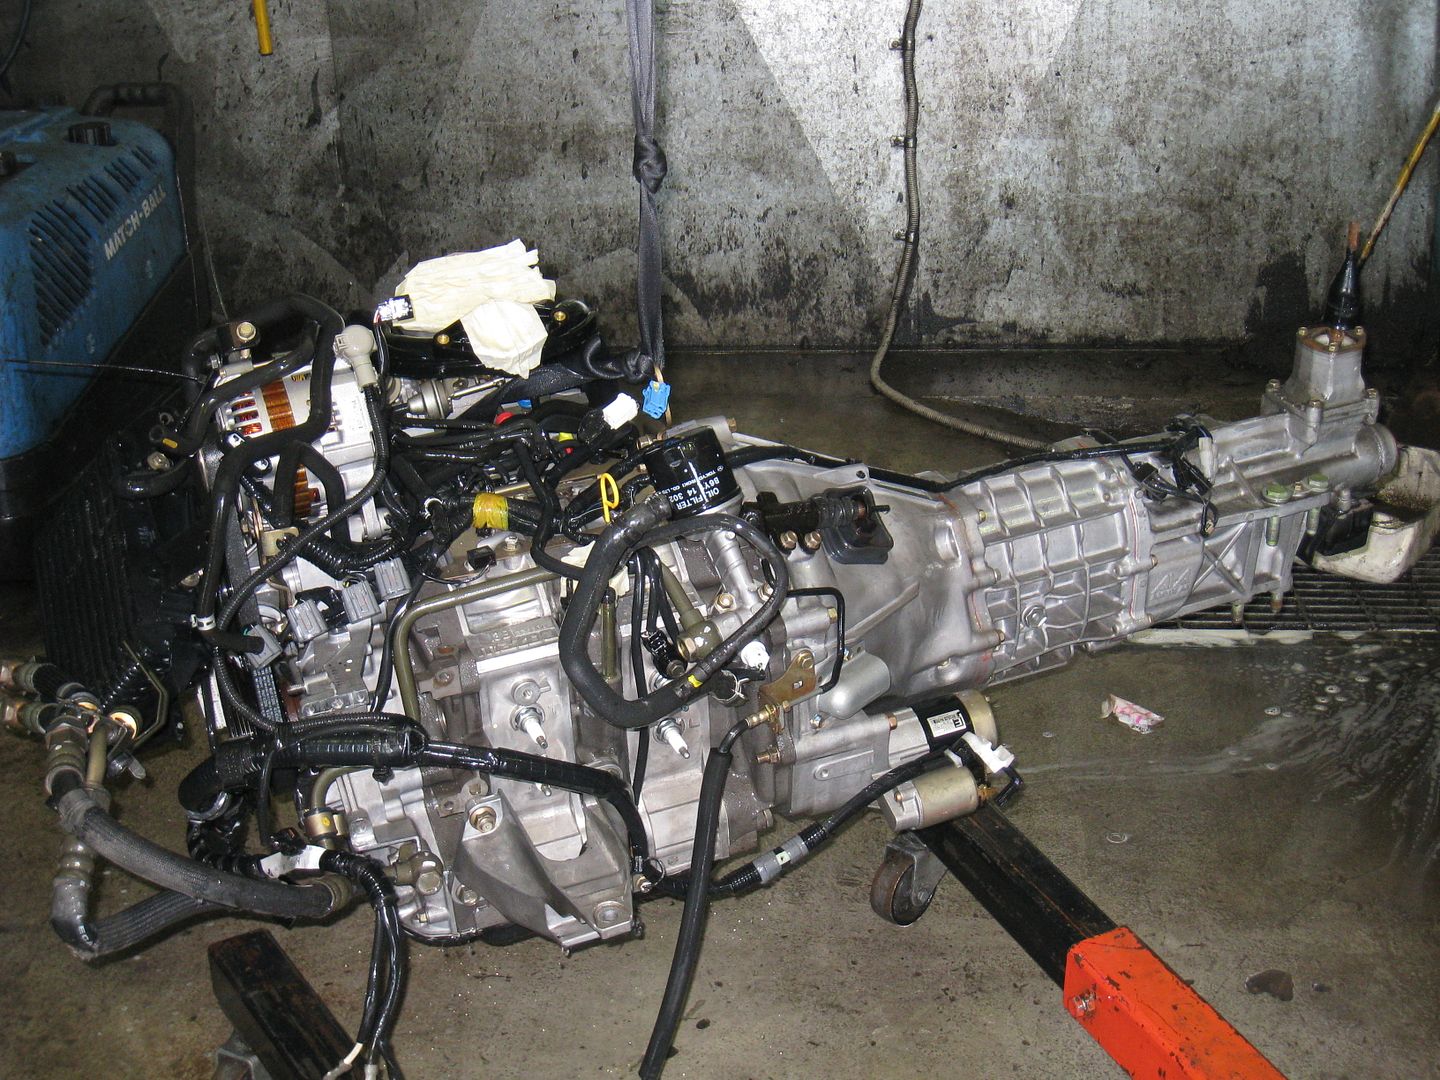
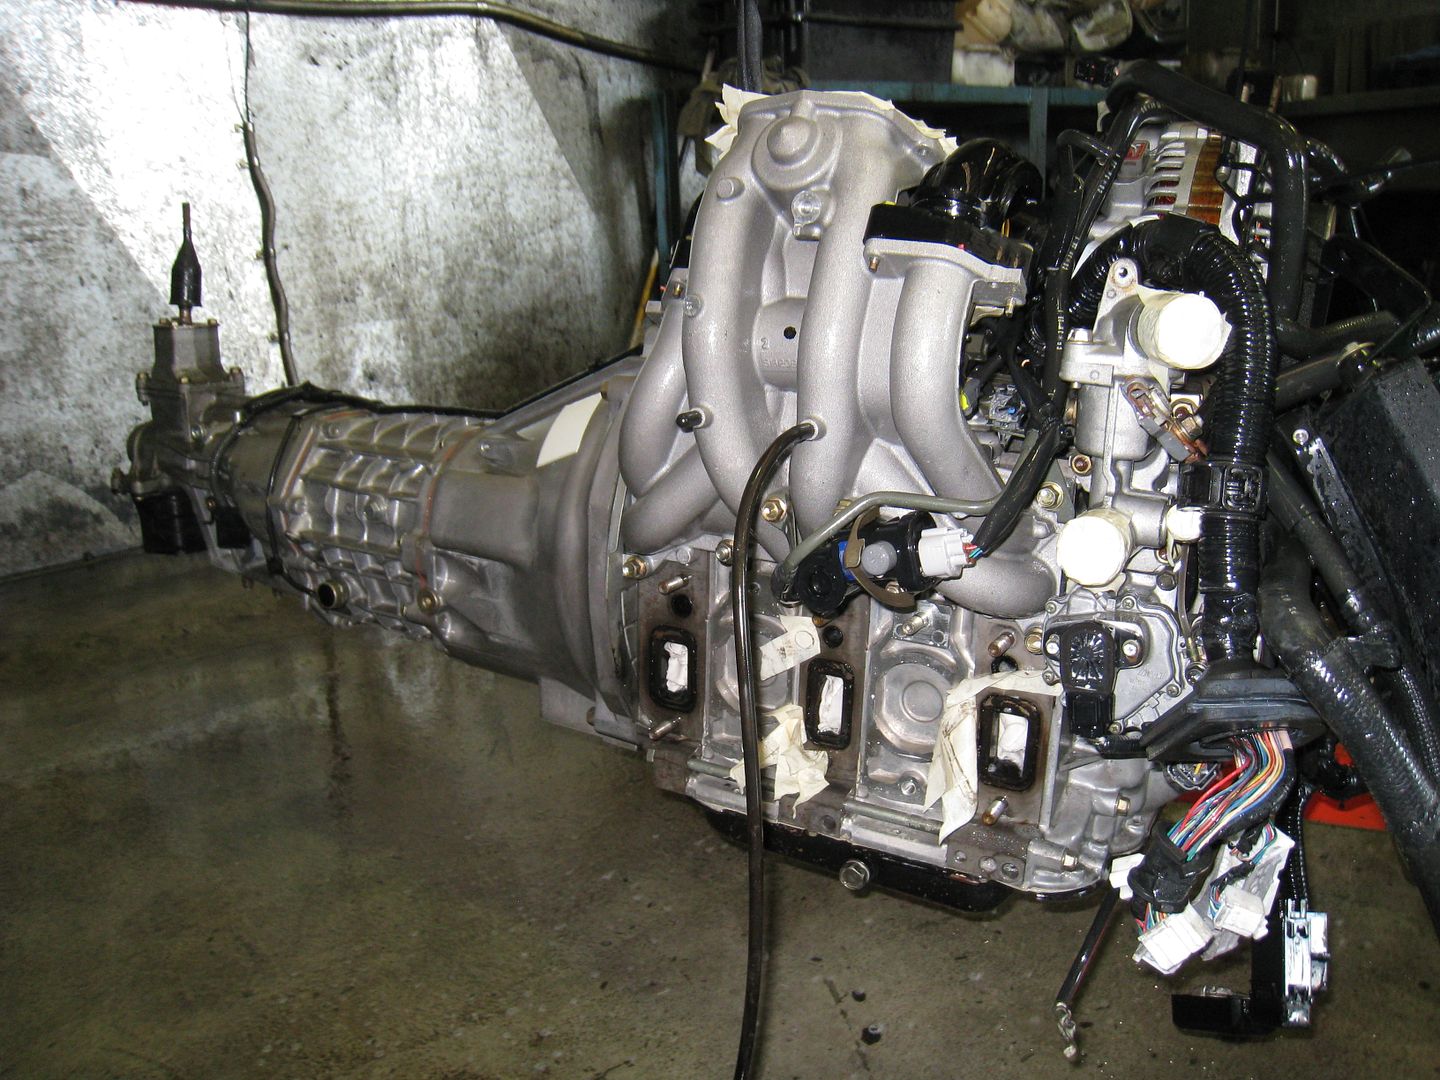
Once dried, the gearbox was removed from the engine and placed upon the workbench. The supercharger mounting plate utilises a the alternator mounting bolts and most of the water pump bolts to lock it in position. So these standard fasteners (bolts and studs) were removed.
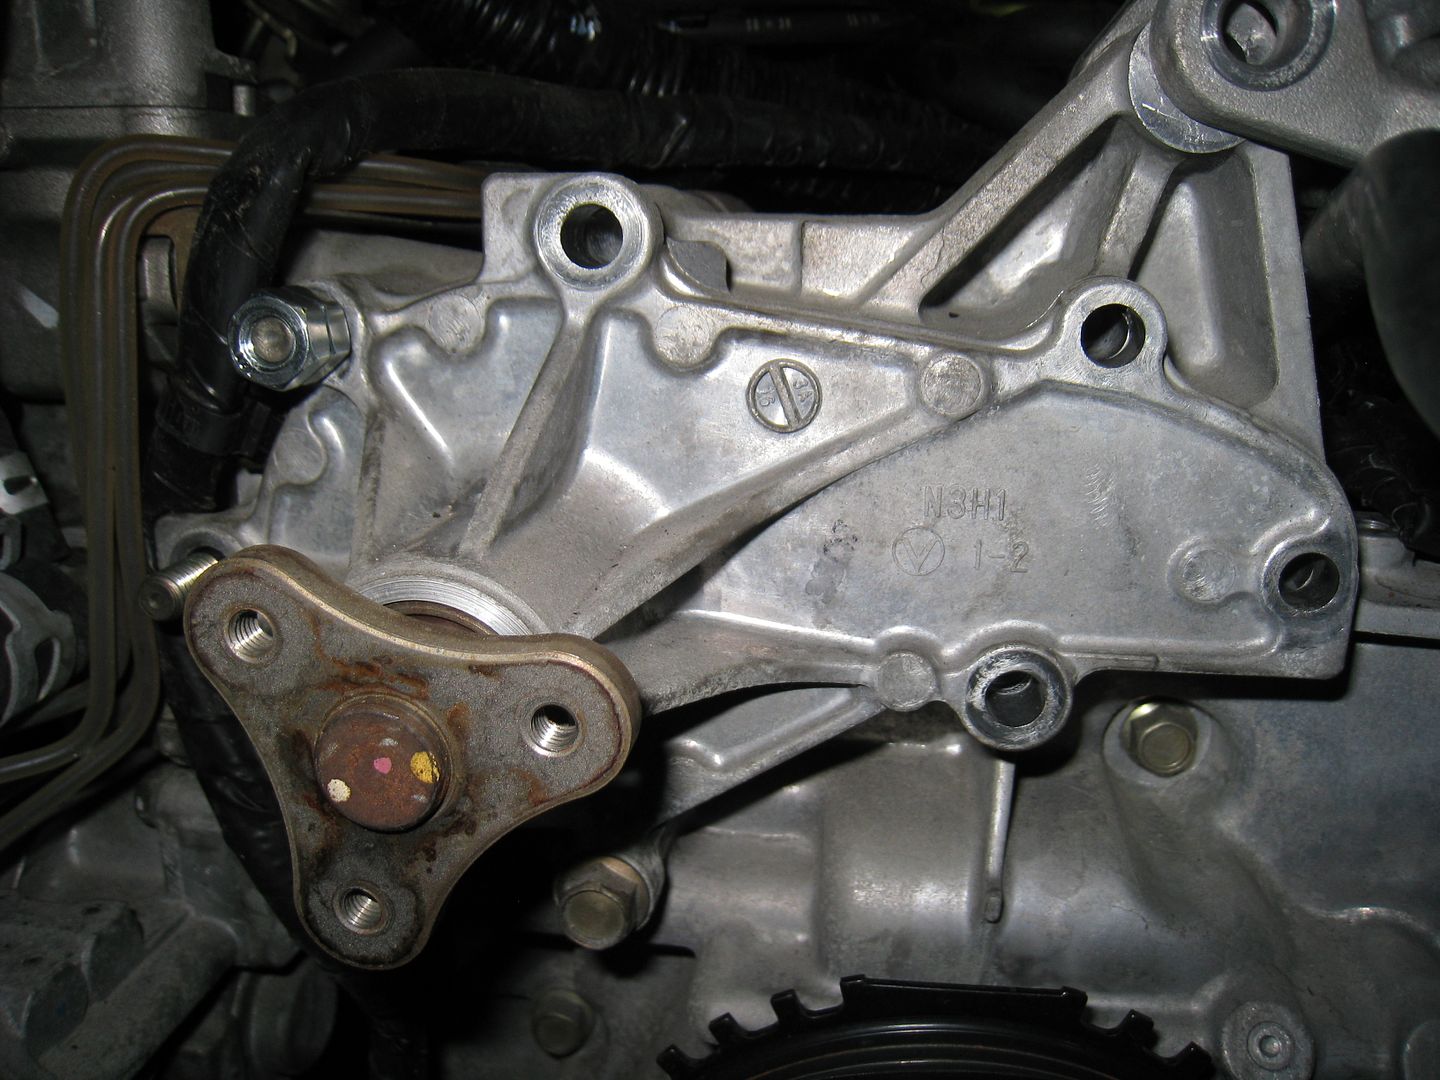
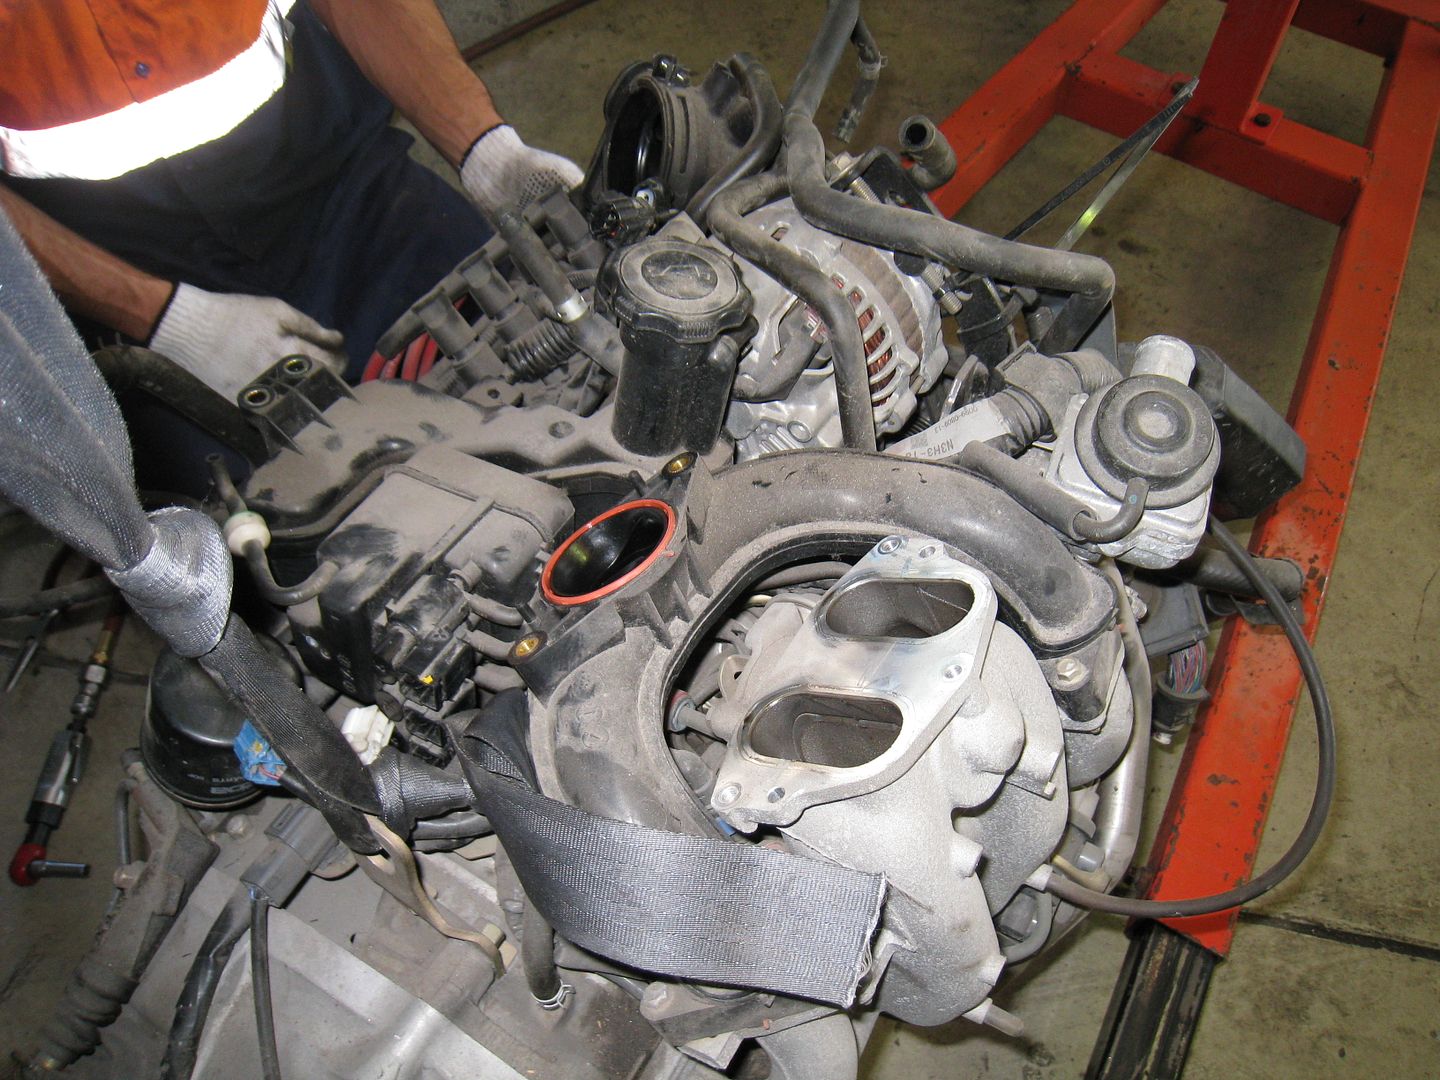
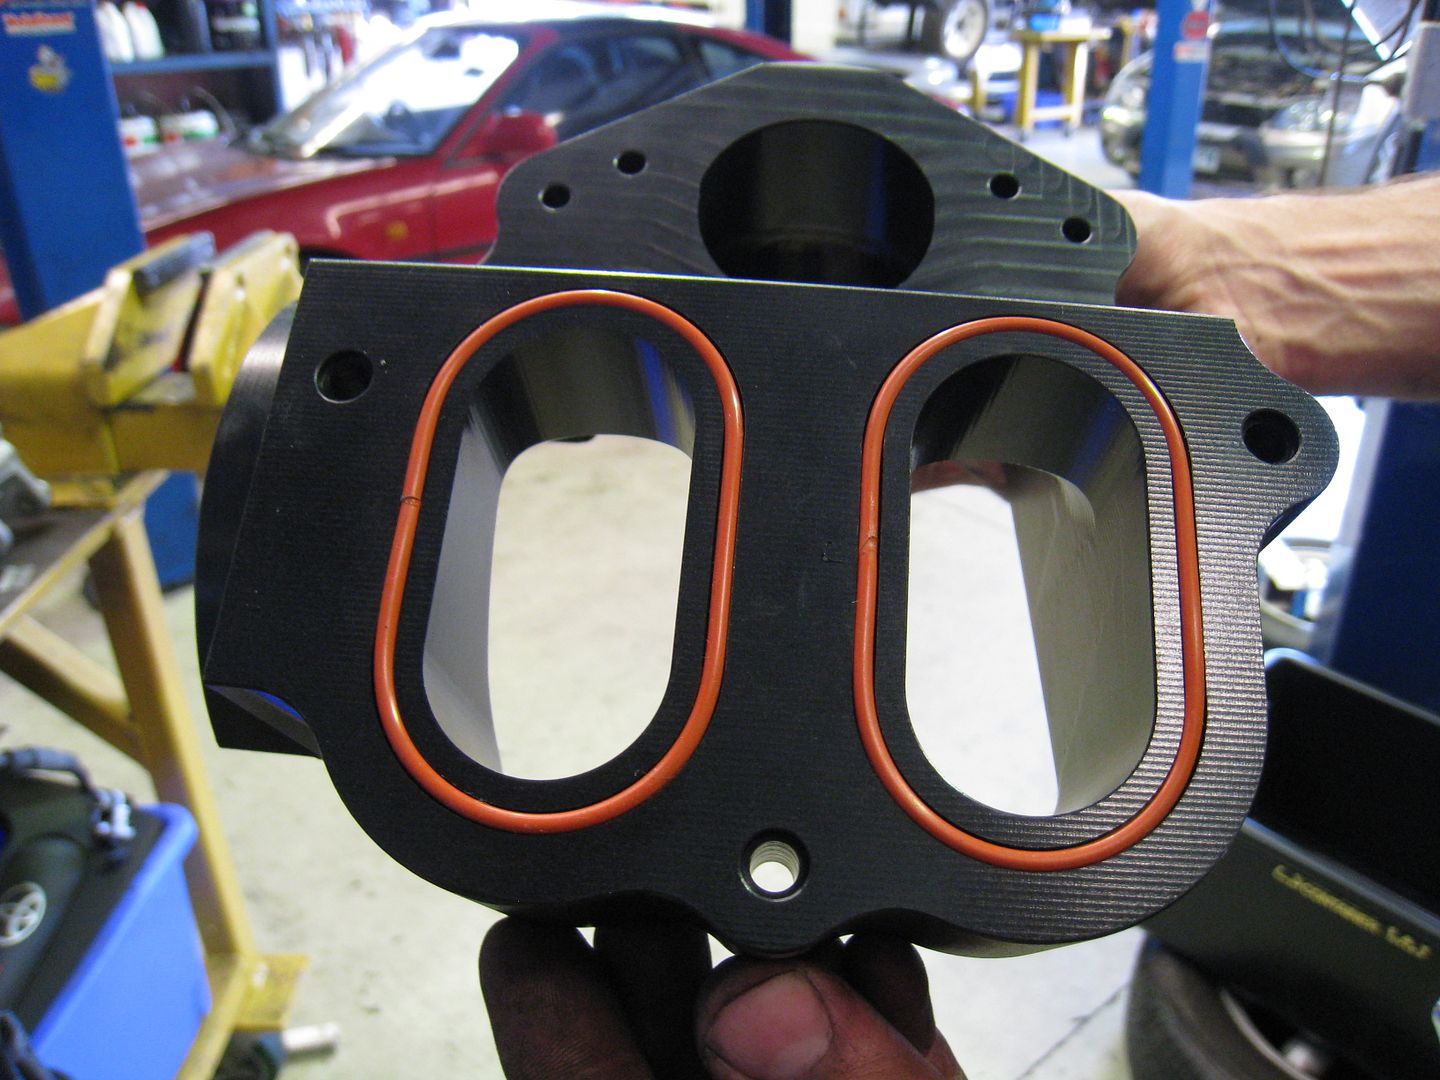
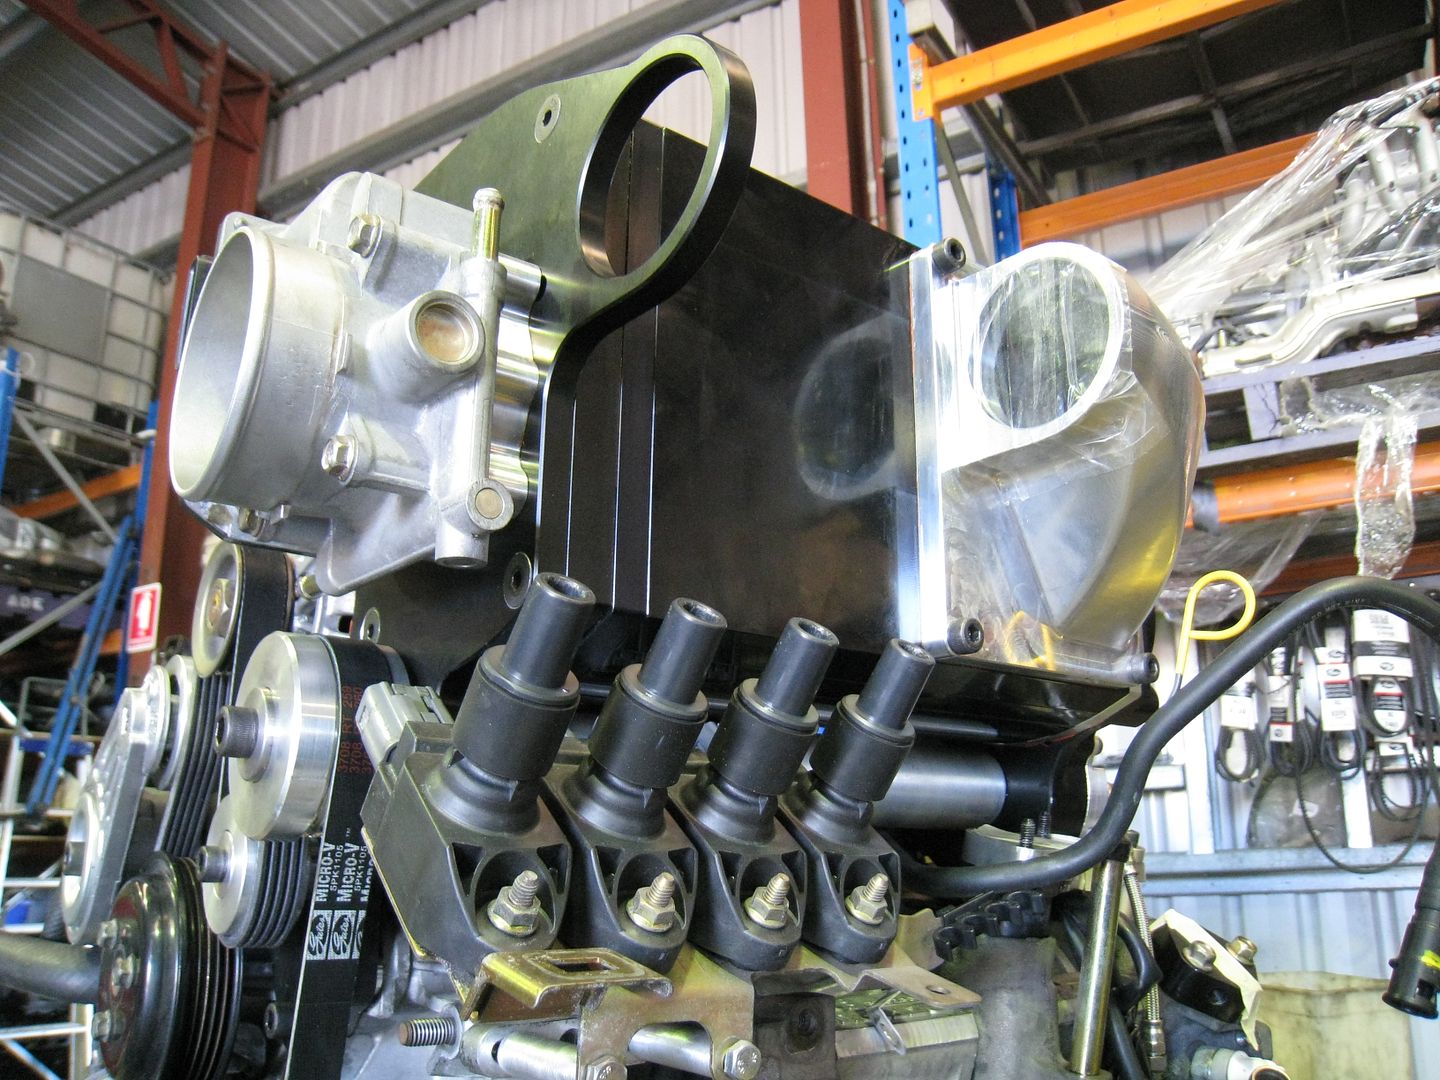
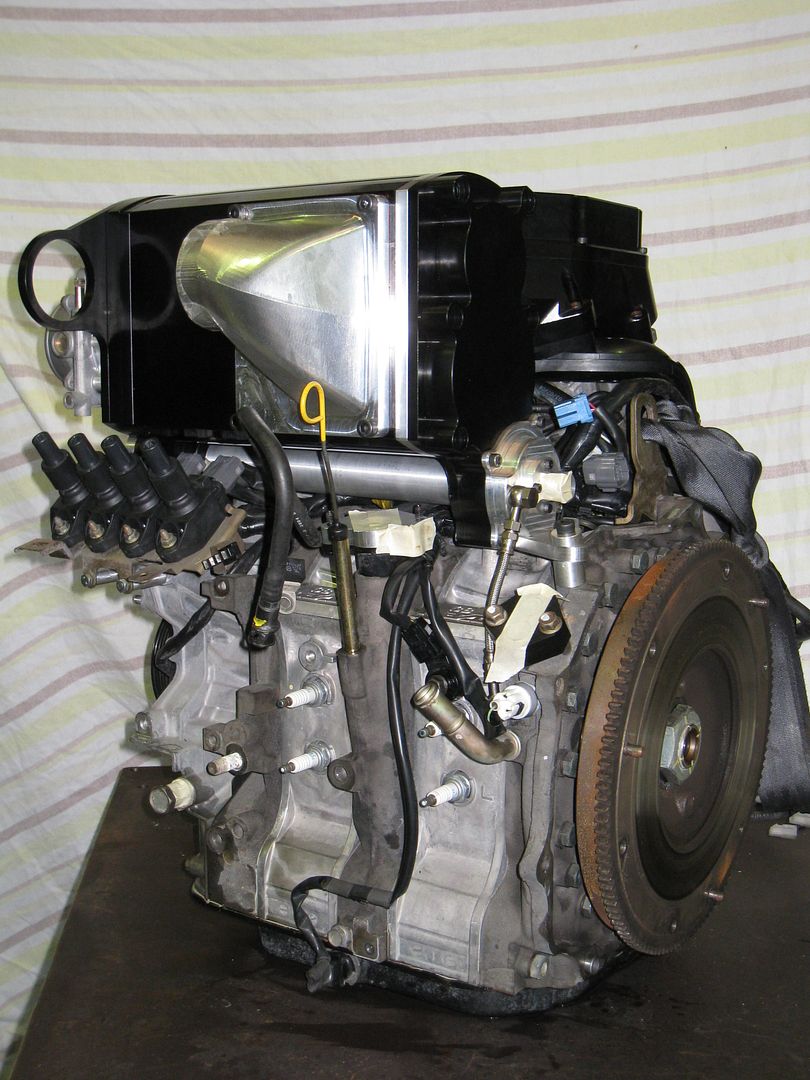
The first item of the supercharger kit to be installed was the two piece plenum and inlet tube. Here is the lower section of plenum with it's 'O'-rings fitted.
It mates with the surfaces as shown in the next photo.
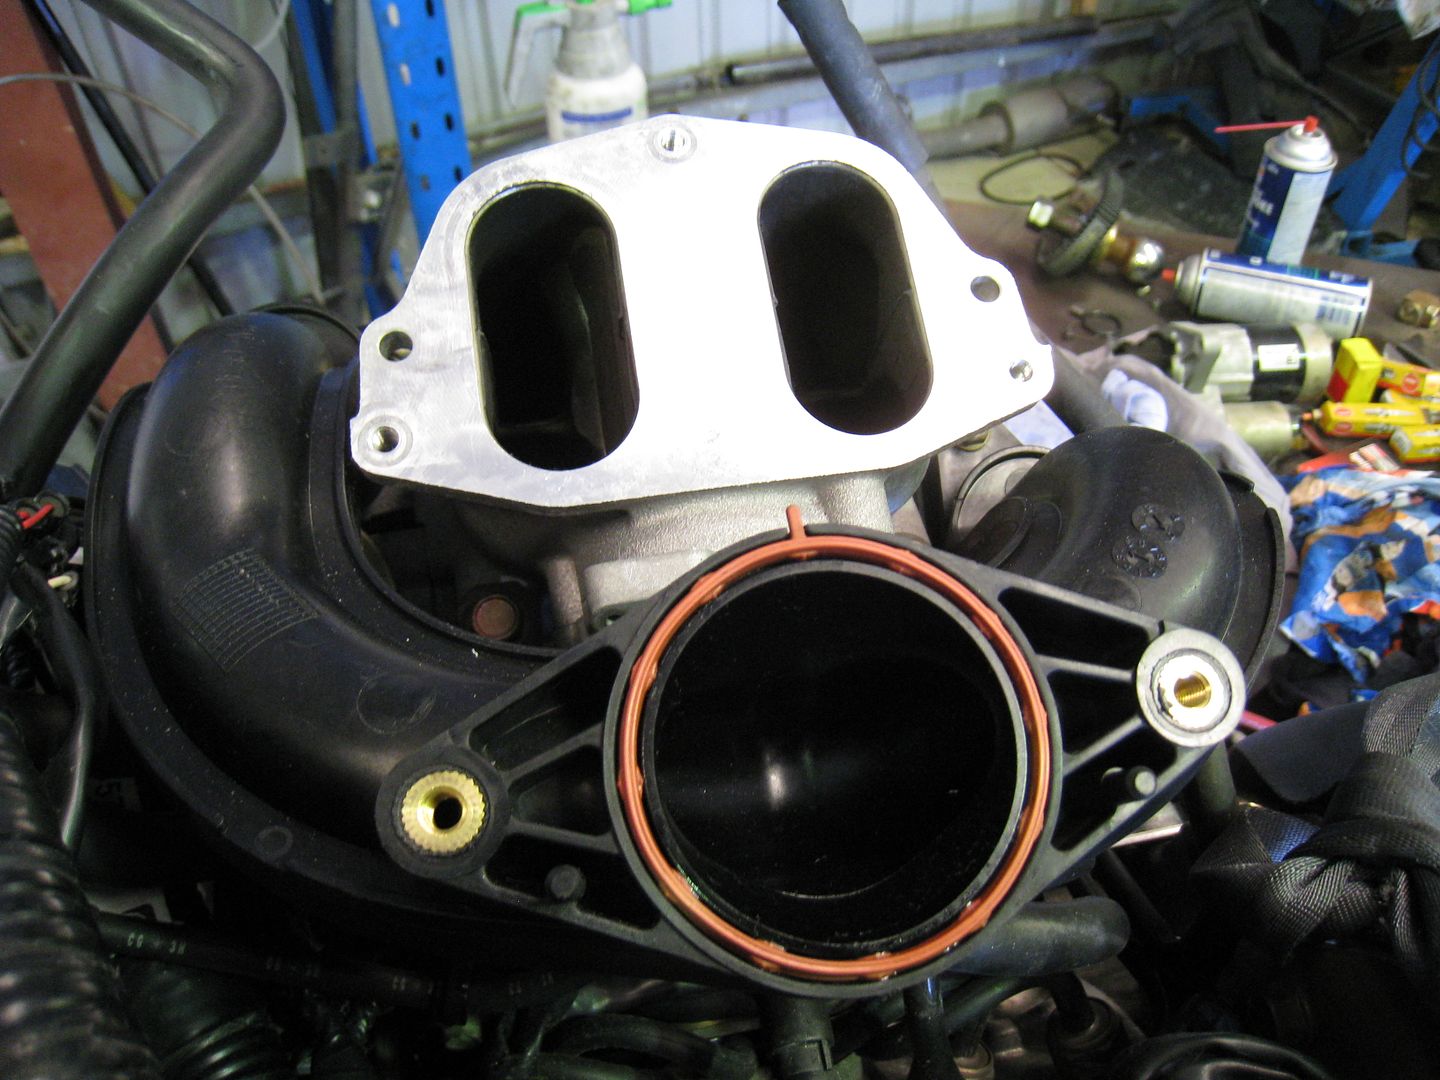
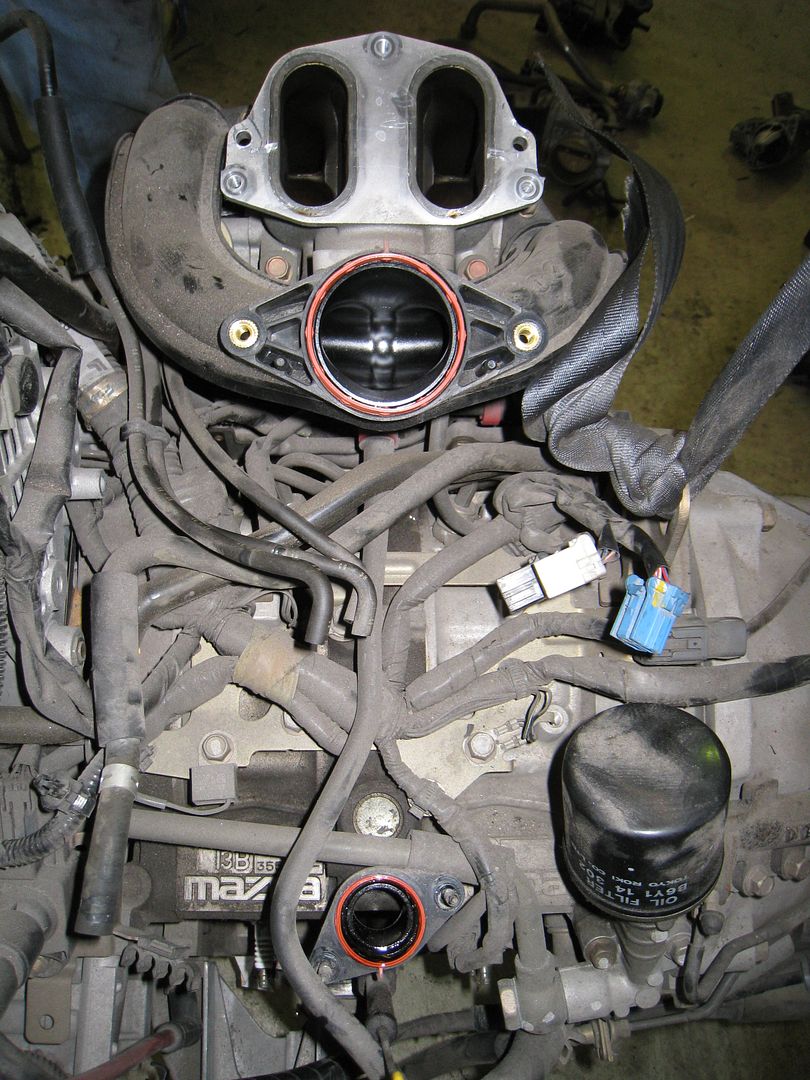
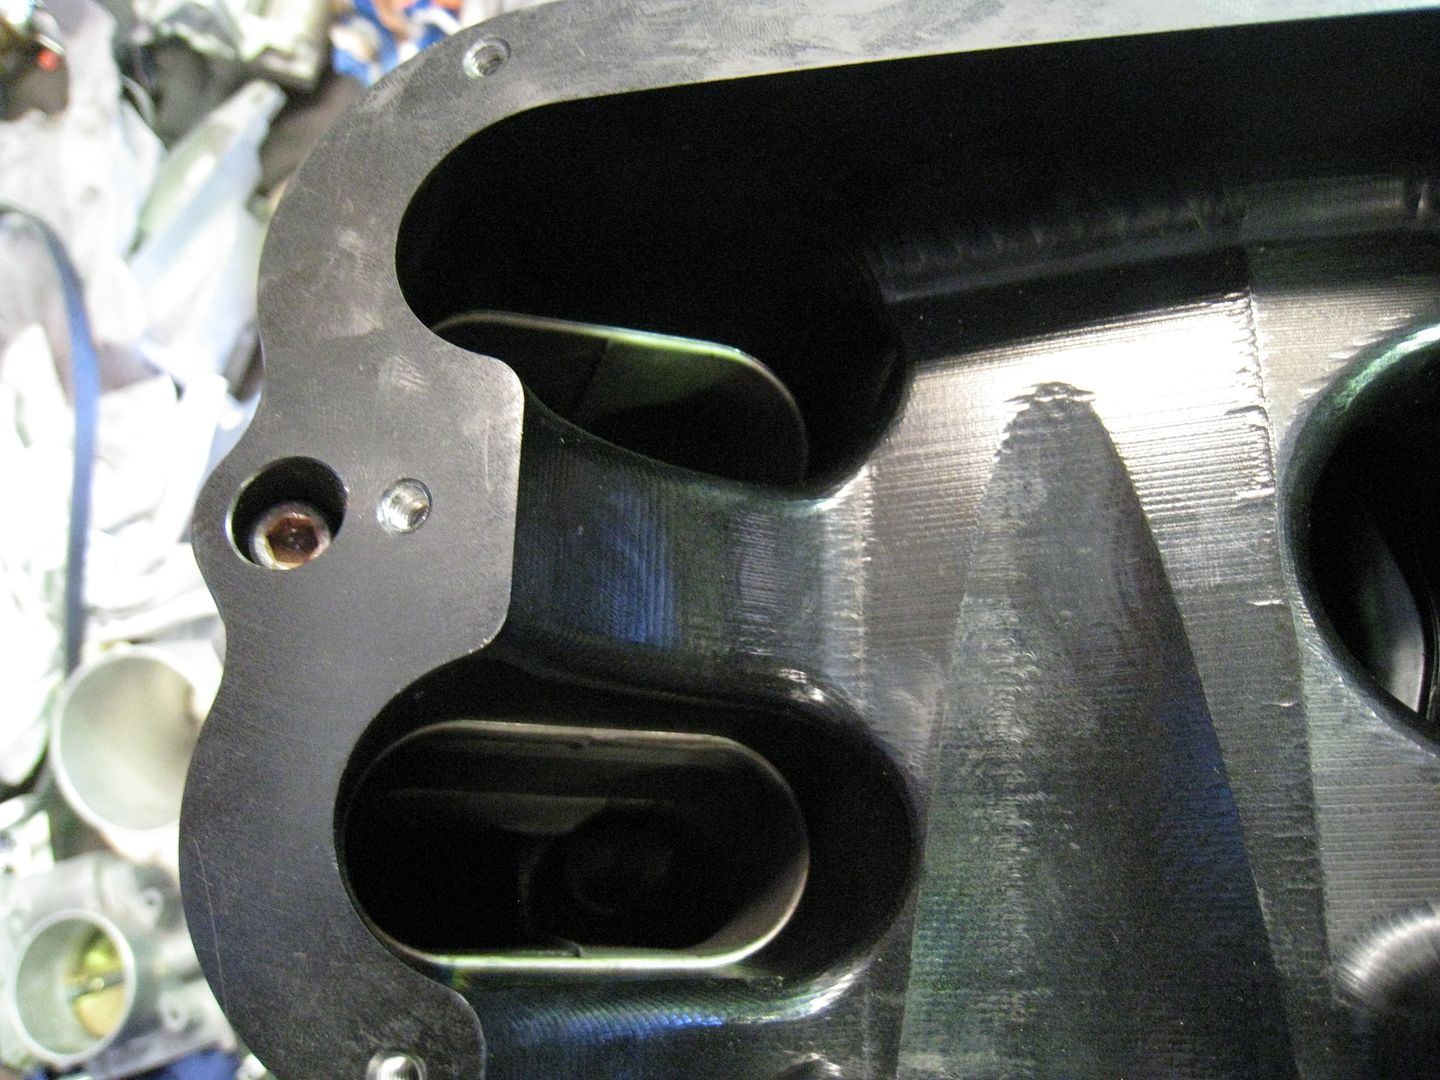
With the lower section of plenum bolted in place you can really appreciate the dimensional accuracy of the kit as the port matching was perfect.
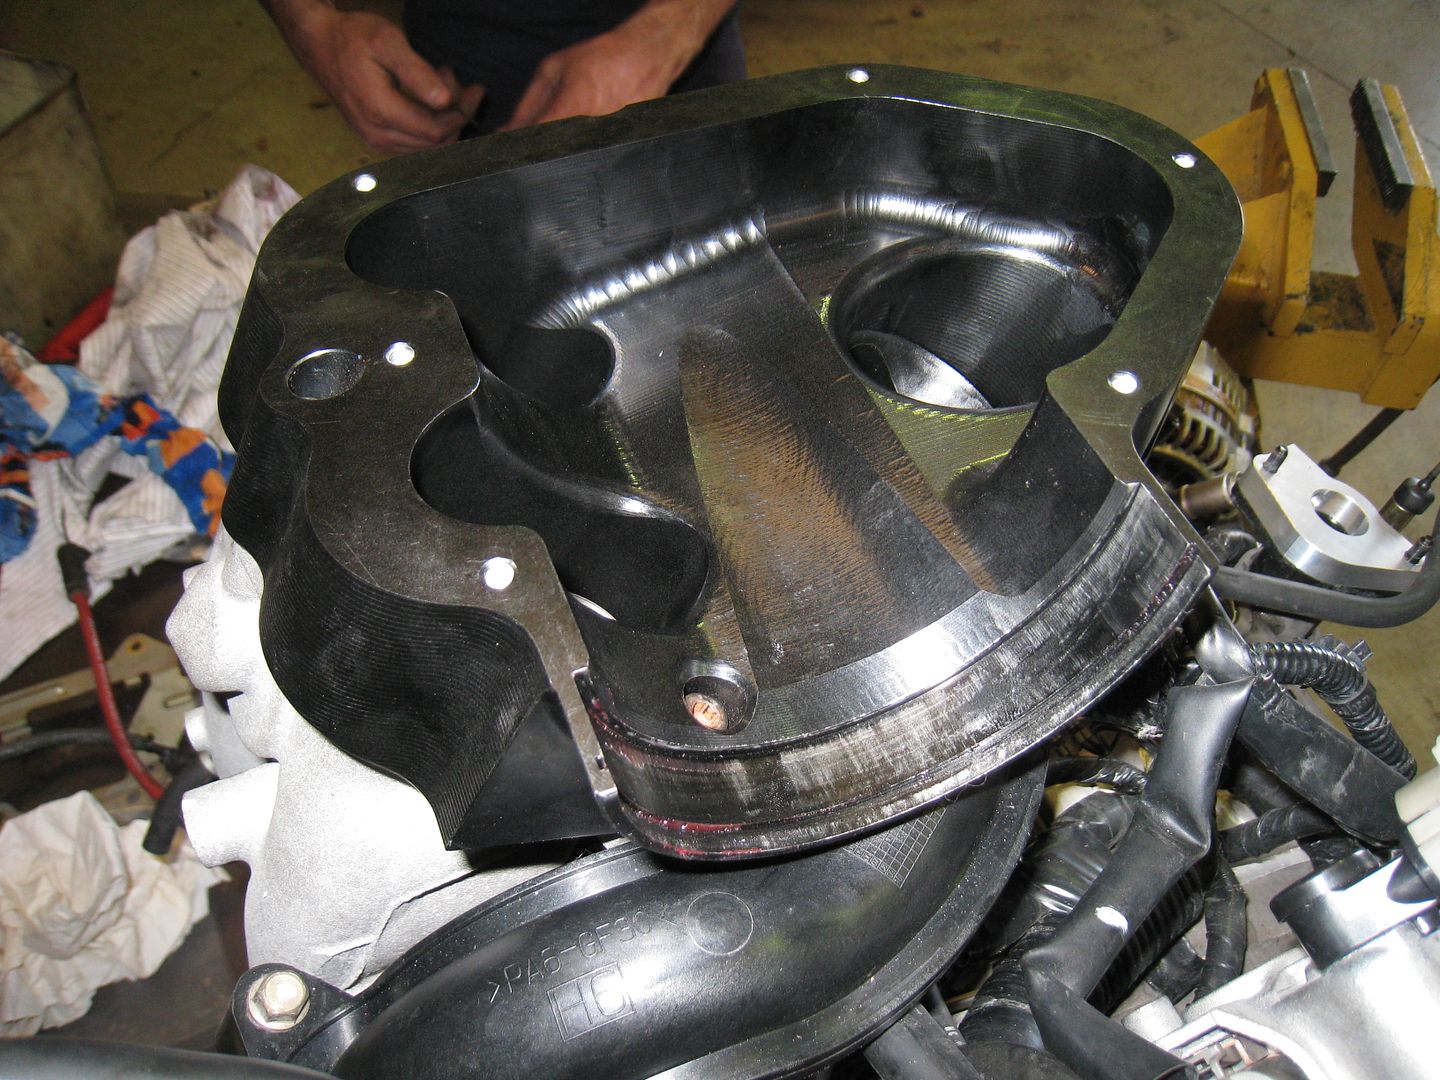
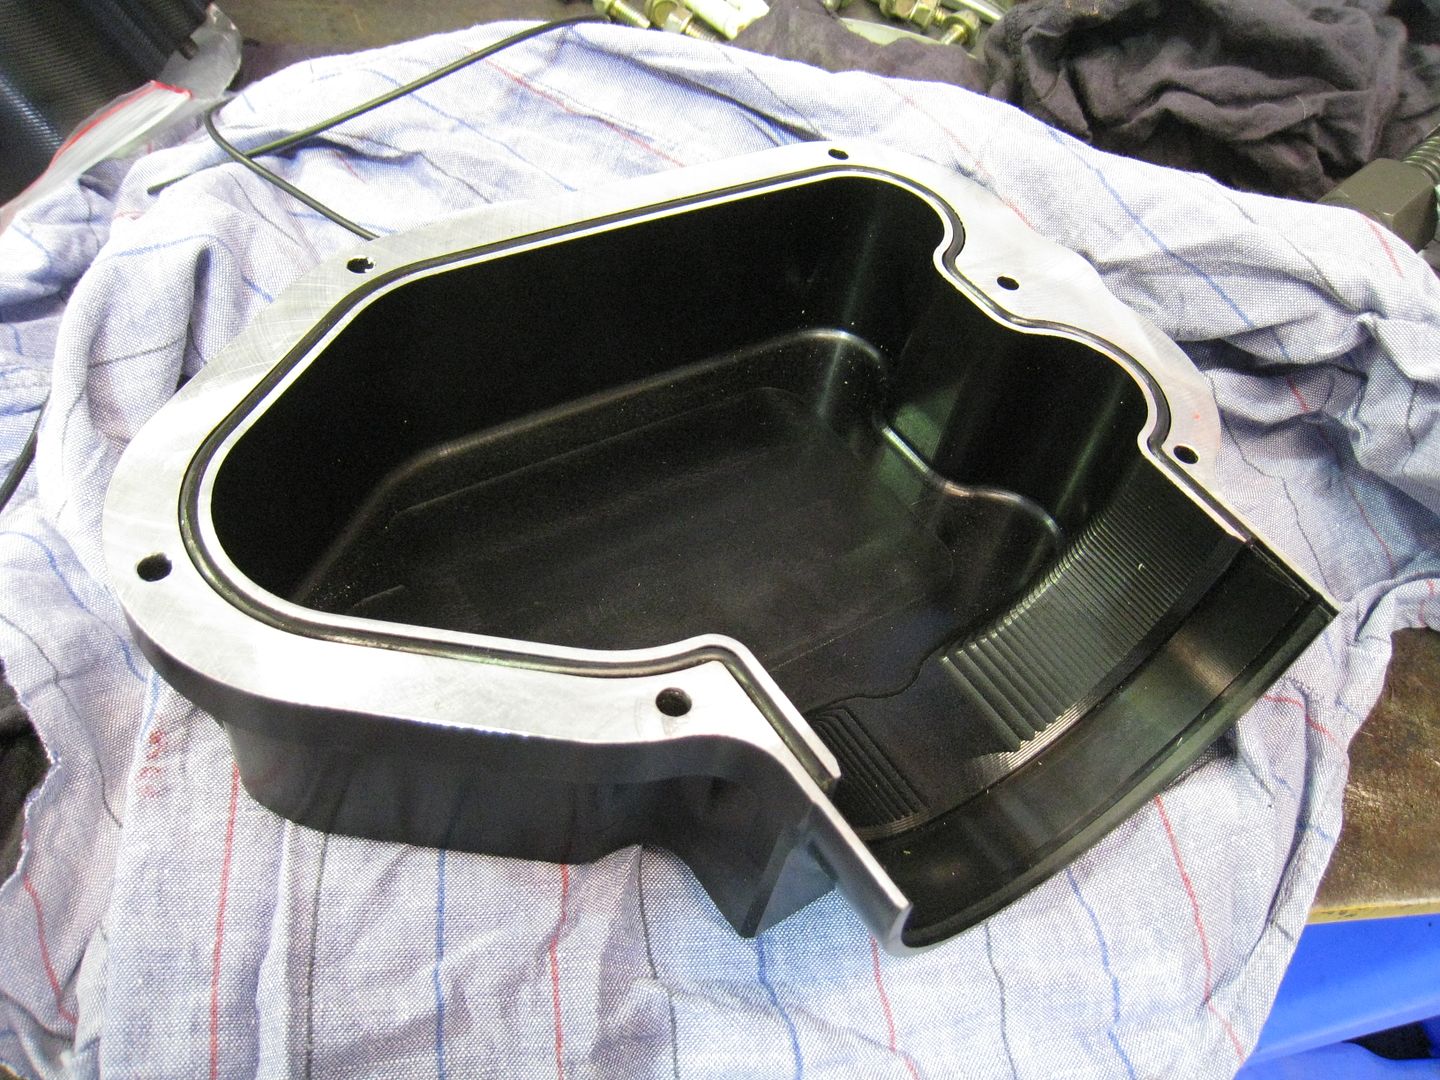
This is the upper section of plenum awaiting its 'O'-ring to be installed.
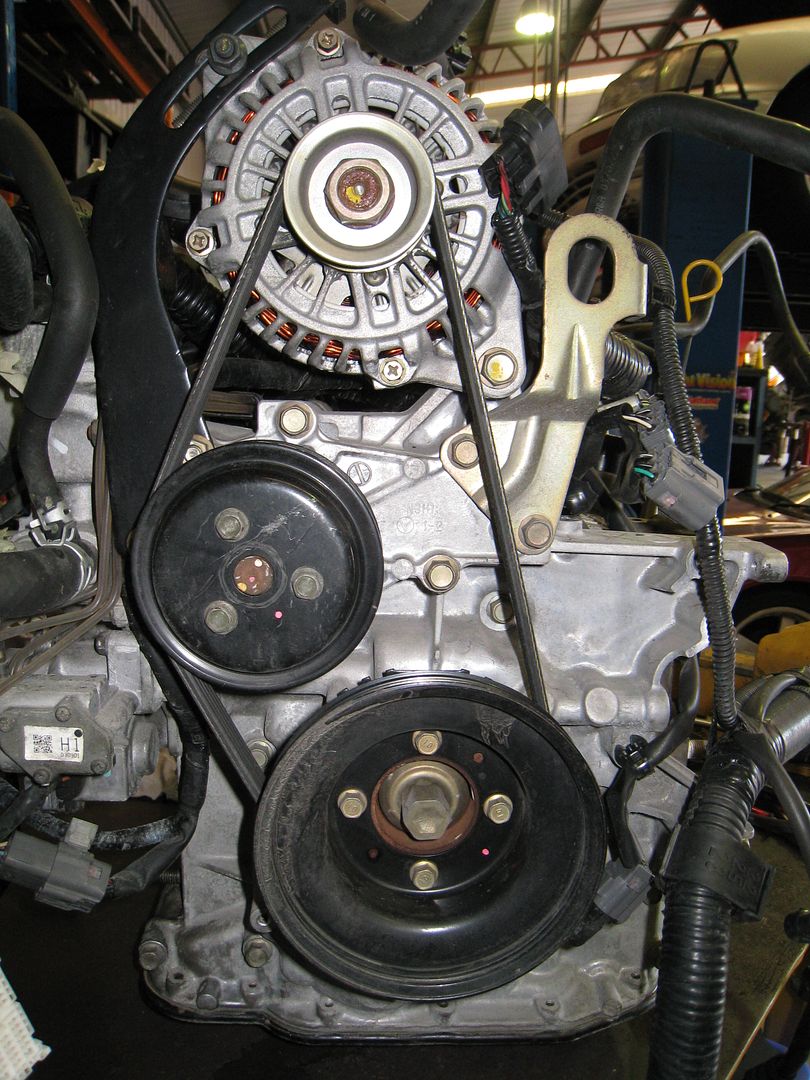
Then things got exciting and happened really quickly and I forgot to take stage photos! Here is the belt/tensioner arrangement for the supercharger drive.
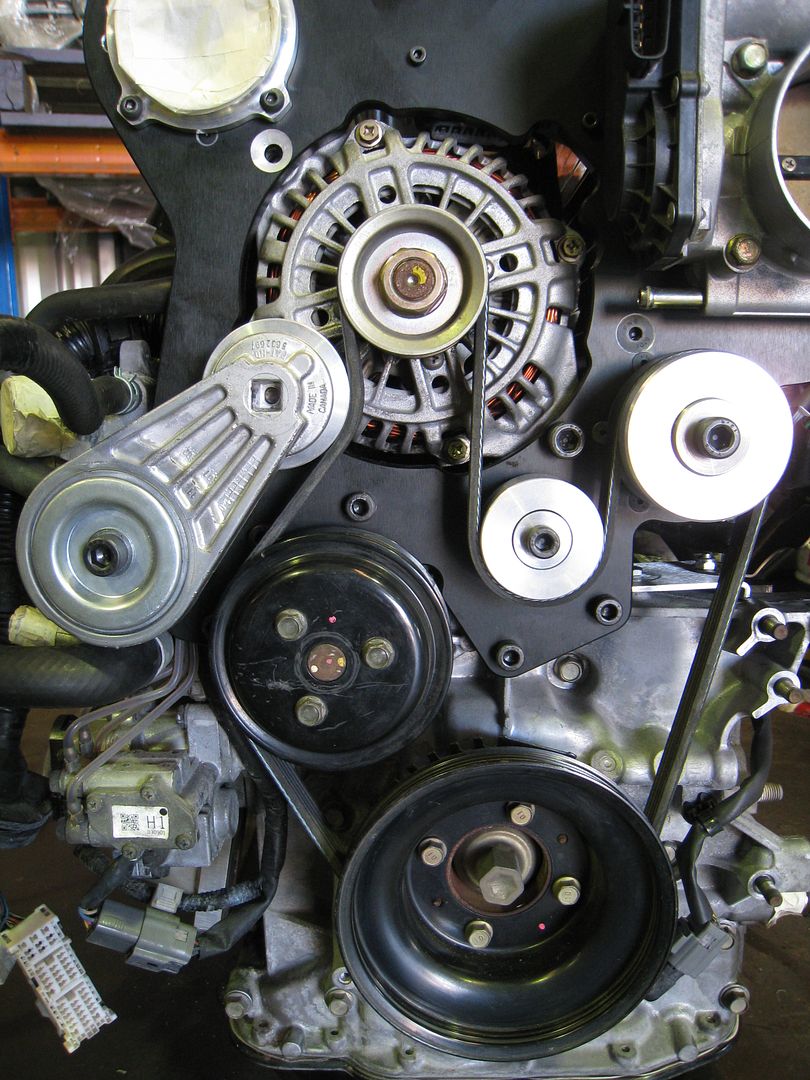
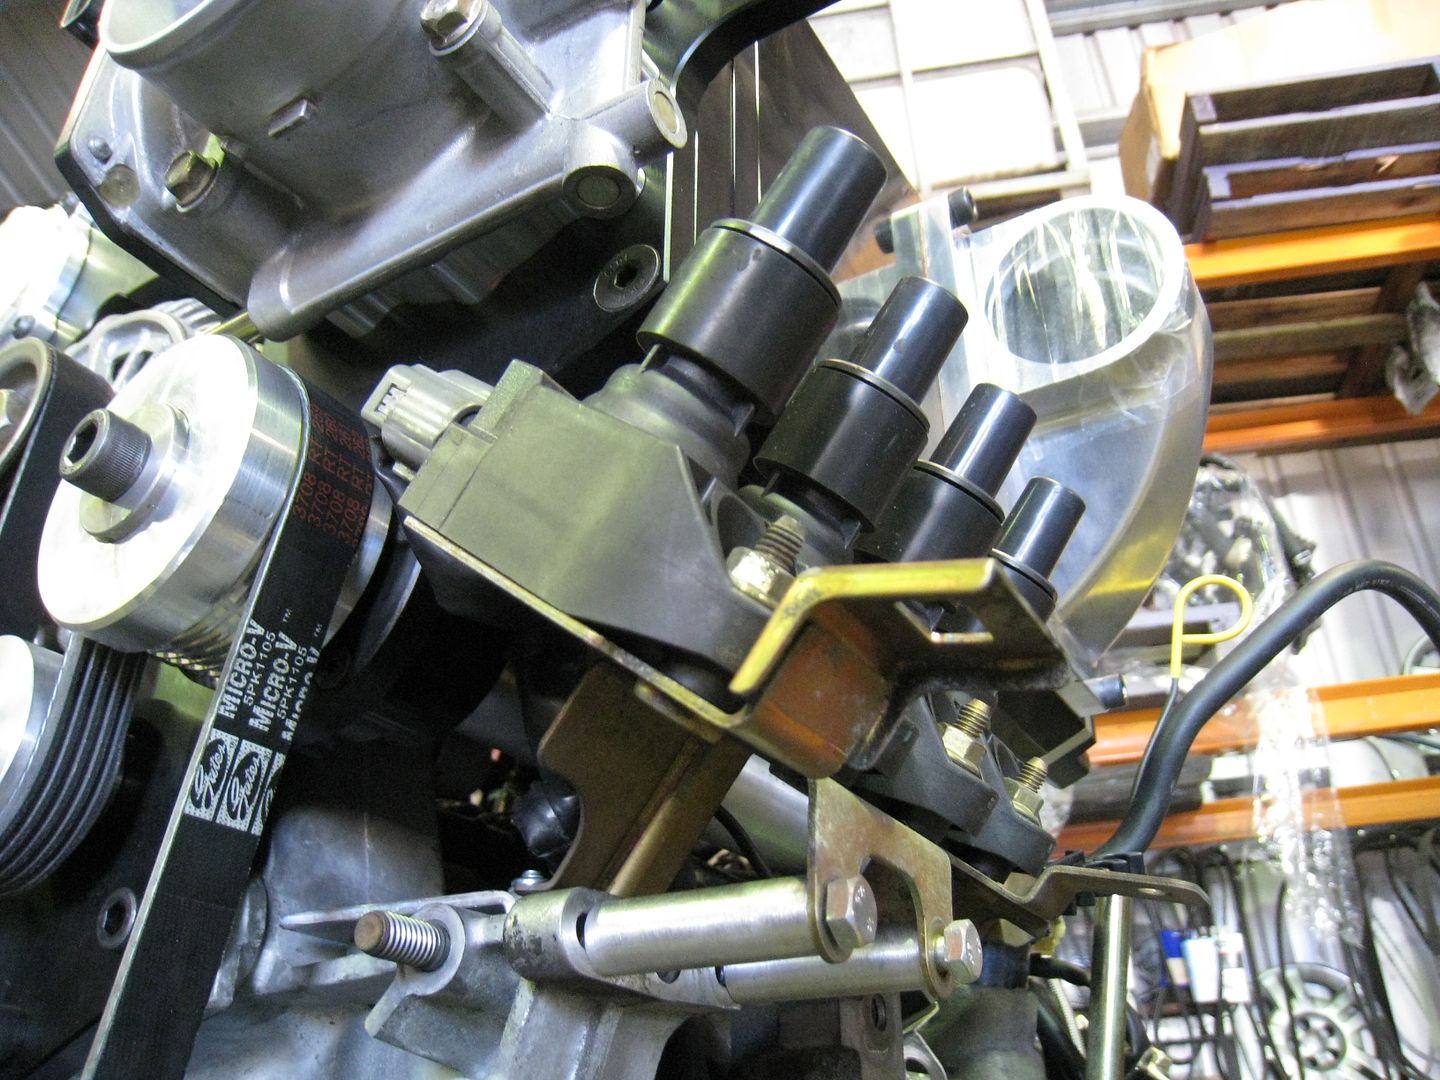
The factory ignition coils and bracket are retained and relocated further outboard by way of a bracket and two spacers.
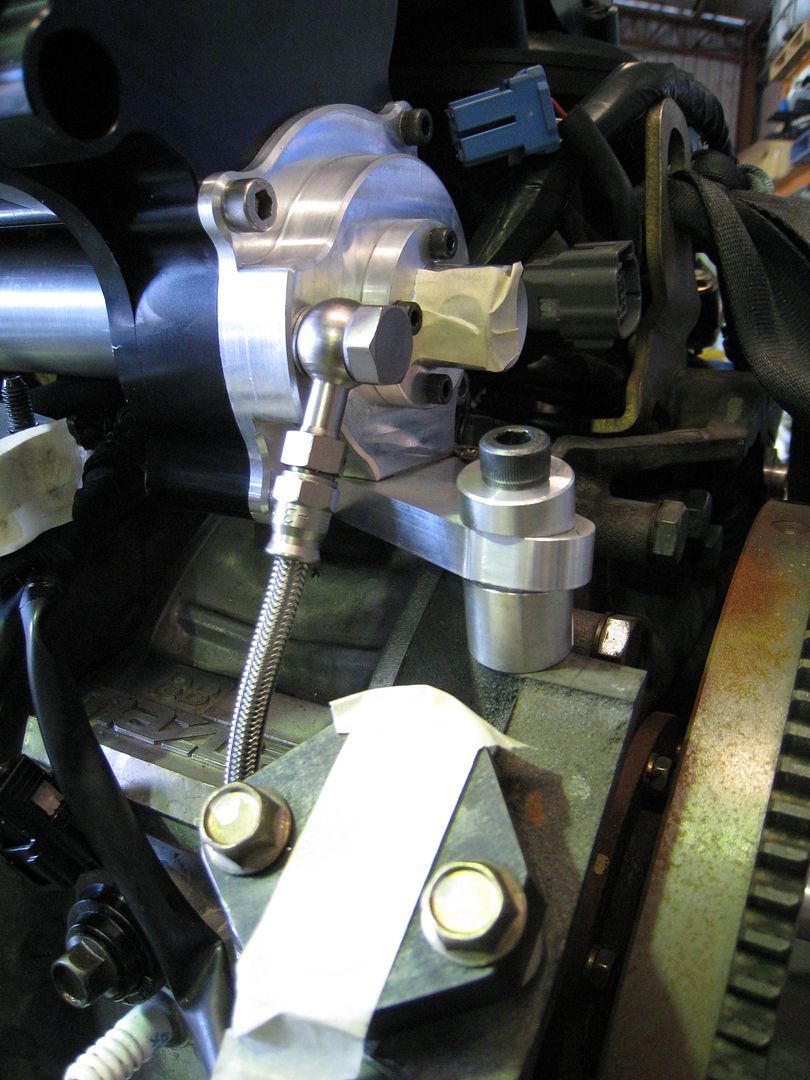
The supercharger kit uses a layshaft to transfer the drive rotation from the front belt drive arrangement to the internal gearset at the rear of the compressor. Lubrication is provided via an oil line tapping from the oil filter outlet to the sealed supercharger drive gearset and returns to the sump via an oil filler neck adaptor. The supply line is the small gauge stainless wire braided hose. The return line is not shown.
I'll let the next group of photos speak for themselves.
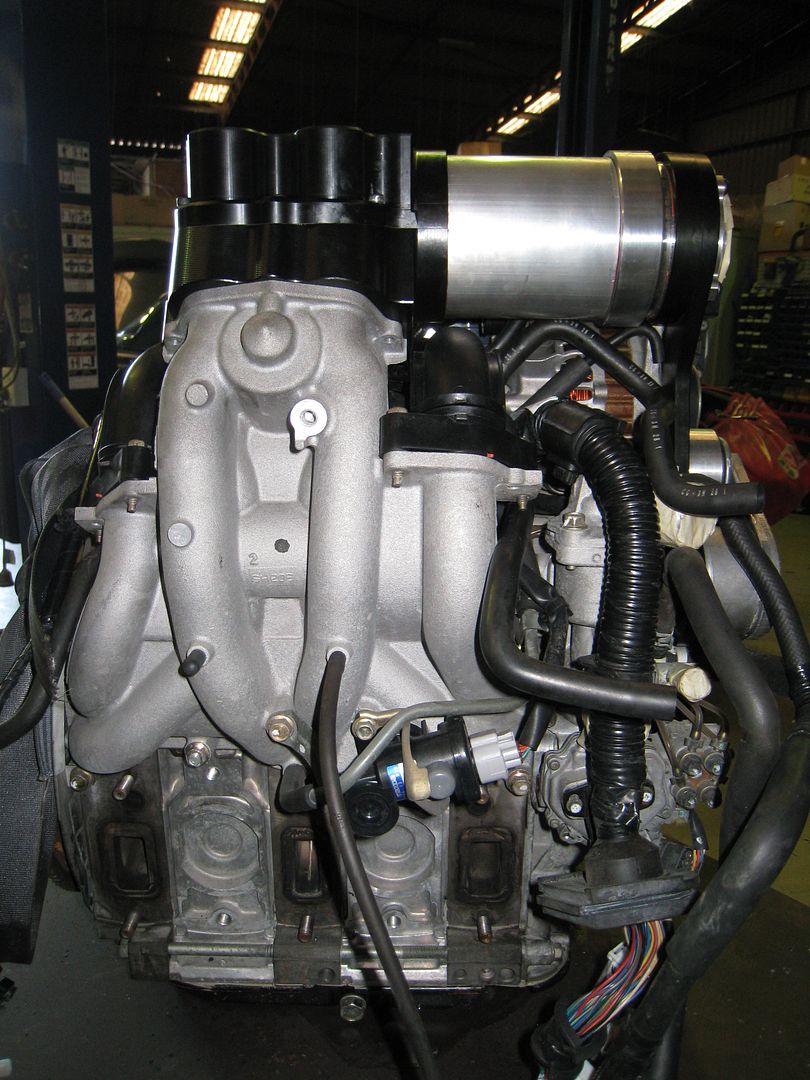
I'm still to sit down and write-up a list of items that need to be addressed before the engine can head off to the engine dyno to be tuned. So I'm not sure when it will be despatched. Two obvious items that need to be designed and manufactured are the oil filter pedestal and the oil filler neck. The necessity to replace the oil filter pedestal is only an issue on this kit as the supercharger is larger than the supercharger being used on the road-going RX-8 kits.
Cheers,
Danny
Today was indeed a "Milestone" for the Renesis NC project with the installation of the supercharger kit getting underway.
First up this morning was the removal of unnecessary components and cleaning of the engine in anticipation of the supercharger installation. The engine is from a FY 2005 JDM RX-8 and has 33,000km on it. It has been in storage for almost 12 months so it was pretty dusty. A quick hit with citrus cleaner and a pressure washer was exactly what was required as I couldn't let the engine detract from the awesomeness that was about to be bolted to it.
Upper section of inlet manifold including throttle body removed.
Removal of the oil filler neck and vacuum reservoir assembly. The vacuum reservoir and components will be reinstated at a later date.
After all the orifices were suitably protected the engine got washed and came up looking like it was on the Mazda production line awaiting fitment.
Once dried, the gearbox was removed from the engine and placed upon the workbench. The supercharger mounting plate utilises a the alternator mounting bolts and most of the water pump bolts to lock it in position. So these standard fasteners (bolts and studs) were removed.
The first item of the supercharger kit to be installed was the two piece plenum and inlet tube. Here is the lower section of plenum with it's 'O'-rings fitted.
It mates with the surfaces as shown in the next photo.
With the lower section of plenum bolted in place you can really appreciate the dimensional accuracy of the kit as the port matching was perfect.
This is the upper section of plenum awaiting its 'O'-ring to be installed.
Then things got exciting and happened really quickly and I forgot to take stage photos! Here is the belt/tensioner arrangement for the supercharger drive.
The factory ignition coils and bracket are retained and relocated further outboard by way of a bracket and two spacers.
The supercharger kit uses a layshaft to transfer the drive rotation from the front belt drive arrangement to the internal gearset at the rear of the compressor. Lubrication is provided via an oil line tapping from the oil filter outlet to the sealed supercharger drive gearset and returns to the sump via an oil filler neck adaptor. The supply line is the small gauge stainless wire braided hose. The return line is not shown.
I'll let the next group of photos speak for themselves.
I'm still to sit down and write-up a list of items that need to be addressed before the engine can head off to the engine dyno to be tuned. So I'm not sure when it will be despatched. Two obvious items that need to be designed and manufactured are the oil filter pedestal and the oil filler neck. The necessity to replace the oil filter pedestal is only an issue on this kit as the supercharger is larger than the supercharger being used on the road-going RX-8 kits.
Cheers,
Danny
10-17-2009, 07:35 AM
#1718
Now for the scoop. My valued customers who have pre-ordered kits already know about this, but I have been keeping it close to my chest up until now (I think??). As some have noted elsewhere, the 1.7 litre versions of this supercharger compressor design have been discontinued. This happened about the time I was preparing to order 10 compressors for my first production run. It was a bit of a PIA as you can understand.
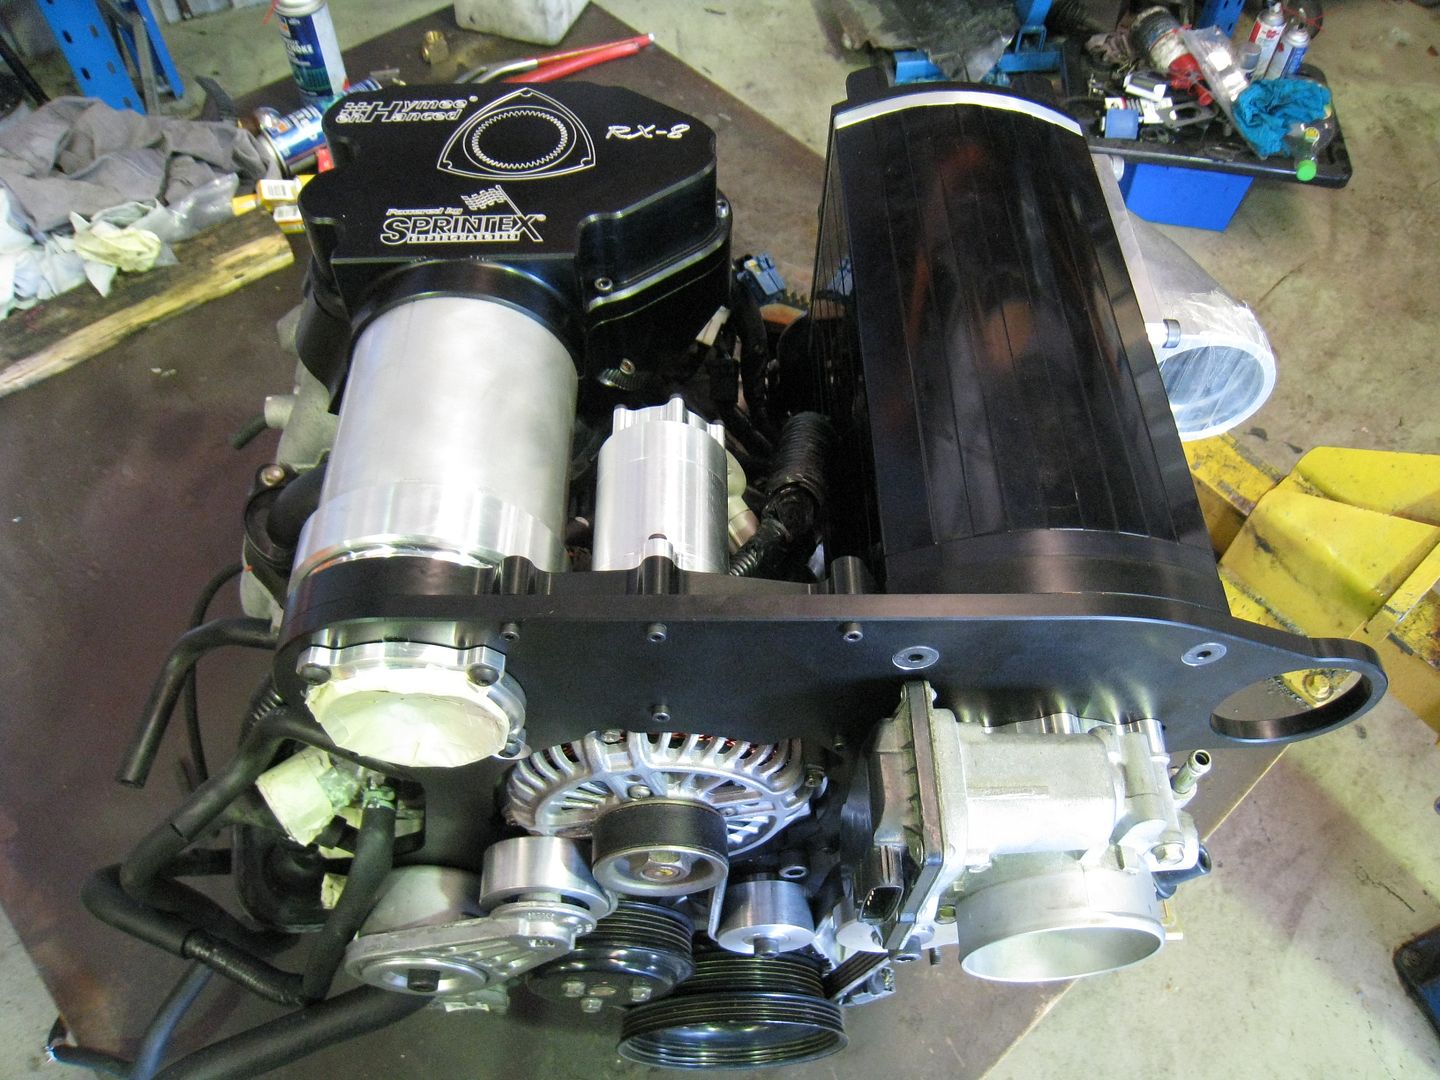
Instead of going for the cheaper, less efficient "eaton" OEM style compressors, I stuck to my beliefs, and did some further hunting around with some help from my friends at Sprintex Supercharges here in Australia. What effectively transpired was I paid for a crate of 10 brand new compressors. 9 of them are a new 2.1 litre design, and the 10th was for Danny's race car. It is a 2.8 litre version.
The other major change/development was I was unhappy with the belt drive on the rear, and felt it was a weak link. What you can/can't see in the photos is that a gear has been added at the rear end of the layshaft, and this meshes with the compressors internal timing gearset. To ensure this was done in the highest possible quality, I engaged the services of the same company that is the OEM supplier of the gearsets. Did you know the gears inside the blower are a match pair, and I had to remove the meshing gear from each blower, and sent the 10 of them to Italy to have my "third gears" made with the correct tolerances? Can you believe that! You can imagine how long this added to the process, and to my frustrations, and that of my valued customers.
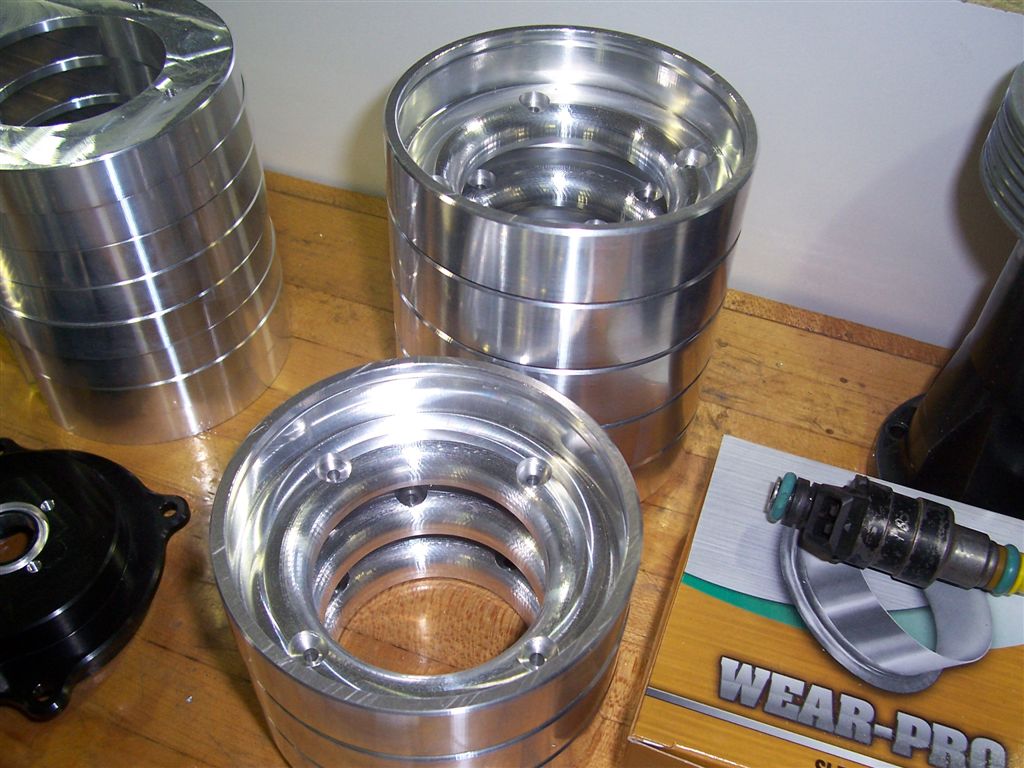
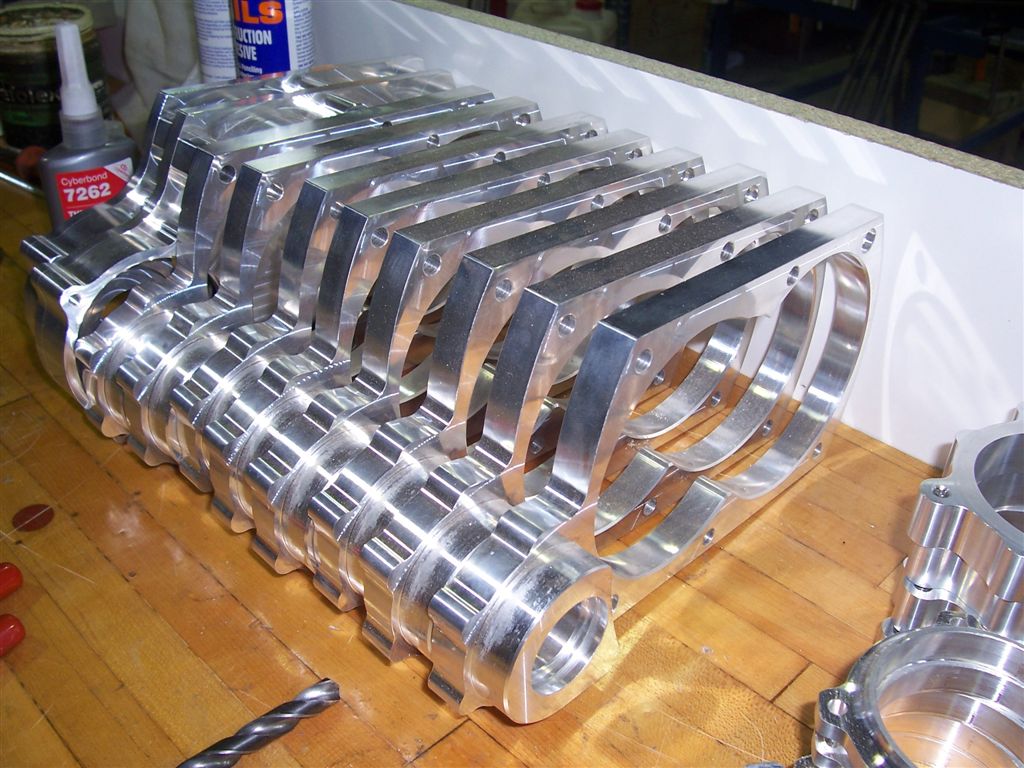
Anyway, that is all water under the bridge now, and we are essentially in production. Here are pictures of a bunch of parts on the bench getting readied for the trip to the anodize-ers next week:

Cheers,
Hymee.
Instead of going for the cheaper, less efficient "eaton" OEM style compressors, I stuck to my beliefs, and did some further hunting around with some help from my friends at Sprintex Supercharges here in Australia. What effectively transpired was I paid for a crate of 10 brand new compressors. 9 of them are a new 2.1 litre design, and the 10th was for Danny's race car. It is a 2.8 litre version.
The other major change/development was I was unhappy with the belt drive on the rear, and felt it was a weak link. What you can/can't see in the photos is that a gear has been added at the rear end of the layshaft, and this meshes with the compressors internal timing gearset. To ensure this was done in the highest possible quality, I engaged the services of the same company that is the OEM supplier of the gearsets. Did you know the gears inside the blower are a match pair, and I had to remove the meshing gear from each blower, and sent the 10 of them to Italy to have my "third gears" made with the correct tolerances? Can you believe that! You can imagine how long this added to the process, and to my frustrations, and that of my valued customers.
Anyway, that is all water under the bridge now, and we are essentially in production. Here are pictures of a bunch of parts on the bench getting readied for the trip to the anodize-ers next week:
Cheers,
Hymee.
10-17-2009, 09:01 AM
#1719
WOW!!! I am really looking forward to some reviews from your initial customers!
That really sucks you had to make such a major change at the last minute. Any power differences between the previous and current super charger? You know everyone is going to want to know if the 2.8 version will be an option?!
That really sucks you had to make such a major change at the last minute. Any power differences between the previous and current super charger? You know everyone is going to want to know if the 2.8 version will be an option?!
10-17-2009, 04:23 PM
#1721
You Dumbass!!!
Join Date: Feb 2008
Location: New York
Posts: 719
Likes: 0
Received 0 Likes
on
0 Posts
Pardon my ignorance, but if you go from a 1.7 Liter Compressor to a 2.1 Liter... wouldn't that equate to more power?

Lastly I just want to say how impressed I am with your work ethic, the fact that you already have an amazing product, yet continue to improve upon it. Definitely can't wait to see the future for you and your company.
Last edited by Symbioticgenius; 10-17-2009 at 05:20 PM.
10-17-2009, 05:42 PM
#1722
Thanks for the kudos. I guess the real answer to your question is that there is more power potential. It basically comes down to how fast you spin the blower in relation to the engine. We are spinning this one (in stage 1 form) slower than the smaller one with the rationale of trying to have a base kit that does not require upgrading of the injectors etc. So it truly is a single bolt-on unit, plus the associated plumbing etc.
It should also equate to making the power a little more "lazily" in that the larger compressor does not have to spun as hard, therefore requiring less effort from the engine. I guess there are boundaries though, but we all know the rotaries love air. I feel the 2.1 litre blower might have it's "sweet spot" in a better zone, but like I said, it is all to do with ratios. At least this blower has some serious headroom for pushing the boundaries further.
Cheers,
Hymee.
10-17-2009, 11:22 PM
#1723
damn right it does and thats a good thing. i like that belt drive set up especially the auto belt tensioner mate.
To heck with that table of parts--the chassis in the back ground of that picture looks like FUN?
How about alternator temps? I know you would check that but that thing does get hot?
It surprised me you went with a 5 ribbed belt. Specially on a 2.1?
Beatiful set up dude--loving it!
OD
To heck with that table of parts--the chassis in the back ground of that picture looks like FUN?
How about alternator temps? I know you would check that but that thing does get hot?
It surprised me you went with a 5 ribbed belt. Specially on a 2.1?
Beatiful set up dude--loving it!
OD
10-18-2009, 11:23 AM
#1724
But its nice to know the potential is there, isn't it?
