When you click on links to various merchants on this site and make a purchase, this can result in this site earning a commission. Affiliate programs and affiliations include, but are not limited to, the eBay Partner Network.
I already capped the LIM nipple, and I removed the OMP and lines, so they're all plugged on the engine side. Currently the only vacuum port from the original 3 intake ports being used is the breather for the oil filler neck. Is that correct?
Also, I'm going to need two vacuum signal sources for the Haltech and the BOV. What's typically used for those?
Are you using the SSV and VDI, or no? If you aren't, plug the Haltech's vacuum signal into the port that usually supplies the vacuum chamber. If you still are and will be using the vacuum chamber still, consider putting a T-barb to grab signal from in that line before the small check valve.
Are you using the SSV and VDI, or no? If you aren't, plug the Haltech's vacuum signal into the port that usually supplies the vacuum chamber. If you still are and will be using the vacuum chamber still, consider putting a T-barb to grab signal from in that line before the small check valve.
Ahhhh ok, I forgot about the VFAD port. Thank you. And yes, I'm going to use the SSV and VDI still, so I think that'll still plug in according to Haltec's instructions. (I do feel like their diagram is kinda crap though)
Last edited by FasterNLouder; Mar 24, 2026 at 02:35 PM.
Ahhhh ok, I forgot about the VFAD port. Thank you. And yes, I'm going to use the SSV and VDI still, so I think that'll still plug in according to Haltec's instructions. (I do feel like their diagram is kinda crap though)
The diagram isn't bad, I understand what you're saying however. Their "To VDI and SSV.." should say vacuum chamber or something, and still show the check valve on that line in place and oriented properly to avoid confusion for anyone installing this into their cars and to avoid the vacuum immediately leaving the chamber and causing the valves to not work.
The diagram isn't bad, I understand what you're saying however. Their "To VDI and SSV.." should say vacuum chamber or something, and still show the check valve on that line in place and oriented properly to avoid confusion for anyone installing this into their cars and to avoid the vacuum immediately leaving the chamber and causing the valves to not work.
100%. It all makes sense though. I'm also figuring out the wastegate/Mac solenoid routing. Is there any downside to the "simple" routing that has a single vacuum line from the mac solenoid to the "bottom" port of the wastegate? Boost pressure source would have to be the IC hot side since my turbo doesn't have a port.
Added some reflective heat barrier on the firewall. Ditched braided fuel line plan and went with fuel injection and E85 rated hose with quick connects. Test fuel system--good, with no leaks. Finished oil system modifications with oil filter sandwich plate, and placed the oil feed and return line (went to front of oil pan). Ordered a Funk Motorsports downpipe exhaust pipe blanket, which should help out a ton with several of the very close components like coolant hoses and APV. Also ordered some PTP lava heat shields (or whatever they call them) to cover coolant hoses, brake lines, A/C lines, etc. Modified a 2.5" 45 degree stainless steel tube with a slash cut and 20-25 degree turn off toward the side of the car for the wastegate dump pipe.
Ordered a tight 90 degree bend for my initial drop down for the downpipe, so that'll make that part a lot easier. Still waiting on the bash bar from True Focus Fabrication. They do take their time....(ordered on 2/27)
Also made a Part 1 video on Youtube for the build. I've done quite a bit of work since then and will post up a Part 2 in the next week or so.
List of everything so far (this is at least 98% of everything needed. You'll notice a theme with some of my items. Some are super cheap (Aliexpress or used), while other components are higher quality. I feel like there is a "grey area" with some of these items, but I did try to be cost effective and smart with some of my items while fully understanding some of it might not work as intended and may have to be replaced later down the road. You are totally fine to buy all the "premium" parts for every component--just be ready to add another $2500 or so to the total price.
Esmeril Turbo Manifold Top mount turbo manifold (used) $675.00
Turbo Pulsar 6266E T4 open inlet .96 A/R $722.00
Downpipe Custom Downpipe $260.00
Haltech Standalone PnP Standalone w/O2 Sensor $1,805.00
Custom Tune $300.00
Fuel Pump DW300 (+RX8 Install Kit and new assembly) $250.00
Fuel Injectors Yellow (2 OEM, 4 uncapped) clean & flow test all $235.00
Ignition BHR (Black Halo Racing) Ignition Kit $400.00
Intercooler Treadstone TR10C $321.00
Intercooler Piping 2.5"" Universal Aluminum Intercooler Kit $83.00
Intercooler reducer elbows $50.00
Intercooler mounting hardware $30.00
Cooling (Radiator) GPI Racing Aluminum Radiator $130.00
Wastegate Turbosmart Gen-V WG60 Power-Gate 60 $325.00 (gently used)
Wastegate piping $7.00
Blow-Off Valve (BOV) TiAL Q 50mm VTA (Clone) $75.00
3 Port MAC Valve $55.00
MAC Valve fittings $15.00
Oil Feed Line Ebay -4AN Kit w/ Restrictor $35.00
Oil Drain Line -10AN Universal Kit $32.00
Heat Management 1 PTP T3/T4 Turbo Blanket $25.00
Heat Management 2 DEI Titanium Exhaust Wrap (2""x50') $69.99
Haltech Flex Fuel Sensor $210.00
Haltech Auxiliary Harness $105.00
Reflective Heat barrier for ECU box $25.00
New fuel lines and hardware $120
Titatnium Header Wrap for downpipe $10.00
Downpipe exhaust blanket Funk Motorsports $112.00 (Not using--will sell!)
PTP Lava Fire Sleeves (3) PTP Turbo Blankets $110.00
Reflective Heat barrier $20.00
Battery Relocation Kit $93.00
OMP Delete Plate (Pineapple Racing) $25.00
Silicone Radiator Hoses $60.00
True Focus Front Bash Bar $335.00
Greddy Oil Filter $32.00
Oil Filter Sandwich Plate $42.00
Bead roller $35.00
Silicone Vacuum lines and heat sleeves $30.00
Catch Can $50.00
Tight radius bend for downpipe $32.00
NPT fitting for hot side $10.00
5 qts oil $32.00
Exhaust donut gasket $10.00
4 post power block $15.00
Cushioned P-clamps $8.00
There's a lot of talking through the process in this video, but that was intentional. I feel like a lot of what's available on YouTube focuses more on the results/outcome, and not so much on the actual process of building a turbo setup on an RX8.
I've been talking to a couple tuners about my flex fuel tune. Any thoughts on tuning with full E85 at 12lbs of boost? As I stated earlier, I have a DW300 with the modified fuel pump assembly, larger 3/8 fuel lines to the fuel rail, yellow primaries, and uncapped yellows for the secondaries. It's not necessary to run full E85, but it will make tuning easier in some ways, and if I can safely run full E85, that would obviously be a bonus. The things that confuses me the most about all that is the "scaling" of the injectors. Technically, these uncapped injectors would be right around 1000cc/min flow at 58-60 psi, but my understanding is that they're scaled back and treated like smaller injectors. How does that play into the equation?
Good progress 👍🏻 When will the downpipe and all the remaining bits be completed?
Thanks! I�m hoping my stepdad will be able to weld up the pie cut sections of the downpipe in the next couple days. We�re only tacking it together for now so I can make sure it fits properly. Once I�ve confirmed fitment, we�ll finish up the welds and start on the second half.
I also need to finish the vacuum lines to the max solenoid and wastegate and add the BOV to the intercooler piping.
Last edited by FasterNLouder; Apr 12, 2026 at 10:03 AM.
Lots of bends in the IC piping. Every single bend robs you of ~3hp... especially at 2.5" pipes. Hot air intake and a tiny 2000s inspired air filter again doesn't help.
Lots of bends in the IC piping. Every single bend robs you of ~3hp... especially at 2.5" pipes. Hot air intake and a tiny 2000s inspired air filter again doesn't help.
Not any more bends than the vast majority of turbo builds out there. Also, the intake isn't hot air. The plate you see is just the back side of an airbox I'm fabricating and will be sealed to the hood. The front inlet on the hood will directly feed air to the air box, and there will be a secondary 2" inlet from under the bumper to the air box for additional volume.
I've been there done that. Want to see for yourself... be my guest. But I somehow feel I'm wearing out my keyboard for nothing here.
Before: 2.5" and a million 90 deg bends, 3" intercooler core:
After. 3" everywhere, smooth 45 deg bends, 4" intercooler core.
This isn't even the best way around it but the closest pictures I had at hand.
I still despise the undersized air filter and difficult access to it but I don't see any other way.
Last edited by ciprianrx8; Apr 14, 2026 at 10:25 AM.
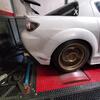
I�ve been taking a little bit of a break from the turbo build, but today I decided to do some test fitting to see how everything looks with the front bumper on.
With the tubular bash bar and larger opening on the Leg Motorsport front bumper, I�m able to keep the TR10C intercooler almost completely exposed to fresh air. I decided to tilt it at about a 10 or 15� angle, too. This will allow some air to escape underneath the intercooler , but this is a calculated decision. The additional fresh air hitting the intercooler directly should offset any negative byproduct of tilting it this way. The front bumper also provides about 120 in.� of direct airflow to the radiator underneath the intercooler. 
I also previously begin designing a fresh air intake box that utilizes the hood and an additional smaller fresh air intake (2�) behind the bumper.
The idea is to keep the air intake temperatures as low as possible, while still letting the radiator do its job. If it doesn�t work out quite the way I want it to, there�s still plenty of room for adjustment later on. 
At least 90% of the intercooler will get direct air View from the front to the radiator Just peeking at where I might want to block air on the sides. The factory plastic still fits without modification on the passenger side. The driver side needs a little trimming for the piping, but not much.