When you click on links to various merchants on this site and make a purchase, this can result in this site earning a commission. Affiliate programs and affiliations include, but are not limited to, the eBay Partner Network.
That's wrong, because you're observing the opening of the SSV which always overlaps the secondary injectors coming online. Better said, whenever the secondaries come online, the SSV also opens. You need to provision a rich pocket before that happens(which, interestingly, Mazda didn't do - perhaps it doesn't mean anything for an NA engine). It's not injectors, it's the sudden surge in VE the engine gets when the SSV opens. This happens regardless of injector size for as long as the SSV is still operational.
In my experience ...both things are an issue. SSV and reds + large injectors. I know that if you pair yellows with blues for example .... you get a much better more stable tune than reds with blues irrespective of what's happening with the SSV.
The best tune is with SSV locked open and yellow/blue/blue or similar.
Originally Posted by FasterNLouder
I will be upgrading the radiator, but as long as there�s enough airflow to the radiator, it�ll be ok. One of the problems with putting turbo in a car that was never designed for it, is people do things like completely block the direct airflow to the radiator with a front mounted intercooler. I will be using a proven set up, but I will also likely be limiting boost at a certain IAT.
I think you will find it�s not enough radiator, regardless of upgrade or unshrouding if you plan on using it in a Valley summer. But, all the best with your build, watching with interest!
I love how all these factors work in concert, but it also makes it very difficult to pinpoint what exactly is causing the outcome. lol
Does anyone know what BSFC and VE one could expect at 8000 RPM + 10 lbs of boost + E85? I'm seeing as low as .75 and as high as .95 for BSFC, and as high as 110 for VE. Considering just doing a full on E85 tune with slightly less boost for simplicity and additional cooling properties.
Most cooling issues with turbo 8's occur when people don't allow a decent amount of air past the intercooler direct to the radiator. That's why I came up with the IC I recommend in my manifold thread. As mentioned the stock radiator is compromised anyway so handicapping it further has .... consequences. My solution ... that has worked well for the last 17 years was to, pay attention to IC design/size and fitment, run an aftermarket AL. rad, an additional water rad. where the second oil cooler goes and to make sure both wont allow air to bypass around them.
Most cooling issues with turbo 8's occur when people don't allow a decent amount of air past the intercooler direct to the radiator. That's why I came up with the IC I recommend in my manifold thread. As mentioned the stock radiator is compromised anyway so handicapping it further has .... consequences. My solution ... that has worked well for the last 17 years was to, pay attention to IC design/size and fitment, run an aftermarket AL. rad, an additional water rad. where the second oil cooler goes and to make sure both wont allow air to bypass around them.
Haven't heard about the second radiator idea before, but I'll look into it. I was planning on using the TR10C mounted up high, but I may have to make some modifications to make it fit properly.
I'm definitely keeping that in mind for when I have the front bumper on. I'll probably be playing with some cardboard and sheet metal to make some scoops.
Decided to schedule a few baseline dyno pulls with Cordes Performance in Tempe, AZ next month. I'll also be dropping off my injectors with them to get cleaned and flow tested.
Still waiting on the Haltech to get shipped out (they aren't on backorder right now). Hopefully I won't have to come on here and blast the vendor for being a deadbeat--it'll be 3 weeks as of tomorrow since I ordered it. I don't really love having spent $1800 and having nothing to show for it.
The vendor I tried to purchase the Haltech through was pretty bad with communication and gave me the run-around for 3 weeks, so I ended up getting a refund on that. Not super keen on having $1700 floating around with nothing in hand. I'll try that again in a few months after I get some of the other work done. To be clear though; Haltech themselves have been great so far, and very helpful.
As of this week, I have now purchased a Turbosmart 60mm wastegate, Tial clone 50mm blow off valve, Treadstone TR10C intercooler, and GPI 42mm radiator (allegedly a re-branded Mishimoto) that offers 40% more cooling capacity.
After my baseline dyno pulls later this month, I'm going to start mocking everything up so I can get the downpipe fabricated--since finding an original Esmeril downpipe is likely impossible 10+ years after they quit making them. I also need to dig into what needs to be done with the OMP and coolant hoses, mostly as it pertains to turbo manifold fitment and proper routing of everything. After I receive all the new parts and get the downpipe made, all I'll need is the Haltech, oil feed/drain lines, silicone coolant hoses, and some heat management items. Getting there!
I also need to dig into what needs to be done with the OMP and coolant hoses, mostly as it pertains to turbo manifold fitment and proper routing of everything.
I feel ya and don't do what I did with the t-stat housing. Rerouting the coolant lines is the one regret i have with my build. I found out after the fact that good quality heat shielding around the t-stat, the coolant line and the OMP lines was a manageable item
The builder insisted on a 3.5" downpipe that was routed right through the t-stat location that if the dp was rotated just a bit, and not be 3.5 ", there would have been ample clearance.
Don’t order with PurelyRX8.com (Xavier Neeley). Took me about 5-6 weeks just to get my money back after he spent 3 weeks without putting in the order with Haltech, and then proceeded to take 2+ weeks to refund me my money.
That being said, I did decide to prioritize purchasing other items, like:
I also scheduled some dyno time for baseline pulls. These will be done on a Mustang dyno and will likely be pretty conservative numbers as a result. If I make 170 on the Mustang dyno, I’d be pretty happy, but I have low expectations. My intention is to use the same exact dyno afterwards to see how much power was gained, since I rarely see before and after dyno testing being done.
The same shop also does fuel injector cleaning and flow testing, so I’ll be getting that done there, as well.
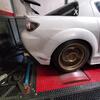
Pictures of the new wheel and a Japanese car meet in Phoenix:
Got there super early, but the sunrise was pretty cool looking. Street Aero steering wheel installed. Took quite a bit of work to get it installed properly and have no SRS/DSC lights.
Last edited by FasterNLouder; Feb 16, 2026 at 02:11 PM.
Any thoughts on the turbo filters like the HKS mushroom shaped ones? My only real concern is IAT being really high when sitting in traffic when it's hot outside, but the airflow would be superior to having 3+ feet of intake tubing going to the front of the car. Pros and cons, I suppose. I do think the TR10C will do just fine at cooling intake air...especially under 95 degrees Fahrenheit. Any thoughts? Personal experience? I see RX7s with those filters all the time.
Last edited by FasterNLouder; Feb 20, 2026 at 06:03 PM.
Route the intake outside of the bumper space. Most filters have a "maximum" airflow from the manufacturer to ensure the volume of air going through the filter media at any given time. You want it sized appropriately in order to make sure you dont have an intake restriction as well as that the velocity of the air as it goes through the filter media is low enough that its getting caught by the filter and not just ripping though and ending up with a ton of garbage going into your intake/engine anyways.
I know for a fact that this manifold fits with the factory OMP, but I�m sure it would be �easier� with it out of the way.
Ah. I forget which kits forced removals of the OMP/T-Stat housing.
My OMP lives quite happily in the glove box.It talks to me during drives. I filled it with fresh Idemitsu, plugged the Oil injector outs and platted up the input side. Just to keep the mechanical pins lubricated while it activates.
How my T-stat housing is configured for coolant connections. I have to assume that coolant flow isn't the most optimal.
I will say, I have had one high heat event. I stuck traffic on I10 due to an accident, in rush hour during a 120 temp day. < This particular chain of events will never happen to most top mount Rx-8 owners, but it is a very real risk here in Az.
Top Mount with highly modified T-Stat housing.
Originally Posted by ciprianrx8
So... you start noticing the major downsides of a top mount. Go on, at least on this(noticing issues...) matter you're going the right way.
I won't say "start noticing" the major downsides of a top mount. I was very hands-on during the design, fabrication, and installation of mine. Still acutely aware of the "will happen", "can happen" and the "why" aspects of a implementing a one-off top mount turbo system on a platform that was not engineered for such a modification. :-)
Any thoughts on the turbo filters like the HKS mushroom shaped ones? My only real concern is IAT being really high when sitting in traffic when it's hot outside, but the airflow would be superior to having 3+ feet of intake tubing going to the front of the car. Pros and cons, I suppose. I do think the TR10C will do just fine at cooling intake air...especially under 95 degrees Fahrenheit. Any thoughts? Personal experience? I see RX7s with those filters all the time.
Yes, like @Ricky SE3P said, route the air intake to outside the engine bay and into the void of the front bumper. The Rx7's can get away with these in the engine bay, as the engine control is using a MAP setup. MAP only measures the absolute manifold pressure, where as MAF measures the total amt of air. However, High Temp intake air, has a tendency to skew how the MAF's hot wire reads how much air is really being ingested.
Yes, like @Ricky SE3P said, route the air intake to outside the engine bay and into the void of the front bumper. The Rx7's can get away with these in the engine bay, as the engine control is using a MAP setup. MAP only measures the absolute manifold pressure, where as MAF measures the total amt of air. However, High Temp intake air, has a tendency to skew how the MAF's hot wire reads how much air is really being ingested.
I�ll be using a Haltech, so the MAF setup won�t be a concern. My largest concern is the intake air temps.
I thought their dyno was a Mustang dyno, but it�s a Dynojet. Just to recap a little bit, the only things done that might affect performance at all would be the full exhaust with header and catless HKS Hi-Power, stock airbox with K&N filter, BHR coils, and Versatuner premade tune.
The front rotor has high 90s for compression, and the rear rotor is between 105 and 110.
not super strong results, but definitely not bad, either. I do also think that if I got a proper tune done, I could probably squeeze out an extra 5-10 hp, but I�m not super concerned with that.
it does look like it falls off a little bit after 7200 RPM, so that could be ignition timing or AFR. Unfortunately, the guy operating the dyno didn�t log AFR readings, but I didn�t think to ask him, either.
Since my dyno day, I�ve been pretty busy. I believe I started everything (fully started tearing into things) at the beginning of March, so I�m in the third week of the turbo build. I�m trying to get as much of the heavy lifting done as possible since it�ll be getting very hot very soon.
my original plan was to be very linear in my approach, only tackling one item at a time. I learned this is largely not possible due to the fact that so many components are interconnected or have to be done while other things are being done.
I removed the header and passenger engine mount and mocked in the turbo and wastegate. The turbo manifold does fit around the OMP, but just barely. The 60mm wastegate does drop down more than I anticipated, though, so my stepdad and I made an adjustable height to solid motor mount to tilt the engine up ever so slightly to provide a little more ground clearance. Time will tell if it creates any vibration while driving, but it�s a small enough change that it shouldn�t.
After looking at how everything is in the engine bay, I determined that the motor mount and APV would be the biggest obstacles for the downpipe. That being said, I still decided to do an OMP delete to give me more room�and for another reason: I realized that my turbo is oil cooled only�no water ports like later generations. This isn�t a dead end necessarily, but I�m doing things to mitigate this fact. I will run good synthetic oil to help prevent oil coking in the turbo, and set up a turbo timer in the Haltec.
In completing the OMP delete, I took off the UIM, so I began more work under there as well. Swapped out my injectors, removed/blocked off the vacuum lines that originally went to the accordion tube, and started devising a plan for my turbo oil feed source. Originally I was going to use the Franklin Performance oil pedestal adapter, but I quickly realized that with how it�s placed, it wouldn�t work with my now tilted engine (it would be very tight if it weren�t). So I decided to go with the Glowshift sandwich plate (4 NPT ports), which is allegedly 1 inch thick, and changed to a Honda style Greddy oil filter which is about .4� shorter than stock. I�ll be changing oil every 1000-1500 mile anyways, so not a big concern there. I�m actually still waiting for this sandwich plate, and it�s causing a small pause in progress right now.
In the meantime, I also ran a new 6AN braided PTFE fuel line from the fuel pump to the engine bay. When I get my Haltech flex fuel sensor, it�ll be connected to that before going to the fuel rail.
I also decided to relocate my coolant reservoir to the firewall where the washer fluid tank was. This frees up even more room for the downpipe and air box plan.
My air box plan: I�m going to use the front forward facing air scoop on my hood to act as a ram air duct. I made a little insert that will guide air from the inlet straight down into the engine bay where it will go into a sealed box that feeds directly to the turbo which will have the HKS Super Power Flow filter on it. Utilizing the space my coolant reservoir previously occupied, I will have a secondary 2.5� hole going from under the bumper to the air box for additional fresh air if the turbo demands it.
I�m waiting on my new bash bar so that I can mount the TR10C intercooler, but as of today, I�ll have everything else I need to do that. The tubular bash bar will shroud about 2.5� less area on the intercooler than the stock crash bar would and still allows me to mount it high enough that air can still go under it directly to the radiator.
Today we are modifying the HKS mid pipe to be a V-band clamp instead of the 3-bolt flange so that it can properly and easily connect to the yet to be fabricated downpipe.
I removed the old insulation and cleaned up things a bit, too. Added hold reflective heat barrier to the bottom of the hood, and bought a turbo blanket. Will be adding barrier to the firewall, too.
I replaced the stock 26.5mm thick radiator with and aftermarket (GPI) 42mm radiator, and replaced the main hoses with silicone hoses.
I still need to figure out where the return line should drain back to from the turbo, and I need to figure out how all the MAC valve/wastegate stuff needs to be set up and routed.
Stickers are for sale. $10 shipped anywhere in the US.