
Definitive Greddy Turbo Fixes - Here they are


Originally Posted by rkostolni
The boost controller pressure source also needs to be connected to the fitting at the turbo outlet.
Only plumb the solenoid into the signal line between the turbo outlet and the WG can.
Take a look at the E-01 instructions again. The diagrams explain this pretty clearly.

Registered
Joined: Aug 2004
Posts: 1,294
Likes: 0
From: Virginia/Maryland
That doesn't make sense to me though. Then the boost controller would still be trying to hold the WG flap shut until Xpsi is established in the manifold instead of at the turbo outlet. It would have the identical effect as if you didn't have a BC and then plumbing the wastegate signal directly at the manifold. The only downside I see to plumbing the pressure source at the turbo outlet is the pressure reading would read lower than it actually is. But you would just disregard that reading and use your boost gauge.

Consiglieri
Joined: Feb 2004
Posts: 1,275
Likes: 0
From: yourI'mgirl
I think you are all saying the same thing.
It seems to me that Ryan's talking about the signal line - not the sensor.
Originally Posted by rkostolni
The boost controller pressure source also needs to be connected to the fitting at the turbo outlet.
Originally Posted by MazdaManiac
No. The boost sensor should go to the same source (after the TB) as the boost gauge and other accessories.
Only plumb the solenoid into the signal line between the turbo outlet and the WG can. Take a look at the E-01 instructions again. The diagrams explain this pretty clearly.
Only plumb the solenoid into the signal line between the turbo outlet and the WG can. Take a look at the E-01 instructions again. The diagrams explain this pretty clearly.

Registered User
Joined: Dec 2003
Posts: 431
Likes: 1
From: Whitby Ont
I do not think they are.But anyway it has been pointed out earlier that if the boost controller solenoid is OPEN,then the WG operator sees turbo discharge pressure.When there is vacuum at the PRESSURE SENSOR,the boost controller solenoid OPENS,therefore it is not necessary to have the boost controller pressure sensor at a different point from the E-Manage pressure sensor or boostgauge.
Consiglieri
Joined: Feb 2004
Posts: 1,275
Likes: 0
From: yourI'mgirl
I hate to interupt, but...
I just got back from some test runs with the eManage controlling timing. All I can say is 'incredible'. From start to finish, it took all of 2 hours to get the timing harness installed. Its very, very easy. Although, I found the harness to be too short by about 18 inches.
So, on to why I'm all of a sudden wanting to control timing. Well, we were all wondering why the GReddy turbo can't hold boost in the higher RPM. I'm now convinced that the majority of the problem is the wastegate actuator. I cranked down on the adjustment as far as I could, so as to preload the spring as much as possible. With the additional load on the wastegate flapper holding it closed, I can just about hold 7.5-8psi all the way to redline. This is about 3psi more than I could before! The actuator is just too weak to hold the flapper closed as the exhaust gas pressure increases in the higher RPM.
Previously, I had investigated the effects of the tertiary intake runners on the ability to hold boost. I had noticed in my data logs that the boost dropped the moment the APV opened the runners. I incorrectly thought that the cause was the increase in intake volume that the turbo was required to fill. Holding them closed resulted in a loss of power. Now, I realize that the opening of the runners results in a step increase in exhaust gas pressure. This increase in force on the flapper exceeds the preload on the actuator and opens it - resulting in the boost dropping after 6kRPM. I don't know why we didn't think of this before.
So, while I didn't need to control timing before, once I adjusted the actuator I started to get a little detonation in fourth gear above 6kRPM. The AFR was fine - 11.5 and the injector (490cc) duty cycle was only at 78%. Fuel wasn't the issue. It was just time to get my *** in gear and start adjusting timing using the eManage. I used the timing MAP that Jeff posted a while back. Bingo - no more pinging.
So there you have it folks. I have some concrete evidence that the wastegate actuator is to blame for the boost falling off. An external wastegate is the best option, but, you should be able to hold a few more pounds just by adjusting the actuator to max out the spring preload. This increase in pressure forced me to finally address the timing issue - which was exceedingly easy thanks to the work that Jeff did a while ago regarding the need for the diodes on the eManage output. The result is really quite seemless.
Wow. Adjusting timing and completely controlling my injectors with the $289 eManage blue. I'm still less than $5k into it and I'm faster than an STi! I'll head back to the dyno soon for some concrete numbers.
Originally Posted by epitrochoid
wouldn't that still spin the turbine faster than necessary? just because there's vaccum in the manifold doesn't mean there isn't already boost in the intake plumbing

Registered
Joined: Jan 2005
Posts: 299
Likes: 0
I am aliitle confused with "plumb a line to the wastegate"
my understanding is that you seal the line
If so, does this mean you are suppose to connect the boost controller to the new nipple that was made in the outlet of the turbo?
my understanding is that you seal the line
If so, does this mean you are suppose to connect the boost controller to the new nipple that was made in the outlet of the turbo?
Consiglieri
Joined: Feb 2004
Posts: 1,275
Likes: 0
From: yourI'mgirl
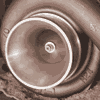
what you have illustrated is the wastegate actuator. DO NOT SEAL IT OFF! Connect the new nipple to the boost controller solenoid input. Connect the boost controller solenoid output to the wastegate actuator.
Registered
Joined: Jan 2005
Posts: 299
Likes: 0
I have been looking over the installation manual for my boost controller, I am having trouble locating the "Fuel pressure regulator vaccum line" I checked over the whole rx8 manual and there's no such thing?
Last edited by mikefrombarrie; Feb 26, 2006 at 07:25 PM.


rotor rider
Joined: Oct 2005
Posts: 62
Likes: 0
From: Markham, Ontario
Help!
I just installed the fixes at the beginning of this section (Diode for Air pump, waste gate plumbed to turbo outlet and cutting the injector wires) The car went into limp mode, so I towed it to the dealer and they say the PCM is blown ($1,900 CDN). But now I'm afraid to connect the emanage when the new PCM comes in.
Is there any way to test the emange? Any other thoughts?
rotor rider
Joined: Oct 2005
Posts: 62
Likes: 0
From: Markham, Ontario
Originally Posted by MadDog
You really didn't give us a lot information here.
My first guess is that you left the PCM connected while soldering the air pump diodes in.
My first guess is that you left the PCM connected while soldering the air pump diodes in.
Having said that, and more important, do you think the emanage harness will be safe to attach to the new PCM. (assuming that the only mods I made were installing the diode and clipping the two wires which I traced in the RX8 manual and carefully followed MM's direction, and traced from the PCM connector to the GReddy wire block)
EDIT: Just for clarity, I disconnected the wire from the dongle to the harness before working on it. Then held the diode in with jumper wires; tested for operation; then soldered and reassembled.
Last edited by TurboX8; Feb 28, 2006 at 09:58 AM. Reason: Clarify modification


