View Poll Results: Which sticker placement do you like best?
Picture 1 (pointing down)


33
71.74%
Picture 2 (pointing right)


3
6.52%
Picture 3 (pointing left)


2
4.35%
Picture 4 (pointing up)


8
17.39%
Voters: 46. You may not vote on this poll
Pettit radio knob sticker placement
 03-07-2007, 10:22 PM
#26

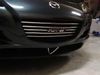
I did mine in position #1.
I also used "Plastidip" for the blackout of the back section so that it would match the buttons (rather than the piano black).
I also opted to not polish it but left it satin to match the other "metal" objects in the interior.
Looks OEM that way.
I also used "Plastidip" for the blackout of the back section so that it would match the buttons (rather than the piano black).
I also opted to not polish it but left it satin to match the other "metal" objects in the interior.
Looks OEM that way.

 03-07-2007, 10:30 PM
#29
The problem with the "RX-8" in the middle is that it is disturbing to look at when the passenger grabs it and turns it up a few clicks.
I have to reach over, turn it back down so that it is level again and then use the steering controls to raise the volume.
I have to reach over, turn it back down so that it is level again and then use the steering controls to raise the volume.
03-08-2007, 12:53 AM
#30

Originally Posted by MazdaManiac
The problem with the "RX-8" in the middle is that it is disturbing to look at when the passenger grabs it and turns it up a few clicks.
I have to reach over, turn it back down so that it is level again and then use the steering controls to raise the volume.
I have to reach over, turn it back down so that it is level again and then use the steering controls to raise the volume.
Very true, it bugs me if it is off a notch.

I probably wouldn't have polished it if I didn't have the illuminated shift **** or a polished titanium shift ****.

Now I am looking at replacing the fan and temp ***** for the climate control with the Shinka polished *****.

The satin silver matches quite well with the stock accents inside the car.


 03-08-2007, 07:12 AM
#34
4th batch : Apr 03'
Originally Posted by MazdaManiac
Which ****? The radio or the driver?
Sorry. I couldn't resist.
As long as she is a ****-gobbler, its all good!
Sorry. I couldn't resist.
As long as she is a ****-gobbler, its all good!
 03-08-2007, 07:25 AM
#35
4th batch : Apr 03'
Originally Posted by 4 years to Supercharge

 i'm sure my friends never ask again where the radio volume **** with those look because they can't find with the stock before
  03-08-2007, 07:28 AM
#36
Peeping over the fence

Join Date: Oct 2006
Location: Natchez, MS
Posts: 524
Likes: 0
Received 0 Likes
on
0 Posts
The picture with no label looks very nice. Simple and classy. Just as I expected it would.
I could not vote for No Sticker, because it is not an option.
I could not vote for No Sticker, because it is not an option.

 03-08-2007, 07:44 AM
#40
Originally Posted by foo77
maybe the black look stealth for them as for hazzard light,that'll be a chance they won't touch it too lol
as for hazzard light,that'll be a chance they won't touch it too lolWilson unfortunately I don't have the option of adding another option for the poll. I thought about it as well.
 03-08-2007, 07:50 AM
#41
Originally Posted by foo77
how about the RE inner rotor sticker? but the plain still looks good

They could rub all the image off of the sticker after peeling the foil off.
Do some photoshopping (the image doesn't have to be glossy because the top section of the sticker gives the gloss).
Print it
Glue it to the inside of the sticker with a thin layer of clear epoxy or other glue that doesn't cloud over when cured.
Glue it to the indented area of the radio ****
03-08-2007, 09:35 AM
#43

Love my **** but the carbon fiber sticker needs to go. And to put a rotor sticker inside of a rotor ****? Seems redundant. I would love to see a metal **** that looked like an authenic scale replica of a rotar, size, shape and some fine detail. That would be something.
03-08-2007, 01:35 PM
#44
Originally Posted by tjbourgoyne
Love my **** but the carbon fiber sticker needs to go. And to put a rotor sticker inside of a rotor ****? Seems redundant. I would love to see a metal **** that looked like an authenic scale replica of a rotar, size, shape and some fine detail. That would be something.
 05-01-2007, 01:11 PM
#46
Registered

Join Date: Oct 2006
Location: New Jersey
Posts: 57
Likes: 0
Received 0 Likes
on
0 Posts
Thanks
Thanks. You're tips on removal saved me a bunch of headaches. I had the **** switched in less than 5 minutes. BTW, using #1 position. Will paint the backknob later (now that it is so easy to remove/replace). Painted is definitely better than the way it comes from Pettit.
Originally Posted by 4 years to Supercharge
The stickers that are supplied are not see through because they have a silver foil and then the adhesive.
Mine is... when I heated and pulled the sticker off the foil did not come with it.
So I rubbed most of the simulated carbon fiber off the sticker from the back and hand brushed some flat black on the area which was now clear after taking the CF image off. The area that says RX8 is clear so I could do the LED on a later date.
For those that have had trouble taking the **** off. The easiest way is to pop the two panels that surround the numbers (above and below).
For the top panel: insert a small flat head screwdriver below the 2 and then below the 5 and pry gently, moving the screwdriver handle up. (Important to be gentle so as not to snap off the clips that hold the numbers in place)
For the top panel that says Push Power and VOL:
Pry from just above the 2 and 5, screwdriver handle going down. (again being gentle to not snap the clips for the numbers).
If you do snap one of the clips, don't give up, a little 5-minute epoxy does wonders if you don't lose the piece that broke off.
05-02-2007, 03:18 AM
#48
Registered

Join Date: Dec 2005
Location: SF Valley!
Posts: 124
Likes: 0
Received 0 Likes
on
0 Posts
in my experience the easiest and perhaps quickest way to remove the ****, with no chance of damage done to the surrounding is as follows.
-cover the rotor portionall the way around with a single piece of masking tape (the thicker the better)
- make sure that the tape adheres all the way around the rotor, and does so well
-then simply pull using the tape as an extended grip surface and it should easily pop out.
-cover the rotor portionall the way around with a single piece of masking tape (the thicker the better)
- make sure that the tape adheres all the way around the rotor, and does so well
-then simply pull using the tape as an extended grip surface and it should easily pop out.

Thread
Thread Starter
Forum
Replies
Last Post
Learners_Permit
Series I Interior, Audio, and Electronics
8
09-27-2015 07:38 PM