
Painting interior trim pieces-FAILED.


Thread Starter
Vtak just kicked in yo!!
iTrader: (1)
Joined: Jun 2007
Posts: 4,053
Likes: 1
From: Lake County IL
Painting interior trim pieces-FAILED.
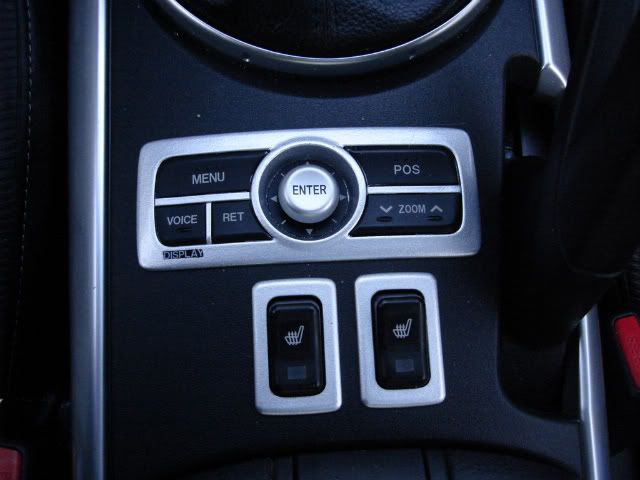
So I spent my evening off last night tearing apart my interior so I could paint my heavily scratched silver pieces black. I sand them down, give them 3 coats of primer, sand the primer, by this point my project was going seamlessly perfect. Until I put the black on it. 
My first coat wasnt really sticking and kinda ran a bit, then 3 coats later it still looked the same. So I obviously didnt proceed to clear coat it, I just left it alone to decide what the hell to do now .
Im almost sure the cold weather ruined the project for me. It was under 20 degrees last night here in chicago and I was painting these in my garage. I have a little space heater but I doubt it was warmer than 40-50 degrees. In similar conditions, my badges turned out perfect over the weekend.... maybe because it was a smaller project...
What do you guys recommend at this point, do I have to sand it all back down and start over ?? Maybe I should just buy carbon fiber trim pieces like I wanted anyways

I recently painted those as well for a friend. Yes, cold temps do have a negative effect. If you noticed it was starting to run after the first coat, why continue? First coat should always be a light layer.
I suggest sanding back down to primer and start over on paint in warmer temps.
Or you could do what I did with my rear pieces and put black vinyl over them.
I suggest sanding back down to primer and start over on paint in warmer temps.
Or you could do what I did with my rear pieces and put black vinyl over them.


Registered User
Joined: Apr 2005
Posts: 544
Likes: 0
From: CFB Comox, BC, Canada
Tell the wife / girlfriend that you need Pepto Bismol pronto, then head into paintbooth.....er bathroom and take all the time you need. Chances of her bugging you or asking what you are doing in there, slim to none. Think about it, it is perfect, tape some clear plastic around the walls in the bathtub, it is heated, has good lighting and a built in ventilation system..... I know that you are thinking about this now....
 . Ill just wait until she goes home to see her family
Need for Speed Satisfied
Joined: Mar 2008
Posts: 343
Likes: 0
From: Monroe, CT
lol i did the bathroom bit once too... some paint got everywhere though. the window sills, sink, the curtain was done. and i just had that same problem. i didnt bother clearcoating it either. mine ran, and even though i tried sanding it, it still doesnt work. i was looking at doing suede on the doors, thought maybe doing the silver runners to suede would be a very nice way to cover up the cold weather damage.

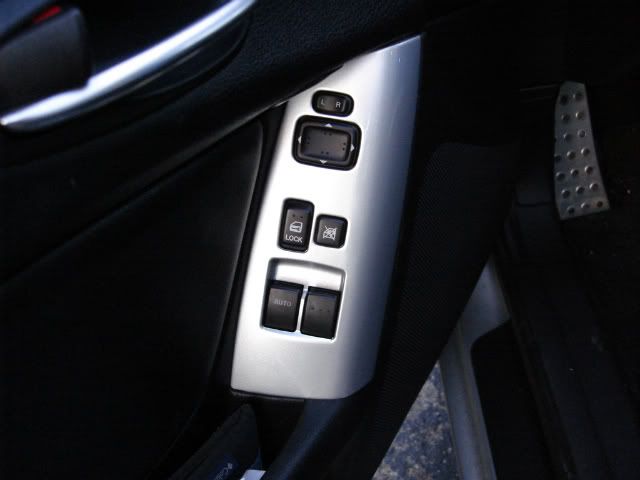
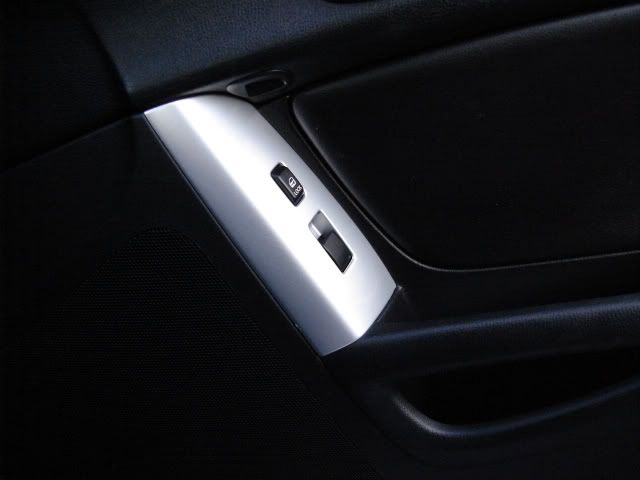
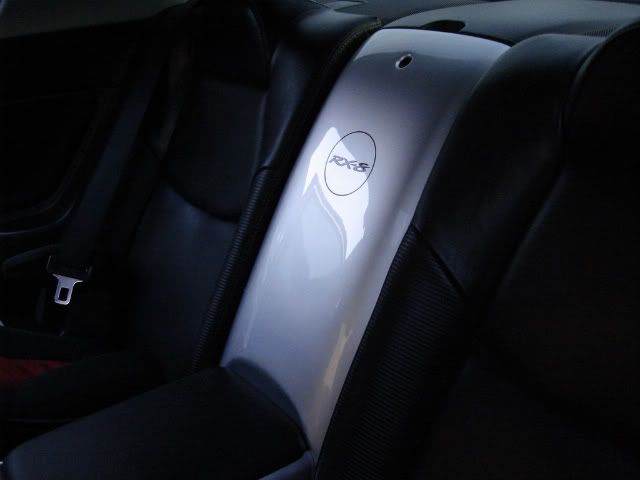
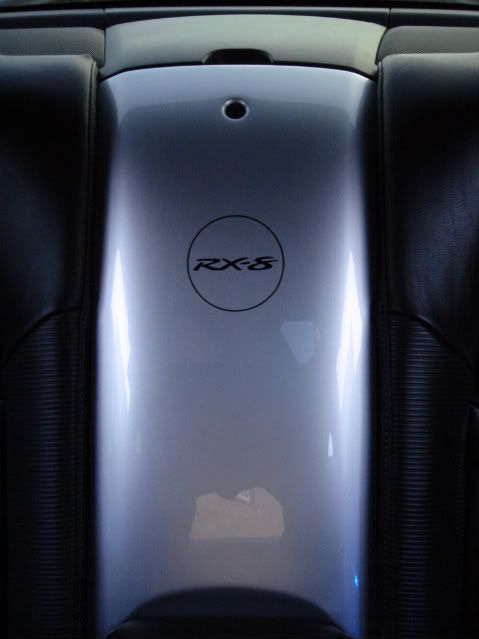
lol....if anyone wants me to paint their interior pieces I can...I was offering a service a little while back painting pass thru covers, got a lot of interest but not many takers. I do them for cheap too. Here are some pix of my stuff. PM me if anyone is interested.  I can do any removable interior piece.
I can do any removable interior piece.

So I don't get it. Was it the cold that caused the problem or the actual piece? Because I was going to take mine out to paint black also in the next week or so. Then again I am in FL and the low is 50 here. lol
![Josh[dl]'s Avatar](data:image/svg+xml;utf8,<svg xmlns='http://www.w3.org/2000/svg' viewBox='0 0 50 50'><circle class='avatar-circle-default' fill='%23b576bf' cx='25px' cy='25px' r='20px'></circle><text class='avatar-text-default' x='49%' y='53%' fill='white' text-anchor='middle' alignment-baseline='middle'>J</text></svg>)
Registered User
Joined: Nov 2008
Posts: 29
Likes: 0
I painted my trim in my old tc. came out really nice. passed it off as a professionally done job and they gave me more on my trade for it. heres how i did it.
Painting Interior Trim
Supplies: Duplicolor Self Etching Primer
Duplicolor Sandable Primer (for brighter colors, choose a white primer; darker, black)
Duplicolor Color Enamel
Duplicolor Clear Enamel
400, 1000 grit Sandpaper
Advanced Auto Parts carries Duplicolor.
Stay away from krylon, you wont get the professional look of duplicolor.
1. After removing your pieces, wipe everything off with some alcohol, and wet sand the stock paint (even if it doesn’t look like there is paint on it such as the gauge pod) until you have stripped as much of the paint off as possible and roughed up the plastic a bit. Wipe everything off with some alcohol and a dry paper towel again. I used anywhere from 400 to 800 grit to do this. keep it real wet, makes it easier.
2. Take your self etching primer, REMEMBER TO SHAKE VERY WELL BEFORE USE. Spray a light coat over the piece. Let dry. Then spray another light coat. Let dry again. Wet sand with 1000 grit to make as smooth as possible. Wipe with dry paper towel.
3. Take your Sandable Primer and spray a very light coat on your piece. Let dry. Lightly wet sand with 1000 grit until smooth. wipe with dry paper towel. Repeat 3 times.
4. Take your Color Enamel. Spray light even coat through piece, starting before the piece, ending after it. Let dry. Lightly wet sand with 1000 grit until smooth. Wipe with dry paper towel. Repeat as needed. I did it 5 times. The final coat of color I applied a wet coat (fairly heavy without dripping) Let dry.
5. Spray very light coat of clear enamel. Let dry. Spray another very light coat of clear enamel. Let dry. Wet sand lightly with 1000 grit until smooth. Spray wet coat (heavy clear coat without dripping) over entire piece evenly. Spray heavy enough just to where you start to notice the clear turning whitish. Let dry overnight.
Note: Don’t do in heavy humidity. DO NOT touch piece when applying clear coat, it seems to pull up the color coat. Allow ample time for drying where directed.
It’ll take some time but you’ll find things that work better then others. I just put what worked best for me.
-Josh LaGrave
I am willing to bet it was a combination of low temp and spraying the coats too heavy
I painted my trim in my old tc. came out really nice. passed it off as a professionally done job and they gave me more on my trade for it. heres how i did it.
Painting Interior Trim
Supplies: Duplicolor Self Etching Primer
Duplicolor Sandable Primer (for brighter colors, choose a white primer; darker, black)
Duplicolor Color Enamel
Duplicolor Clear Enamel
400, 1000 grit Sandpaper
Advanced Auto Parts carries Duplicolor.
Stay away from krylon, you wont get the professional look of duplicolor.
1. After removing your pieces, wipe everything off with some alcohol, and wet sand the stock paint (even if it doesn�t look like there is paint on it such as the gauge pod) until you have stripped as much of the paint off as possible and roughed up the plastic a bit. Wipe everything off with some alcohol and a dry paper towel again. I used anywhere from 400 to 800 grit to do this. keep it real wet, makes it easier.
2. Take your self etching primer, REMEMBER TO SHAKE VERY WELL BEFORE USE. Spray a light coat over the piece. Let dry. Then spray another light coat. Let dry again. Wet sand with 1000 grit to make as smooth as possible. Wipe with dry paper towel.
3. Take your Sandable Primer and spray a very light coat on your piece. Let dry. Lightly wet sand with 1000 grit until smooth. wipe with dry paper towel. Repeat 3 times.
4. Take your Color Enamel. Spray light even coat through piece, starting before the piece, ending after it. Let dry. Lightly wet sand with 1000 grit until smooth. Wipe with dry paper towel. Repeat as needed. I did it 5 times. The final coat of color I applied a wet coat (fairly heavy without dripping) Let dry.
5. Spray very light coat of clear enamel. Let dry. Spray another very light coat of clear enamel. Let dry. Wet sand lightly with 1000 grit until smooth. Spray wet coat (heavy clear coat without dripping) over entire piece evenly. Spray heavy enough just to where you start to notice the clear turning whitish. Let dry overnight.
Note: Don�t do in heavy humidity. DO NOT touch piece when applying clear coat, it seems to pull up the color coat. Allow ample time for drying where directed.
It�ll take some time but you�ll find things that work better then others. I just put what worked best for me.
-Josh LaGrave
Thread Starter
Vtak just kicked in yo!!
iTrader: (1)
Joined: Jun 2007
Posts: 4,053
Likes: 1
From: Lake County IL
I just redid 2 of the pieces and they came out much much better. I bought a 30 dollar space heater and painted them in my storage closet that is on the balcony of my apartment. The cold was definately the issue. I will post before/after pics once all 4 of the pieces are done and installed


We have a member on here who used a thin plastic window-tint like stuff, that just adheres to the surface. Looked perfect. No sanding and impossible to have runs. Couldn't tell the difference between that and paint.


Thread
Thread Starter
Forum
Replies
Last Post
nferguson88
RX-8 Parts For Sale/Wanted
1
Oct 6, 2015 12:45 PM
Tgiolitto100
RX-8's For Sale/Wanted
1
Sep 29, 2015 10:52 AM

