
My Apple Car-Puter Install Project - First Pics


Thread Starter
Registered
Joined: Sep 2008
Posts: 161
Likes: 1
From: Was New Zealand, now Australia.
Brettus, Kapiti Coast, you?
Question....has anyone come across a way to automatically switch av sources on the lilliput 629 when the car is put into reverse? I picked up a reverse camera and a spare boot stop lamp that I am fitting the camera into to replace the factory stop light....camera works fine, can manually (with the remote) change AV source...but it would be awesome to have the Lilliput switch sources when I chuck the car in reverse...
Question....has anyone come across a way to automatically switch av sources on the lilliput 629 when the car is put into reverse? I picked up a reverse camera and a spare boot stop lamp that I am fitting the camera into to replace the factory stop light....camera works fine, can manually (with the remote) change AV source...but it would be awesome to have the Lilliput switch sources when I chuck the car in reverse...
Thread Starter
Registered
Joined: Sep 2008
Posts: 161
Likes: 1
From: Was New Zealand, now Australia.
Boot Tail Light + Reverse Camera Custom Install
Ok, all assembled & tested.
All that is needed is a quick matt black spray of the transparent red bracket, then its ready to go.
Camera hooked up and works fine with the Lilliput, nice wide angle. Not auto switching AV sources yet...thinking of ways to tackle that, driven via the reverse lights...relay/microswitch maybe. At the moment, the AV source is switched by a push button mounted on the dash. (soldered some wires to the Lilliput's physical buttons, ran them out and down to a switch, works a treat, saves using the remote).
Cheers
Dean
www.deanknowsley.com
Thread Starter
Registered
Joined: Sep 2008
Posts: 161
Likes: 1
From: Was New Zealand, now Australia.
Ok, all the hardware is mounted in the car.
All went off without a hitch, apart from a tiny scratch on the HU faceplate....dammit. Out comes the fine grit!
Reversing camera is working way better than expected. To reduce reflected glare, I have relayed the rear high light, so when in reverse, the high light doesnt work. Turns out as a bit of a bonus, the camera is a day/night one (I got it with a spare boot lid).
Getting the Nav hood in was a doddle. No dramas.
Only one small issue, getting some alternator whine (a lot actually) when the screen is on. Going to go around in the morning and check all the grounds, see if that fixes it.
Heres some pics taken today after the install:
Now you see it...

Now you dont!

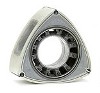
Wide shot of the reverse camera/tail light mod.

Close up...

Dash, with reversing camera image, automatically reversed.

Any help on the alternator whine would be appreciated. It's only when the lilliput is ON.
Cheers
Deano
All went off without a hitch, apart from a tiny scratch on the HU faceplate....dammit. Out comes the fine grit!
Reversing camera is working way better than expected. To reduce reflected glare, I have relayed the rear high light, so when in reverse, the high light doesnt work. Turns out as a bit of a bonus, the camera is a day/night one (I got it with a spare boot lid).
Getting the Nav hood in was a doddle. No dramas.
Only one small issue, getting some alternator whine (a lot actually) when the screen is on. Going to go around in the morning and check all the grounds, see if that fixes it.
Heres some pics taken today after the install:
Now you see it...
Now you dont!
Wide shot of the reverse camera/tail light mod.
Close up...
Dash, with reversing camera image, automatically reversed.
Any help on the alternator whine would be appreciated. It's only when the lilliput is ON.
Cheers
Deano
Thread Starter
Registered
Joined: Sep 2008
Posts: 161
Likes: 1
From: Was New Zealand, now Australia.
Stills and a youtube link as the embed doesnt appear to be working...
The Green technical looks awesome at night, I feel like Michael Knight.


http://www.youtube.com/watch?v=wRQwoqikLJk
The Green technical looks awesome at night, I feel like Michael Knight.
http://www.youtube.com/watch?v=wRQwoqikLJk
Last edited by deanrx8; Apr 4, 2009 at 05:17 AM.

Thread Starter
Registered
Joined: Sep 2008
Posts: 161
Likes: 1
From: Was New Zealand, now Australia.
I made the technical screen in Quartz Composer. Work as screensavers or iTunes visualisers on a Mac, not sure if PC's can run them. File extension is .qtz Once all is said and done, I will post them for download.
Thread Starter
Registered
Joined: Sep 2008
Posts: 161
Likes: 1
From: Was New Zealand, now Australia.
Ok, all tested.
Annoying alternator whine is caused by ground loop. I checked, and rechecked all grounds and wiring. It's all good. Bit more reading on the interweb revealed that the most likely cause of the problem is my AUXMOD. So I need to get myself a Ground Loop Isolator.
This neck of the woods is quite hard to get things, but Repco happened to have one in stock further up the coast, so they are sending it down to the local store this week.
Raptor GL1...

Fingers crossed, that should (***should***) solve the whining noises coming from the stereo when the carputer is connected to the Bose.
Failing that, I will try an FM modulator...
Failing that, a USB FM Transmitter.
Should be able to update later this week with how it all worked...
Annoying alternator whine is caused by ground loop. I checked, and rechecked all grounds and wiring. It's all good. Bit more reading on the interweb revealed that the most likely cause of the problem is my AUXMOD. So I need to get myself a Ground Loop Isolator.
This neck of the woods is quite hard to get things, but Repco happened to have one in stock further up the coast, so they are sending it down to the local store this week.
Raptor GL1...
Fingers crossed, that should (***should***) solve the whining noises coming from the stereo when the carputer is connected to the Bose.
Failing that, I will try an FM modulator...
Failing that, a USB FM Transmitter.
Should be able to update later this week with how it all worked...

Thread Starter
Registered
Joined: Sep 2008
Posts: 161
Likes: 1
From: Was New Zealand, now Australia.
I was going to duct some pipe into the compartment from the boot, and a 12V extractor fan to take out the warm air and dump it in the boot. Fans fore and aft sufficient?
Ground Loop Isolator arrived today. Should be able to get some time to test it this week..
Dean
Thread Starter
Registered
Joined: Sep 2008
Posts: 161
Likes: 1
From: Was New Zealand, now Australia.
Funnily enough, sooner than I expected. Might be heading through to Auckland. Normally bypass Hamilton :-), but I'm sure I could make a pitstop.
I want to know more about your louder Tacho Buzzer.
Males over 30 have problems hearing certain frequency ranges. Starts from about 18 years old in guys, our hearing goes downhill, especially in the mid-ranges. Ironically, the two things that are important are in the mid ranges....women's voices, and the RX-8 Tacho Buzzer. (SOME would argue that NOT hearing a female voice is good news).
Upshot is, I am profoundly deaf in one ear, and the other ear is rooted, so I am forever having the engine cut-out.
I want a louder buzzer, without too much hassle. How did ya do it?
Cheers
Dean
 . I have another mounted in the rear and duct to the trunk/boot. I'm hoping this will create enough circulation when I have the A/C on. The only thing I'm afraid of is the heat soak from the trunk/boot when the car is just sitting parked in the lot.
Thread Starter
Registered
Joined: Sep 2008
Posts: 161
Likes: 1
From: Was New Zealand, now Australia.
Cool. I was going to mount a solenoid in the cup holder, controlled by a temp switch. When it gets too warm, the cup lid pops up automatically, the fans kick in. We'll see.
As soon as I get the Ground Loop issue solved, I will start the permanent install stuff. Keep me posted on what you experience.
Dean
As soon as I get the Ground Loop issue solved, I will start the permanent install stuff. Keep me posted on what you experience.
Dean
Thread Starter
Registered
Joined: Sep 2008
Posts: 161
Likes: 1
From: Was New Zealand, now Australia.
Ok, the ground loop isolator worked a treat. All alternator whine gone.
So...I started with the console build/fit.
The way I decided to go is this:
The pass-through box (the big 'pocket' on the back of the pass-through) was closed at the top, and a 12V High Flow Fan Mounted, to create a 'Vacuum Box.' I then used some 4cm Diameter Hose, running out the bottom of the box. (I am praying my wife doesn't notice that for some reason the Vacuum cleaner hose doesn't reach as far as it used to :-) )
The hose then runs to the back wall of the rear centre console compartment. Cool air is drawn in from the front latch, and in from the sides of the lid, and sucked out the back, into the boot.
My original plan was to use the extractor hose as a conduit for the cabling at the same time, but the odd shape of the mini's ports, the power on the far corner, and the low placement of the DVI port, meant more holes had to be drilled.
In the end, the cabling looked a bit ugly, especially with the airtight putty, so I made a textured black plastic cover for looks.... bonus is, this cover seems to improve cooling!
A small rocker switch was mounted in the cupholder compartment for the 'valet' feature of the Power Supply.
Next step is to finalise the pass-through box, by fabricating a 4th side of the vacuum box (i.e. so the air is only sucked in through the pipe and not the massive hole in the top! The last photo is a mock up of how the Power Supply will sit on top of the vacuum box.
Last edited by deanrx8; Apr 17, 2009 at 08:23 PM.


Registered
Joined: Feb 2005
Posts: 164
Likes: 0
From: South Florida
Ha! I was just thinking that myself.. I'd love to put in a Nav/MP3/Camera setup (the engine diagnostics are nice too but I know nothing about that kind of stuff)
I've always been afraid to even go to any of the local stereo shops for something like this, they couldn't even provide me with an Aux input years ago , ended up doing it myself.
Maybe we can convince Dean to write up a full part list, detailed instructions and pics of every step Hell I'd be willing to pay for instructions if they were detailed enough for a somewhat-techie to be able come complete/
I've always been afraid to even go to any of the local stereo shops for something like this, they couldn't even provide me with an Aux input years ago , ended up doing it myself.
Maybe we can convince Dean to write up a full part list, detailed instructions and pics of every step
Hell I'd be willing to pay for instructions if they were detailed enough for a somewhat-techie to be able come complete/
Thread Starter
Registered
Joined: Sep 2008
Posts: 161
Likes: 1
From: Was New Zealand, now Australia.
When I am next in LA, I will drive up and help...of course I will take your leather handbrake handle at the same time.
Now...
The setup has been in and running for 3 weeks now (not including the week when I flooded the 8, and pulled out my hair trying to get it started. WILL NEVER short start AGAIN..EVER).
Funnily enough, without external cooling the Mac in the rear centre console seems to be running at normal temperatures. Its drawing enough air in under the lid, and expelling enough out the back of the tray (and the hole I made) to be normal...will keep an eye on it, and post further.
Some issues I am having...
I am mainly using front row (which is not touch screen compatible at the stage) using the remote...(well my wife is using the remote while I drive). Problem is the IR beam cant get to the mac when it is tucked away. I am going to extend the remote IR LED with a wire back to the mac...temporary, but it will work whilst on the look out for a front row touch screen mod.
I also need to check my jumper settings on my Carnetix, because the battery got drained after three days....(I'm sure I had the dead mans switch set, but perhaps not).
Apart from that, it looks awesome cruising down the motorway with the tech screen running (I've re-done it in red to match the red in-car displays).
I'm sure when I get a few moments (busy working on something at this moment) I can put together some instructions/diy type thingy.
Will post some video and pics of the unit and its operation shortly.
Cheers
Dean
Thread Starter
Registered
Joined: Sep 2008
Posts: 161
Likes: 1
From: Was New Zealand, now Australia.
Problem solved with controlling for the time being.
Generally, I don't go anywhere without my wife in the passenger seat, as the 8 is my weekend cruiser. By creating a wireless network on the Mac Mini, her iPhone can connect, and using the Apple Remote app, control the tunes.
I'm going to work on a usb hat switch for the steering wheel...which would be much better...


You can take the opportunity to upgrade the Bose amp to something aftermarket.. an amp that would allow you to fully take advantage of all the channels the PC outputs.
That or you can go the simple route and use something like a grom audio unit that plugs into the back of the stock HU and gives you an aux line that you can use to just run to the PC.. that's what I did. I forgot the exact model, but you can check my thread/
That or you can go the simple route and use something like a grom audio unit that plugs into the back of the stock HU and gives you an aux line that you can use to just run to the PC.. that's what I did. I forgot the exact model, but you can check my thread/