When you click on links to various merchants on this site and make a purchase, this can result in this site earning a commission. Affiliate programs and affiliations include, but are not limited to, the eBay Partner Network.
I have an 05 with leather seats - so they have the plastic clamshell on the back. I'm having a seat warmer issue and I've identified it as being a problem in the upper warmer pad (in the seat back, not bottom) but I can't get in to fix it because I can't get the top portion of the seat apart.
I've searched the forum to the best of my ability and I can't find any instructions or DIY help on how to take apart the top half of the seat (I found something for cloth seats where you can just unzip and roll up the fabric but that doesn't help me)
Can anyone help me with instructions on how to get that back plastic clamshell off? Pictures and/or workshop manual would be amazing. I'm pretty sure I can do it if I know where to tug/pull/push/unclip, I just don't want to break off any tabs or whatever is holding it on and after a reasonably thorough inspection and searching, I need some help.
I have the same problem, leather seat and plastic clamshell type back.
I searched for 2 hours, spent 2 hours on seat but still struggling . I can see that you need to remove the 2 bolts attached at the bottom of the sides but the plastic shell covers these. Since the plastic shell is crewed on from the inside (you can see this from the airbag hole) you must have to remove the leather seat side first but how? any advice would be great thanks
Doesn't really say how to do it, but maybe it will help?
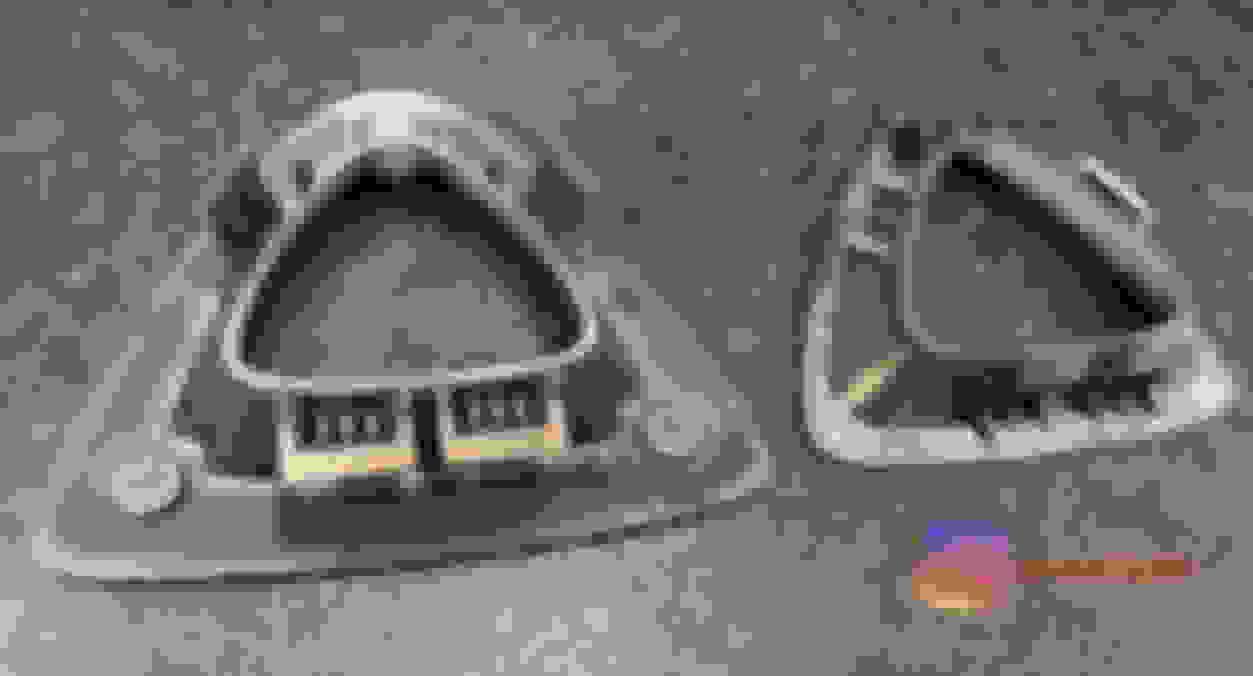
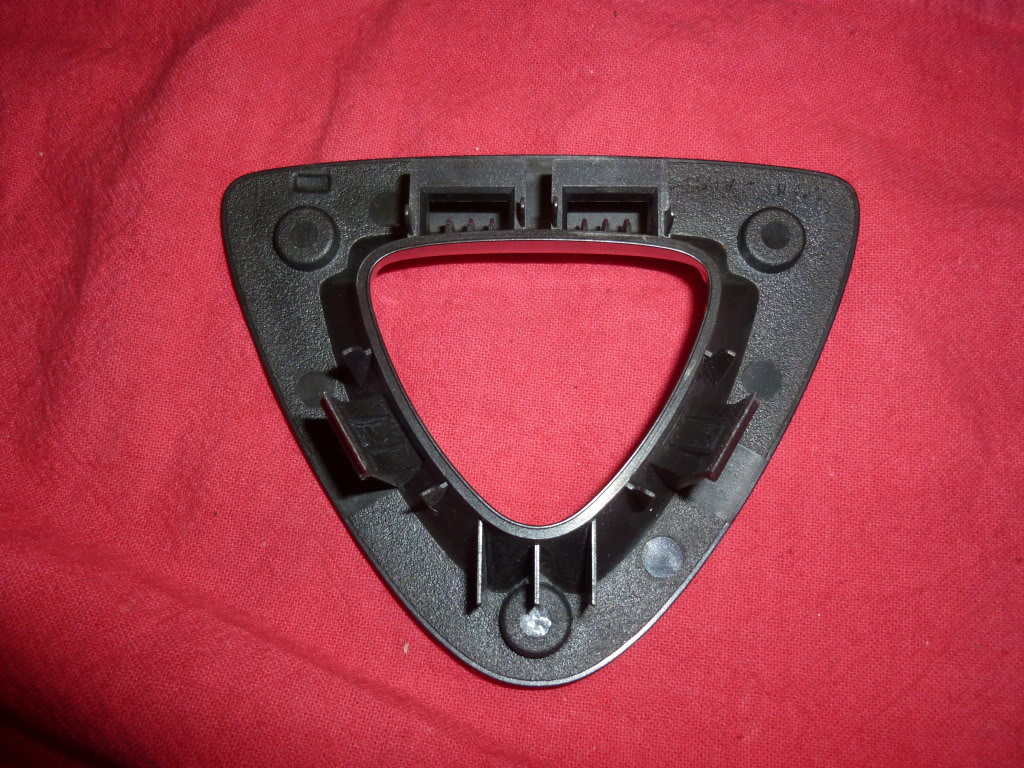
Yes, rotor assembly snaps as I recall. Study pictures closely and notice it does say to do in order of table.
Also......follow the airbag rules!
One screw there, but makes sure it won't go off on you!
Don't miss the last two pages.
Last edited by Mazurfer; Dec 10, 2011 at 05:33 PM.
dannobre - your right about the Rotor (see below) and there is a big bolt under the airbag, nothing wrong with the grey cells there!
Mazurfer - again right the Rotor just pulls apart, but the PDF is useless as it has no explaination on how to remove the leather facing of the seat.
I missed out the details on the rotor assembly on my first post (which I had figured out), and for everyone whos interested the method to remove it is:-
you can get your fingers under the sides by pushing in on the leather and then push it off the seat but keep rotating the fingers so you keep the pressure nice and flat to the seat, it just pulls off but if you do not keep it straight you will break the plastic prongs which it uses to join the front and rear halves.
The PDF comes from the manual and shows a great breakdown of the parts but gives no instruction on how to separate the leather portion of the seat from the Plastic backing of the seat.
Seats in the house so no worries about the airbag but a good reminder to anyone, I am told once you remove power it takes 10 seconds for the airbag to disarm.
So does anyone know how to remove the leather front section from the rear plastic section.
Pics of the rotor in the seat and where if pulls out from plus my seat in a partical meltdown!
You can see there are two prongs that push in and two that pull out, hence the need to keep presure even when pulling out. Other option but I did not try would be to reach under leatehr front and try to push the prongs in.
Where I have got stuck!
I'm trying to research it, but don't have the full workshop manual, just ones I have either found, people have given me access, or gotten from here.
Don't try this, but from the pic, it looks like it pulls off, but again................that is dangerous!
I'll post back if/when I find anything.
Look at the pdf again and you can see where the clips are for holding the rotor on, so I'm thinking if one studies the picture hard enough, maybe the rest will come into focus?
Mazurfer - I got a big headstart from your post on this subject about a non plastic backed seat - many thanks
I have looked under the leather and there seems to be some form of clip but cannot see enough to see if its a pull out job so not willing to take risk of wreaking the seat to find out!
If you can find anything on the web you are a better searcher then me (and I thought I was good at google advanced!!!)
thanks
Last edited by vfrmark; Dec 11, 2011 at 03:56 AM.
Reason: spelling!!!
I managed to find a posting about dismantling the cloth seats but nothing about the leather ones.
for those interested in cloth instructions try this link by 7aull (Stu Aull in alaska,) its a RX7 page but hes fitting a rx8 set of seats to it and needed to strip it right down to weld new rails on http://www.rx7club.com/showthread.php?t=802427&page=2
so if anyone has every taken their leather ones apart please let me know the trick to removing the leather seat back.
Mazurfer, I tried to research but found nothing, so I tried the manual method and pulled! But all this did was break a press joint between the Leather/Foam seation of the seat.
So still no nearer and sooner will be in problems with orther half (not just car!!).
I could do a full DIY writeup on how to fully disassemble the leather powered seats and diagnose a seat warmer issue but since both of those threads sort of exist in DIY I'll just post answers to questions left unresolved for future readers.
To disassemble the seat backs you first have to remove the rear plastic shell, this isn't easy I recommend nylon pry bars and careful pulling with gloves on. There are nylon door panel clips that pop into the sides of the seat, nylon clips that squeeze onto the metal wire-frame of the seat back, a bolt and screw hidden behind the SRS airbag logo, as well as the rotary symbol which clips in from the front. You'll then have to unzip a zipper on the back of the seat, pull a few staples out of the fabric on the back, cut a zip-tie going through the fabric around a seat support bar and finally you can begin to remove the seat back by carefully reaching to where the leather is "stuck" to the seat and cutting the metal hog rings pulling the back leather to the seat's wire frame. Once that's undone you can pull the leather away from the seat back, you'll need to carefully reach in and cut hog rings holding cutouts in the leather to metal wire embedded in the seat. When reinstalling you can just use some small zip-ties and cut the excess and roll the head into the foam, it's probably easier than trying to get ring pliers in there anyway.
As I said I could do a writeup, but it's not a super common job and I think I gave enough information to work on it if you really wanted to. May upload some pictures later...
Last edited by limitlesscodes; Apr 2, 2020 at 04:14 AM.
Hey do you know if the seats have identical mounting bolt patterns on both sides of the back rest part ? What I would like to do is swap back rests from driver to passenger so the bolster wear would be new.. Anyone know if that would be possible?
pretty sure they don’t unless you don’t unless you want anyone in either seat getting punched out by having the side airbags mounted in the center between both seats rather than on the outside.
Airbags are disabled, anyone else who has completely taken apart the two front leather seats know if the back rest side mounts are the same on both sides ?
That was an excellent video thanks, it�s for cloth seats not leather, are brackets and mounting holes the same on both style seats ?
From the video I would say yes both sides of that seat are the same and technically the other seat�s back rest should interchange, interestingly enough, the two red leather power seats I acquired have been swapped to manual seat brackets bottoms and the driver side feels like it has those two same mount holes.
I did the same thing and removed the air bag and kept the cover but without the metal part.
Last edited by VICEdOUT; Mar 15, 2021 at 06:51 AM.
pretty sure it wasn�t necessary to take the seat backs apart before removing them. That was extra work for nothing if I recall correctly.
i took a set of OE seats apart to mount race seats using the OE sliders & feet. So sort of the opposite of the way he did it; removed the stuff from on top of the slider rails without using an aftermarket mount. Seats are aluminum Kirkey Intermediate road race seats. Welded mount tabs to the top of the slider rails, then bolted the seats directly to them. Had to modify/replace the slider actuator bar at the front to get it at a different angle (used aluminum tubing). Super low mounting too. If anything, too low.
No post about "plastic clamshell on the back"
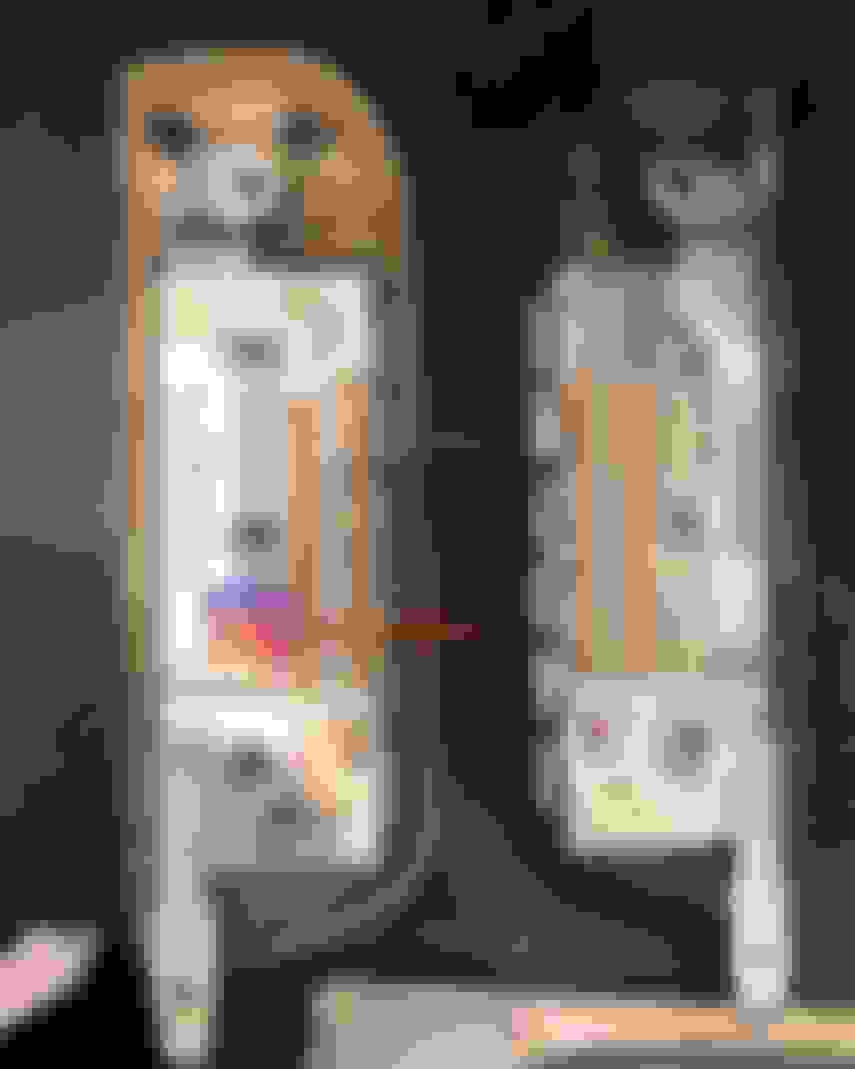
I have both clamshell and leatherback type as same as I was trying to do some Frankenstein build which I give up as becomes more than I want to chew!
So, the black is the driver (RHD) clamshell and beige/sandstone/blond is the passenger (RHD) leatherback version.
The frame is littery different and non-interchangeable.
Here as photos, any questions?
i wonder if you could fit aftermarket seat into the rx8 stock base keeping all the features of the power system and heated seats and such. i wanna replace my seats in my 05 Shinka with the diamd tuck Brown Tanaka seats. there some on Ebay.


 . I can see that you need to remove the 2 bolts attached at the bottom of the sides but the plastic shell covers these. Since the plastic shell is crewed on from the inside (you can see this from the airbag hole) you must have to remove the leather seat side first but how?


 .
.


 is the passenger (RHD) leatherback version.