When you click on links to various merchants on this site and make a purchase, this can result in this site earning a commission. Affiliate programs and affiliations include, but are not limited to, the eBay Partner Network.
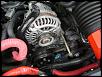
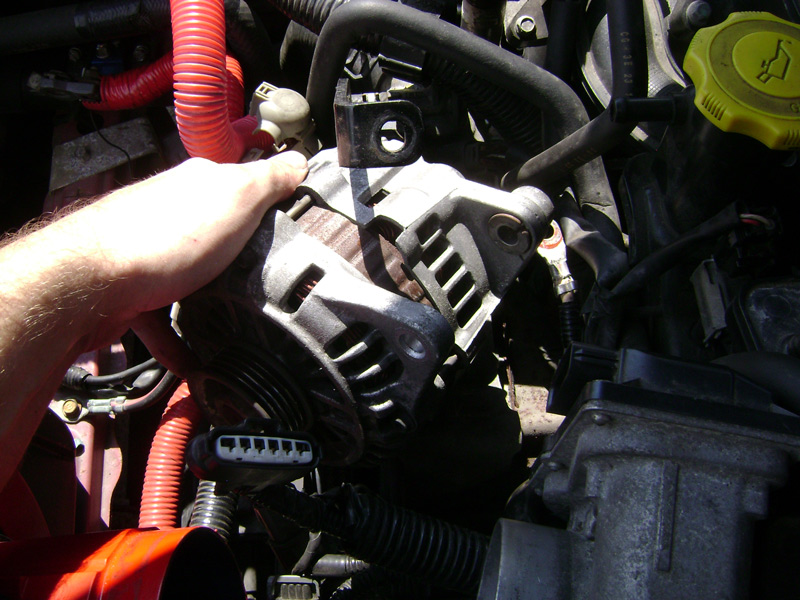
Appears that we needed a DIY for removing the alternator because some feel that you need to remove the alternator bracket.
It would make it easier, but isn't necessary.
1) Disconnect and remove battery along with the upper battery tray to gain some room (and to prevent electrocution).
The pic below I have the whole battery box removed, but its not required (I was working on something else too).
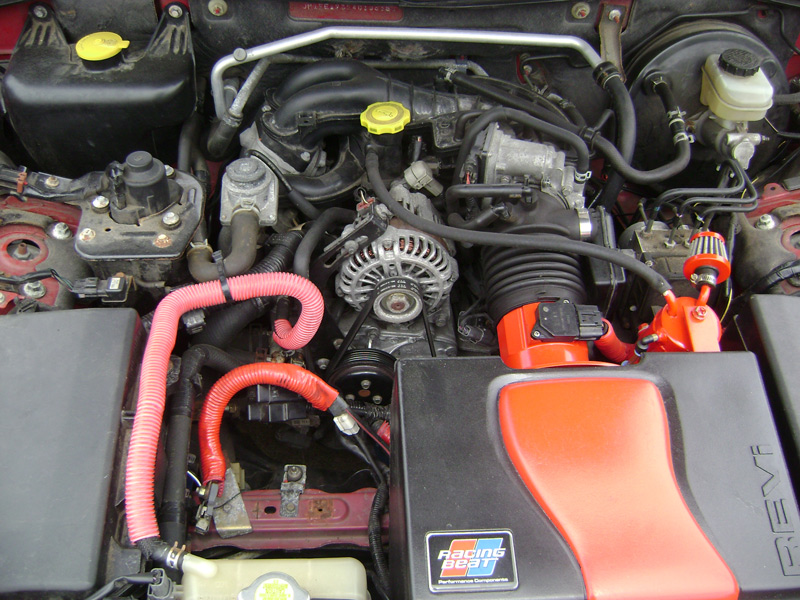
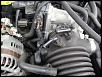
2) Disconnect the harness to the alternator.
3) Open covers to expose the wire and nut, then remove nut and wire from housing.
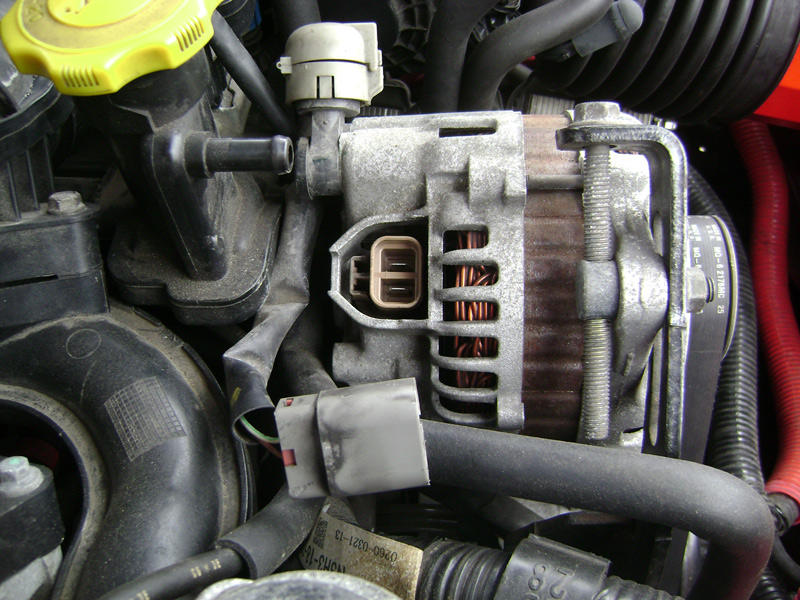
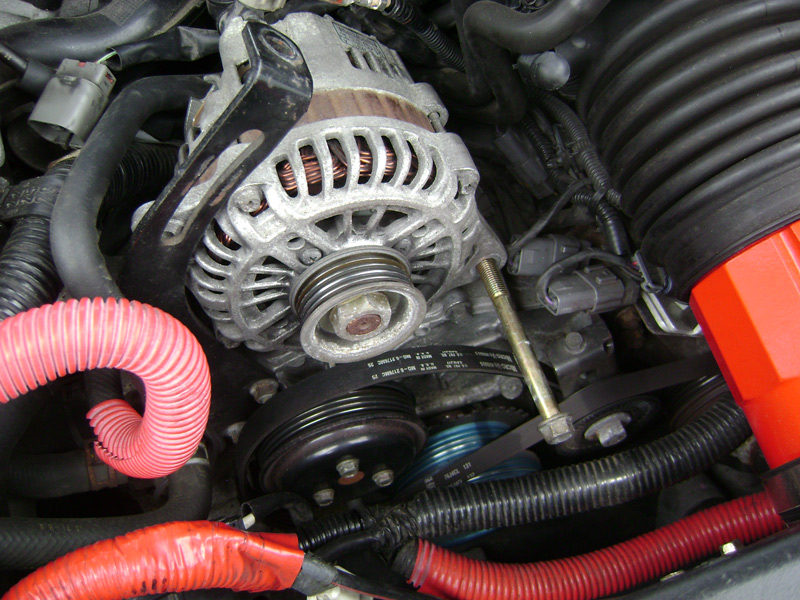
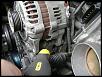
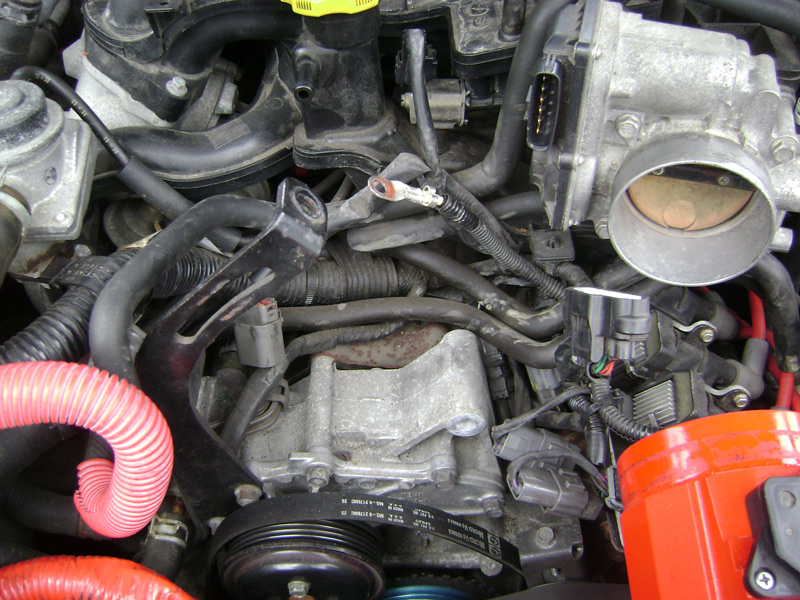
4) Completely remove tension bolt and the piece that runs through the alternator bracket (piece the tension bolt threads through).
5) Remove bolt that secures alternator to the engine.
6) Removing the intake's accordion tube will make things easier.
Remove all hoses going to the accordion tube, loosen the clamps, and remove it.
Also, remove the electrical connector to the throttle body.
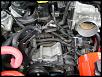
7) This is where having the accordion tube out makes it easier...
Use a large flat-head screwdriver to lift the alternator out.
You'll need to "rock" the alternator while lifting it.
It'll take some time (few minutes), just be patient and you'll see it begin to lift out.
Some good FYI provided by TeamRX8:
Originally Posted by TeamRX8
The reason you have to rock it back and forth to get it out is because there is a sliding bushing in the lower mount that cinches up against the lower alternator mounting tab.
Once you get it to slide back a bit the alternator lifts right out.
When you tighten down the bottom mount bolt on the re-install it cinches back in place again.
8) Now rotate the alternator counter-clockwise (if facing from the front) and then rotate sideways.
The alternator will come out forward and under the bracket.
9) Enjoy a beer since you managed to get the alternator out without removing the bracket.
it's probably worth noting that the reason you have to rock it back and forth to get it out is because there is a sliding bushing in the lower mount that cinches up against the lower alternator mounting tab. Once you get it to slide back a bit the alternator lifts right out. When you tighten down the bottom mount bolt on the re-install it cinches back in place again.
Thanks Team.... I added your quote to the DIY.
Even though I'm sure people would have seen your post right after the DIY, I wanted to give you a little credit for the suggestion
I know it is an old thread but I couldn't find any information on how to remove the nut from the alternator's pulley. I want to change to pulley while I am also changing the alternator. the pulley spins along with the nut. I tried a strap wrench to hold the pulley but I am not sure if the nut comes off clockwise or counter-clockwise. I tried both with no luck. I don't wanna try too hard and damage the bearing.
I have done all of this but when I go to remove my wire harness it will not come out and the plastic around the wires just keep breaking when I try to remove it so any suggestions or is there something I'm doing wrong?
Well that was the fight of my life, but I did prevail!! Removed the air box plenum and resorted to lifting the alternator straight up then spinning it clockwise (towards the drivers side). I will be getting hold of a 10-12 inch long 12mm open end to remove the bracket during the installation Thanks for having this DIY!!!
Follow on to alternator removal: the new one went in twice as fast as compared to the removal process, and with much less effort!! The best part was not having to remove the belt adjustment bracket !!
So I tried this I've been kicking myself in the ***** for it ever since. In my opinion it was *much* easier to just remove the bracket last time I did it. Probably takes a total of 5-10 minutes, and removes a LOT of the headache from this process.
I do appreciate the work that went into writing this up though.
I have done all of this but when I go to remove my wire harness it will not come out and the plastic around the wires just keep breaking when I try to remove it so any suggestions or is there something I'm doing wrong?
Appears that we needed a DIY for removing the alternator because some feel that you need to remove the alternator bracket.
It would make it easier, but isn't necessary.
1) Disconnect and remove battery along with the upper battery tray to gain some room (and to prevent electrocution).
The pic below I have the whole battery box removed, but its not required (I was working on something else too). Attachment 173691
What tab? That's the problem is I see no tab system or anything! Can you please send a picture or a diagram or something? Been stuck on it for 2 days cannot figure out how to get it out.
is there a close up picture available of the harness connection on picture 2? I cannot figure out how to take it off! I see no tab or anything and i've tried forcing it out. I really don't wanna break it.
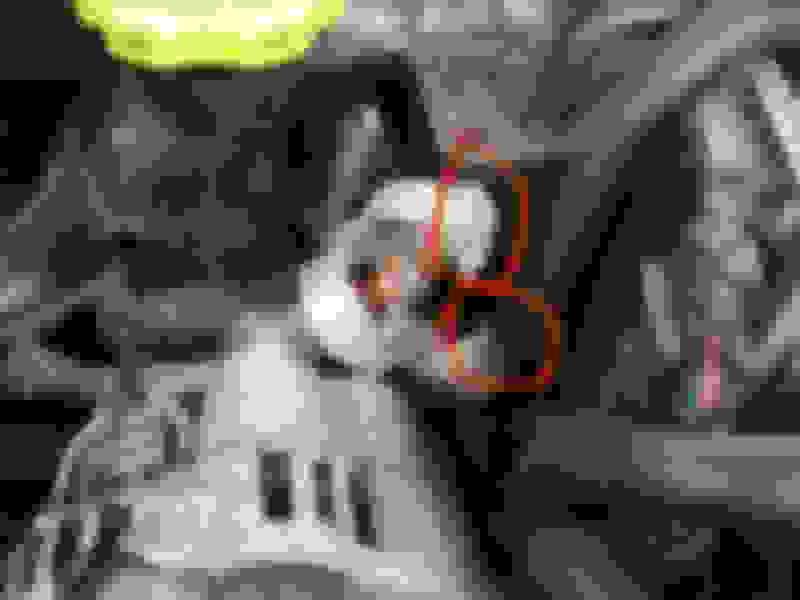
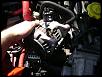
sorry, found and marked this up the other day and meant to post it, but got sidetracked. So there’s one on the main cover that exposes the nut and the smaller one on the side that releases the cable. I usually just take the main one loose and pull the cover off with the wire, but it can be a bit tricky to get the cover off the alternator post but because it’s has some captive barbs on the underside
I think you mean the other one off to the side though. I was looking for that when I got off onto something else. Let me look around.
here it is, tab is in the rear, which if you look at the socket opening in the pic above you can see where the tab locks into, hth
I just woke up, went to it, and kinda pulled it off with the tab. No clue how the hell I did it, but it worked. Just slipped off, like it was supposed. Still don't know how it works. I'm just an ape I guess.
it’s ok, we’ve all been there. My apology for not having helped you get there sooner.
the tab may be broken; which it’s a bit of a snug, tight fit even without the tab, or sometimes those tabs are just difficult. It’s always best to push the connector in first with pushing on the tab to help release it, then pull the connector out.


 Thanks for having this DIY!!!