DIY: Lowering Springs Install


BALLIN!!
Joined: Jan 2007
Posts: 19
Likes: 0
From: Dracut, MA
me and a friend used this DIY to install my koni shocks and Eibach springs this weekend and it took about 4.5 hours....the only time consuming part is compressing and decompressing the springs, thank God this kid had an impact wrench!!! its so easy to get them in and out though...thanks!!!

BALLIN!!
Joined: Jan 2007
Posts: 19
Likes: 0
From: Dracut, MA
if you go to this site there are instructions with pictures for the front and rear
http://www.hi-impact.org/ryang/modify/modify.html
http://www.hi-impact.org/ryang/modify/modify.html

Registered Lunatic
iTrader: (1)
Joined: Aug 2003
Posts: 3,591
Likes: 49
From: SF Bay Area, California

the stig is my hero
Joined: Feb 2006
Posts: 701
Likes: 0
From: NC
^second that. As useful as this DIY was, I found that several of the details were a bit.. off. A couple of the bolts are listed as different sizes than what they really are, and where he refers to the "control arms" for the front shocks, I believe he means the end links. Minor typos, but without pictures it's kindof confusing.

Free!
Joined: Jun 2007
Posts: 177
Likes: 0
From: Daytona Beach, Florida
I did this install earlier this week...it was super easy probably took 4 hours or less. I'm not sure why everyone considers the rear harder to do...It was far easier. My first front took about 1 hours 2 minutes, second one took about 45 minutes. My first rear took about 45 mins-hour. Second rear spring took literally 20-30 minutes. I did use air tools which make a job like this much, much faster.

Registered
Joined: Feb 2006
Posts: 397
Likes: 0
From: Conroe, Texas
I did this install earlier this week...it was super easy probably took 4 hours or less. I'm not sure why everyone considers the rear harder to do...It was far easier. My first front took about 1 hours 2 minutes, second one took about 45 minutes. My first rear took about 45 mins-hour. Second rear spring took literally 20-30 minutes. I did use air tools which make a job like this much, much faster.
^^^^Air tools rule, huh??
 Personally, I wouldn't attempt this DIY without them, but that's just my opinion. If you don't have any, just go to a local RX-8 or RX-7 meet and ask around!

Rotary Dominican Republic
Joined: Apr 2007
Posts: 6
Likes: 1
From: EHT, NJ
Lowering Springs
Hey thanks men, well its sunday 21st and yesterday i did just my front, i've been so busy all these day, but the car looks nice like that, can somebody tell me if one of you guys have just the front Tein S, and stock in the back???
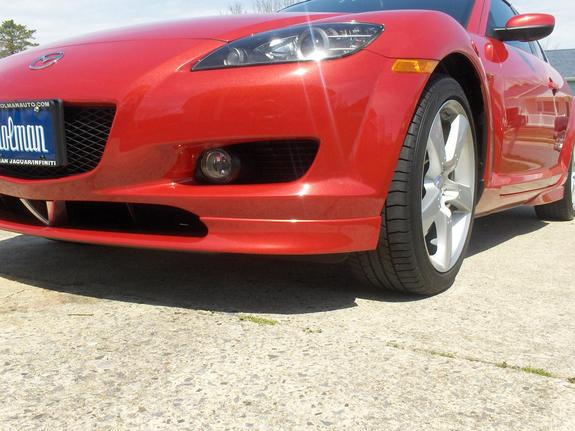
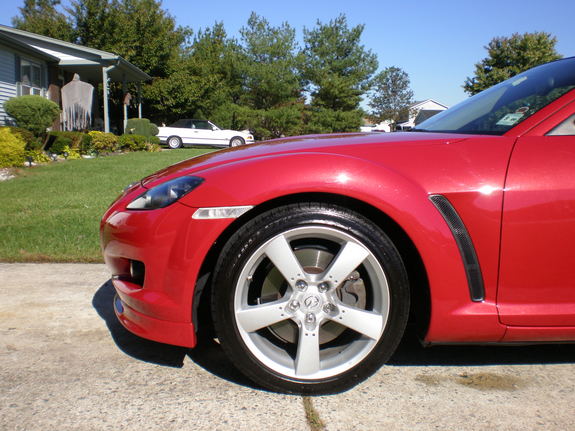
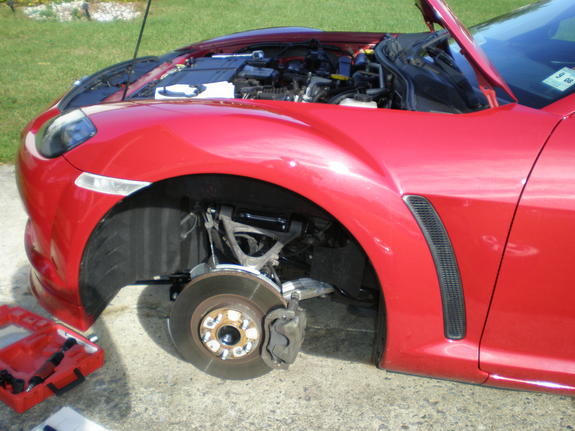
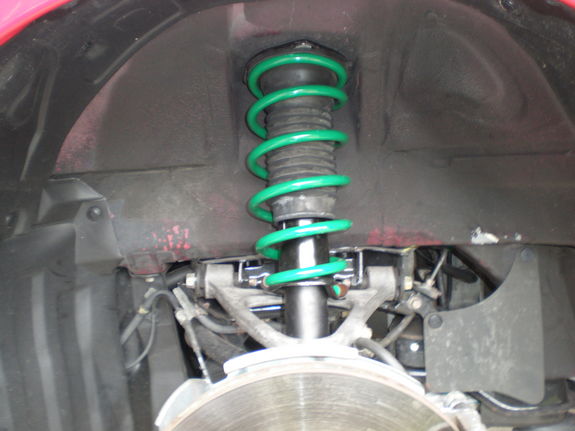
Pictures!!!!!

BEFORE

AFTER
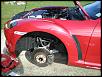
NO SHOCK
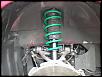
NEW SPRINGS ON!

I'M A MEMBER OF:
THANKS A LOT GUYS
Pictures!!!!!
BEFORE
AFTER
NO SHOCK
NEW SPRINGS ON!

I'M A MEMBER OF:
THANKS A LOT GUYS
Last edited by willrotary; Oct 22, 2007 at 06:23 AM.


Also when you go and tighten all the bolts back on, what I do is leave the car onthe jackstand, get a jack, and jack up the knuckle of the suspension until the car gets off the jack. Then you can tighten up all the bolts without worrying about settling issues.

Registered User
Joined: Mar 2008
Posts: 237
Likes: 0
no it doesnt.
a easier way is to get everything back together with loose bolts.
get a jack and place it under the rotating assembly.
and load the front suspension by jacking it up.
it will be fully loaded when the entire car starts to raise and not just the suspension.
load it all the way up, then tighten all your bolts.
unload it and slap your wheel on, then your done.
this way is ALOT easier than having to lower the car down and try and reach the bolts.
^thanks for the suggestion...now I have to try to loosen the bolts. I had a mechanic put the springs on and I'm sure he used an impact. I don't have one..so this should be interesting..........
we will just have to disagree on this.. both will work. i think it is easier my way, + if you drive just a bit and hit a speed bump or two it settles..
have done it both ways.
beers
have done it both ways.
beers
no it doesnt.
a easier way is to get everything back together with loose bolts.
get a jack and place it under the rotating assembly.
and load the front suspension by jacking it up.
it will be fully loaded when the entire car starts to raise and not just the suspension.
load it all the way up, then tighten all your bolts.
unload it and slap your wheel on, then your done.
this way is ALOT easier than having to lower the car down and try and reach the bolts.
a easier way is to get everything back together with loose bolts.
get a jack and place it under the rotating assembly.
and load the front suspension by jacking it up.
it will be fully loaded when the entire car starts to raise and not just the suspension.
load it all the way up, then tighten all your bolts.
unload it and slap your wheel on, then your done.
this way is ALOT easier than having to lower the car down and try and reach the bolts.