DIY: Coolant Change


I wonder why no one asks for the picture of throttle body hose yet...?? I guess most people just don't bleed and just use the topping off method?
What's the trouble with having air in the system? (probably a stupid question.)
What's the trouble with having air in the system? (probably a stupid question.)

That's all I do. Leave the radiator cap off or at least not closed completely and warm it up thoroughly. Then let it cool down completely. Once cool, top off the the fluid in the surge tank to the lower cold level mark, tighten the radiator cap, and you are done.

Super Moderator
Joined: Apr 2005
Posts: 10,880
Likes: 340
From: Australia
Got a small easy out taper, drill a small fine centered pilot hole and use a small easy out?
Will need to be careful you don't damage seat (female part) of drain plug.
Edit" You are unscrewing in the correct direction?
Will need to be careful you don't damage seat (female part) of drain plug.
Edit" You are unscrewing in the correct direction?
I wonder if a new plug will be less likely to break...if so I will just change one out every other year. Can't believe a coolant plug is more trouble to deal with than any other seal plugs.
I broke mine as well a month ago. But I also broke the nipple on the top so I just replaced the whole thing. I certainly don't want to deal with the plug again.
I broke mine as well a month ago. But I also broke the nipple on the top so I just replaced the whole thing. I certainly don't want to deal with the plug again.
This is weird, I actually observed the head of the plug today and it doesn't look like the oem one. Looks like the previous owner used a different plug... Attached are 2 pics, any advice would be helpful as to how I can remove this.

Registered User
Joined: Jan 2012
Posts: 56
Likes: 0
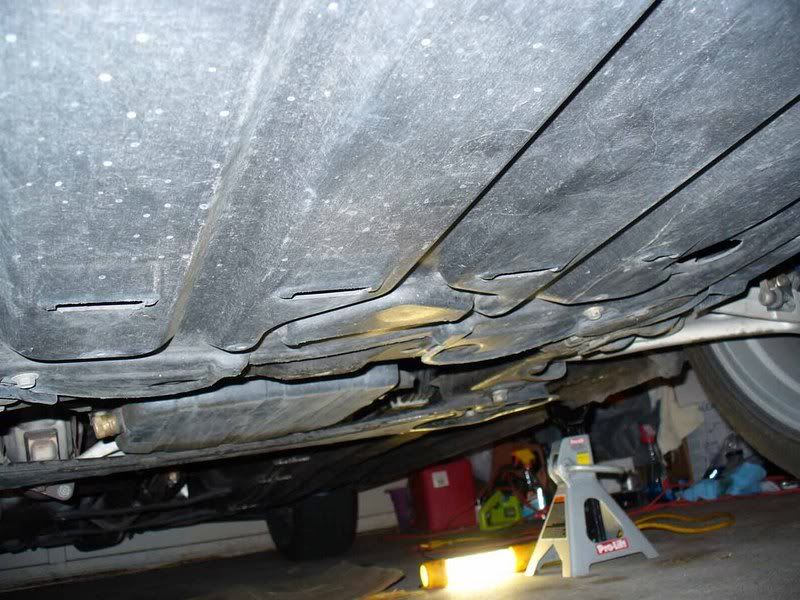
THIS DIY IS INTENDED TO SHOW YOU HOW TO TAKE OFF THE UNDERBODY TRAY FOR Rad change/ hose change/block draining.
To empty only coolant by itself you can just stick a phillips screwdriver in the hole in the underbody tray and it will drain out. No need to remove the underbody tray for just that.
Okay, this is a pretty simple project, but with the overflow reservoir being our only access to fill the radiator it becomes very time consuming. This is about a 4-6 hour project but I would allocate an entire saturday to it, plan on changing your oil while your at it, its right there anyway since your car is going to be jacked up.
Keep in mind that after doing this you are going to have about six gallons of antifreeze contaminated waste liquid after doing this, granted that you should have enough plastic containers from the "required materials" to store it all.
Tools needed:
-Phillips Screwdriver
-8mm socket (optional but makes undoing the plastic underbody tray much easier)
-10mm socket + extender
-drainpan, you can buy one of these from autozone or any other place for <$3
-ethylene glycol antifreeze, at least 2 gallons of the concentrate, or three gallons of the 50/50 premix.
-redline water wetter or royal purple ICE (optional)
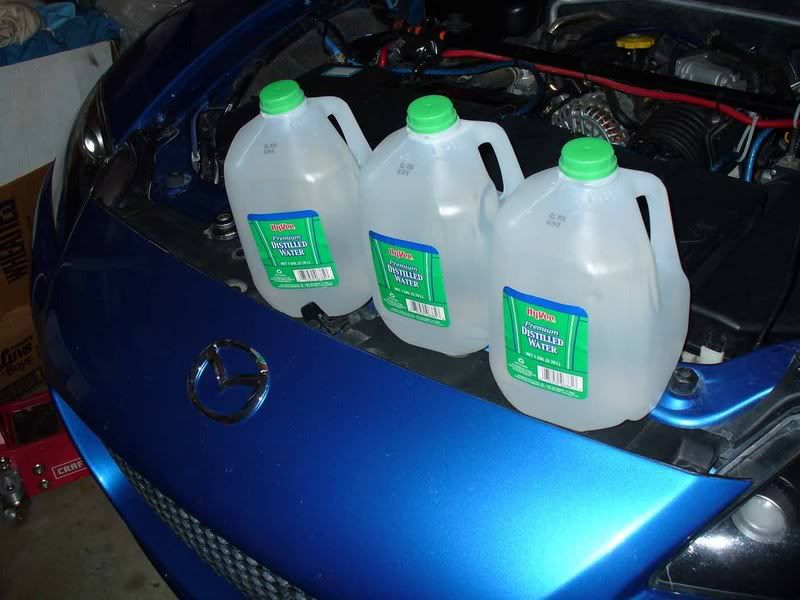
-5 gallons distilled water
-car jack + two jackstands
-goggles
-plastic gloves
Step 1: Jack up car, & allow to cool if it has been warmed up to operating temp recently.
Step 2: remove center plastic underbody tray & the 8mm bolts along the plastic underbody trays in front of the wheels.
Underbody tray, the bottom is held on with plastic fasteners, 5 - 8mm bolts, 2 - 10mm bolts:
Plastic tray in front of wheels, remove the bottom 8mm bolts near the front on this also:
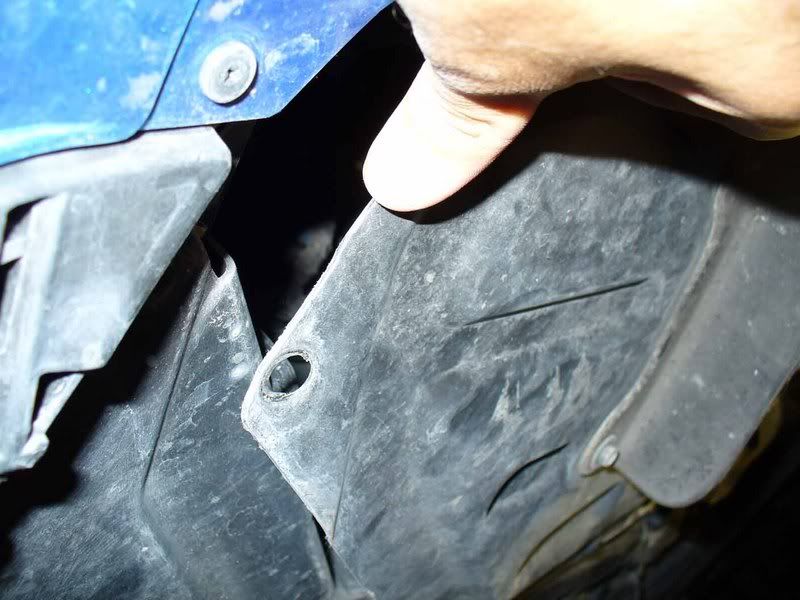
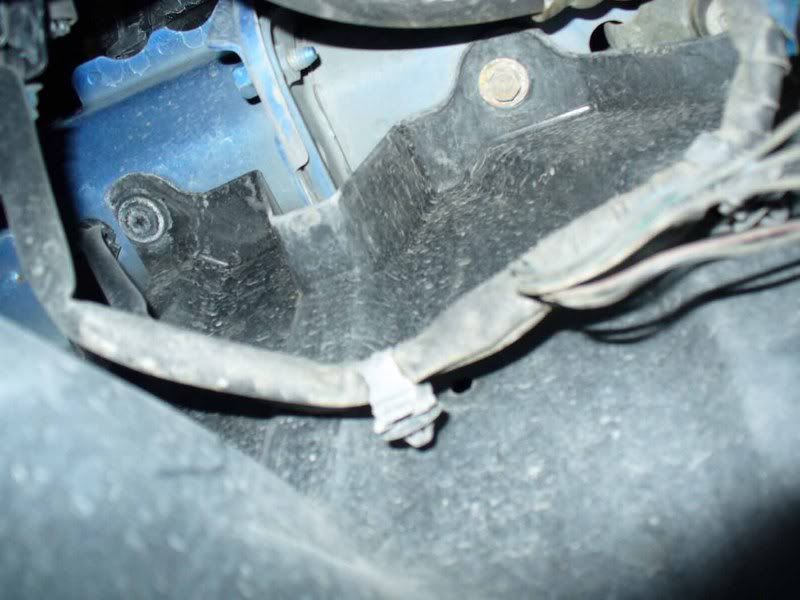
Besides the 8mms, the plastic fastners, and the 2 - 10mms at the rear of the tray, there are 2 - 10mm bolts + 1 plastic fastner on each side that hold the plastic tray up in the fender well, two are below the headlights and the other is right next to the front swaybar bushing. Be sure to unsnap the ABS wire holders and the headlight calibration system wire holders from the tray before dropping,
Okay so the tray is now out.

Step 3:
Put your hand carefully on the radiator, if it is hot then I suggest letting it cool because hot flluid will come out. (Racing Beat A/C condenser screen pictured)
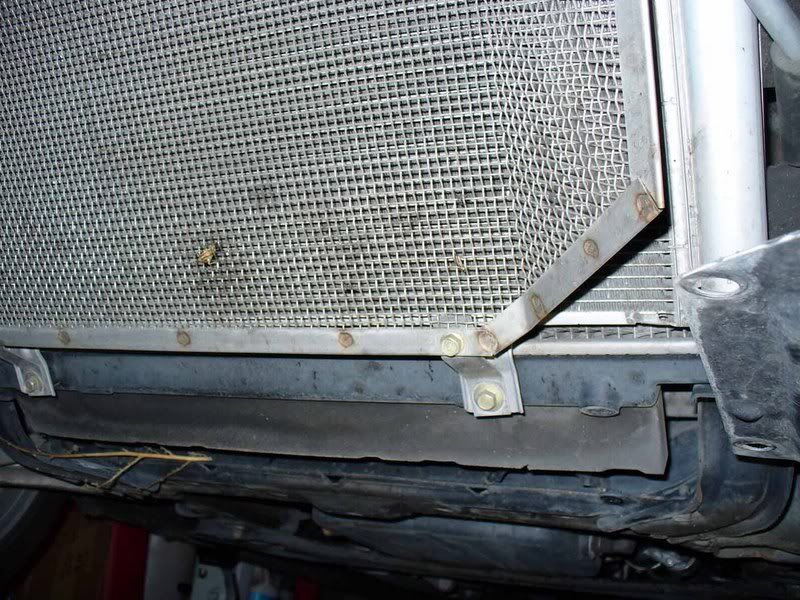
Find the radiator drainplug on the bottom right of the radiator and undo the plastic phillips screw. Antifreeze will come out, I suggest wearing the gloves and the goggles, because it will splash.
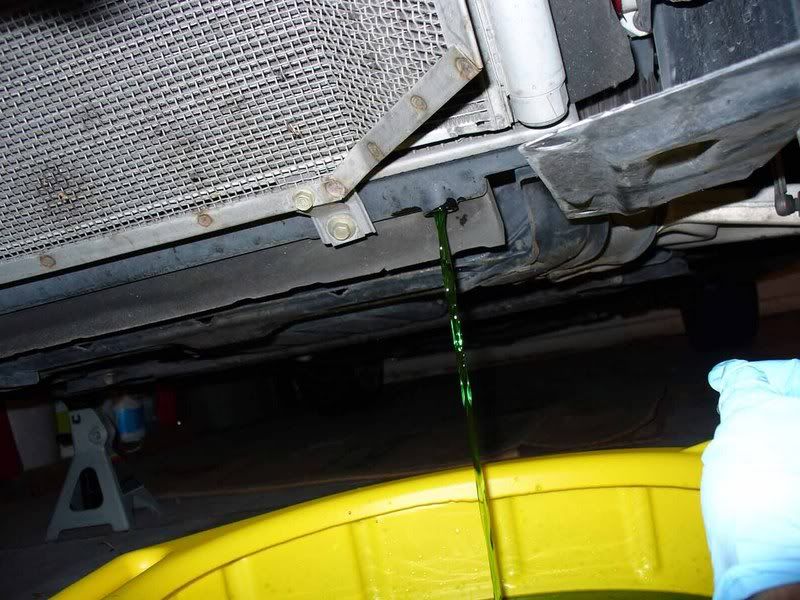
Step 4: allow to fully drain, then re-install the plastic drain plug screw
Fill overflow tank with distilled water up to the fill mark. The system won't fully drain since you have it jacked up, so it will only accept about 1 & 1/2 gallons depending on how much drains. So don't expect manual spec amounts of fluid in or out.
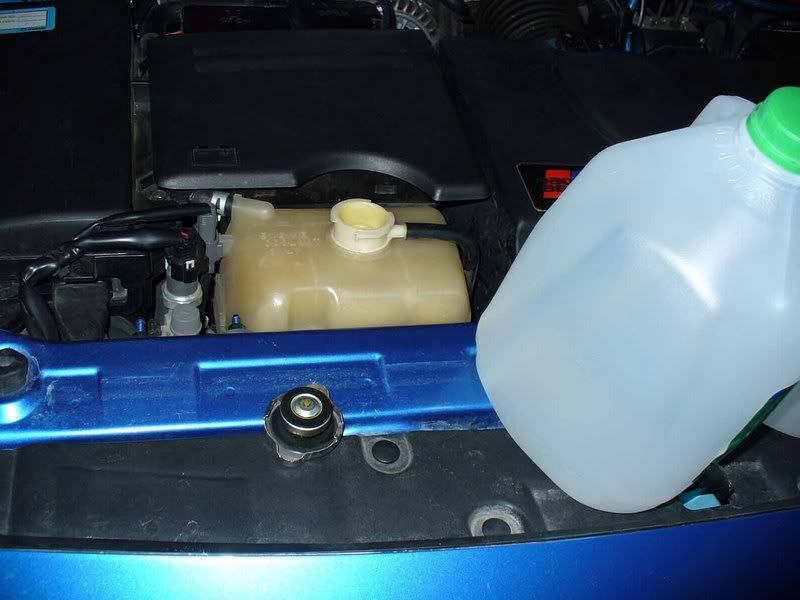
After the level is pretty stable at the F mark leave the pressure cap off and go and start the car. Come back quickly and check to see if the level went down, if so, refill to the F mark. Stay attentive and allow the car to reach operating temp at idle. Like I said, only 1 & 1/2 gallons or so will go in total though this process, don't expect to put it in all at once and be done with it.
After the car has reached operating temp, reinstall the pressure cap and rev it to 3.5K for about 15 seconds. Go and check the level in the filler tank. Then turn on the heater to full hot, and air setting of 4. rev to 3.5K for 15 seconds again.
Shut off car and allow to cool for about 30 minutes.
This was the first flush, but since we were only able to get half of the coolant out on each drain we must do another flush just like this.
So, repeat flush process again with distilled water only.
And optinally repeat the flush process a third time, I know I did
The filling and the cooling take the bulk of the time. There are easier quicker ways to do this but they are less environmentally friendly and make much more waste fluid.
Step 5: After you are satisfied with your level of rinising, plug the drain hole and fill the overflow with your coolant addative if you desire. Then fill with antifreeze, if you are using the concentrate, you should add about 1 & 1/4 gallons of this. If there is any room left in the system fill with distilled water.
Or just fill to the F with the 50/50 premix.
I put only 40% in mine because I wanted more cooling, but I don't drive mine in the winter. IF your car is going to see -15 temps on a regular basis I suggest the 50/50 concentration or more (up to %70)
Step 6: Re-install the underbody tray, dont forget to route the ABS and headlight calibration lines correctly.
your done!
To empty only coolant by itself you can just stick a phillips screwdriver in the hole in the underbody tray and it will drain out. No need to remove the underbody tray for just that.
Okay, this is a pretty simple project, but with the overflow reservoir being our only access to fill the radiator it becomes very time consuming. This is about a 4-6 hour project but I would allocate an entire saturday to it, plan on changing your oil while your at it, its right there anyway since your car is going to be jacked up.
Keep in mind that after doing this you are going to have about six gallons of antifreeze contaminated waste liquid after doing this, granted that you should have enough plastic containers from the "required materials" to store it all.
Tools needed:
-Phillips Screwdriver
-8mm socket (optional but makes undoing the plastic underbody tray much easier)
-10mm socket + extender
-drainpan, you can buy one of these from autozone or any other place for <$3
-ethylene glycol antifreeze, at least 2 gallons of the concentrate, or three gallons of the 50/50 premix.
-redline water wetter or royal purple ICE (optional)
-5 gallons distilled water
-car jack + two jackstands
-goggles
-plastic gloves
Step 1: Jack up car, & allow to cool if it has been warmed up to operating temp recently.
Step 2: remove center plastic underbody tray & the 8mm bolts along the plastic underbody trays in front of the wheels.
Underbody tray, the bottom is held on with plastic fasteners, 5 - 8mm bolts, 2 - 10mm bolts:
Plastic tray in front of wheels, remove the bottom 8mm bolts near the front on this also:
Besides the 8mms, the plastic fastners, and the 2 - 10mms at the rear of the tray, there are 2 - 10mm bolts + 1 plastic fastner on each side that hold the plastic tray up in the fender well, two are below the headlights and the other is right next to the front swaybar bushing. Be sure to unsnap the ABS wire holders and the headlight calibration system wire holders from the tray before dropping,
Okay so the tray is now out.
Step 3:
Put your hand carefully on the radiator, if it is hot then I suggest letting it cool because hot flluid will come out. (Racing Beat A/C condenser screen pictured)
Find the radiator drainplug on the bottom right of the radiator and undo the plastic phillips screw. Antifreeze will come out, I suggest wearing the gloves and the goggles, because it will splash.
Step 4: allow to fully drain, then re-install the plastic drain plug screw
Fill overflow tank with distilled water up to the fill mark. The system won't fully drain since you have it jacked up, so it will only accept about 1 & 1/2 gallons depending on how much drains. So don't expect manual spec amounts of fluid in or out.
After the level is pretty stable at the F mark leave the pressure cap off and go and start the car. Come back quickly and check to see if the level went down, if so, refill to the F mark. Stay attentive and allow the car to reach operating temp at idle. Like I said, only 1 & 1/2 gallons or so will go in total though this process, don't expect to put it in all at once and be done with it.
After the car has reached operating temp, reinstall the pressure cap and rev it to 3.5K for about 15 seconds. Go and check the level in the filler tank. Then turn on the heater to full hot, and air setting of 4. rev to 3.5K for 15 seconds again.
Shut off car and allow to cool for about 30 minutes.
This was the first flush, but since we were only able to get half of the coolant out on each drain we must do another flush just like this.
So, repeat flush process again with distilled water only.
And optinally repeat the flush process a third time, I know I did
The filling and the cooling take the bulk of the time. There are easier quicker ways to do this but they are less environmentally friendly and make much more waste fluid.
Step 5: After you are satisfied with your level of rinising, plug the drain hole and fill the overflow with your coolant addative if you desire. Then fill with antifreeze, if you are using the concentrate, you should add about 1 & 1/4 gallons of this. If there is any room left in the system fill with distilled water.
Or just fill to the F with the 50/50 premix.
I put only 40% in mine because I wanted more cooling, but I don't drive mine in the winter. IF your car is going to see -15 temps on a regular basis I suggest the 50/50 concentration or more (up to %70)
Step 6: Re-install the underbody tray, dont forget to route the ABS and headlight calibration lines correctly.
your done!

Registered User
Joined: Jan 2012
Posts: 56
Likes: 0
After flushing all the coolant out of the radiator and the heater core out with distilled water, I filled her back up with the mazda FL22. Right after i turned the A/C on cold for the first time, I noticed this stinky smell coming out of the vents. It was pretty strong at first so I proceeded to blast the cold air and then turned it to hot. The smell went away after a few cycles but on a long trip over this past weekend, I began to notice a faint version of the smell esp when the car is blowing cold A/C on fresh. I had a few ppl sit in the to observe but they couldn't smell it. The smell is at the end of a whiff. The smell gives me a slight headache...and i know it was there before i flushed the coolant.
Any thoughts?
Any thoughts?


my other car is a 787b
Joined: Apr 2008
Posts: 109
Likes: 1
From: Southern California
Thanks for the writeup - I finished up flushing mine today. My original FL22 extended life collant looked only shades darker than the fresh premix. I don't this there is any reason not to wait the full 10 years / 100k miles before flushing. Less work and more cash in your pocket.
One question: I wasn't able to find the ft/lbs for the 14mm bolt?
One question: I wasn't able to find the ft/lbs for the 14mm bolt?
just did mine again the other night; Evans NPG-R, which needs to be changed annually IMO. As many times as I've changed it it seems like I always end up with coolant on the floor draining the block assembly from the plug bolt on the LH side of the engine. I'm half-tempted to come up with an elbow extension solution the next time I empty it so that the coolant exits downward like the radiator plug rather than to the f'ing side.
.
.
Last edited by TeamRX8; Feb 21, 2012 at 06:07 PM.


Registered User
Joined: Mar 2011
Posts: 4
Likes: 0
Kinda a stupid question but once you flush the coolant twice using the bolt on the engine and on the rad with only water won't you be left with only about half a gallon of water in the cooling system? Do you guys just pour straight 50/50 premix in there from there and not worry about it or do you pour in some straight antifreeze first then add 50/50? I live in new jersey so I don't really wanna put too much water in there since we occasionaly see some temps below 0.

Registered User
Joined: Feb 2012
Posts: 53
Likes: 0
From: Queens NY
Hi I just want to say first that this is an excellent DIY but,
here are some tips I thought could be useful, after just having done the procedure.
1. There is an opening under the tray already, I found no real need to remove the under tray cover. 04 GT MT
2. I did 3 full flushes with the car lifted as high as possible and used only 3 and 3/4 gallons of D. water.
3. The car took in 1 and 1/2 gallons of 50/50; ran the car
with heat and the level did not really go down. While freshly filled with 50/50 I removed the screw and cold anti-freeze that I just put in ran down my hand, hence the system was full with 1 & 1/2 Gal. (air bubbles taken out prior).
4. Check constantly while flushing with water, after revving the F level goes down significantly.
5. Bring a turkey baster o.o.. It's hard to see the level.. I found using a key-chain flash light inside the container to best depict the level of liquid.
Many thanks to staticlag, great DIY.

Registered User
Joined: Apr 2012
Posts: 2
Likes: 0
From: Pittsburgh, PA
is is completely necessary to run the FL22? i've been reading these posts and there doesnt seem to be a clear answer. is it just mazda suggesting we buy the FL22 so they can make more money off of us, or is it truely better for our cars?


Registered
Joined: Feb 2012
Posts: 79
Likes: 0
From: Plano, TX
FYI: Doing full coolant flush this weekend and converting from the FL22 antifreeze to regular Prestone and need appropriate containers to capture all the waste fluid. A friend let me know you can buy 5-gallon plastic pickle barrels for $2 each at Firehouse Sub's restaurants. These will be perfect and accepted by my city for local hazardous waste pickup at home.