
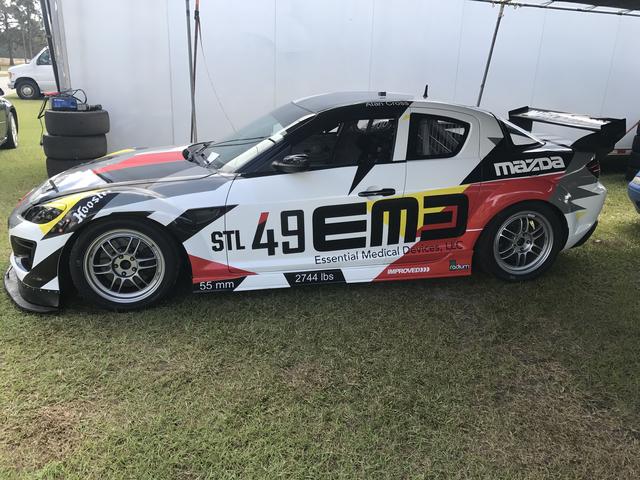
SCCA STL Build


SCCA STL Build
I have some down time in this build and decided to upload a few images with a little commentary of/on the RX-8 I'm building for the STL class in SCCA road racing.
Some background; I'm not new to this. I've been racing Spec Miata in SCCA/NASA for almost 10 years now. I build my last Miata myself, you can read about it here.
Alan's OCD '03 SM buid - Mazda Racers
I decided it was time to add another class to my race weekends and having previously owed an FD, an RX-8 looked good. Kevin Anderson of TechSport put one of his ex Pirelli World Challenge cars up for what seemed like a reasonable price so I bout it based on pics and after speaking with a previous driver.
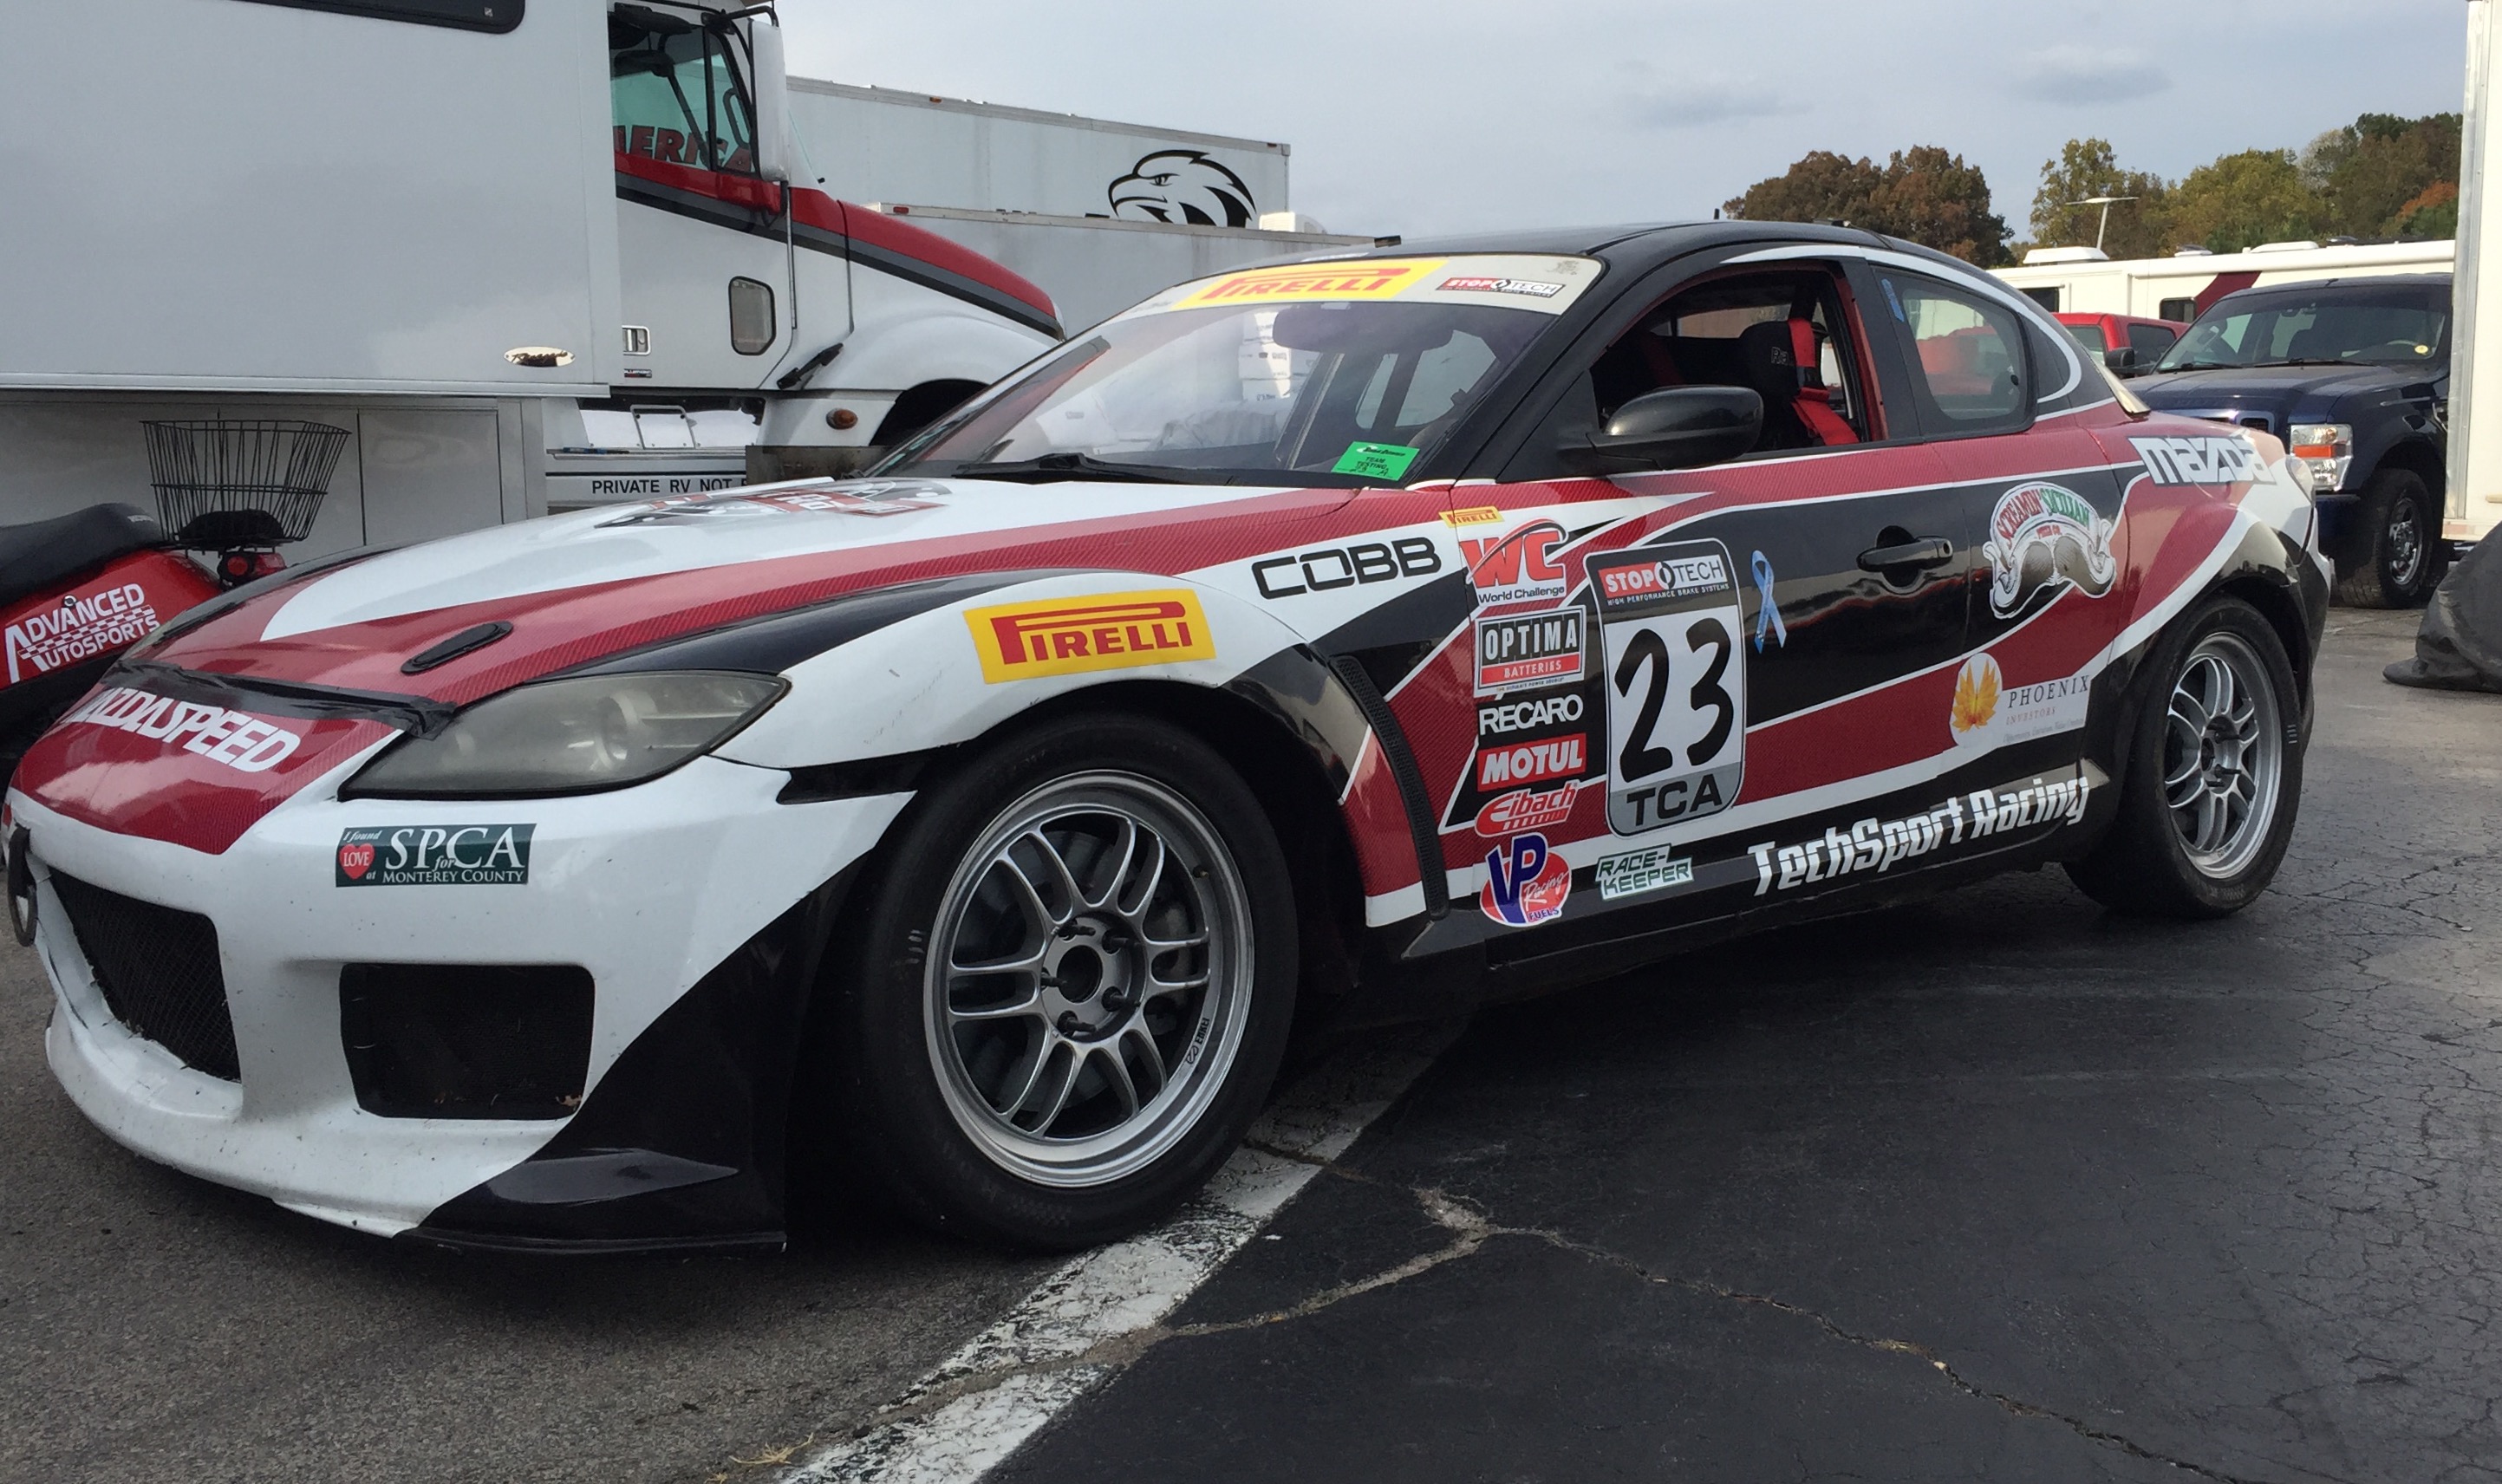
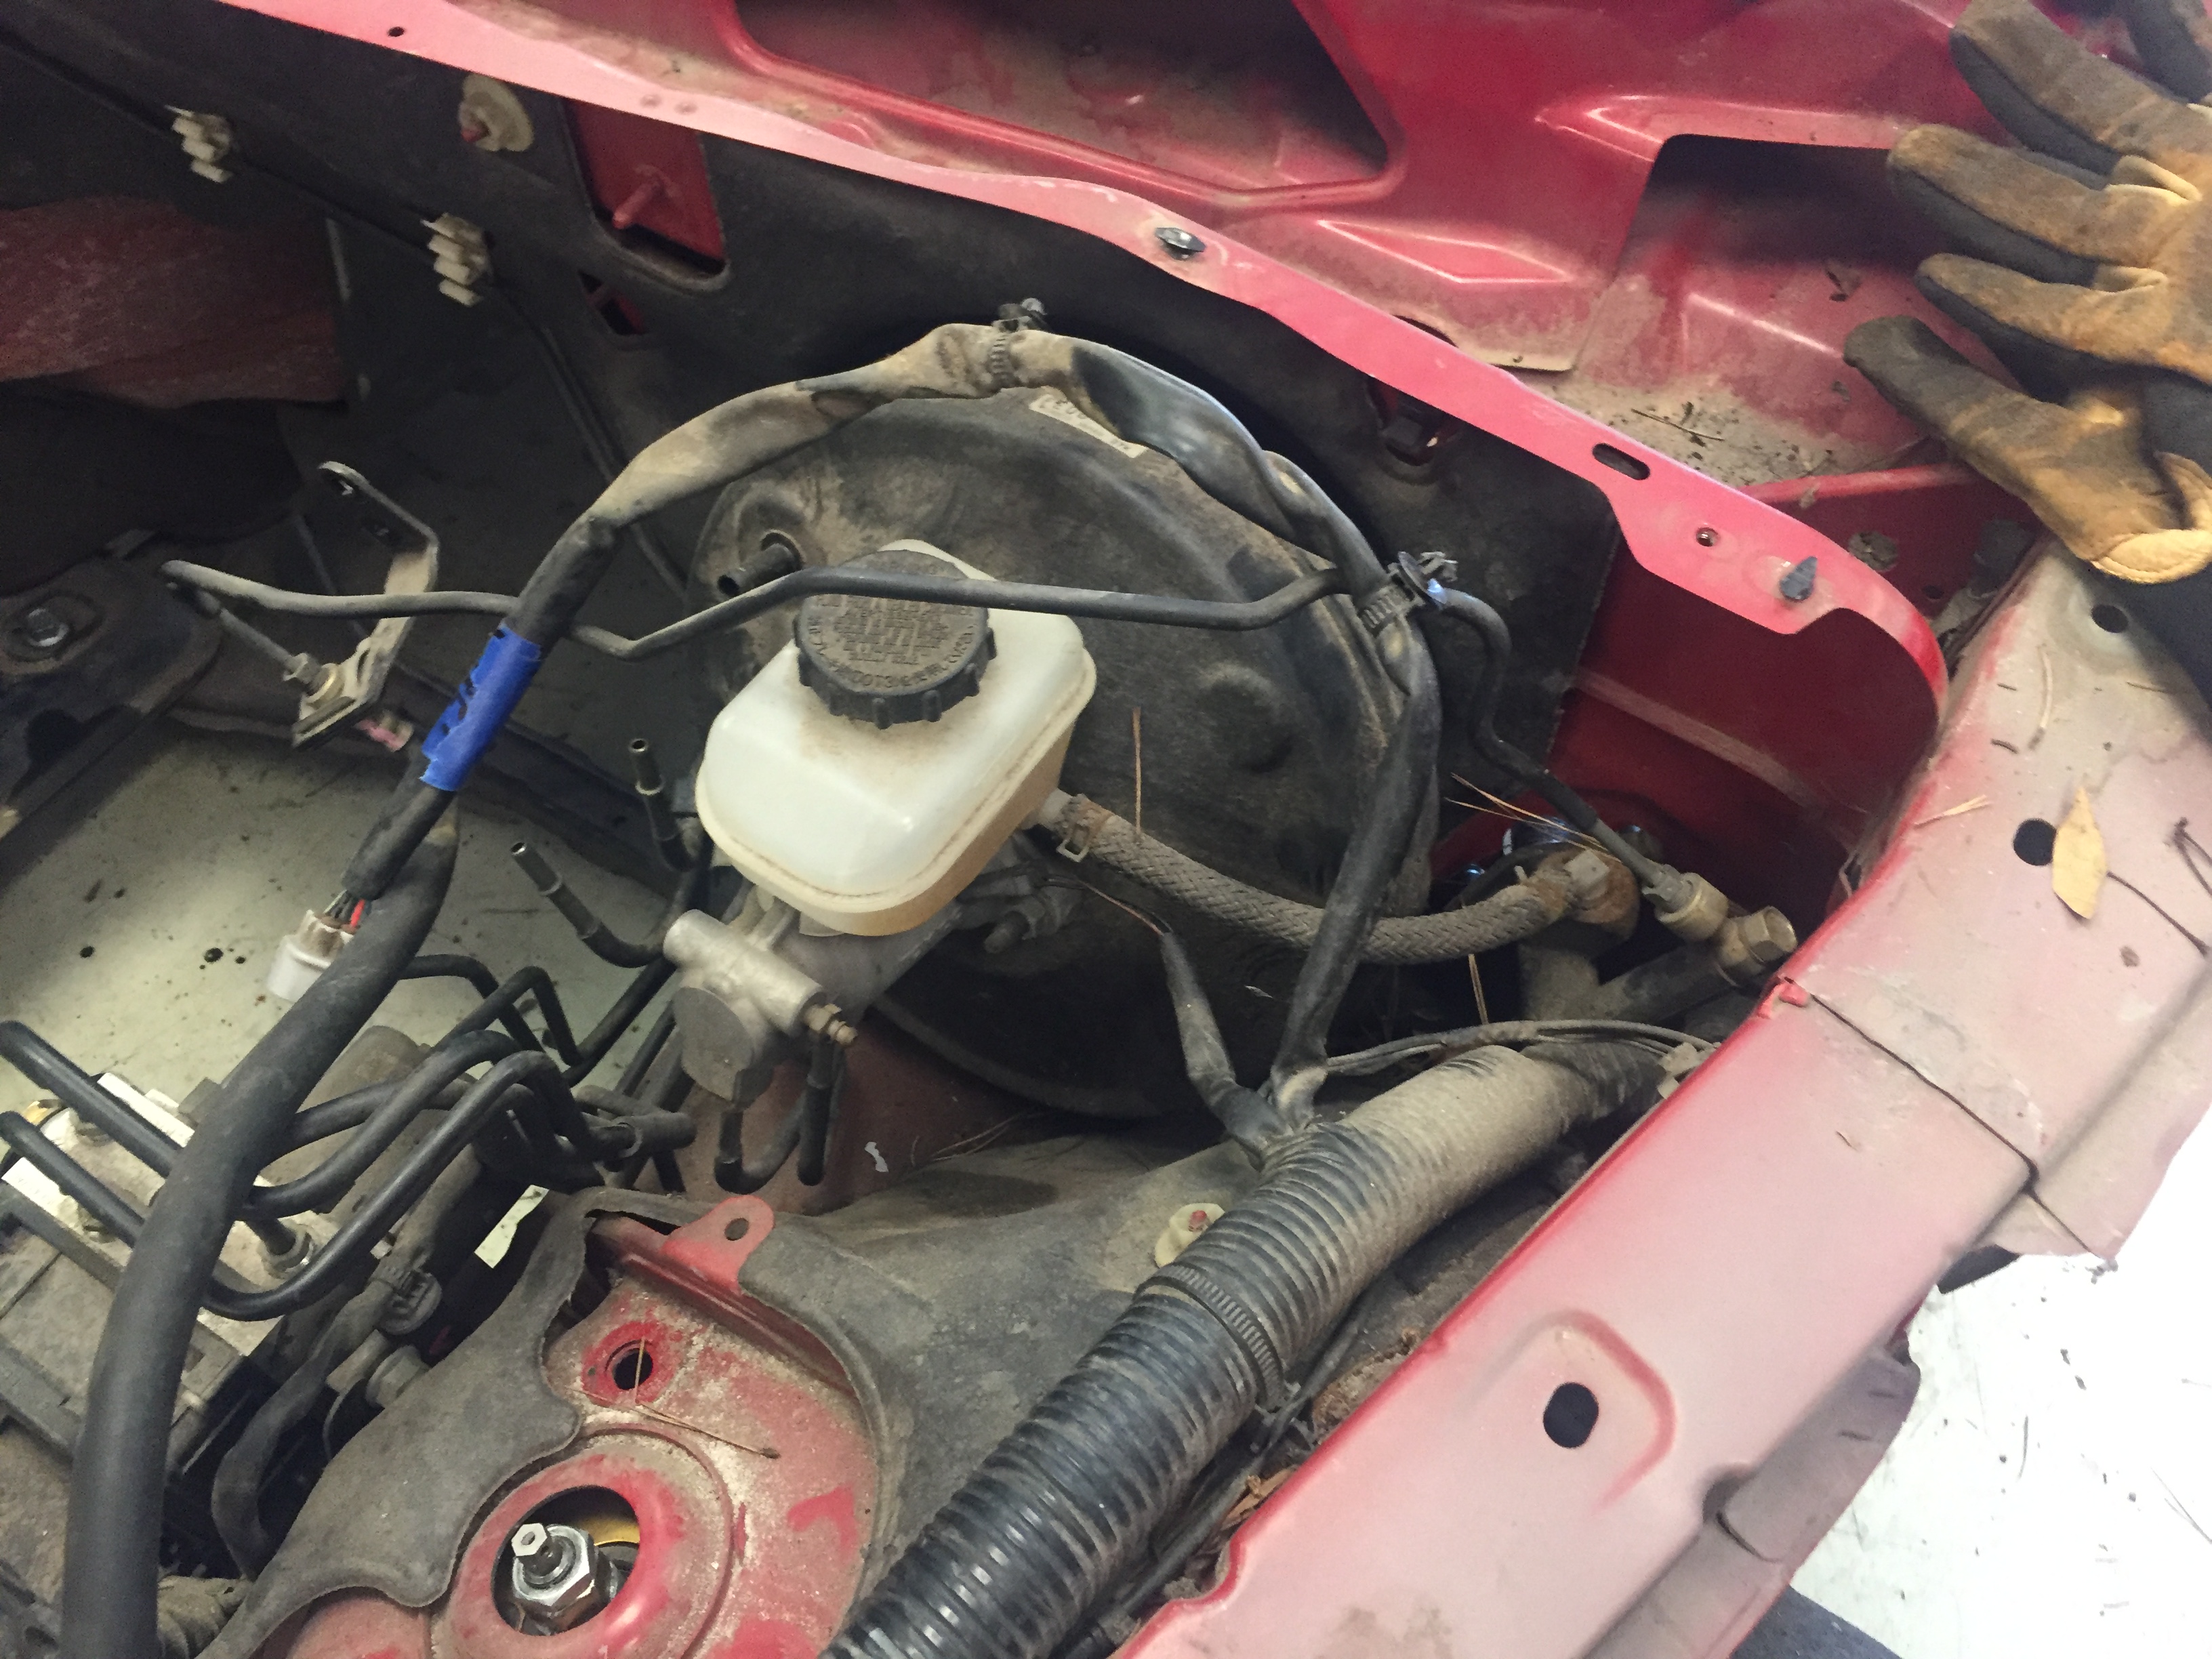
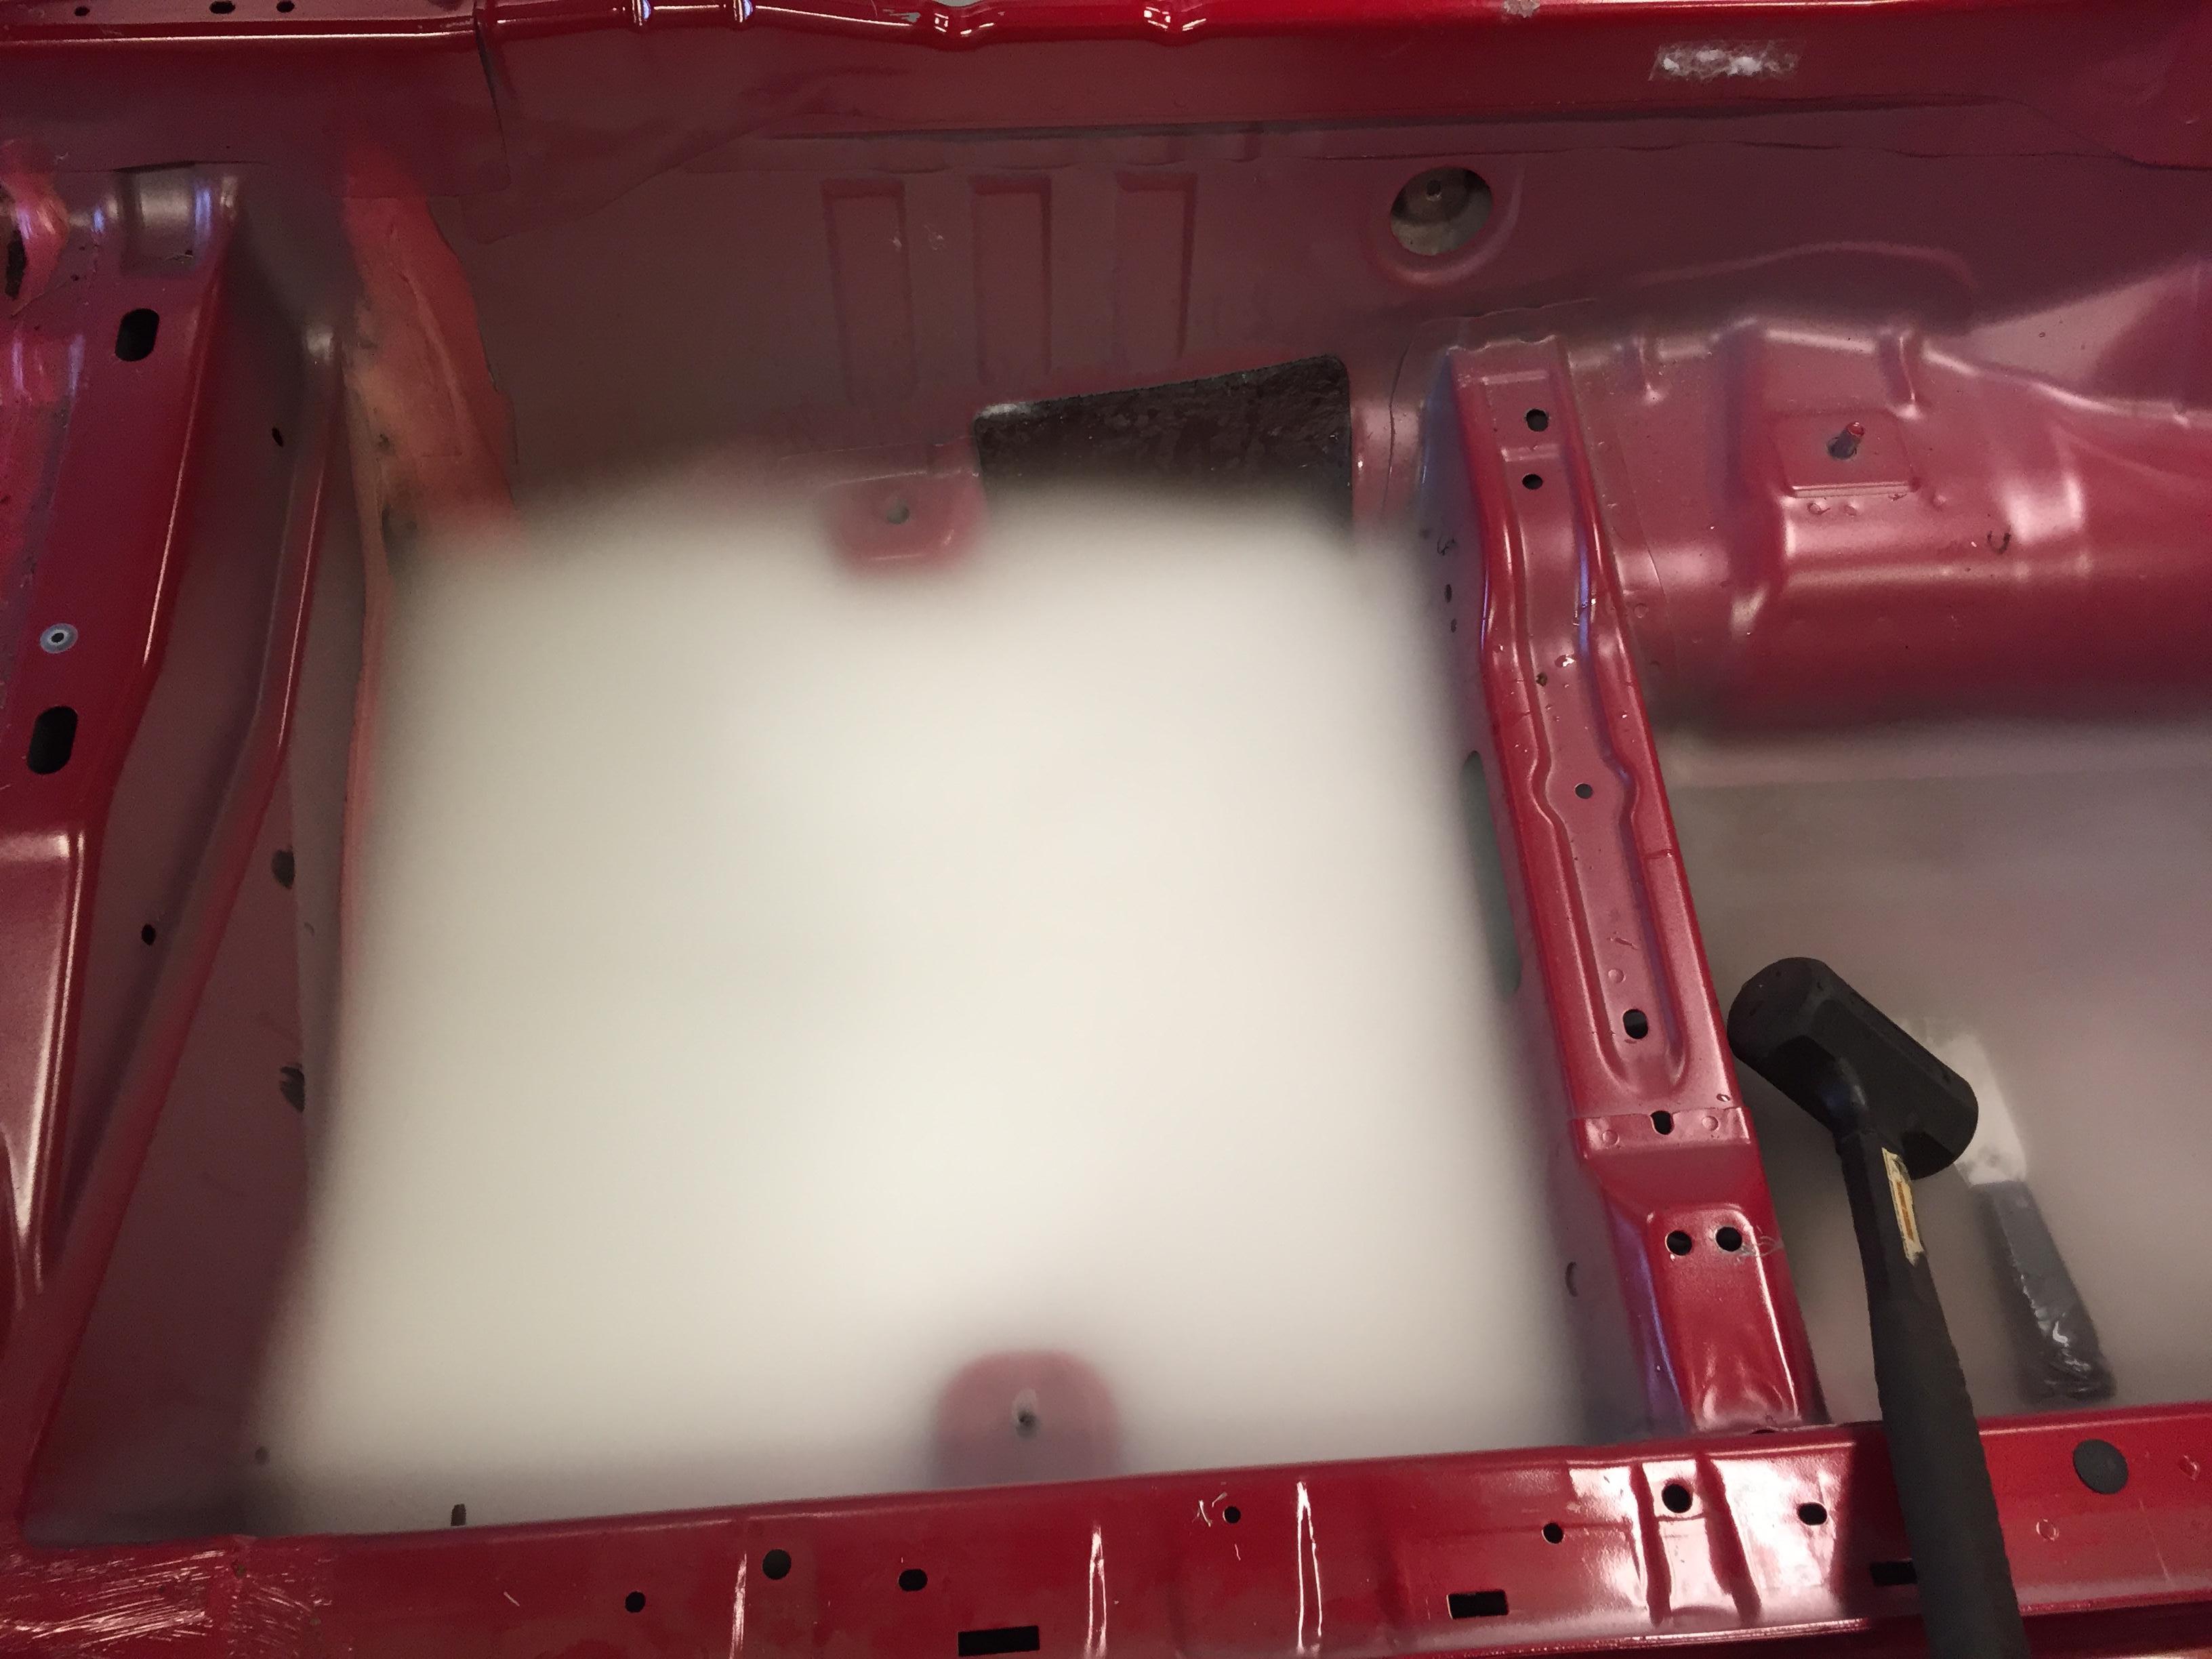
It ran and the wrap looked decent. I knew it would need some TLC over the winter but I wasn't quite prepare for what was under the wrap. It had been hit on both ends and right side (not surprising) but repairs were poor. Interestingly there was still evidence of a very nice build from Roer Racing a decade ago but everything since then was just enough to get it to start the next race. It was held together with zip ties and self-tapping screws. I stopped taking pics of the laughable repairs and fabrication after a while.
It slowly became obvious that this car's glory days were over and it's future lied in ChumpCar at best. It was going to require complete rewiring, body work, and some cage work to be acceptable. If something stopped working at the track I'd have no hope of figuring it out. Plus it had been run without the catch can connected so every surface was covered in oil.
I had bought a roller for parts (no drivetrain) and made the decision to move the Anderson car drivetrain into the roller and build the car from this chassis.
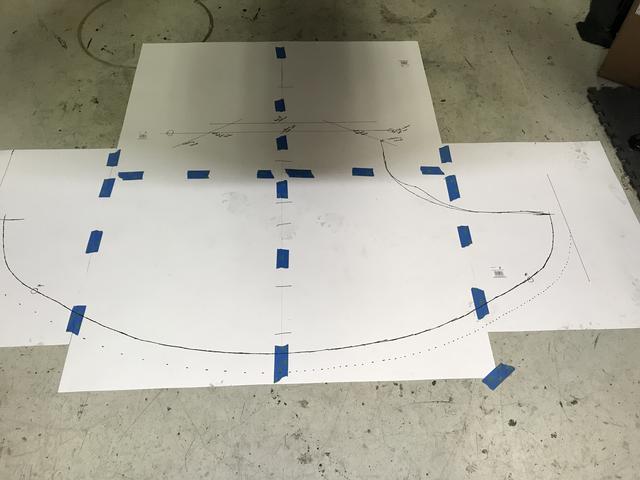
Complete stripping of the tub, cage, paint, and rebuild is at least as difficult and time consuming as you might think if done right. Images of the process follow.
Some background; I'm not new to this. I've been racing Spec Miata in SCCA/NASA for almost 10 years now. I build my last Miata myself, you can read about it here.
Alan's OCD '03 SM buid - Mazda Racers
I decided it was time to add another class to my race weekends and having previously owed an FD, an RX-8 looked good. Kevin Anderson of TechSport put one of his ex Pirelli World Challenge cars up for what seemed like a reasonable price so I bout it based on pics and after speaking with a previous driver.
It ran and the wrap looked decent. I knew it would need some TLC over the winter but I wasn't quite prepare for what was under the wrap. It had been hit on both ends and right side (not surprising) but repairs were poor. Interestingly there was still evidence of a very nice build from Roer Racing a decade ago but everything since then was just enough to get it to start the next race. It was held together with zip ties and self-tapping screws. I stopped taking pics of the laughable repairs and fabrication after a while.
It slowly became obvious that this car's glory days were over and it's future lied in ChumpCar at best. It was going to require complete rewiring, body work, and some cage work to be acceptable. If something stopped working at the track I'd have no hope of figuring it out. Plus it had been run without the catch can connected so every surface was covered in oil.
I had bought a roller for parts (no drivetrain) and made the decision to move the Anderson car drivetrain into the roller and build the car from this chassis.
Complete stripping of the tub, cage, paint, and rebuild is at least as difficult and time consuming as you might think if done right. Images of the process follow.
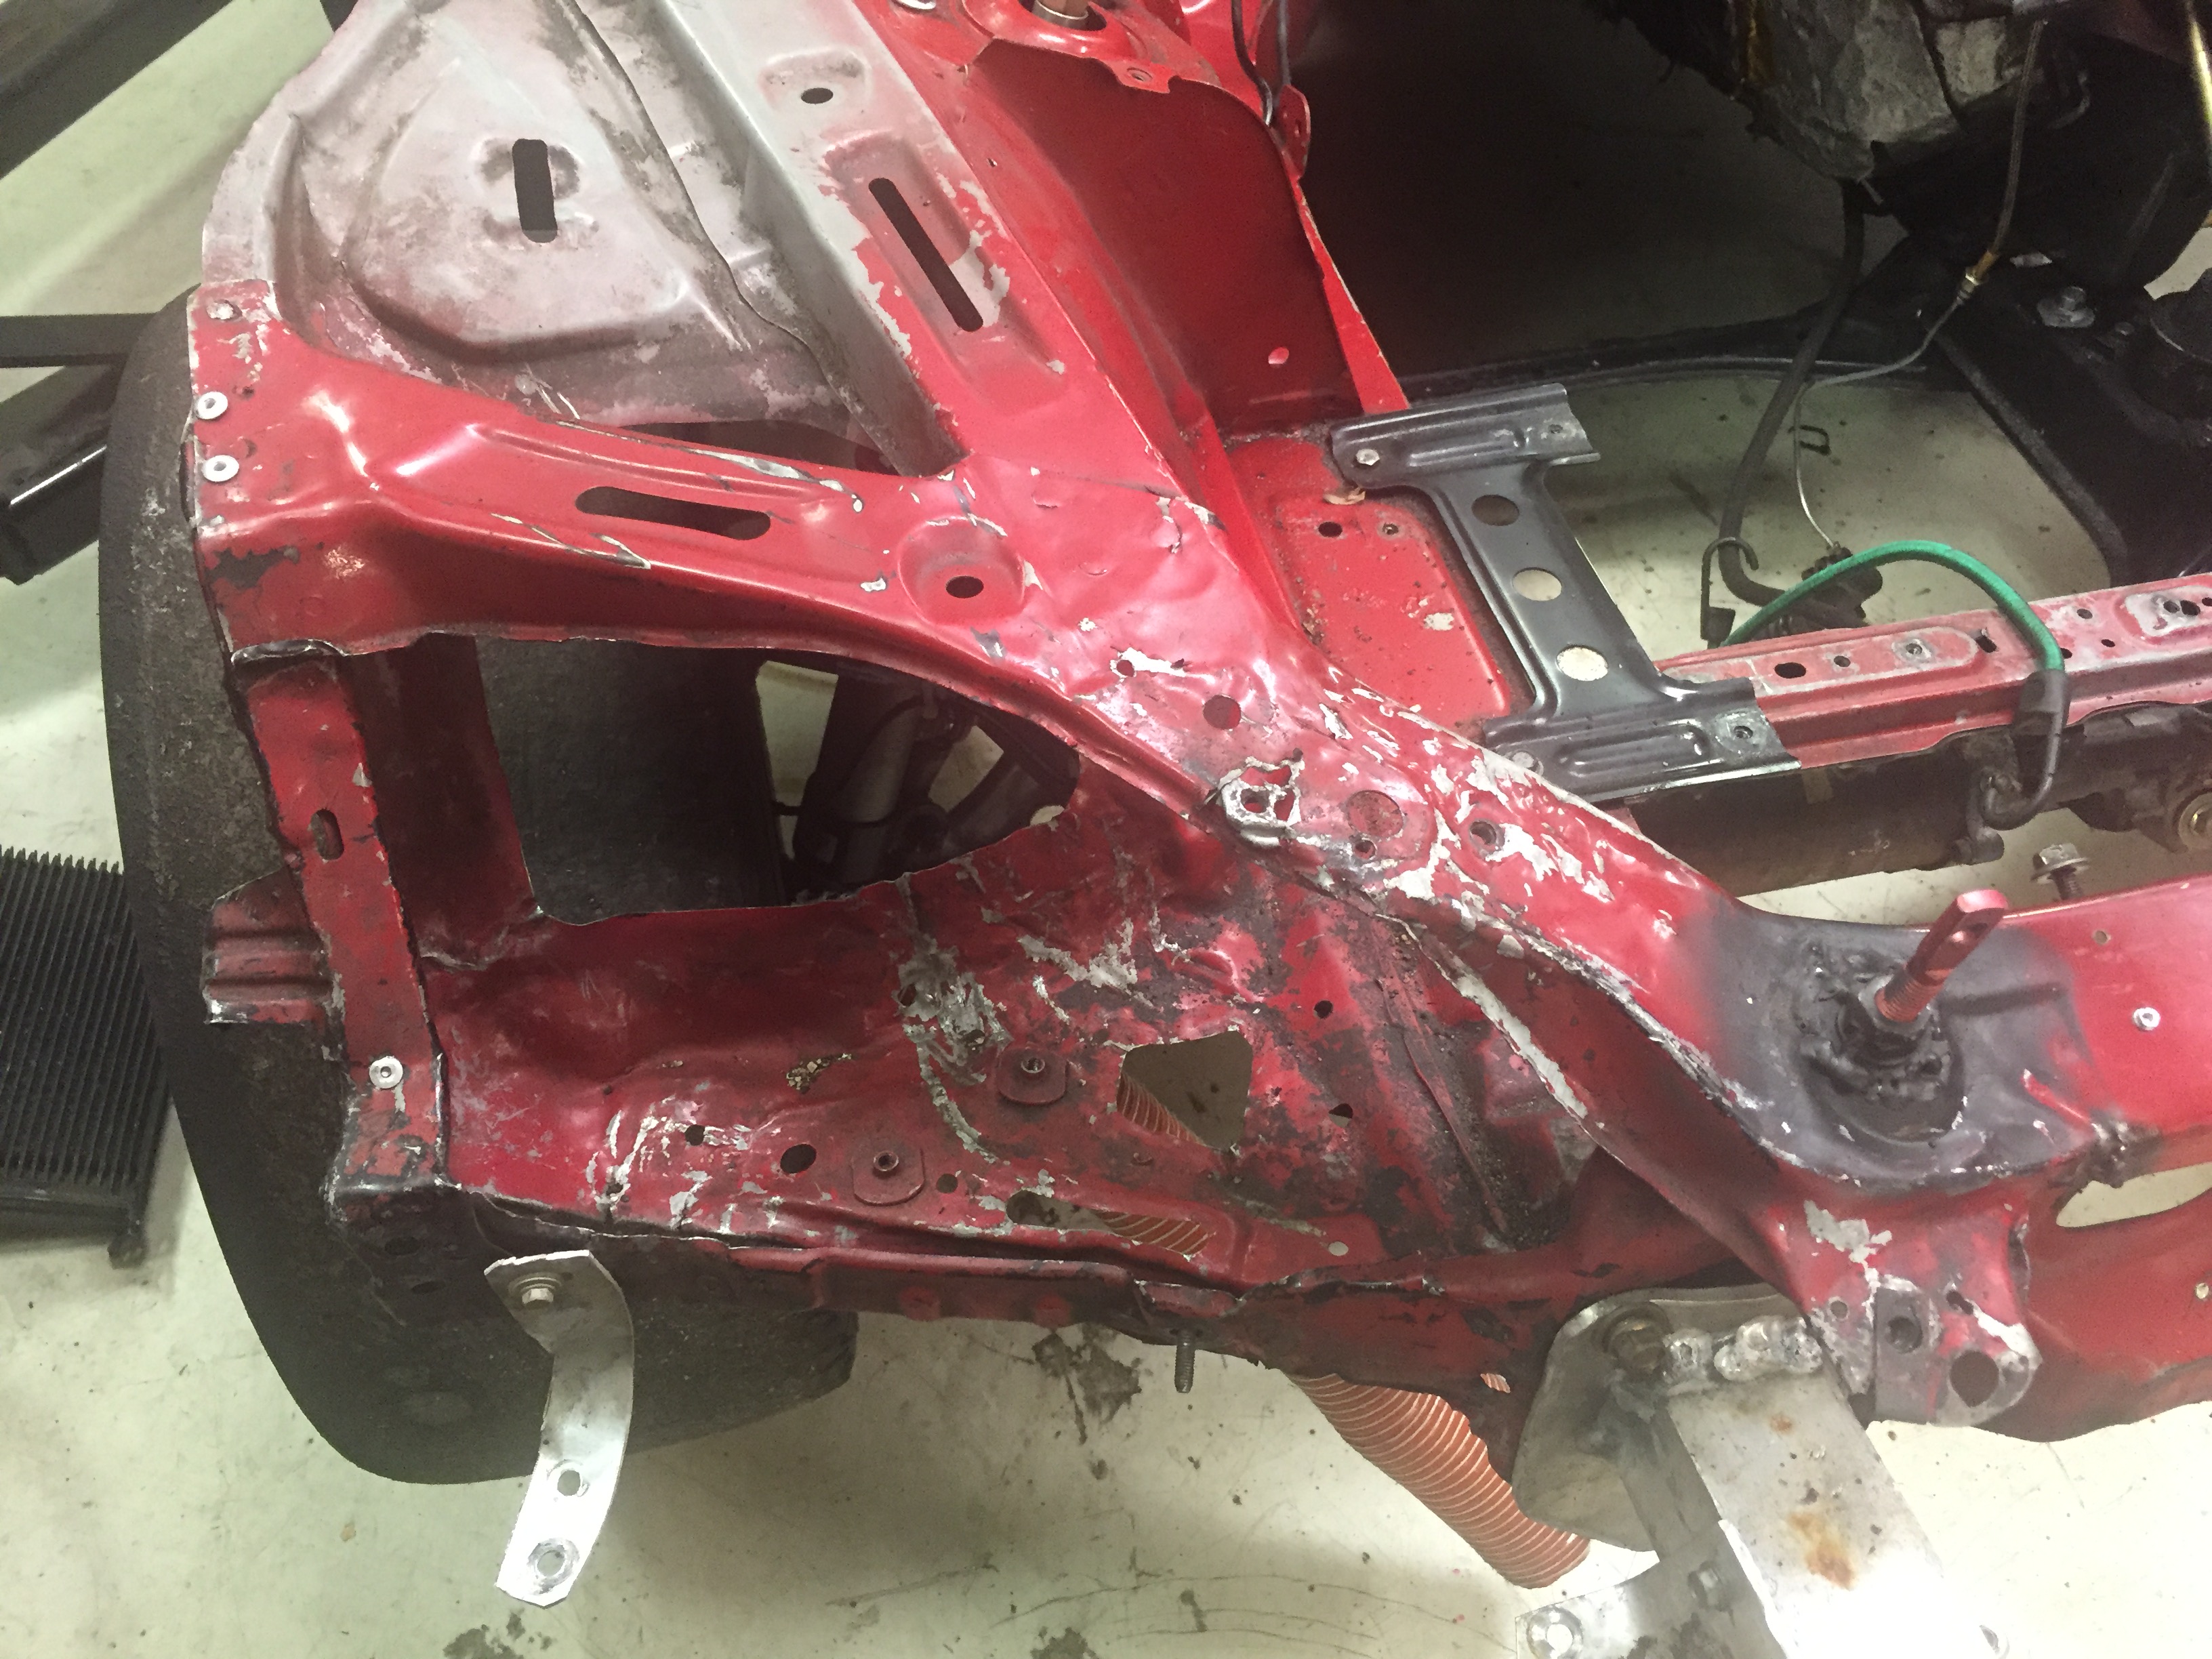
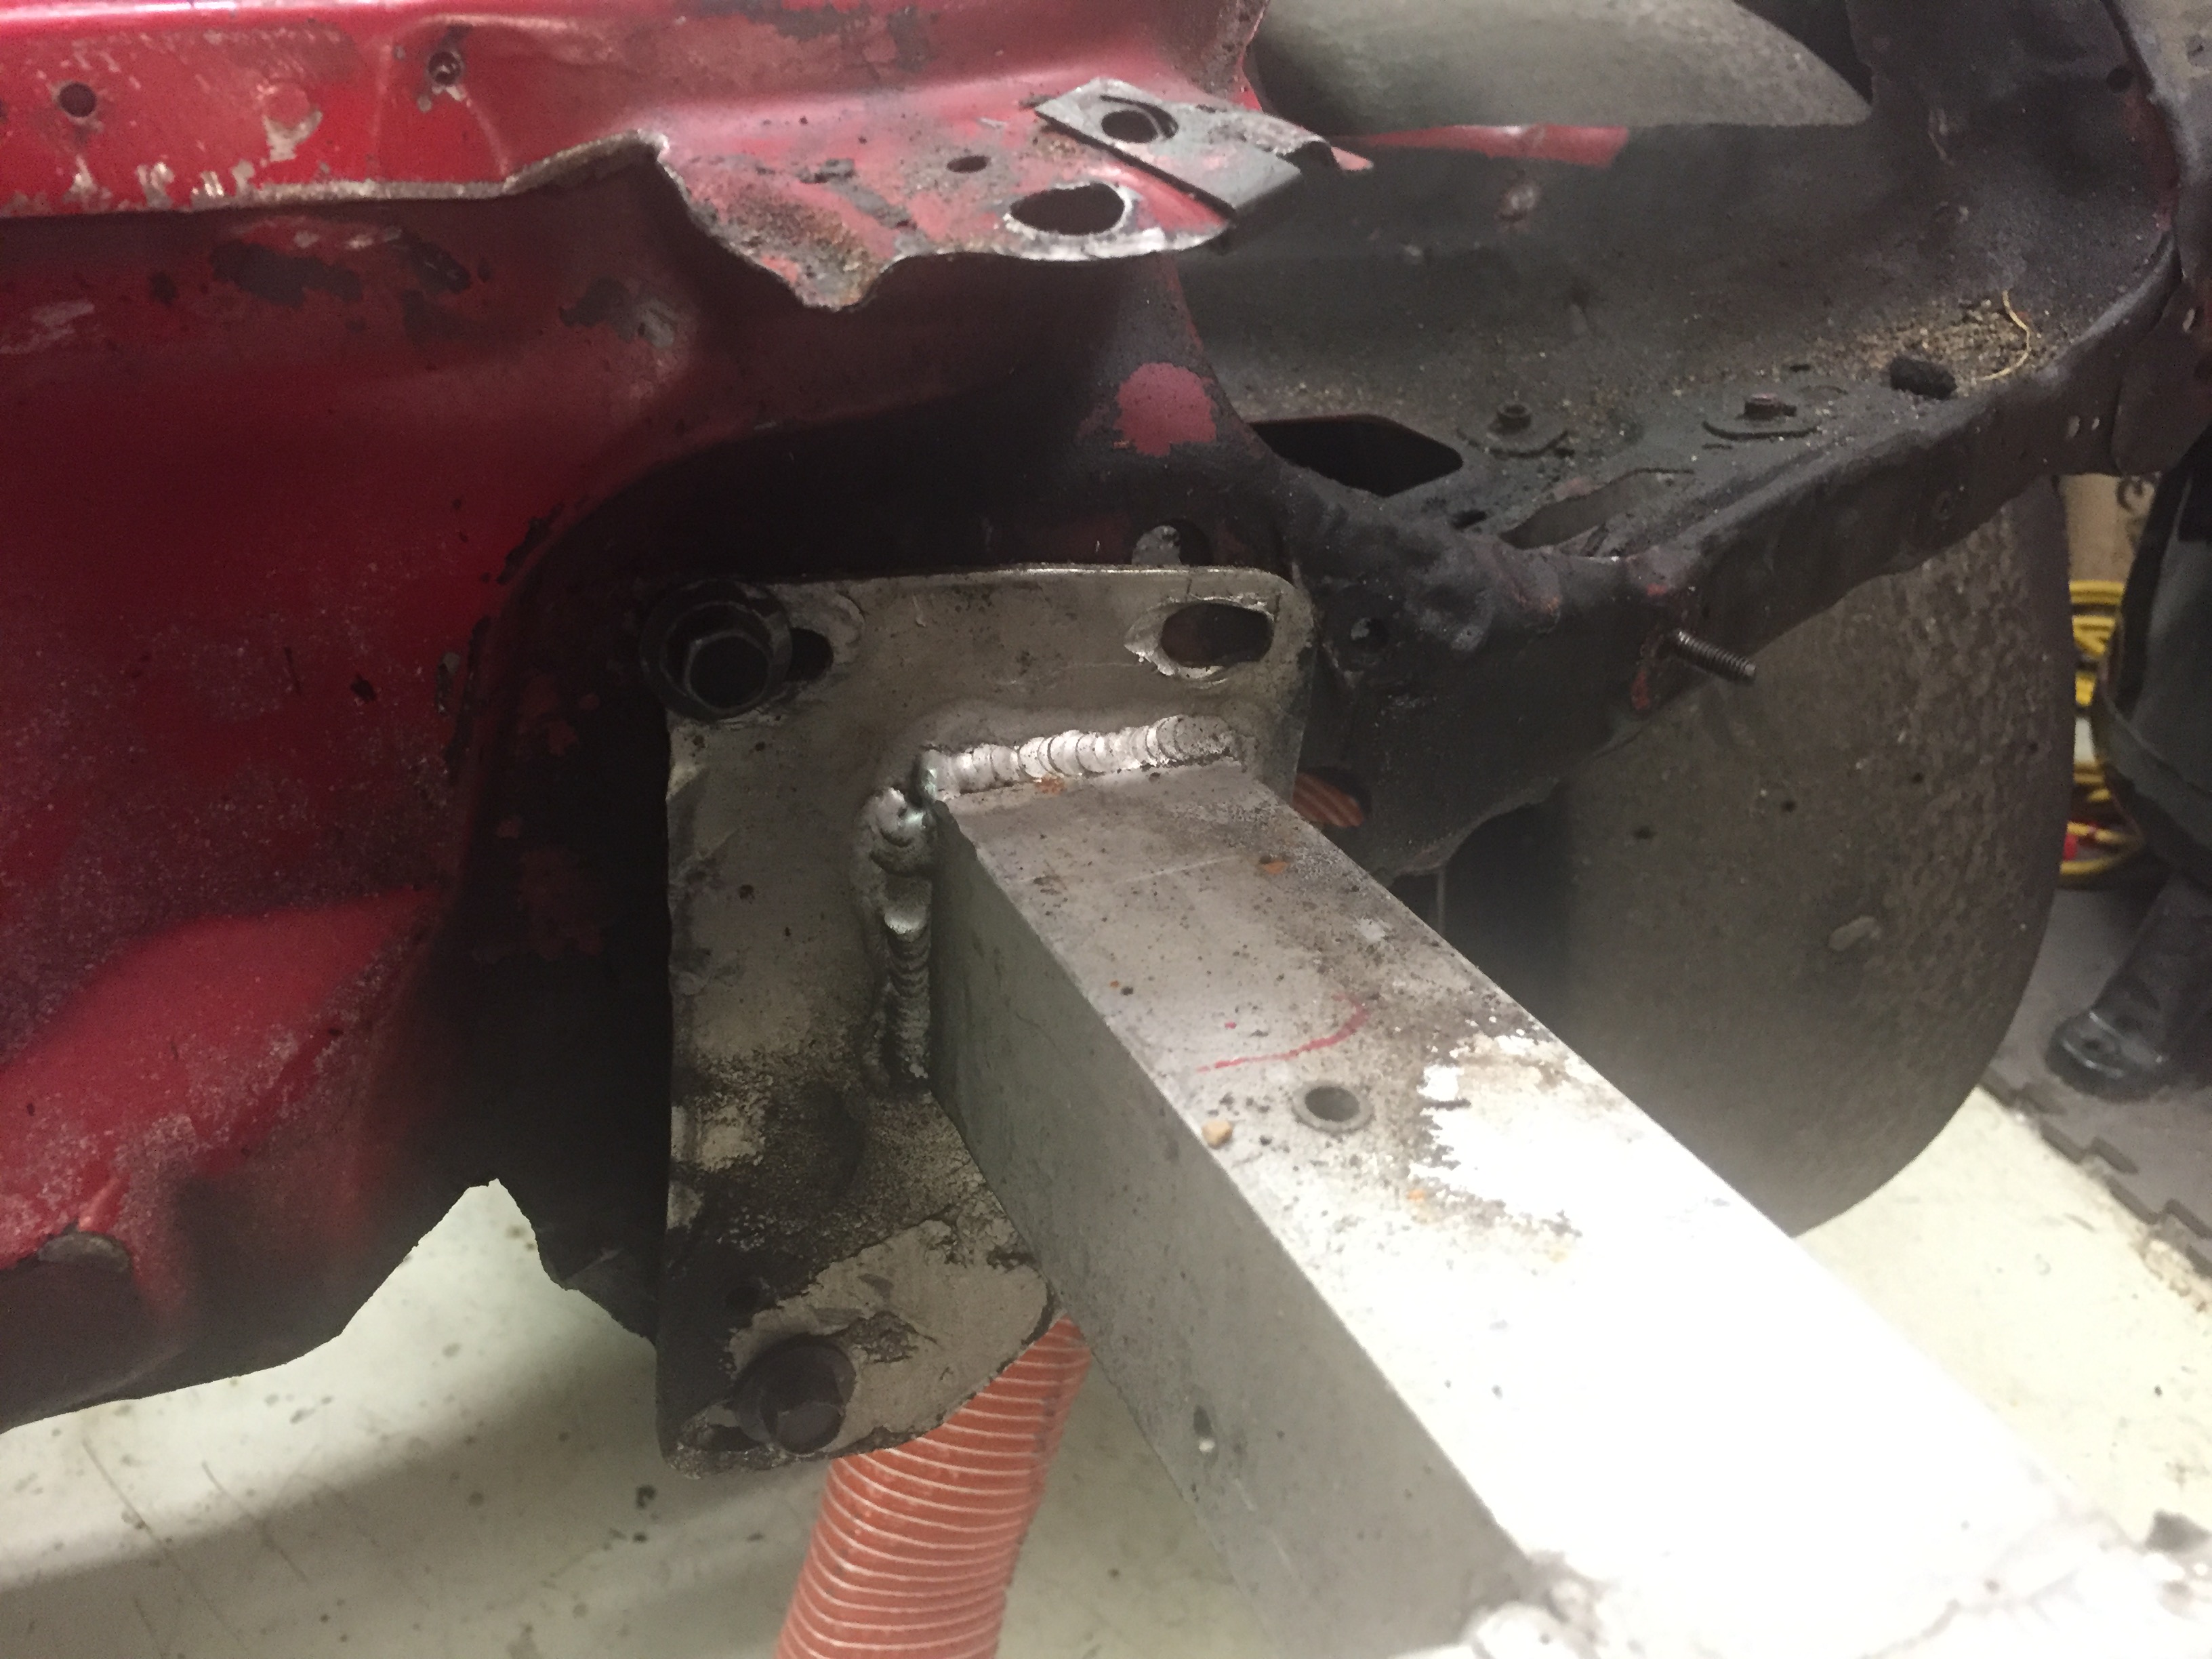
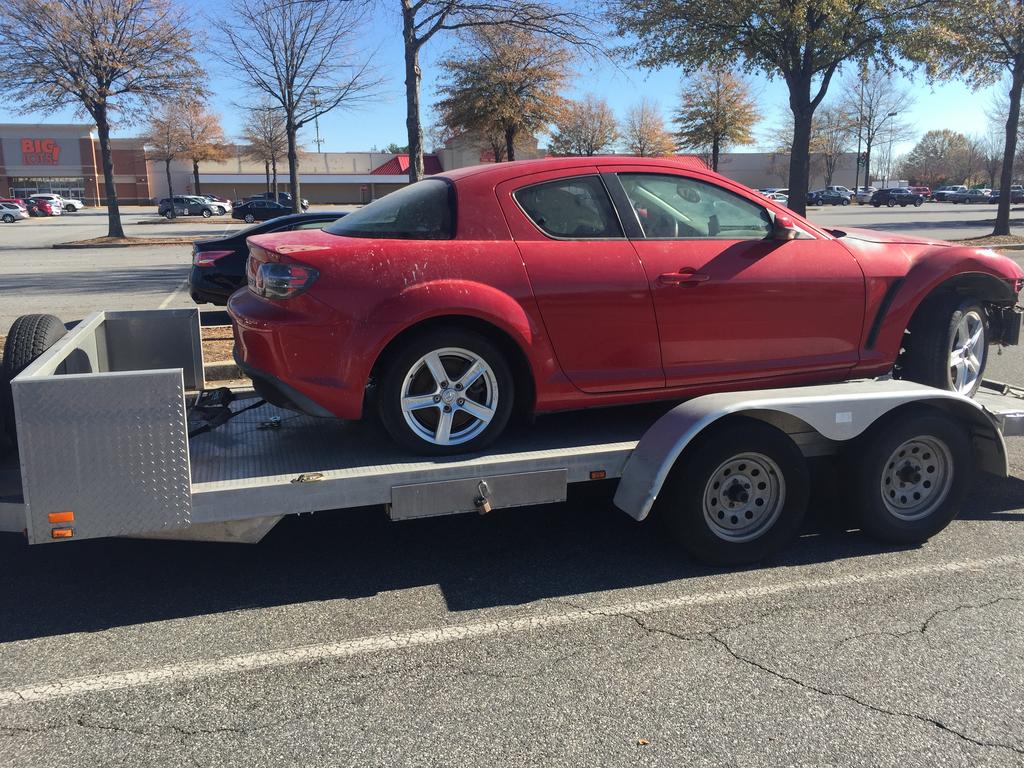
I was able to purchase the donor for $400. It did not have a steering rack which made loading it nearly impossible but I got it home.
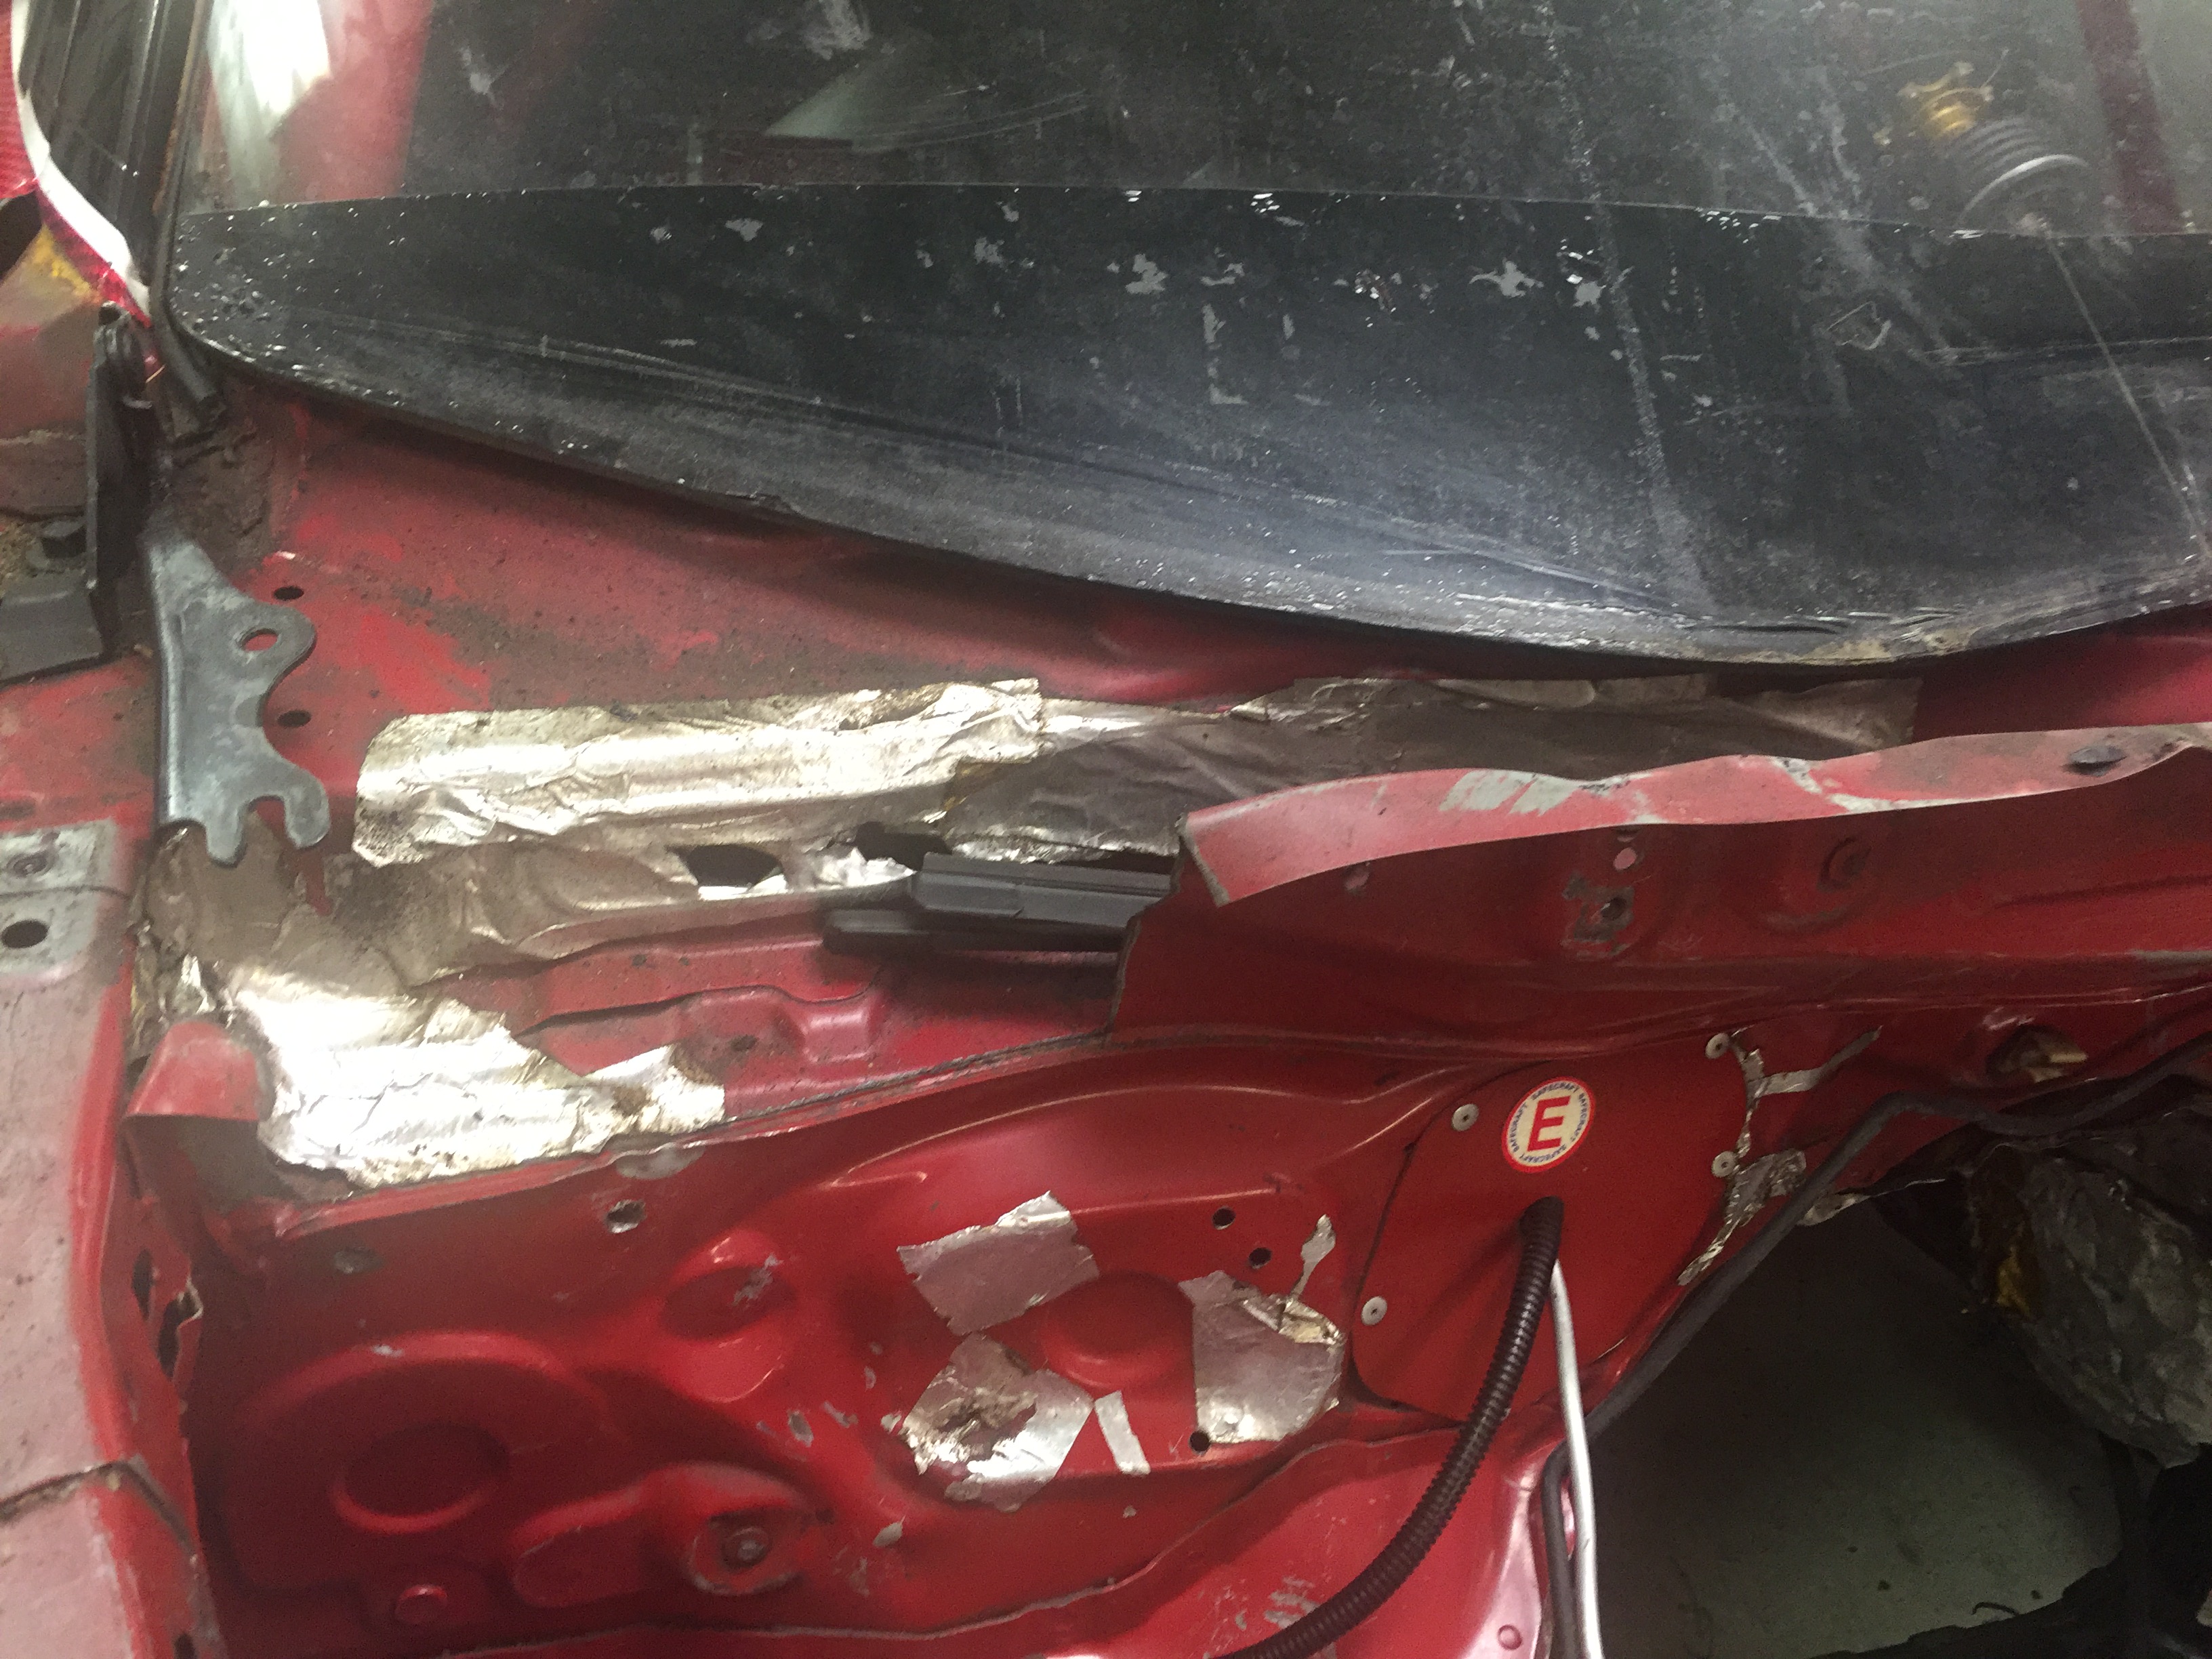
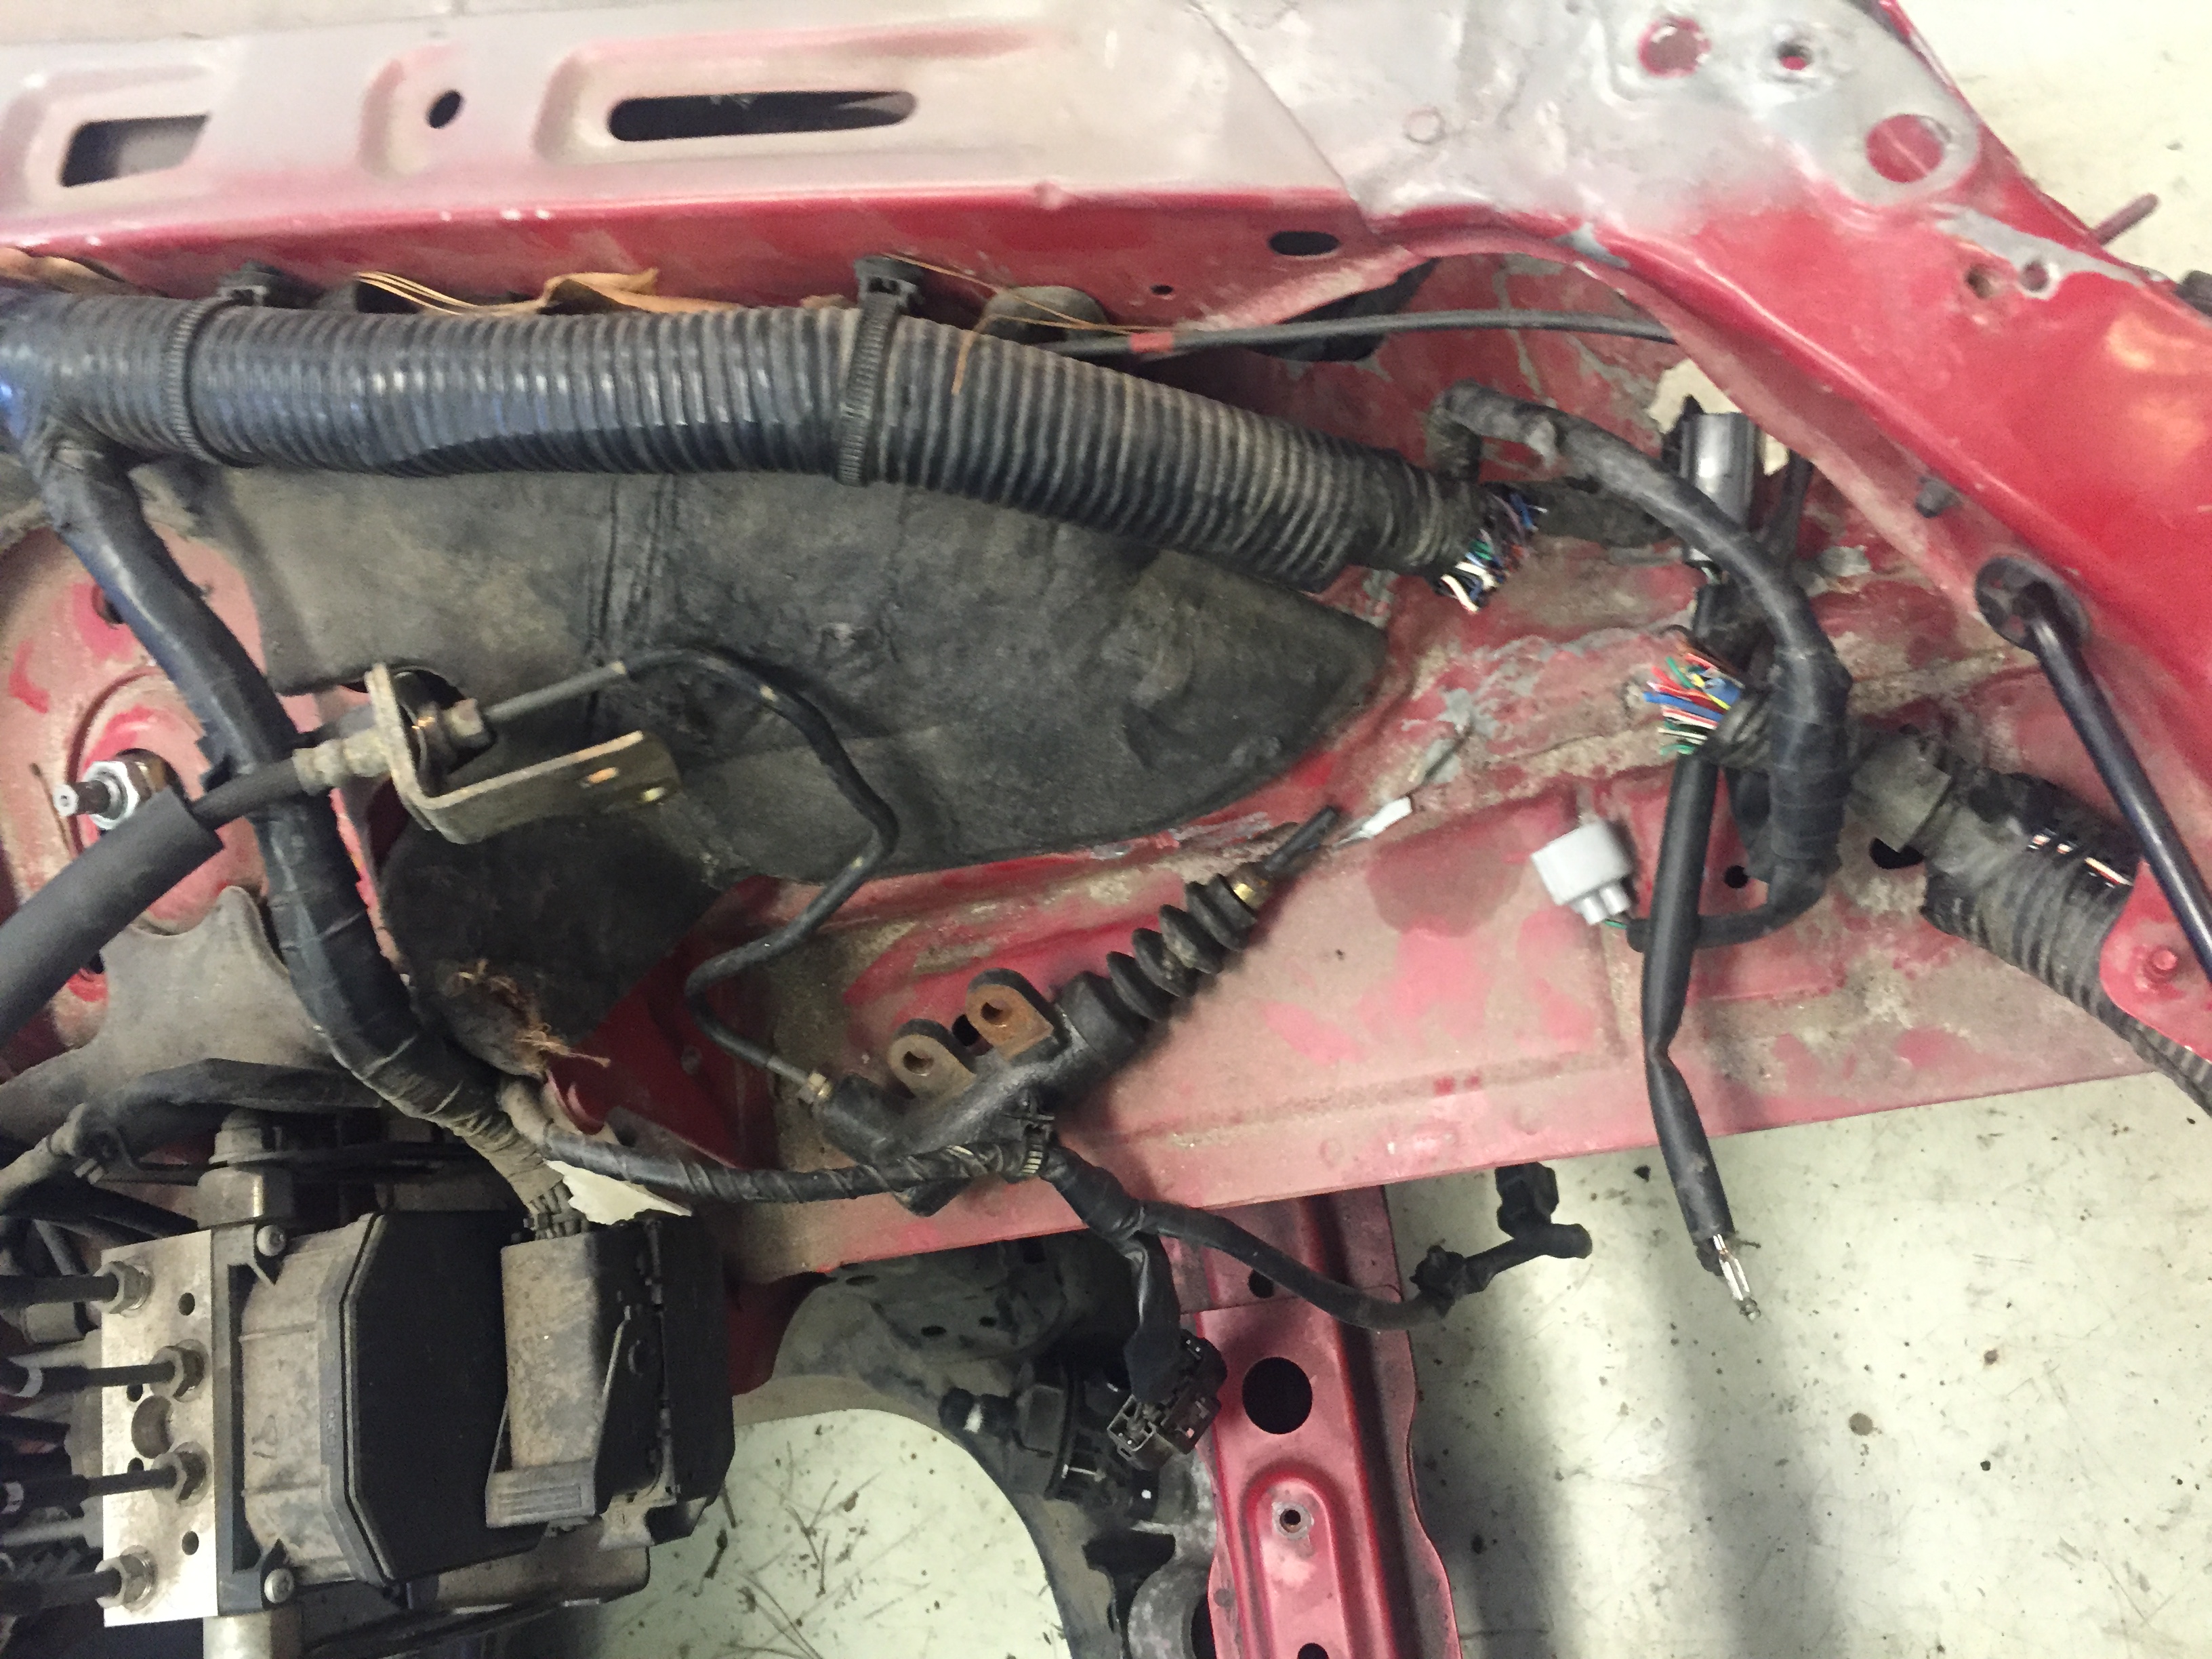
The tear-down process is long and dirty. I've got several hundred images to document everything for re-assembly but it's still not quite enough.
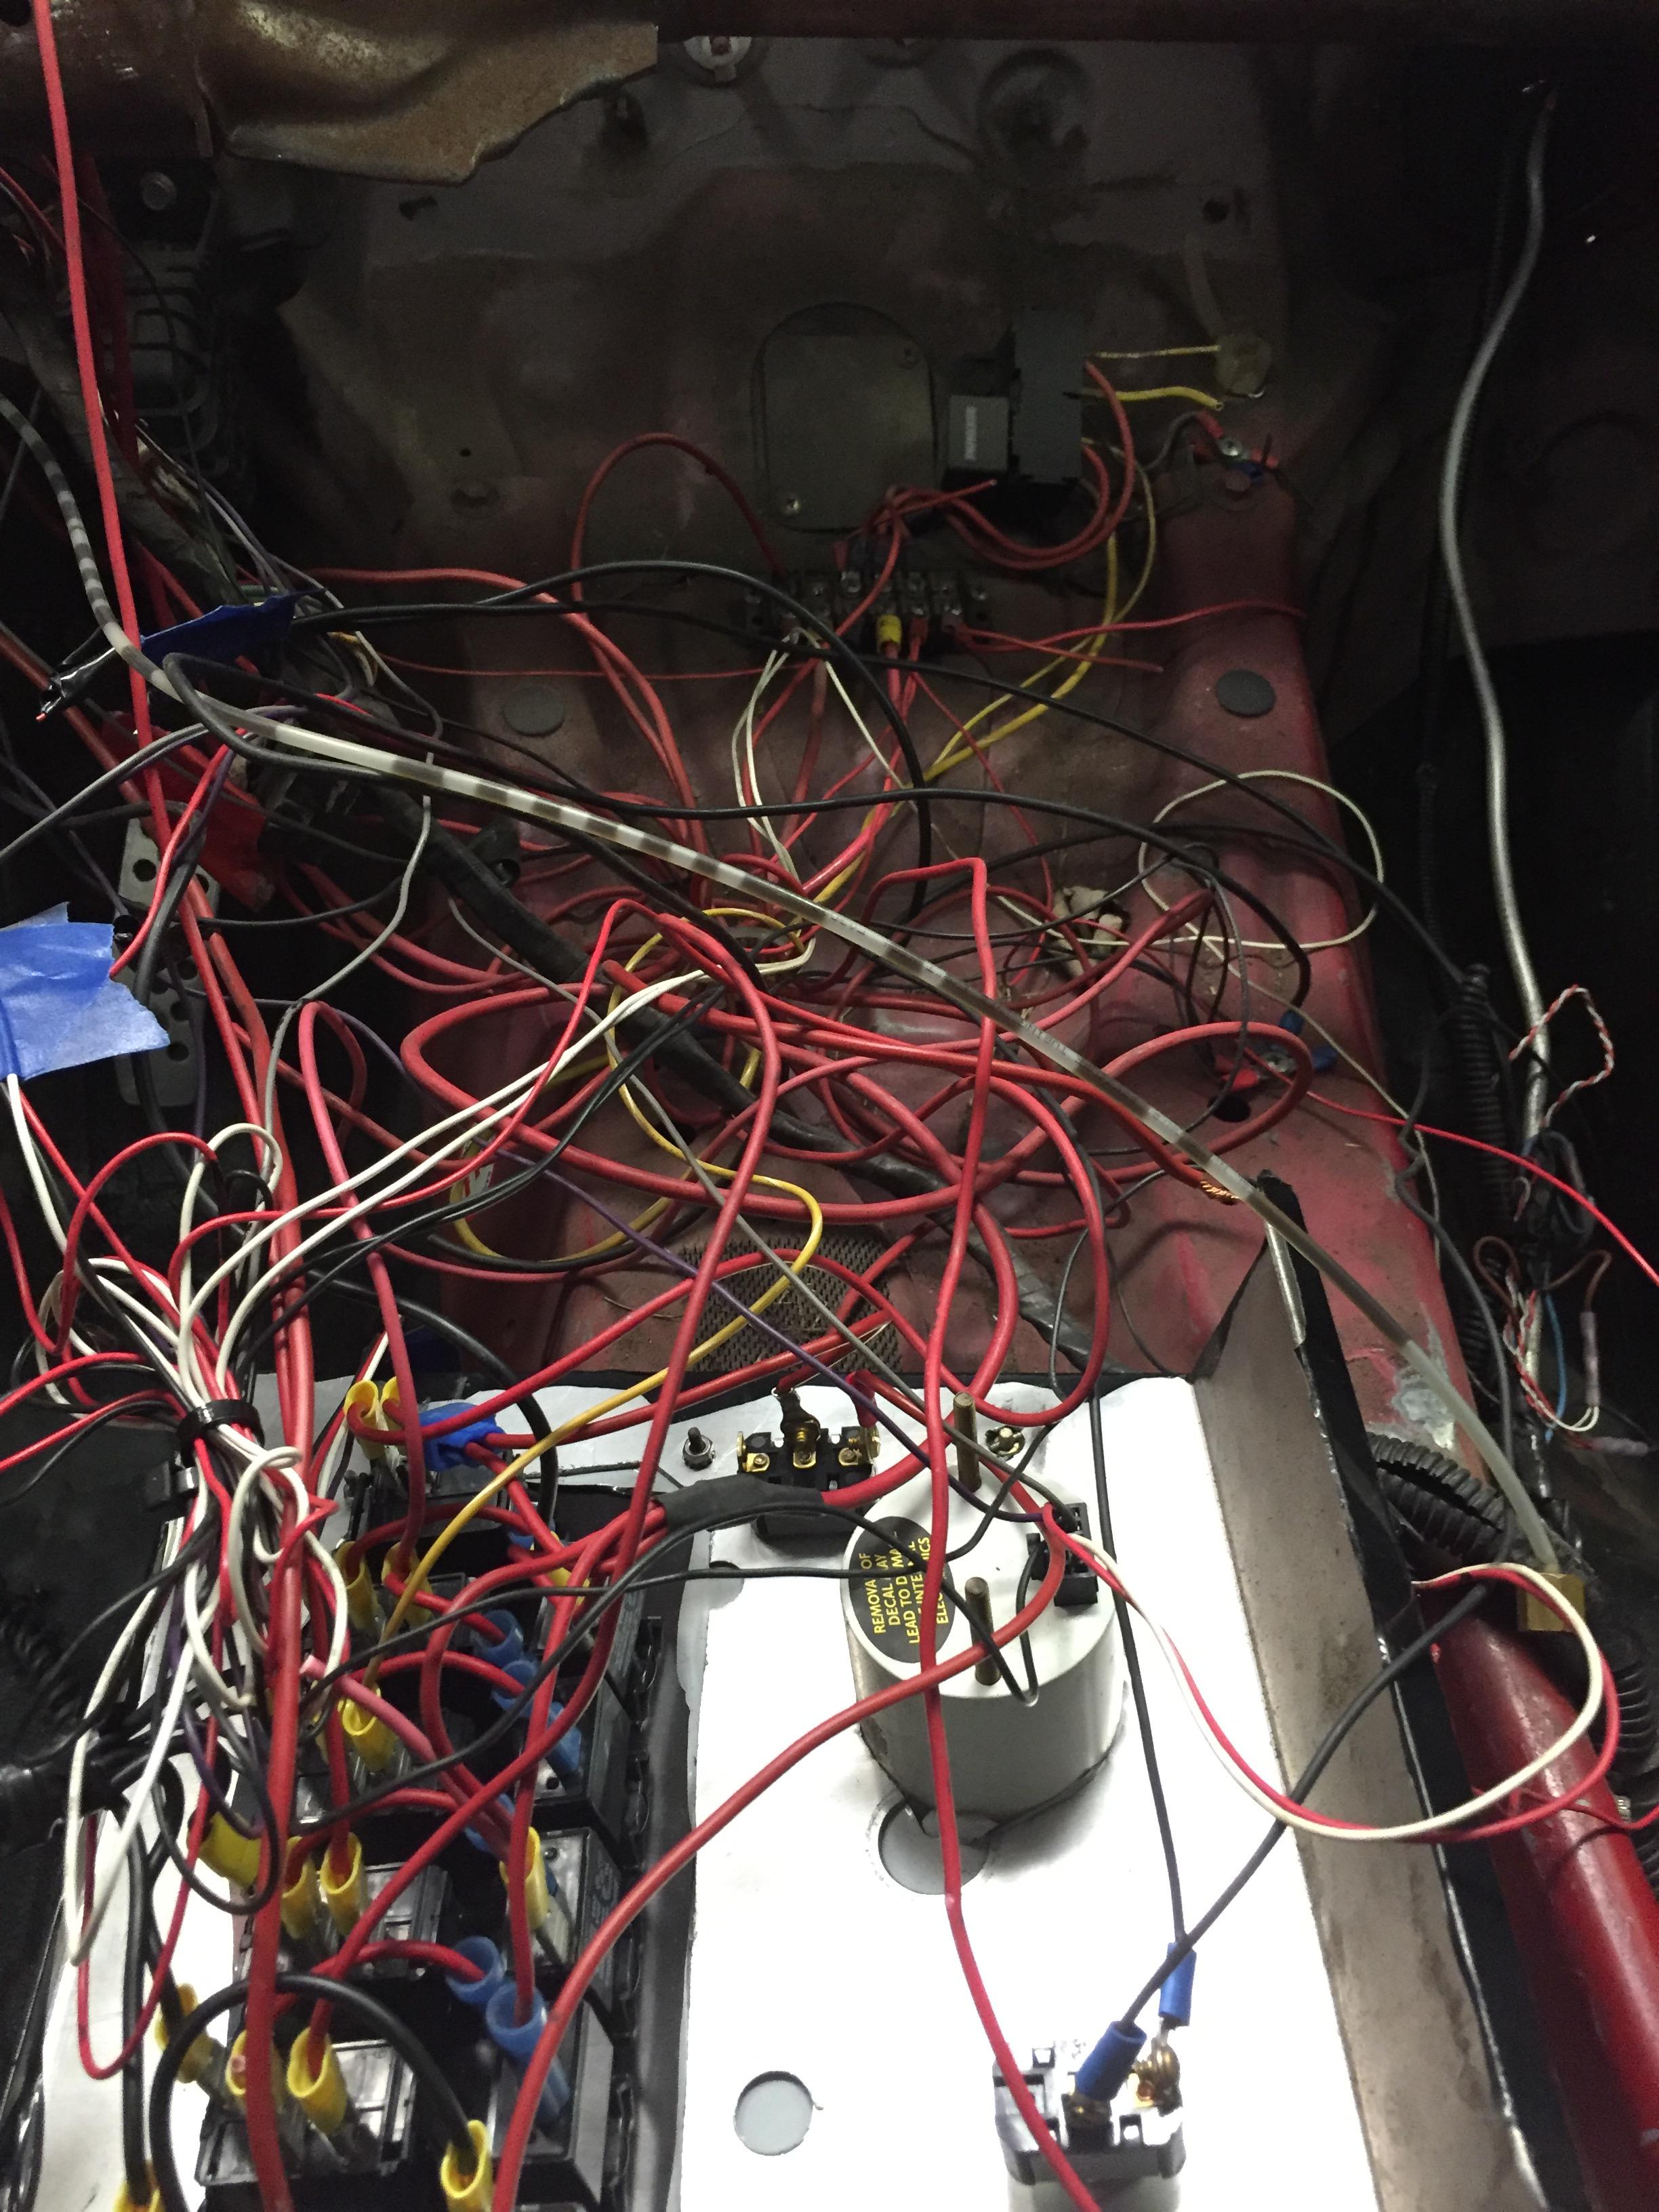
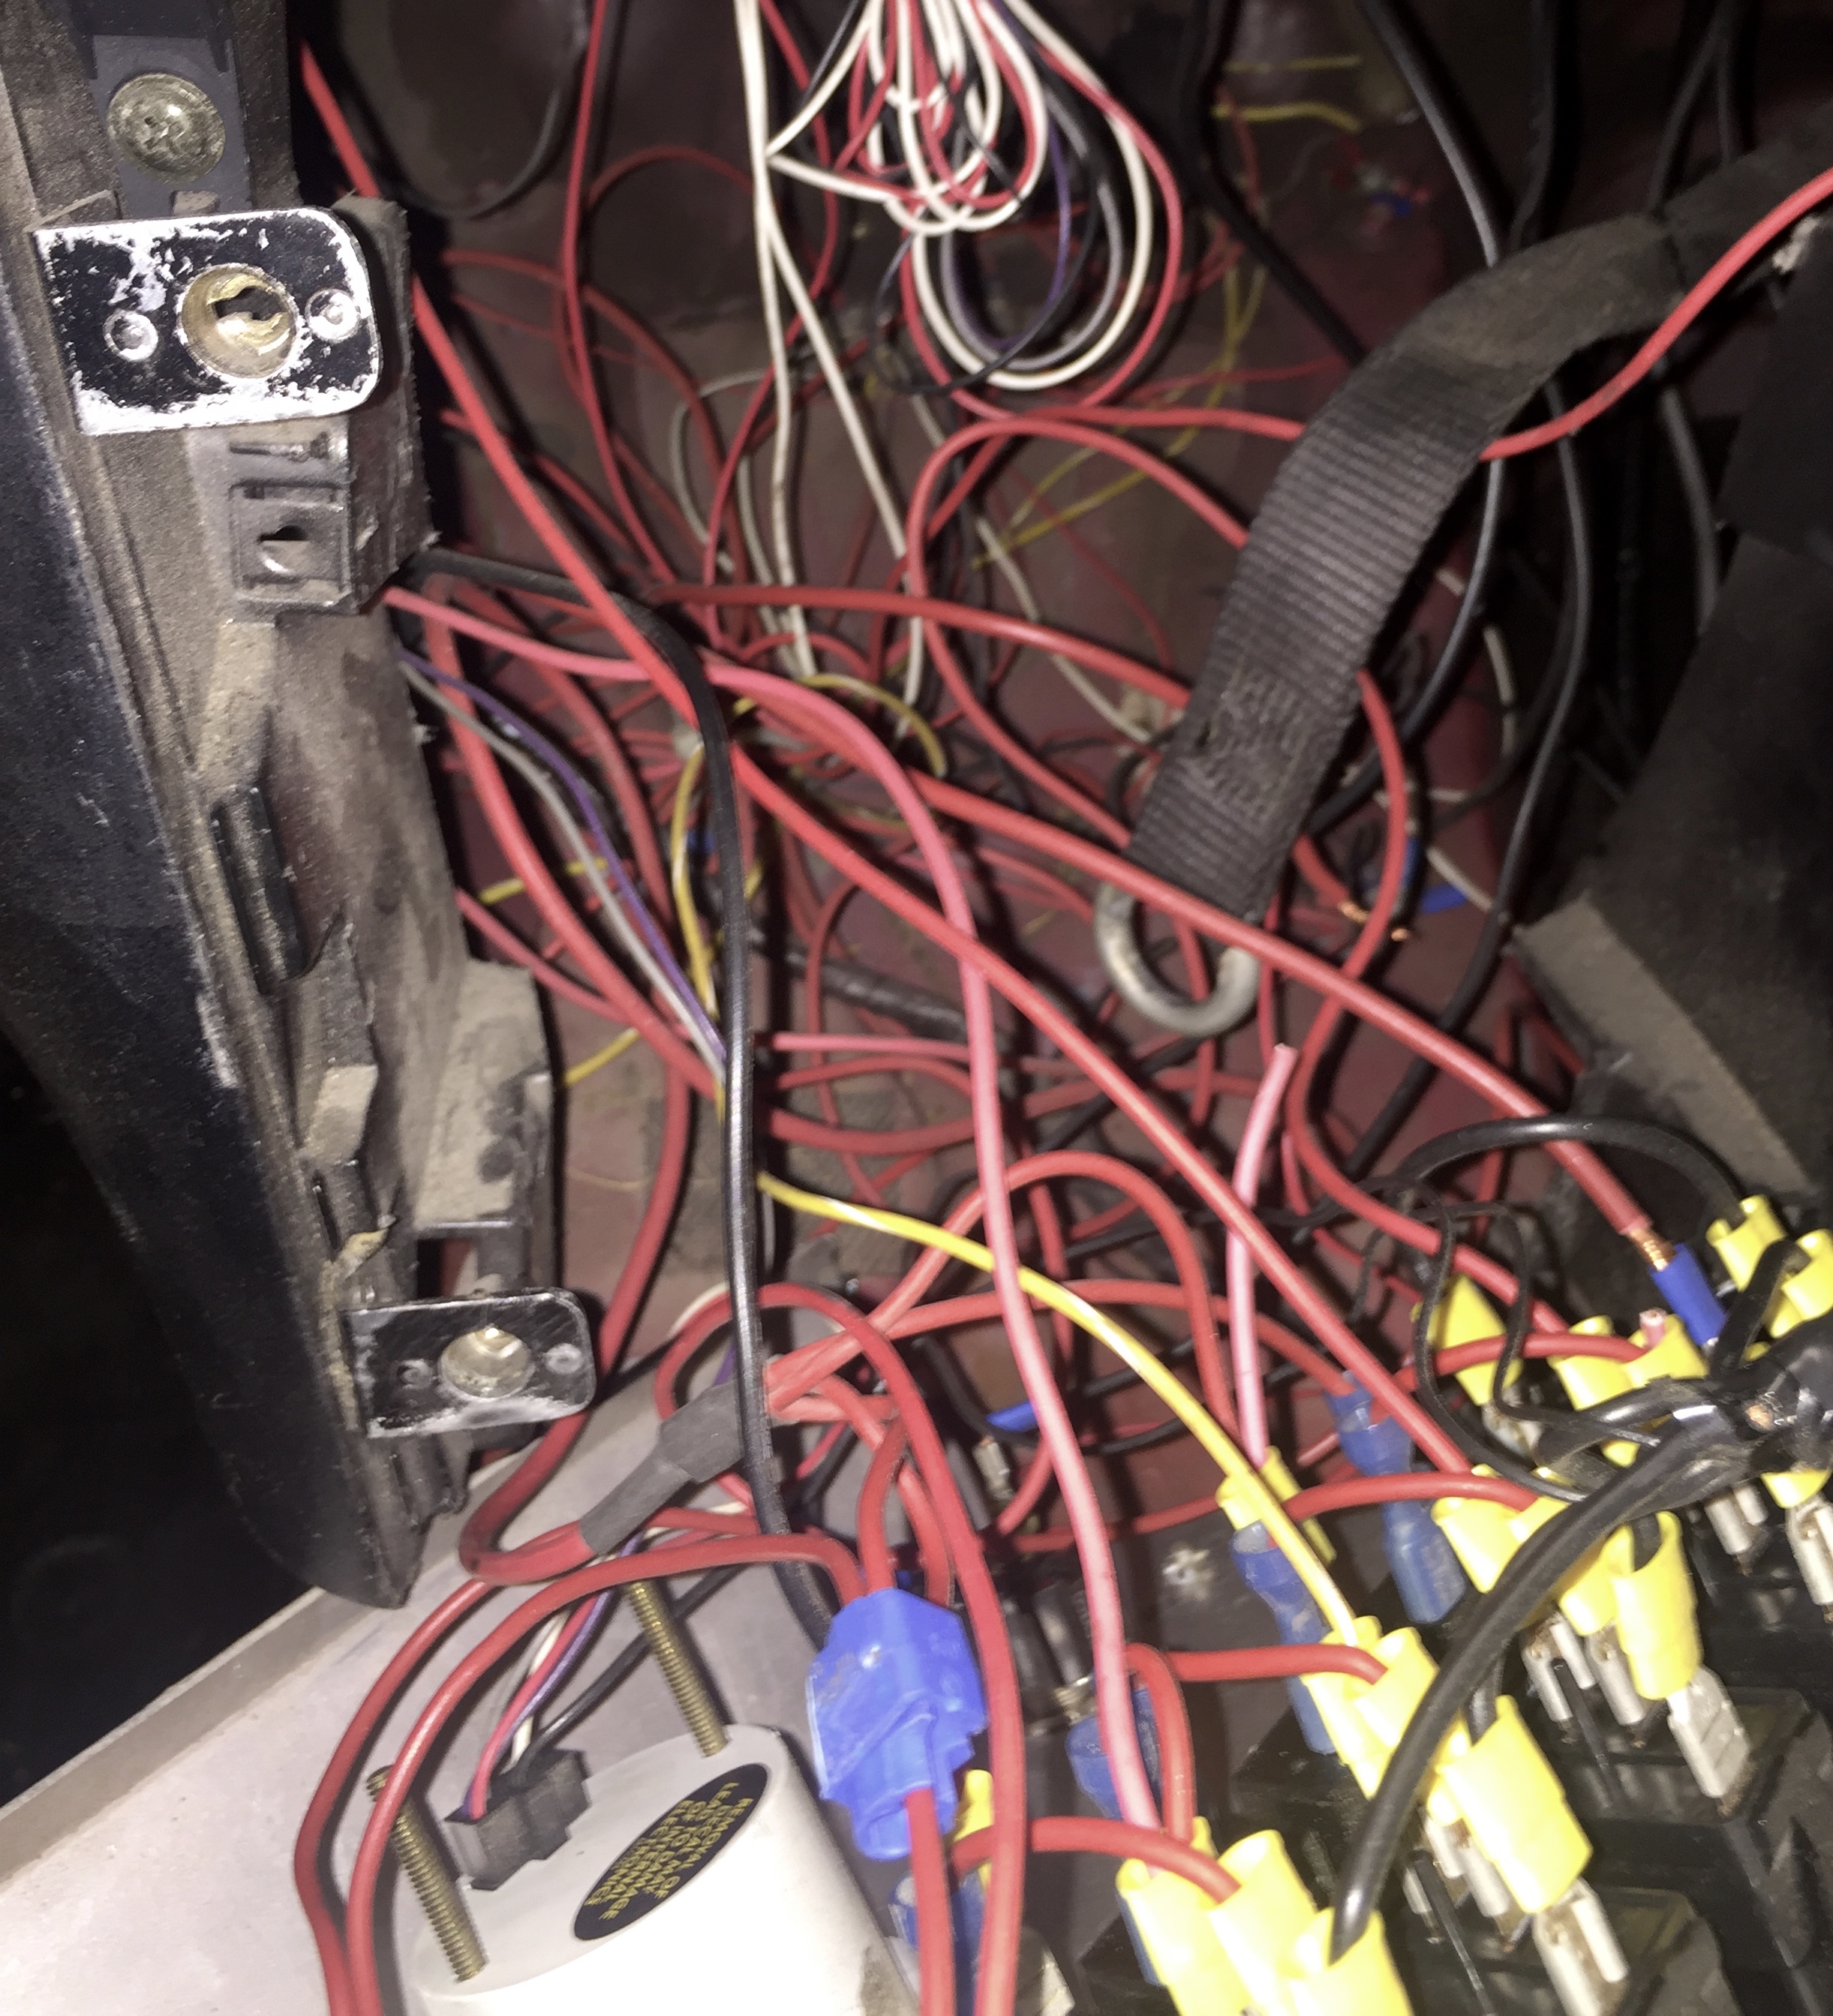
Someone had cut the fuse/relay box out of the harness ruining it.
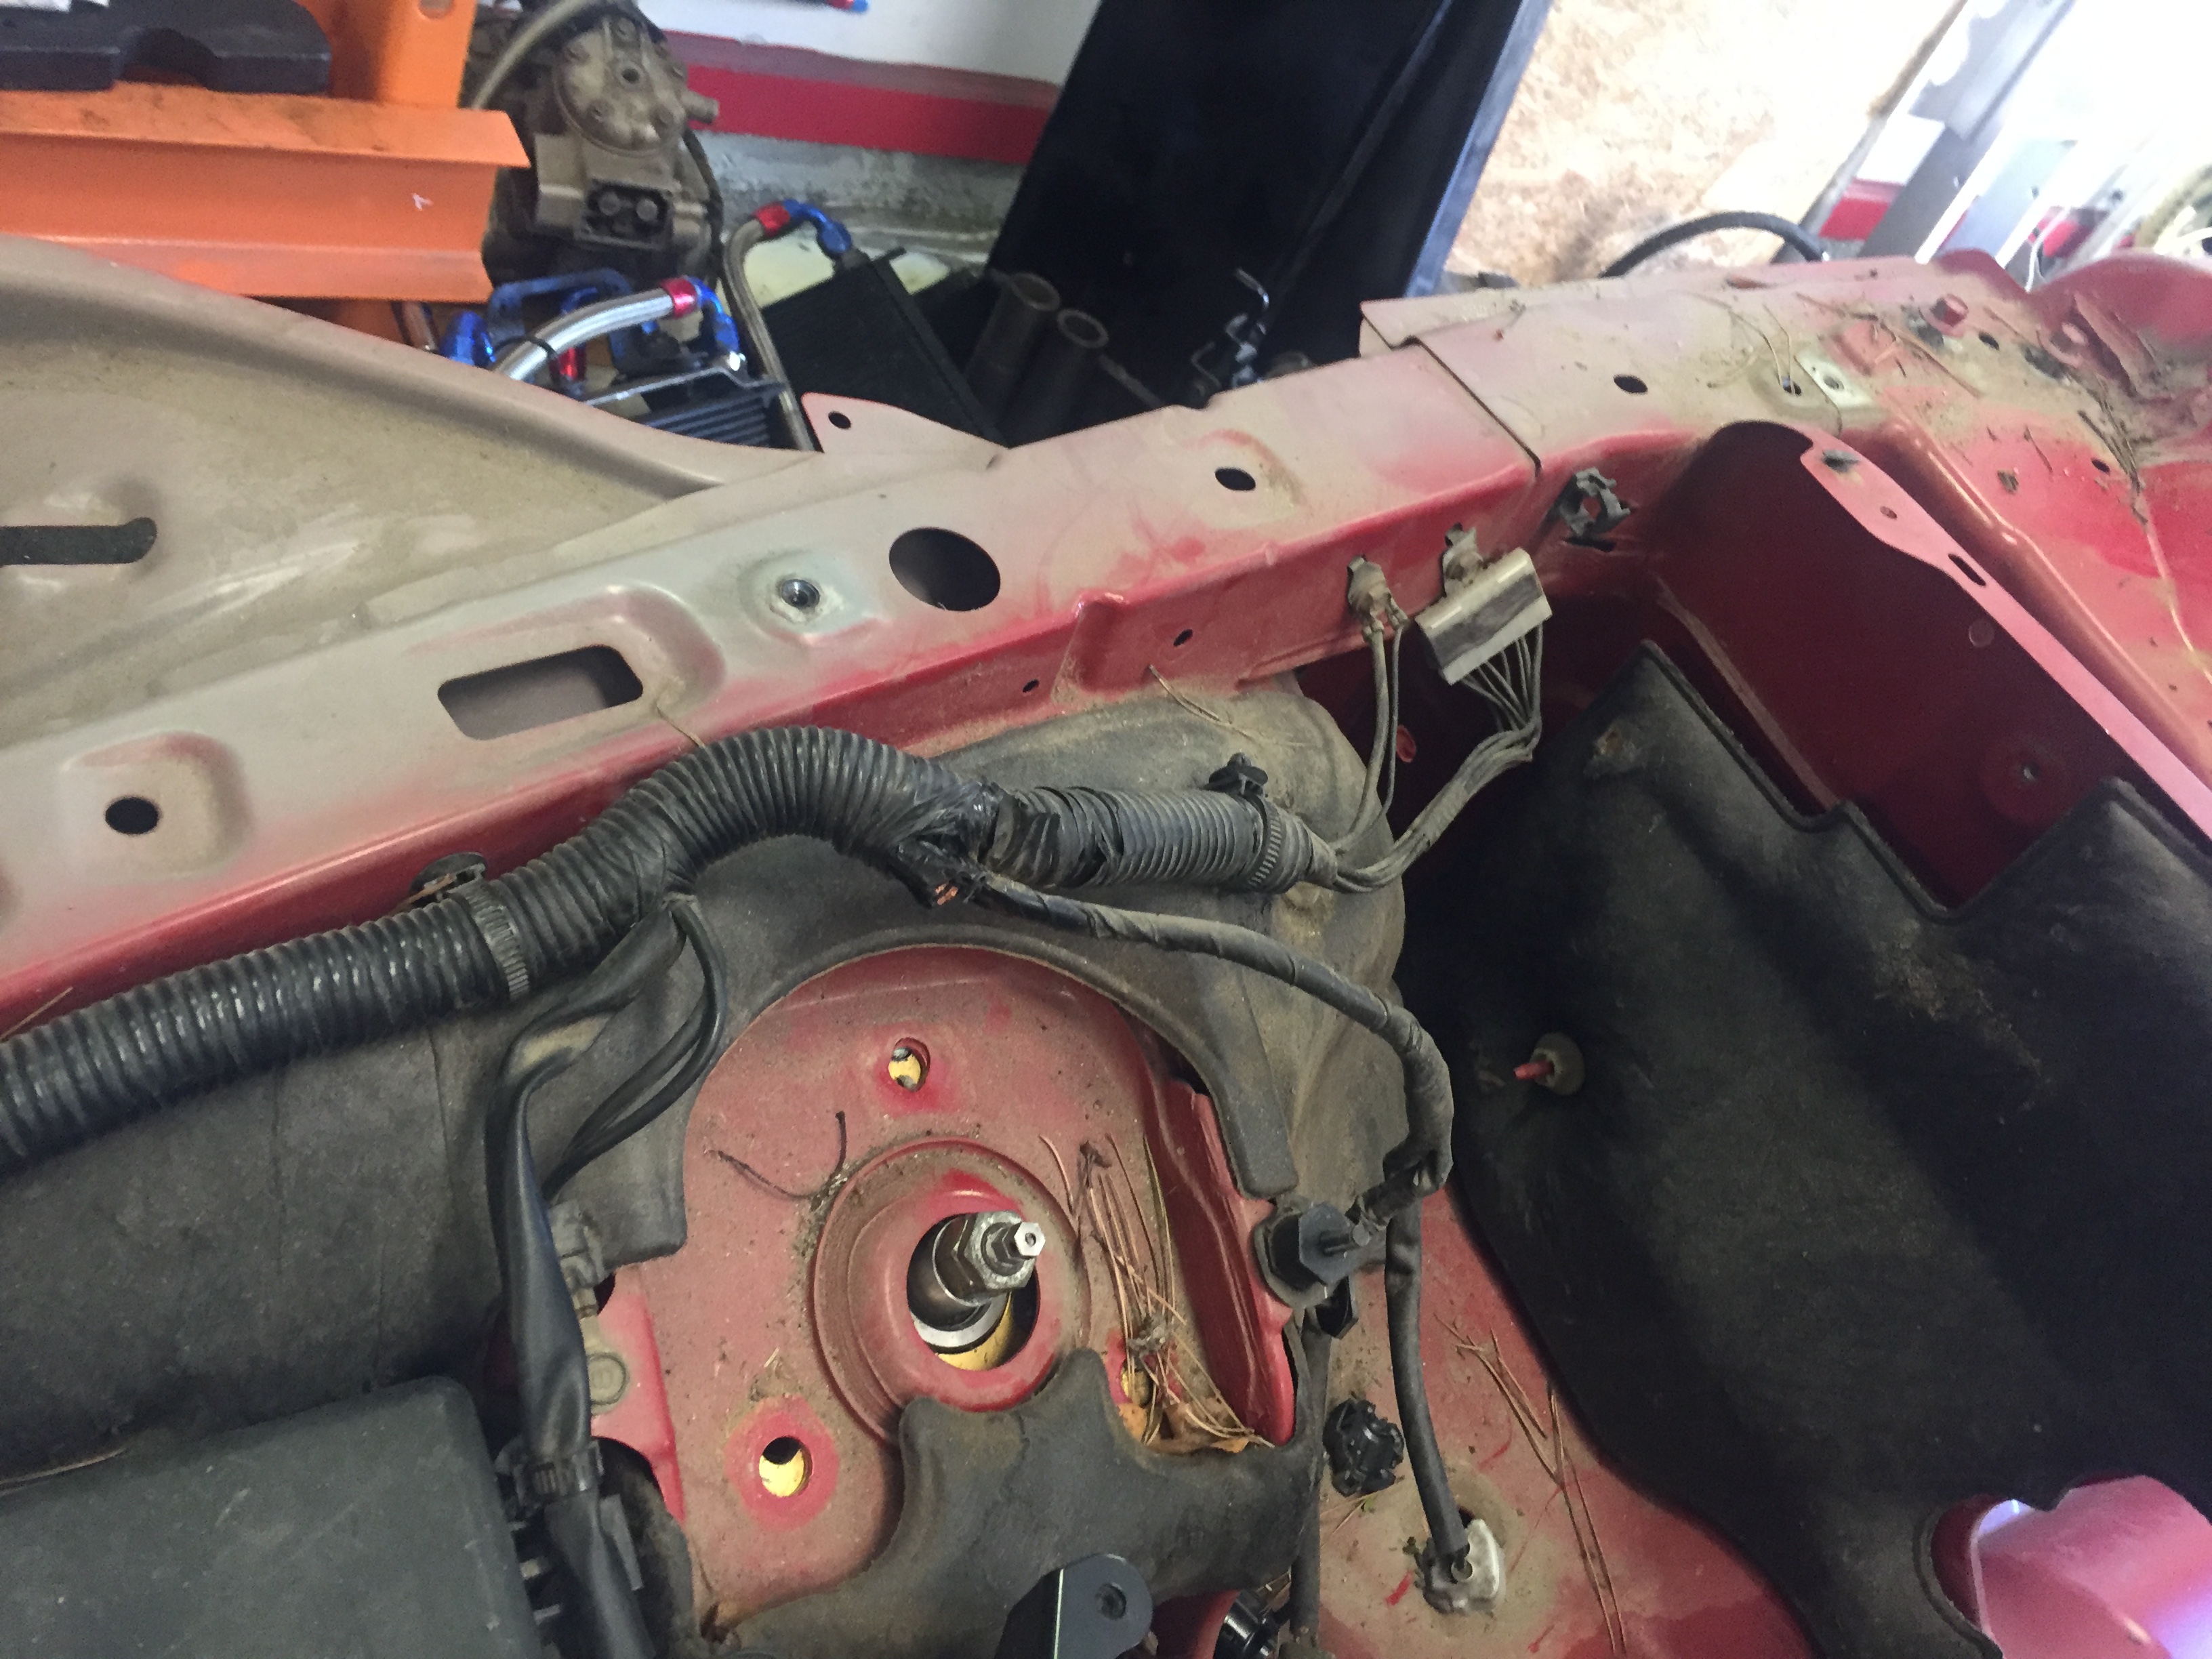

You get the idea. Eventually I got it down to this
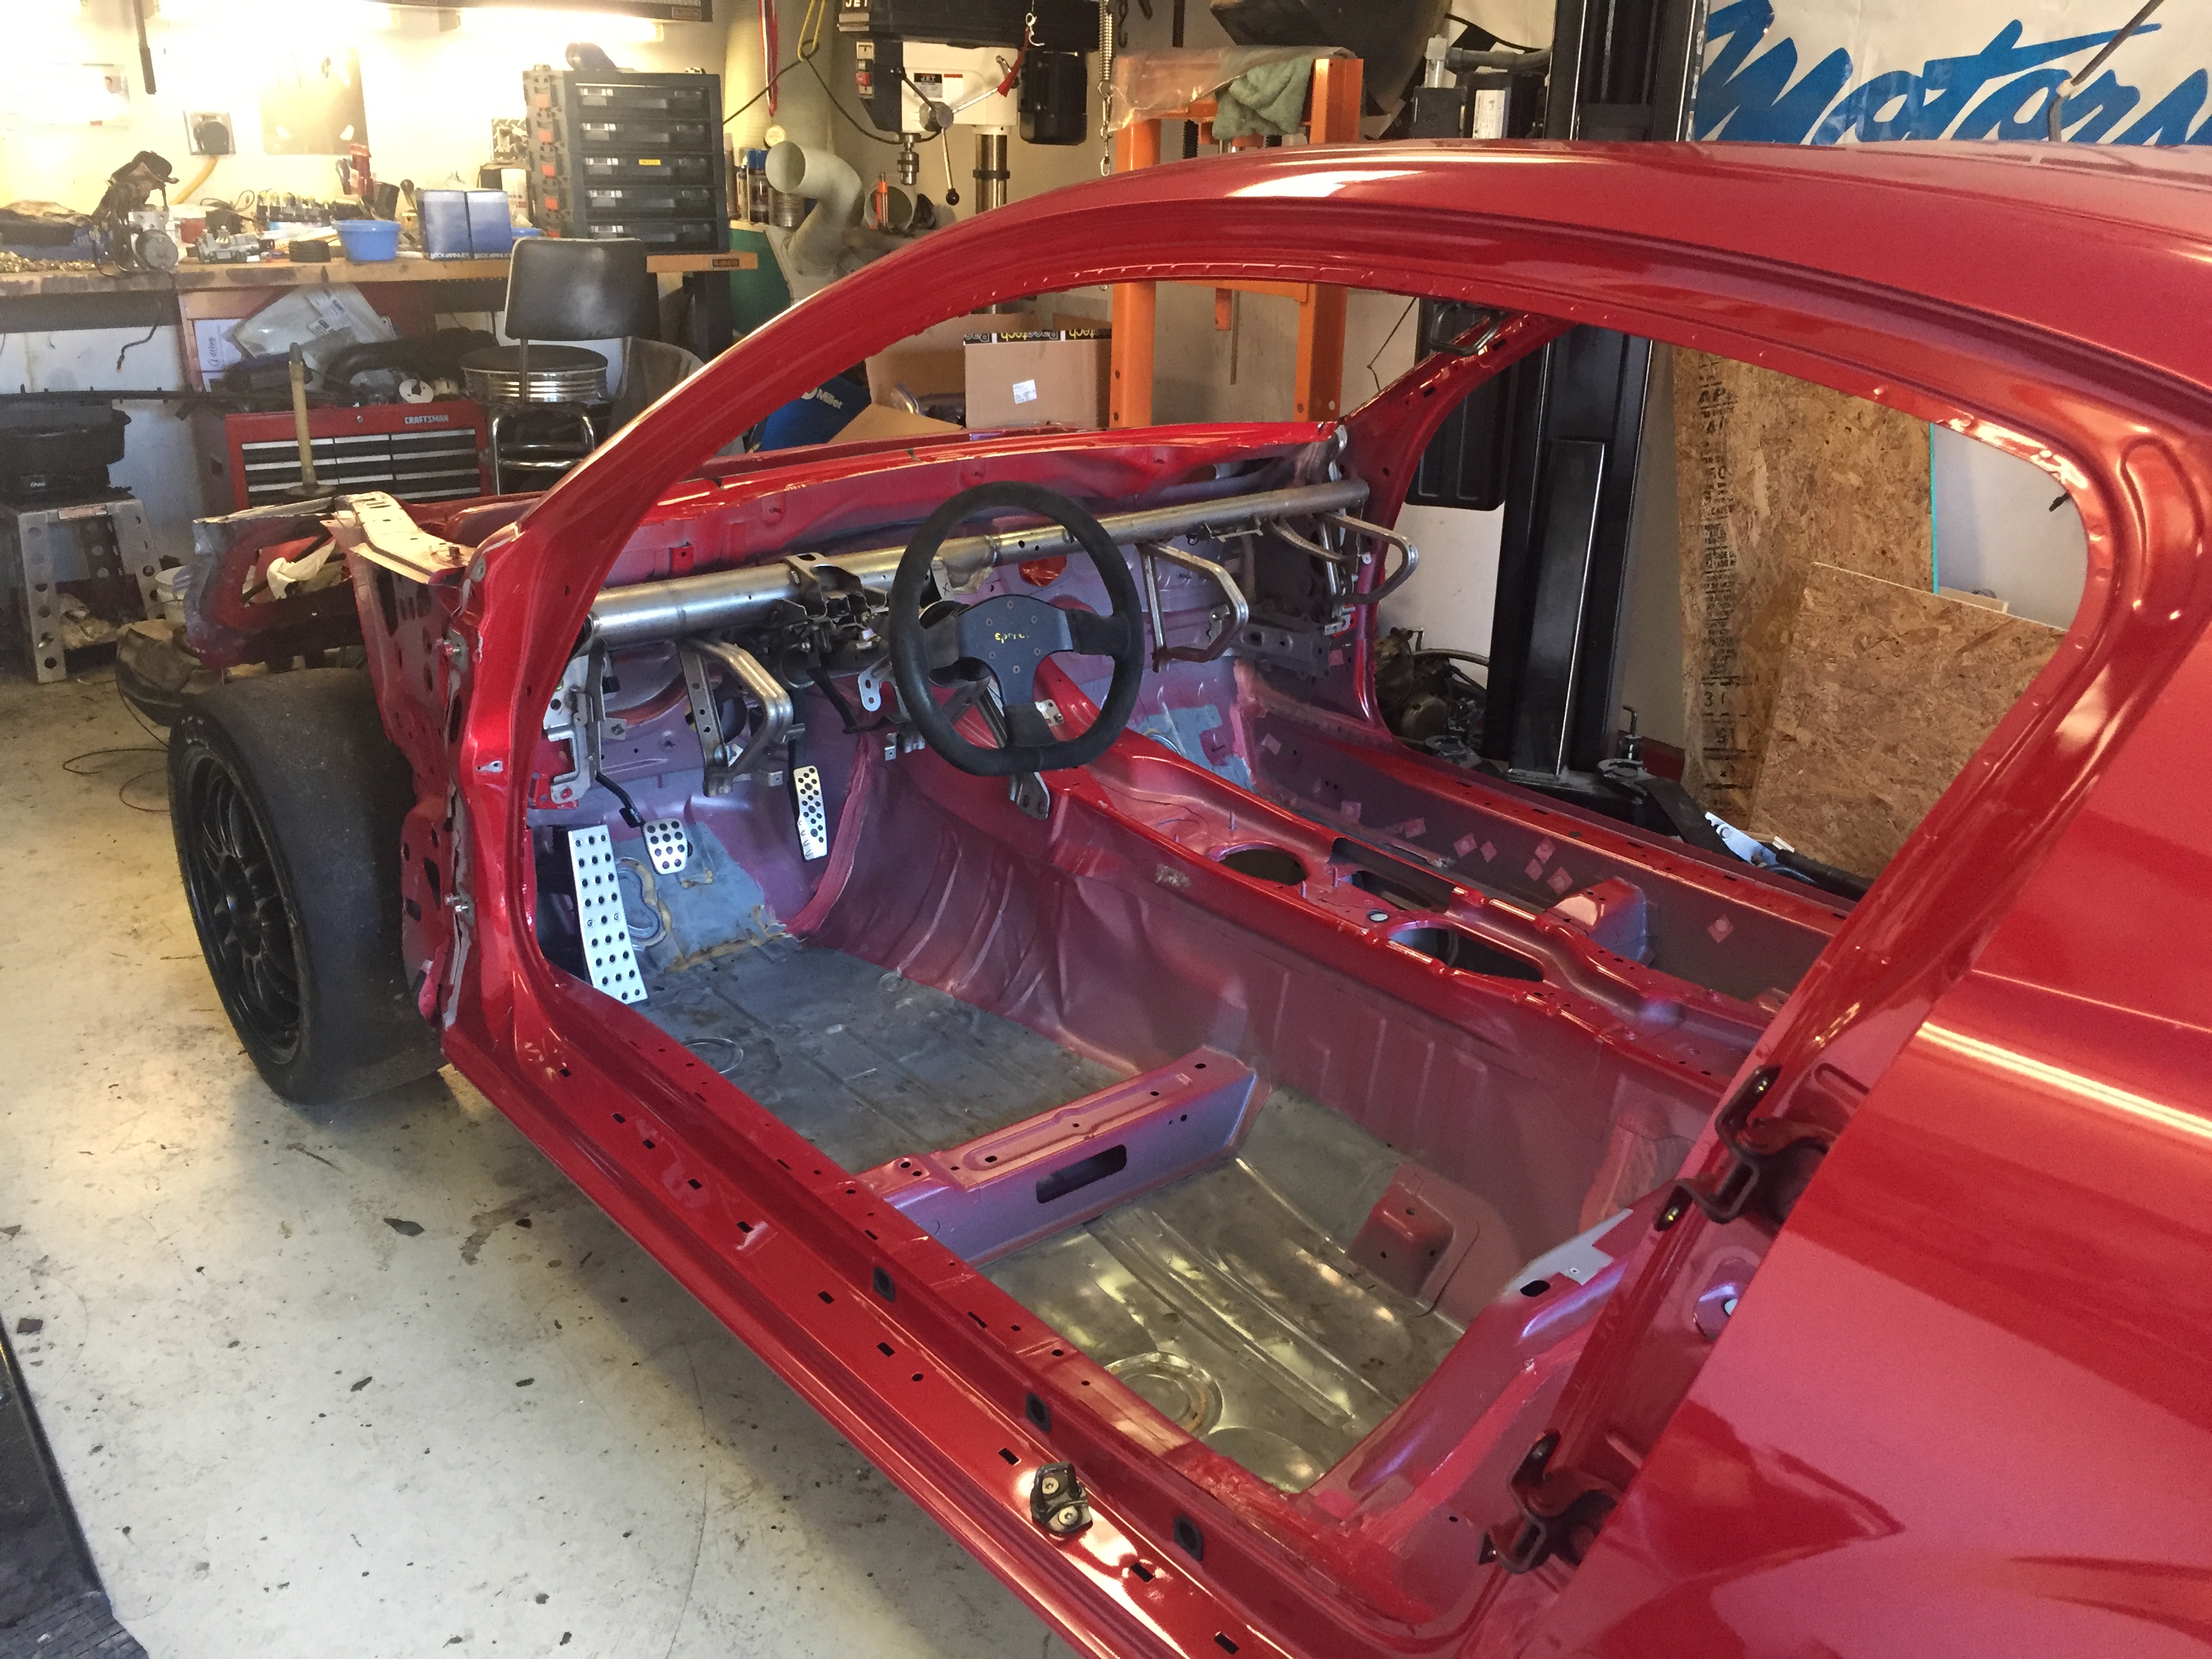
Cage building is best done with the windows out. I was able to get both out with a pull knife and eventually some creative use of fine gauge wire.
Sound deadening needs to come out too which is also messy. Dry ice helps a lot.
I build the cage in my last SM car but it's a time consuming process with a manual bender and notcher so I decided to let my friend Trevor do this one (he does it for a living).
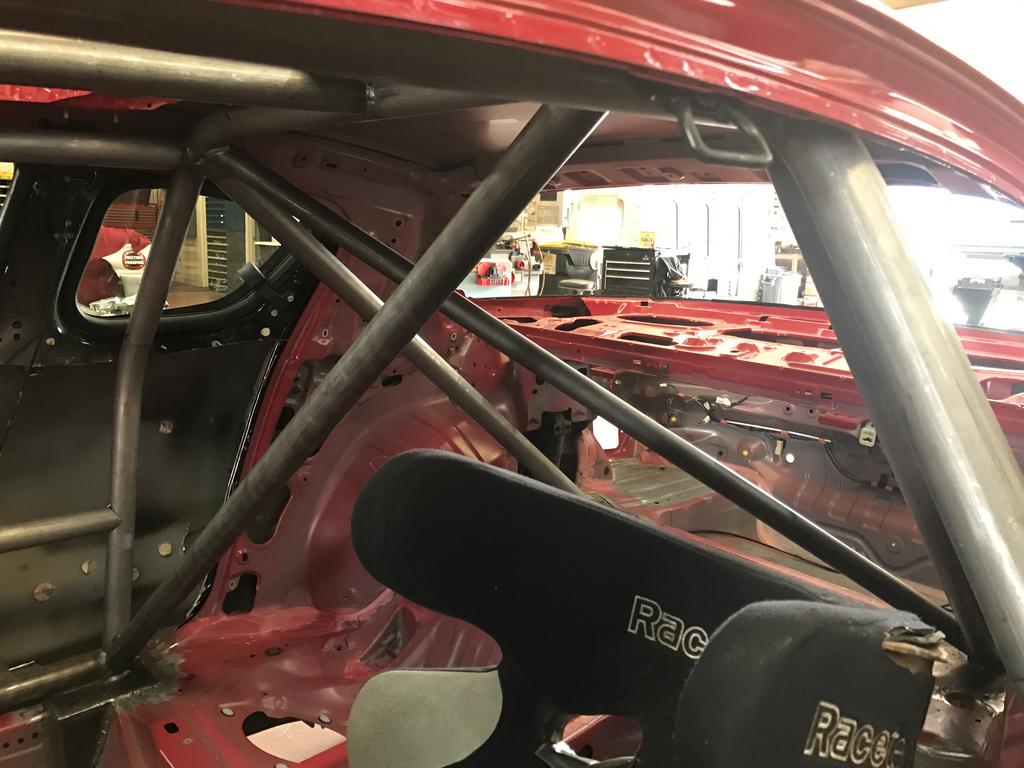
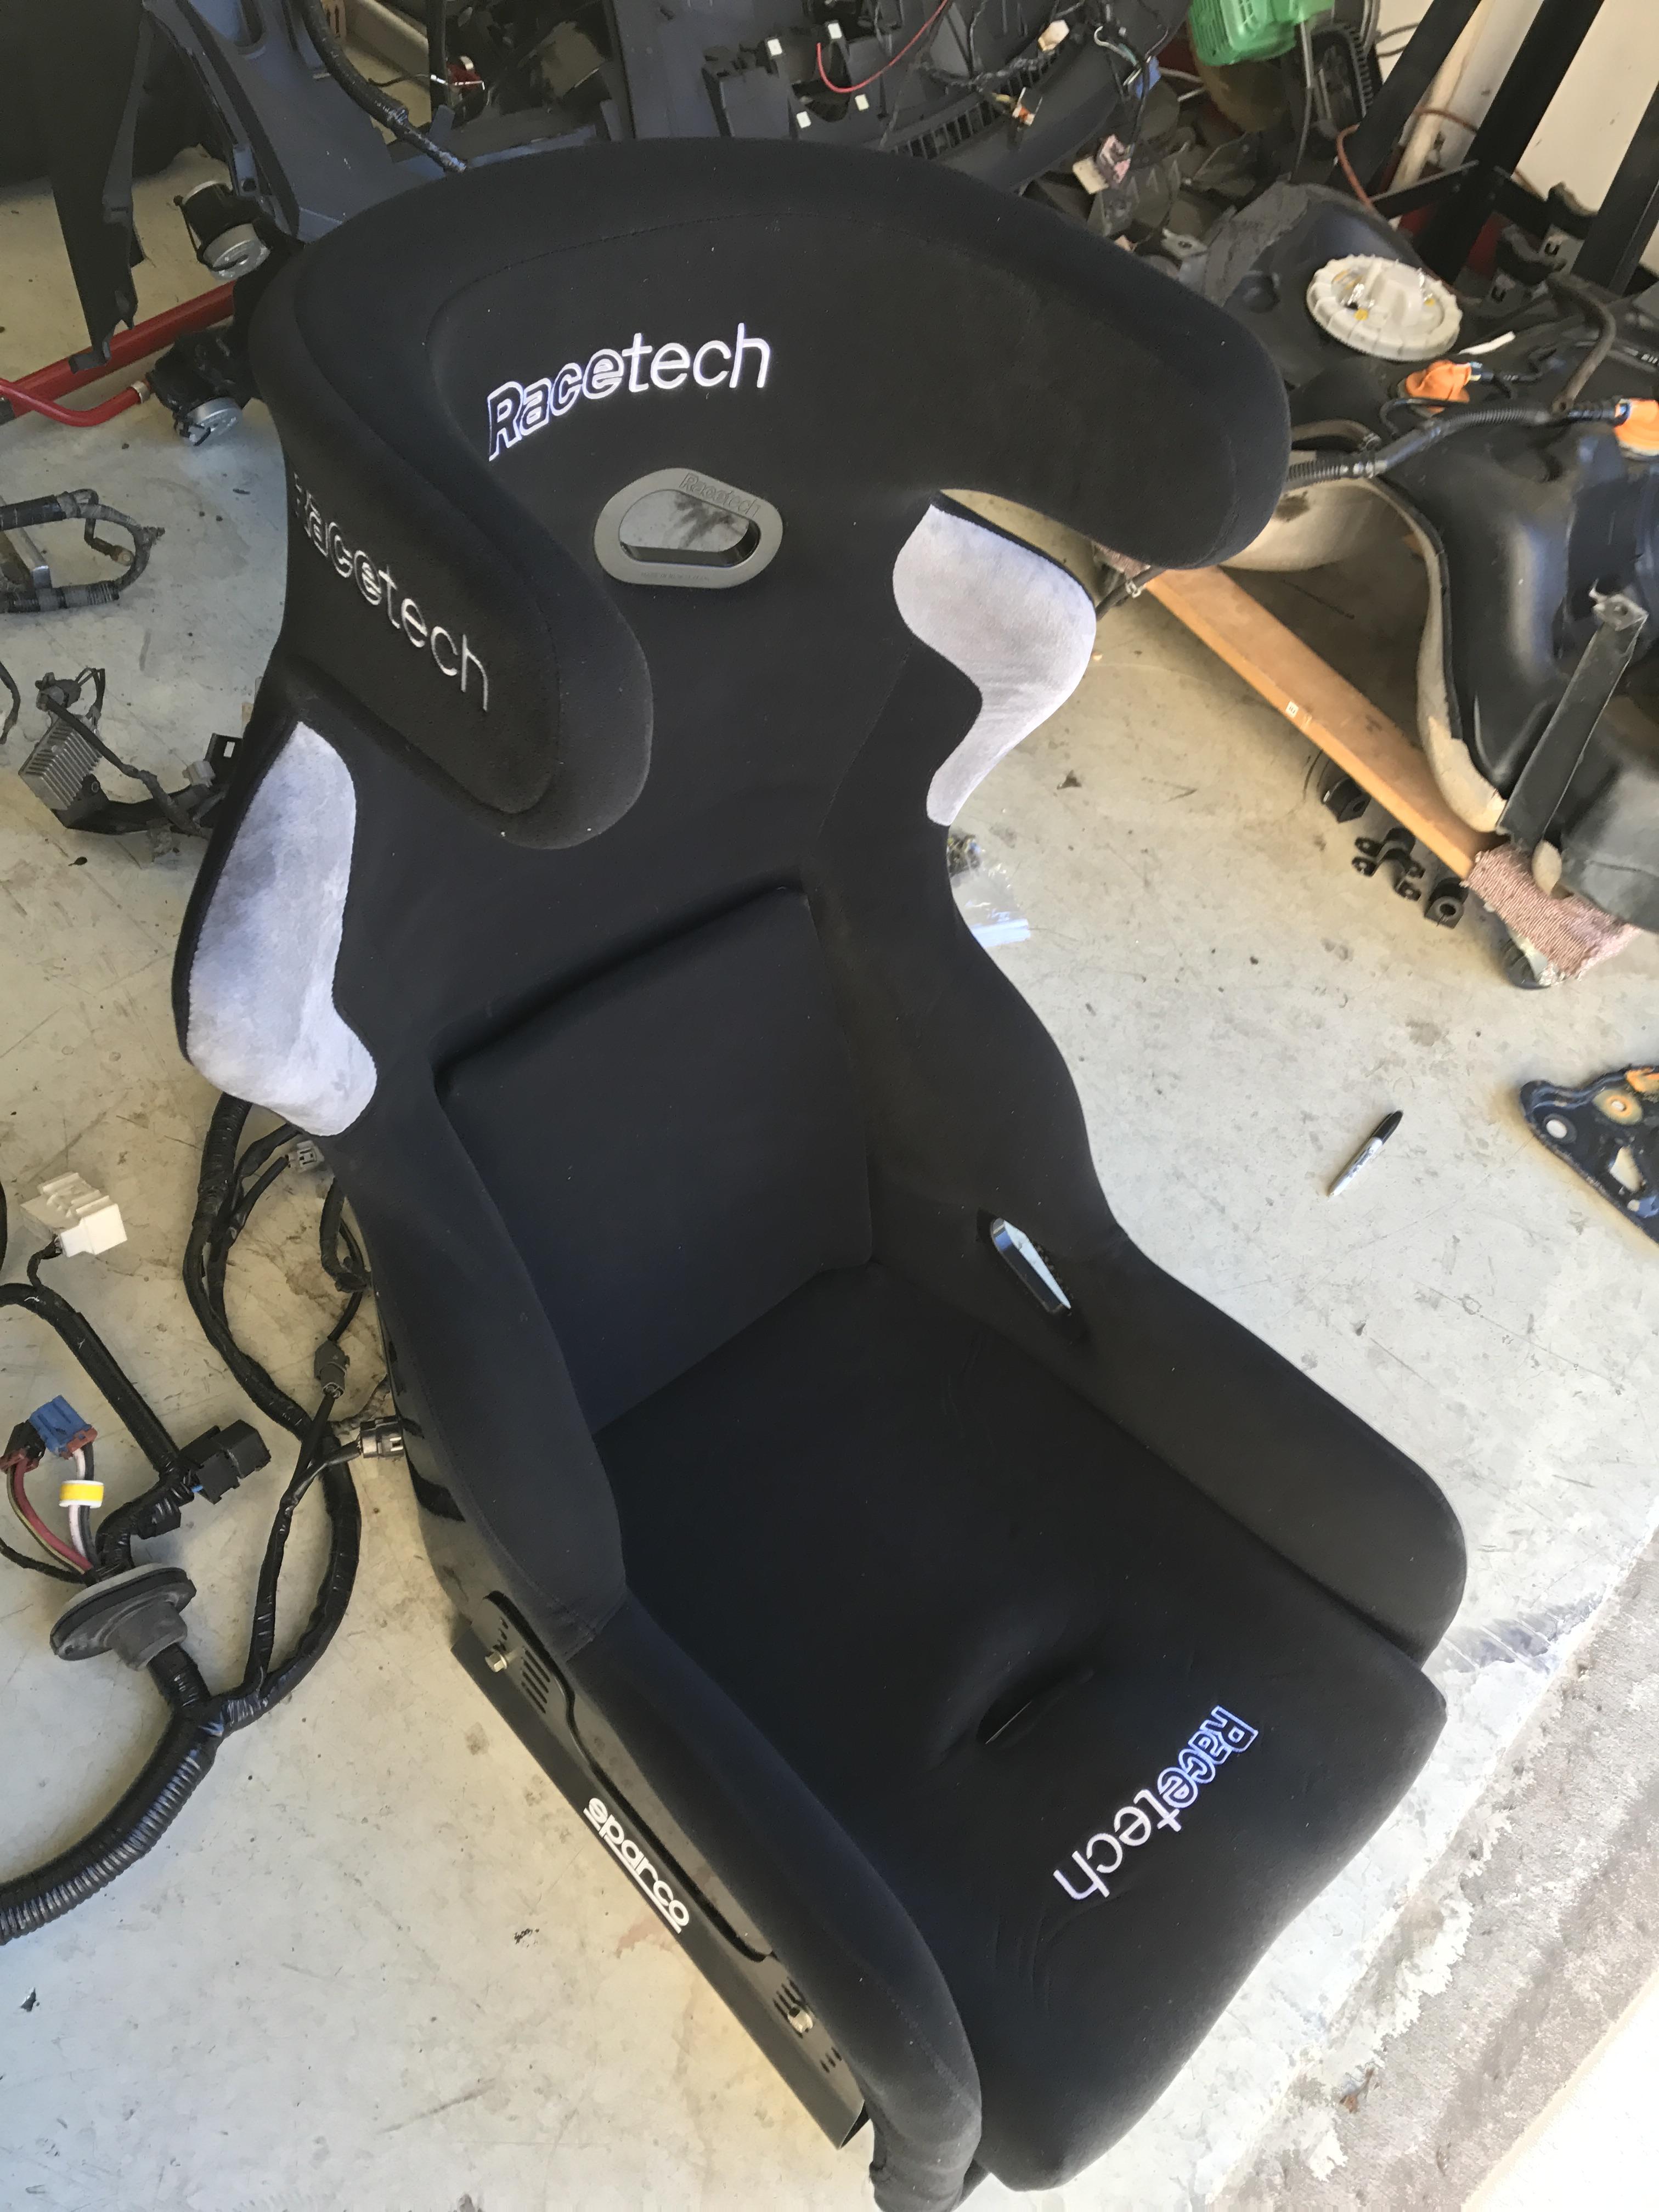
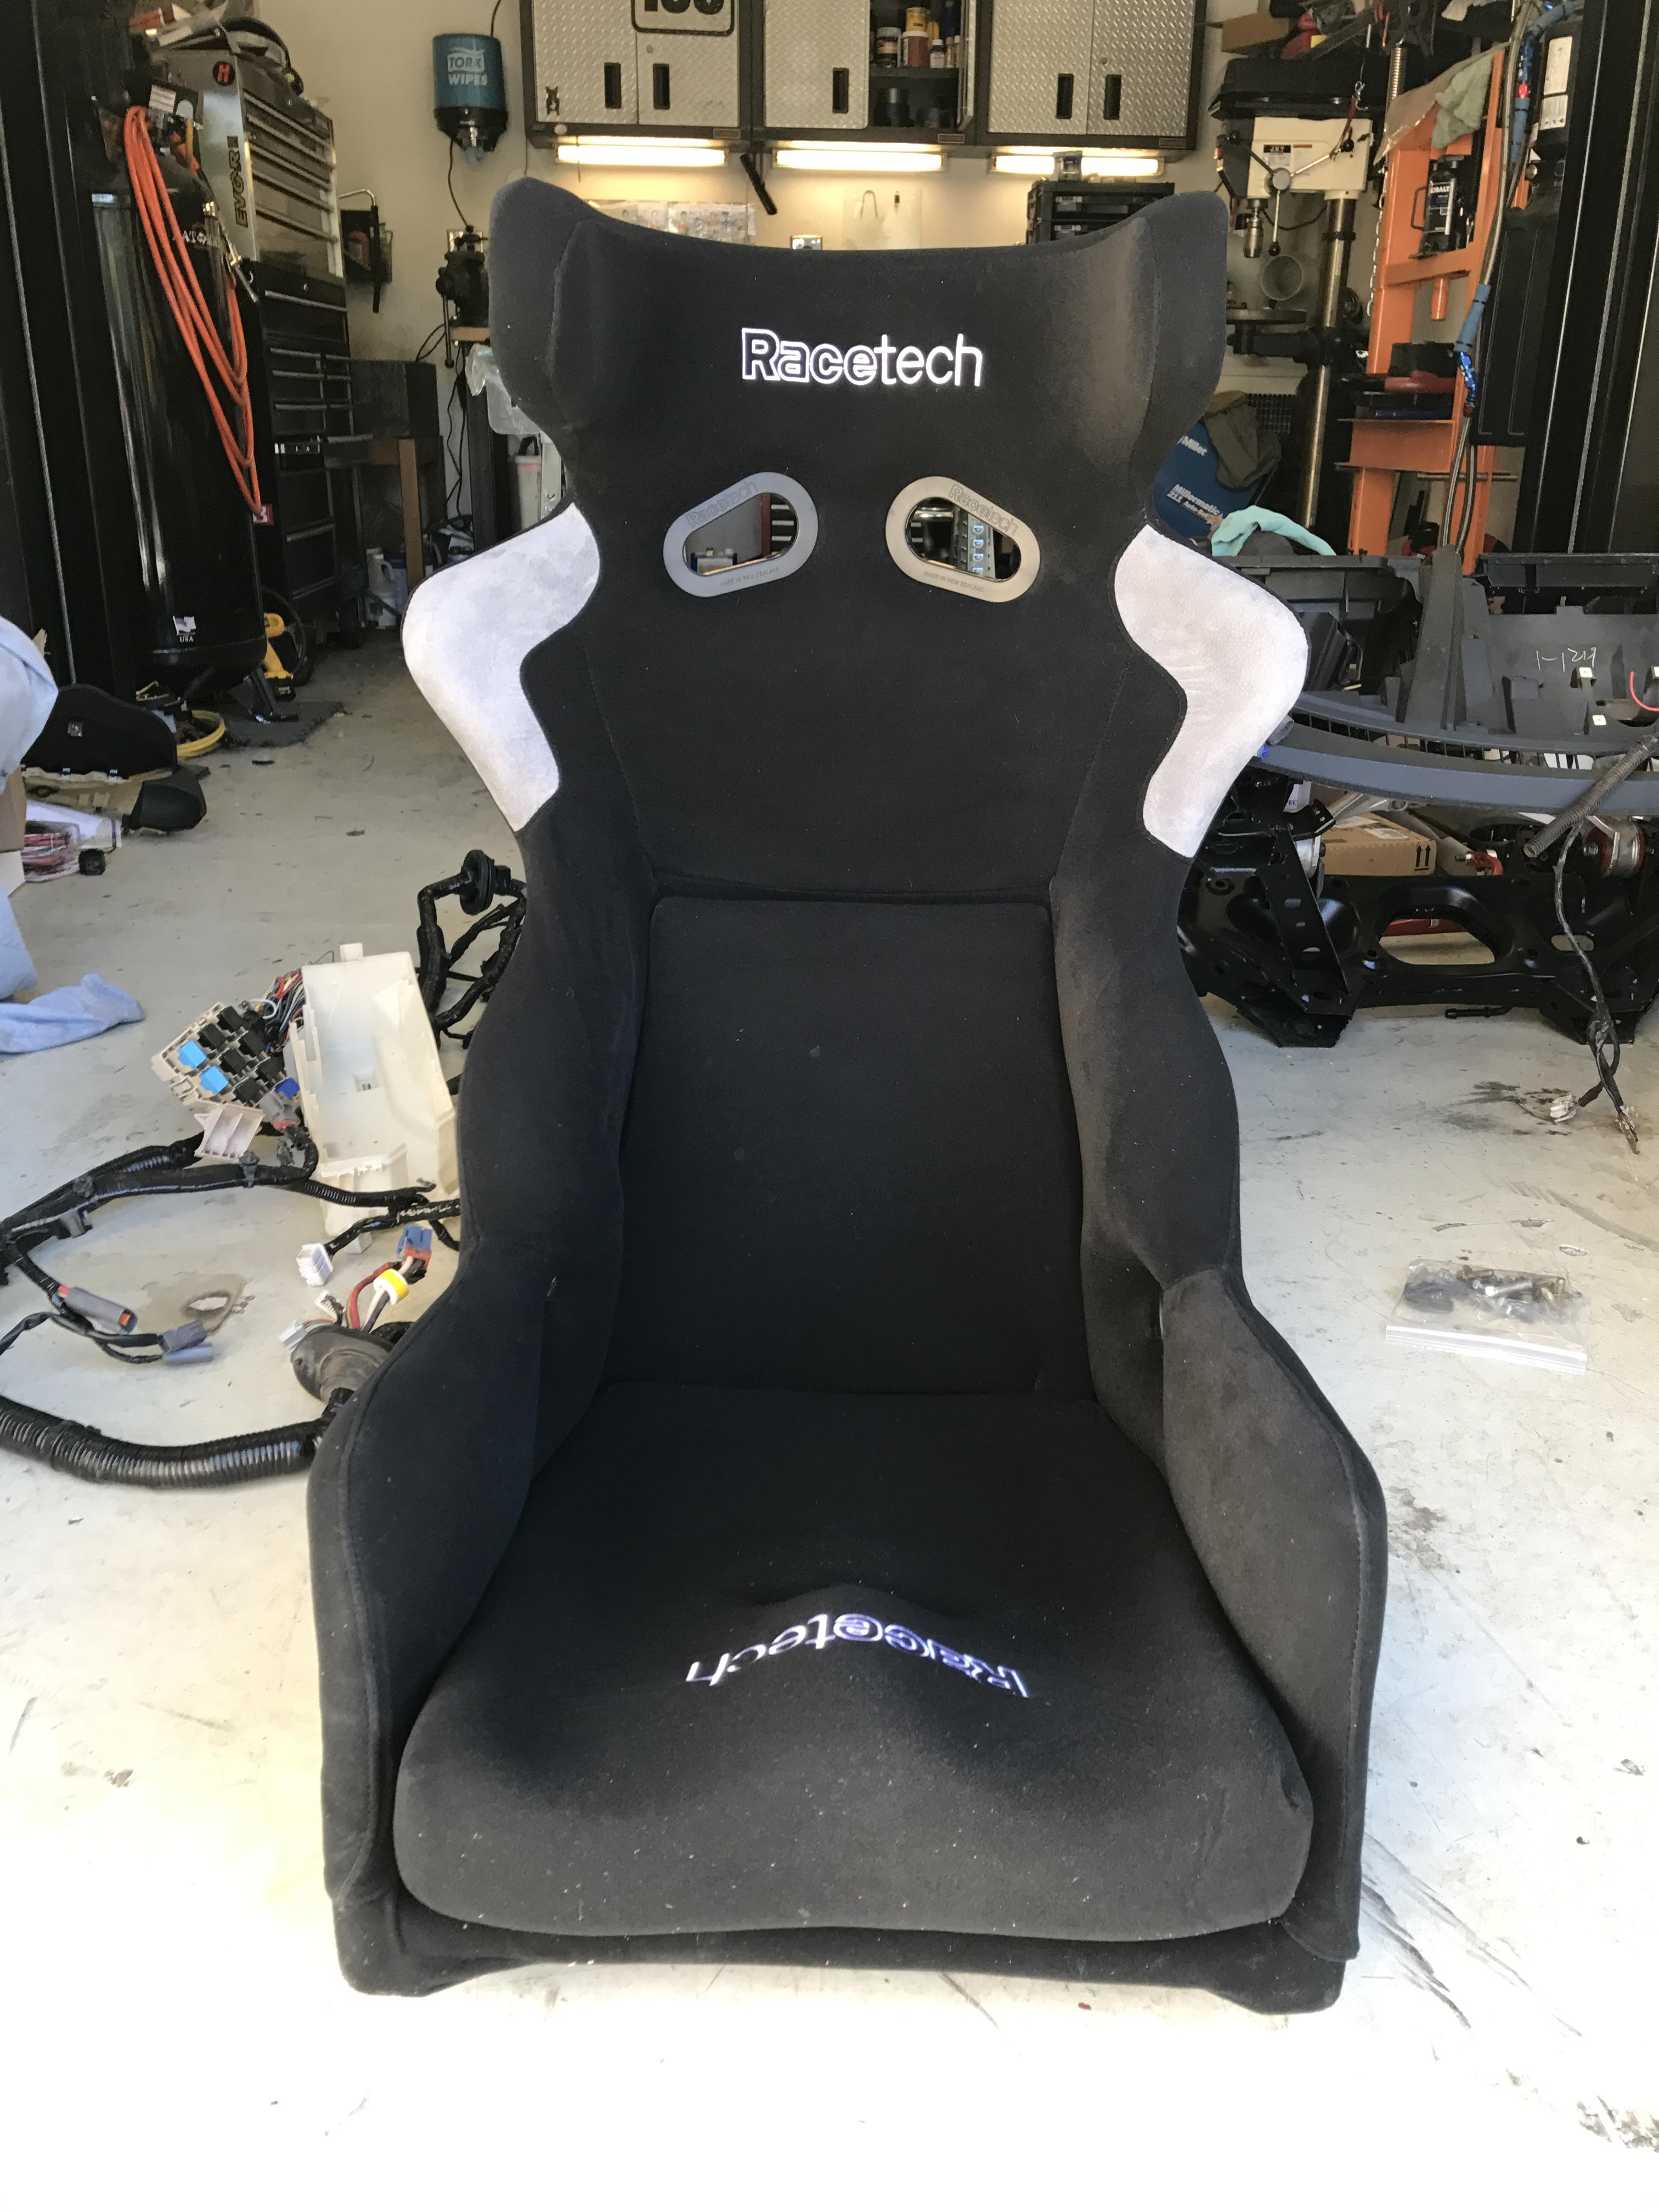
Here's the cage being fabricated. Notice the condition of the seat, I'll address that later.

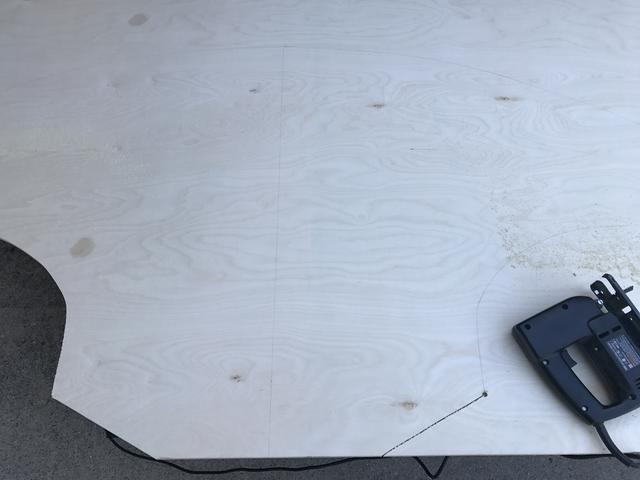
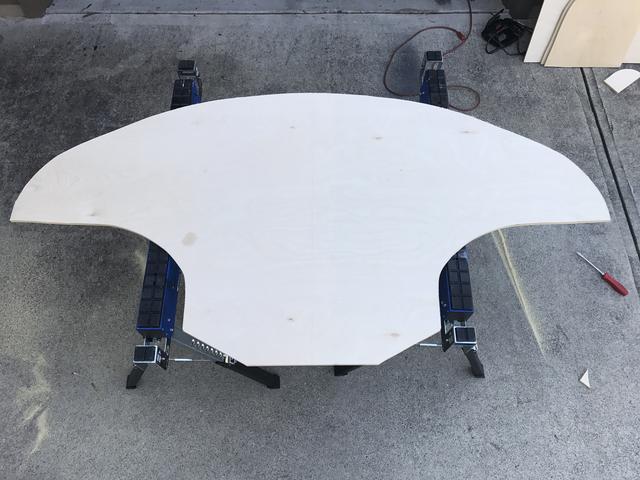
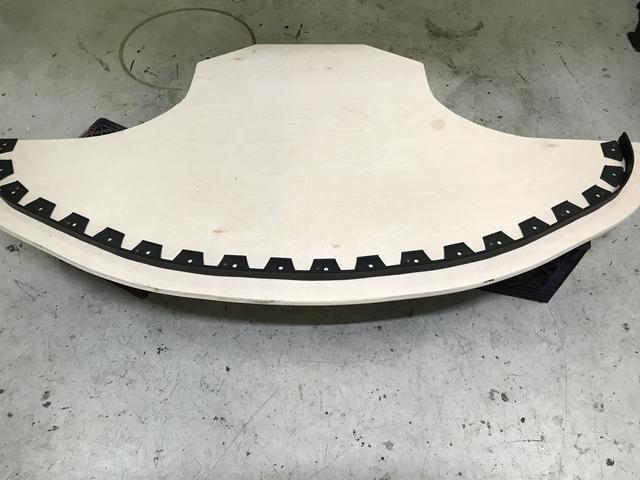
I'm campaigning for a weight reduction for this car in STL so I asked Trevor to build a legal cage but not overkill to save weight. This car had a sunroof which must go. I had the option of riveting a piece of steel (must be the same material as the top) over it or cutting the top off the Anderson car and moving it over. We went with the Anderson car top. It was not as difficult as it sounds. I could have bought a new slick top from Mazda for around $250 I think.
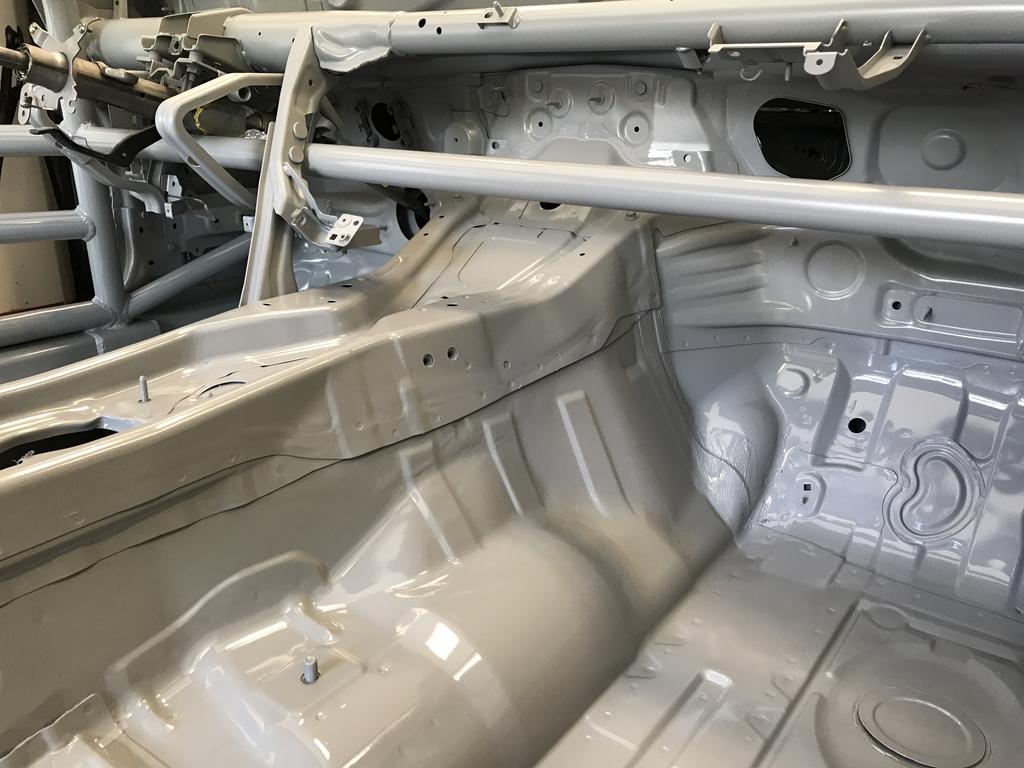
My friend Vic and his dad Glen repair race cars for a living. I had him paint it a dove grey color for me inside and out, including engine bay, trunk, and door jambs. The car will eventually be wrapped.
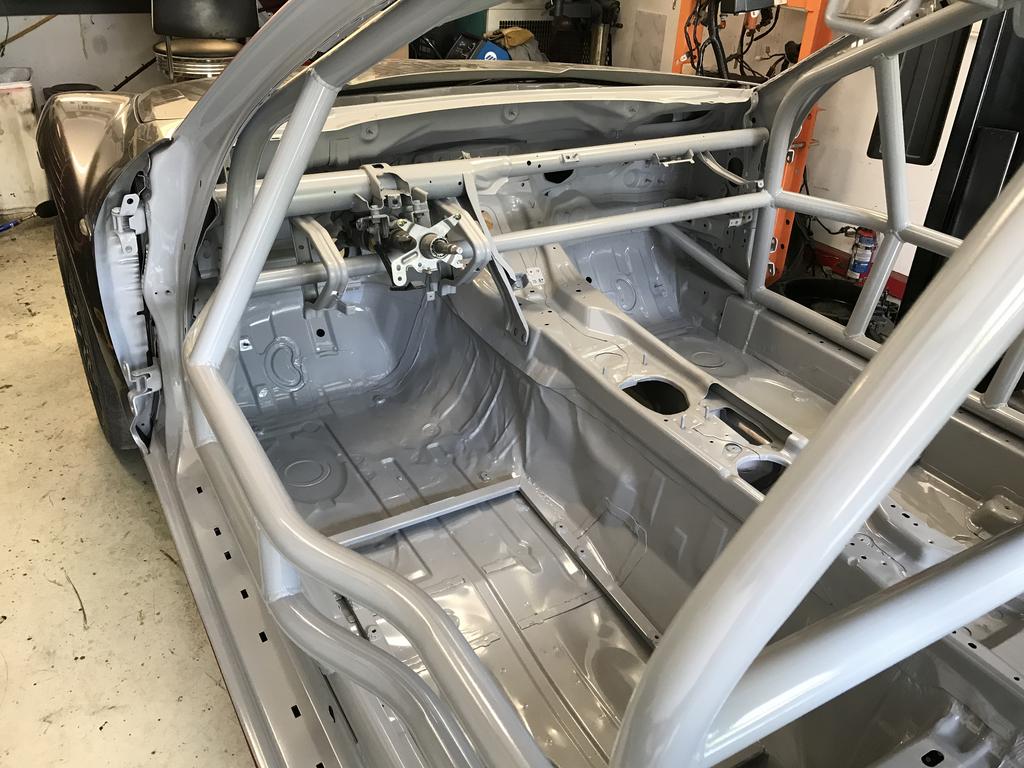
Back from cage and paint.


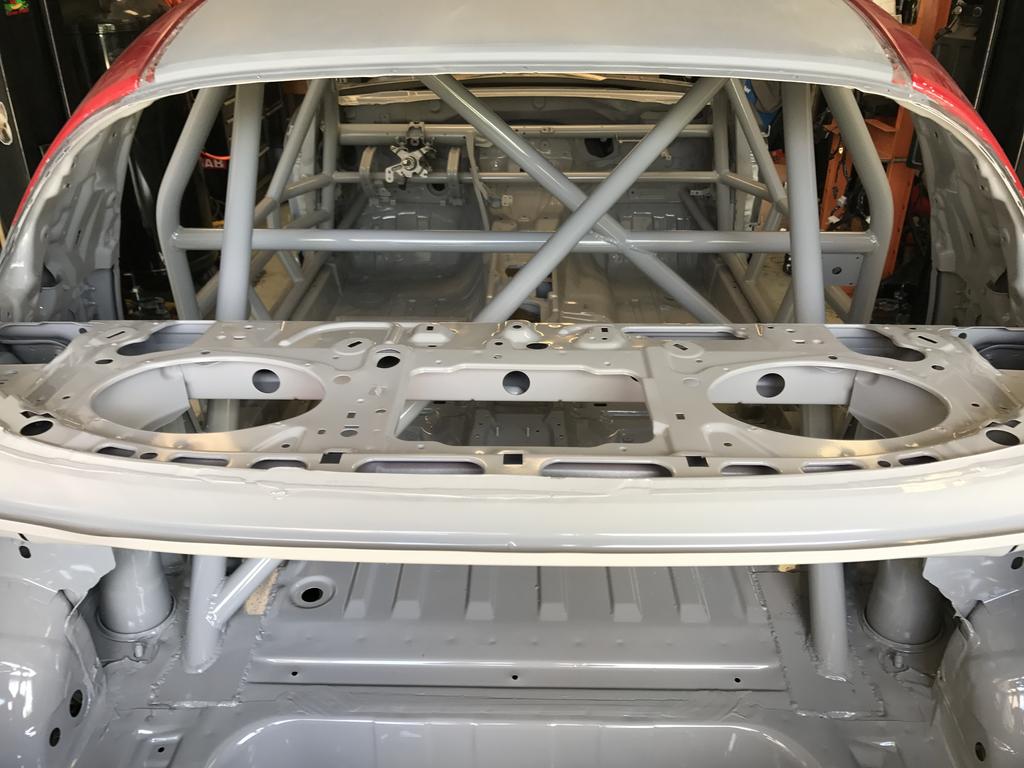
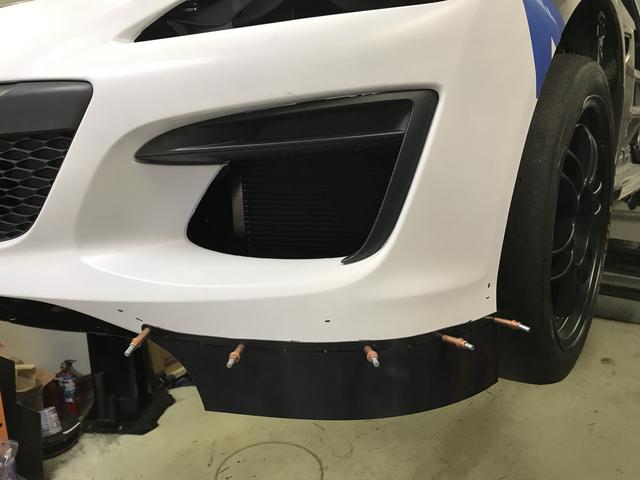
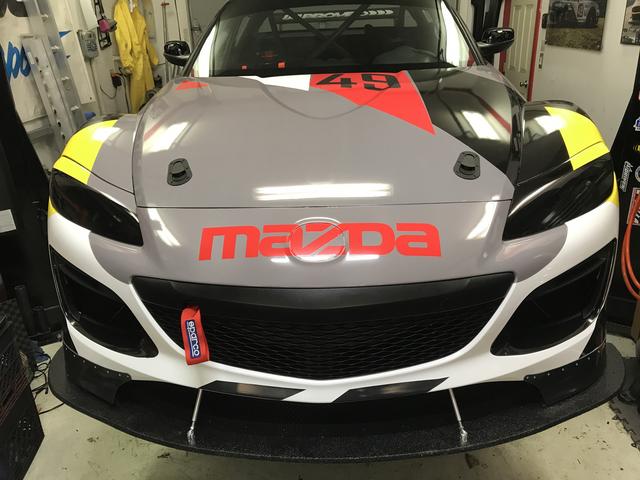
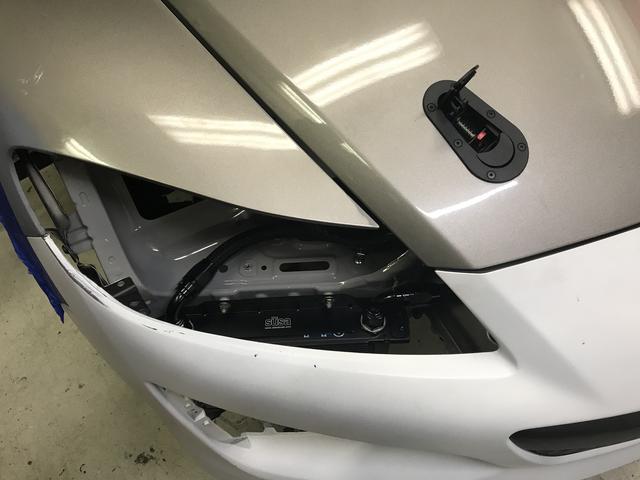
You may notice the '09 fenders on it. I bought half of a '09 roller with a friend. He needed the back half to repair a R3 and I wanted the front to convert it to an '09 front. The R3 bumper cover is dirt cheap new from Mazda so I'll be using that in the final version.
The tear-down process is long and dirty. I've got several hundred images to document everything for re-assembly but it's still not quite enough.
Someone had cut the fuse/relay box out of the harness ruining it.
You get the idea. Eventually I got it down to this
Cage building is best done with the windows out. I was able to get both out with a pull knife and eventually some creative use of fine gauge wire.
Sound deadening needs to come out too which is also messy. Dry ice helps a lot.
I build the cage in my last SM car but it's a time consuming process with a manual bender and notcher so I decided to let my friend Trevor do this one (he does it for a living).
Here's the cage being fabricated. Notice the condition of the seat, I'll address that later.
I'm campaigning for a weight reduction for this car in STL so I asked Trevor to build a legal cage but not overkill to save weight. This car had a sunroof which must go. I had the option of riveting a piece of steel (must be the same material as the top) over it or cutting the top off the Anderson car and moving it over. We went with the Anderson car top. It was not as difficult as it sounds. I could have bought a new slick top from Mazda for around $250 I think.
My friend Vic and his dad Glen repair race cars for a living. I had him paint it a dove grey color for me inside and out, including engine bay, trunk, and door jambs. The car will eventually be wrapped.
Back from cage and paint.
You may notice the '09 fenders on it. I bought half of a '09 roller with a friend. He needed the back half to repair a R3 and I wanted the front to convert it to an '09 front. The R3 bumper cover is dirt cheap new from Mazda so I'll be using that in the final version.
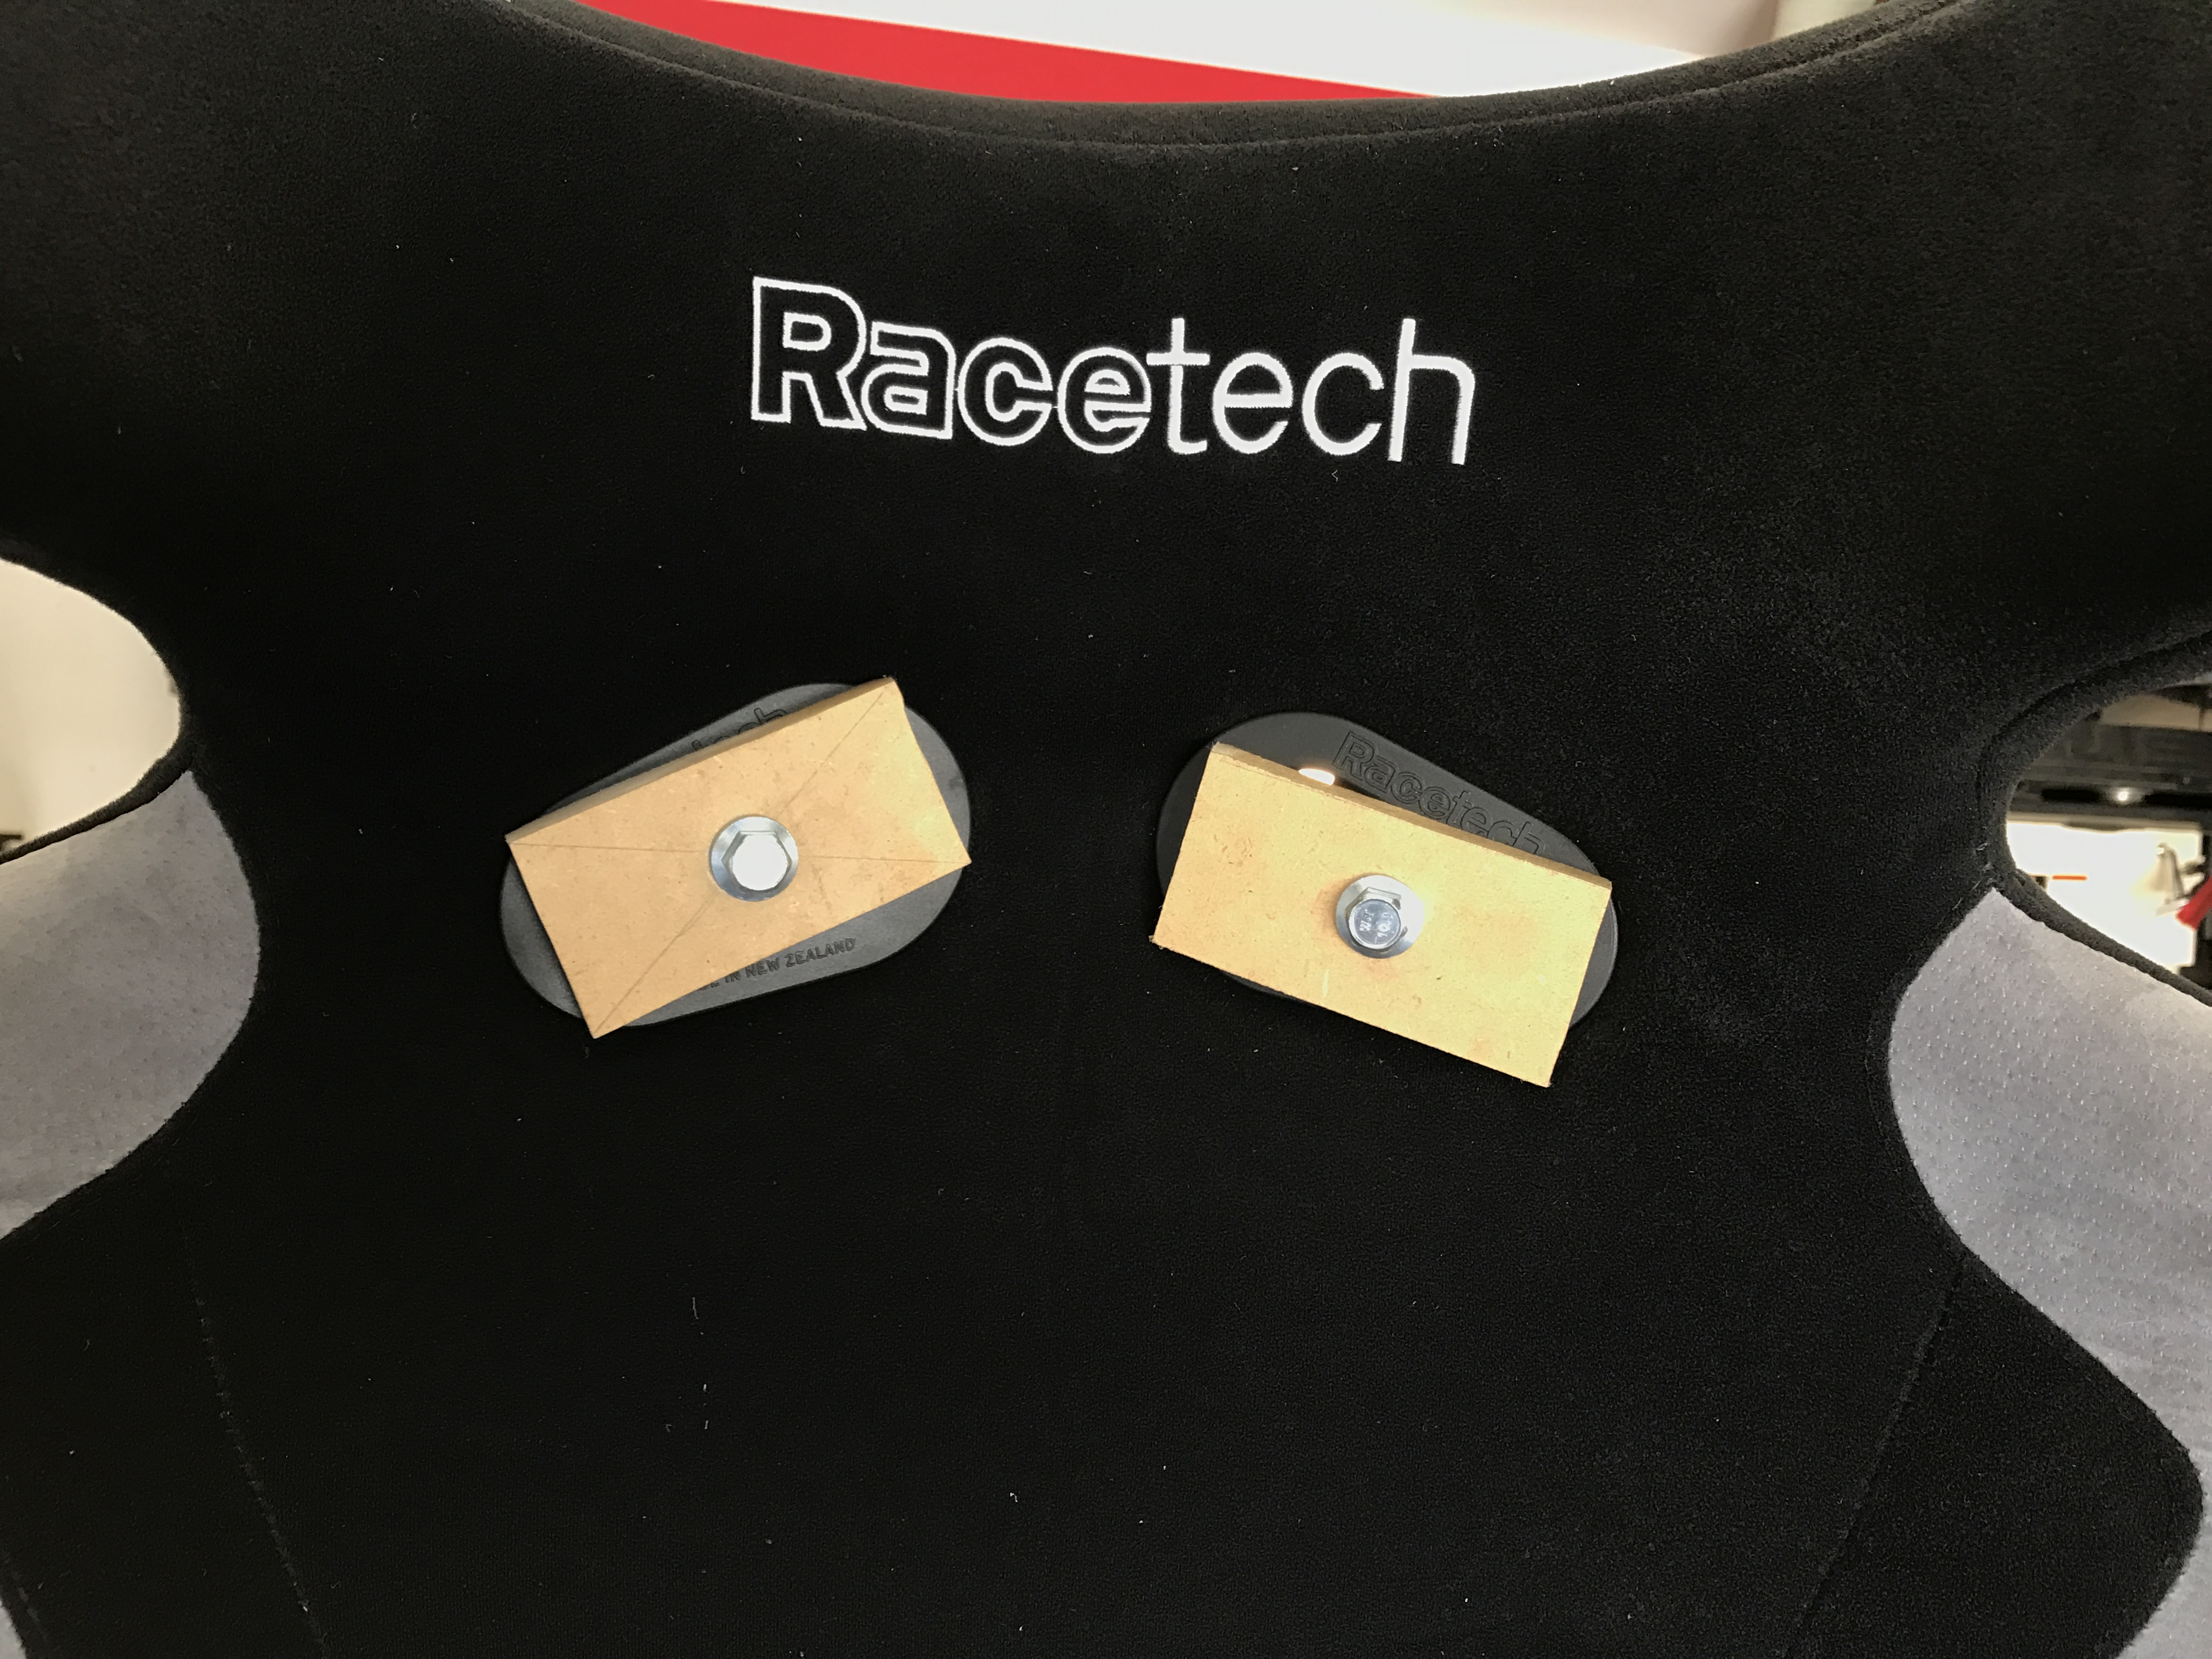
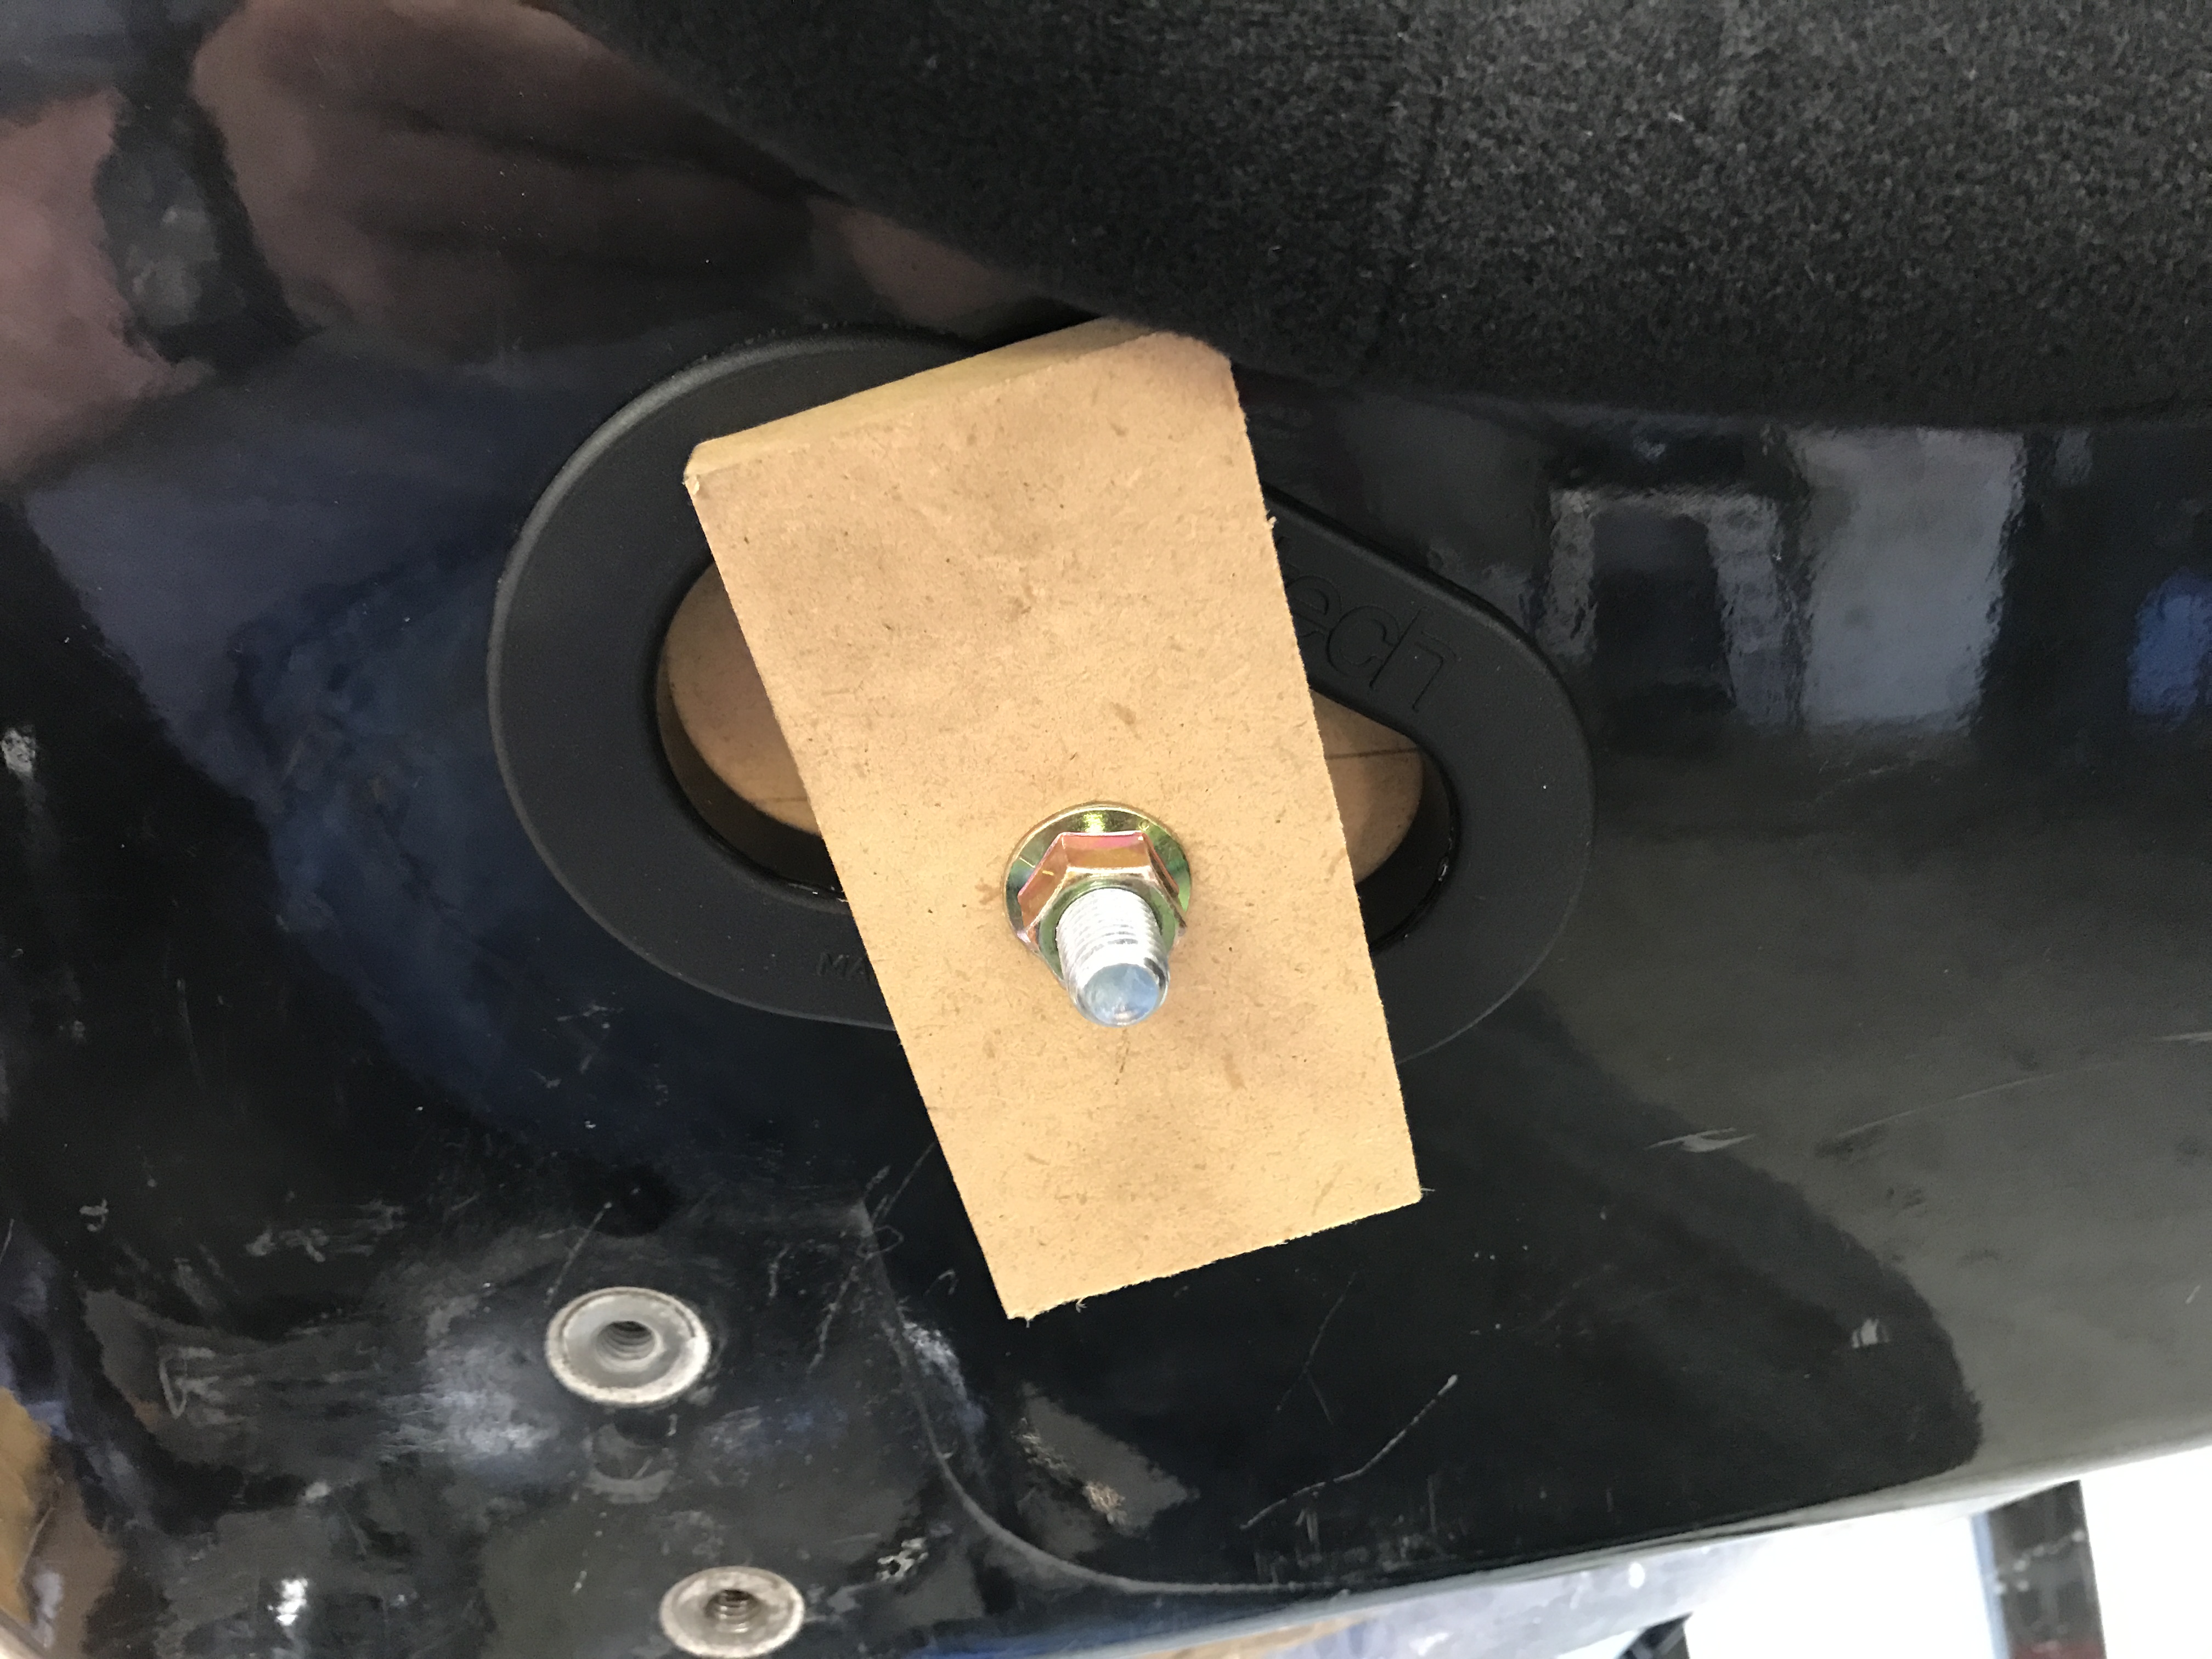
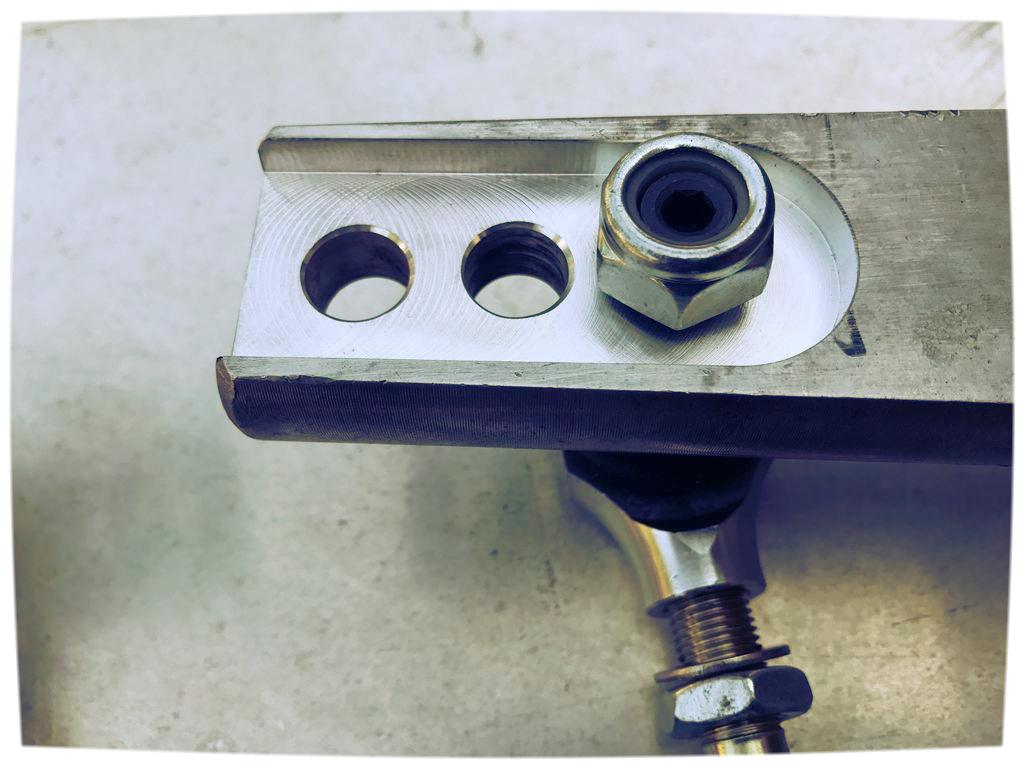
The RaceTech 4119 seat above was in pretty bad shape but it was structurally sound and in date so I looked into re-uphostering it. I got a new cover from RaceTech which is a one-piece cover with a tension cable around the perimeter. it is held in place with upholstery glue. This also gave me the option of adding high density foam in areas to make it fit me better. It took the better part of a day to do but I'm happy with the result. The block clamps are to hold the belt guides in place - they are two-piece and must be glued together.
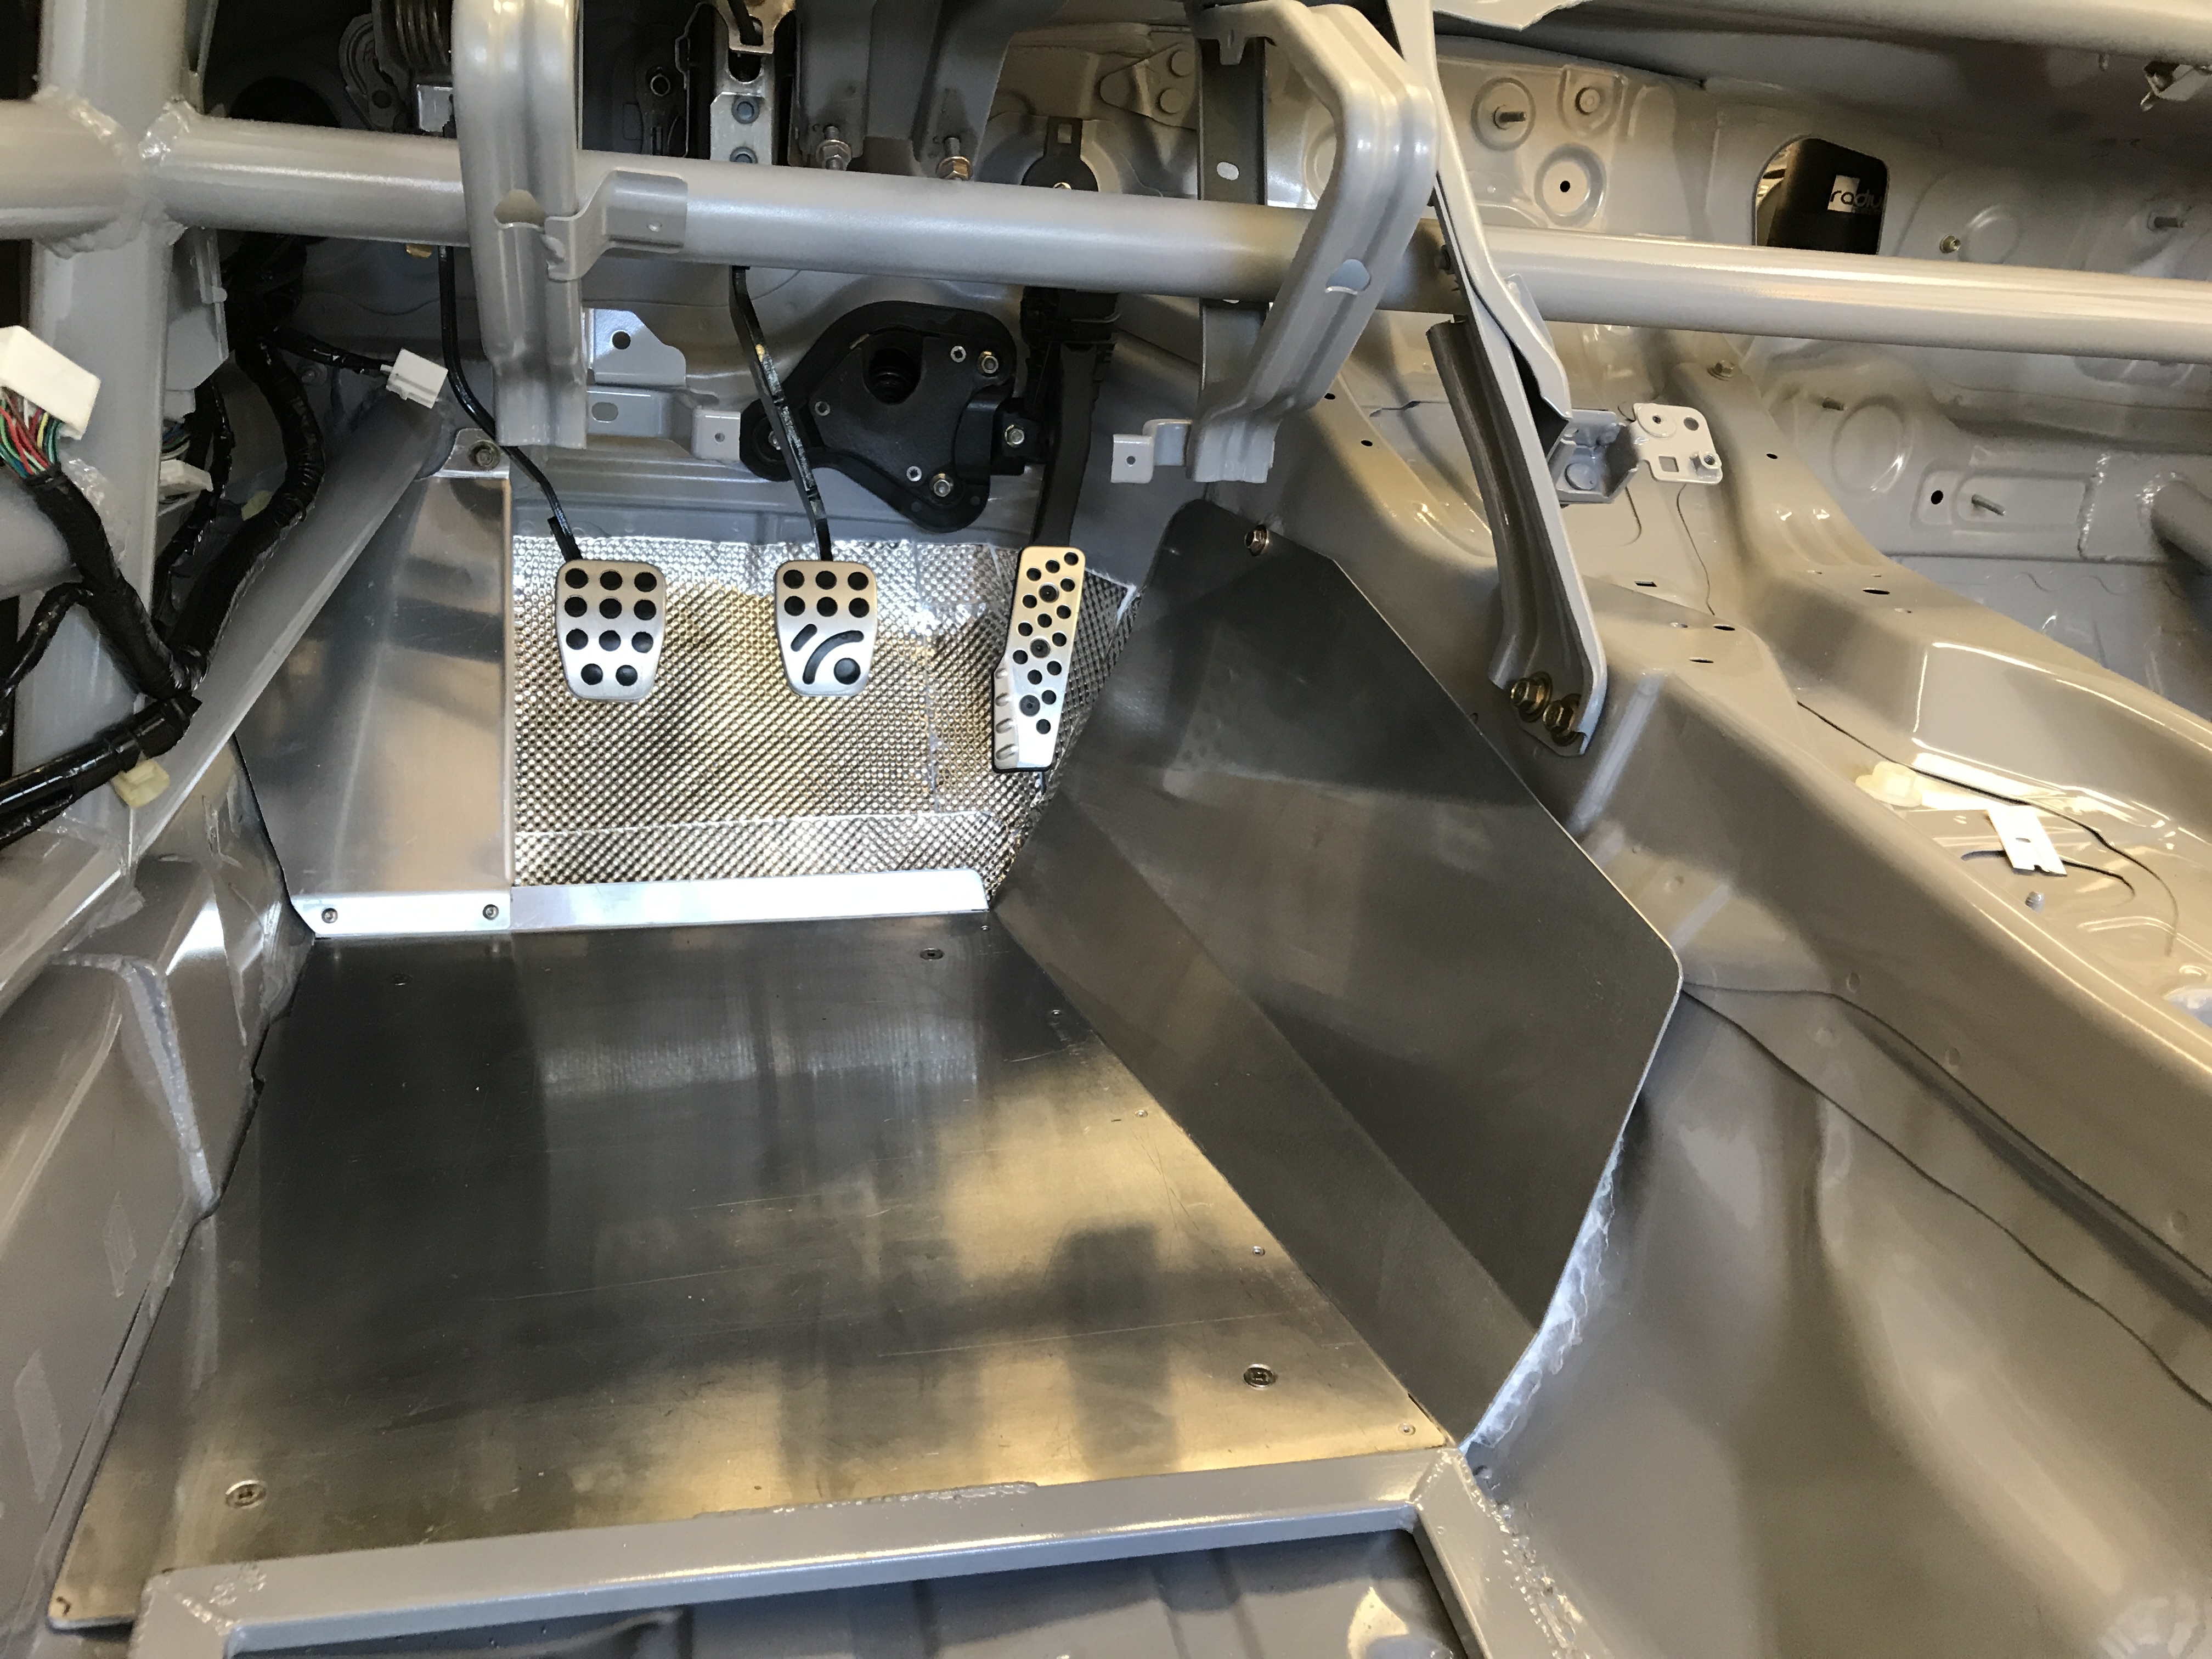
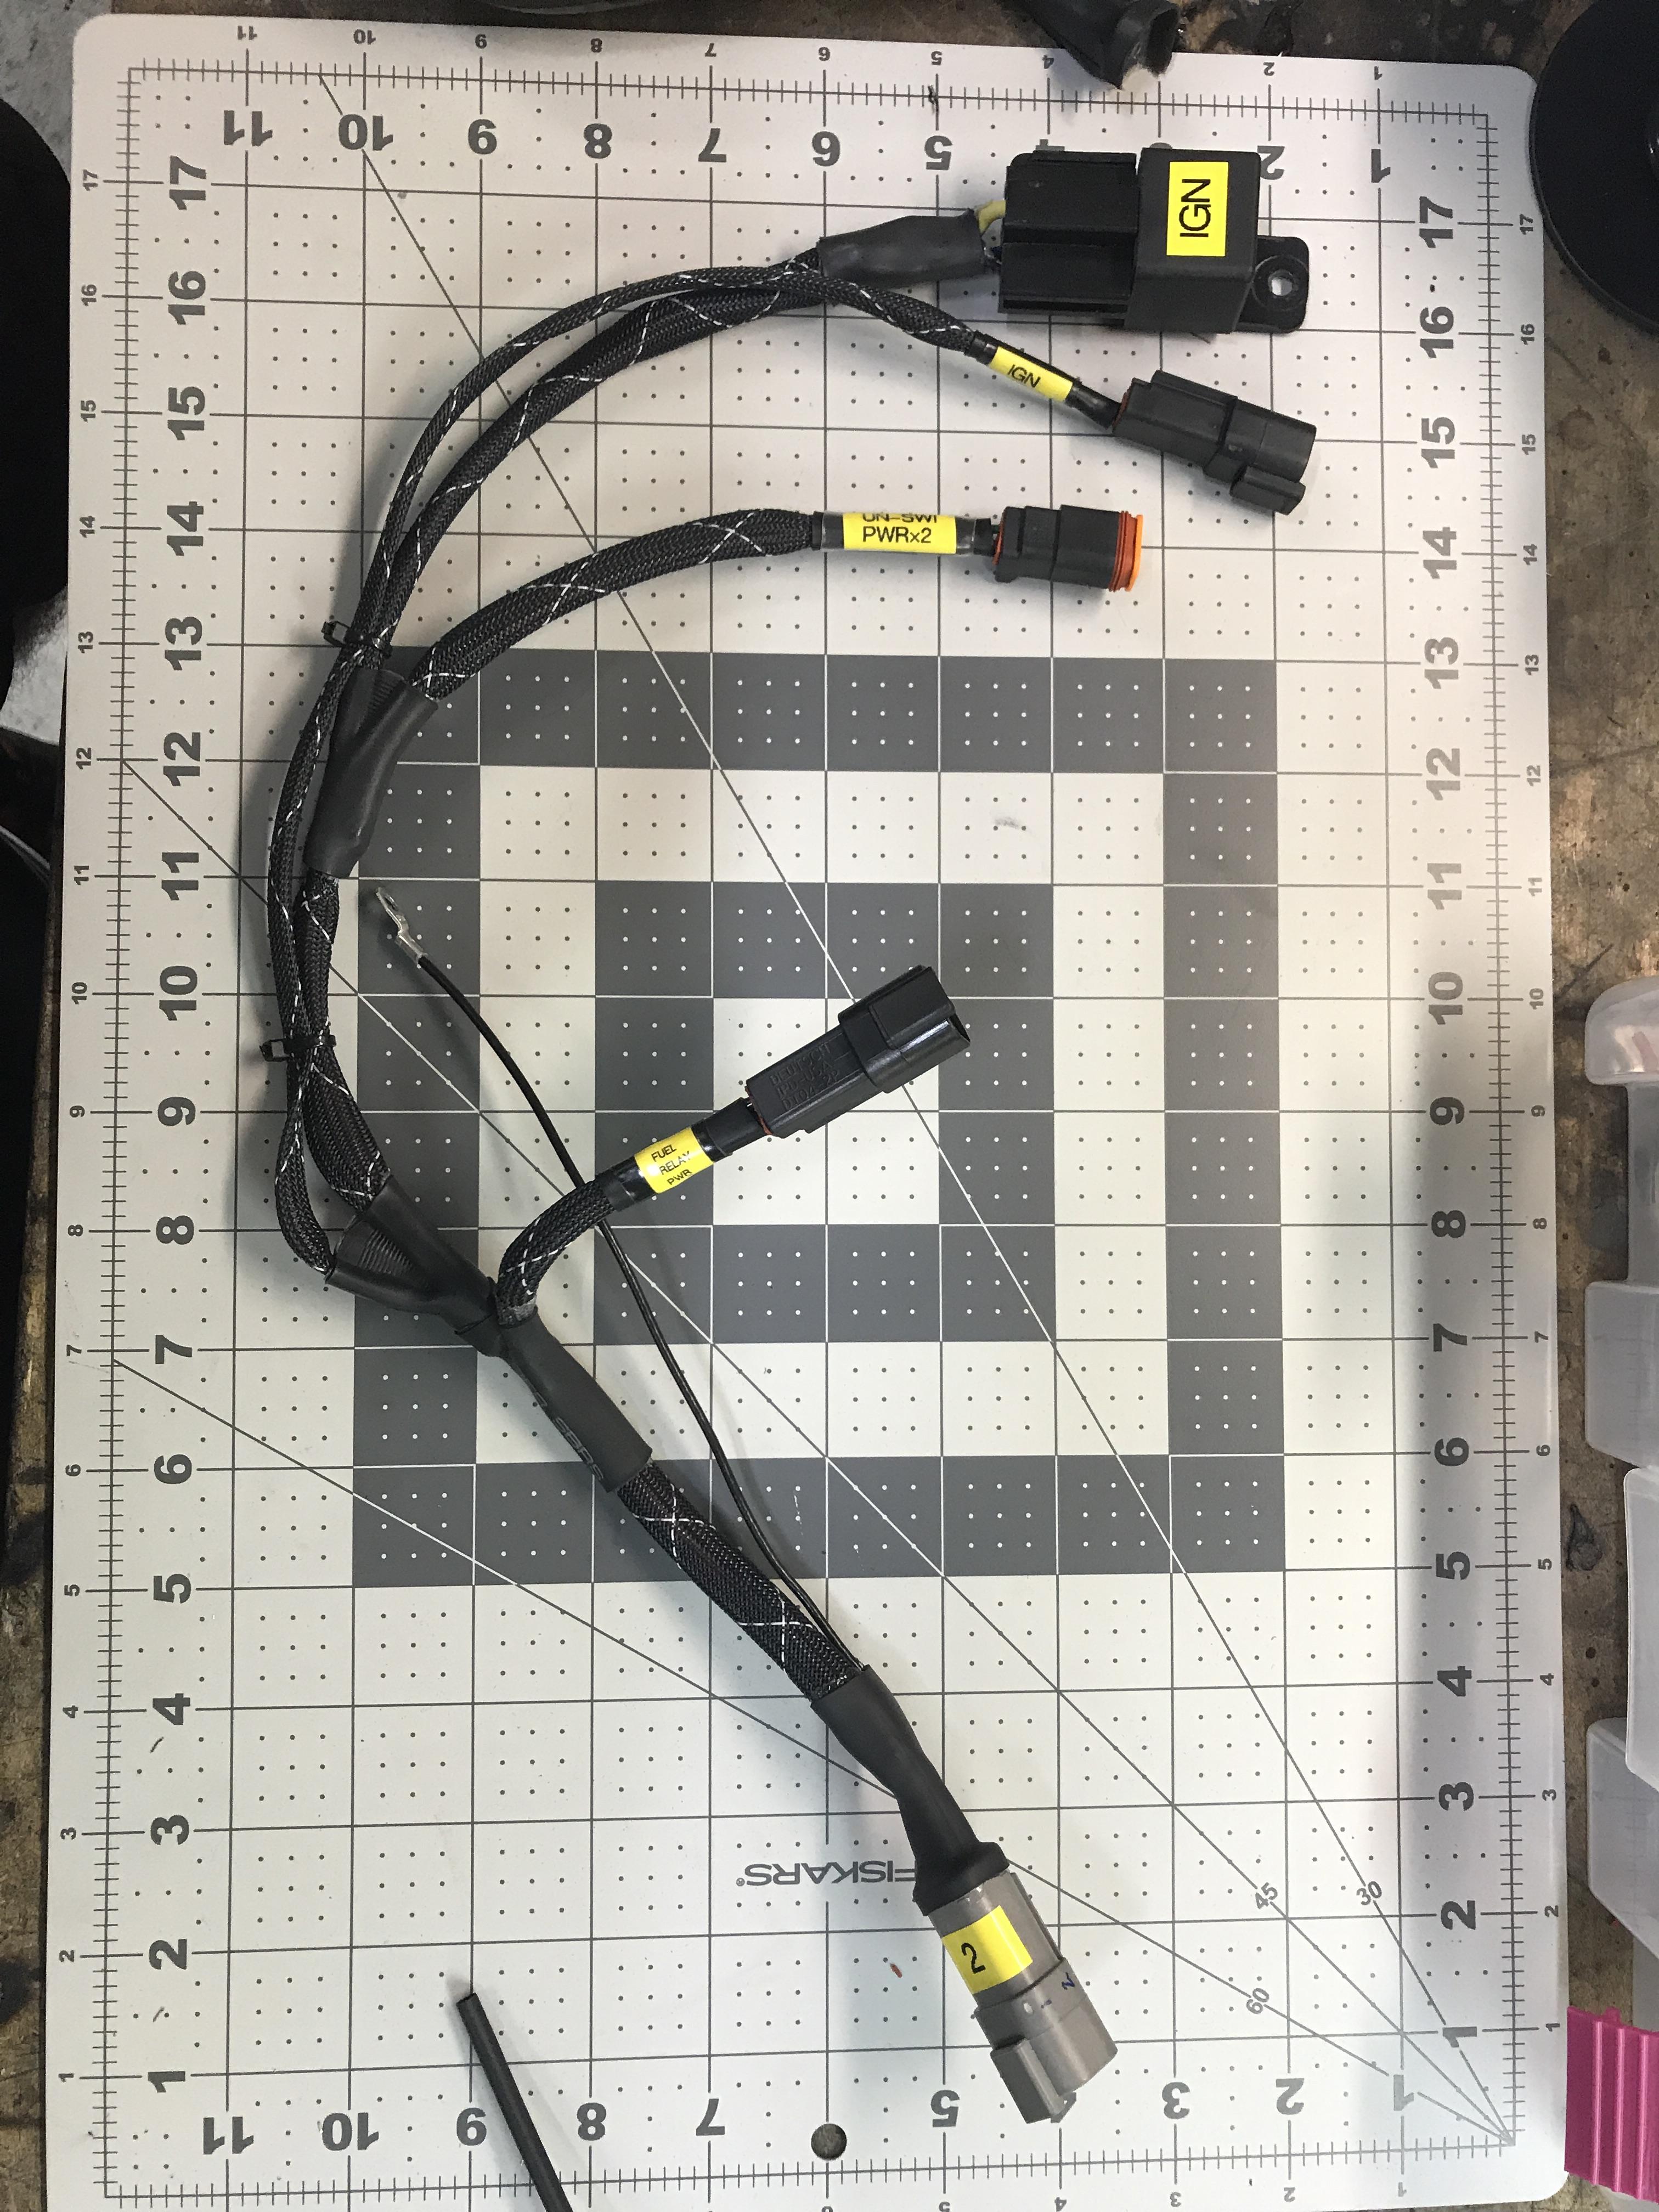
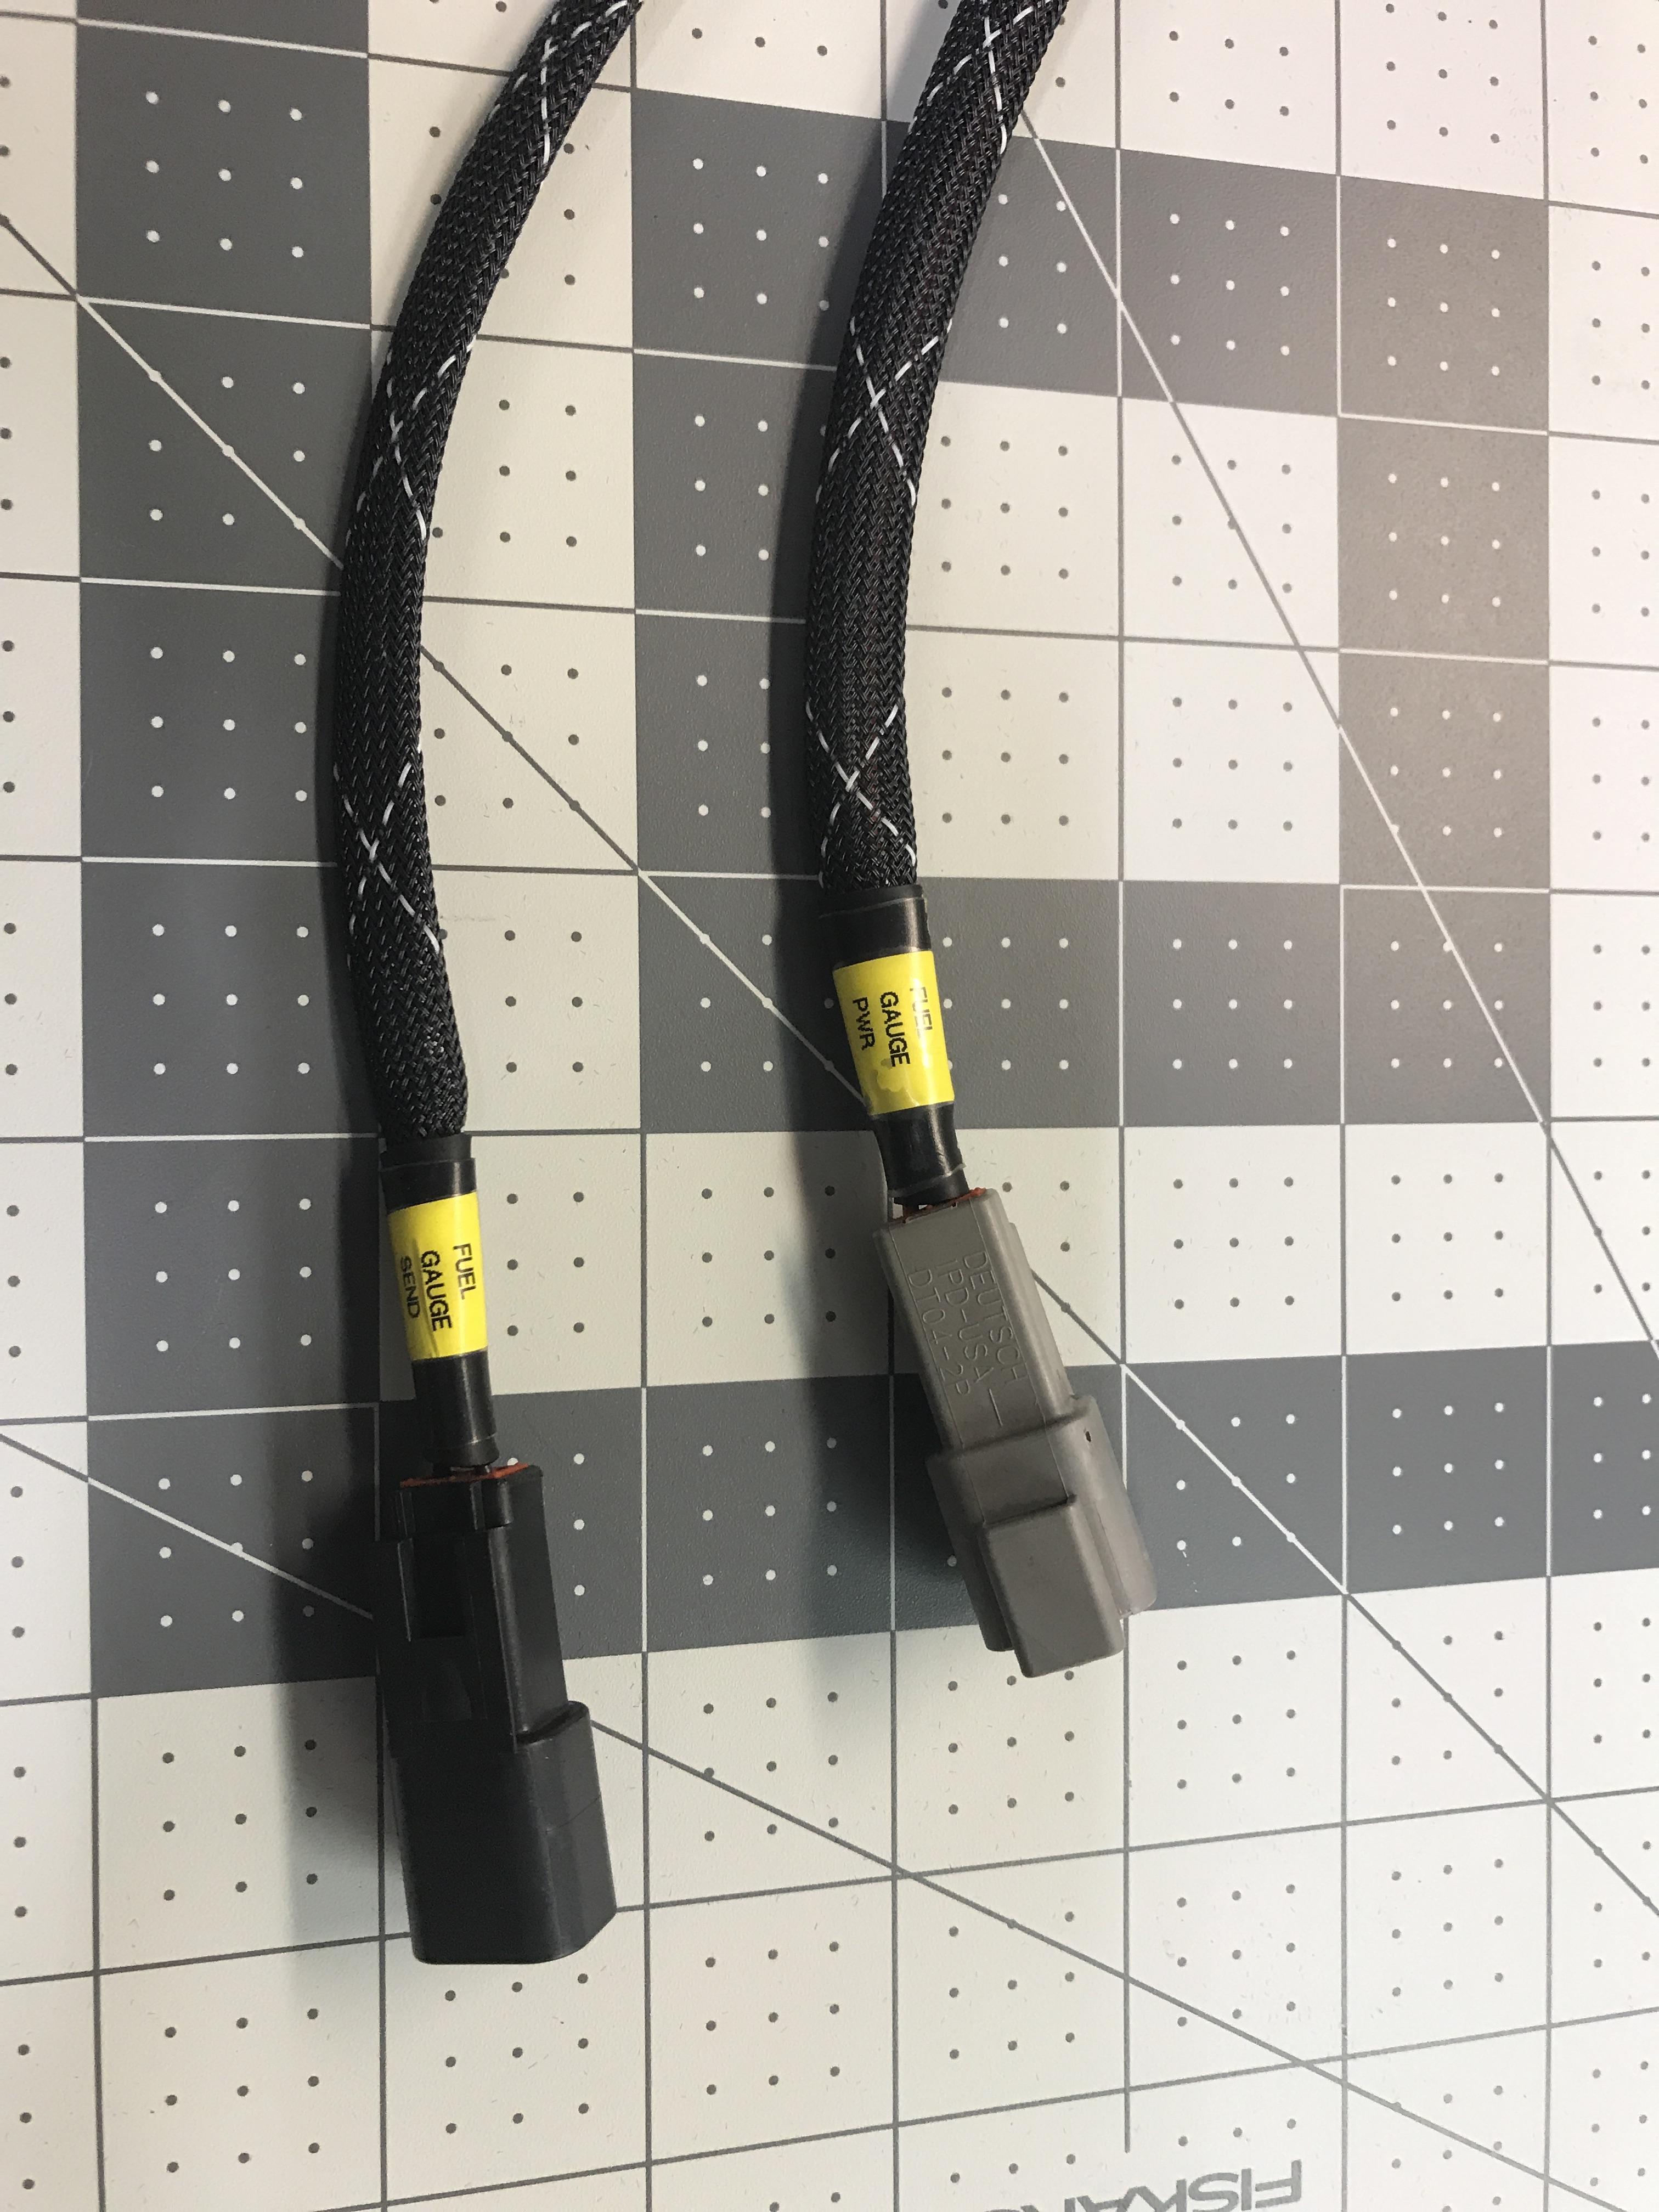
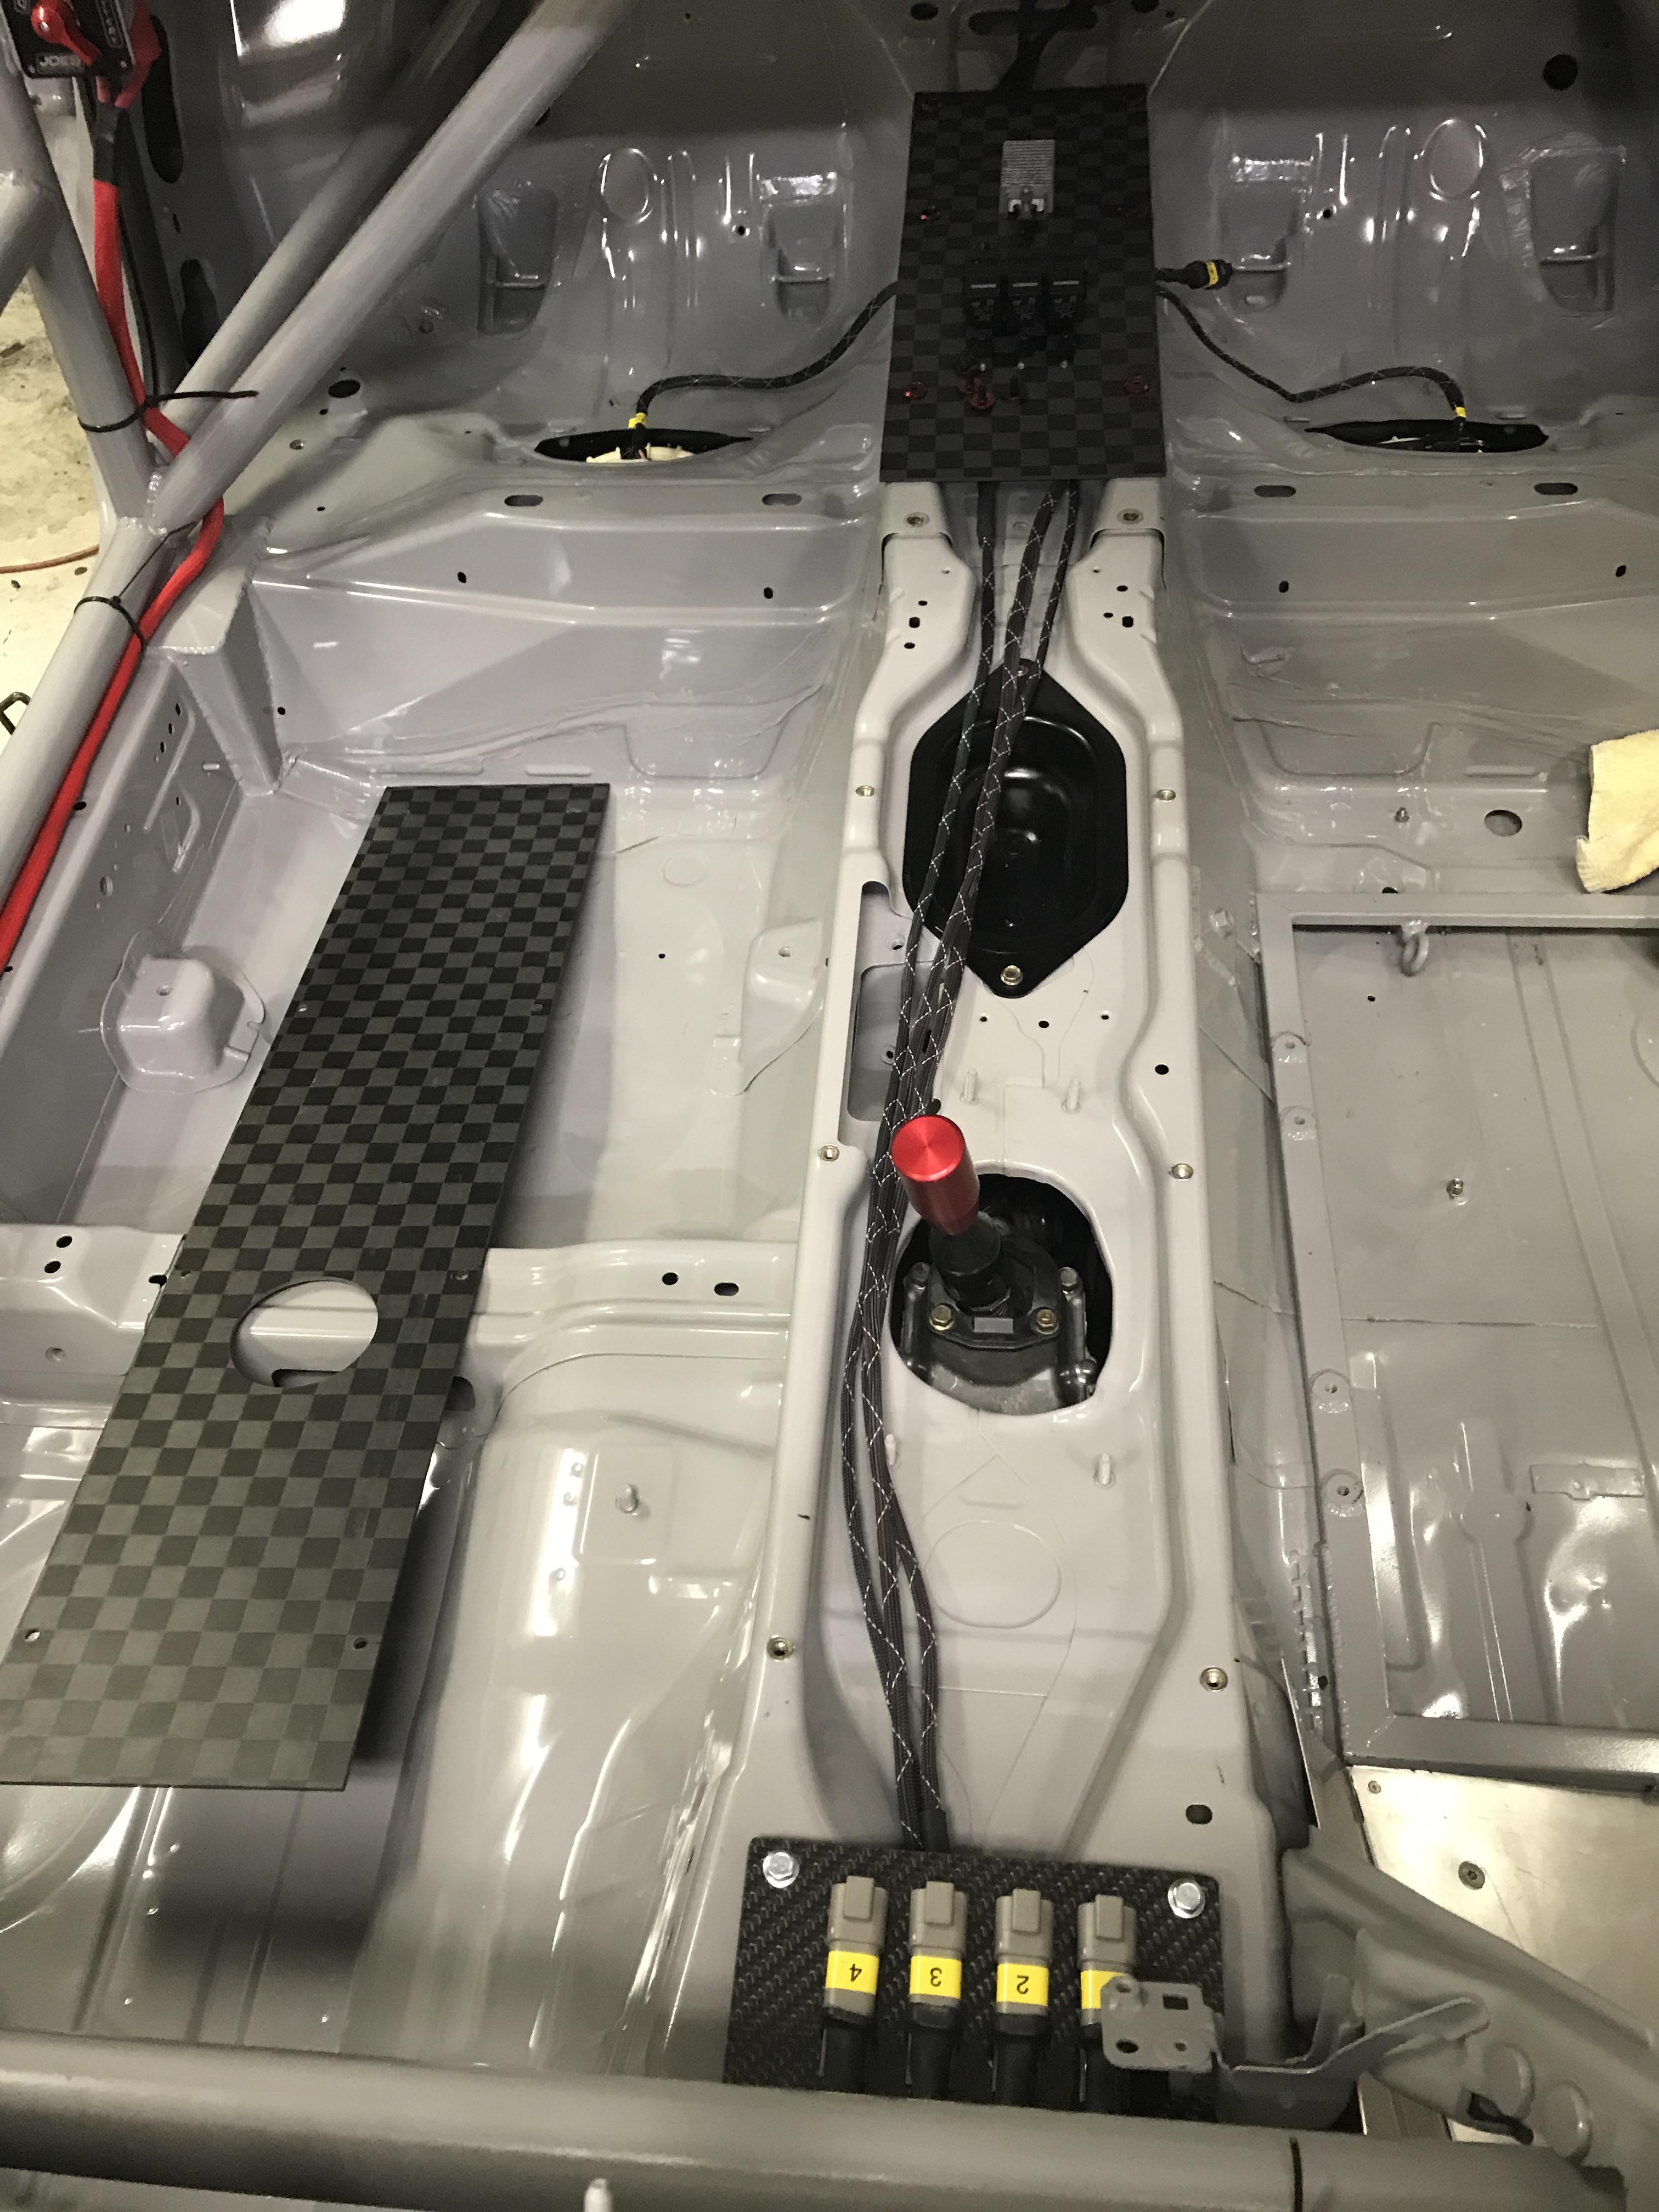
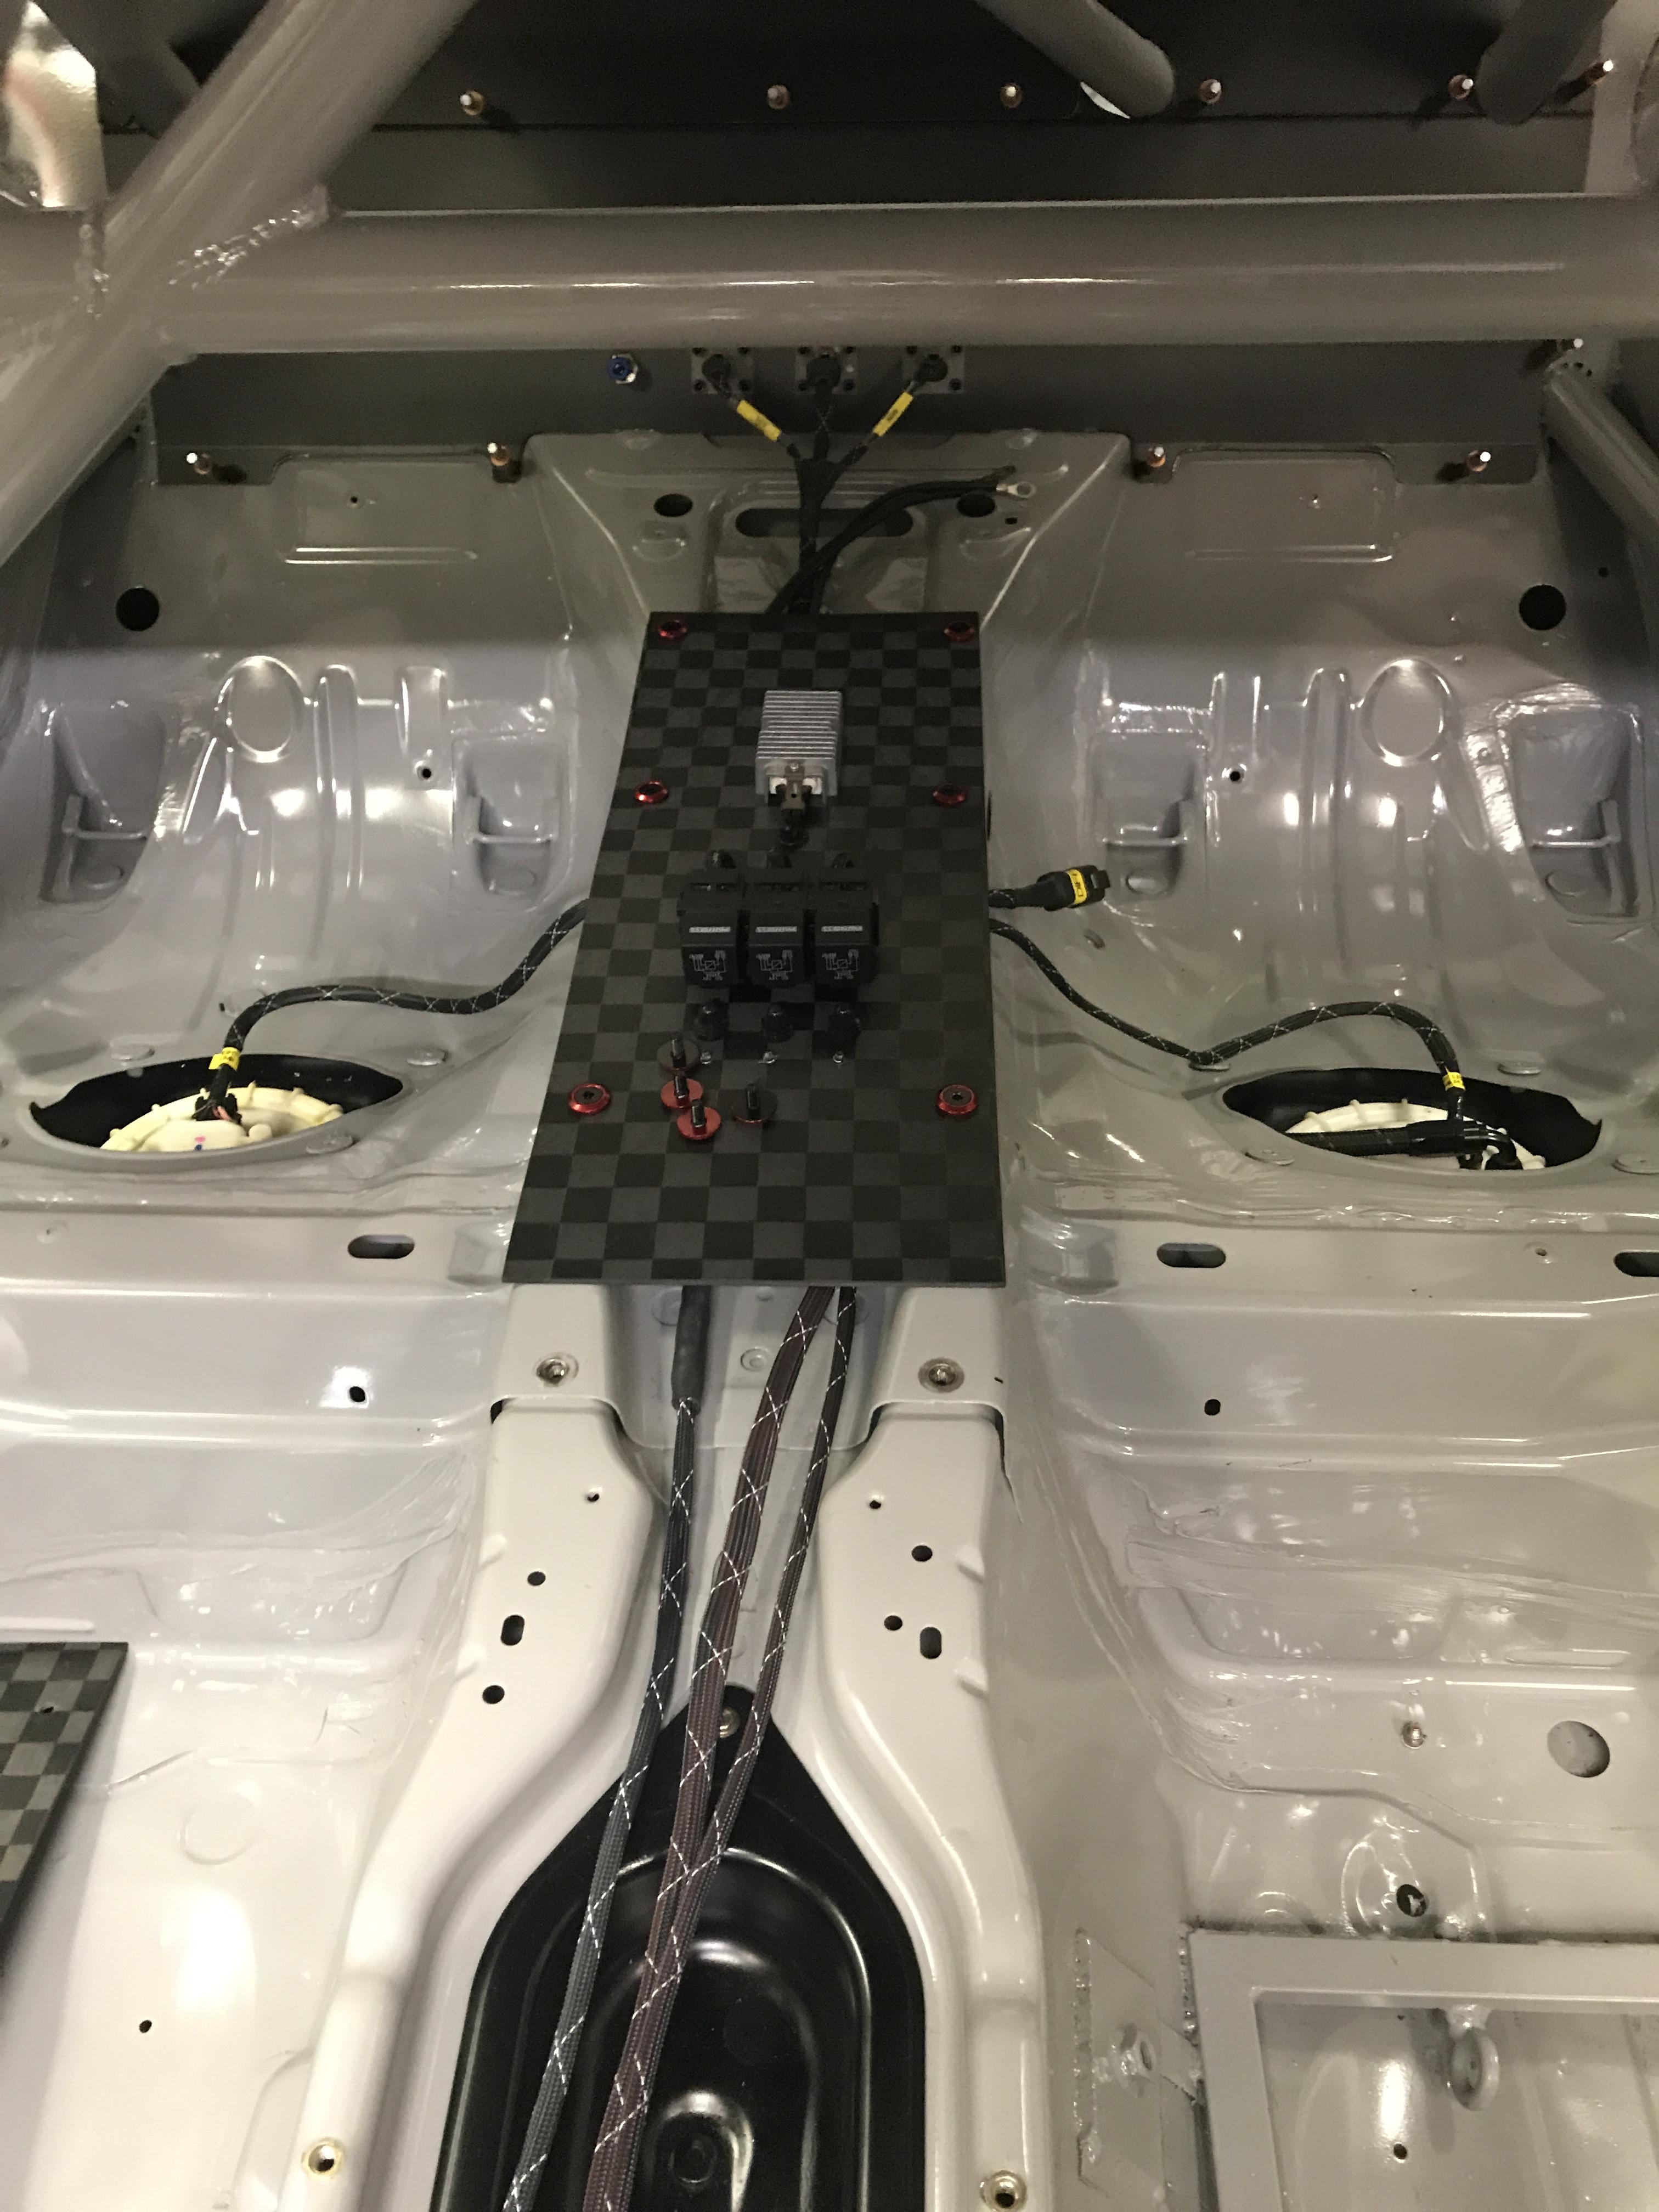
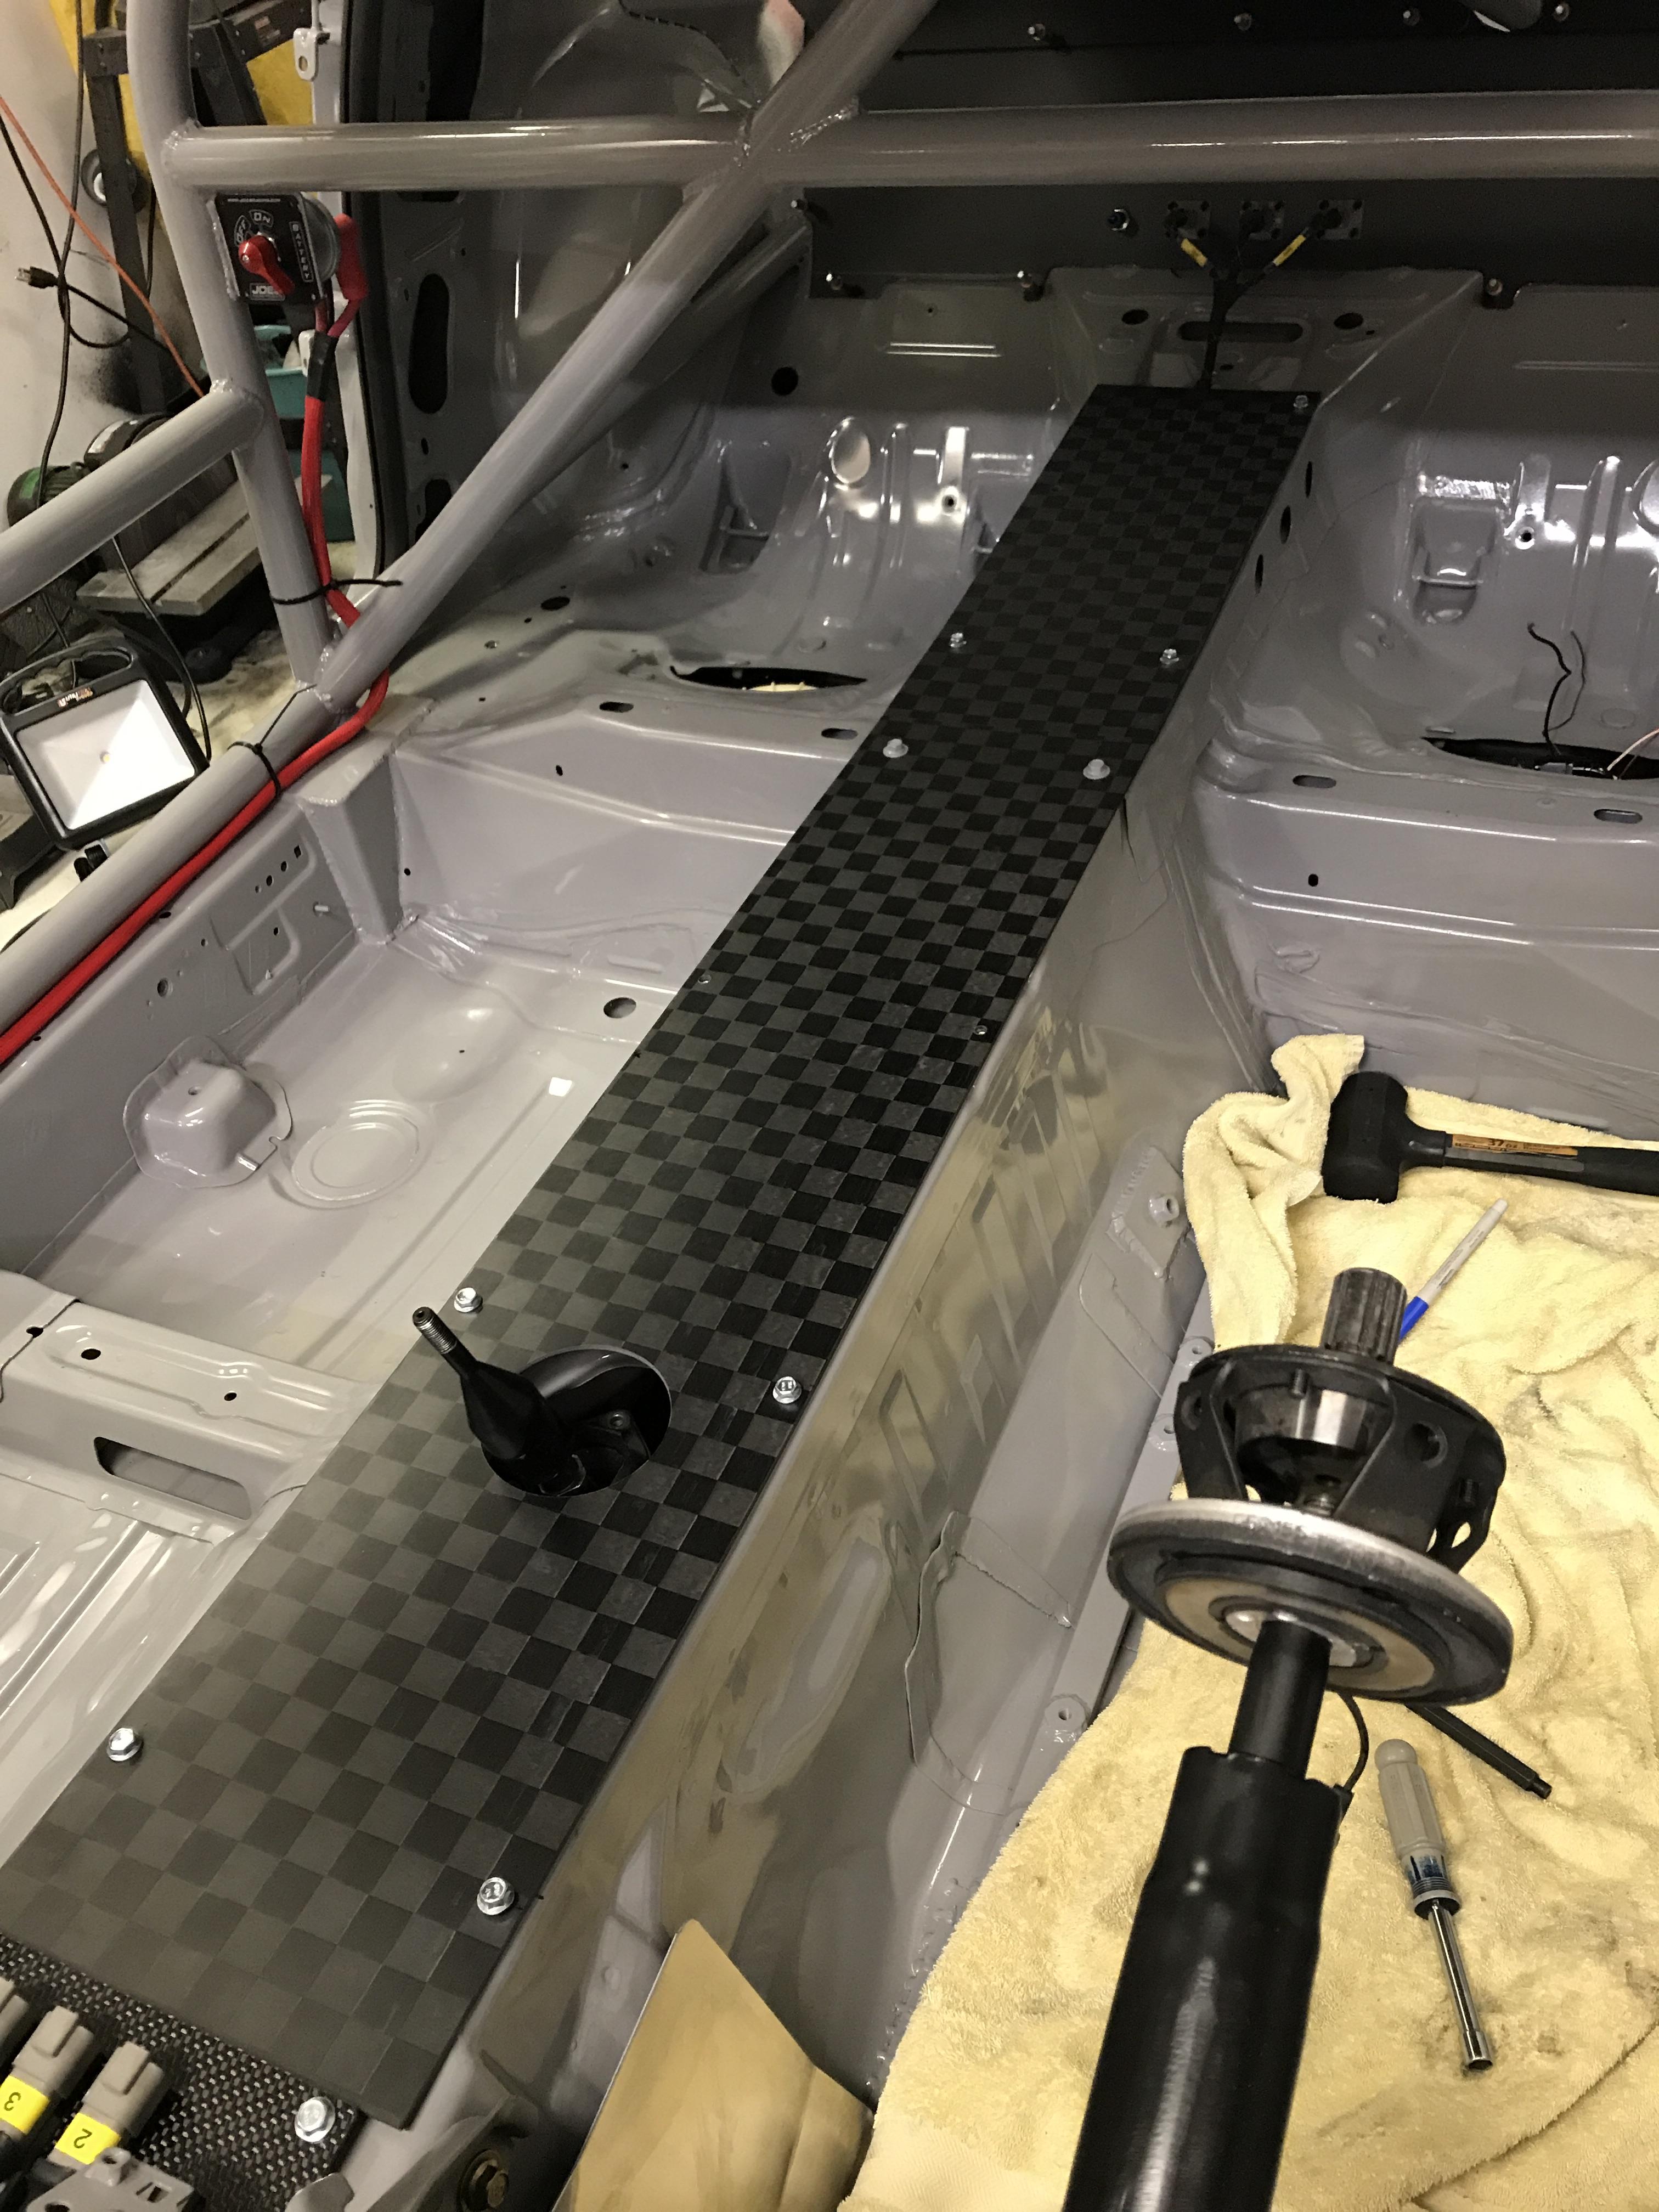
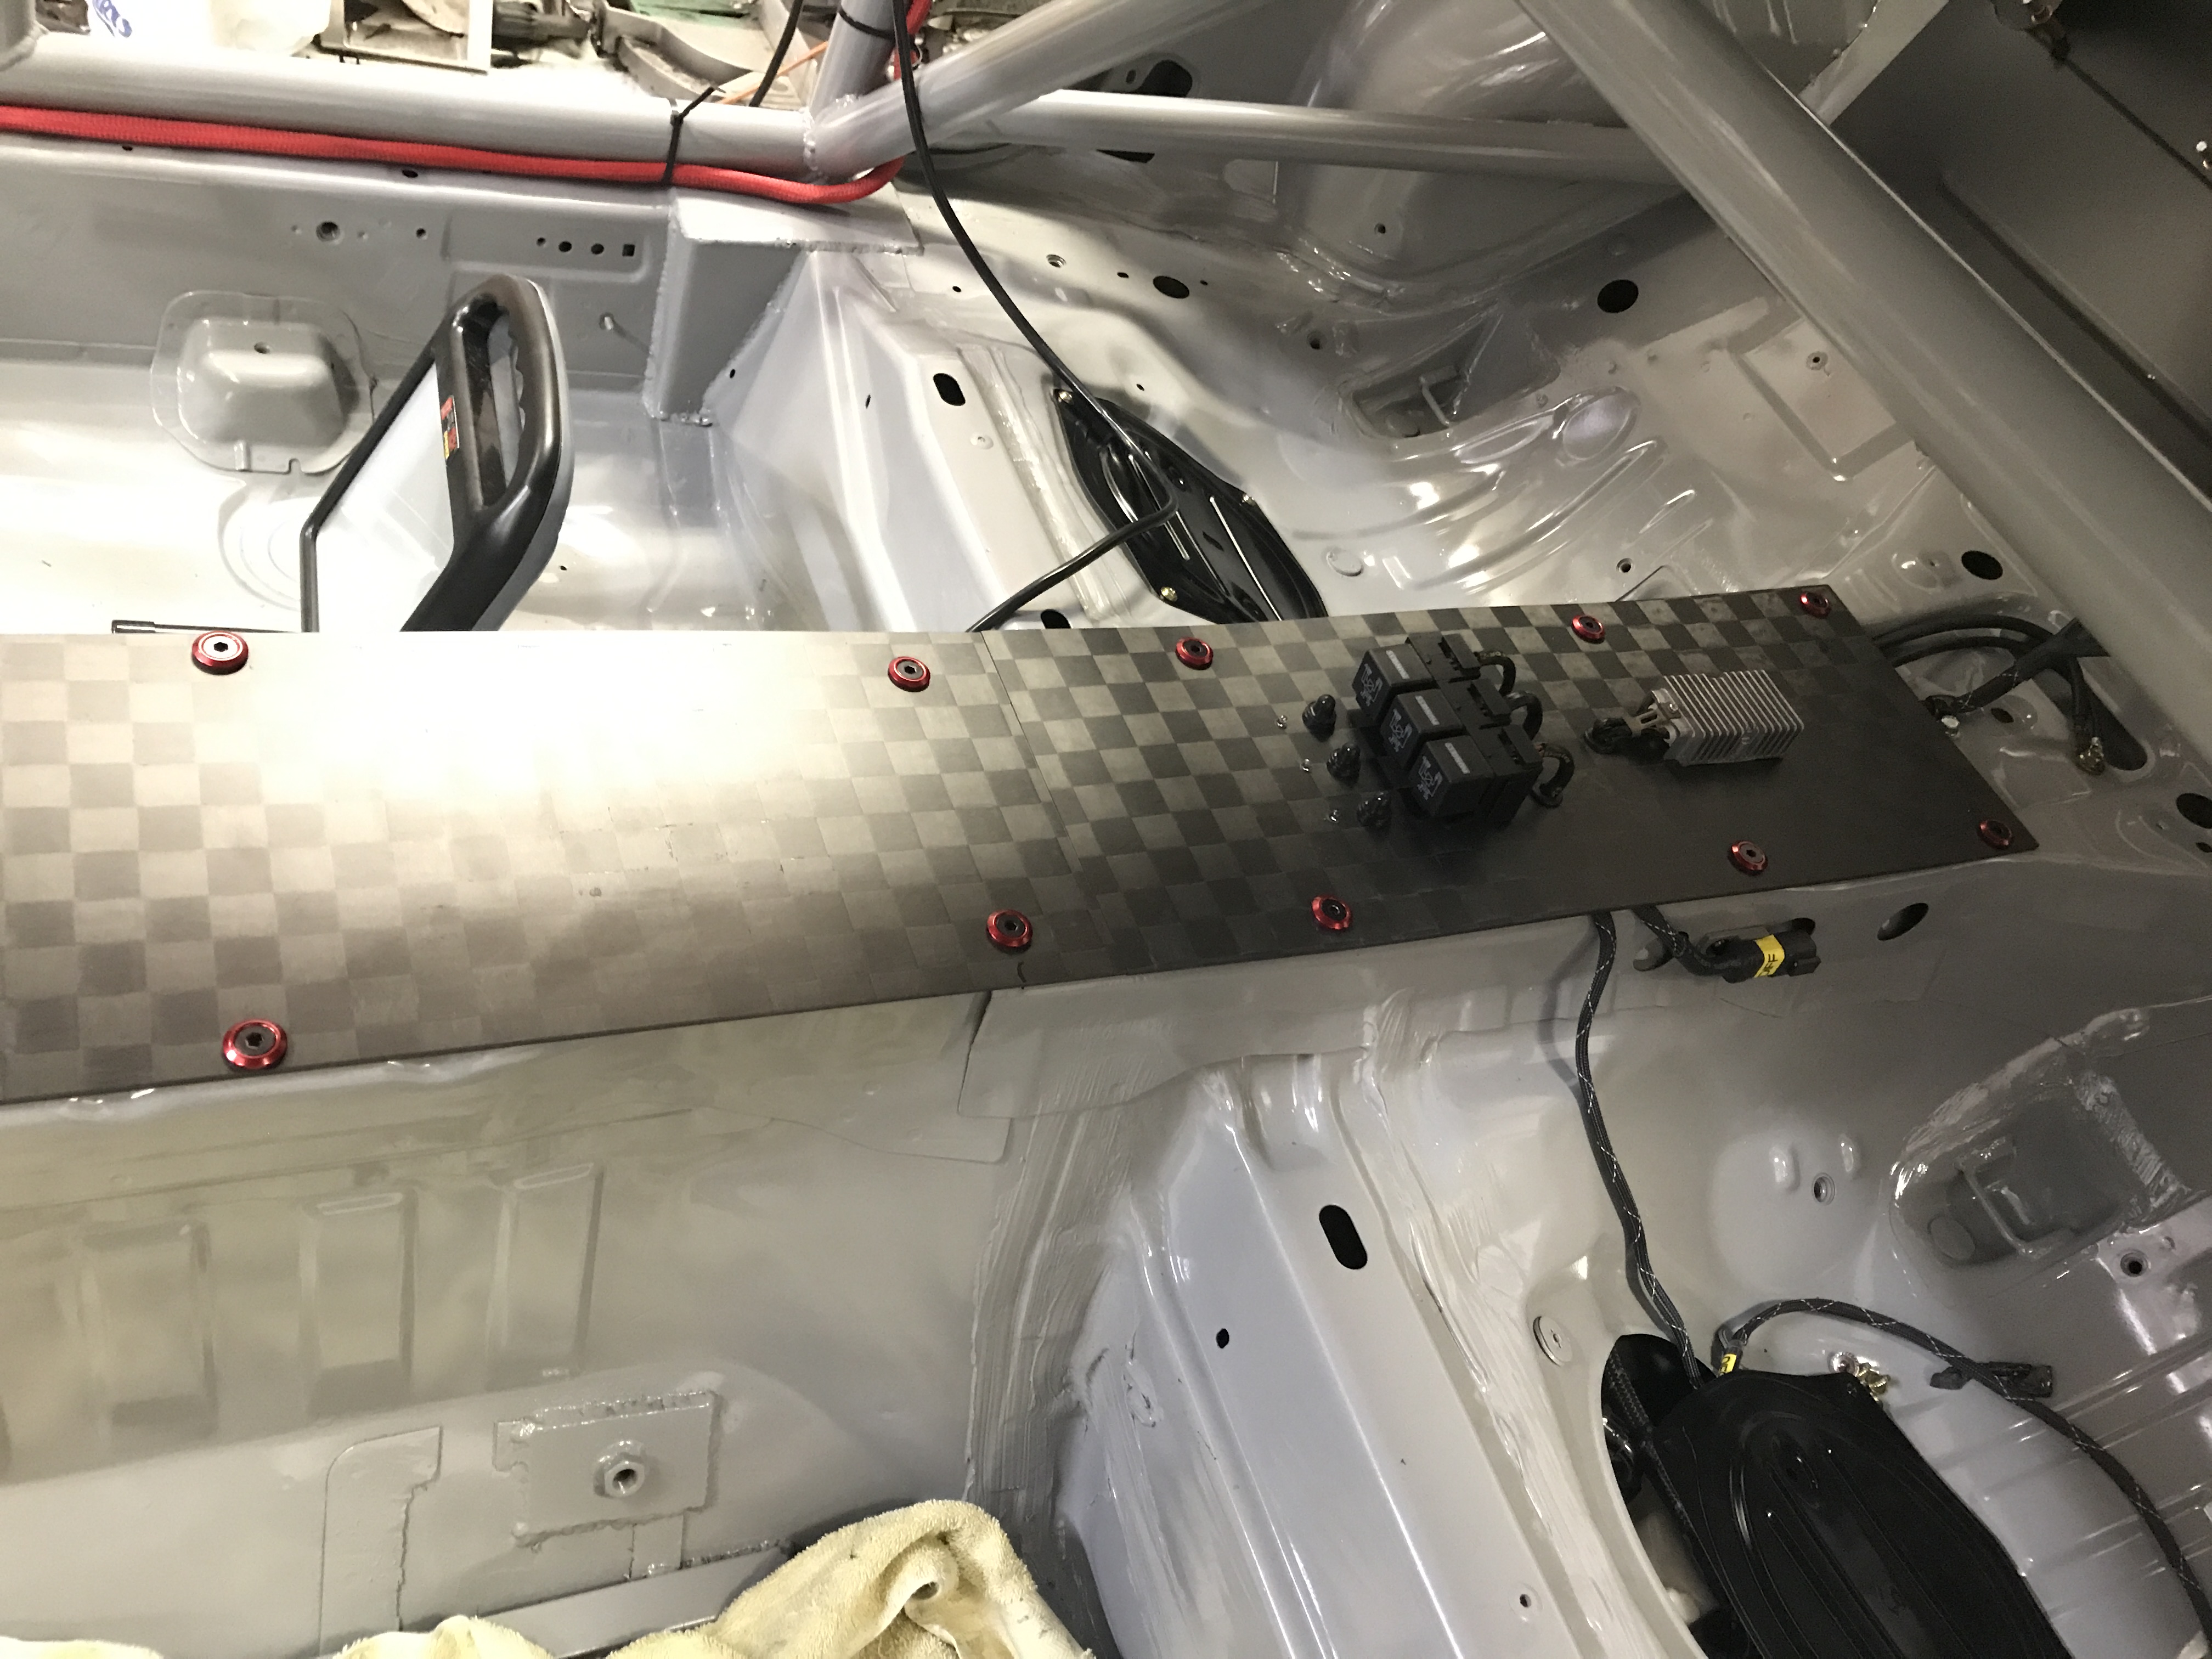
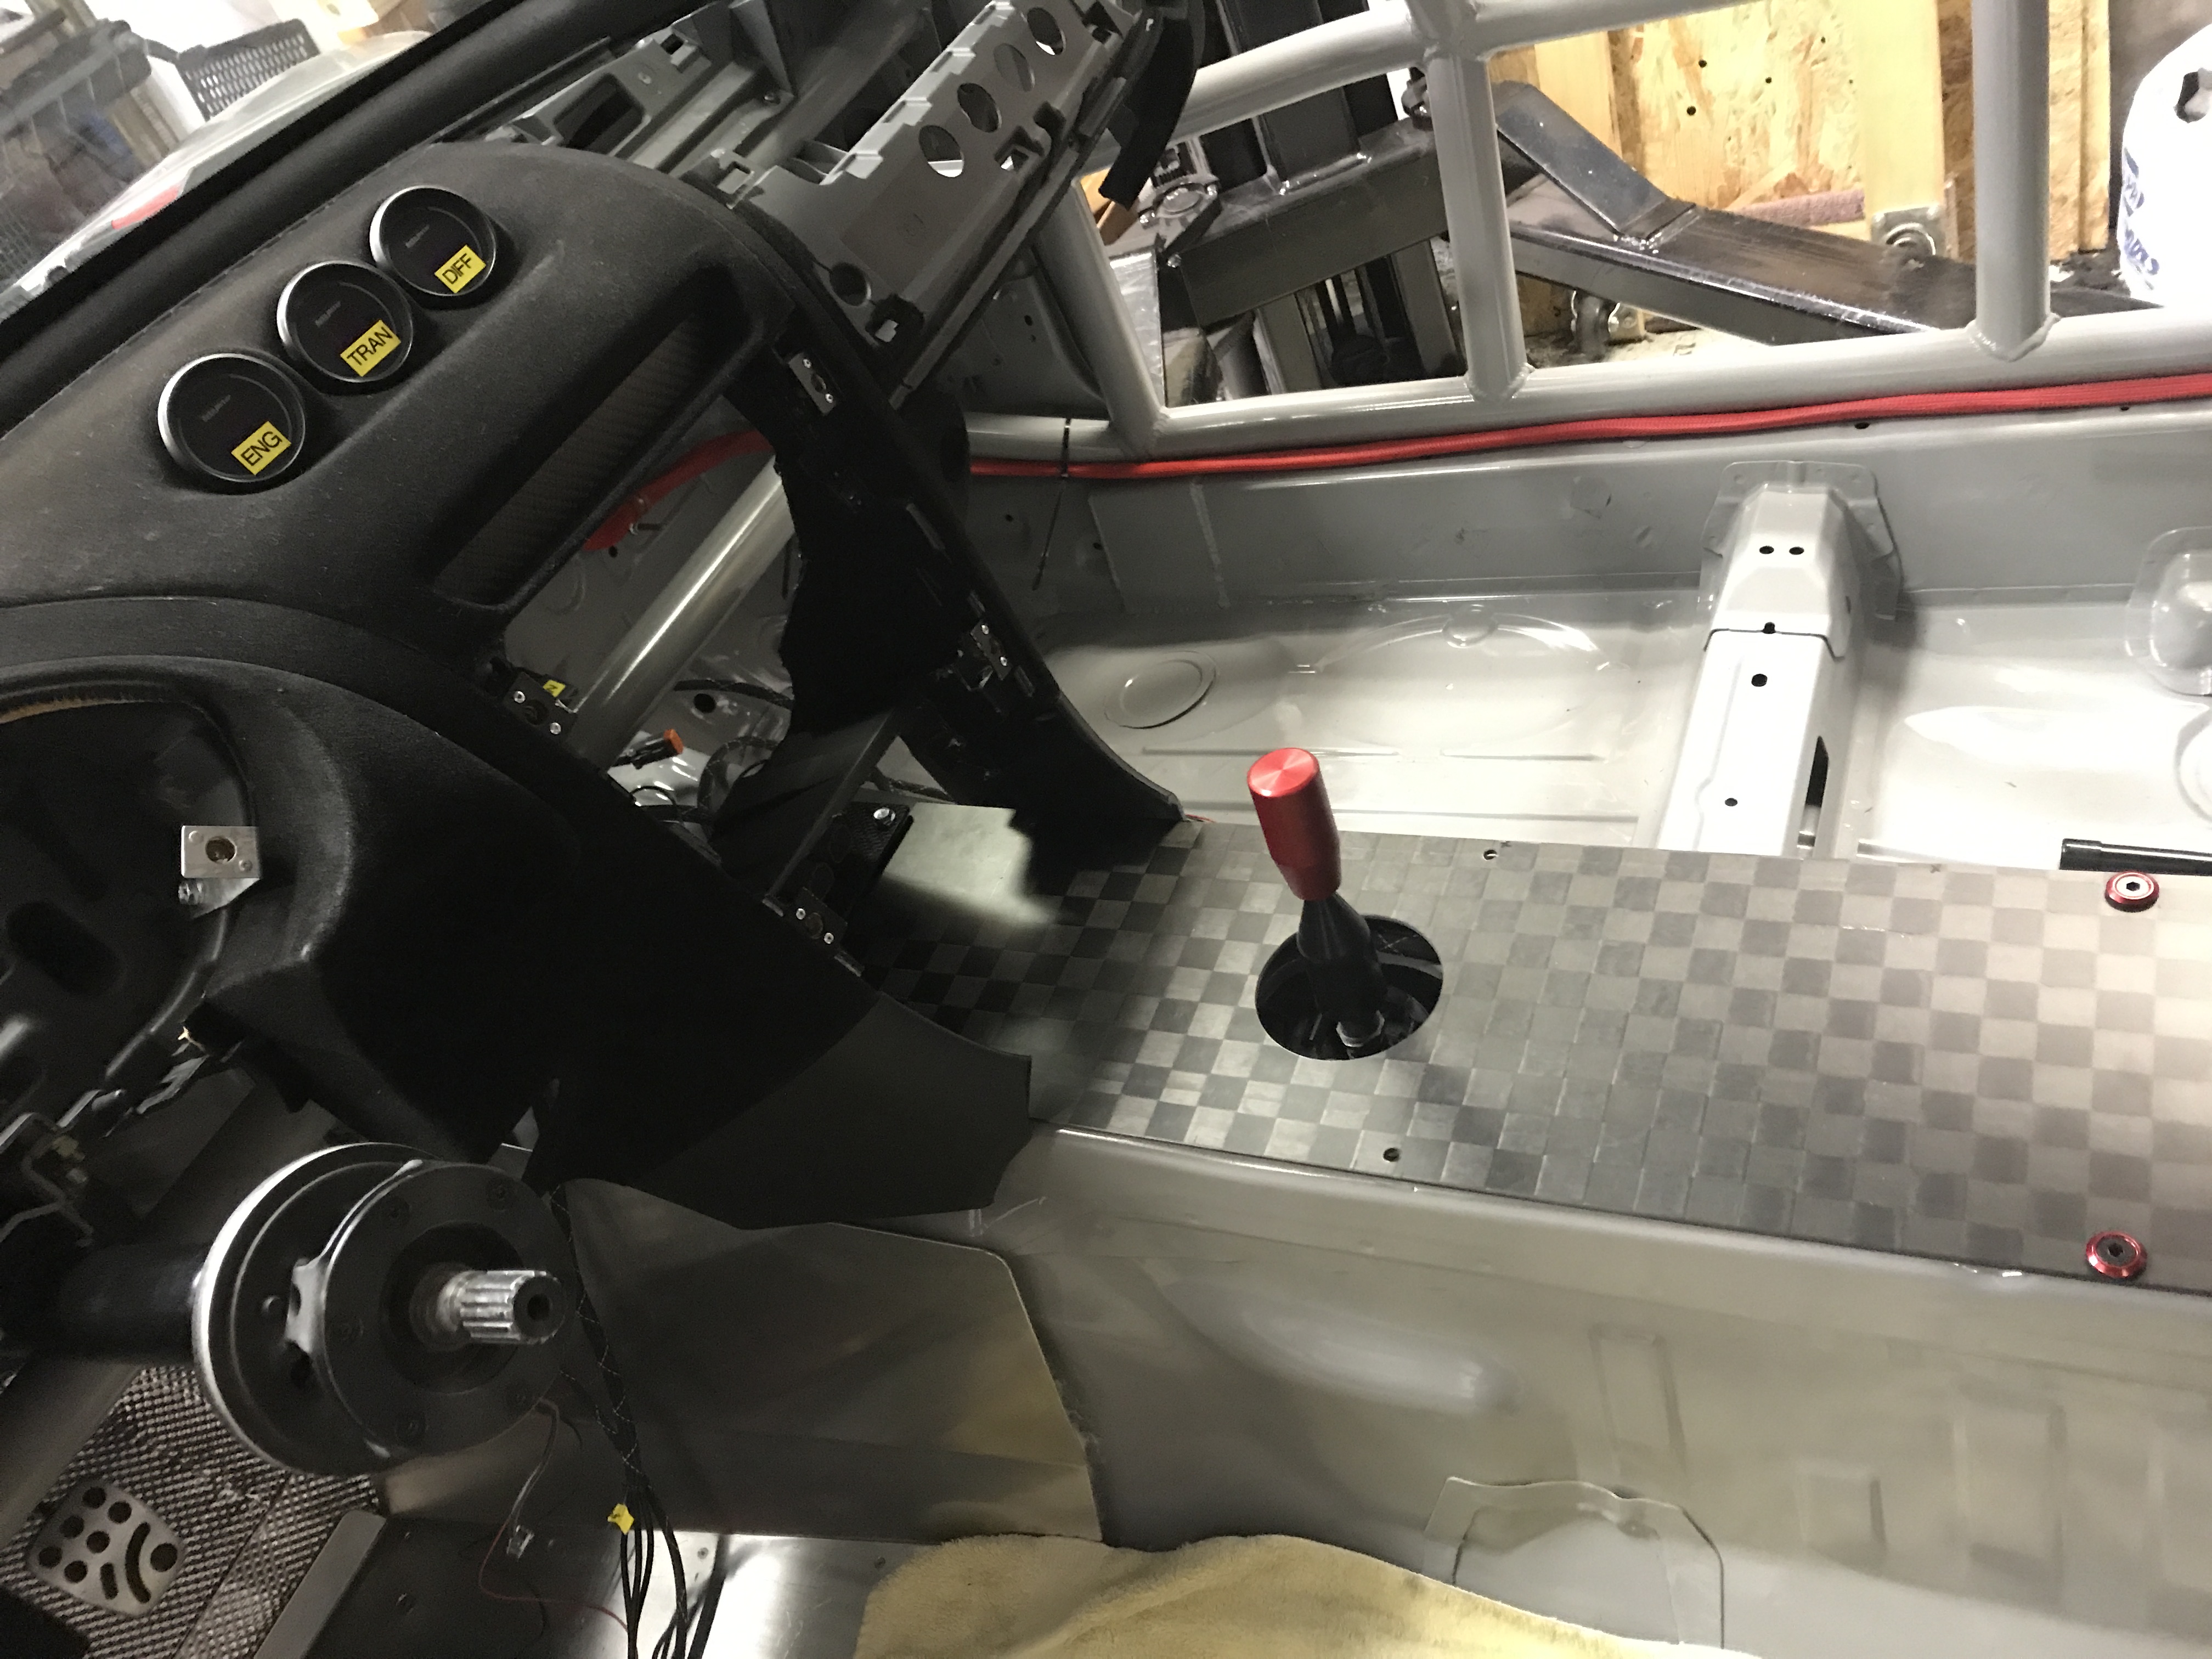
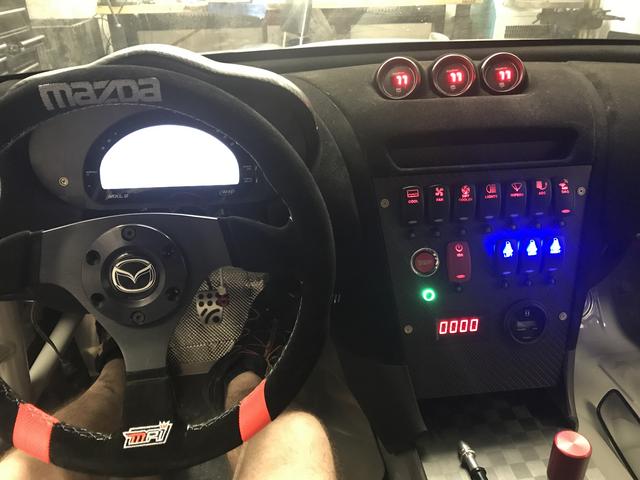
STL does not require preservation of the original wiring harness so most of the interior harness is being removed. I fabricated a center console switch panel to cover all vital functions.
The round gauge is A/F and the digital readout is a stopwatch.
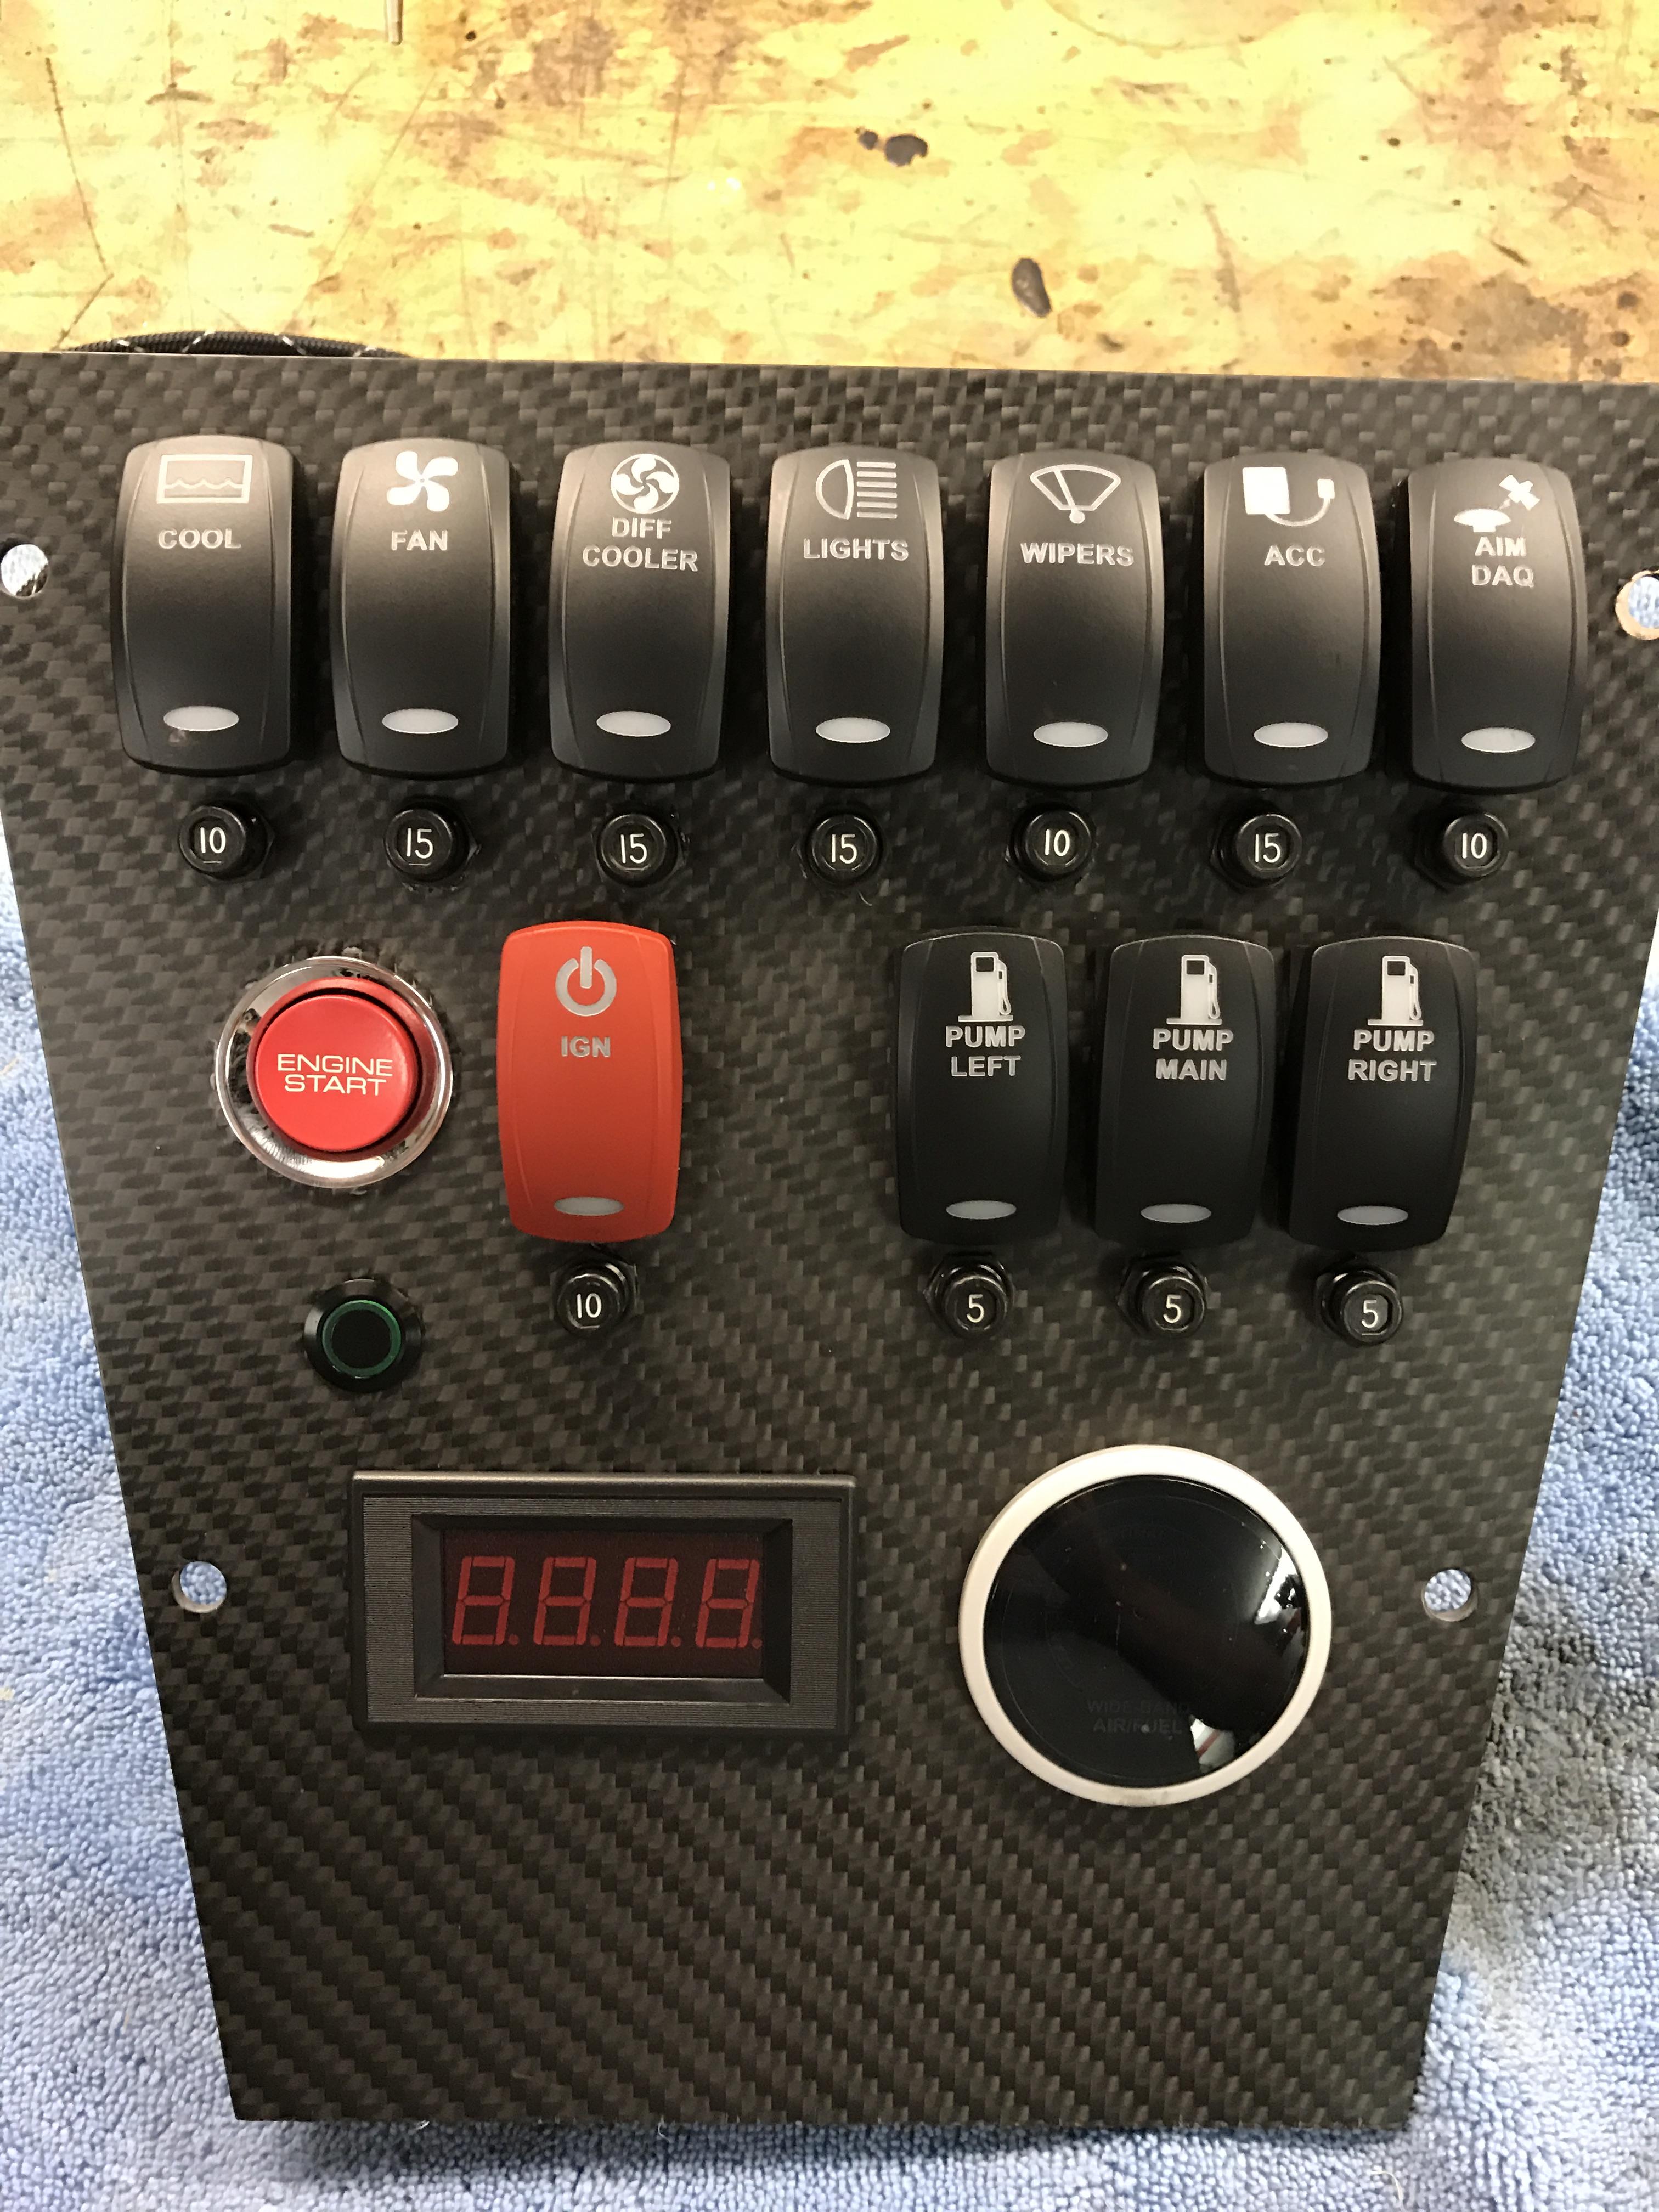
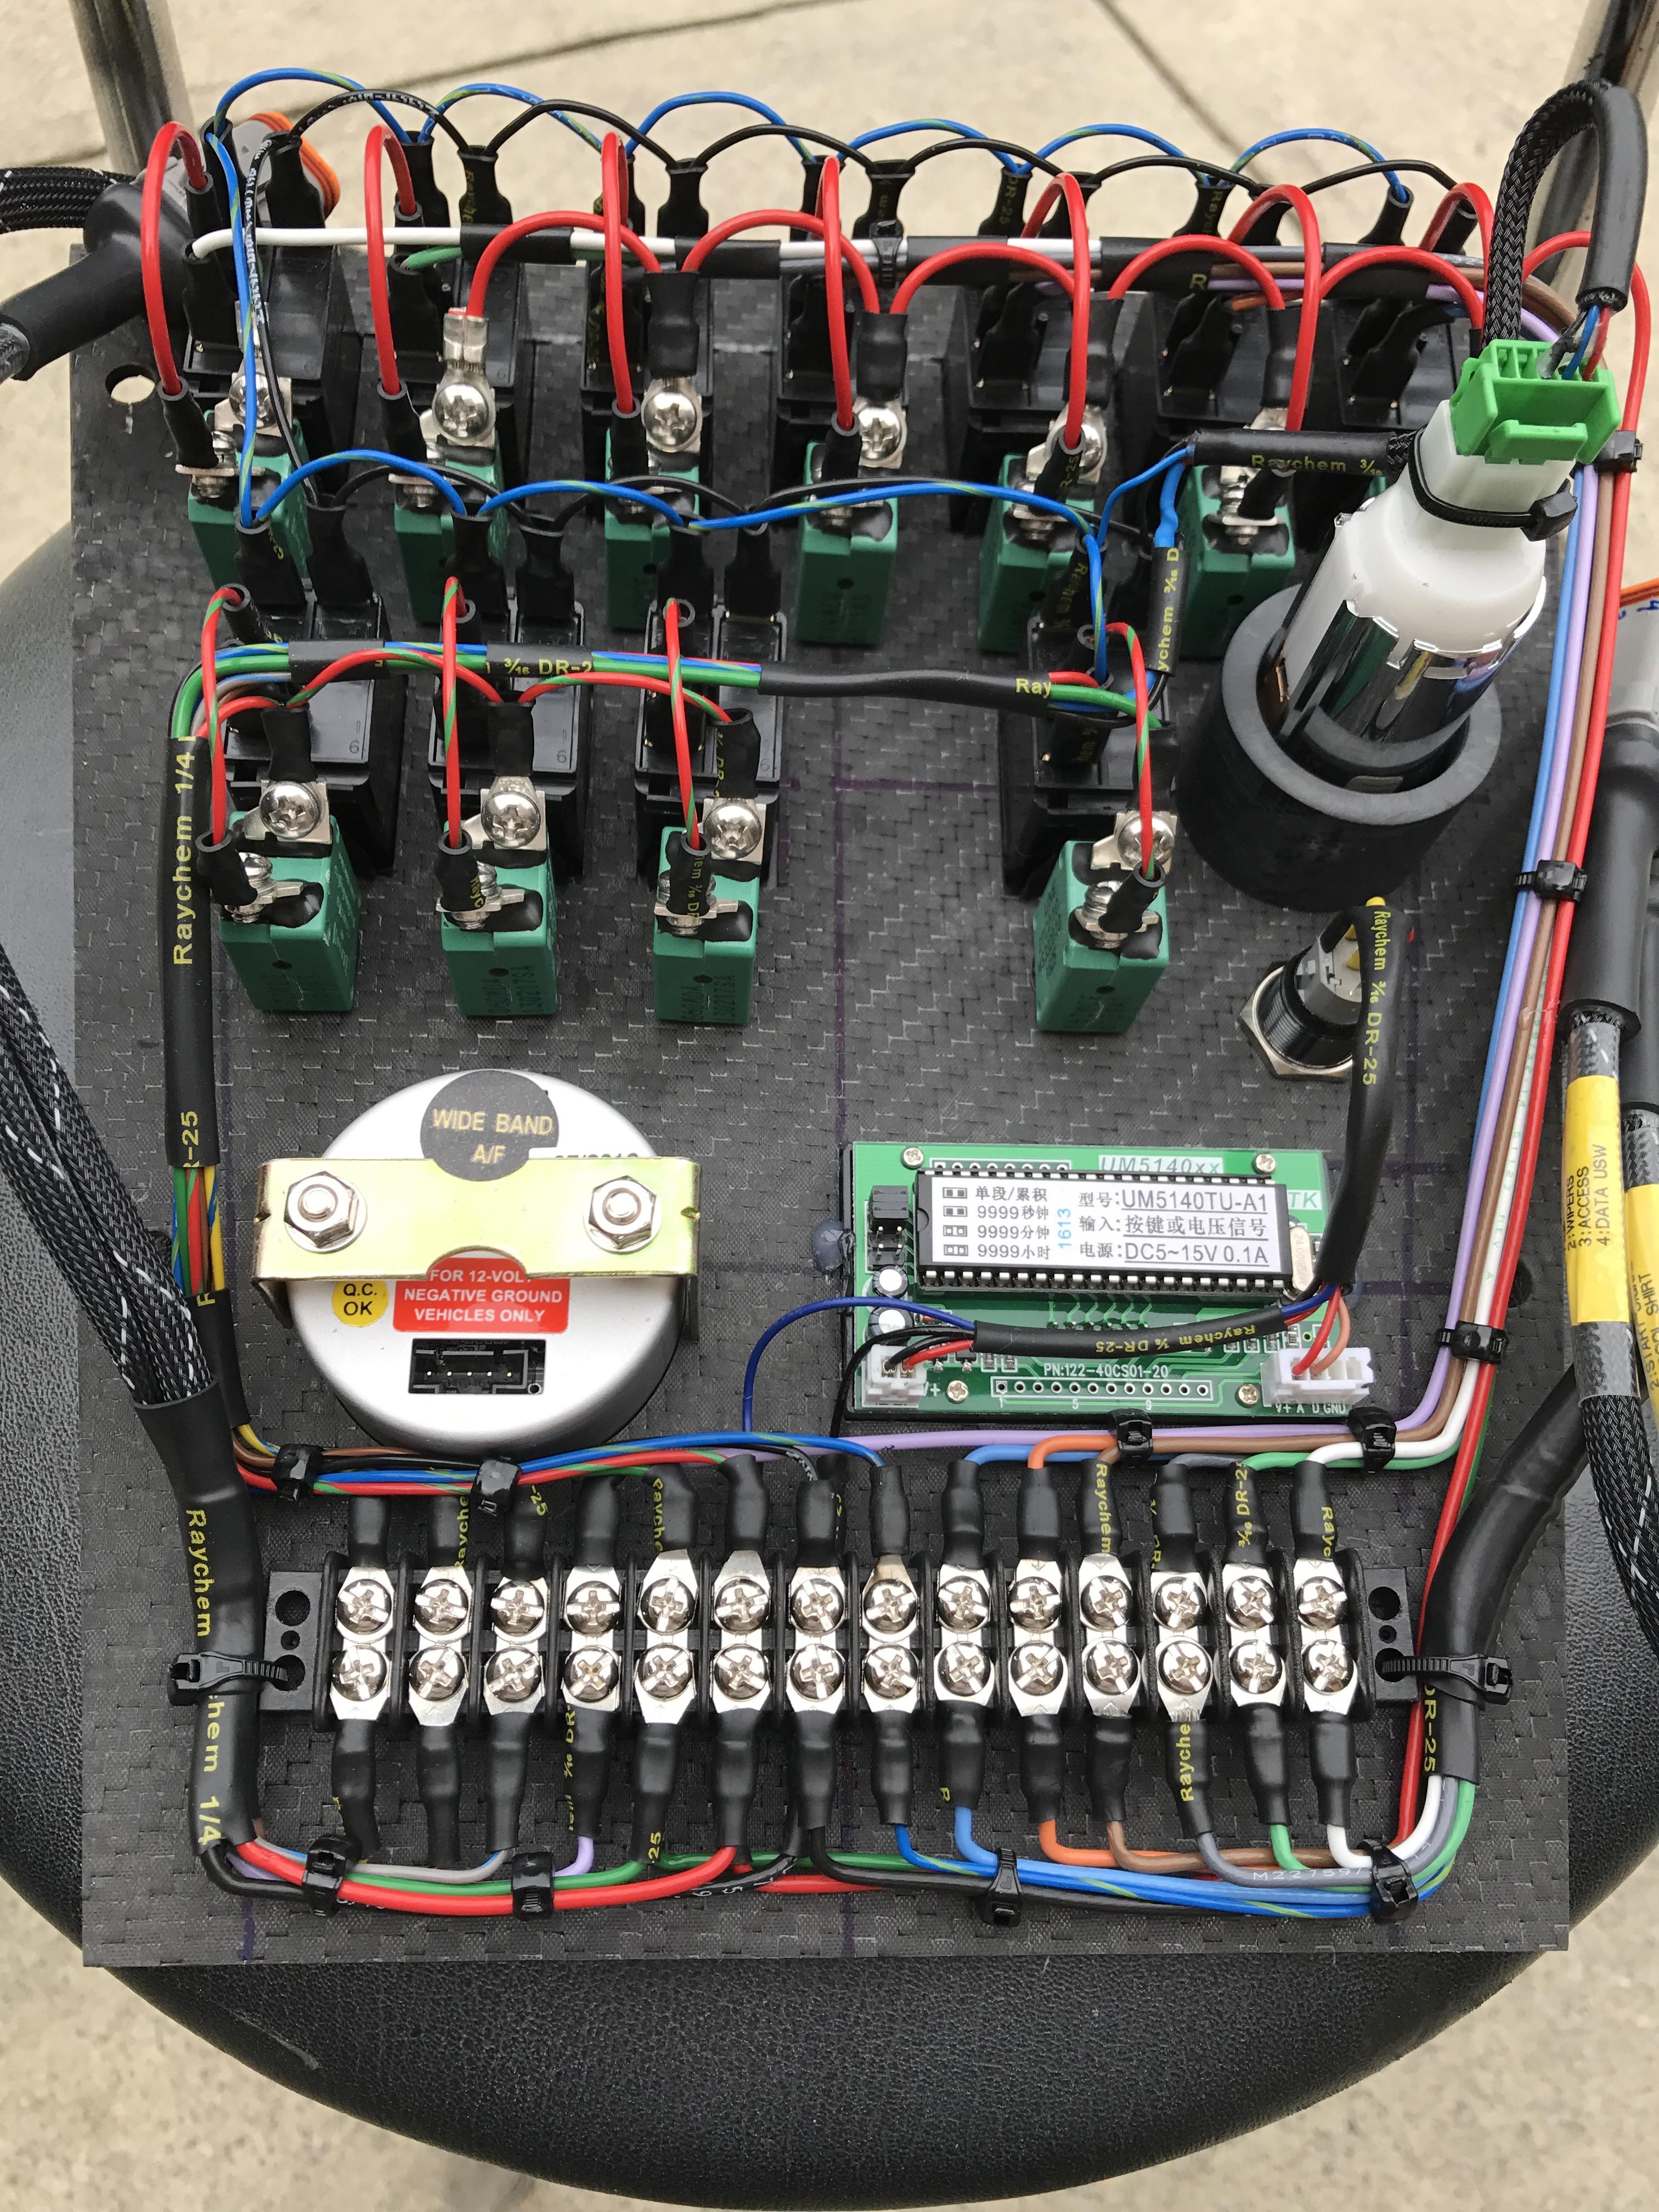
The round gauge is A/F and the digital readout is a stopwatch.

Switches:
https://rockerswitchpros.com/
Circuit breakers are Klixon mil spec units. As is all the wiring.
Thanks
https://rockerswitchpros.com/
Circuit breakers are Klixon mil spec units. As is all the wiring.
Thanks
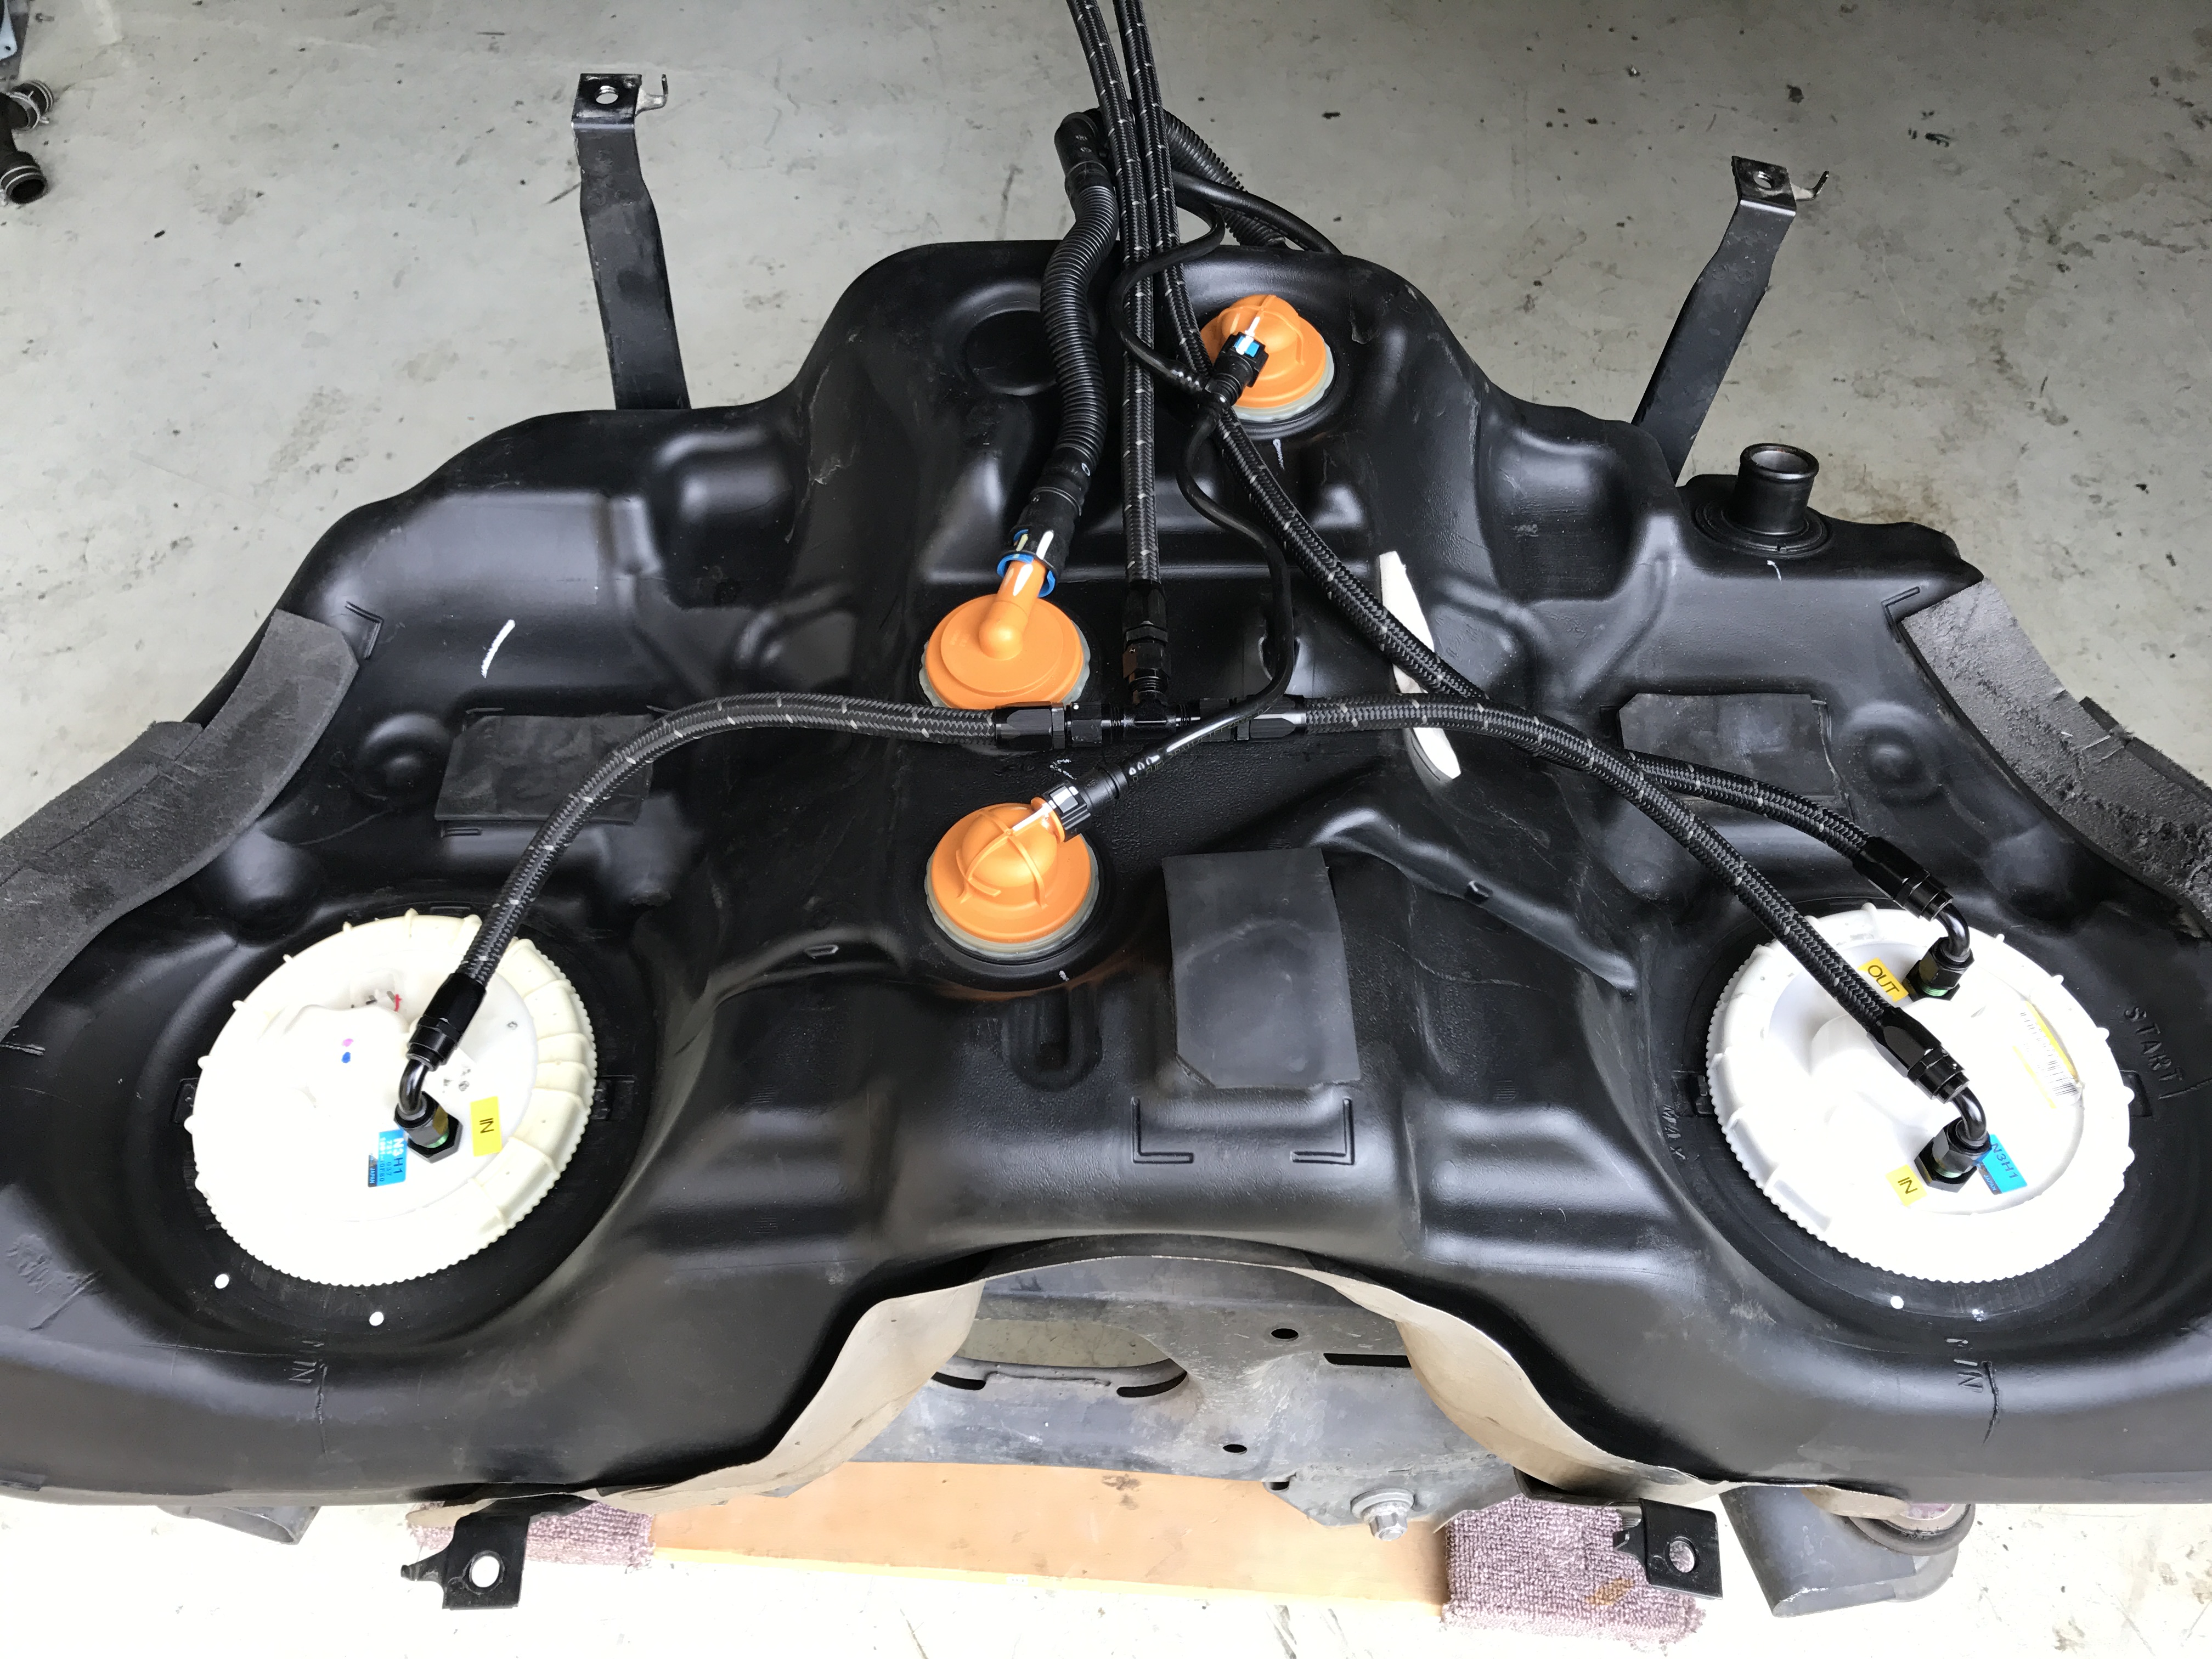
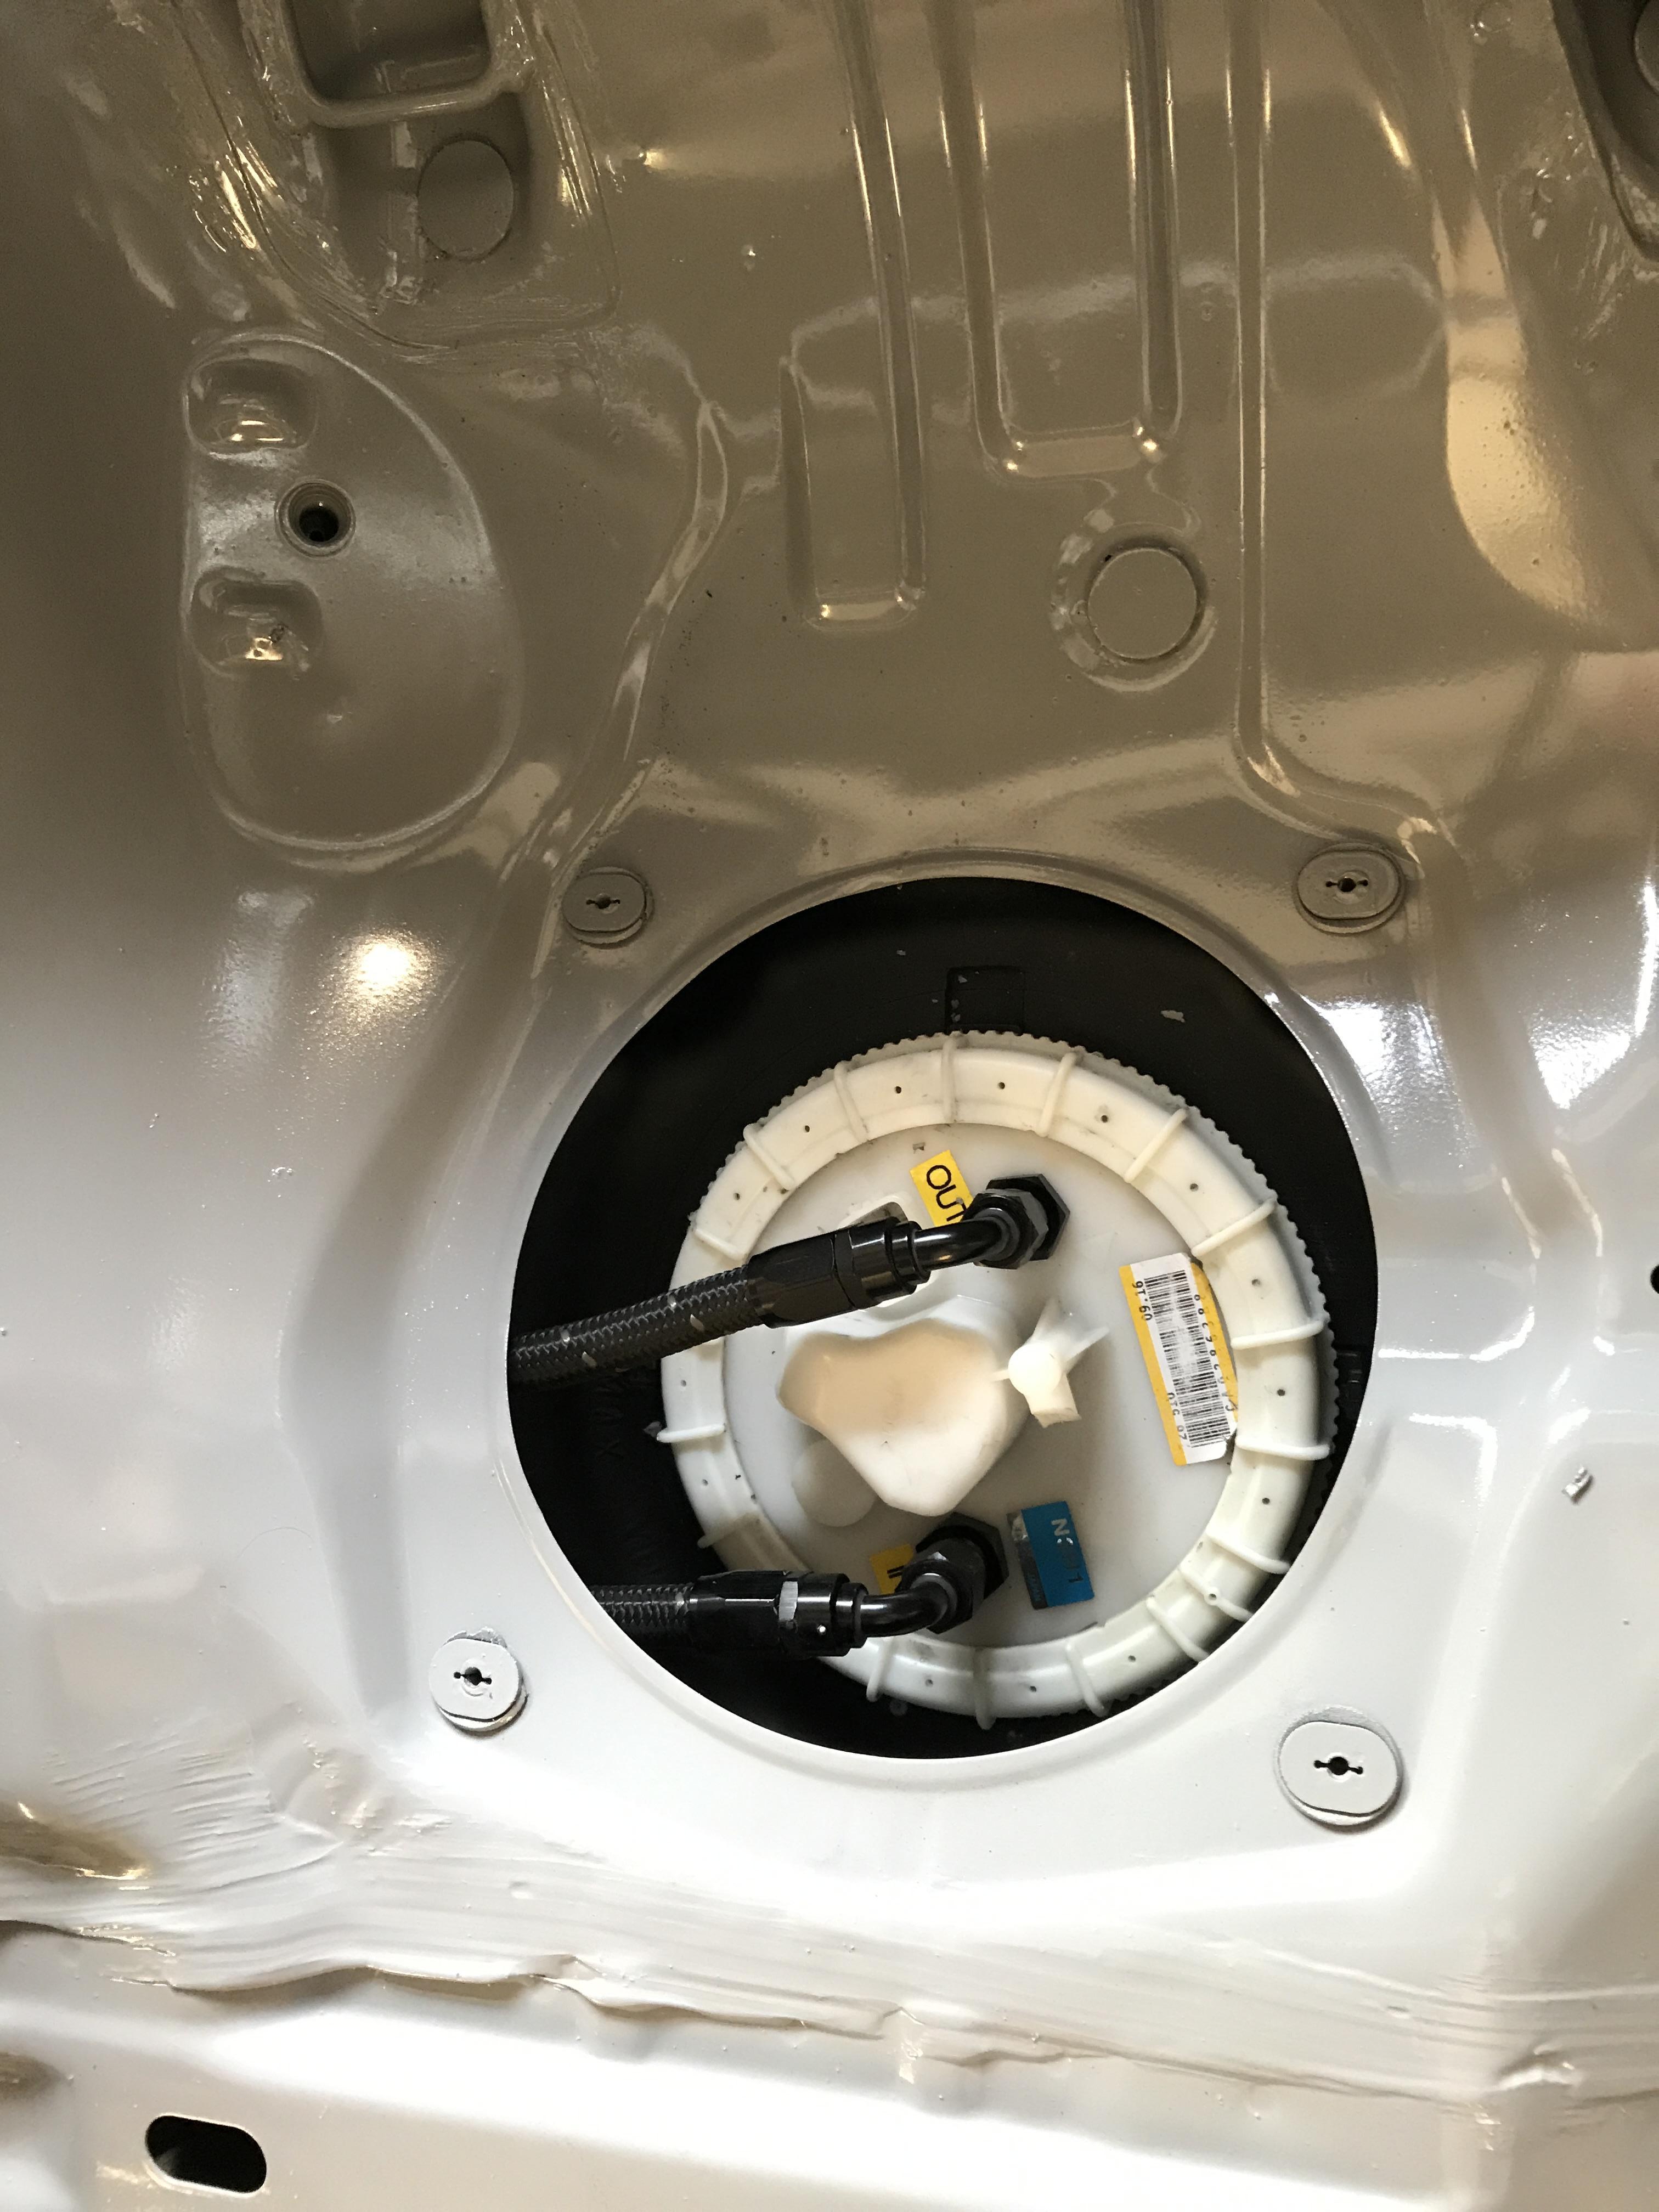
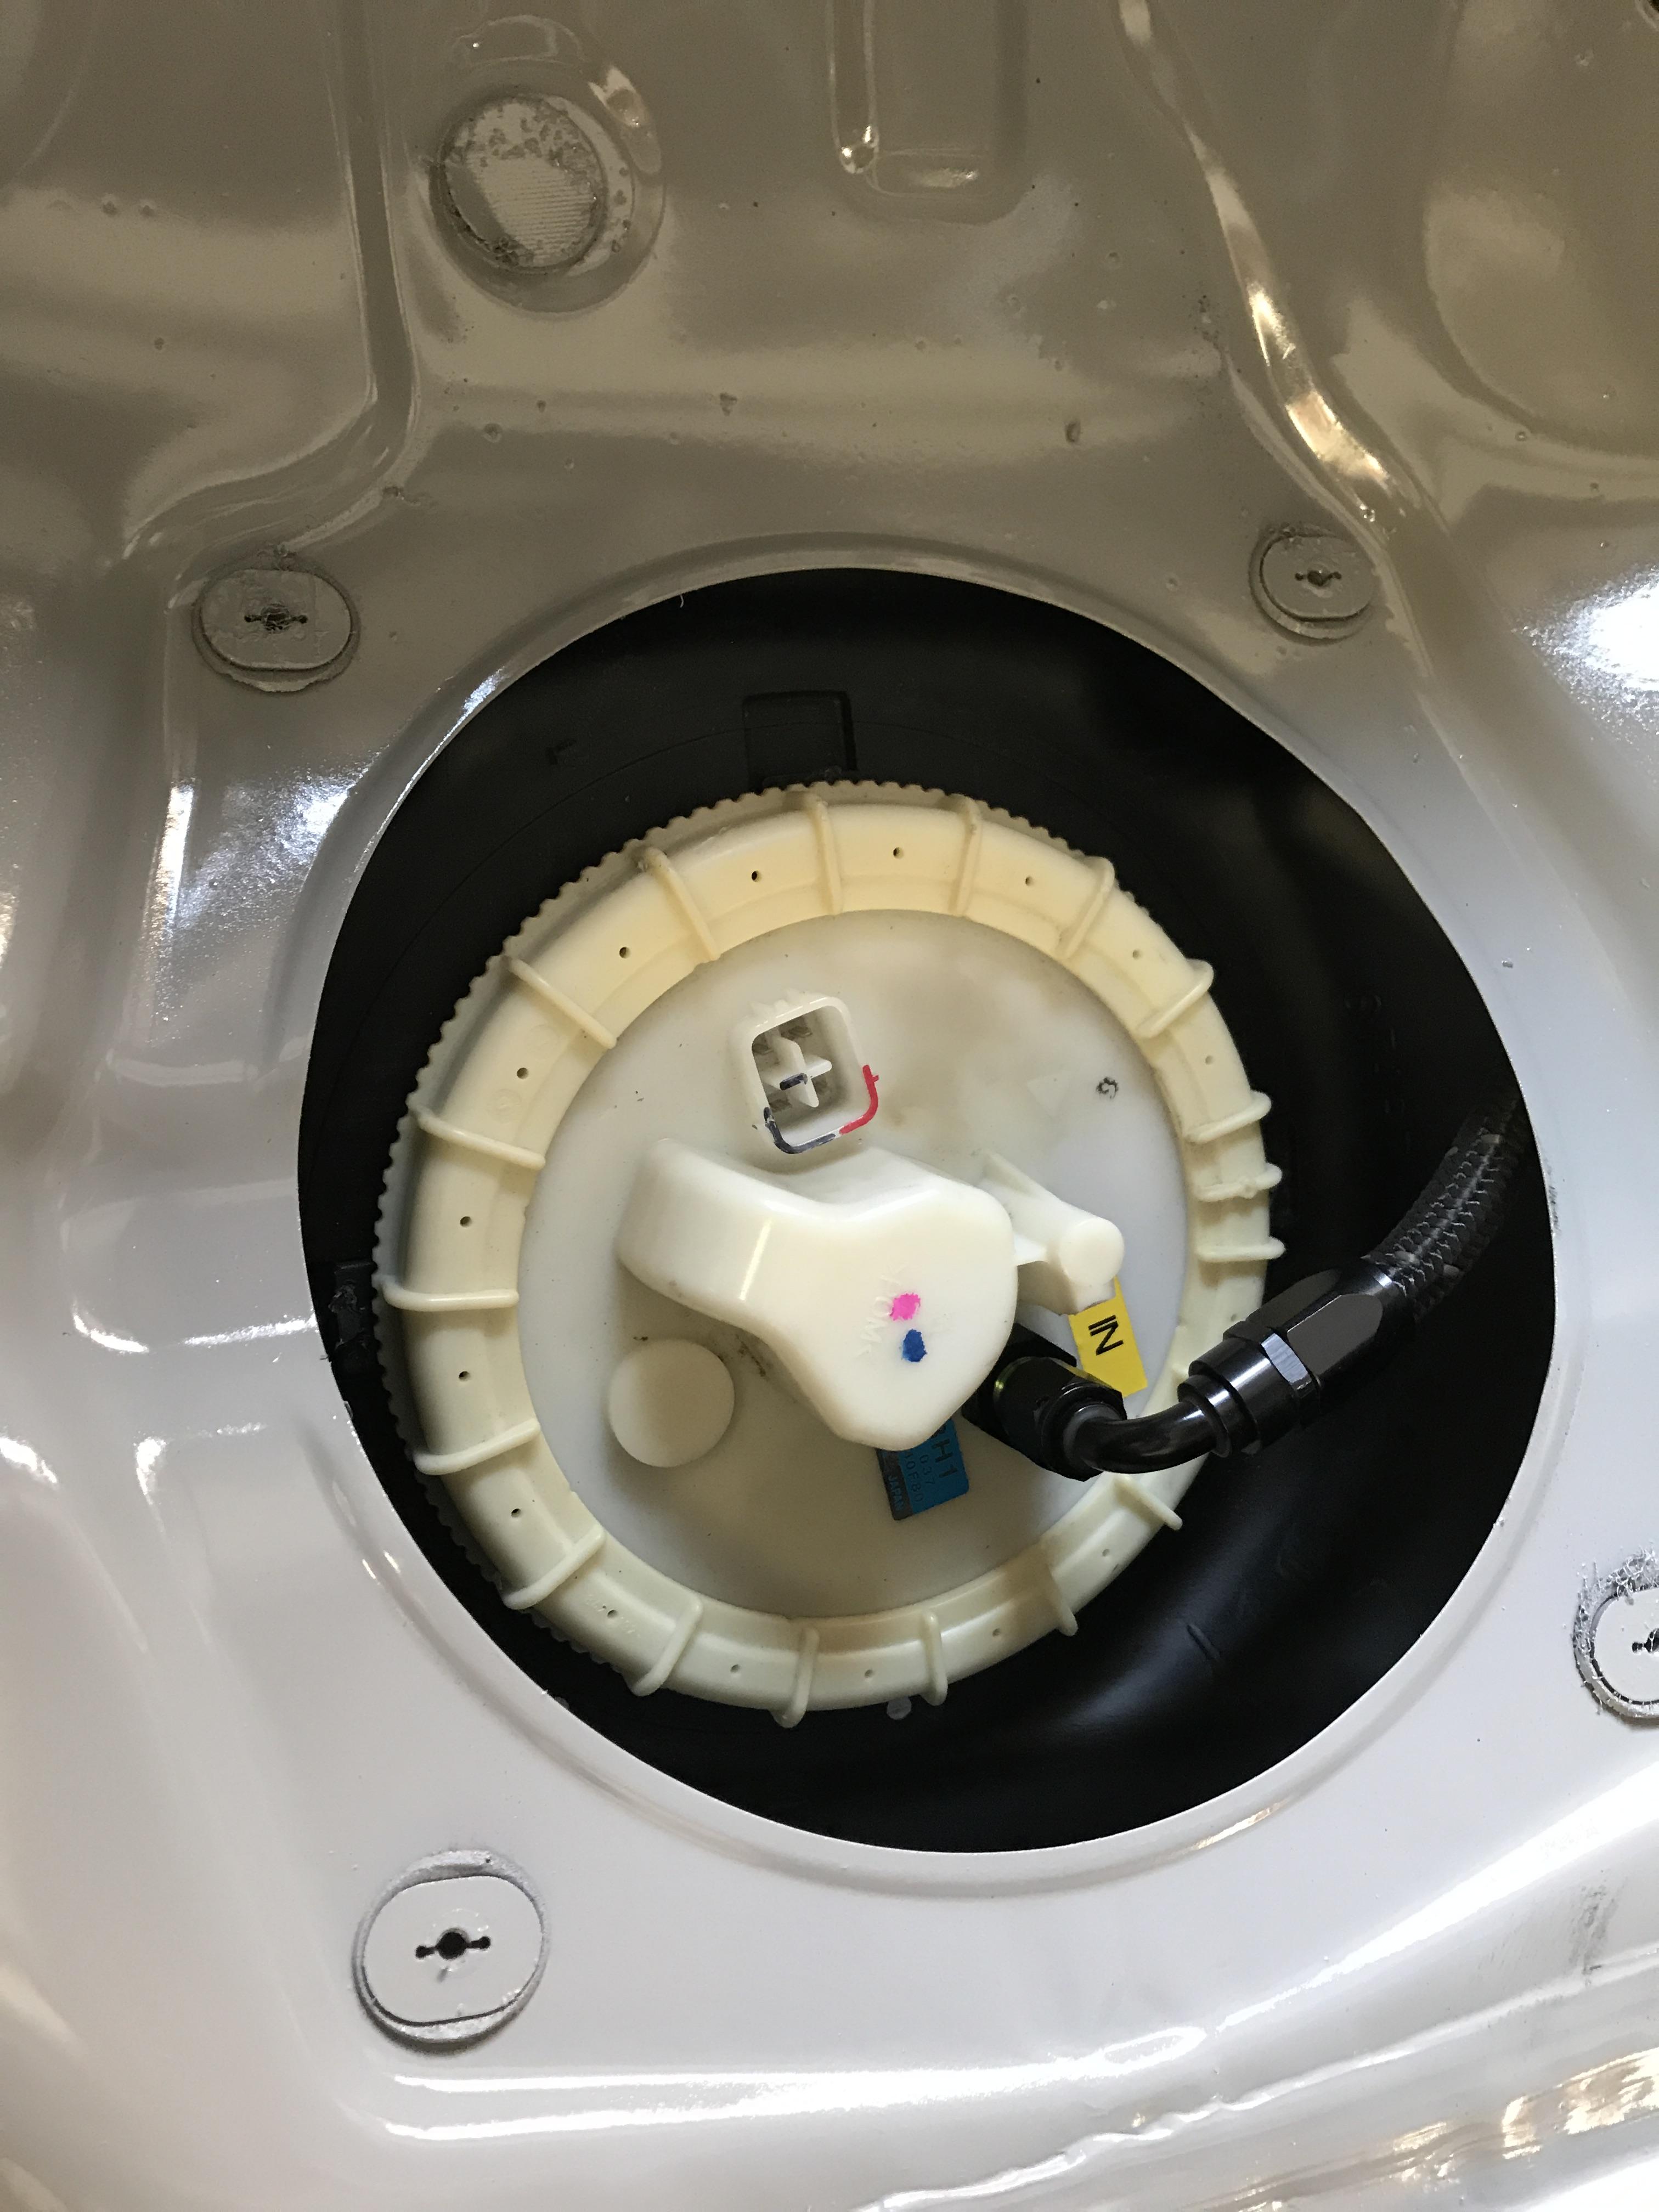
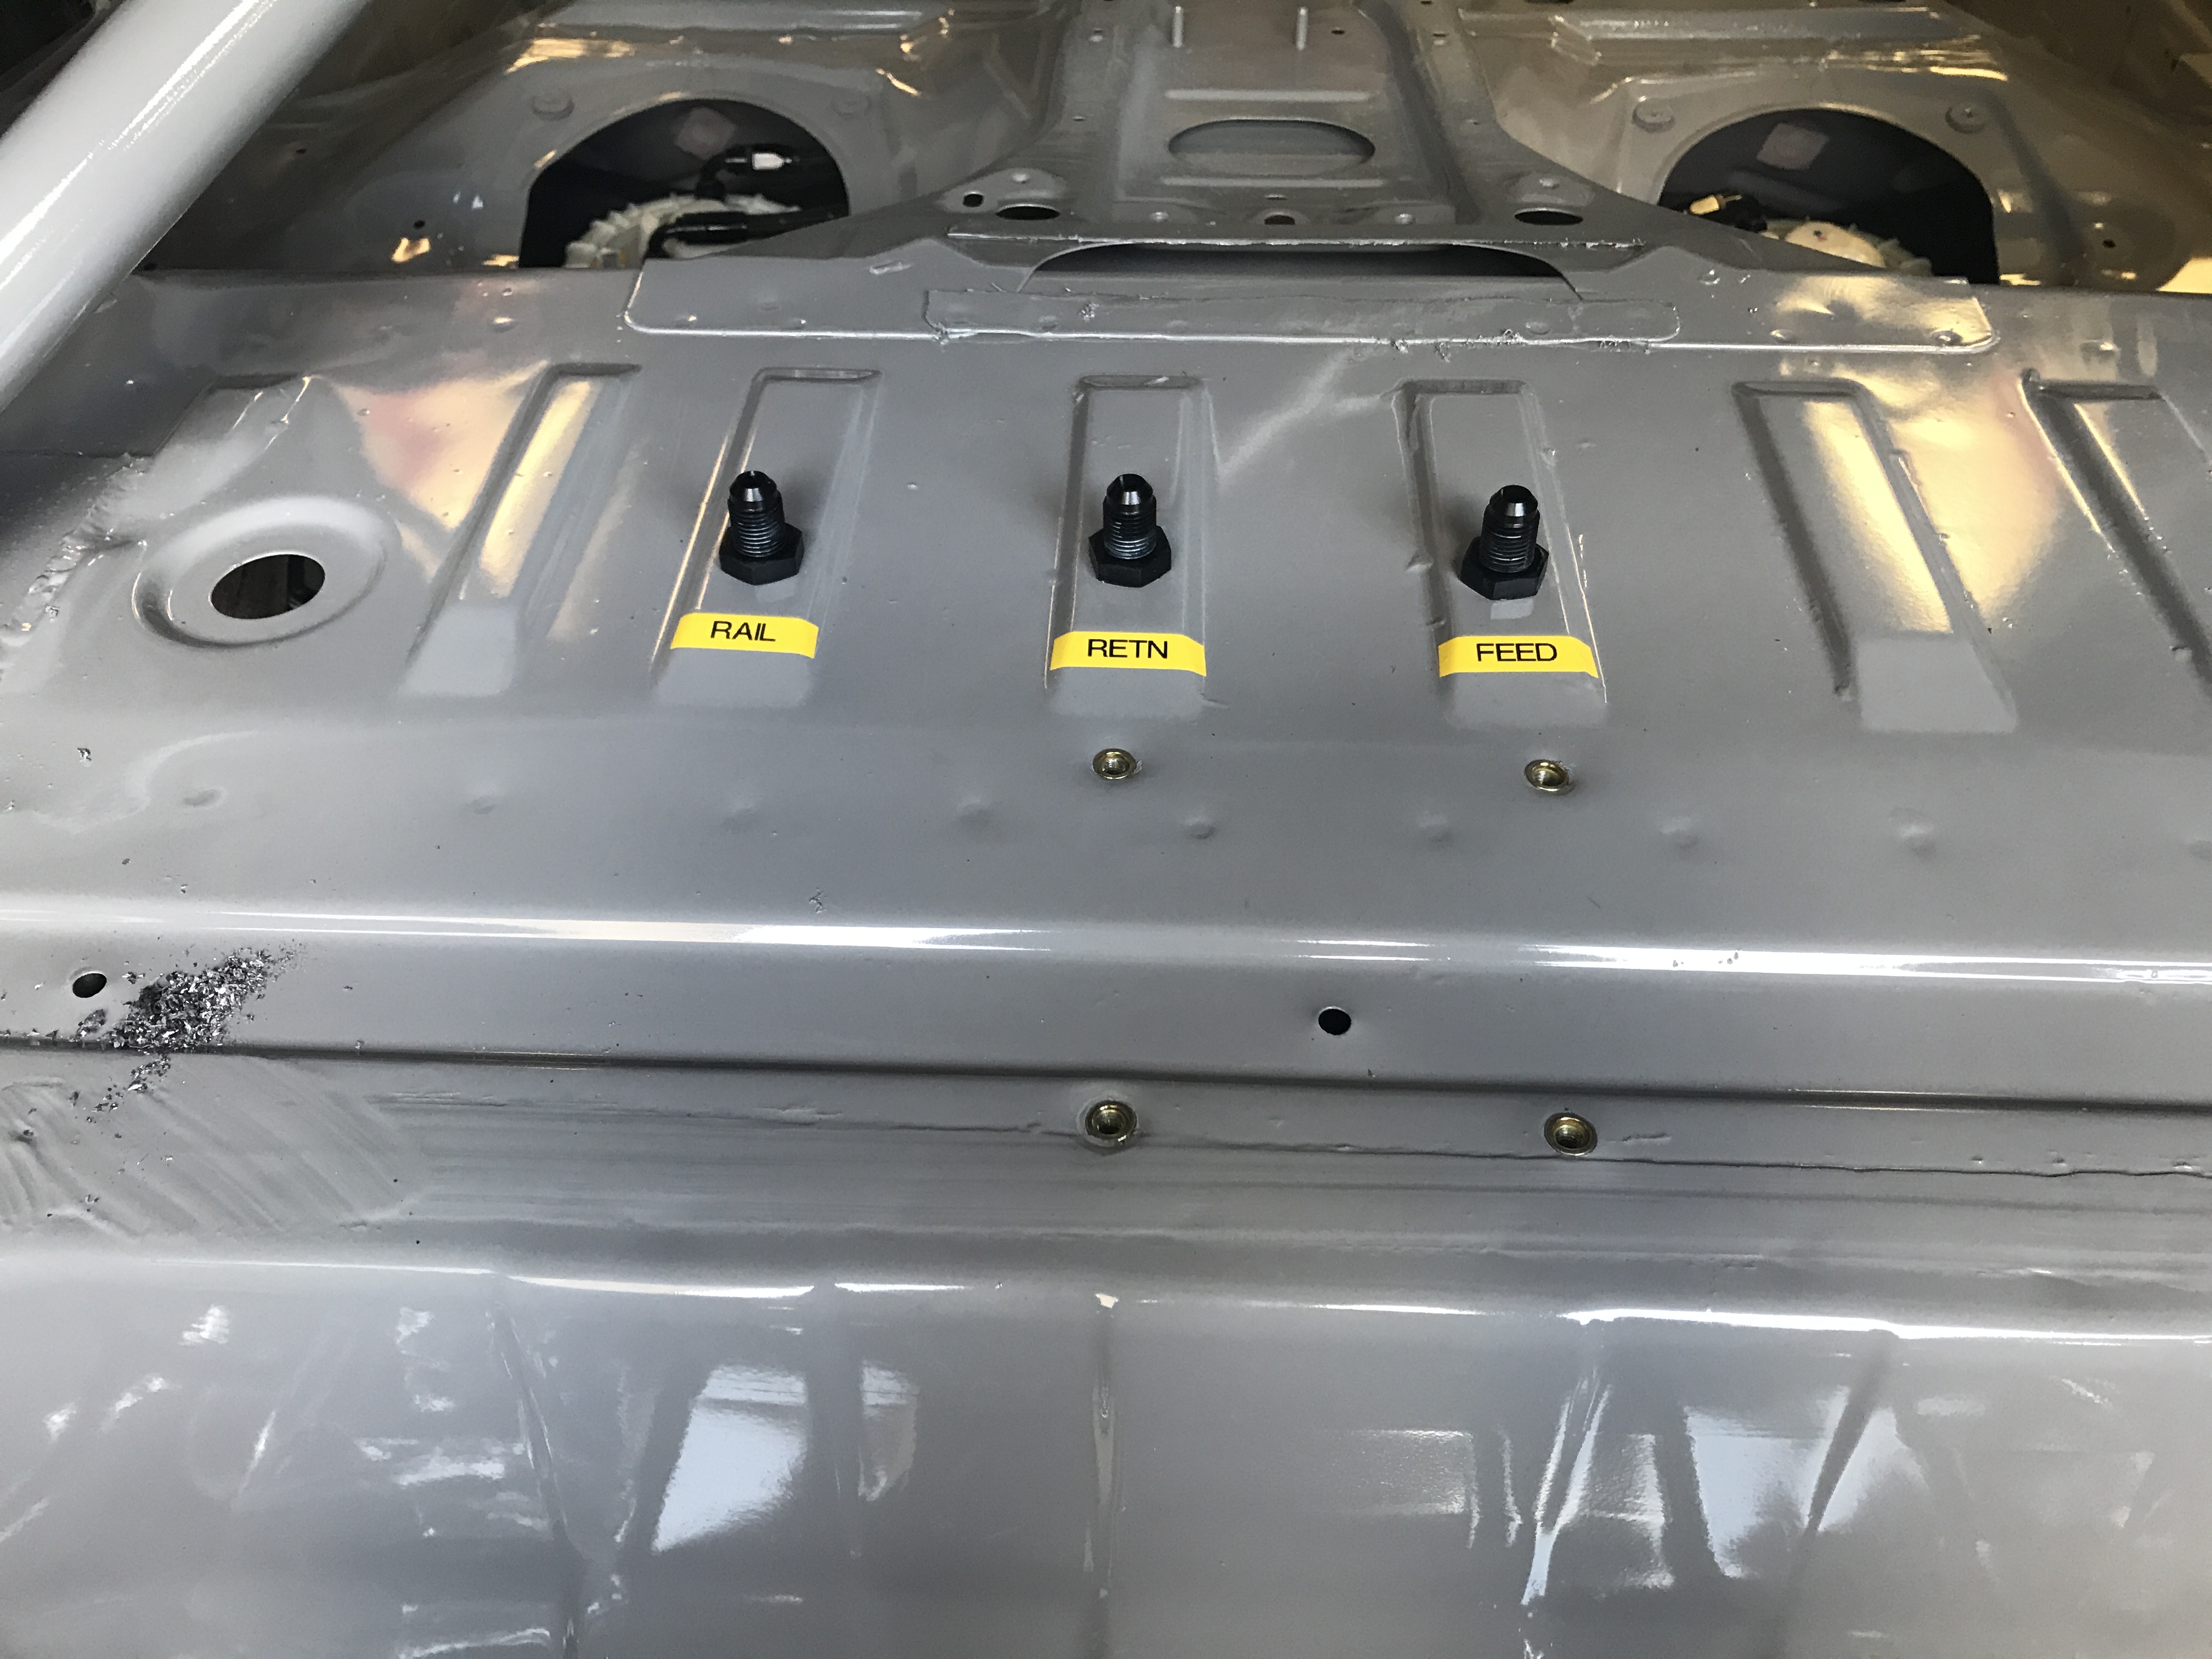
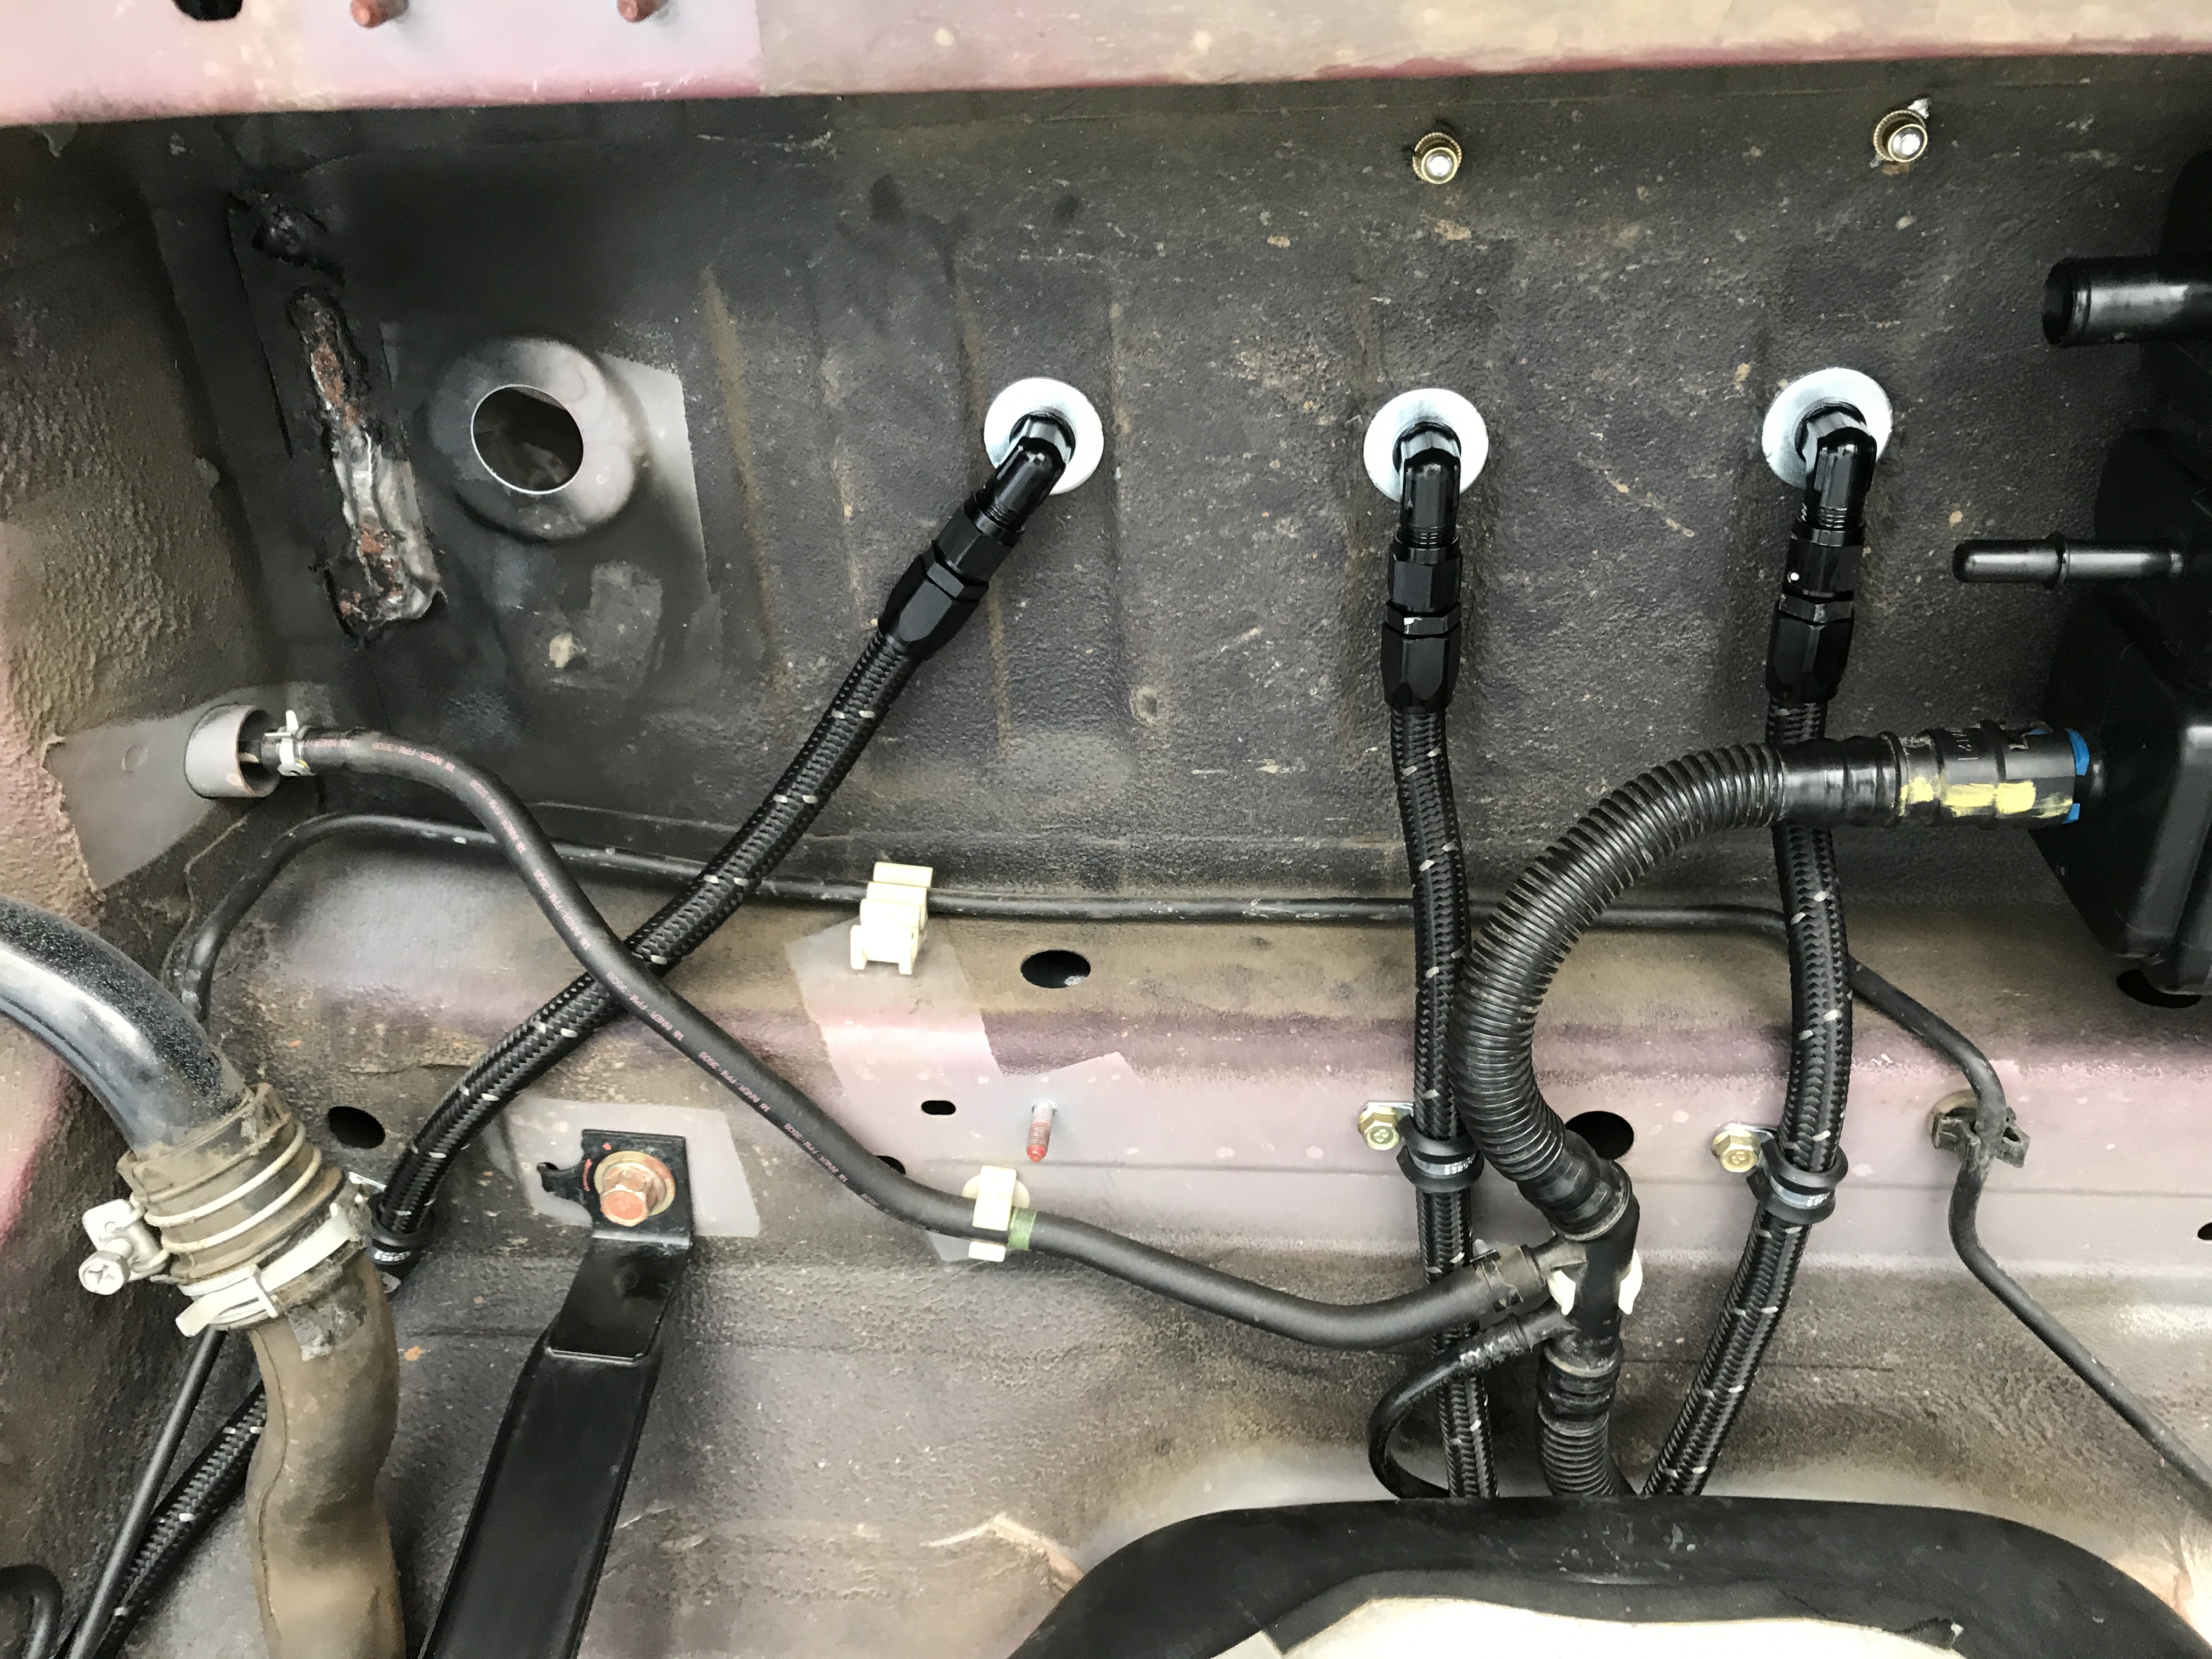
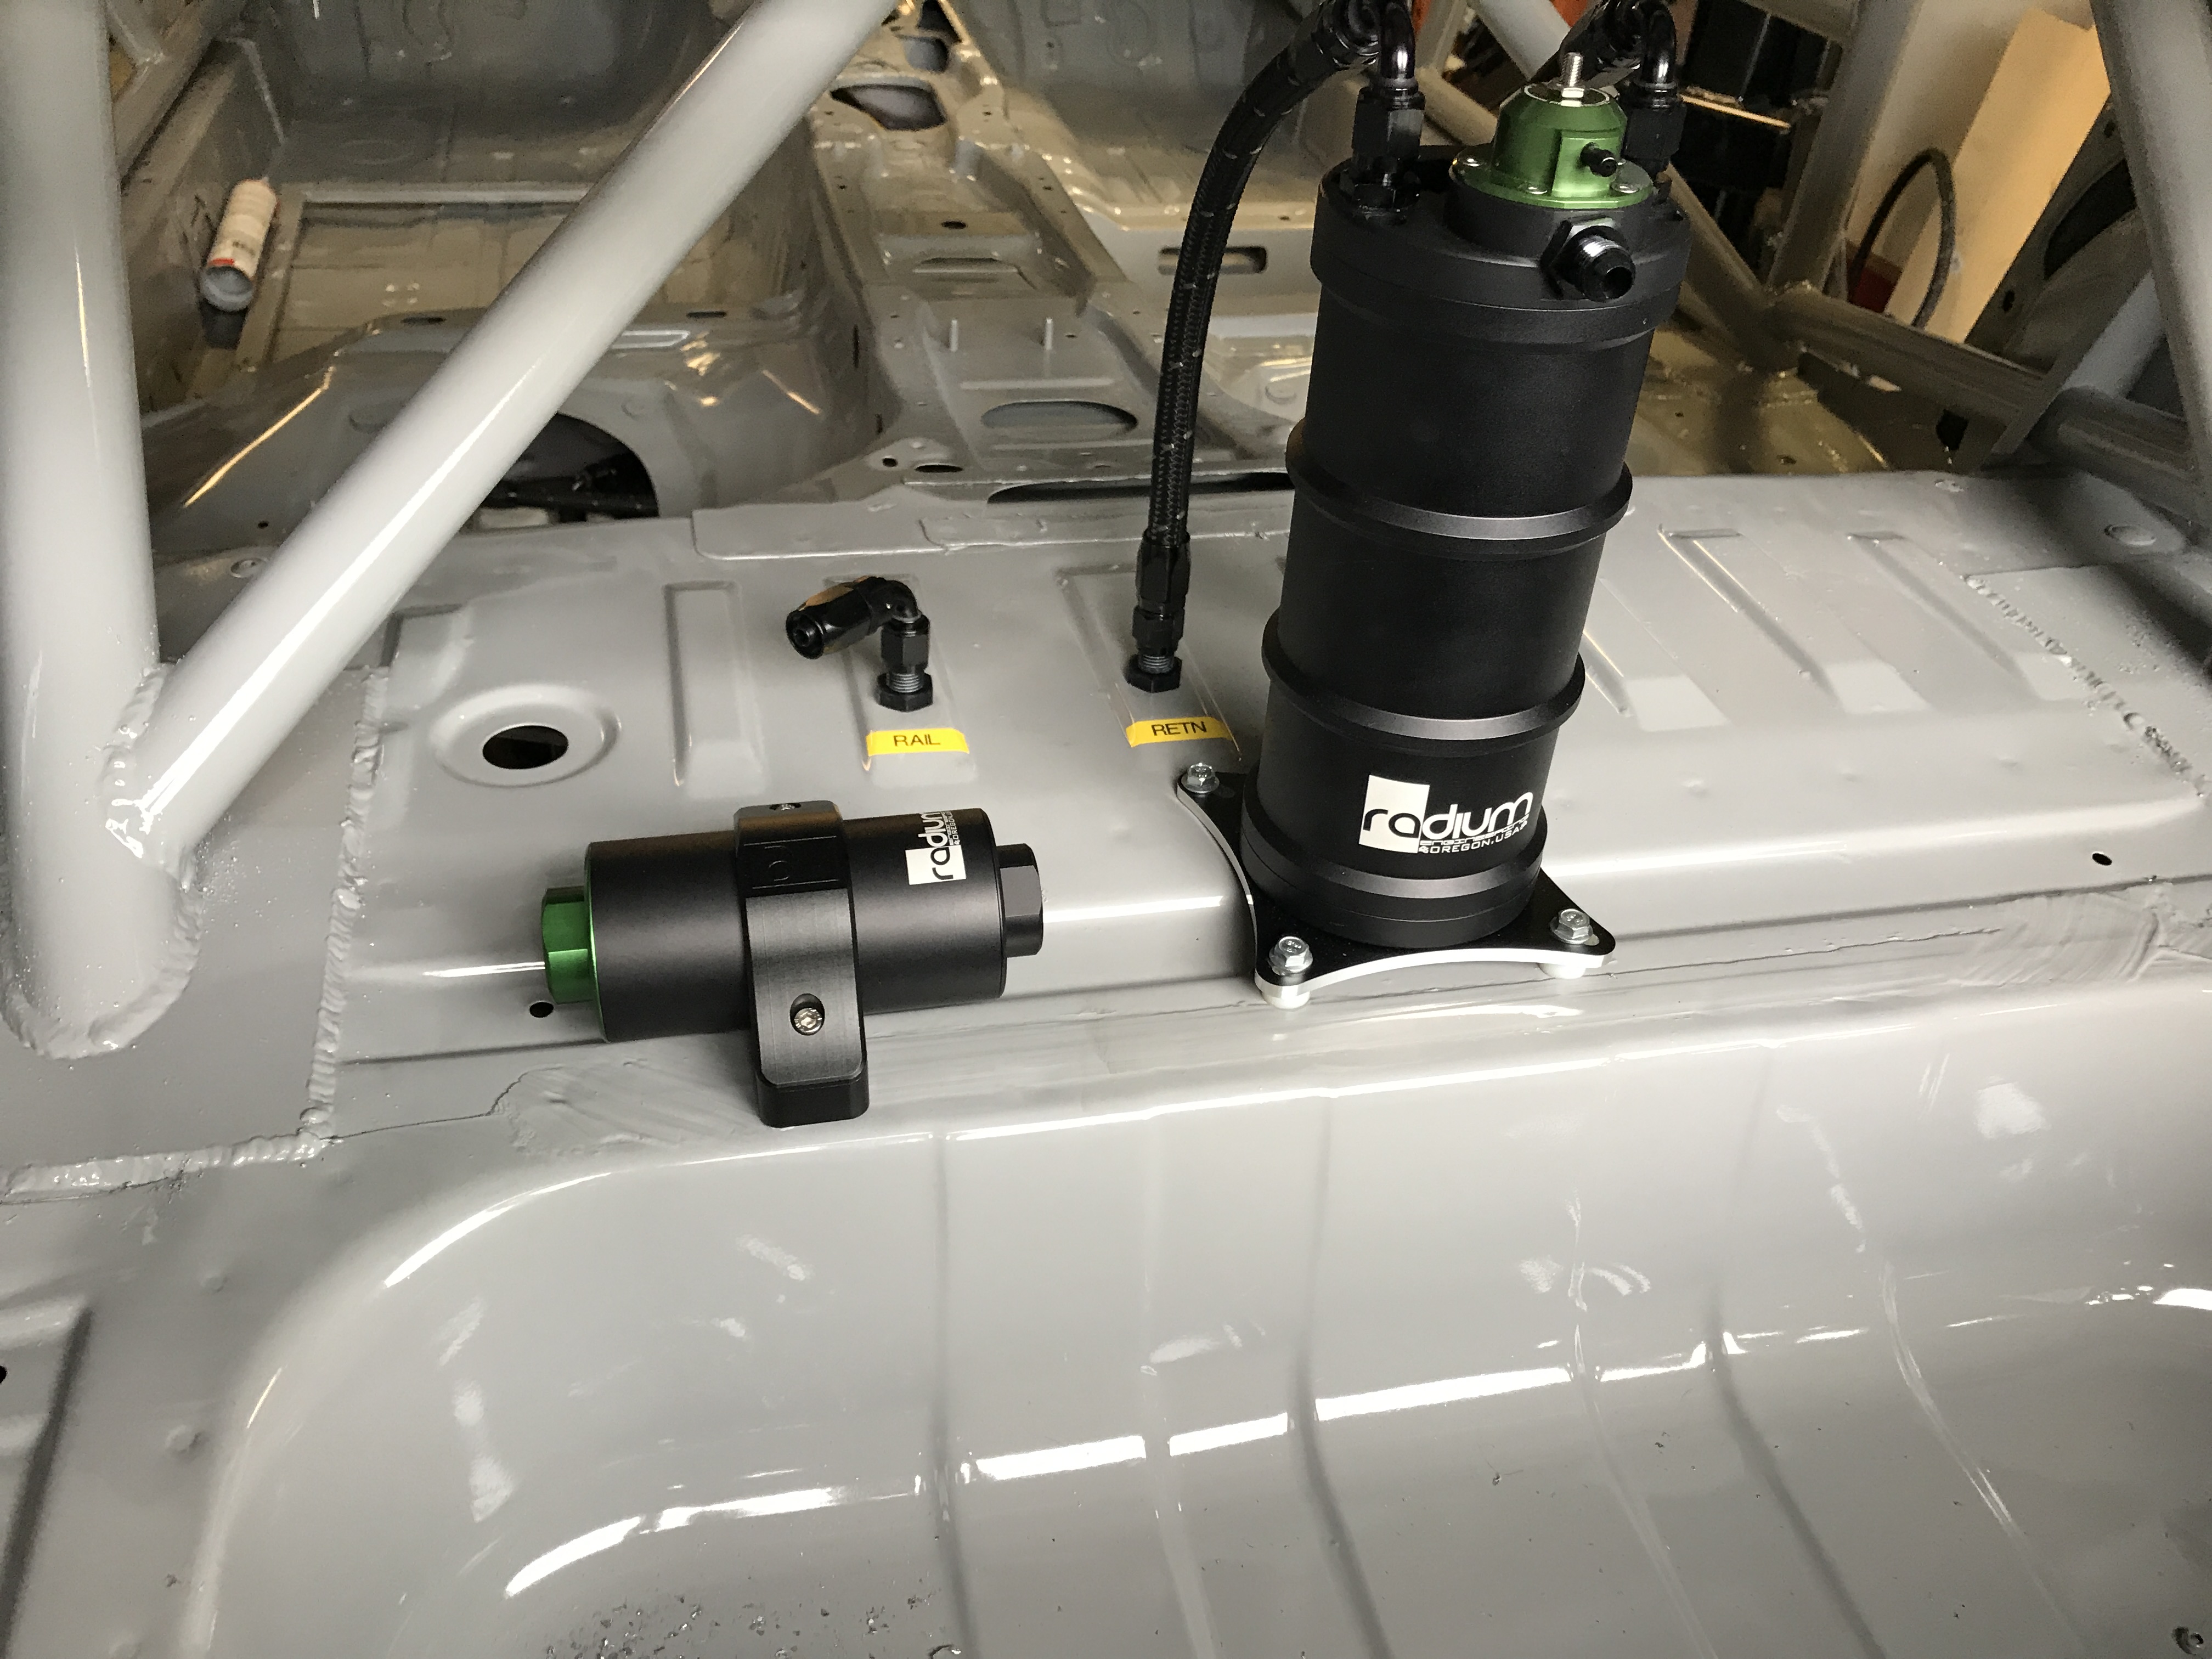
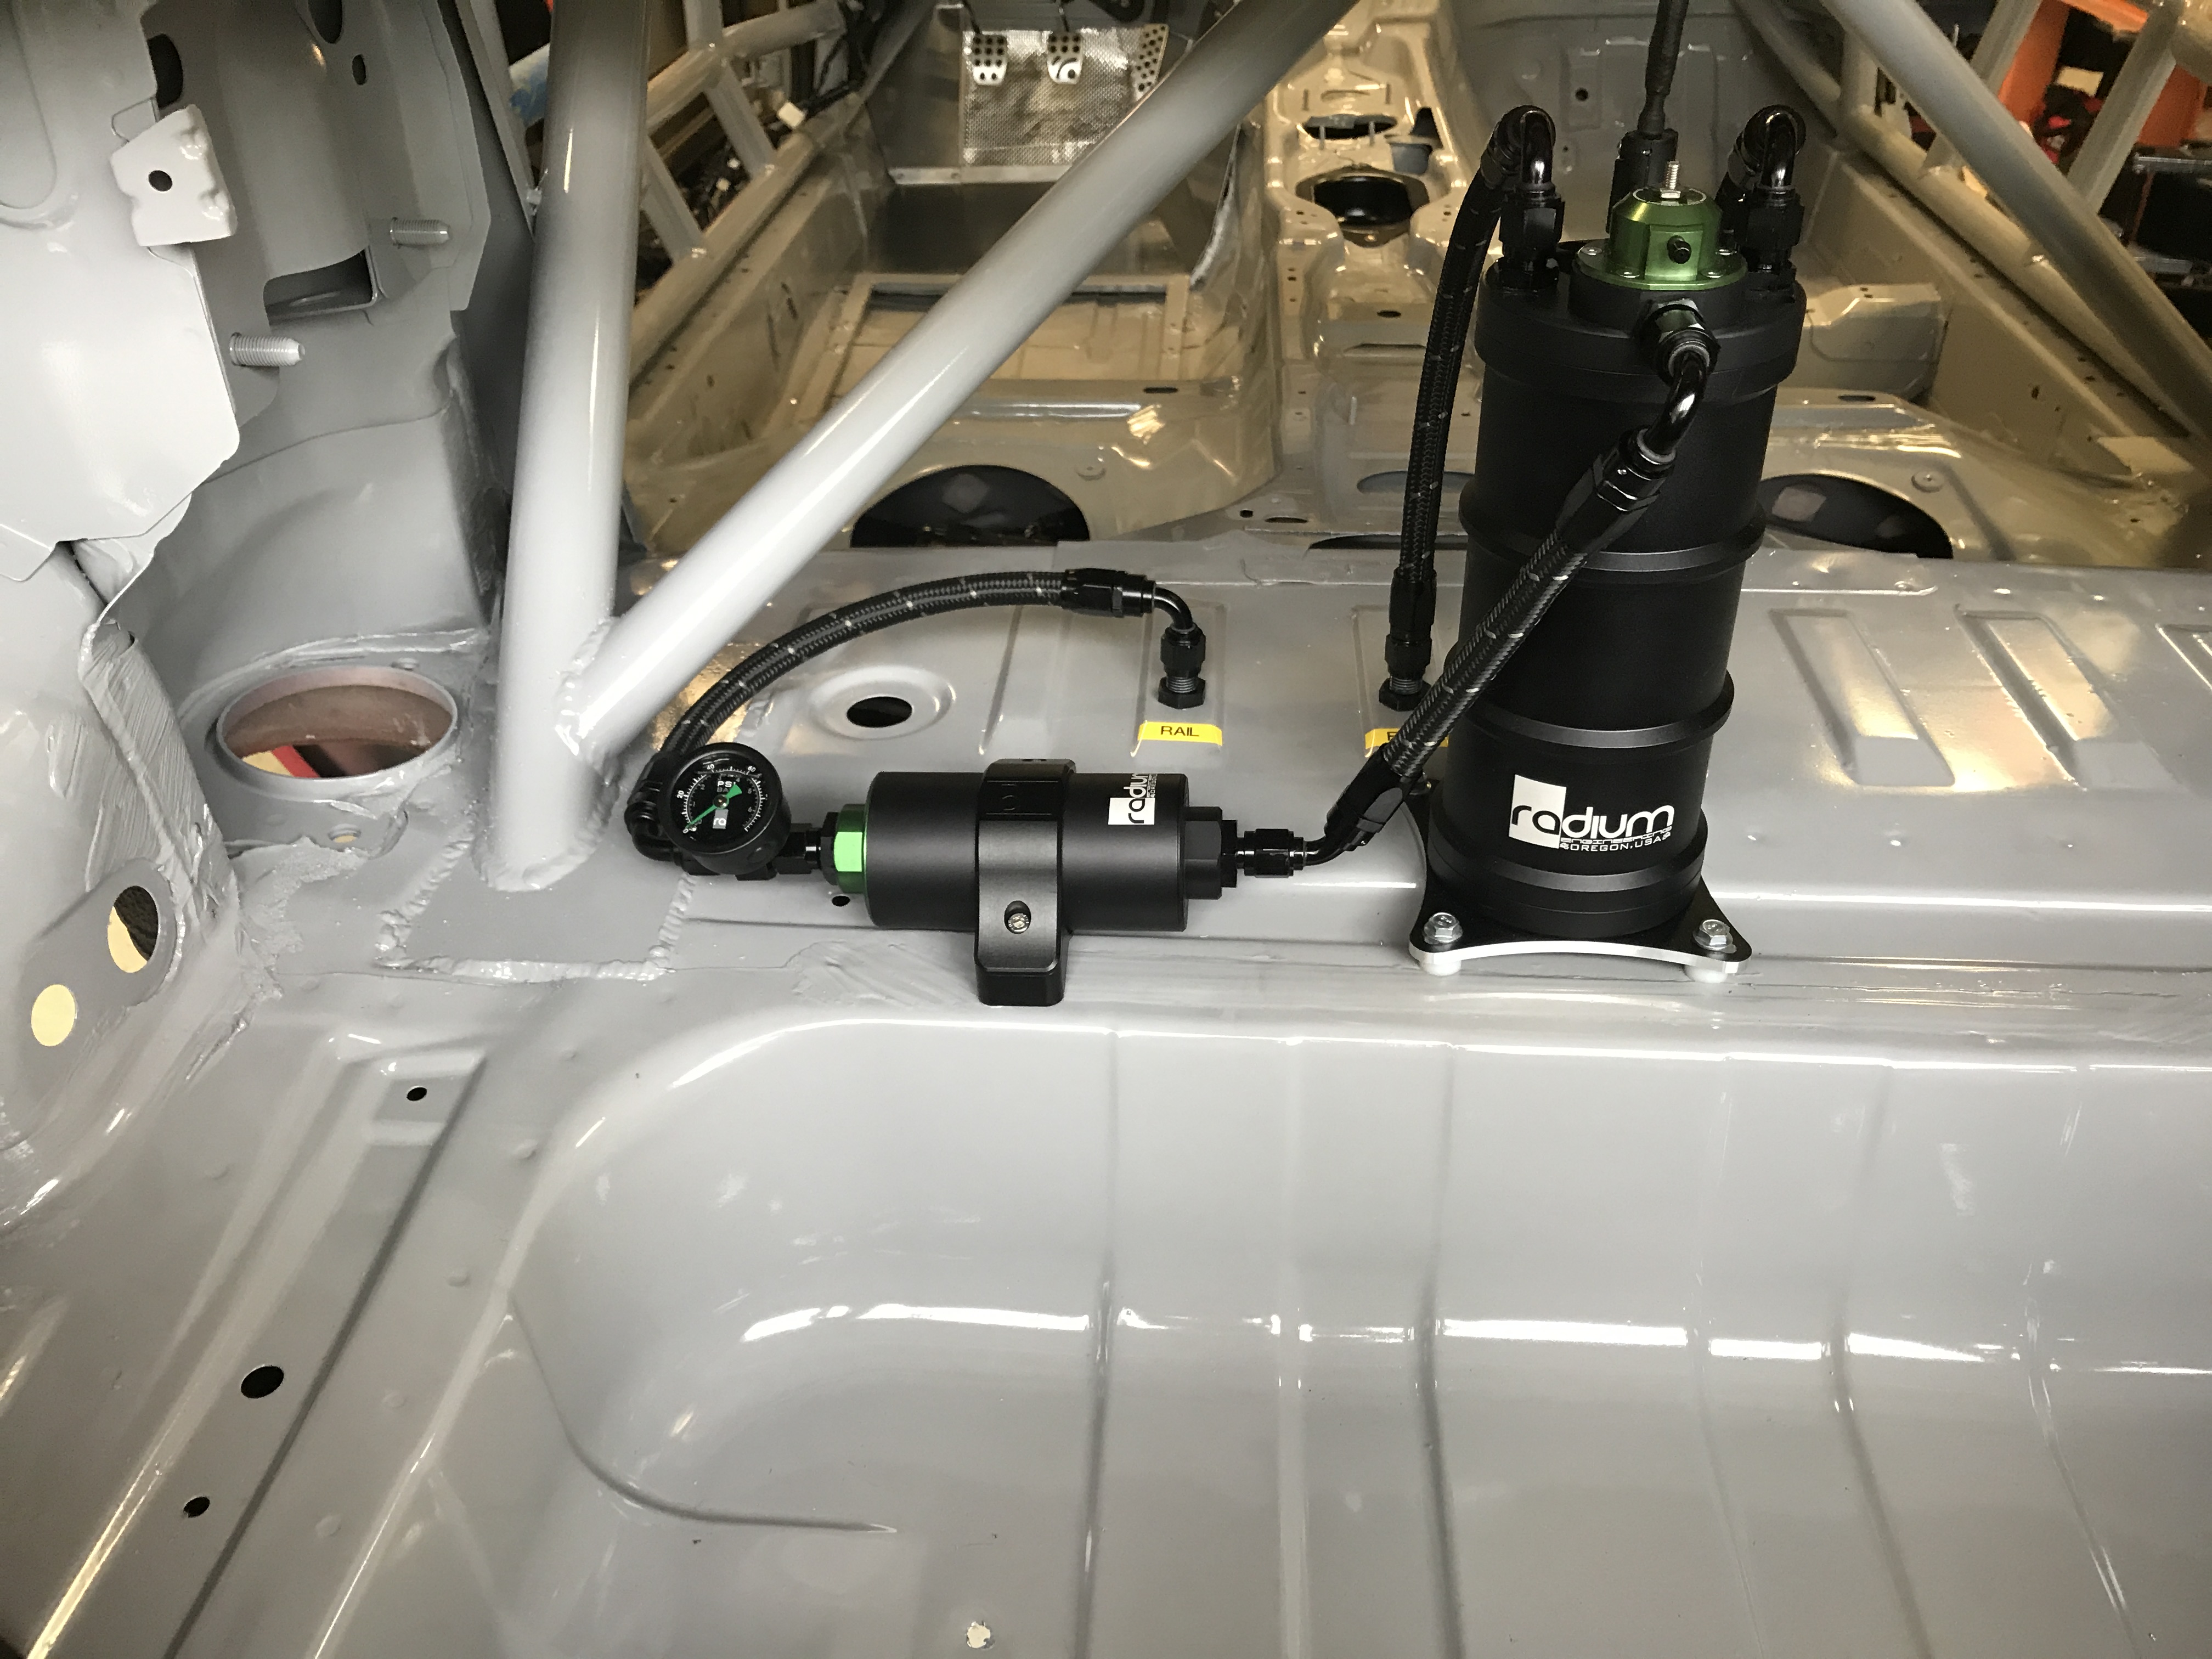
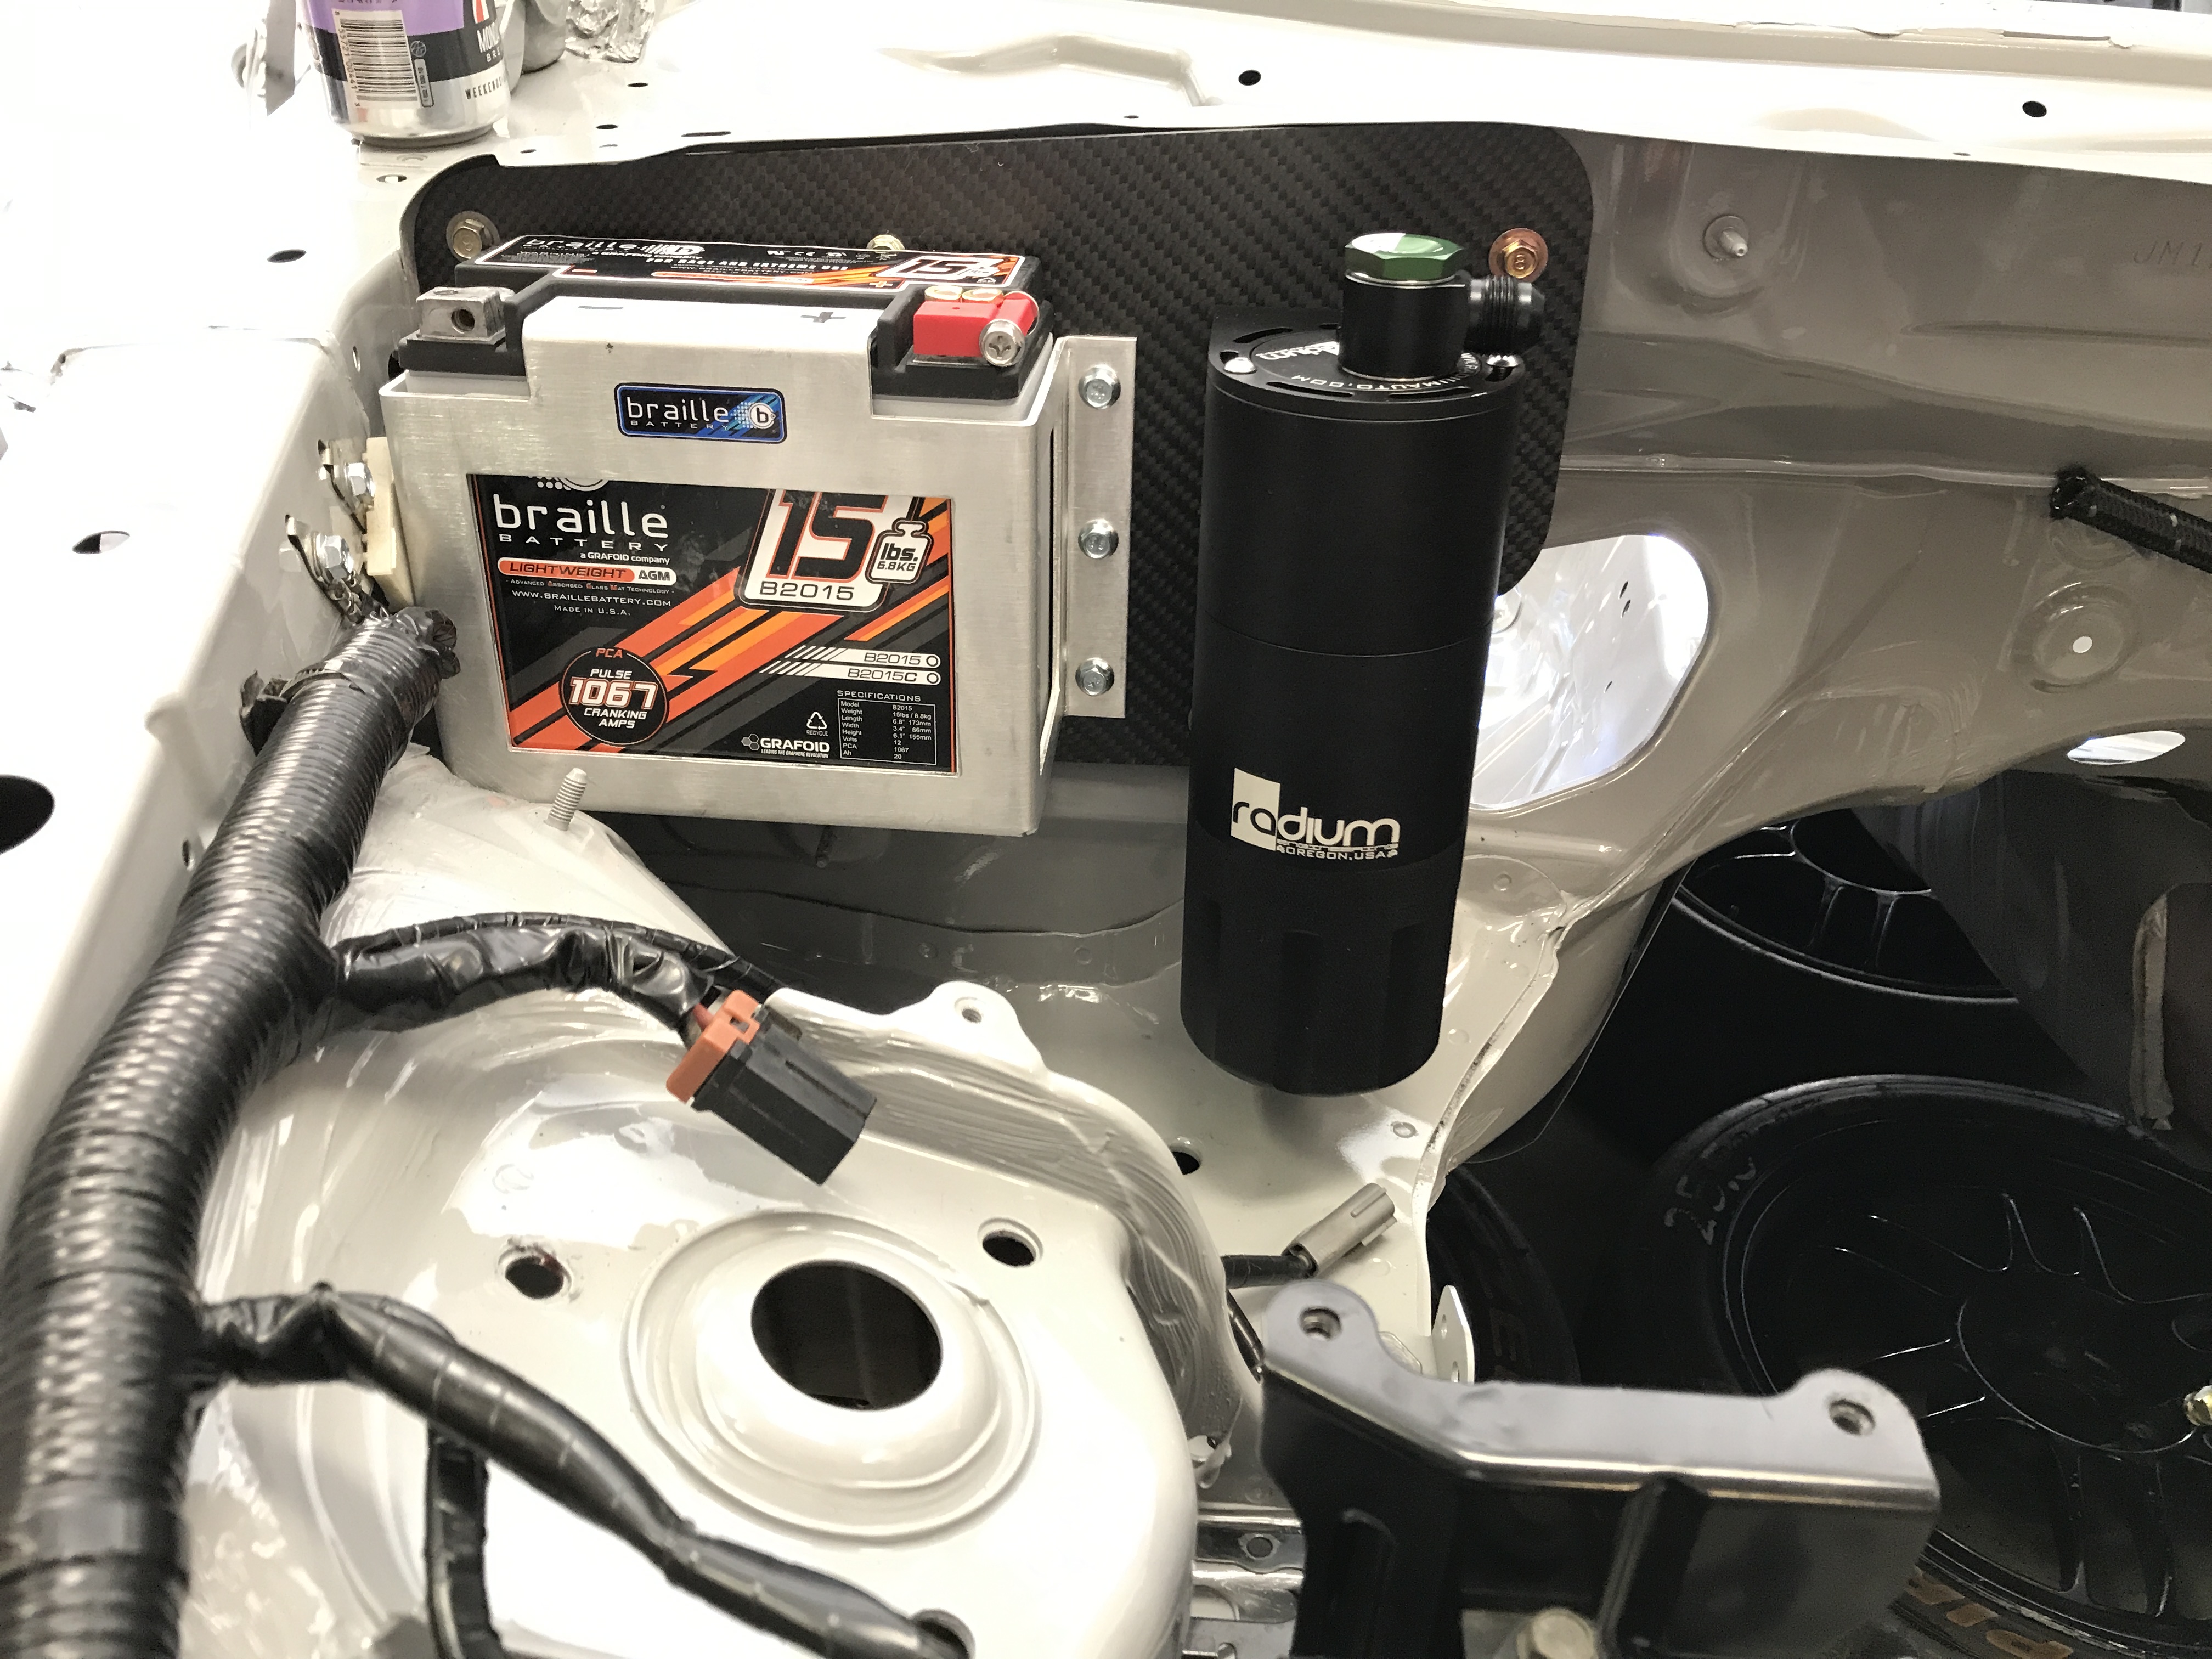
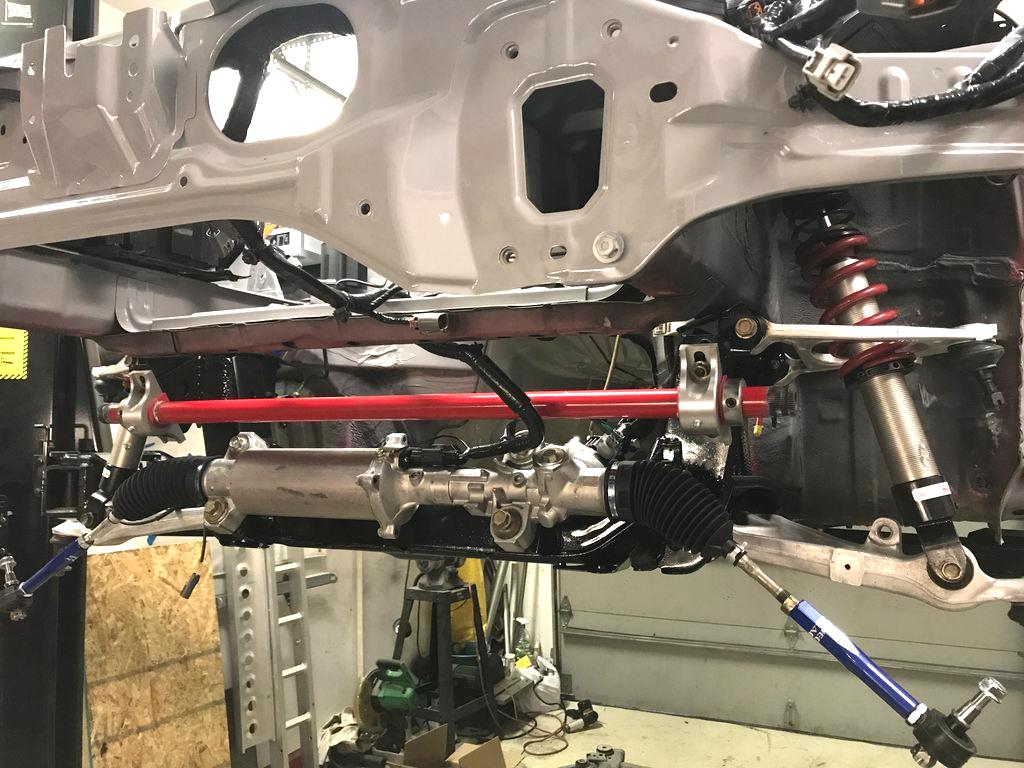
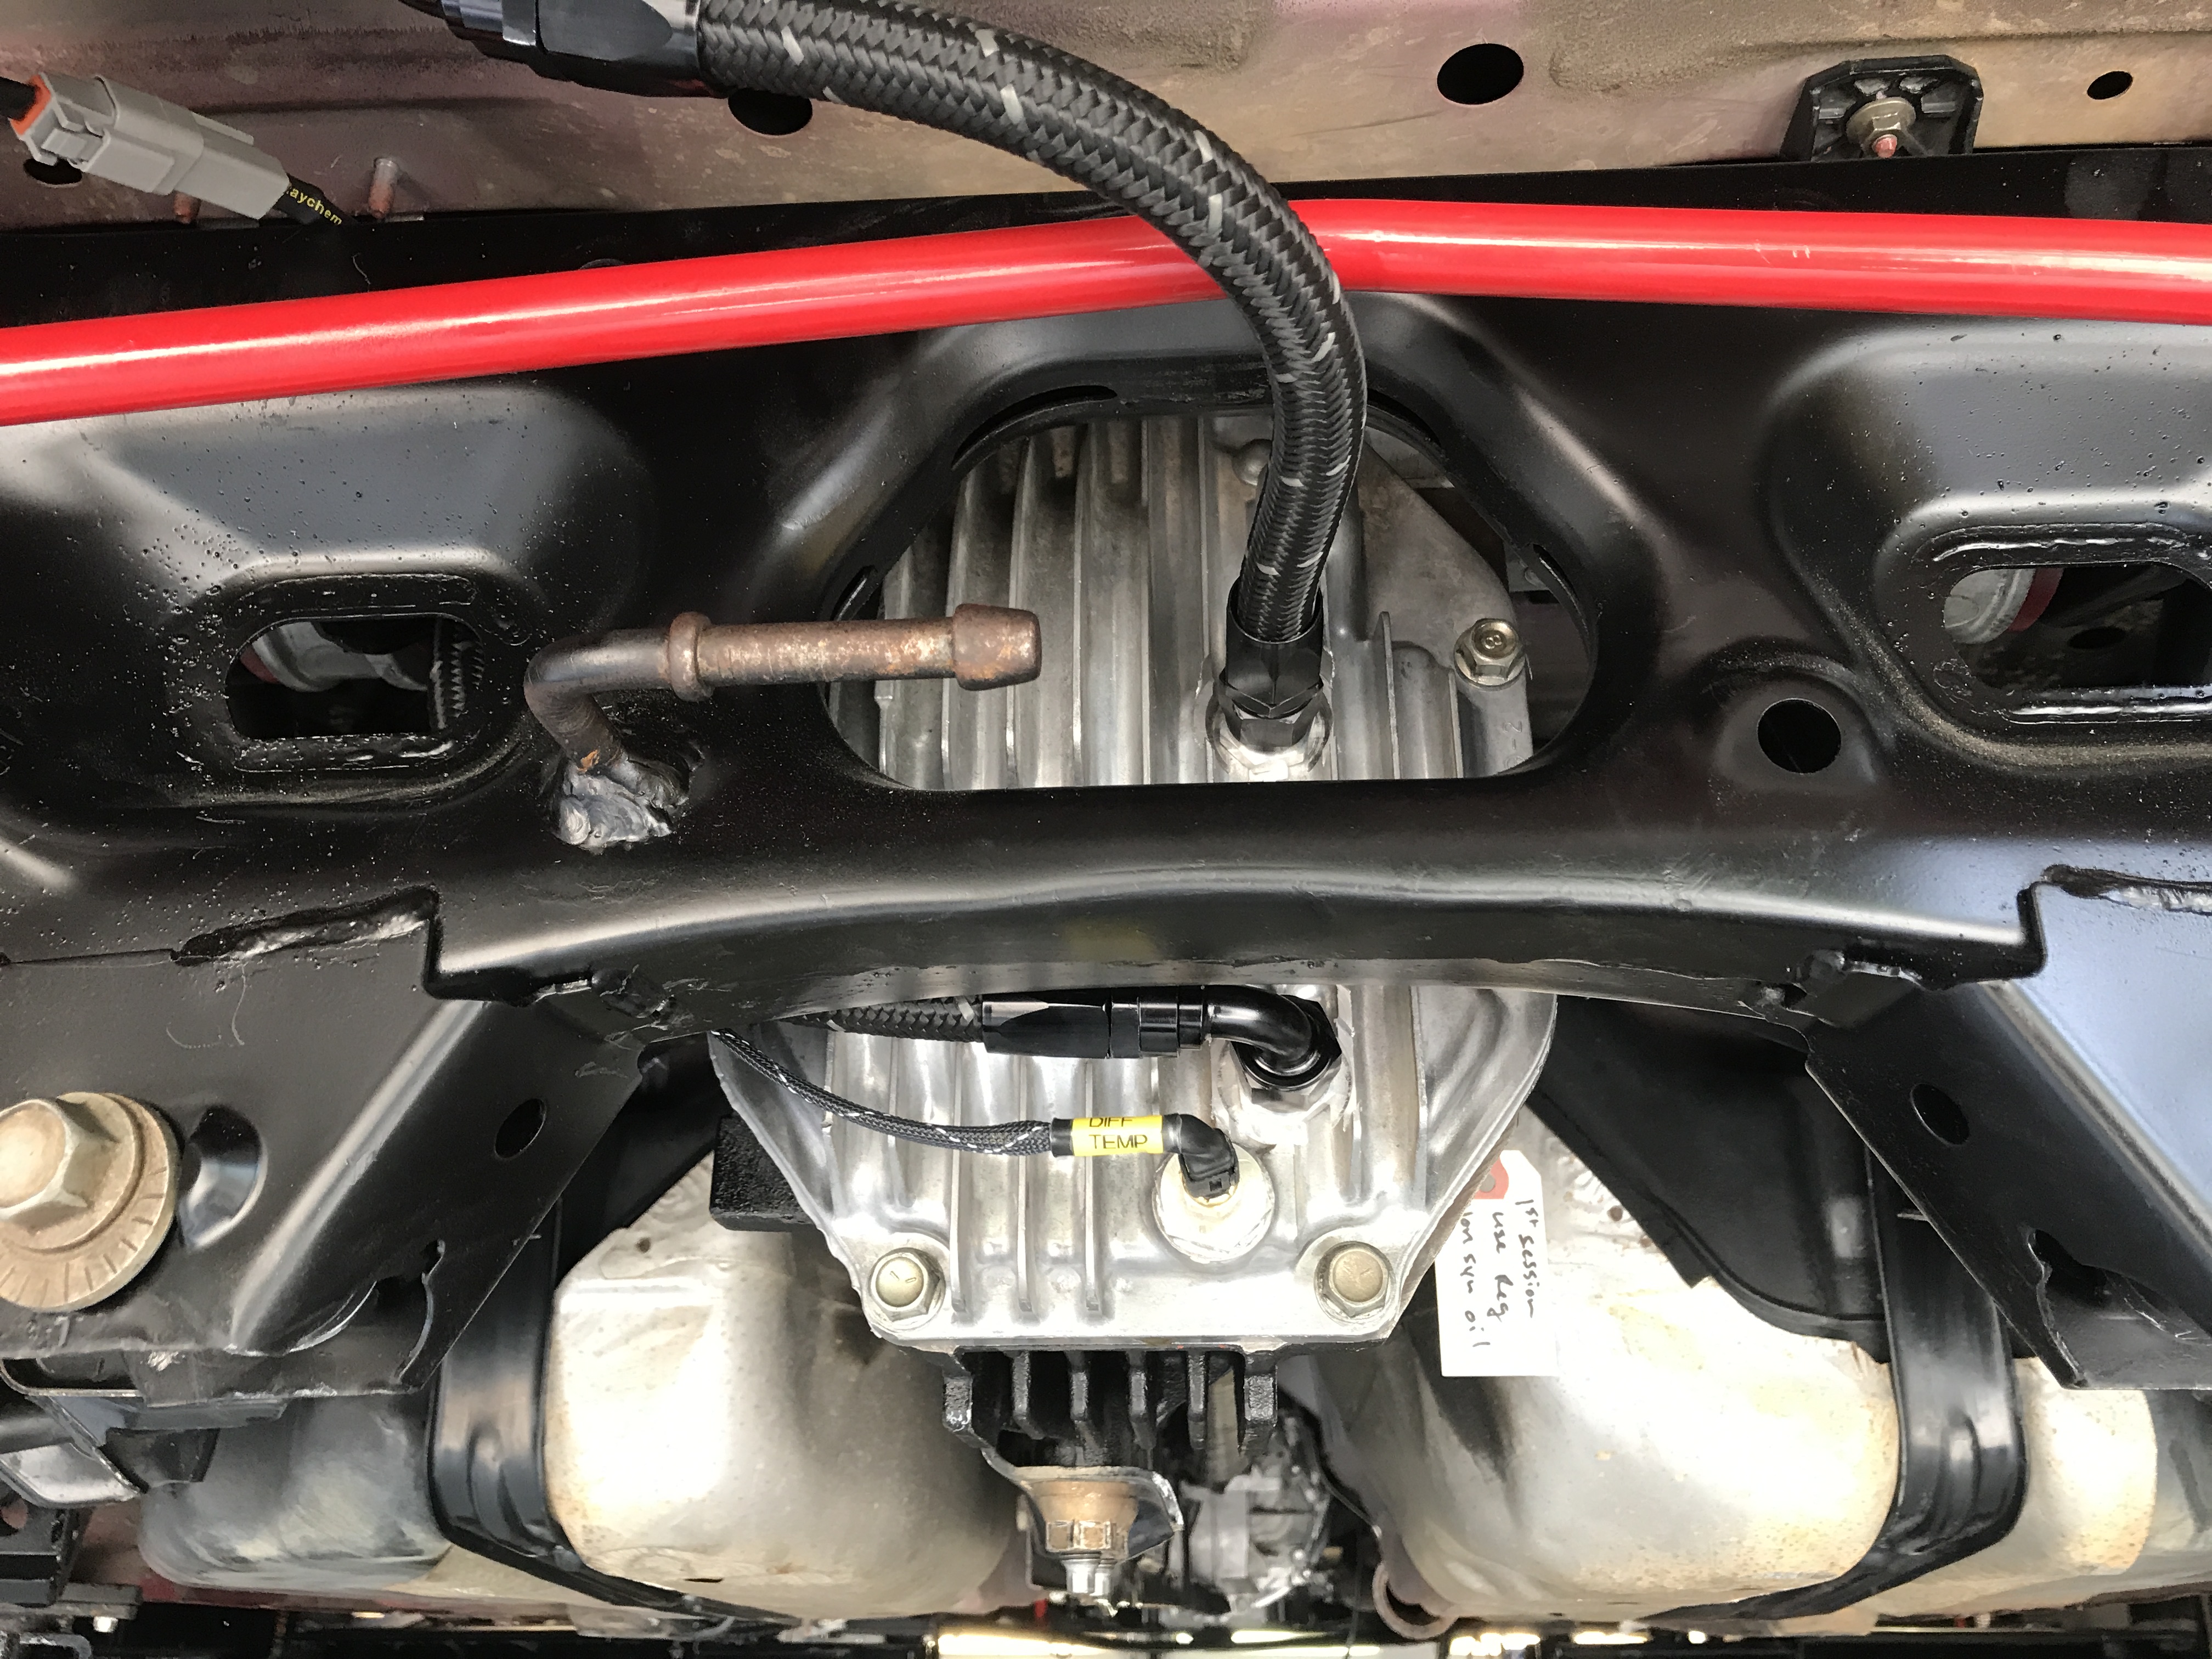
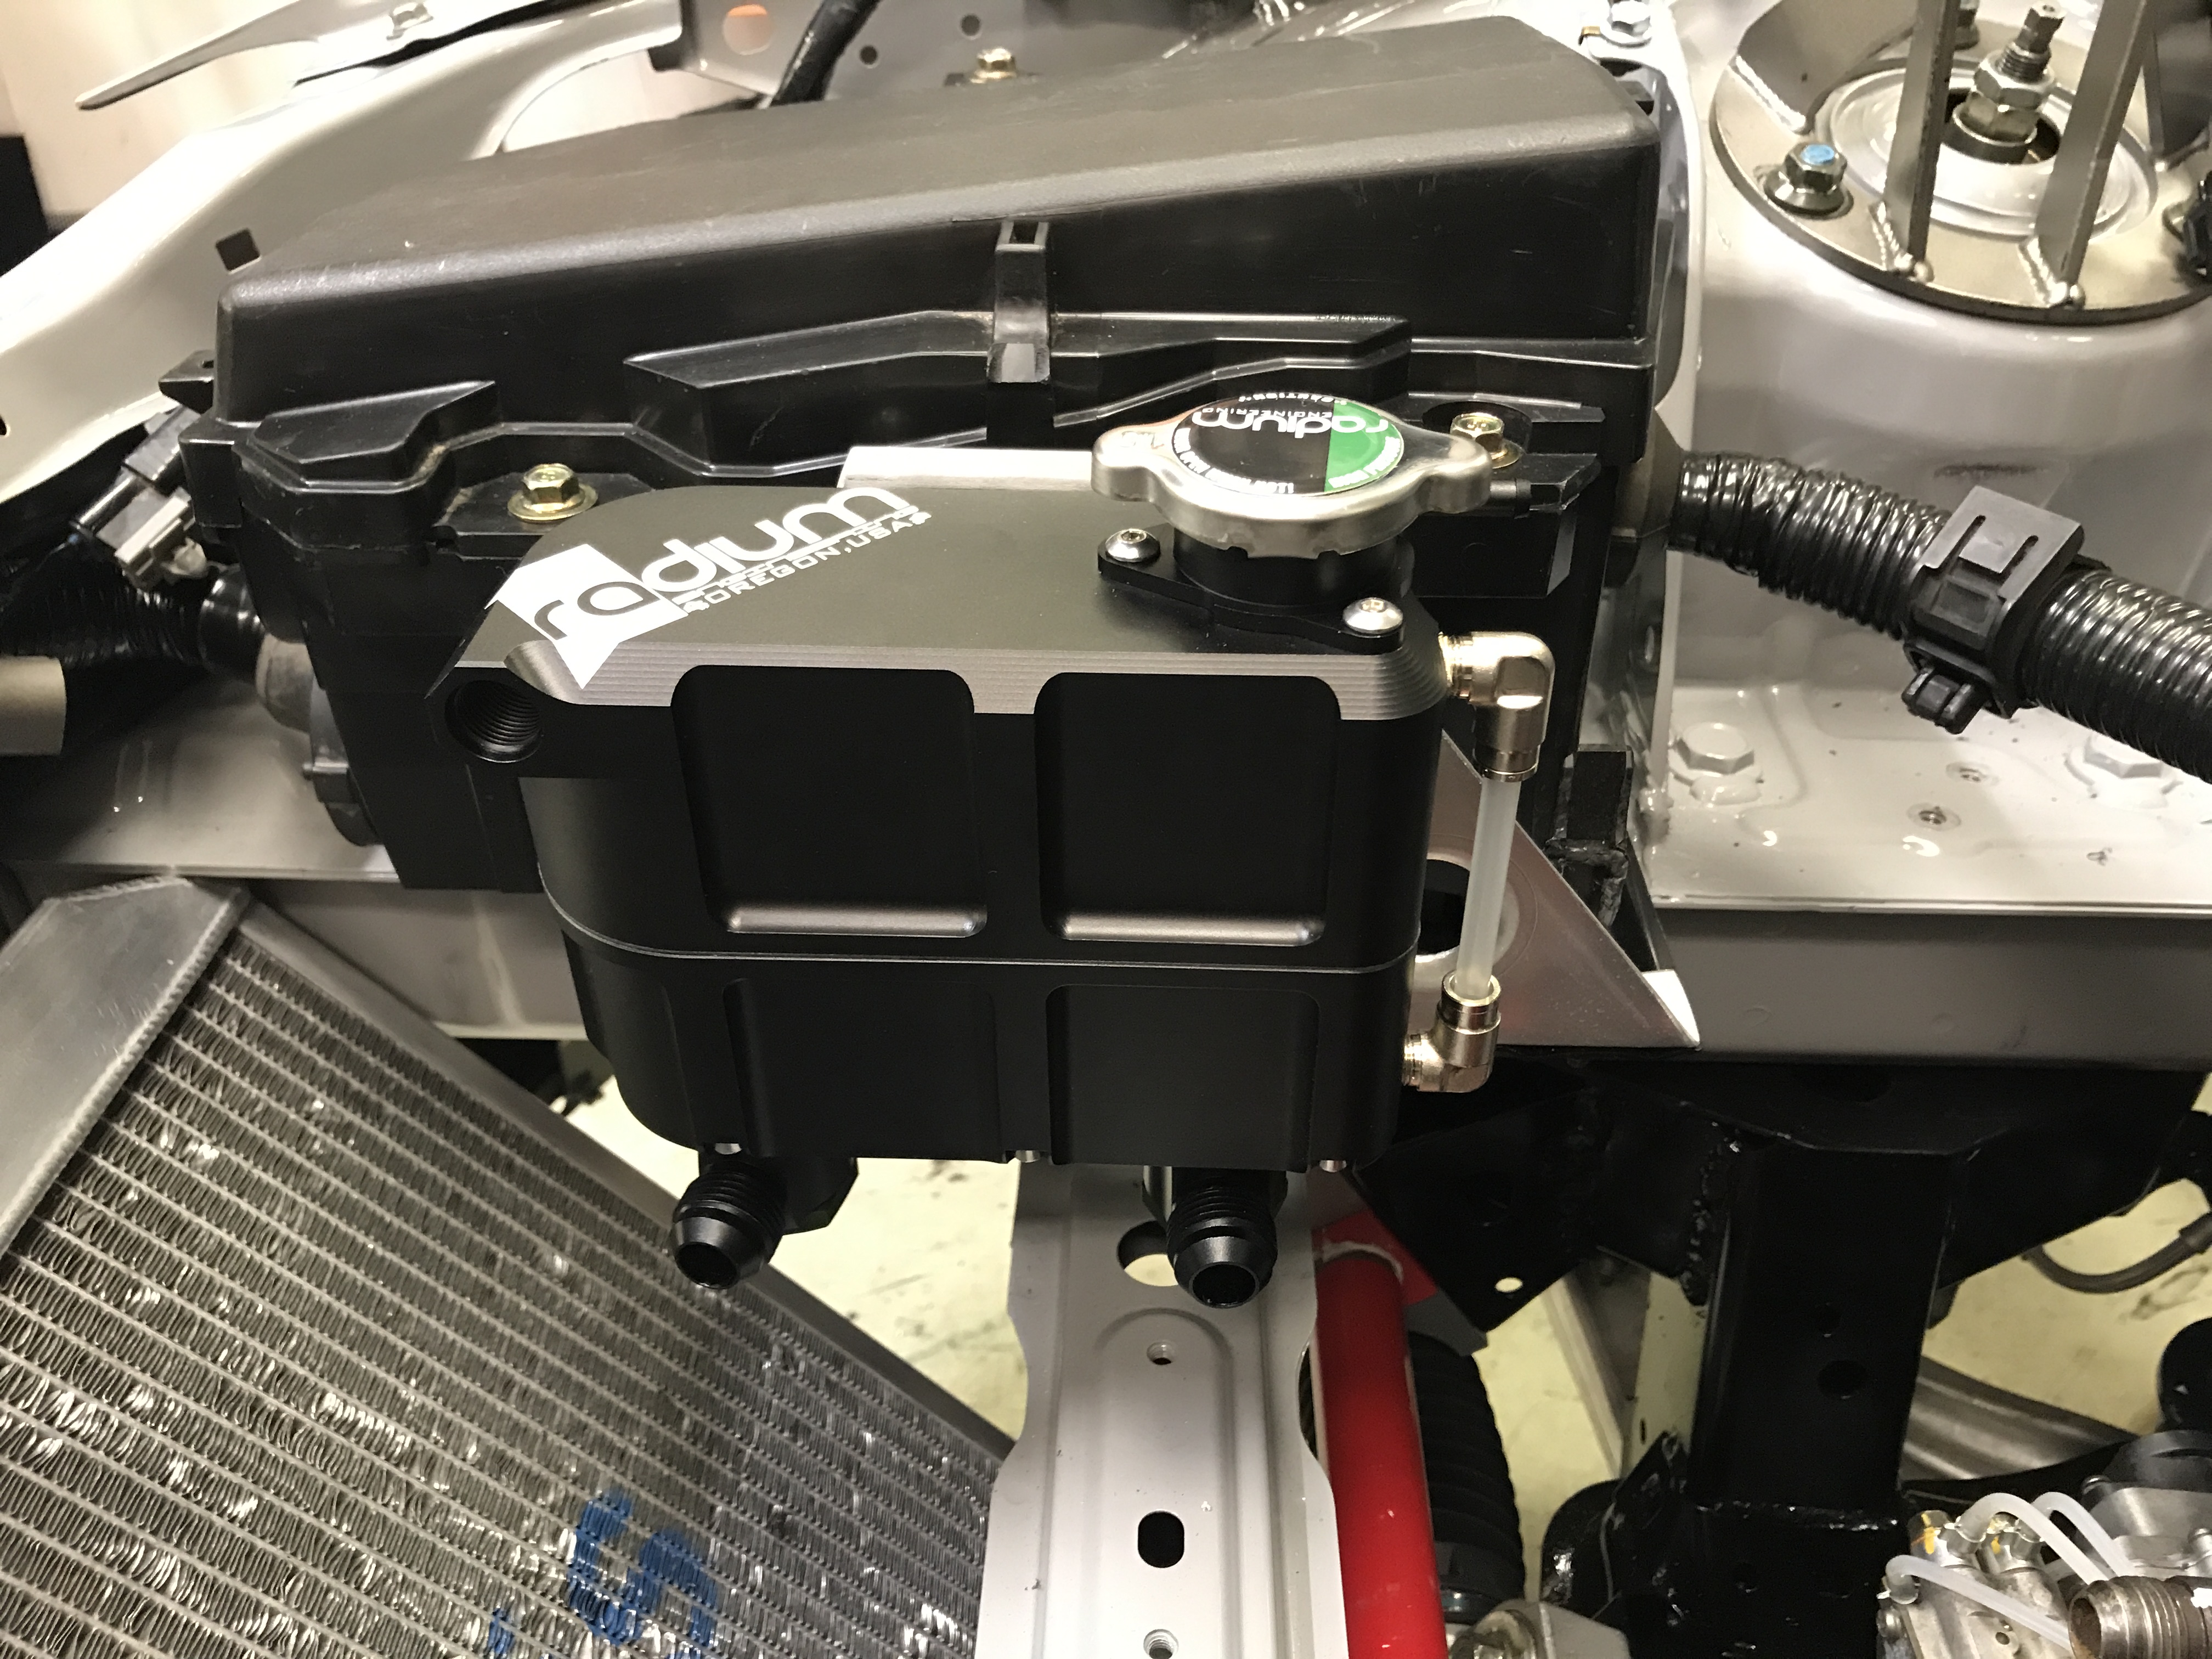
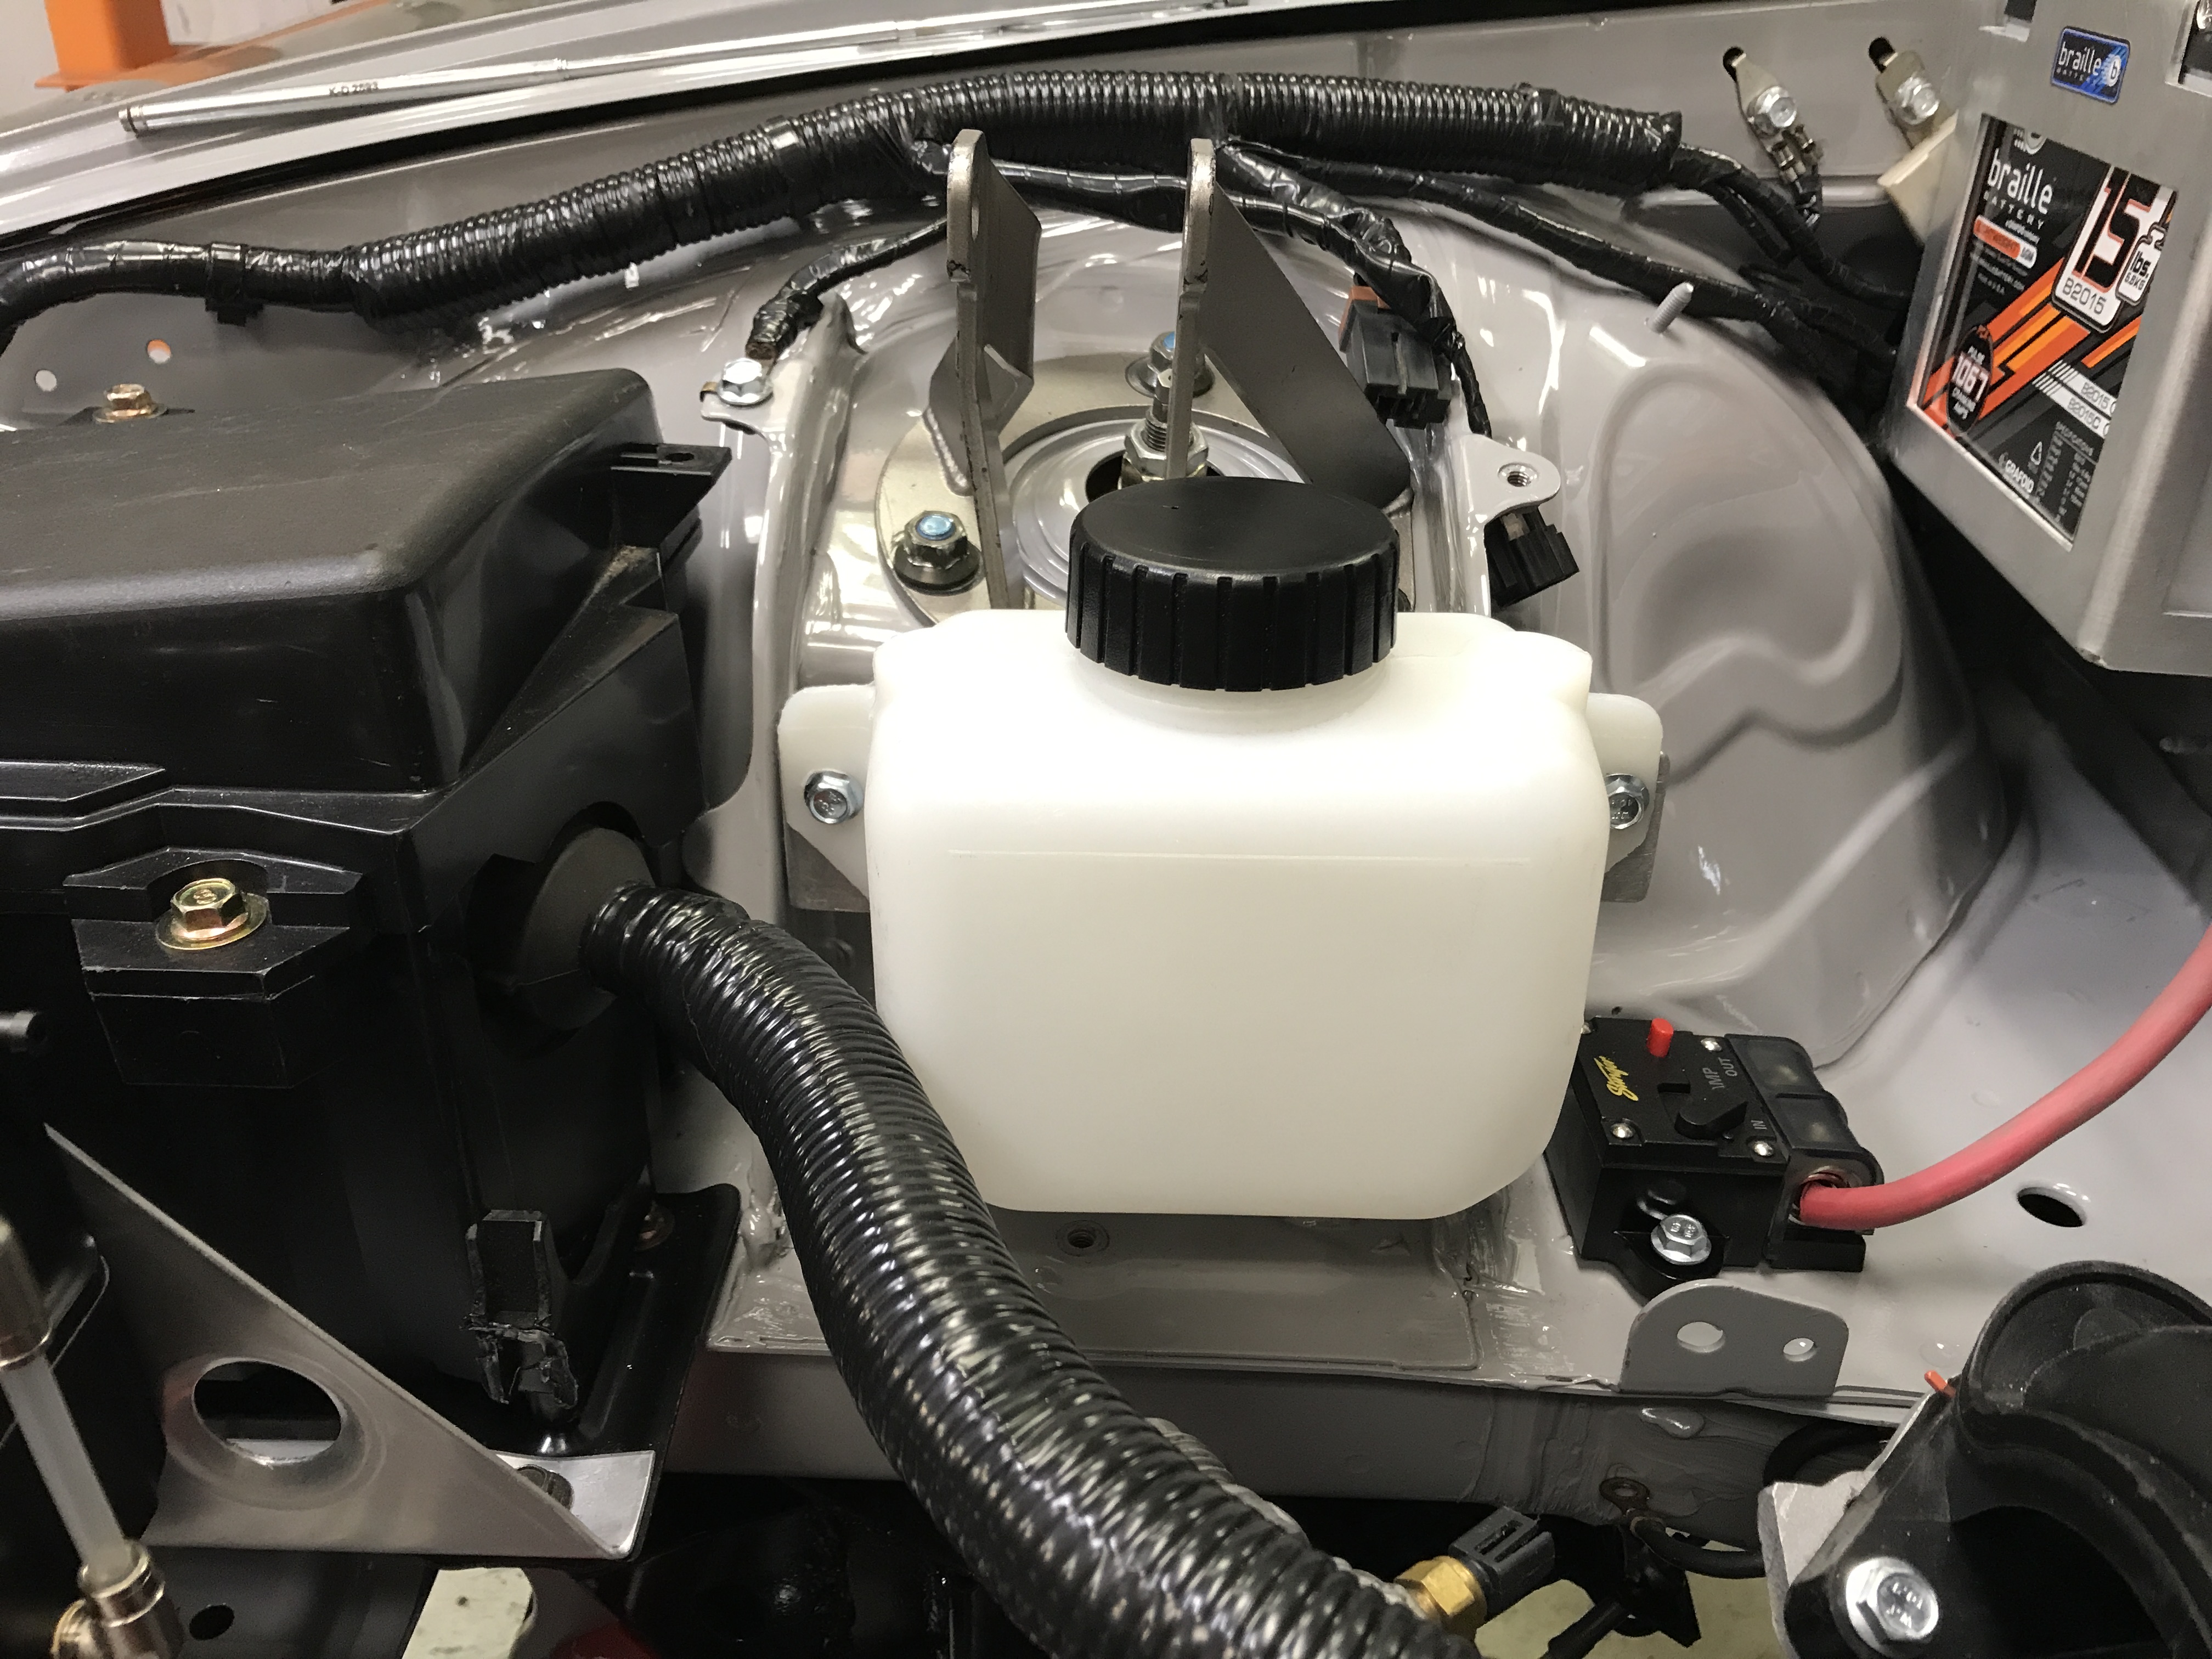
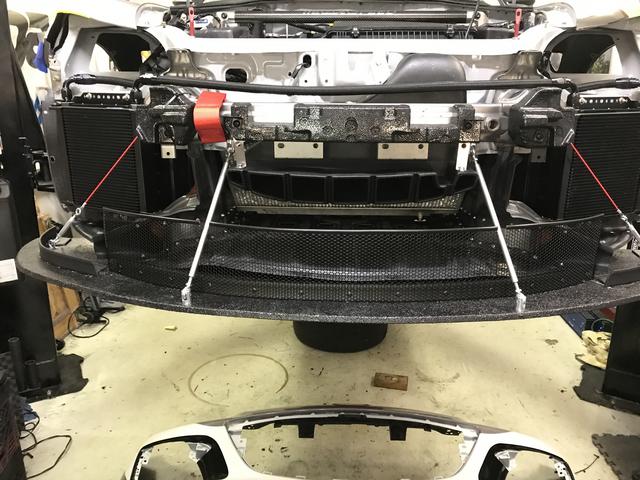
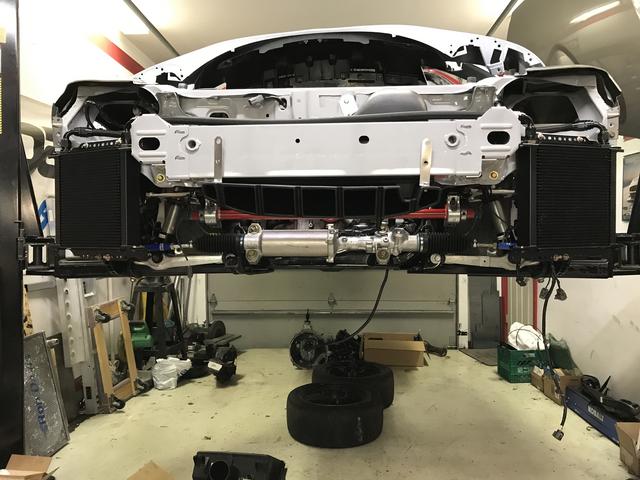
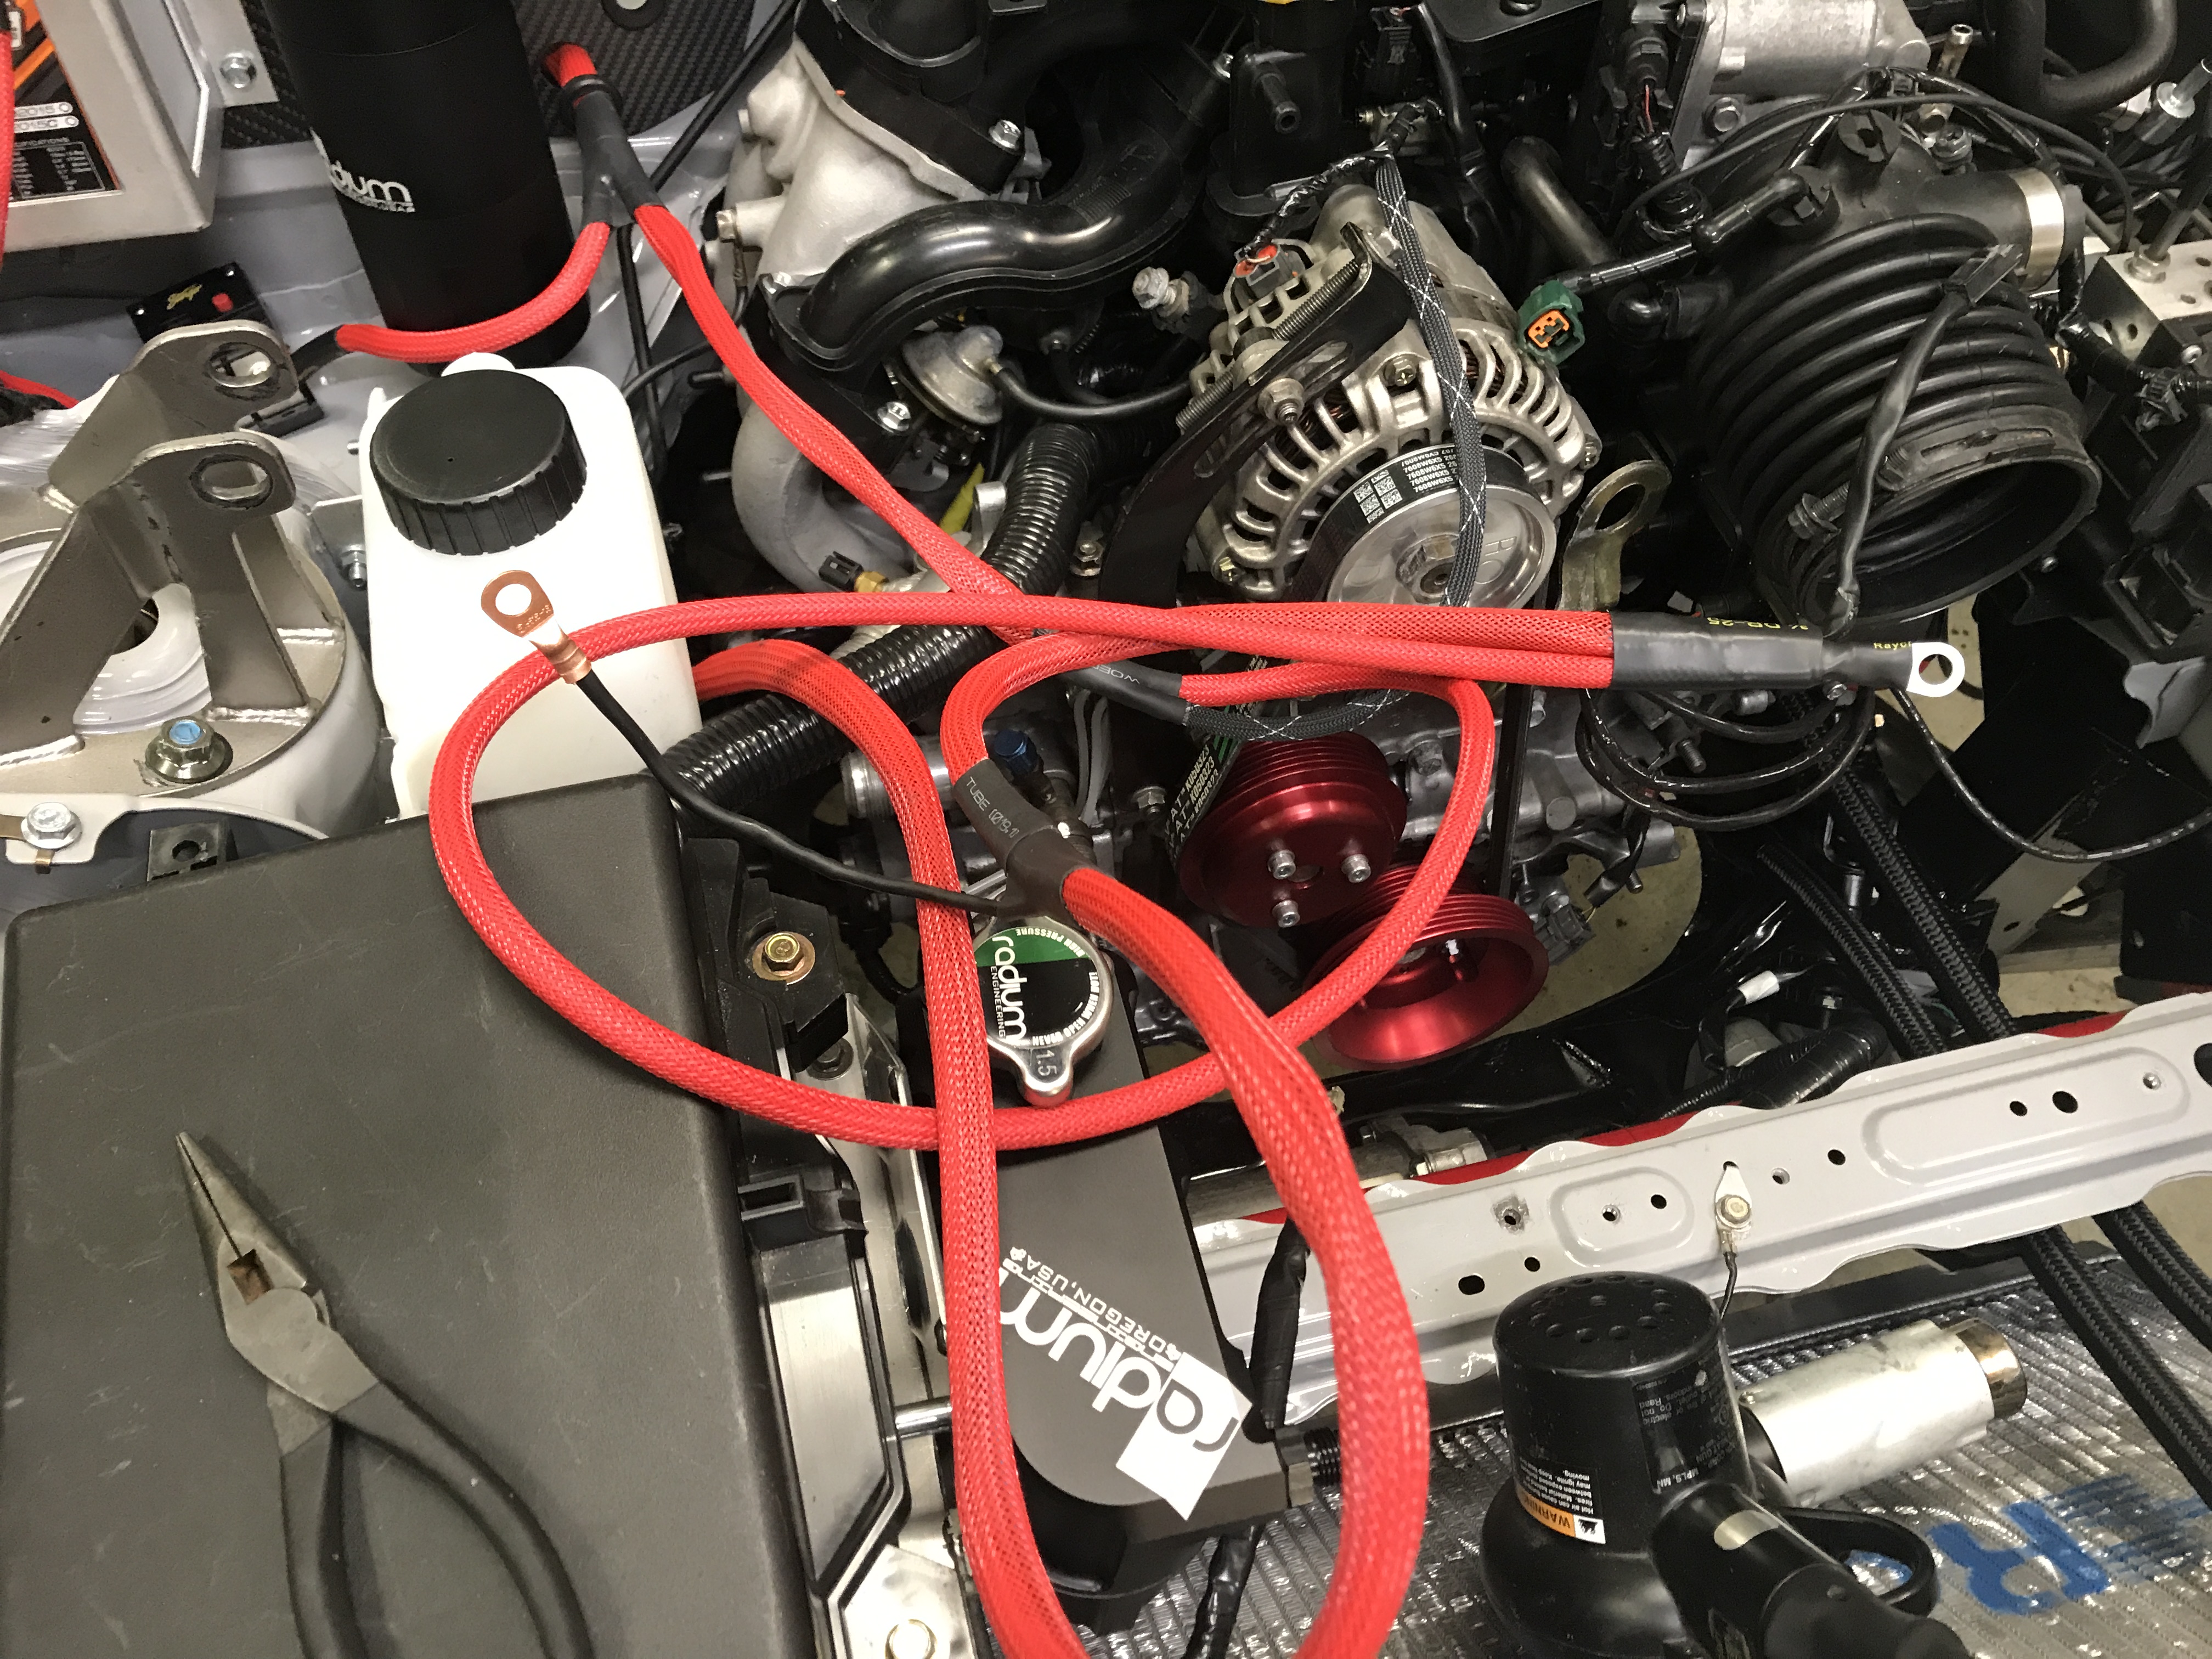
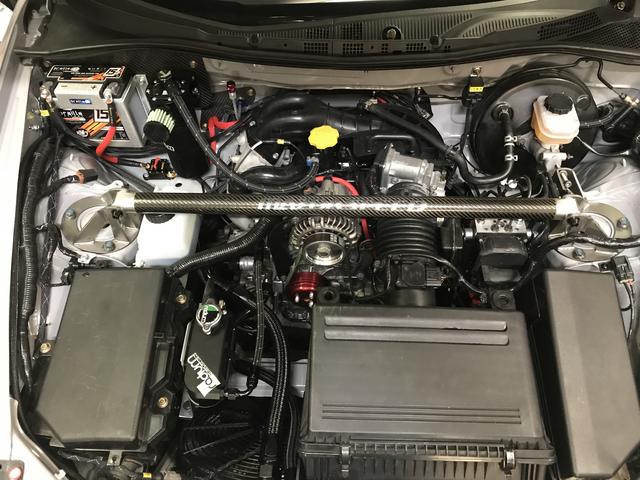
Fuel system. I didn't want to be dealing with starvation so here is the setup: S1 fuel pumps in both sides of the tank with the right side pumping into the bowl of the left. Left pumps into a Radium surge tank. Return from the surge tank is split between both pumps in order to keep them cool and happy. Surge tank pumps through a radium filter then to the rail. I'm powering the stock pumps through the stock fuel pump resistor since they are not pumping against a load. A big thanks to my sponsor, Improved Racing for the high quality hose and fittings.
improvedracing.com
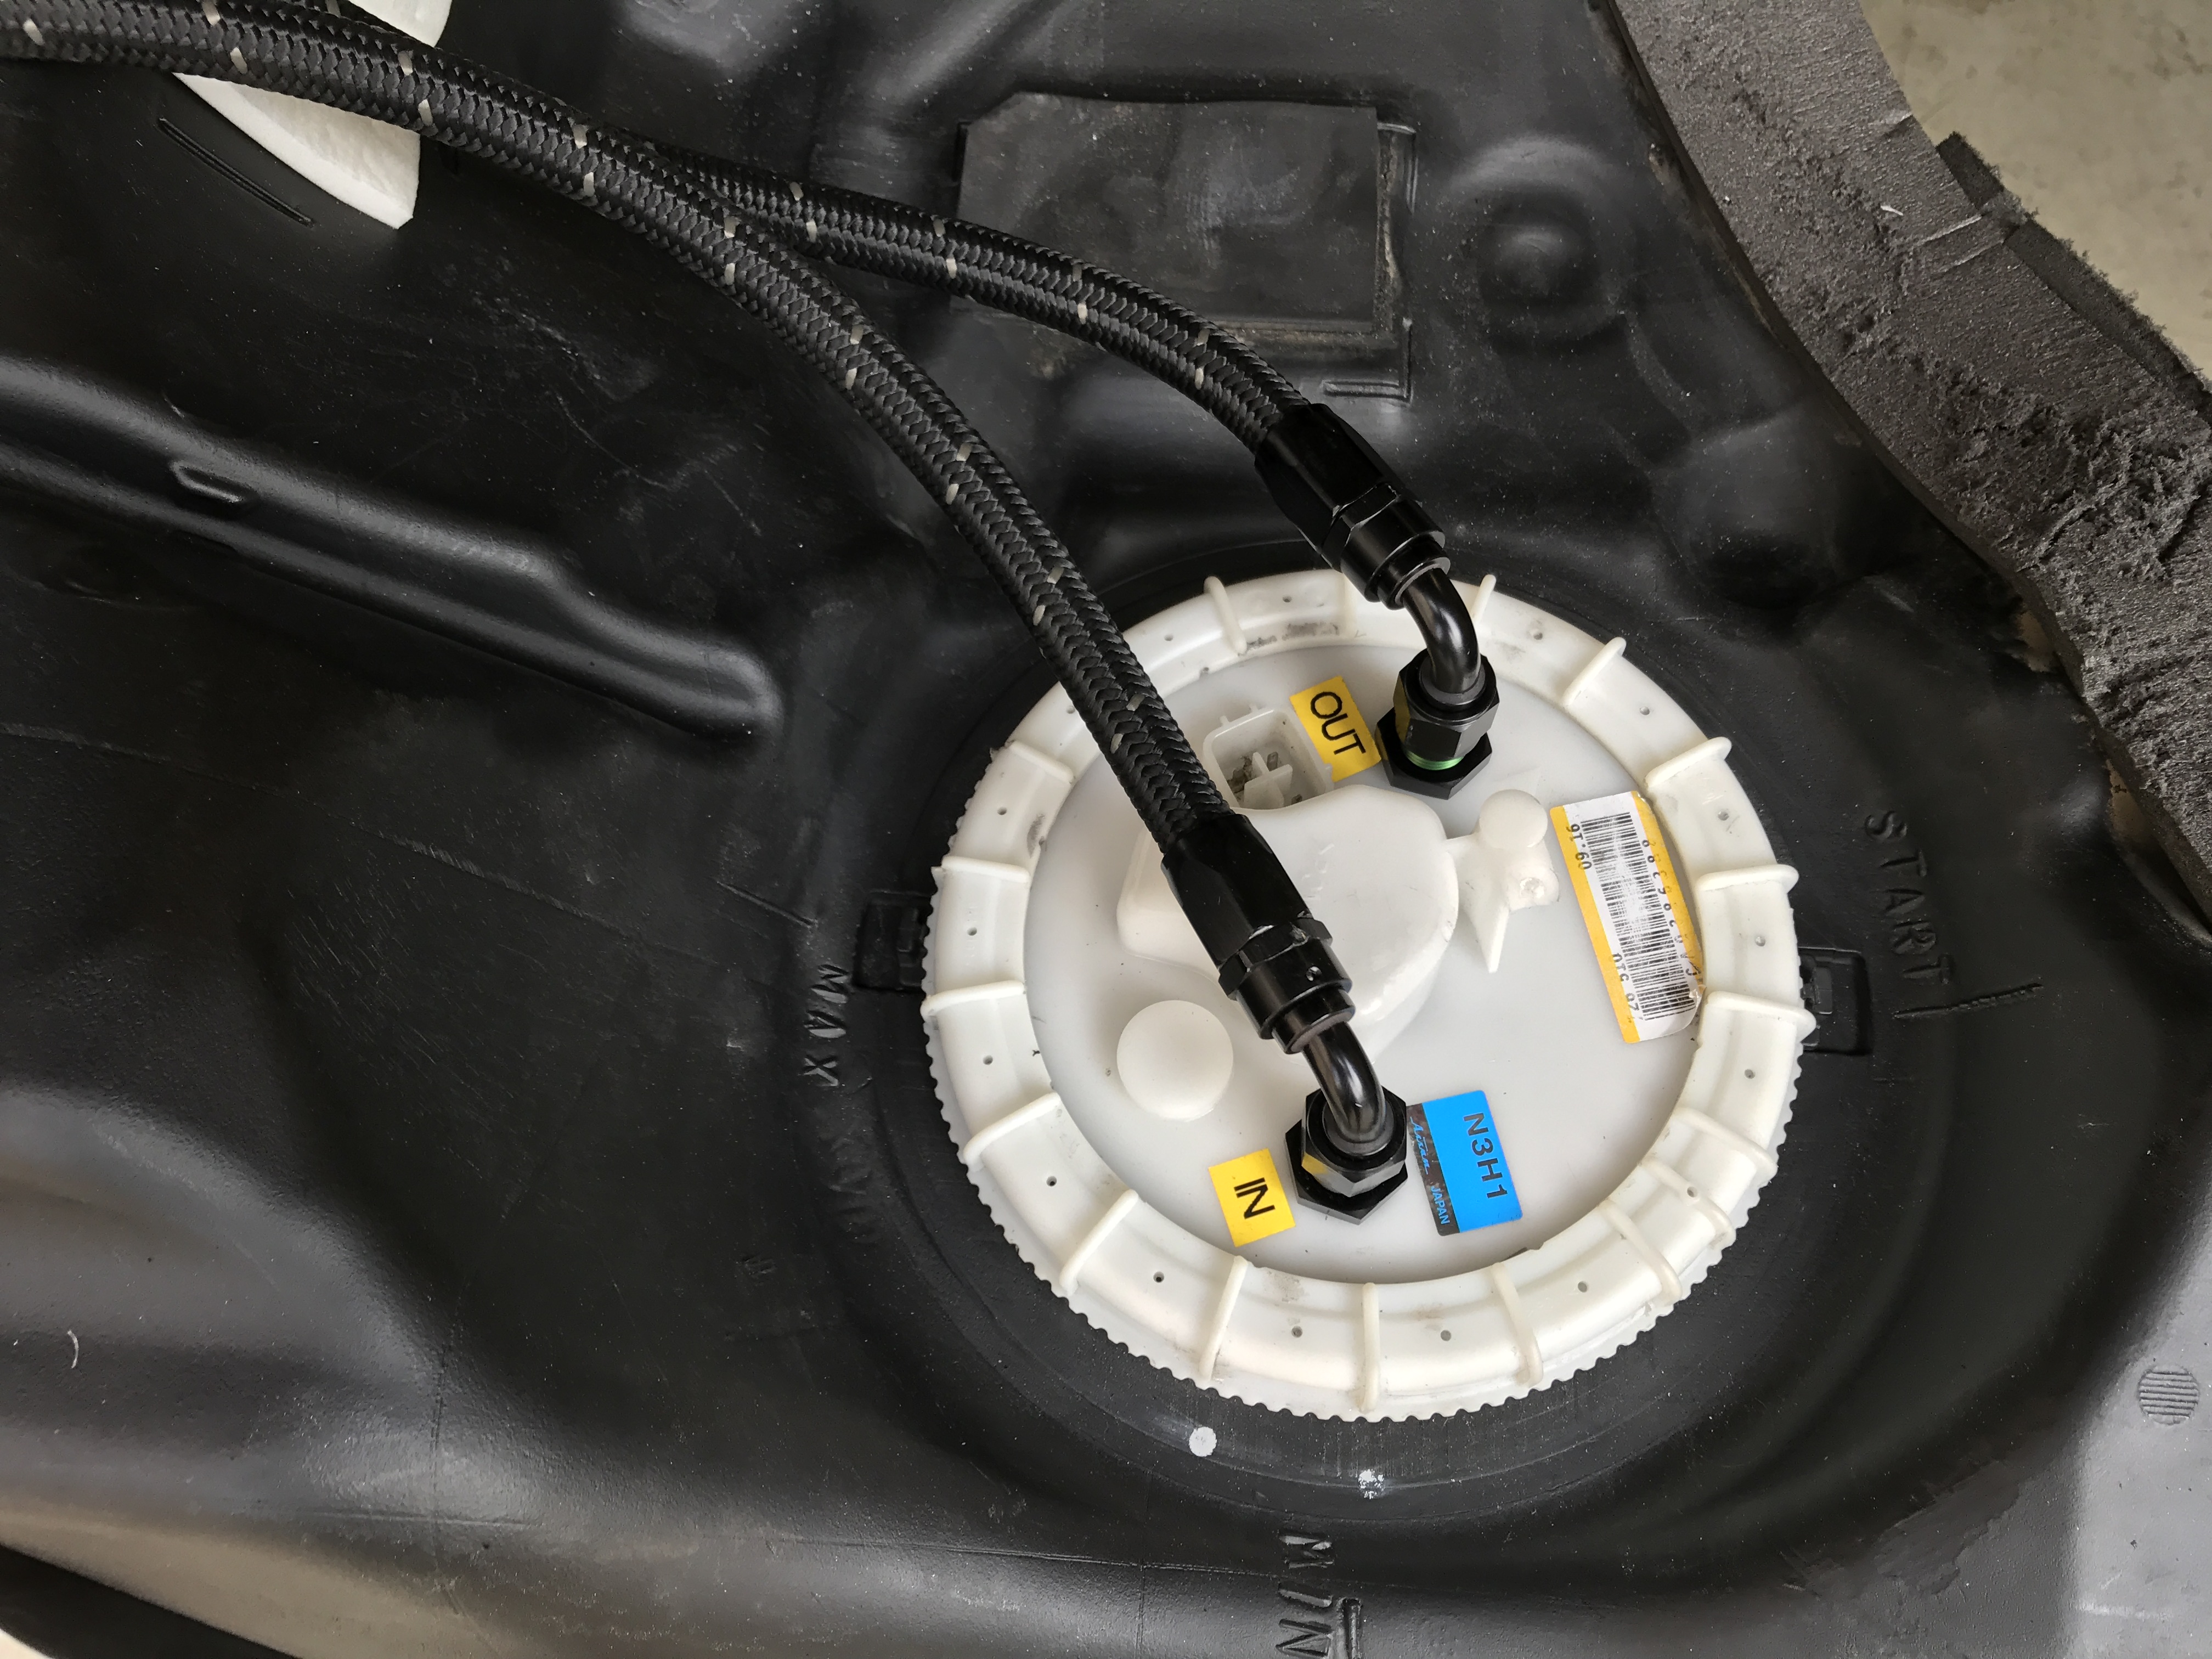
improvedracing.com

Excellent job except using S1 pumps would not have been my choice. The internal filters, relief valve, etc. are not rebuildable on the S1 pump. You have to dump the whole thing for a new one for anything other than a pump replacement. That all changed on the S2 pump, which not only can you replace those parts individually it also has a better pump and a better fuel bowl setup.
It would have been nice to see how you did the pump fittings in detail if you have those pics.
It would have been nice to see how you did the pump fittings in detail if you have those pics.
Didn't photograph the pumps themselves unfortunately but if your prediction is correct, I may be soon.
I was aware of the S1 problems but since I'm only using them as low pressure lift pumps and not using the siphon and the bowl really doesn't matter, I figured I'd be ok.
AC
I was aware of the S1 problems but since I'm only using them as low pressure lift pumps and not using the siphon and the bowl really doesn't matter, I figured I'd be ok.
AC
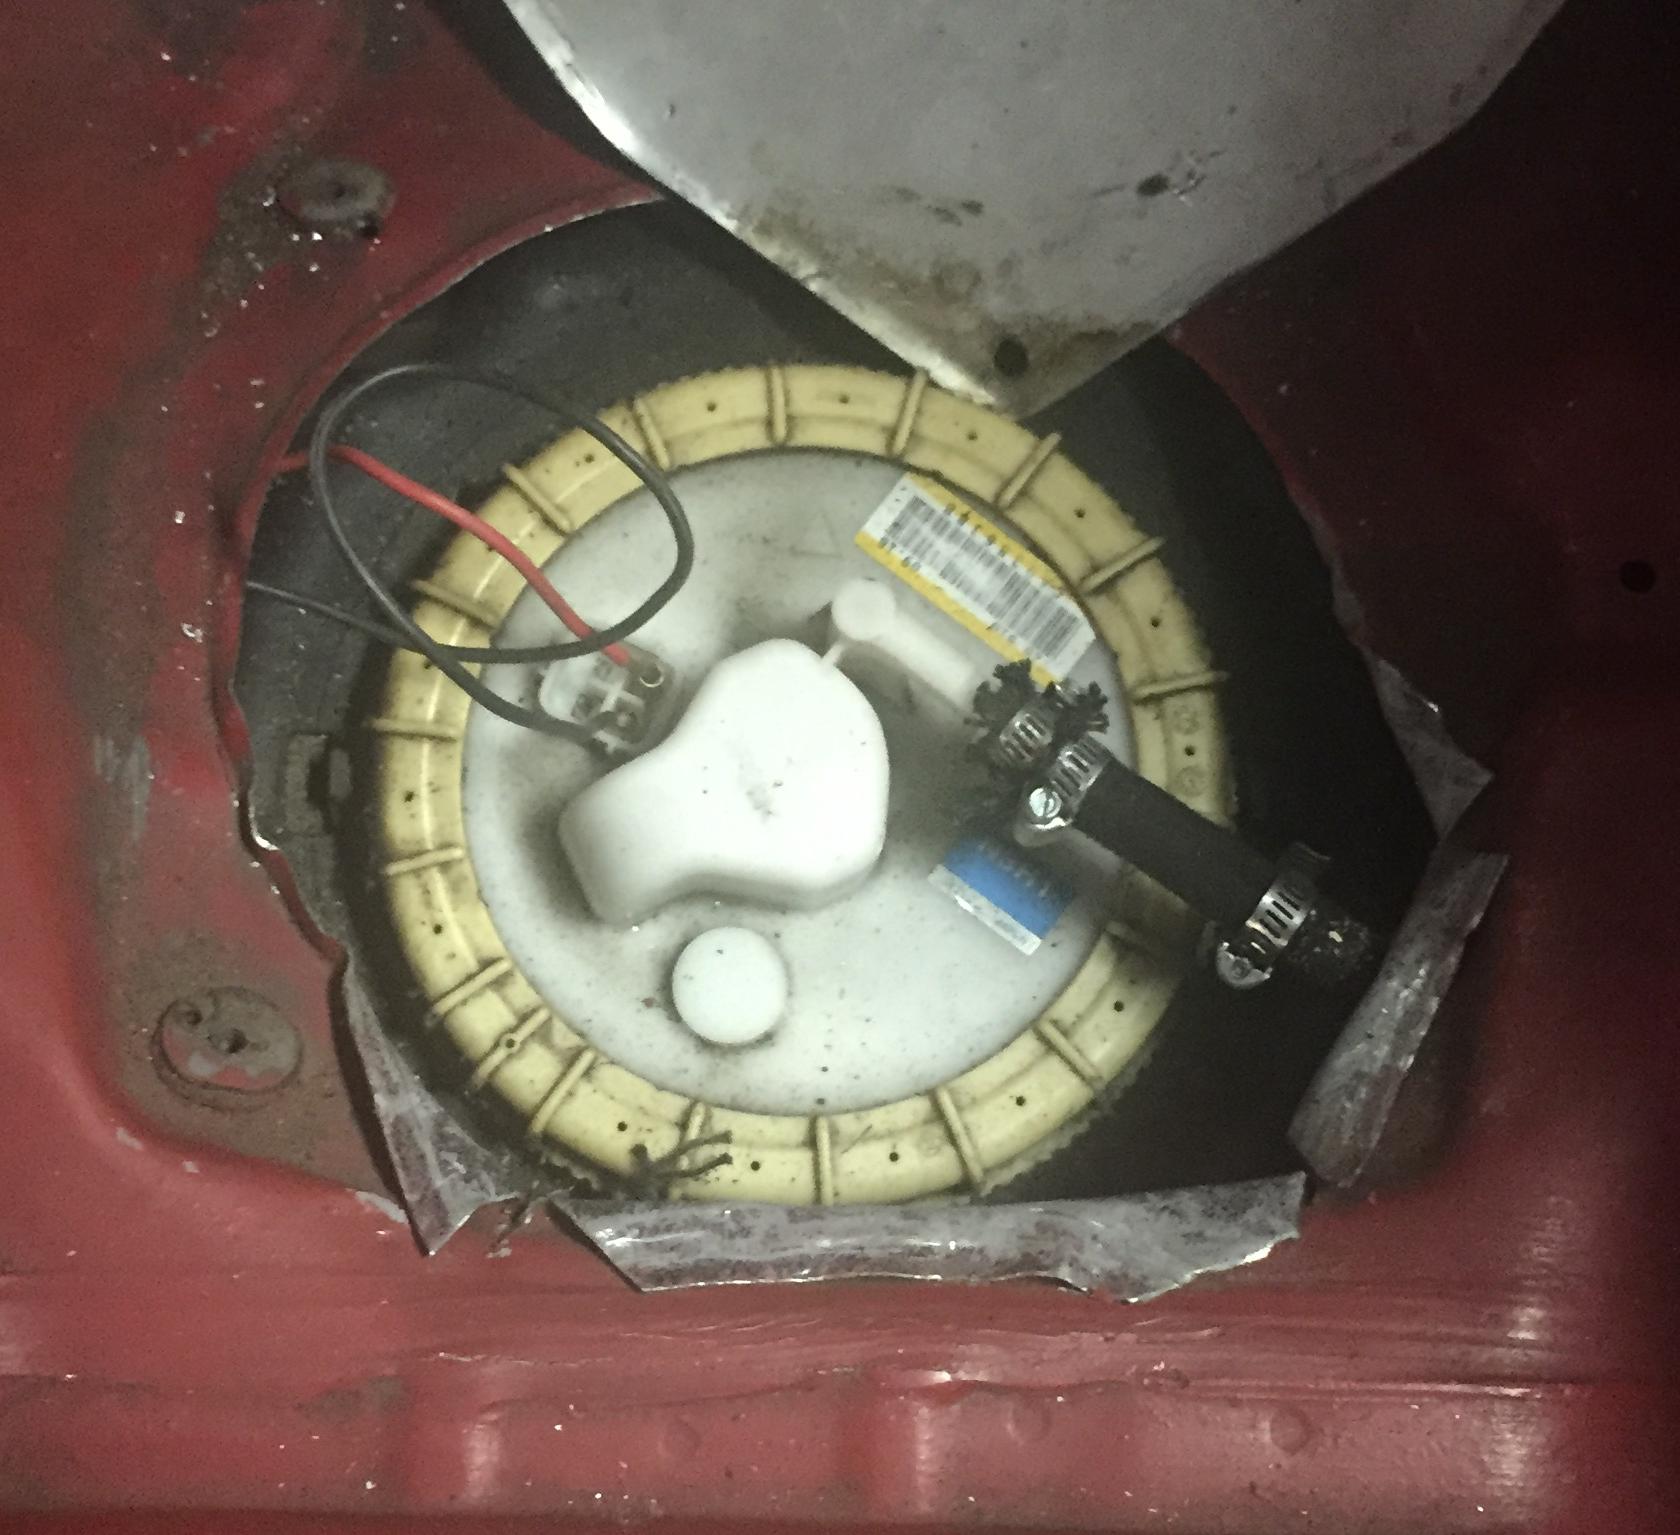
I'm only using the LH float. Since I'm not using the stock instrument cluster is doesn't matter. The fuel gauge I'm using is programmable. Realistically it's not that important as we typically pump the tank empty then add a known quantity of fuel prior to the race/qual session.
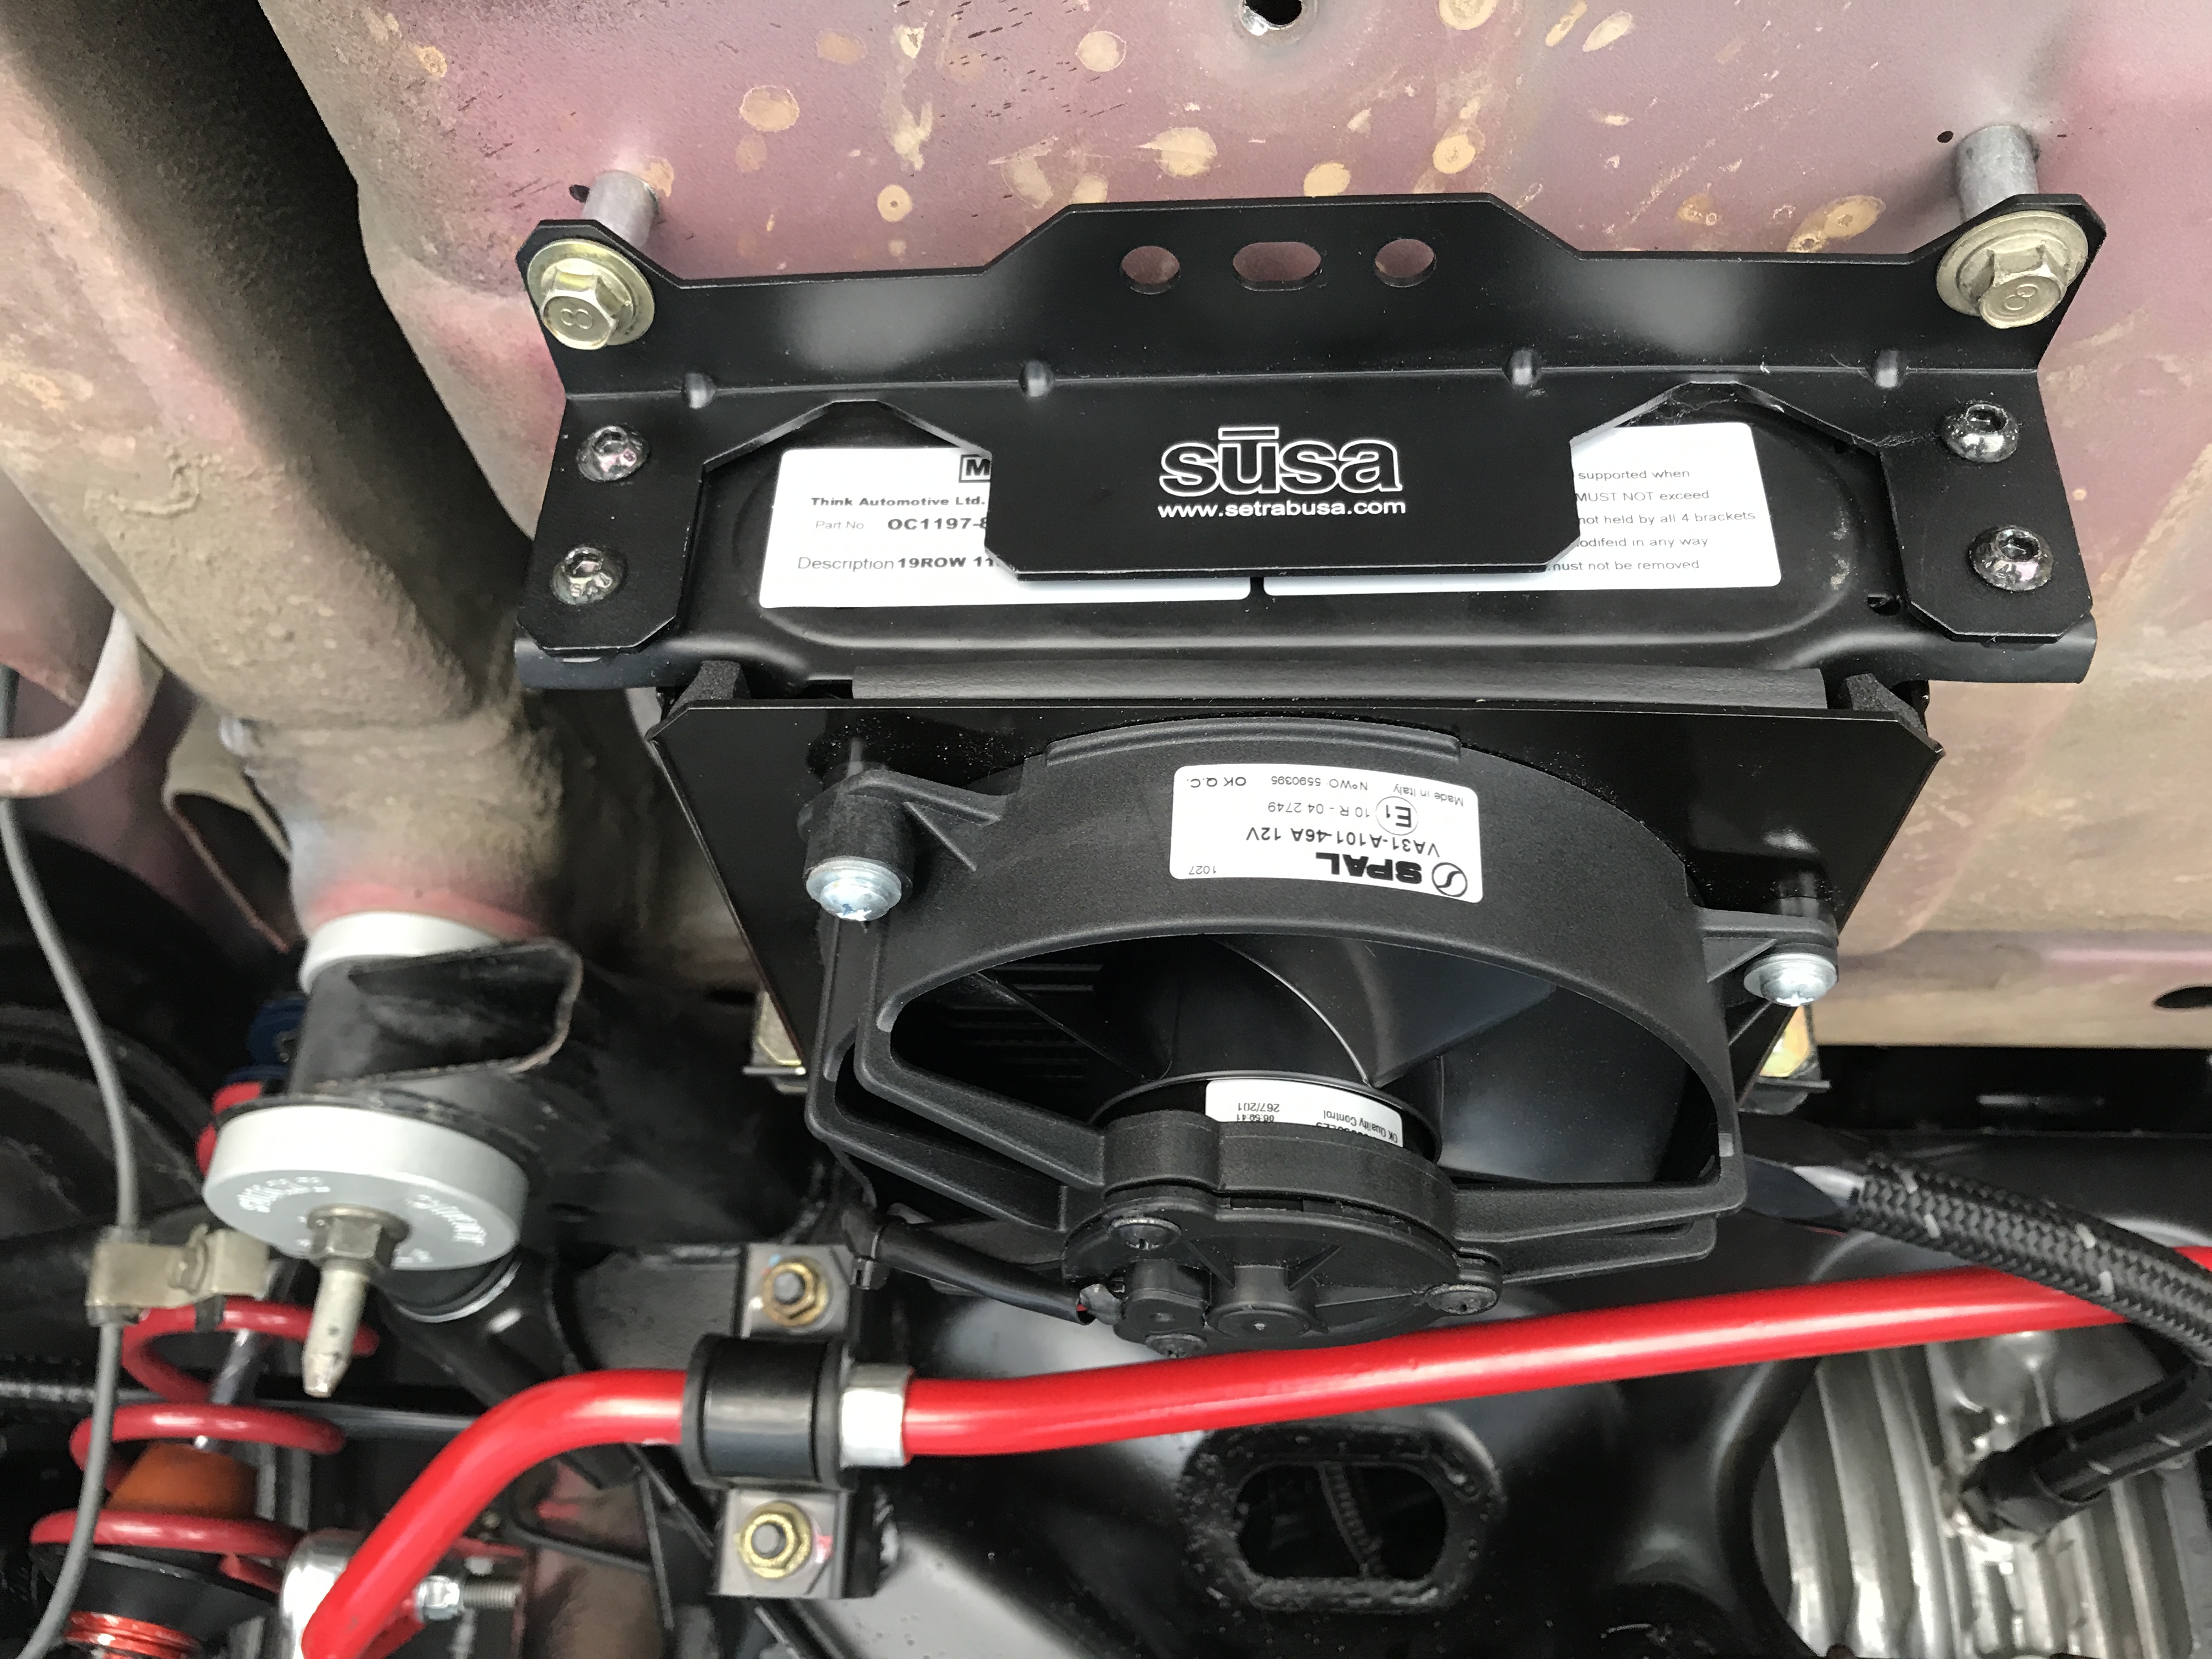


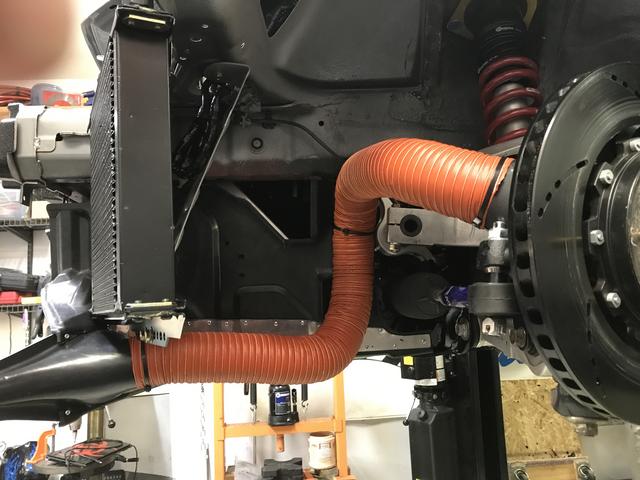

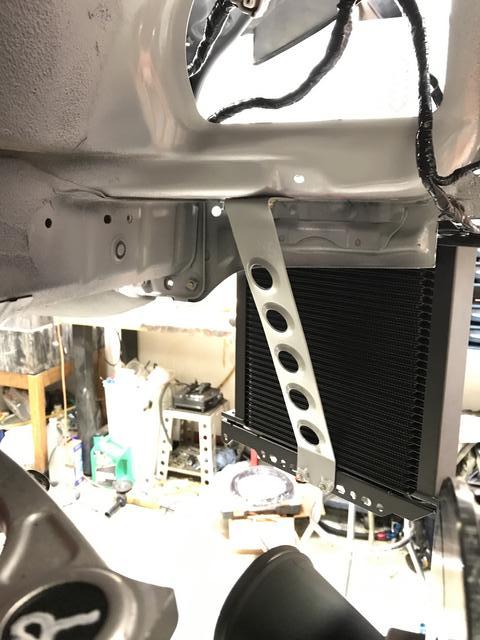
Setrab Oil coolers and plumbing from Improved Racing | GM LS Parts, Oil Pan Baffles, Thermostats, Intakes, Performance Oiling & Suspension


A couple of questions, if you don't mind me asking:
Where did you get the alternator pulley?
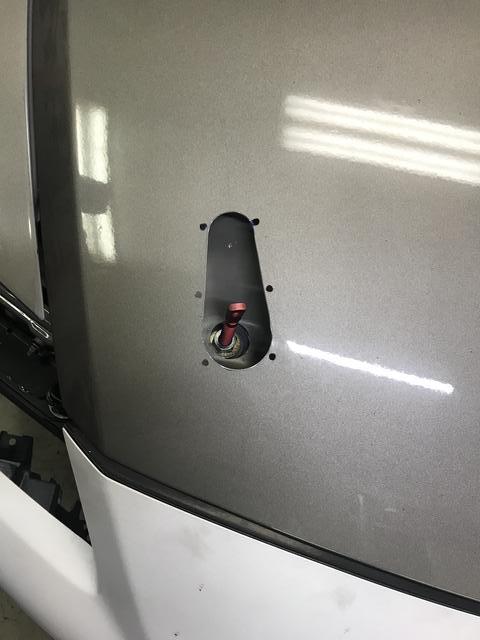
Your catch can is vented to atmosphere. Why didn't you route it back to the intake?
Thank you.
Where did you get the alternator pulley?
Your catch can is vented to atmosphere. Why didn't you route it back to the intake?
Thank you.