Trifecta Mod: Oil Cooler/Fog Light Delete/LED Driving Lights
 08-14-2010, 03:44 PM
#1
Momentum Keeps Me Going
Thread Starter

Trifecta Mod: Oil Cooler/Fog Light Delete/LED Driving Lights
I had been trying to come up with some improvement to the stock front 'look' of the RX-8 for some time. Last year on my ‘04 I tried LEDs like this http://i240.photobucket.com/albums/f...pin9k/EYES.jpg, then like this with fewer LEDs http://i240.photobucket.com/albums/f...n9k/FINAL4.jpg, and I kept that version until now. Several others have done mods with LEDs around the headlights in some fashion or other, but while these look OK, it’s easy to know they are not OEM, my feeling was it's very much a "not-quite-right" look IMO. In the end, no front LED mod I'd seen had made the RX-8 front really 'pop' more than stock... and as I said, that applied to my own certainly.
Still, I love the front LED look that I see on various cars now, e.g., Audis, Porsches, and others. LEDs offer great placement flexibility and near-HID light color match options. I already have LED side and center brake lights, front and rear turn signals, trunk, foot well, dipstick, and much of the rest of the interior lighting converted to LEDs. The last LEDs I added for the front marker lights this Spring http://www.v-leds.com/Exterior-LED/C...-p7114849.html are a decent match for the HIDs. I didn't go for the higher power ones V-LEDs offers because of heat concerns. But that really showed off my earlier "warm white " LED string lights as looking really lame IMO.
Fast forward a few months, and after much thought, and lots of trial and failure... and a good dose of dumb luck finding just the right thing - here's the result. I got to this point because the stock 'fog lights' are fairly useless IMO, and beyond that I've never been enamored of the 'cross eyes' look they give the front. Even with the fog light rewire mod letting them operate separately from the headlights, there's little fog around here to deal with, and not much light coming from them if there was. Beside, my 8 being 7 years old (damn the RX-8 still looks good lol), they were more than a little pitted and discolored – IOW just plain ugly looking. Time for a fog light delete!
And finally deciding to ditch the fog lights allowed me to try something totally new, but tasteful and IMO visually correct for the car. The result is a new look to the series 1 RX-8 that to my eye does justice to the car's looks, gives a needed modern refresh to the front, and is not Audi-ish in any way. If anything it owes more to the '09-'10 8's front look, but I think it looks better still and could be seen as OEM if you didn’t know the car.
In removing the bumper and studying what could be done to install something new, I also discovered I had some other mod maintenance to do. My brake cooling ducts MOD https://www.rx8club.com/showthread.php?t=83801.html of several years ago was needing a redo, some of the pieces were coming loose and separating from the internal fender shroud areas. So while adding the lights, I updated and redid the ducts and replaced my plastic oil cooler screens with “clone” Racing Beat style metal mesh screens I created and added an air diverter behind the LEDs to improve air oflow towards the oil cooler. It was required anyway to fill the space formally covered by the fogs.
As I said - this was a trifecta mod with many benefits!
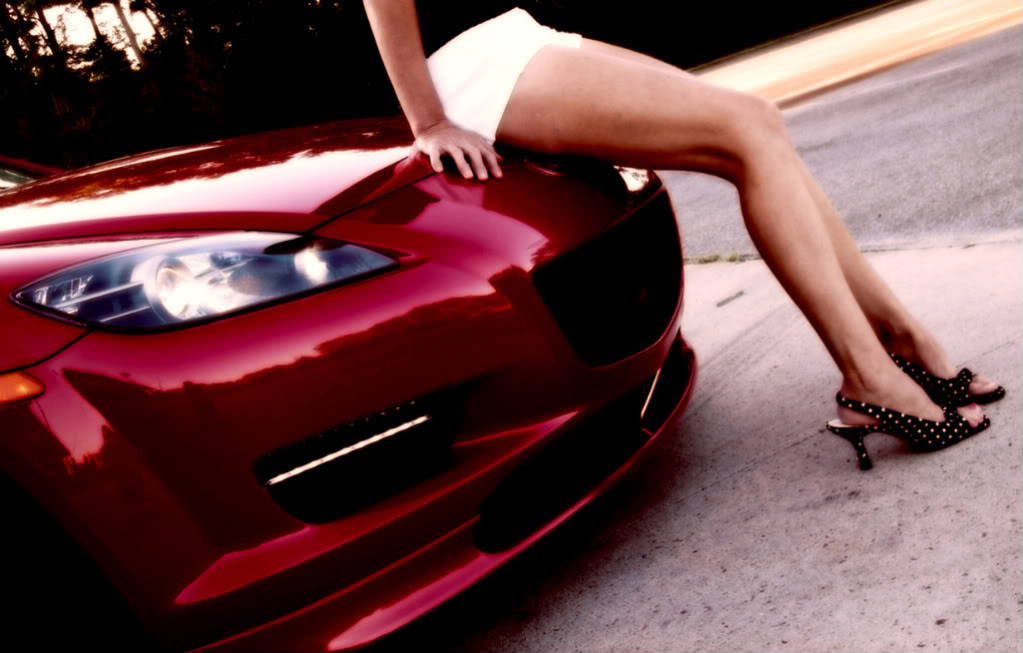
Well, it being a beautiful summer here on the Seacoast of New Hampshire, I thought it a great opportunity to do a photo shoot of sorts over the last few days and show you all. Even got the wife involved a bit as I bought a new 14.1 Megapixel camera and was eager to see what it could do. Check out the results…
Love to hear what you think of both the mod and the photos (camera really)
.
.
.
.
.
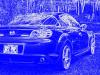
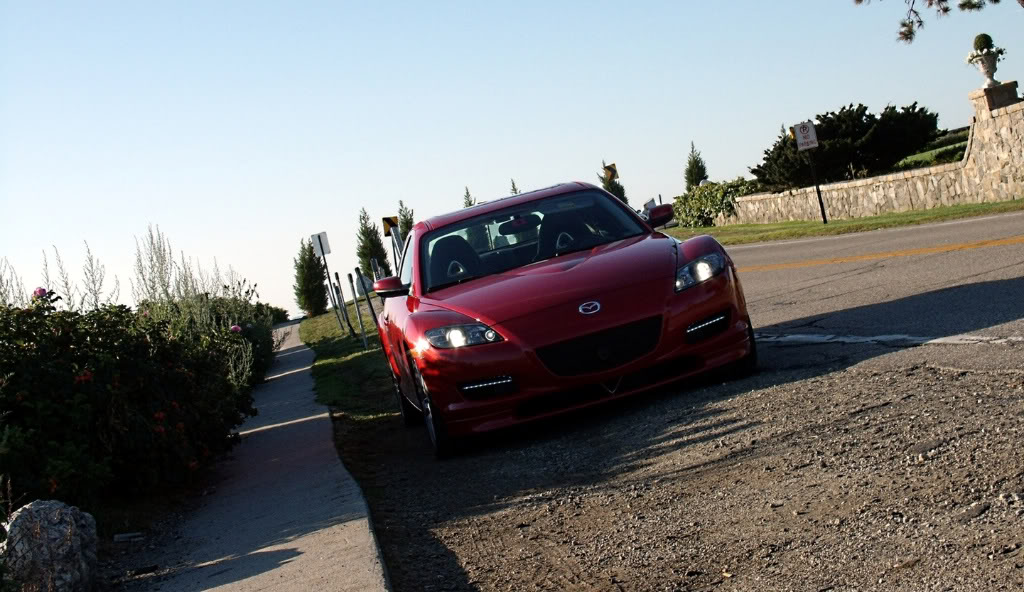
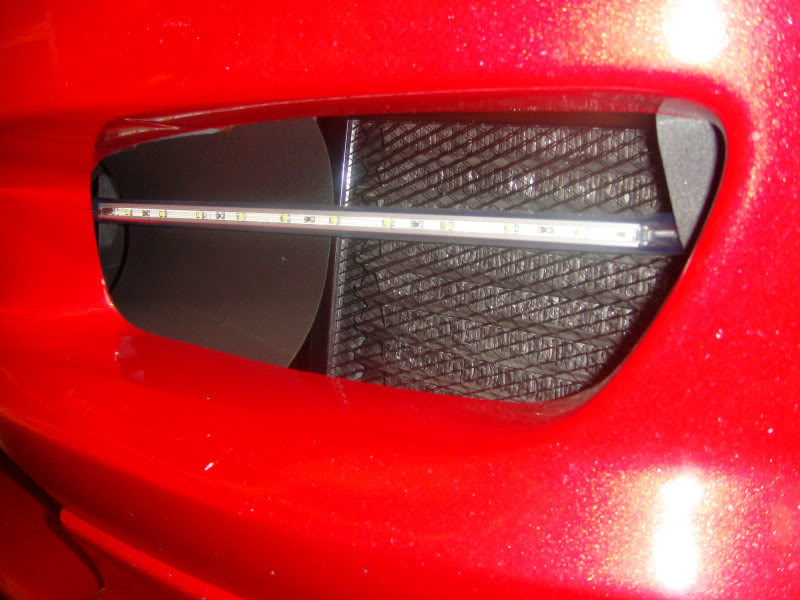
Clean shot of the basic mod here used as daytime running lights.
.
.
.
.
.
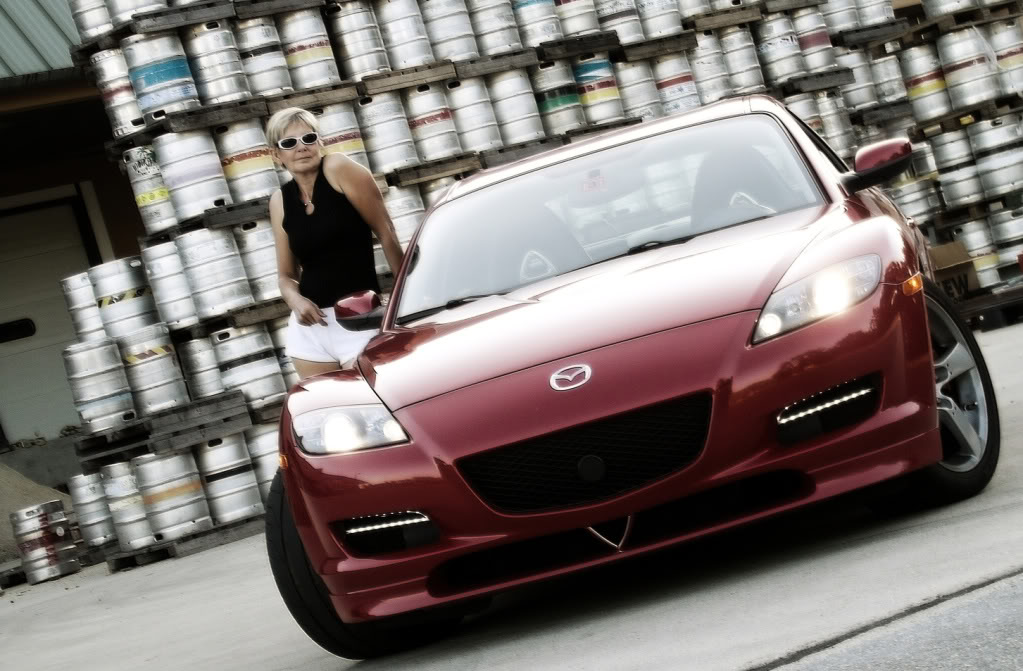
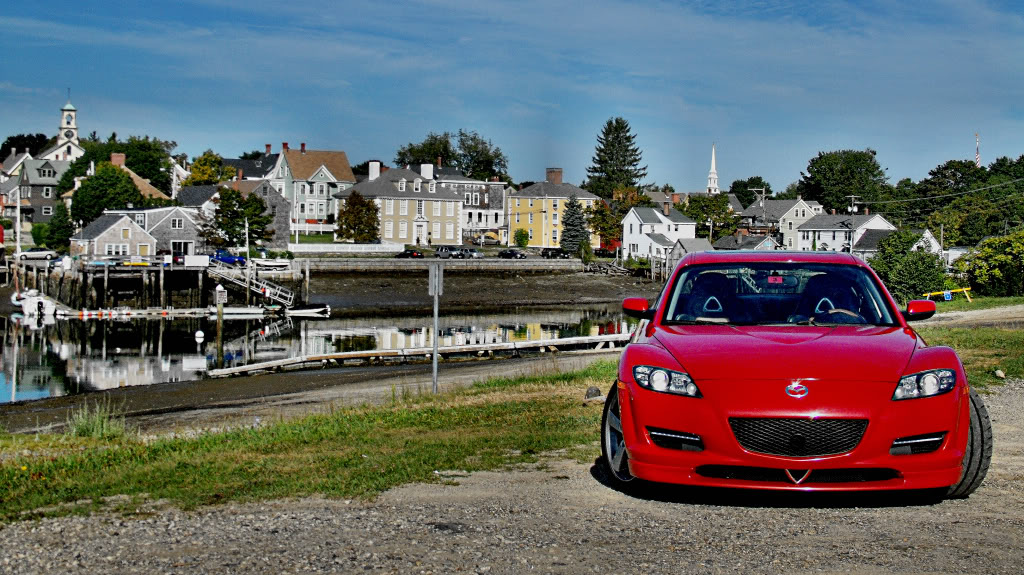
Little photoshop with the wife at the local brewery yea it took THAT much beer to get it right
.
.
.
.
.
...
.
.
.
.
.
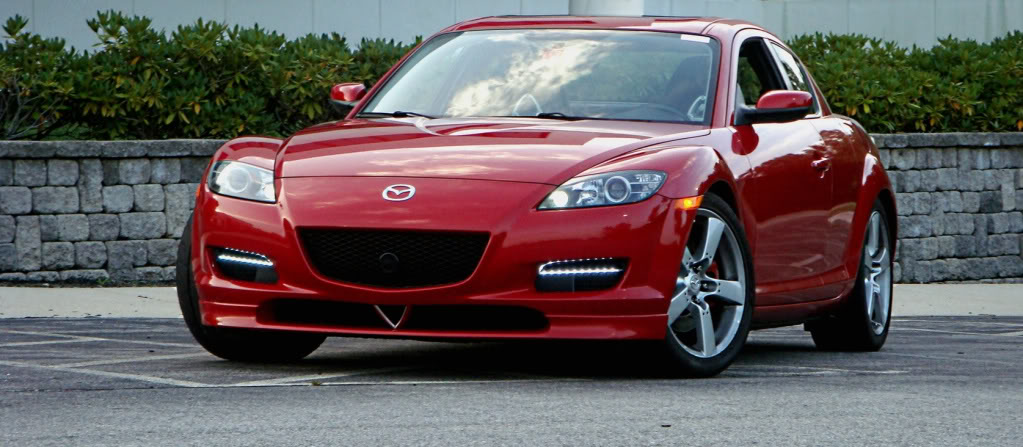
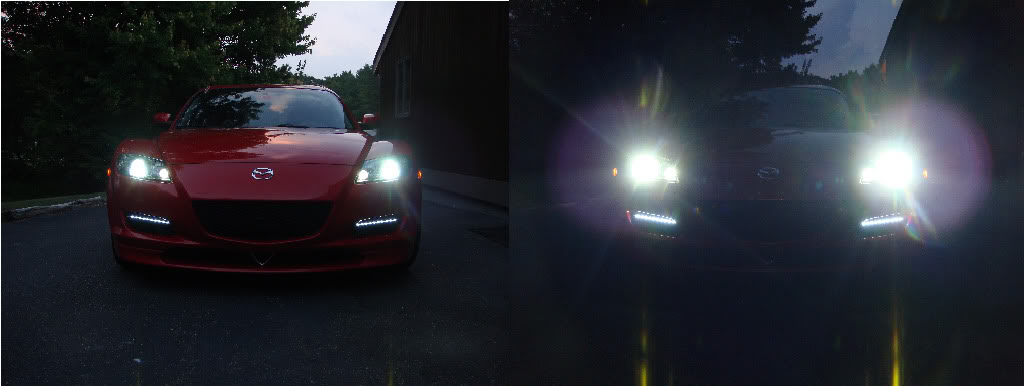
The LEDs show up great day or night.
.
.
.
.
.
A dusk/evening comparison.
Still, I love the front LED look that I see on various cars now, e.g., Audis, Porsches, and others. LEDs offer great placement flexibility and near-HID light color match options. I already have LED side and center brake lights, front and rear turn signals, trunk, foot well, dipstick, and much of the rest of the interior lighting converted to LEDs. The last LEDs I added for the front marker lights this Spring http://www.v-leds.com/Exterior-LED/C...-p7114849.html are a decent match for the HIDs. I didn't go for the higher power ones V-LEDs offers because of heat concerns. But that really showed off my earlier "warm white " LED string lights as looking really lame IMO.
Fast forward a few months, and after much thought, and lots of trial and failure... and a good dose of dumb luck finding just the right thing - here's the result. I got to this point because the stock 'fog lights' are fairly useless IMO, and beyond that I've never been enamored of the 'cross eyes' look they give the front. Even with the fog light rewire mod letting them operate separately from the headlights, there's little fog around here to deal with, and not much light coming from them if there was. Beside, my 8 being 7 years old (damn the RX-8 still looks good lol), they were more than a little pitted and discolored – IOW just plain ugly looking. Time for a fog light delete!
And finally deciding to ditch the fog lights allowed me to try something totally new, but tasteful and IMO visually correct for the car. The result is a new look to the series 1 RX-8 that to my eye does justice to the car's looks, gives a needed modern refresh to the front, and is not Audi-ish in any way. If anything it owes more to the '09-'10 8's front look, but I think it looks better still and could be seen as OEM if you didn’t know the car.
In removing the bumper and studying what could be done to install something new, I also discovered I had some other mod maintenance to do. My brake cooling ducts MOD https://www.rx8club.com/showthread.php?t=83801.html of several years ago was needing a redo, some of the pieces were coming loose and separating from the internal fender shroud areas. So while adding the lights, I updated and redid the ducts and replaced my plastic oil cooler screens with “clone” Racing Beat style metal mesh screens I created and added an air diverter behind the LEDs to improve air oflow towards the oil cooler. It was required anyway to fill the space formally covered by the fogs.
As I said - this was a trifecta mod with many benefits!
Well, it being a beautiful summer here on the Seacoast of New Hampshire, I thought it a great opportunity to do a photo shoot of sorts over the last few days and show you all. Even got the wife involved a bit as I bought a new 14.1 Megapixel camera and was eager to see what it could do. Check out the results…
Love to hear what you think of both the mod and the photos (camera really)
.
.
.
.
.
Clean shot of the basic mod
here used as daytime running lights..
.
.
.
.
Little photoshop with the wife at the local brewery
yea it took THAT much beer to get it right .
.
.
.
.
...
.
.
.
.
.
The LEDs show up great day or night.
.
.
.
.
.
A dusk/evening comparison.
Last edited by Spin9k; 08-14-2010 at 03:47 PM.


 08-15-2010, 05:59 AM
#9
Momentum Keeps Me Going
Thread Starter

 08-15-2010, 07:54 AM
#12
Momentum Keeps Me Going
Thread Starter
 ...less area? no ...there's the same oil cooler area exposed as before... but now there is a "sideways funnel", if you will, pointing towards the oil cooler and funneling air towards that area. Here's a closeup...you can see he 'scoop' effect and because of the shape of the bumper, it is very much sloped towards the cooler, something like 30 degrees or so from straight ahead.
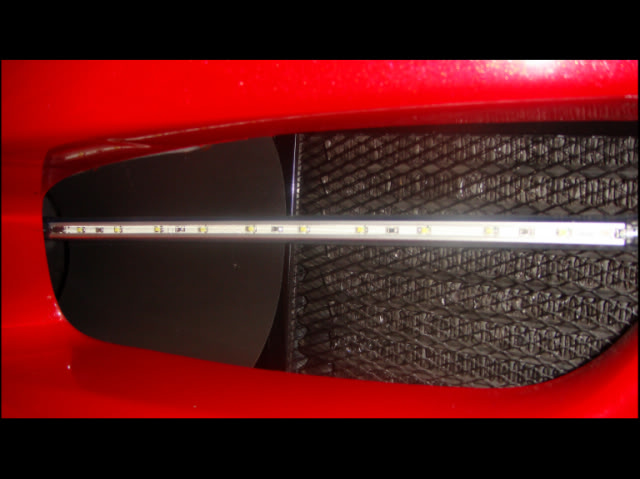 08-15-2010, 08:05 AM
#15
Momentum Keeps Me Going
Thread Starter
08-15-2010, 08:31 AM
#17
Momentum Keeps Me Going
Thread Starter
08-15-2010, 08:06 PM
#19
Registered Rxabuser


 , any tips? suggestions that are not mentioned above?
08-30-2011, 08:52 AM
, any tips? suggestions that are not mentioned above?
08-30-2011, 08:52 AM
#23
Momentum Keeps Me Going
Thread Starter
Someone asked for a little more detail on how these lights were put together and while I don't have a lot of pictures of the project, I do have a few that give some help if you're trying to do something like this.
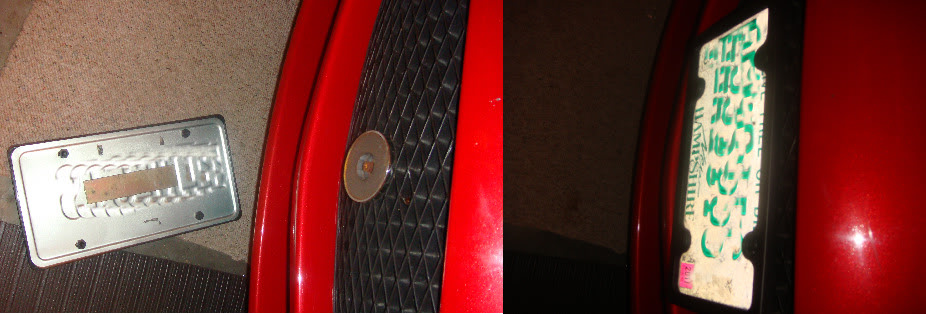
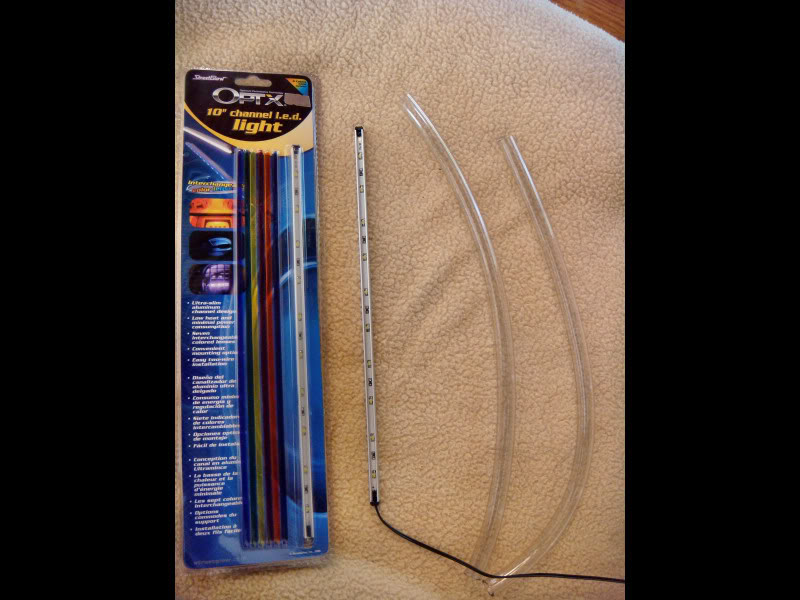
One picture shows the lights as I bought them and you can see if you look close that the light bar is an aluminum extruded piece with the LEDs set into it on a PC board. It's not weatherproof so this causes a problem obviously. What I did was to take some clear vinyl tubing, the flexible plastic kind you'd find at Home Depot plumbing department, and I'd got it just the right diameter to fit this aluminum extrusion and pushed the light inside the tube to cover it. I then plugged the end with a wire coming from it with silicon and the other end with a rubber plug to make it waterproof.
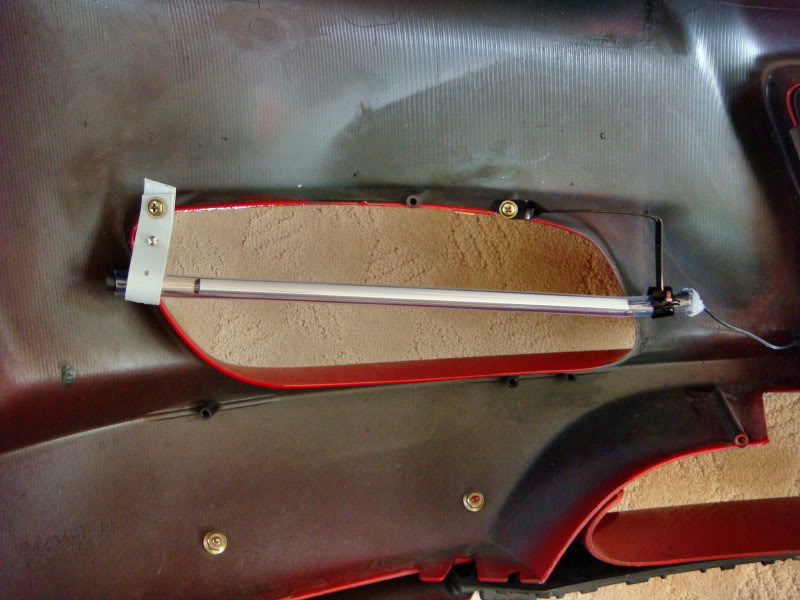
On the backside of the bumper you can see the mounting mechanism for the two
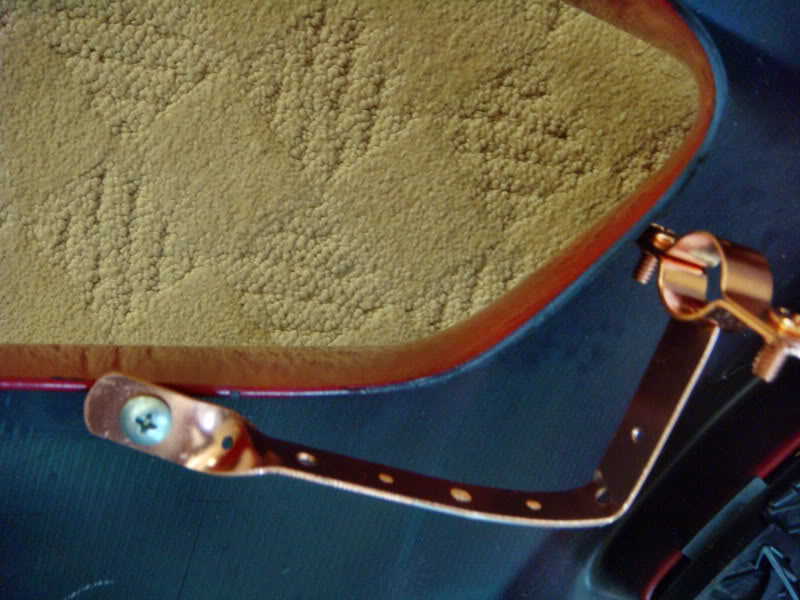
ends of the tube containing the LEDs. On the right side there's a hangar which is simply a copper plumber's pipe hanger twisted to fit and placed so the light in the middle of the opening. The end that would fit normally on a pipe is the end that holes are clear tube. On the other side I just made a small loop of plastic pipe hanger strap and use that to hold the other end of the of the tube. It just sits in the loop of strap freely and can move a little. In another picture, there's also a close-up of the copper pipe hanger so you can see the twist better.
You'll notice on the backside of the bumper there are several holes molded into it. The four holes to the right side were for mounting the fog light obviously but the other two holes on the left side were not used at all. Just lucky for me there was something there to mount to.
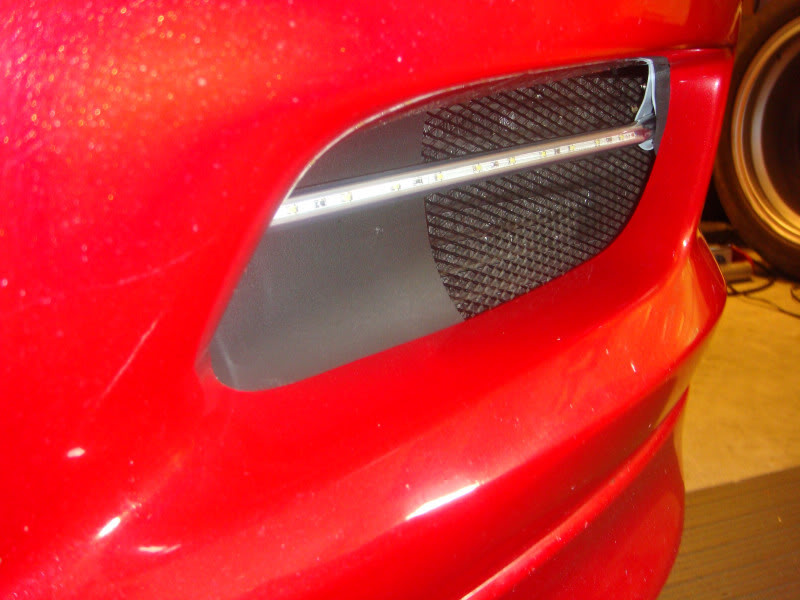
Looking at the front of the car you can see a close-up of the light and in one picture from the side you can see the white-ish plastic strap behind a small piece of black plastic that I cut and placed there to cover that strap and black it out.
The last fabricated piece, which I don't have any photos of other than from the front, is what replaced and filled up the space that the fog light took. That's simply a piece of sheet aluminum painted black and formed into a decreasing radius half round shape in order to funnel air back towards the oil cooler screens. This works well because of the shape of the bumper slants backward as it goes toward the side.
The mounting of that behind the bumper was a little tricky. Out of sight where you can't see it the curve is made flat into a flange in a manner so as to be able to attach it to the remaining holes behind the bumper on the inside.
Something to note if you do this is that there is very very little clearance space behind the bumper where this goes, and essestially the lights have to fit in that available 3 dimensional space exactly. Sounds simple, but in practical terms you'll likely have a lot of practice taking your bumper on and off as you get everything to fit just right Just one of the things a w/gf is good for!
Also, in the picture you can see the oil cooler screens I installed at the same time. What I used is similar to the Racing Beat screens, but instead they are made from aluminum screens that I fabricated and painted black using kitchen vent filter mesh I got at a Lowe's.
Mods don't have to cost a fortune and for me the fun is in fabing it, and how it improves the car's looks.
One picture shows the lights as I bought them and you can see if you look close that the light bar is an aluminum extruded piece with the LEDs set into it on a PC board. It's not weatherproof so this causes a problem obviously. What I did was to take some clear vinyl tubing, the flexible plastic kind you'd find at Home Depot plumbing department, and I'd got it just the right diameter to fit this aluminum extrusion and pushed the light inside the tube to cover it. I then plugged the end with a wire coming from it with silicon and the other end with a rubber plug to make it waterproof.
On the backside of the bumper you can see the mounting mechanism for the two
ends of the tube containing the LEDs. On the right side there's a hangar which is simply a copper plumber's pipe hanger twisted to fit and placed so the light in the middle of the opening. The end that would fit normally on a pipe is the end that holes are clear tube. On the other side I just made a small loop of plastic pipe hanger strap and use that to hold the other end of the of the tube. It just sits in the loop of strap freely and can move a little. In another picture, there's also a close-up of the copper pipe hanger so you can see the twist better.
You'll notice on the backside of the bumper there are several holes molded into it. The four holes to the right side were for mounting the fog light obviously but the other two holes on the left side were not used at all. Just lucky for me there was something there to mount to.
Looking at the front of the car you can see a close-up of the light and in one picture from the side you can see the white-ish plastic strap behind a small piece of black plastic that I cut and placed there to cover that strap and black it out.
The last fabricated piece, which I don't have any photos of other than from the front, is what replaced and filled up the space that the fog light took. That's simply a piece of sheet aluminum painted black and formed into a decreasing radius half round shape in order to funnel air back towards the oil cooler screens. This works well because of the shape of the bumper slants backward as it goes toward the side.
The mounting of that behind the bumper was a little tricky. Out of sight where you can't see it the curve is made flat into a flange in a manner so as to be able to attach it to the remaining holes behind the bumper on the inside.
Something to note if you do this is that there is very very little clearance space behind the bumper where this goes, and essestially the lights have to fit in that available 3 dimensional space exactly. Sounds simple, but in practical terms you'll likely have a lot of practice taking your bumper on and off as you get everything to fit just right
Just one of the things a w/gf is good for!Also, in the picture you can see the oil cooler screens I installed at the same time. What I used is similar to the Racing Beat screens, but instead they are made from aluminum screens that I fabricated and painted black using kitchen vent filter mesh I got at a Lowe's.
Mods don't have to cost a fortune and for me the fun is in fabing it, and how it improves the car's looks.
Last edited by Spin9k; 08-31-2011 at 11:54 AM.