
My eyes!! My eyes!!


Thread Starter
Registered User
Joined: Nov 2008
Posts: 26
Likes: 0
My eyes!! My eyes!!
Today I got my eyelids:
So after work...time for fun
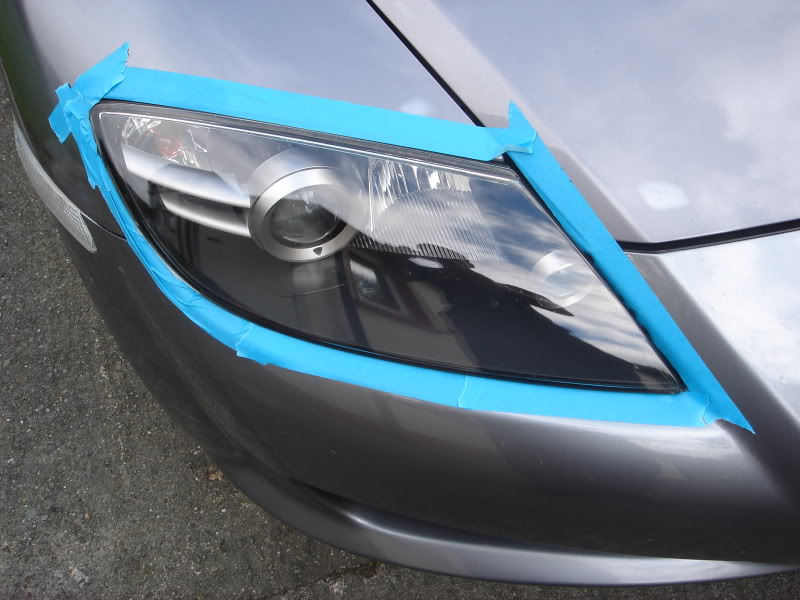
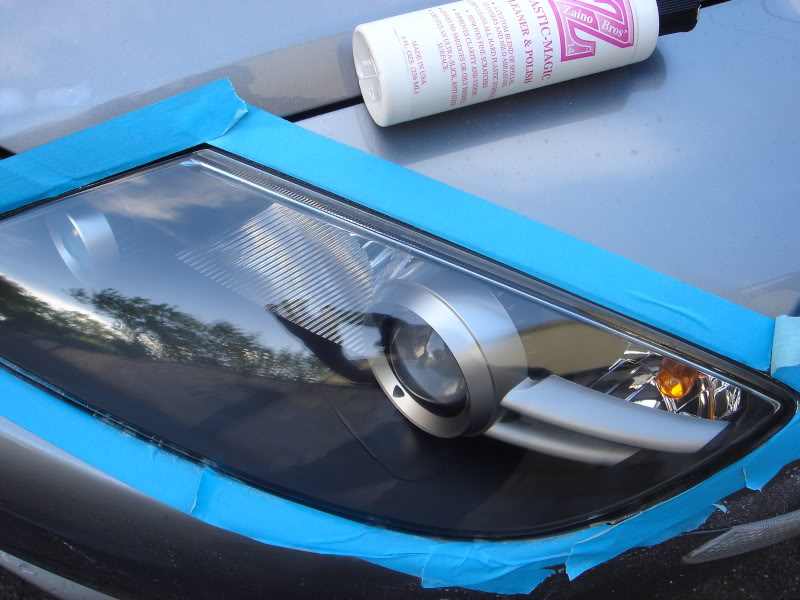
Step 1: Prepare headlights:
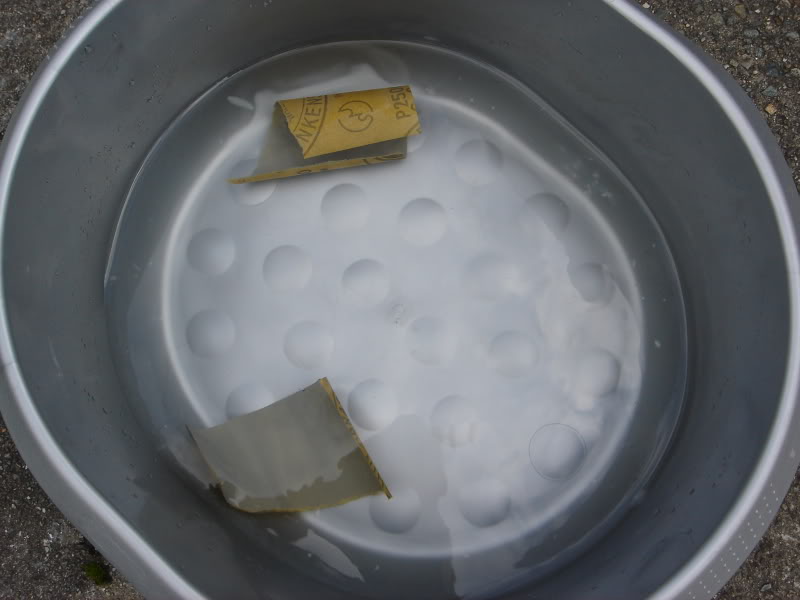
I put 2500 sandpaper in to water:
And masking with 3M tape allbody panels around headlight:
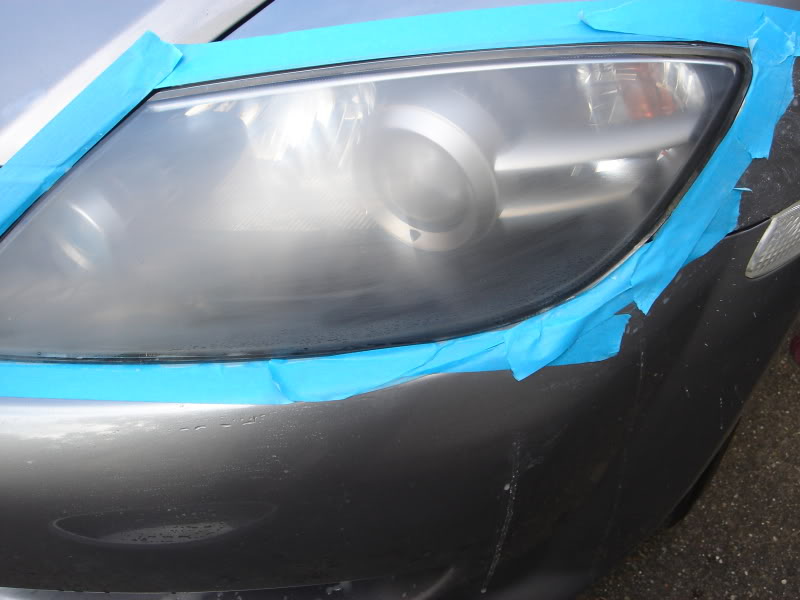
Step 2: Sanding and polishing:
Headlight after 2500 sandpaper:
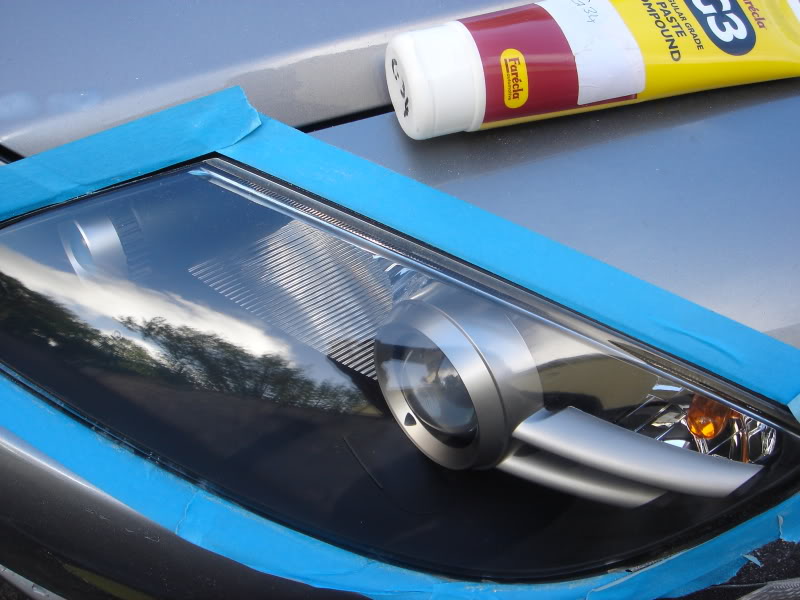
And time for polishing:
3M Farecla compound:
And finish with Zaino plastic polish:
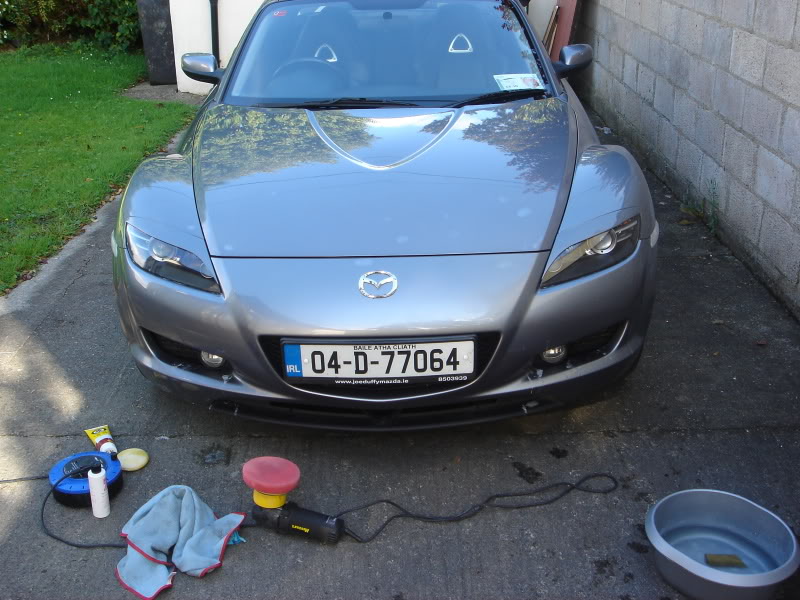
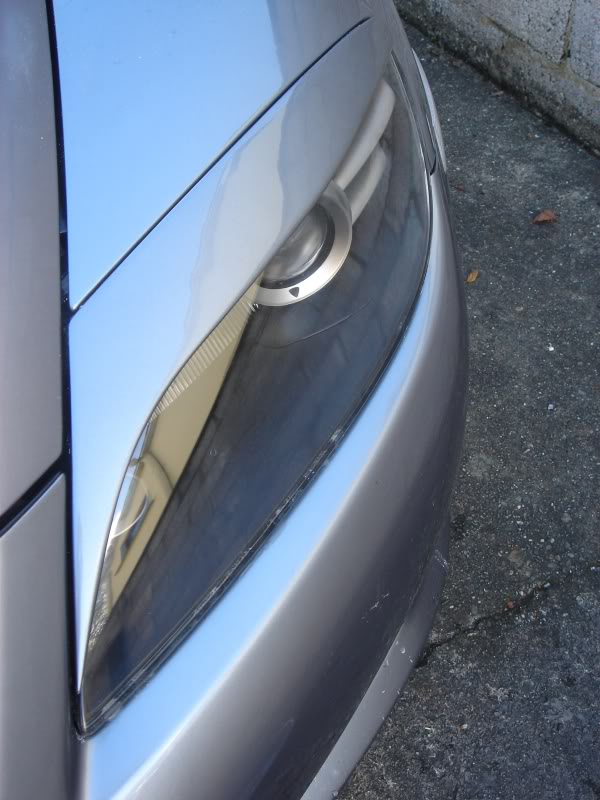
And on my rx:
So after work...time for fun
Step 1: Prepare headlights:
I put 2500 sandpaper in to water:
And masking with 3M tape allbody panels around headlight:
Step 2: Sanding and polishing:
Headlight after 2500 sandpaper:
And time for polishing:
3M Farecla compound:
And finish with Zaino plastic polish:
And on my rx:


Thread Starter
Registered User
Joined: Nov 2008
Posts: 26
Likes: 0
Registered User
Joined: Jan 2008
Posts: 11
Likes: 0
From: Dublin, Ireland
Hay man!
Thats my car
I bought my RX8 off Joe Duffy in Jan 08 he had 2 identical 04 Rx8's
and when my wife went too collect it he sold her the wrong one!
So we got the car with less miles! I think your one had 35.000 on
the clock am I right?
Check out the REG nearly identical! Your like my long
lost brother!

Thats my car
I bought my RX8 off Joe Duffy in Jan 08 he had 2 identical 04 Rx8's
and when my wife went too collect it he sold her the wrong one!
So we got the car with less miles! I think your one had 35.000 on
the clock am I right?
Check out the REG nearly identical!
Your like my longlost brother!
Putting sand paper in water keeps the sandpaper from building up residue on it from what ever your sanding. Also a couple of drops of soap in the water helps disperse the particles.

Blackin' Out The 8
Joined: Aug 2009
Posts: 574
Likes: 0
From: Bel Air, MD
I am going to try this on my dad's car first (his headlights are BADDD) and if it works then try it on my...they are looking a little bad.
Also, I bought the Maguiar's Headlight Restoration Kit...if I do the sanding first, would using the restoration kit work as the polish?

are those the evo-r kei-office replicas?? im suprised they arnt closer to the shape of real kei office lids, as far as the inside corners going all the way down the light and hooking up on the outside. Regardless they look really good, great job with the headlights!!

are those the evo-r kei-office replicas?? im suprised they arnt closer to the shape of real kei office lids, as far as the inside corners going all the way down the light and hooking up on the outside. Regardless they look really good, great job with the headlights!!


Obsessive Paint Polisher
Joined: Aug 2005
Posts: 765
Likes: 3
From: Lynchburg, VA
Ideally, use a round velcro pad on the end of your drill. Attach sandpaper to the drill pad. Depending on how bad the lights are: start with rough paper, move through two or three stages of paper getting more fine each step, finish with the Meguiar's polish on a wool pad or foam if its all you have.
Finally, an acrylic clearcoat will help preserve your work.
![mike[piston eater]'s Avatar](https://www.rx8club.com/avatars/mike%5Bpiston-eater%5D-48728.gif?dateline=1334247180)

The reason lenses look less clear over time is the tiny nicks and abrasions that refract the light. The very fine 'wet & dry' sandpaper helps to smooth these out, as does the finish polishing, leaving a much smoother surface that then appears clear.
Wetting the sandpaper further lubricates the action and as said floats away the sanded matter.
In principle, same rationale and process for dull paint, but be sure to use the right polish for the job. Typically a mild polish alone is enough for clear coated paint.
Well done OP. This has been on my list for awhile. Perhaps tomorrow.

Thread
Thread Starter
Forum
Replies
Last Post
projectr13b
New Member Forum
7
Mar 1, 2019 09:00 AM