kma5783's Build Thread


Thanks
Thanks, it only took around 2 hours for me to remove the interior and install the new one.
And no I don't have the 10mm spacers anymore.
LOL
And no I don't have the 10mm spacers anymore.
LOL


lets just say, he has about 5 or so large boxes of goodies in the garage 
saw them all last night. lots of good things coming for this car. every time I think my car is better he does something else to "up the ante"
saw them all last night. lots of good things coming for this car. every time I think my car is better he does something else to "up the ante"
Lots of updates coming soon, still have parts coming in...No point in teasing everyone lol

") LOL That's funny coming from you
LOL That's funny coming from you 
LOL Not trying to up the ante just want to get it all done at once.
LOL That's funny coming from you LOL Not trying to up the ante just want to get it all done at once.
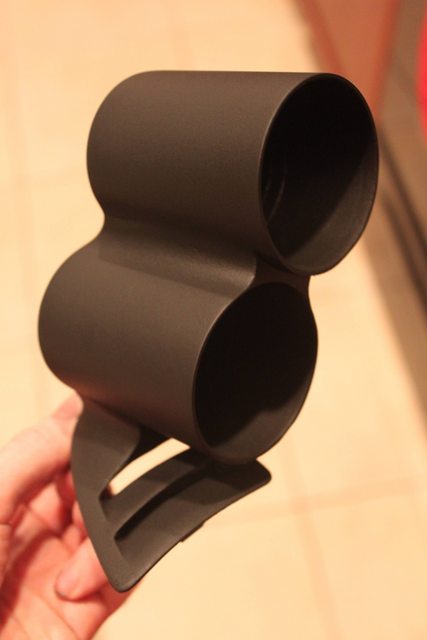
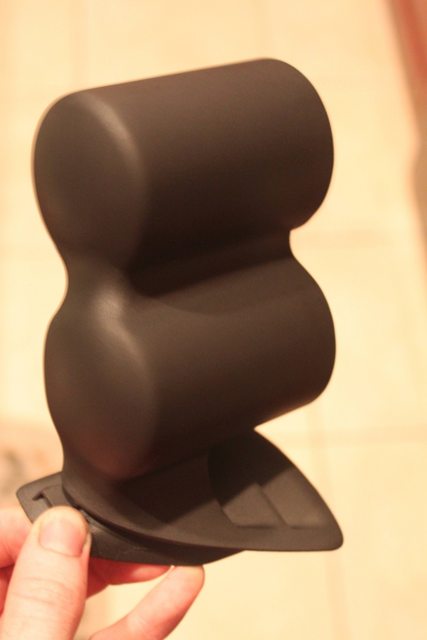
Custom Dual Vent Gauge Pod
So yesterday I decided I was going to make a Custom Dual Vent Gauge Pod....
Here's what I started with...


Here's everything molded together initially before filing and sanding...


Test Fit...

Pics throughout the process, thought I had it finished yesterday, then test fit it again today and decided I didn't like the angle of it, so I cut the vent and gauge pods apart to angle it more towards me for a better view of the gauges, didn't really take pics of that part though...


And now for the finished product...
Here's what I started with...
Here's everything molded together initially before filing and sanding...
Test Fit...
Pics throughout the process, thought I had it finished yesterday, then test fit it again today and decided I didn't like the angle of it, so I cut the vent and gauge pods apart to angle it more towards me for a better view of the gauges, didn't really take pics of that part though...
And now for the finished product...
not original but guys, after seeing this in person, it turned out just as well as, if not better then the one I bought. Well done Kyle. Things are coming together nicely. Paint turned out well too.


 I have spare parts on the workbench to create a single but was not sure what to use to mold with.

Thanks
No Problem
Yea it is, It worked amazingly well... The amount of time you have to work with it is awesome, like 2-3hrs and it's like working with clay. It takes 24hrs to fully cure but I found if you put it in the oven for 10-15min at 100 degrees and then let it sit for 20-30min to cool, it's basically cured and you're able to work with it, as in sanding and filing it down.
Oh and Thanks Greg because I got the idea to use it from your thread.