
Headlight Restoration DIY


Thread Starter
Registered
Joined: Sep 2005
Posts: 2,440
Likes: 83
From: Hayward, CA
Headlight Restoration DIY
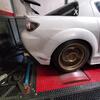
Did a DIY for the Meguiar's headlight restoration kit on my RX-8. Hope you all enjoy and Subscribe to my channel if you enjoy!
Last edited by Mazdaspeed RX8 ver2; Apr 24, 2019 at 01:16 AM.


Thread Starter
Registered
Joined: Sep 2005
Posts: 2,440
Likes: 83
From: Hayward, CA
After having the coating cure since last week, i was able to remove the overspray with the all mighty handy dandy denature alcohol. Haha.Like you said, not a big deal, no damage to the paint and was easy to remove even after fully curing.

Registered
Joined: Jun 2015
Posts: 90
Likes: 2
From: Calgary, AB
I used this same kit about a year ago, headlights looked good for a couple of months. After ~6 months every little imperfection started showing, now it's looking hazy again. But I did have to drive in shitty winter conditions, all the gravel and road grime being flung at me probably didn't help.
Thread Starter
Registered
Joined: Sep 2005
Posts: 2,440
Likes: 83
From: Hayward, CA
I used this same kit about a year ago, headlights looked good for a couple of months. After ~6 months every little imperfection started showing, now it's looking hazy again. But I did have to drive in shitty winter conditions, all the gravel and road grime being flung at me probably didn't help.

Thread Starter
Registered
Joined: Sep 2005
Posts: 2,440
Likes: 83
From: Hayward, CA


Thread Starter
Registered
Joined: Sep 2005
Posts: 2,440
Likes: 83
From: Hayward, CA

What am I doing here?
Joined: Mar 2006
Posts: 3,606
Likes: 652
From: 2017 Miata RF Launch Edition
I'm kind of wondering about using the acetone vapor method.
Remove the factory protective layer (ultra-fine grit sandpaper?).
Put some acetone in a 12v heated mug with a funnel cap.
Let the vapor smooth out the plastic.
Then put a protective film (like this) over the headlight.
Just make sure the mug liner and funnel are acetone compatible (no ABS, polycarbonate, acrylic, etc https://www.plasticsintl.com/chemical-resistance-chart)
Last edited by NotAPreppie; Apr 25, 2019 at 09:19 AM.
Thread Starter
Registered
Joined: Sep 2005
Posts: 2,440
Likes: 83
From: Hayward, CA
I'm kind of wondering about using the acetone vapor method.
acetone vapor method
Remove the factory protective layer (ultra-fine grit sandpaper?).
Put some acetone in a 12v heated mug with a funnel cap.
Let the vapor smooth out the plastic.
Then put a protective film (like this) over the headlight.
Just make sure the mug liner and funnel are acetone compatible (no ABS, polycarbonate, acrylic, etc https://www.plasticsintl.com/chemical-resistance-chart)
Has anyone tried this?
Ehh I don't know how I feel about that. I'll stick to either a drill mounted polishing pad with the compound I mentioned like I have been using now for a considerable amount of time, or the same compound but using a 3" air powered polisher to do the work and probably get significantly better results.
Mind you my example was a polish all by hand... The last time I went all out with a good wet sand and polish (followed with sealing and UV protecting), it lasted years without deterioration or fading.

Registered
Joined: Sep 2019
Posts: 72
Likes: 9
i guess for a quick fix that solution can work.
But nothing beats polish and ceramic coating.
I had my rx8 headlights removed and gave them to a friend who polished them thoroughly.
Finally added two layers of ceramic coating.
Before they were yellow as a lemon and foggy as a bus window in winter.
Now they look like new (apart from spider-web like cracks that cannot be fixed (they are still sealed thought, so no condensation yet))
Thread Starter
Registered
Joined: Sep 2005
Posts: 2,440
Likes: 83
From: Hayward, CA
i guess for a quick fix that solution can work.
But nothing beats polish and ceramic coating.
I had my rx8 headlights removed and gave them to a friend who polished them thoroughly.
Finally added two layers of ceramic coating.
Before they were yellow as a lemon and foggy as a bus window in winter.
Now they look like new (apart from spider-web like cracks that cannot be fixed (they are still sealed thought, so no condensation yet))
But nothing beats polish and ceramic coating.
I had my rx8 headlights removed and gave them to a friend who polished them thoroughly.
Finally added two layers of ceramic coating.
Before they were yellow as a lemon and foggy as a bus window in winter.
Now they look like new (apart from spider-web like cracks that cannot be fixed (they are still sealed thought, so no condensation yet))
Registered
Joined: Sep 2019
Posts: 72
Likes: 9
Well i don't know for sure. Maybe Meguar. But yeah, a year or two should be if i take care of the headlights. Like making sure there are no bugs or accumulated dirt on them

///// Upscale Zoom-Zoom
Joined: Nov 2009
Posts: 1,593
Likes: 190
From: Massachusetts
The issue is you cannot reverse the increasing auto oxidation of polycarbonate as it ages. You can treat the surface to remove the exposed crystalline surface but it will continue to occur.

Registered Lunatic
iTrader: (1)
Joined: Aug 2003
Posts: 3,591
Likes: 49
From: SF Bay Area, California
That's why adding a protective film to the headlight after restoration is necessary, as it will prevent the oxidation and the lights will stay clear for years.

Registered
Joined: Mar 2018
Posts: 298
Likes: 50
From: Colorado Springs
Yep! Even Mazda's in-shop repair procedure/product uses a clearcoat afterward to prevent UV-related polycarbonate failure. I didn't clear mine last time and they are well on their way to dingy again -- going to use the clear and do a more thorough job on the polishing before hand, next time.

Thread
Thread Starter
Forum
Replies
Last Post
Boltaction
Series I Do It Yourself Forum
5
Mar 19, 2016 10:41 AM
chernasty
Series I Exterior Appearance and Body Kits
11
Mar 23, 2011 07:57 PM
bumblebeerx8
Series I Exterior Appearance and Body Kits
1
Jun 18, 2010 09:34 AM
rodjonathan
Series I Exterior Appearance and Body Kits
18
Nov 4, 2009 11:51 PM