When you click on links to various merchants on this site and make a purchase, this can result in this site earning a commission. Affiliate programs and affiliations include, but are not limited to, the eBay Partner Network.
You know that exhaust manifold just may work with a renesis front cover. I think the thermostat housing may be modified and the thermostat relocated but the omp may have room. What are your impressions? How much room did you have to work with in the omp area? Do you know the distance/numbers off the top of your head?
I'm not entirely sure, I didn't compare the two front covers side by side. I've just always known from the planning stage that my engine builder was going to go with RX7 front cover and I never looked back. If I'm being honest I don't see why you would choose to use the Rx8 front cover over the Rx7. IMO It definitely requires more work to get it to work, with Rx7 front you just need a trigger wheel kit and could go with the rx8 Mag sensor or a Hall Effect sensor and run a 12v line as we are doing. The exhaust manifold itself is nowhere near the RX7 OMP, but the turbo cold side is sitting right on top of it (less than 1/2" between compressor and OMP is my best estimate).
IMO, if the turbo manifold I have was oriented to sit the turbo 1/4" or 1/2" closer to the passenger side it would have been a perfect fit. I'm not sure how these manifolds are produced so its possible there is some slight variance from manifold to manifold and I just got a tight one. Of course it also depends what turbo you plan to bolt up to it too...
Originally Posted by Warrior777
Also I’m under the impression that the excessive Kim does shift the lower intake forwards a little. So I wonder if more clearance would be required to make the turbo fit.
That would make sense, I know people say to use the Excessive LIM because it is more compact. It sits tighter to the block leaving more room in the turbo area and won't interfere with the firewall. That last point could mean that the LIM sits more "forward" meaning more interference with this turbo setup as you say. I've never seen the Excessive LIM in person so again... I can't really say for sure.
Last edited by RotaryMachineRx; Mar 23, 2020 at 04:39 PM.
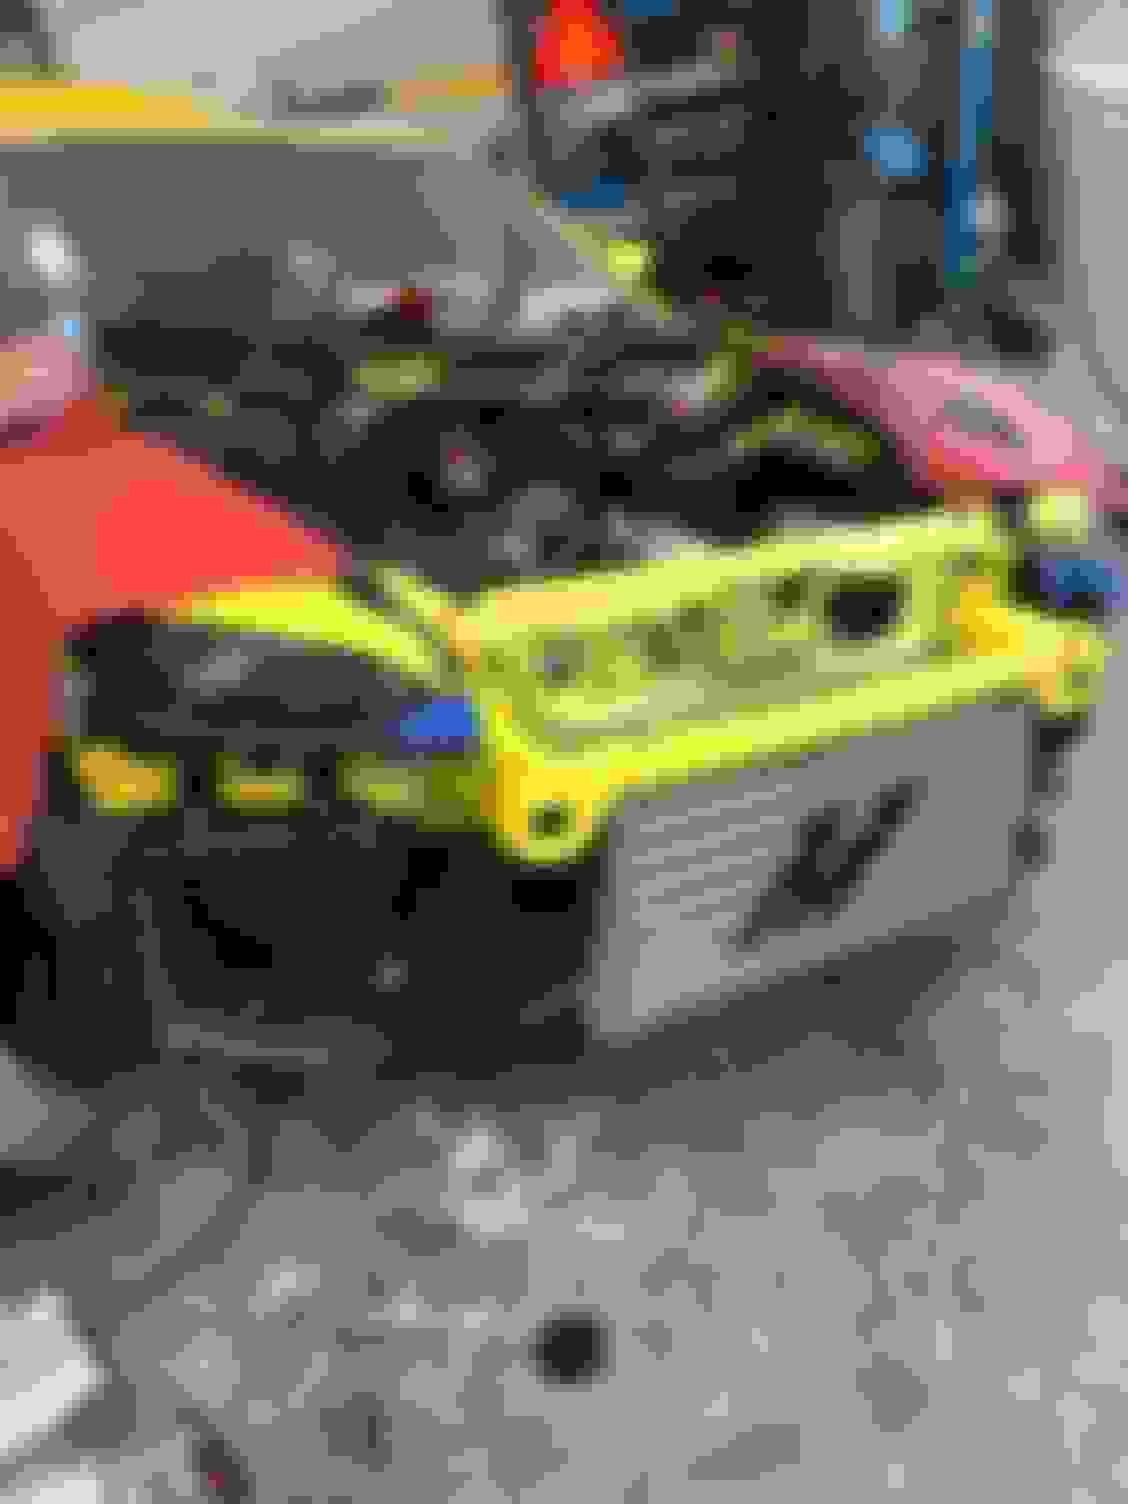
Yeah for sure, I've actually never seen a low mount swapped Rx8 either. There was a minor interference (very minor) between the turbo and LIM (see photo below; I'll try to remember to get a pic of the modified compressor band). We slotted the manifold to block bolt holes about an 1/8" just to slide the turbo forward a little bit too. I was lucky to stumble across this custom manifold and it definitely made me feel more comfortable in regards to spool-up with the 9174 over the 8374; most people said the 8374 was better sized turbo for my power goals. I don't disagree with them but I've already mentioned in previous posts the advantages I was seeking with the 9174.
It is just the stock LIM that we have modified to allow for a bit more clearance against the firewall so we didn't have to hammer it out as much. The Excessive LIM (and maybe the Elite LIM too) would have fit better and without any mods required, but I didn't want to cough up another $1,000USD on top of this build. Spent that contingency on the Exedy twin disc clutch!
I don't recall the exact unused terminals but there are a bunch (electrical is not my forte). They don't need to be removed by any means (the can just sit in the bay unplugged) but for the sake of cleanliness we got rid of them. Also because I decided to go with a Hall Effect sensor rather than the rx8 mag sensor we needed to run a 12V supply to the sensor and decided to put it into the modified harness. Also, not sure if anyone noticed it in the photos, but I wanted to keep the factory OMP (I know its not required but I wanted to keep it along with premixing; same thing I did with the Renesis). It's different than the Rx8 OMP so that required some re-wiring to get it to work with the Adaptronic PNP.
Sorry I can't be more specific on the electrical stuff; I have the services of a friend with more than one engine swap under his belt (LSX FRS, RB26 FD Rx7) to do most of the heavy lifting since I didn't feel like I'd be able to pull this off on my own. Up until this swap I've done all the work to this car myself; but I must say it is worth every cent having this friend on my team; he's doing all of the fab and electrical work too which I would have been completely hopeless on. It allows the car to sit in one spot for the entire winter (in his personal home garage) until it is complete and in the end this project will help promote his newly formed garage/business at a bunch of shows this summer (fingers crossed they don't all get cancelled).
No problem. I plan on doing the same. My concern was having the connectors sitting in the bay potentially getting wet shorting something out.
the only thing I didn�t consider in the previous reply is that since you have to wire it in using an engine swap is whether or not there are enough of the right inputs and controls in place to wire it and do what�s needed. I�m not sure it can be done so easily on a swapped engine now:
the only thing I didn�t consider in the previous reply is that since you have to wire it in using an engine swap is whether or not there are enough of the right inputs and controls in place to wire it and do what�s needed. I�m not sure it can be done so easily on a swapped engine now:
So rx7 omp can be powered with rx8 wire harness.. did u managed to get a wiring digram ? How hard is the process
I'll have to get more info on this for you. The harness did required modification, the Rx7 OMP is not a direct plug in. My impression (and take this with a grain of salt) is that the Rx7 OMP has additional pins on the connector, meaning the Rx8 connector had to be removed, replaced by the Rx7 connector then an additional wire was added to harness and ran to the Adaptronic and pinned to an output on it (Same as using FFE Hall Effect Sensor instead of Reluctor). Again, this is my assumption, I'll have to follow up with my guy on the exact modifications required to make this work. I wanted to make the Rx7 OMP work but if it was going to be too much work I wasn't that concerned about it; I'd just premix a bit more than I am going to with it. My guy doing the electrical spoke with Shawn C from TunedbyShawn (where I bought the ECU) and figured out how to wire it up and that's where I left it because electrical and me are like oil and water; I just don't have enough hands on experience with it to be comfortable doing that work myself
I love to learn things like that, but my goals are to perform this swap with OEM like cleanliness. So I figured this wasn't the project to try and learn it on
Last edited by RotaryMachineRx; Apr 2, 2020 at 12:59 PM.
I’m pretty sure that’s correct and why I noted a correction to my previous comments. It’s not as straightforward in an engine swap as opposed to the original engine/chassis combination.
I'll have to get more info on this for you. The harness did required modification, the Rx7 OMP is not a direct plug in. My impression (and take this with a grain of salt) is that the Rx7 OMP has additional pins on the connector, meaning the Rx8 connector had to be removed, replaced by the Rx7 connector then an additional wire was added to harness and ran to the Adaptronic and pinned to an output on it (Same as using FFE Hall Effect Sensor instead of Reluctor). Again, this is my assumption, I'll have to follow up with my guy on the exact modifications required to make this work. I wanted to make the Rx7 OMP work but if it was going to be too much work I wasn't that concerned about it; I'd just premix a bit more than I am going to with it. My guy doing the electrical spoke with Shawn C from TunedbyShawn (where I bought the ECU) and figured out how to wire it up and that's where I left it because electrical and me are like oil and water; I just don't have enough hands on experience with it to be comfortable doing that work myself
I love to learn things like that, but my goals are to perform this swap with OEM like cleanliness. So I figured this wasn't the project to try and learn it on
please take pictures when you do the process and share with us how you did it..
A few more photos and some more info on fitment and other small modifications required.
1. Modified return style fuel pump assembly in the car.
2, 3, 4. Can see where we had to cut the REW water pump inlet off to avoid the RX8 sway bar interference. All we did was flip it around and weld it back on upside down. Simple fix to allow turbo and heater core connections to be utilized still.
5. The way we have the turbo clocked, where the EFR boost control solenoid mounts to on the compressor housing is making contact ever so slightly with the subframe. Will be shaving this down to allow more clearance. I'm not planning on using the EFR solenoid at this time anyways either (I'll be re-using my Greddy EBC as mentioned back in the first few posts). If I do decide to use it in the future and control boost via the Adaptronic I'll most likely have to remotely mount the solenoid.
The rest of the photos are just random shots.
Last edited by RotaryMachineRx; Apr 4, 2020 at 11:04 PM.
Here's a video of a quick test fire to make sure injectors, coils and ECU are all getting power and proper signal. Sorry about the portrait iPhone orientation
Apart from the hydramat, nearly identical set-up. If I do happen to run into any fuel issues (shouldn't according to Max, I basically copied his set-up) cutting the bottom off of the rx8 assembly shell and replacing the sock filter with a hydramat set-up wouldn't be difficult to do.
Last edited by RotaryMachineRx; Apr 6, 2020 at 04:56 PM.
heck yea man, been following this build on here as well as on your Instagram. looks Great and sounds good.
Thanks man! Should tame down substantially once my downpipe is fabbed, that was directly out of the turbine lol. The iphone microphone doesn't do it justice either, it was just too damn loud for it.
Here's a video of a quick test fire to make sure injectors, coils and ECU are all getting power and proper signal. Sorry about the portrait iPhone orientation ...
Jesse - Looking good, and sounding really good!
I started my 8 during turbo install... one time in the garage straight off the DP. OMG ...LOUD. I'll never do that again.
you gonna get raped by all the noobs and snap-crackle-pop tards ...
.
Not after it's tuned and the exhaust is connected. BHR midpipe will really tame it down, hoping for a nice buttery smooth idle sound, was actually surprised how much "brap" there was with this street port but yeah, as mentioned we're hearing the raw exhaust essentially right out of the block. Speaking of which, just need to upload some photos but the downpipe is fabbed and connected as of last night
Most difficult items remaining are getting the intake piping figured out. Unfortunately I was expecting more room than there is with the brake system still in its stock location and the TB positioned right off the manifold like it is. Probably going to take some serious pie cuts. Second is me doing the tuning myself .... I'm learning a lot, but it's still a scary feeling lol.
Last edited by RotaryMachineRx; Apr 7, 2020 at 10:35 AM.
As mentioned above; downpipe is fabbed and installed. Just need to get a proper sized V-band clamp at the turbo side and a steel clamp to replace the sweet *** zip tie holding the heat wrap on right now.
A little bit of a sneak peak of where I'm planning to run charge piping. It's going to be pretty minimal and simple; essentially following where my greddy piping was (utilizing same holes through undertray I made all those year ago). Planning to just run a filter on the turbo inlet but may run some CAI style piping up above the rad to the opening where the RX8 intake goes, undecided, that will be a decision for later after seeing the charge pipe in place and how much room and how busy it might look with it. As I eluded to in my reply to Team a couple posts above the TB inlet area is going to be the most difficult part to deal with. There is not as much room as I was anticipating with AC hose and brake system in place. Compressor outlet "Horseshoe" is about 6" taller than it will actually be once we cut it down.
you can save some room by locating the BOV on the IC discharge end tank rather than on the pipe at the TB. It will both respond and flow better there for smoother and more efficient operation. I’ve suggested it several times, but sheeple are always reluctant to deviate from the herd.


 Of course it also depends what turbo you plan to bolt up to it too...


 ...LOUD. I'll never do that again.


 .... I'm learning a lot, but it's still a scary feeling lol.