When you click on links to various merchants on this site and make a purchase, this can result in this site earning a commission. Affiliate programs and affiliations include, but are not limited to, the eBay Partner Network.
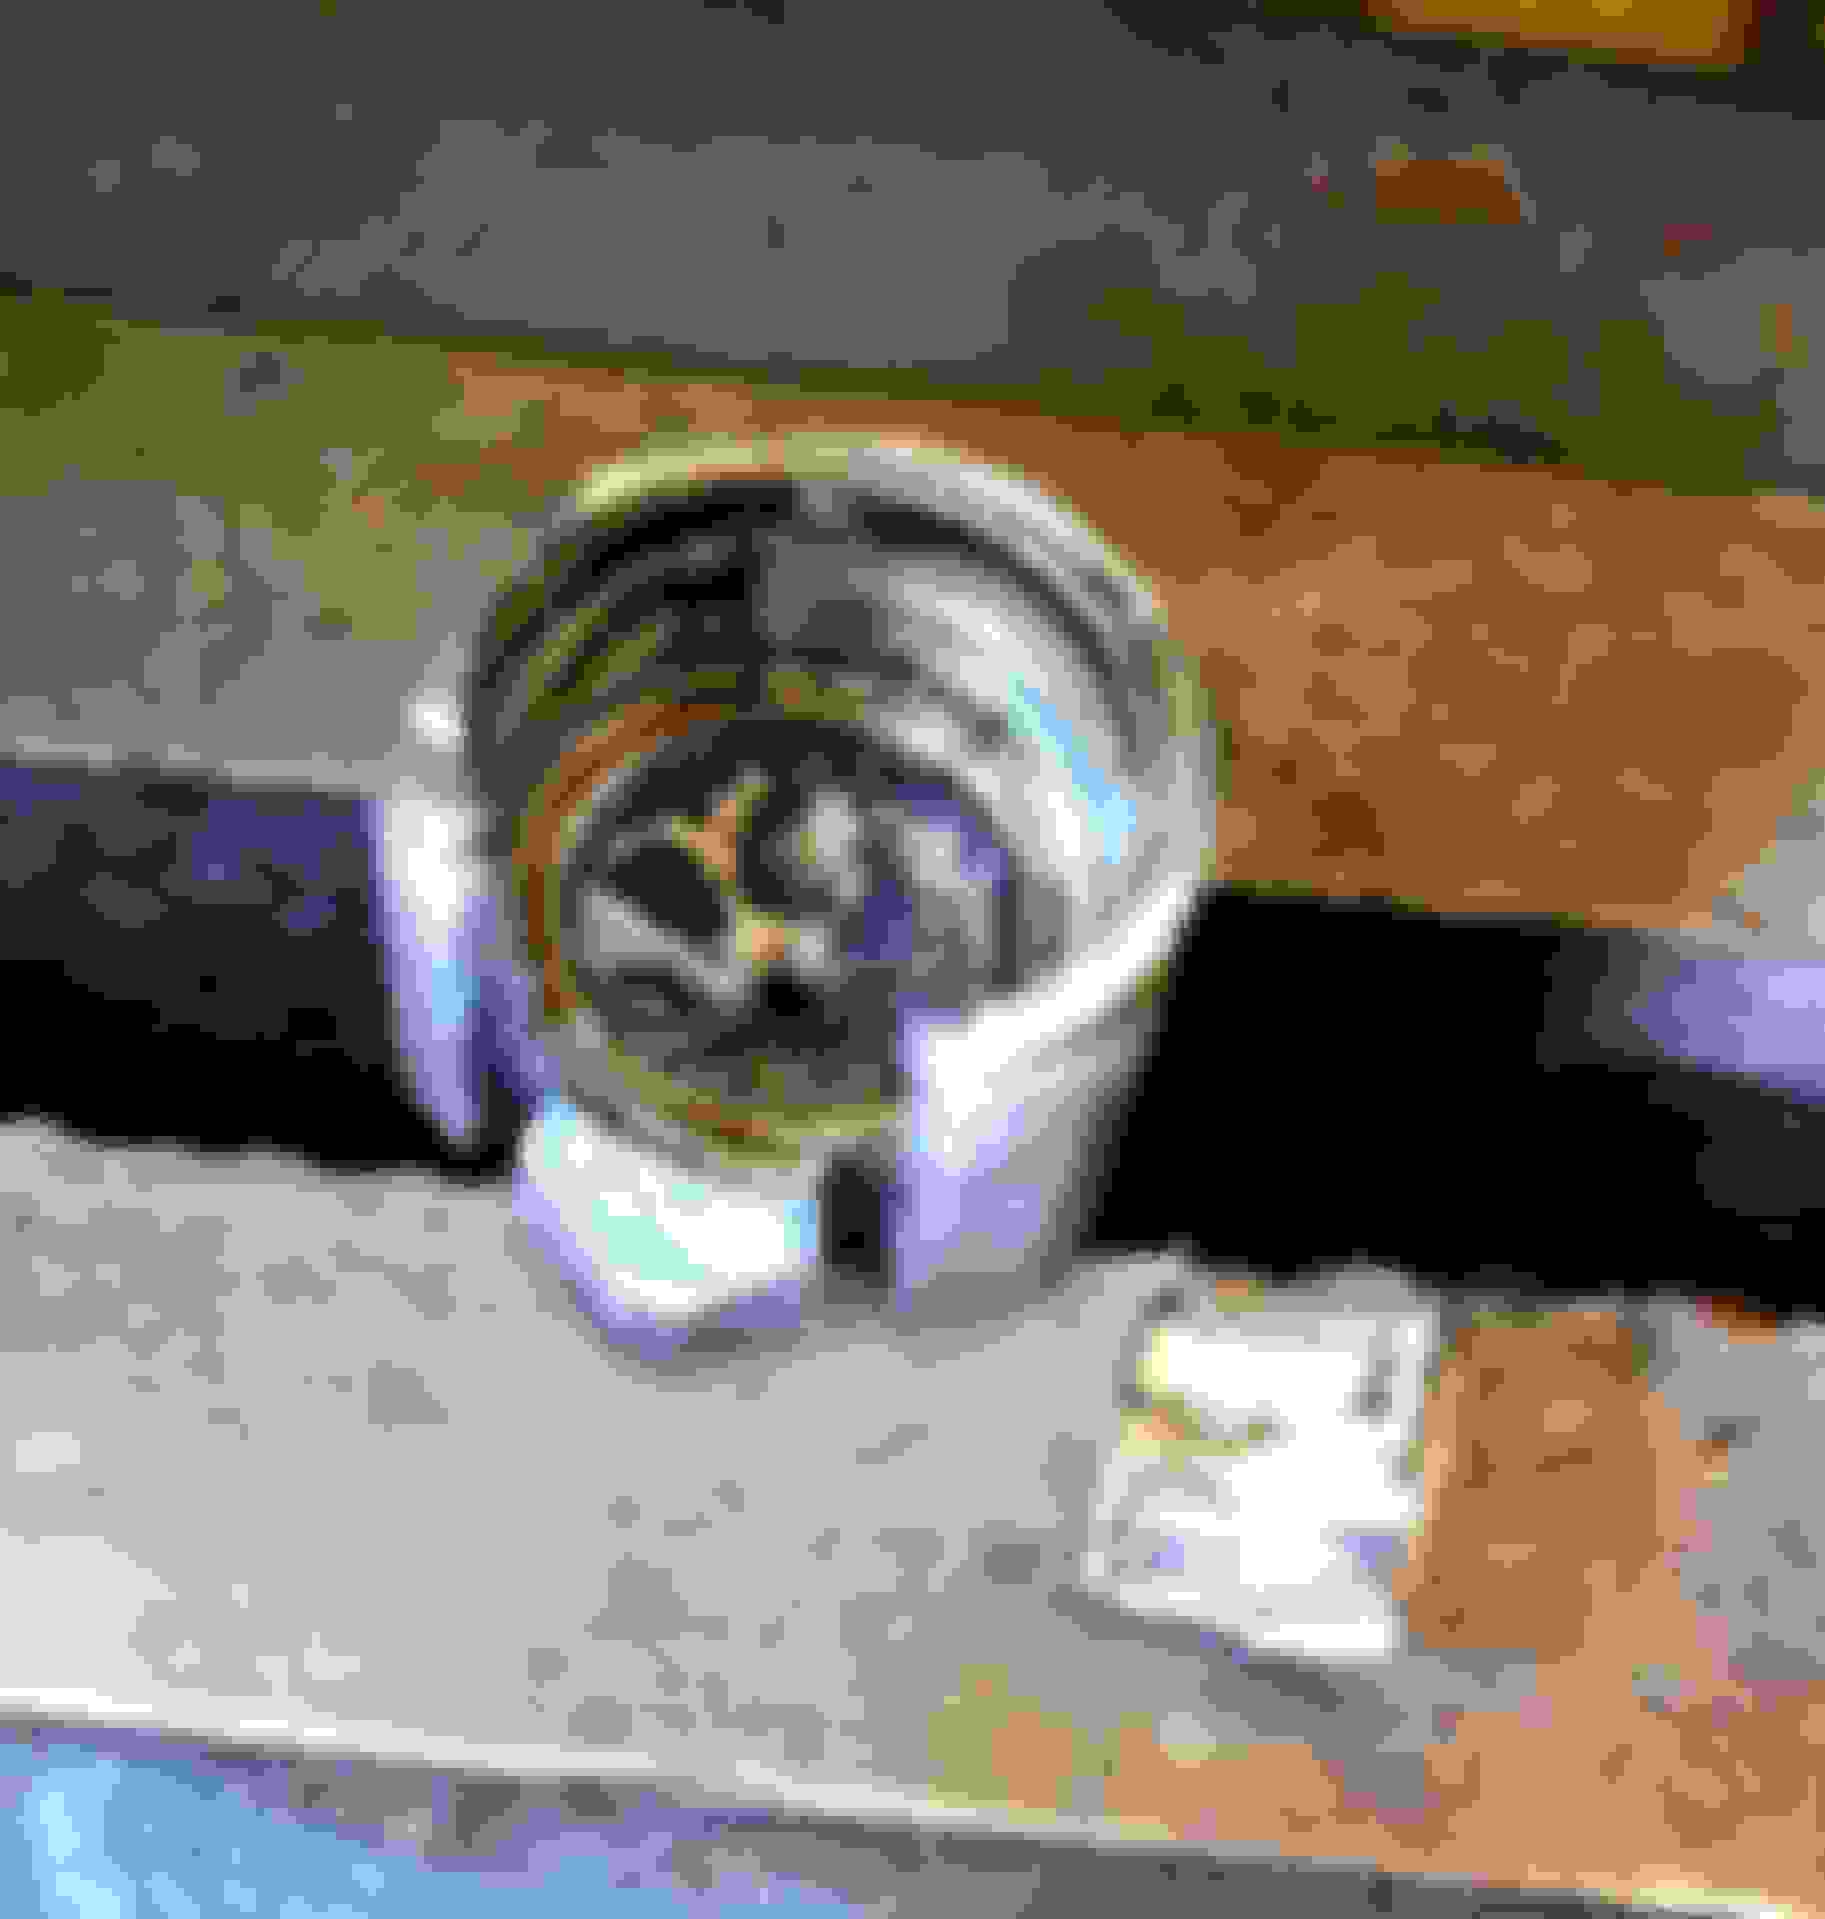
Need some quick help here, I thought I was awesome by putting 90 psi through my oil injectors to clean em out... Well, I just noticed they have a vacuum spec so they should act like a 1 way valve. I have no vac hold on any of the 4, but they sure look pretty. How important is the vac, do I need to order 4 new injectors? Any cheap source for em? They have 88k on em.
Also I was looking at a parts manual and found the numbers for these to be N3H114631A and N3H114631B (on some websites). I have an 04. Is there any difference?
Sorry I'm posting to the new user forum, I dont have access to the good stuff yet.
Well I can't comment on the function or where to get them cheap, but one of mine was damaged in a moment of stupid, and I ordered the B variant. Since mine is an 05 I asked my parts guy what the difference was (and to check my VIN to make sure I got one the same as the other 3) and he told me they were listed for all years of the S1. Order new crush washers as well.
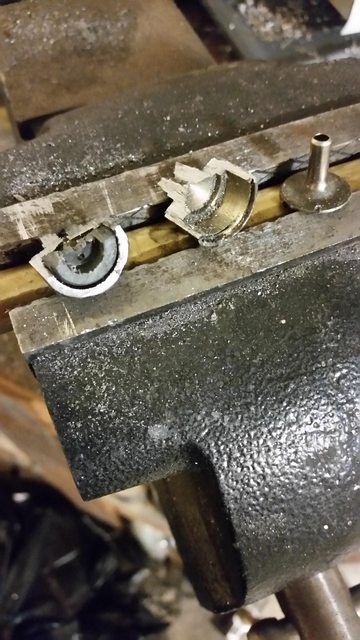
New ones are always best, but you can clean them. There are check valves in the fittings. Recently I removed the 4 oil injectors on my 8, and cleaned them by letting them soak in carb cleaner for half a day. After 100k the nozzles looked clean, but not the check valves. I didn't think it was a "fun" project , but I'm really glad I did it. Maintaining cleanliness to prevent dirt ingress and such was the most worrisome part for me. Beware of the air manifold splitter "thing". During replacement of oil injector air hoses I broke off 3 out of the 4 nipples. (in addition to breaking all the injector hoses.....) This black plastic piece connects a larger diameter air tube coming off the accordion and splits into 4 ports for each of the oil injector lines. The 4 ports are connected to the oil injectors with small diameter vacuum line. With age and heat cycling it can become brittle.
New ones are always best, but you can clean them. There are check valves in the fittings. Recently I removed the 4 oil injectors on my 8, and cleaned them by letting them soak in carb cleaner for half a day. After 100k the nozzles looked clean, but not the check valves. I didn't think it was a "fun" project , but I'm really glad I did it. Maintaining cleanliness to prevent dirt ingress and such was the most worrisome part for me. Beware of the air manifold splitter "thing". During replacement of oil injector air hoses I broke off 3 out of the 4 nipples. (in addition to breaking all the injector hoses.....) This black plastic piece connects a larger diameter air tube coming off the accordion and splits into 4 ports for each of the oil injector lines. The 4 ports are connected to the oil injectors with small diameter vacuum line. With age and heat cycling it can become brittle.
I flowed them with carb cleaner and blew threw the vac port not understanding the internals. 90psi, do you think I have damaged the check valve? I could let em soak in carb cleaner but is there a chance of recovery? I'm prob looking at a 240 investment if not and sorta itching to pull the trigger on an order if not recoverable.
I elected to use gasoline to clean/check mine. I filled a syringe and pressed the tip into the hose. Slowly running gas into it would produce a steady stream out the tip, and giving it a more rapid jolt would cause it to come out the side holes too. Then I would blow through the vac port to clear the gas out before reassembly. I wish I knew how to actually check them, but perhaps you could try that on yours and see if they behave in a similar way? If they do it doesn't necessarily mean they are okay, but if nothing at all comes out, that MAY be cause for concern?
edit: I have a broken one sitting right here. I'm going to cut it up for science, see if I can figure out how they are supposed to work.
I'd love to know what the check valve is made of... it would help with cleaning... there was a cut up one posted on one of the forums here, but I wasnt able to really get a feel for what it was made of. I'll edit this post if I find the link.
The manual states:
Oil Nozzle Inspection
1. Remove the oil nozzle.
2. Connect a vacuum pump to oil nozzle A, and apply negative pressure while checking the pressure value on the pressure gauge.
If the maximum value of the negative pressure is less than 66.5 kPa {0.68 kgf/cm2, 9.65 psi}, replace the oil nozzle.
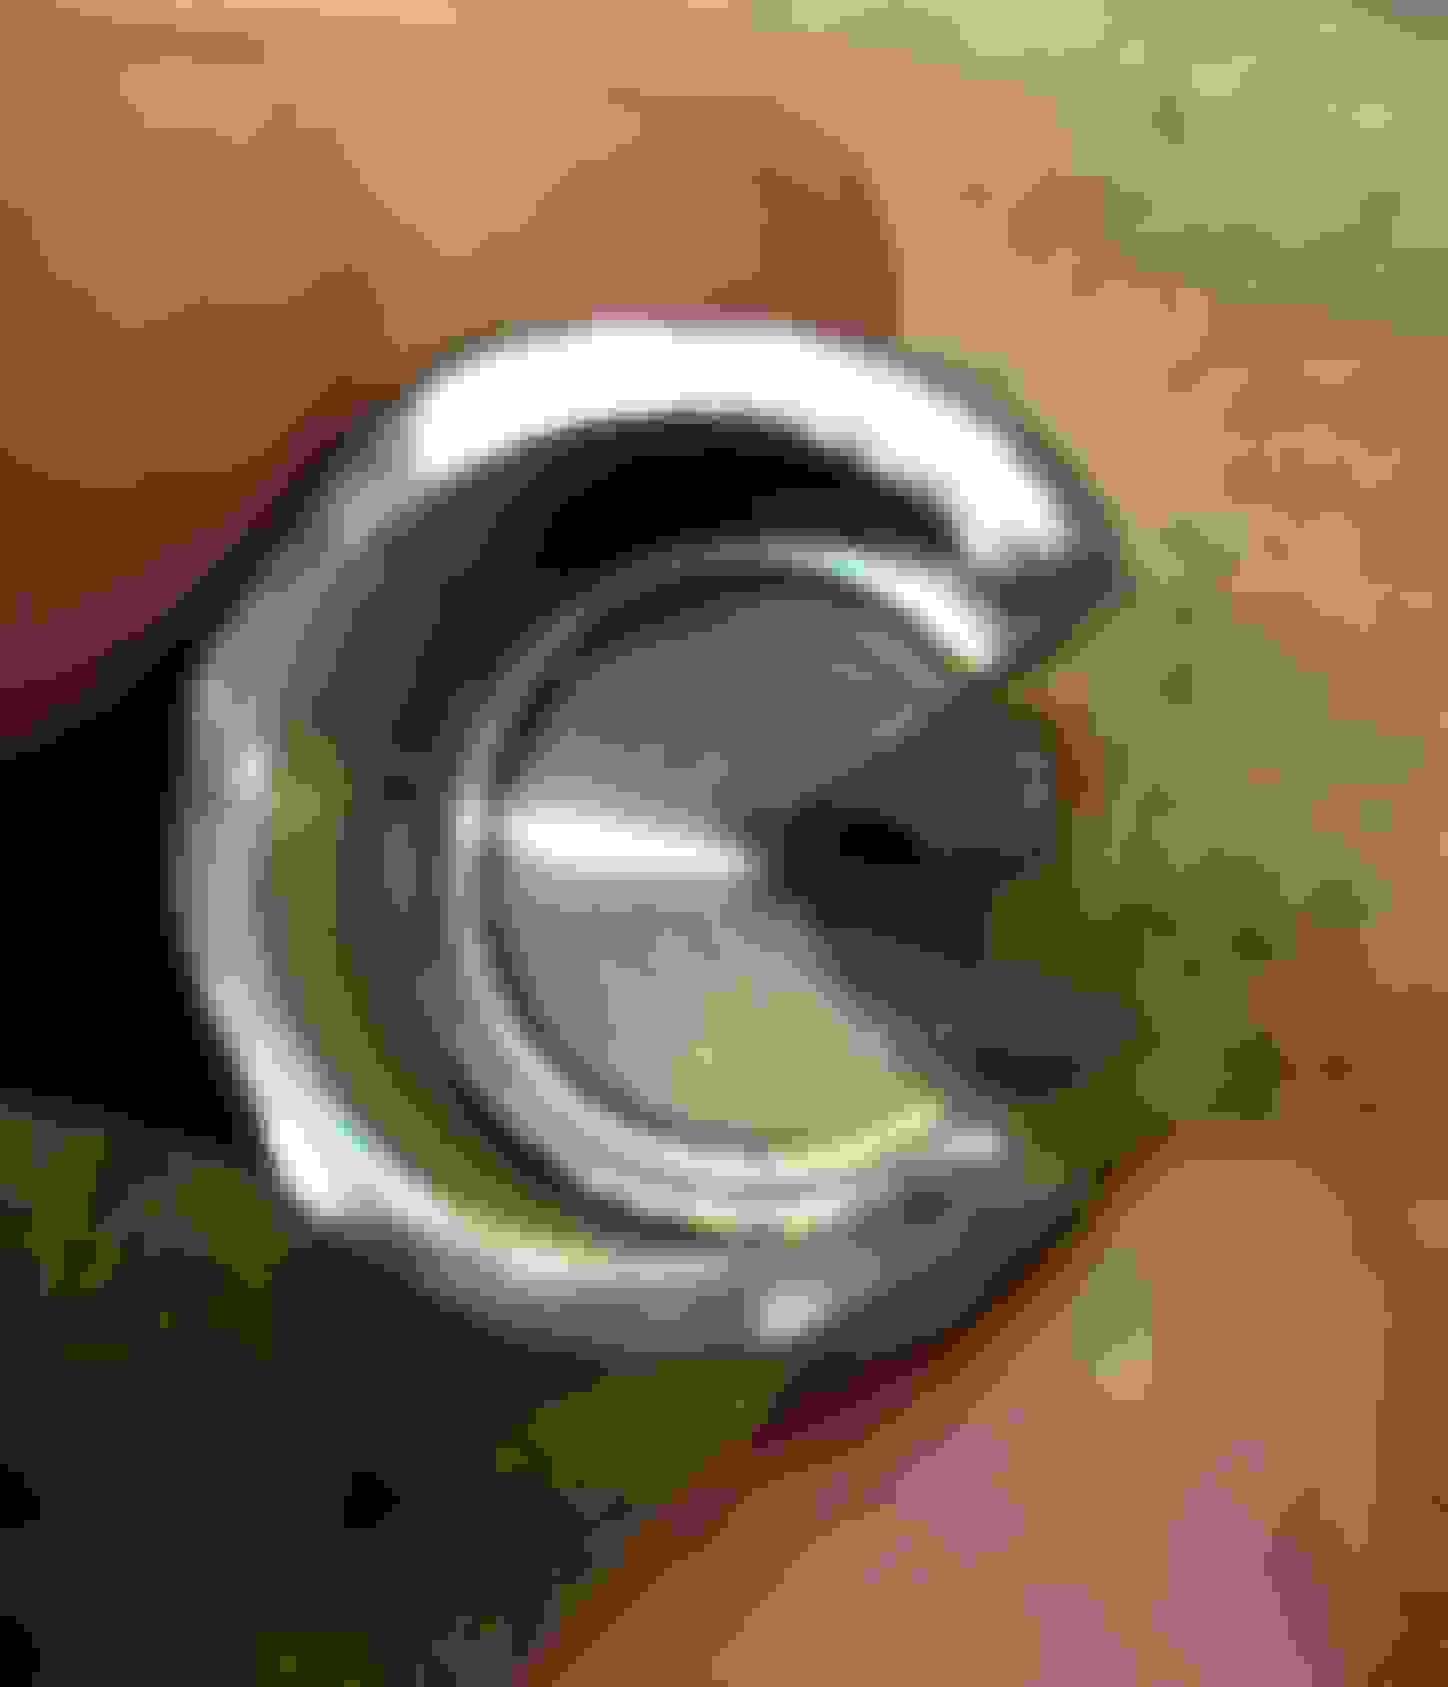
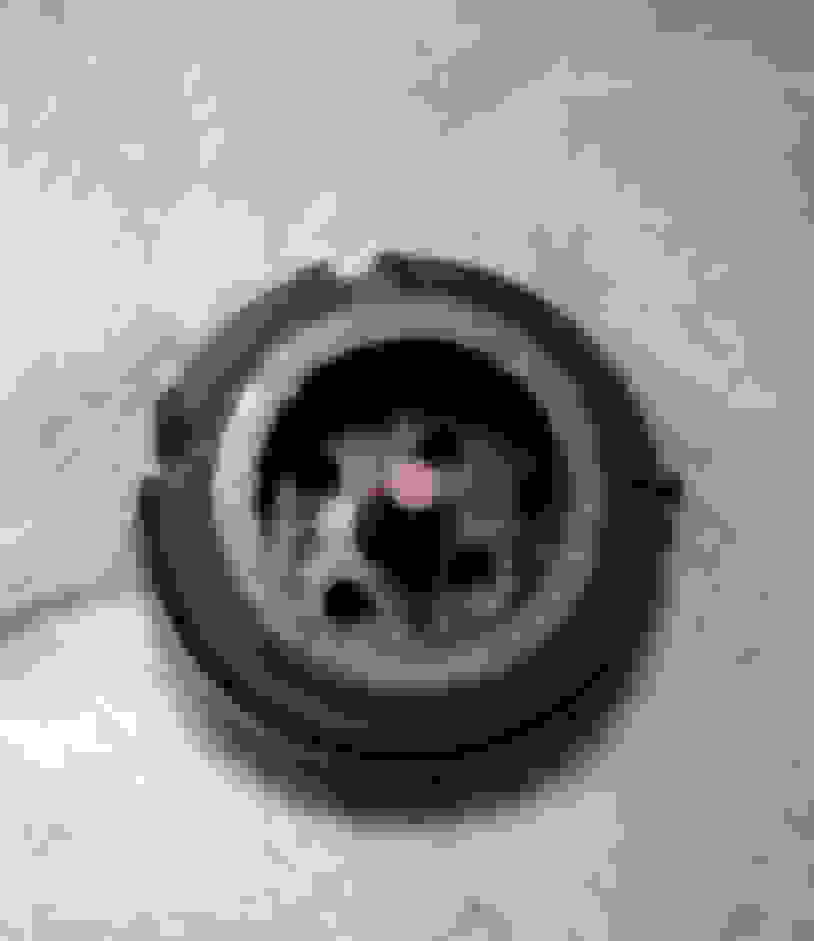
Yikes. Well, it seems to be some sort of plastic. The little red bit is rubber or similar. It kind of fell apart as I cut (was cutting it lengthwise) but I guess a lot of pressure/flow could have done it in. I do recall trying to blow into the tips of mine while they were out and not getting anything. I don't own a vacuum tester though. Amazingly.
In any case if yours aren't holding vacuum that probably means they're banjaxed and I'd be looking to replace them.
I think next weekend I'm finally buying a vac tester and checking mine. Thanks for giving me another thing to worry about. :P
Oh, and cut yours open if you do replace 'em, see how far down that rubber piece went, lol
Yikes. Well, it seems to be some sort of plastic. The little red bit is rubber or similar. It kind of fell apart as I cut (was cutting it lengthwise) but I guess a lot of pressure/flow could have done it in. I do recall trying to blow into the tips of mine while they were out and not getting anything. I don't own a vacuum tester though. Amazingly.
In any case if yours aren't holding vacuum that probably means they're banjaxed and I'd be looking to replace them.
I think next weekend I'm finally buying a vac tester and checking mine. Thanks for giving me another thing to worry about. :P
Plastic or rubber would explain my leaks. I have 2 vac testers if you are anywhere near S Florida. If I understand it right, the best way to clean em would be a vac to the top and a flow from the banjo ports down to the tips, but carb cleaner would be a big no no if rubber (usually). Blah... there goes a good chunk of paycheck.
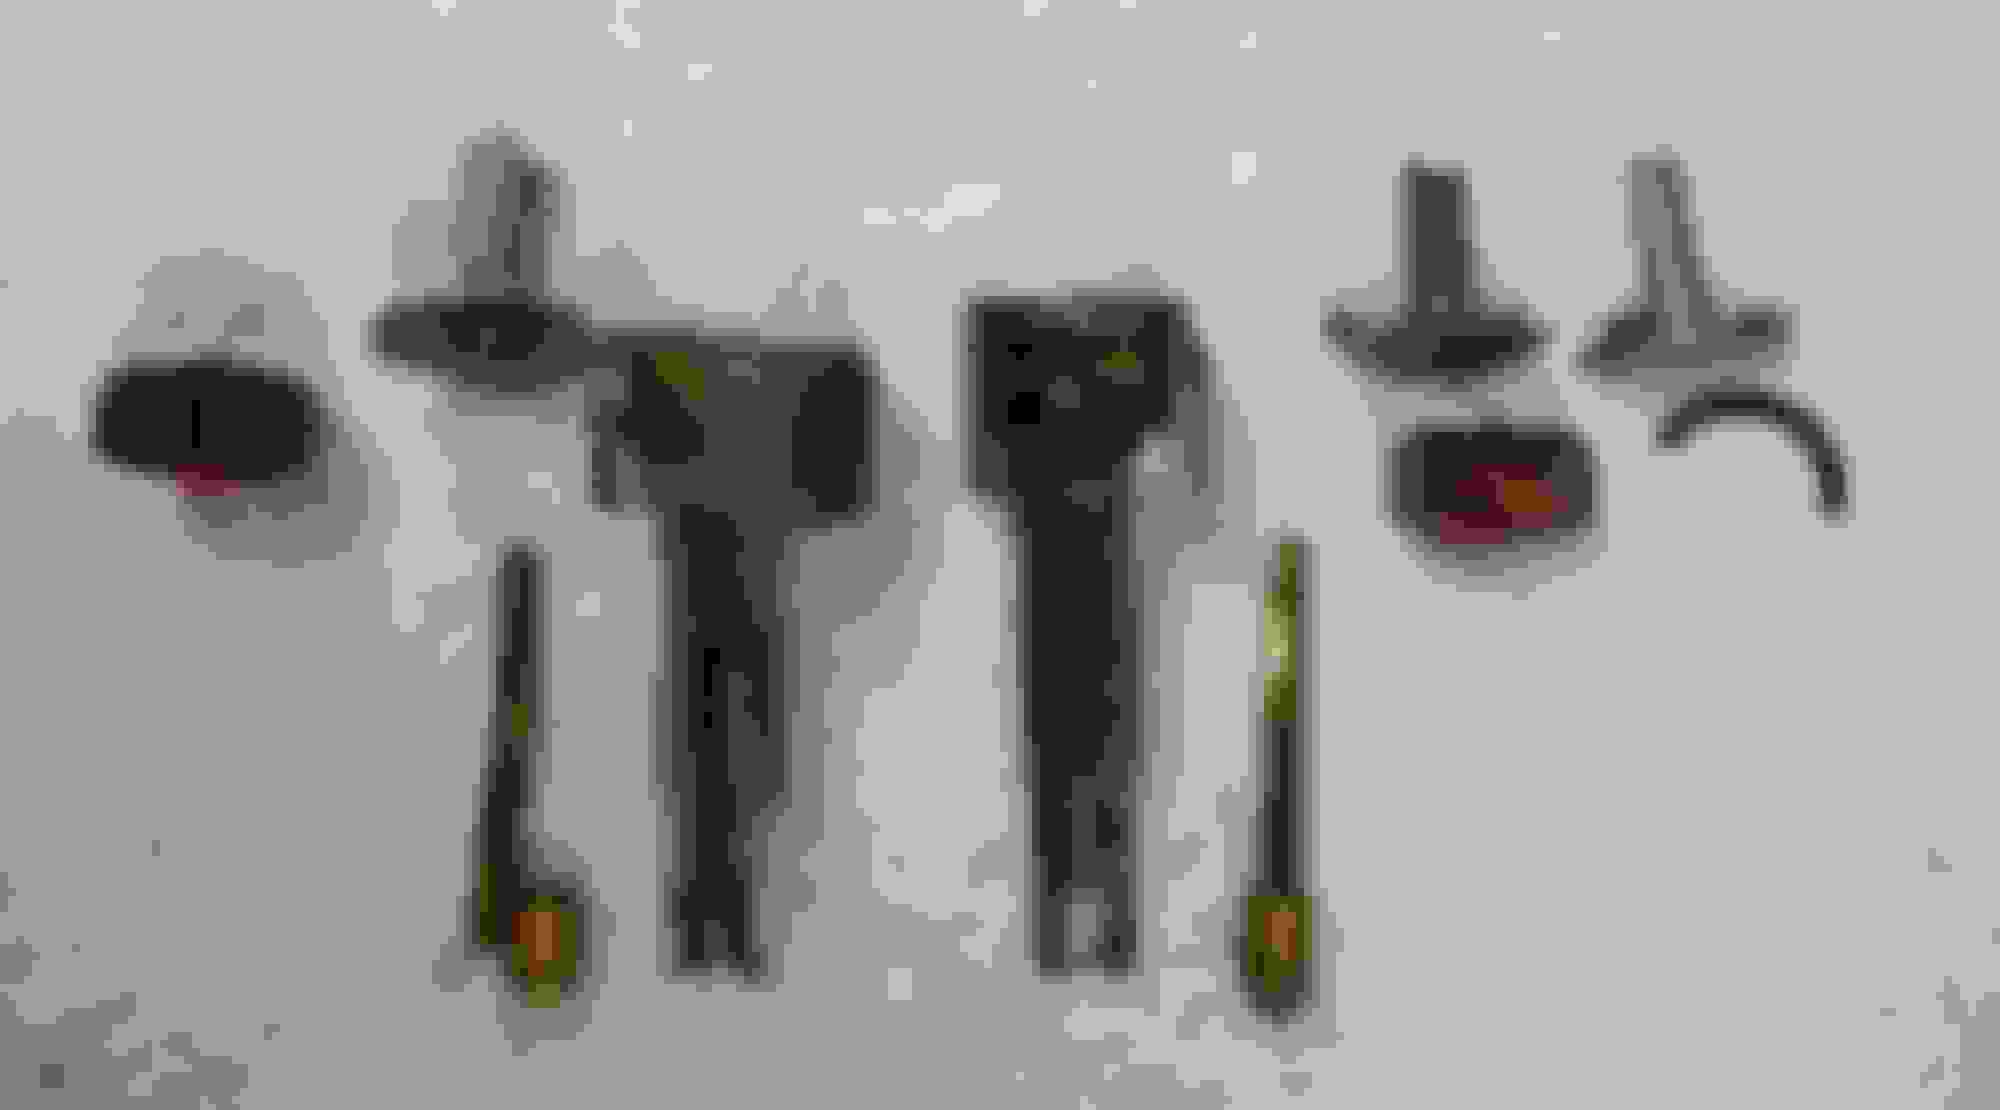
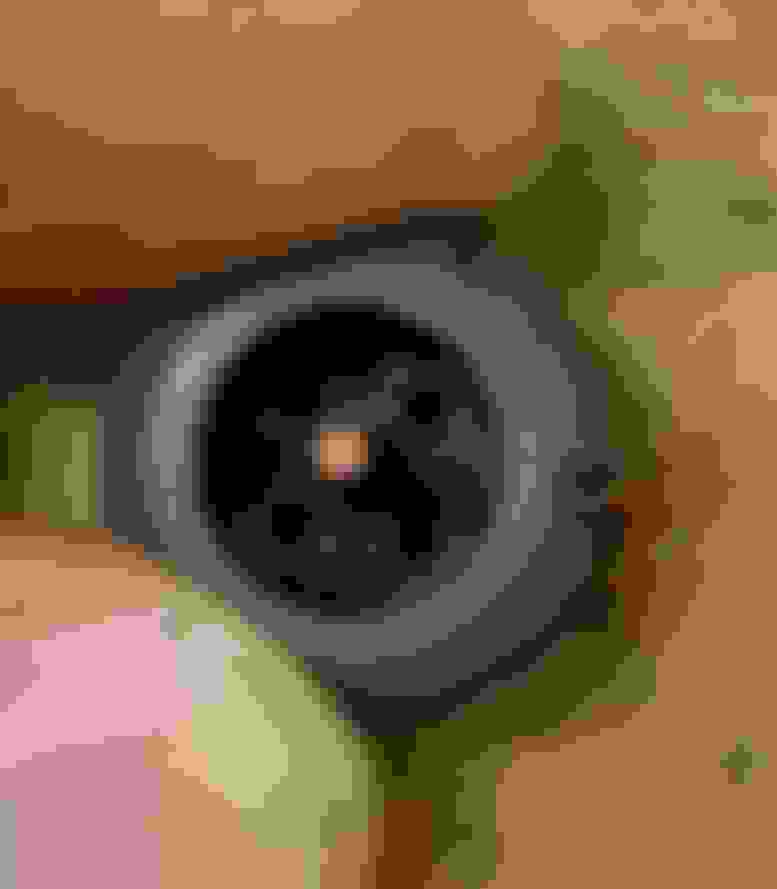
I'm dying to cut one open, I'll probably do that tonight then post pictures... All my belief that its a steel ball, I have my doubts since Mazda put rotors all over the car... there's probably a rotor in there, just needs to move a little to make the seal... probably an apex seal is caught in there :p
Haha, no, the rubber part got away from me while cutting but it looks like it would have been a flat disc that has a little nub coming out the top to hold it in place. The other, hard plastic part, has one hole in the middle for the nub to fit through and then several (4?) smaller holes arranged in a circle where the air passes through (or doesn't).
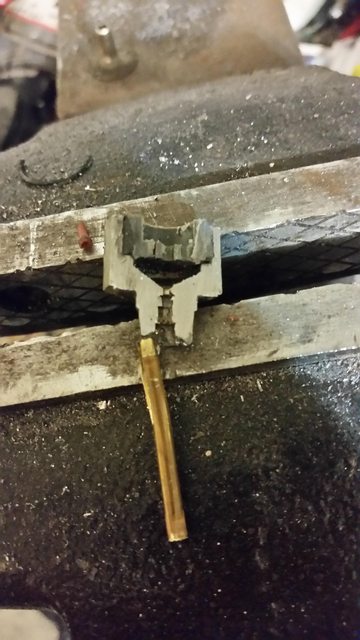
Ignore the mess/random brass rod in the vice..
This pic shows the top of the nub that I broke off intentionally. Little red thing on the left.
Awesome documentation! And that is NASTY. What does the rest of the engine look like?
Great question... Just a bit of a quick background... I always wanted a rotary to learn off of, and well the -8 and -7's I've always loved the look of. I drove across the state back in December for a good priced -8 and it started but didnt start after warm. I didnt know much about em so after it cooled I got it started and hot fueled the whole way home ~ 550 miles. Did a comp test and it failed big time on one rotor. I bought a rebuild and im in the process of swapping over all the components and ran into this snafu. Space is limited in the garage but I elected to keep the core. Once the new motor is in I'll be taking the old one apart and gladly taking pics and posting. After the oil injectors come in, I'm on my way to full assembly. I wish I had taken a pic but the intake tube thingies were really coked as well. So far I haven't seen any major woes besides that. The cat actually looked great.
Good to hear. That's a similar path to what I did, but mine had been sitting two years and came home on a hook.
One more piece of advice then, speaking from experience. Plenty of idiots smash the engine against the ECU box during install and break the OMP position sensor. I'm one of them. It's 2 bolts, just take the fking sensor off before you put the engine in. The sensor is not sold separately and can be a major PITA to source a replacement. Good luck with the rest of the build. It's totally worth it!
One more piece of advice then, speaking from experience. Plenty of idiots smash the engine against the ECU box during install and break the OMP position sensor. I'm one of them. It's 2 bolts, just take the fking sensor off before you put the engine in. The sensor is not sold separately and can be a major PITA to source a replacement.
I appreciate the tip! Some things (like the darn oil injectors) have totally surprised me with cost... so again, thanks, ill get it off.
Awesome pics! really enjoyed reviewing the images. I can't imagine carb cleaner is going to do that red plastic part any good. I'd like to know if it's viton or some derivative. Thanks for going through the effort of taking it apart and photo documenting it.
Awesome pics! really enjoyed reviewing the images. I can't imagine carb cleaner is going to do that red plastic part any good. I'd like to know if it's viton or some derivative. Thanks for going through the effort of taking it apart and photo documenting it.
Carb cleaner literally curled it up... I was surprised that it came back to the normal shape (the clean looking one). I'm willing to do some more experimentation on em (cleaning, de-coking, rubber tests with solvents). Shoot me ideas and I'll take some photos and let the go-pro run at the same time. Maybe if we find a good way we can make a useful sticky post.
Problem is the particle size had to be small enough to make it out the nozzle, and I'm not sure about that. What about soaking in gasoline or kerosene?
Problem is the particle size had to be small enough to make it out the nozzle, and I'm not sure about that. What about soaking in gasoline or kerosene?
I think the question would be what solvent will not deteriorate the rubber. I'm thinking backflow from the tip and pulse to break the crap apart. Pressure to force out of the holes. I was going to try my ultrasonic bath to aide in this.
So, if the red flexible seal deforms, cracks, or does not seat correctly due to debris does this mean air can potentially enter into the oil line?
The way that I see it, if the rubber seal deforms (as well as the black seal on top of that plastic piece that holds the rubber seal) then POSITIVE PRESSURE air can go from the intake manifold into either the banjo fitting line down to the oil metering pump. That is only if the oil pressure is less than the POSITIVE intake air pressure. With that said, you should not have POSITIVE air pressure in your intake manifold unless you run a turbo or supercharger.
Case two: if you have a clog at the bottom tip of the injector, now the oil from OMP will go into the intake manifold vac line (knowing you have 0 to some negative atmospheric pressure).
Case three: The oil injector tip is exposed to a (rotor housing) vacuum stroke and a compression stroke (I think, someone correct me if im wrong). So with an unclogged injector, during vacuum, the rubber seal should flex down allowing the seal to happen and oil is injected into the chamber from the banjo ports. A leak would lessen that and not being sure of the oil pressure coming from OMP, you would hope its high enough to go in two pathways, one, out the nozzle into the chamber, two, partially into the intake manifold.
Case four: During the compression stroke, I'd think the oil coming from the banjo would go only one way, into the intake (with a busted seal). So if the seal was in tact, it would halt that from happening. Being the nozzle is so small, the compression pressure and volume I would hope is less than the banjo pressure and volume... open for question.