
Akron/Cleveland 8 Owners.


Yeah and I did mine twice. The first time tightening the upper left against the firewall first and the second install tightening the one on the top closest to the driver seat first. Both resulted in Failboat.
I'm sure I could record the voltage on crank though since the AP logs it along with the ignition timing and seperation.
 ).
).Would be nice to just rule out one more thing, even if it is highly unlikely.
Only issue with that statement is when we receive an upgraded starter, the problem should carry over to the new starter too if the coils are really drawing too much current.
It may be a far reach, but I'm willing to consider the possibility that the coils are drawing too much current for the starter to handle (even though I said the coils can't impact the starter ).
Would be nice to just rule out one more thing, even if it is highly unlikely.
Only issue with that statement is when we receive an upgraded starter, the problem should carry over to the new starter too if the coils are really drawing too much current.
).Would be nice to just rule out one more thing, even if it is highly unlikely.
Only issue with that statement is when we receive an upgraded starter, the problem should carry over to the new starter too if the coils are really drawing too much current.
If the room you're in just started to smell like a fart it's because I'm totally talking out my ***.

Like I said, lets see what the battery drops to while cranking.
Only issue here is the alternator is going to show voltage going to the battery once it starts.
That bad, huh?
Well coil/starter testing is moving until Thursday since I want to be able to do the coolant tomorrow night.
I removed the battery and the top of the PCM case (only broke 1 tab! Yay!). I can see the one nut towards the passenger side of the PCM case that seems to hold the battery case (in addition to the one at the bottom of the case I already took off). Is that the only one that has to come out? I don't actually need to pull off the PCM, right?
Wait. Is it called a PCM? I'm going back to cheat and look at your attachments.
Crap. You did remove it. So I assume I need to. Any tricks to it? Pretty sure I don't wanna just wing this one. Don't know what a PCM costs but I'm betting its more than I'm in the mood to shell out.
Can't say I have any tricks... just don't loose the bolts
Also, keep them in order that you took them out (I didn't and it took a little bit to remember what went where).
Might help to take pics of it while disassembling it to aid in the re installation.
Sorry couldn't be much help, but you really just remove bolts while working your way down towards the bottom on that housing.
I'll remember most of the sequences but I'll take pics instead.
How did you get the big grommets that all the wires into the box off the box? Do the grommets just pull up? I didn't see any clips but I'll try to figure it out.
How's come there's no DIY for this mothertrucker?
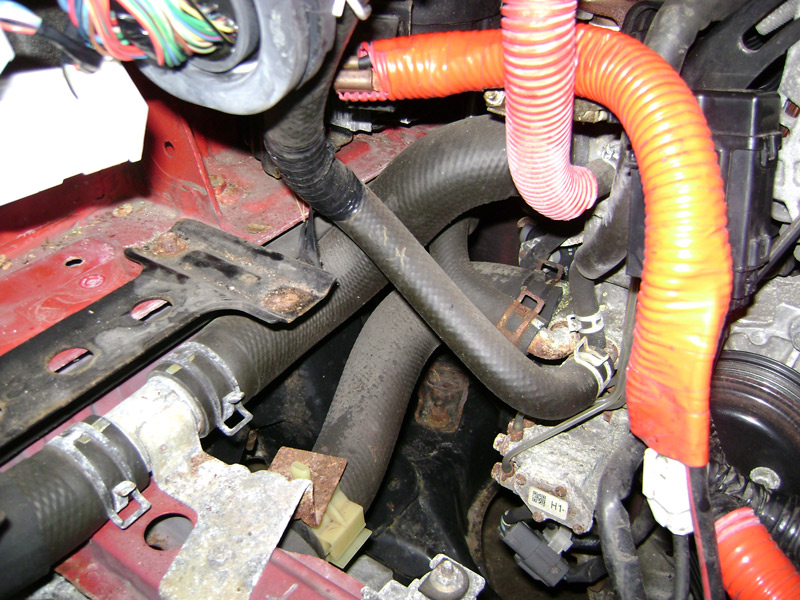
Hmm... Thinking this through it seems like I should be able to do this from underneath just by removing the under tray, right? I mean I just need to get to the lower rad hose.
It'll be harder to get to but might be a little safer of an install.
BTW - Any idea why there's a rubber band around the little PCM box? I noticed both mine and yours have it. Werd.
It'll be harder to get to but might be a little safer of an install.
BTW - Any idea why there's a rubber band around the little PCM box? I noticed both mine and yours have it. Werd.
Can't recall if the power steering unit is in the way (not home to see my pics).
Not sure what you are talking about.
Heh. So I've gotten the PCM off and removed the bolts for the battery case holder underneath.
And I took off my tower bar, took off the middle tubing for the intake, and can't for the life of me get my #()$*()#$%^~ intake box off!
The two white grommets are on some screws that connect it to the front of the body of the car. The right one slid right off but the left one just won't budge. THe part of the car body is flexing but the intake box just won't come off.
Now I'm gonna go look at instructions for the RB intake. I haven't removed it since I put it on but there's gotta be something I'm missing.
ALMOST done for the evening. Hope I'm keeping you from getting too bored, Jon.
The RB intake box has two nuts inside the box up front.
Just remove the filter and reach inside.
BTW... why are you removing the intake?
Just remove the filter and reach inside.
BTW... why are you removing the intake?
Last edited by Jon316G; Feb 24, 2009 at 09:13 PM.
I removed the intake so I could remove the battery case. I couldn't figure out how to get it out w/o removing the intake. My filter was pretty damn dirty too.
Besides I'm gonna check my coils tomorrow night after I do the coolant change and the water temp adapter. Gonna remove my throttle body tonight too.
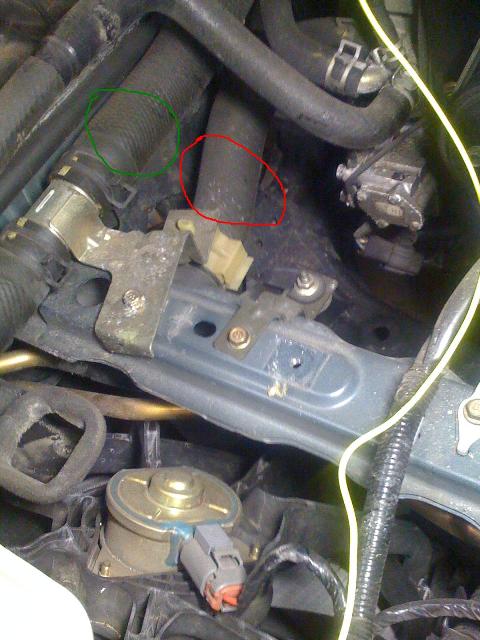
So anyway the hose I wanna do the install on is the lower one, circled in Red (red means go), right? Not the upper rad hose circled in green.
And I'm pretty sure the next meet we go to both you and Brian are getting comped quite a few drinks.
Finally found an install thread on it and they kinda seem to think it should go on the upper rad hose.
https://www.rx8club.com/series-i-tech-garage-22/prosport-water-temp-gauge-141673/
Bedtime. Also looking at my adapter and the hose I now question if it's big enough. Should be 34mm but I think it's 32mm (1 1/4"). So that may very well shitcan this idea. Maybe a local place has the adapter.

Didn't we have this argument before?
You mentioned that you wanted to measure the temp coming out of the radiator and I said to measure the temp coming out of the engine!
I agree that you should tap into the upper hose, but that isn't what you wanted before.
Found the pages where we originally talked about this.
So it appears that we concluded at the end of that conversation to install it after the thermostat (upper hose).
I would swear that you mentioned installing it after the radiator (maybe we talked about it offline) and I said "Ideally it would be nice to have a sensor going to and coming from the radiator."
Now let me ask you this, what if the thermostat fails to open at 180F?
How would you know other than realizing the temp hasn't gone up after several minutes?
I guess that is where the RB sensor works better since that is a constant recirculating line.
Ok if there's no piping between the thermostat and the engine itself and it only releases coolant back to the resevoir/rad when it reaches a certain temp then I would have to put it past the thermostat. Which means if the thermostat malfunctions and is no longer reading correctly I would have no way of knowing - unless the sensor for the OEM gauge is part of the thermostat (?) and was still working.
I would swear that you mentioned installing it after the radiator (maybe we talked about it offline) and I said "Ideally it would be nice to have a sensor going to and coming from the radiator."
Now let me ask you this, what if the thermostat fails to open at 180F?
How would you know other than realizing the temp hasn't gone up after several minutes?
I guess that is where the RB sensor works better since that is a constant recirculating line.
Last edited by Jon316G; Feb 24, 2009 at 10:50 PM.


TeethNThings.com
iTrader: (10)
Joined: Mar 2008
Posts: 1,322
Likes: 0
From: Mere seconds behind the leader...Doh!

The devil made me do it
iTrader: (1)
Joined: Jul 2007
Posts: 3,708
Likes: 2
From: Colorado Springs, CO
So this is what I have for the autoshow.
1. John (1)
2. Doc (2)
3. Ryan (1)
4. Steve (1)
5. Tim (1 maybe)
6. Jon (2 ???)
7. Megan (2)
1. John (1)
2. Doc (2)
3. Ryan (1)
4. Steve (1)
5. Tim (1 maybe)
6. Jon (2 ???)
7. Megan (2)
Last edited by DeViLbOi; Feb 25, 2009 at 11:31 AM.