DIY: Detailing With a Porter Cable 7424XP
 04-30-2011, 10:21 PM
#1

DIY: Detailing With a Porter Cable 7424XP
Detailing our cars has to be one of the most important things when looking to protect the paint, finish, and longevity of the exterior over the lifetime of the vehicle. In this DIY I will describe some tips to use a PC7424XP orbital polisher.
Note: I know that this isn't an RX8, but I wanted to place it in the DIY so that the images are retained.
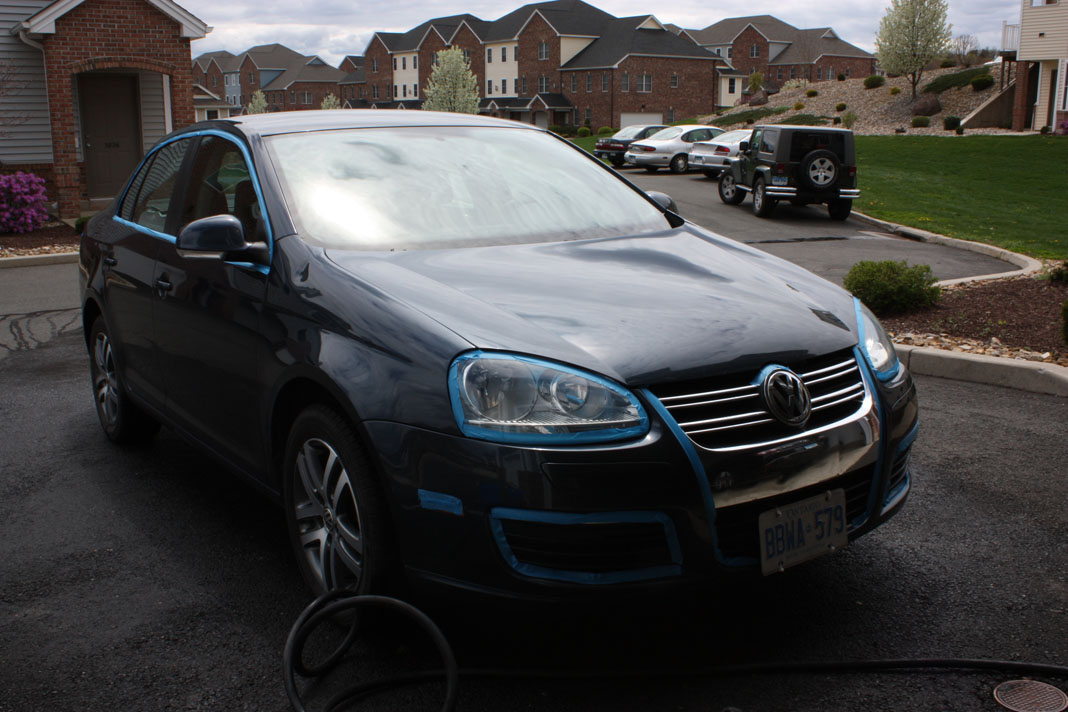
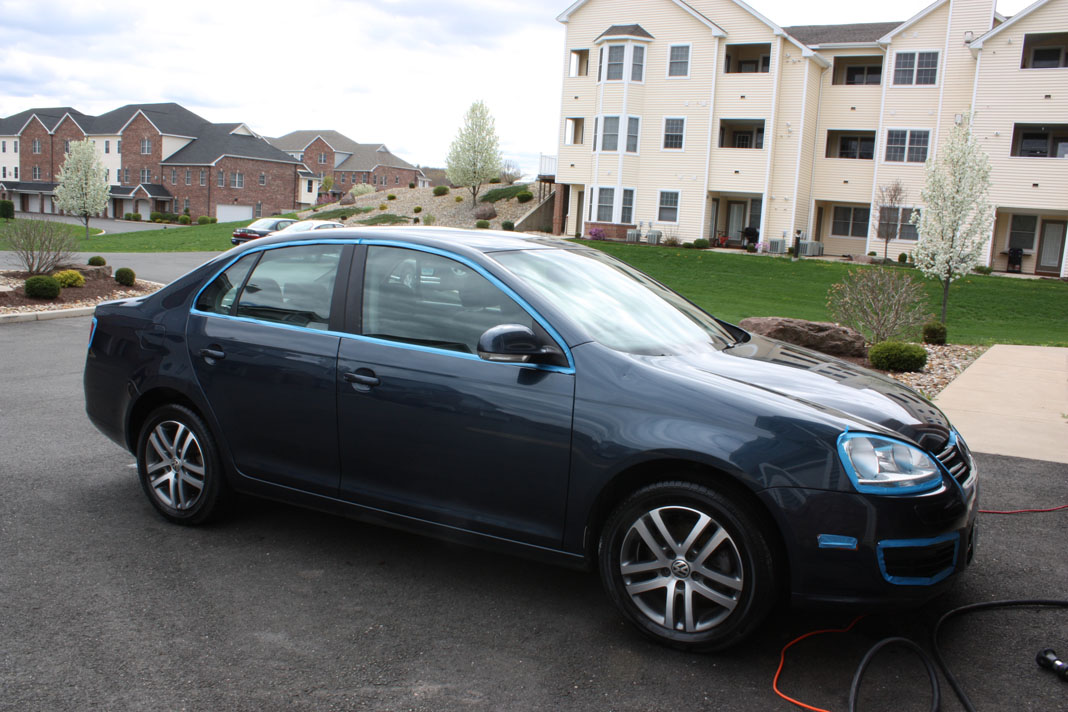
The Patient
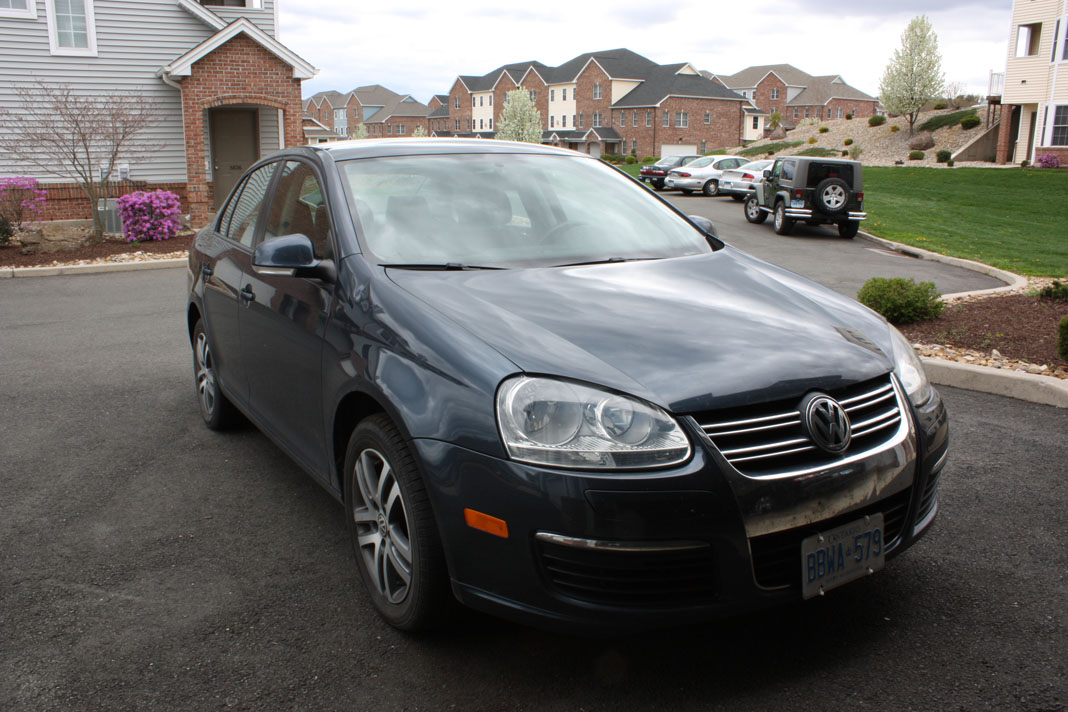
Today I will be working on my gf's friend's car, a VW Jetta
Step 1: Wash The Car Thoroughly In The Shade, And Dry
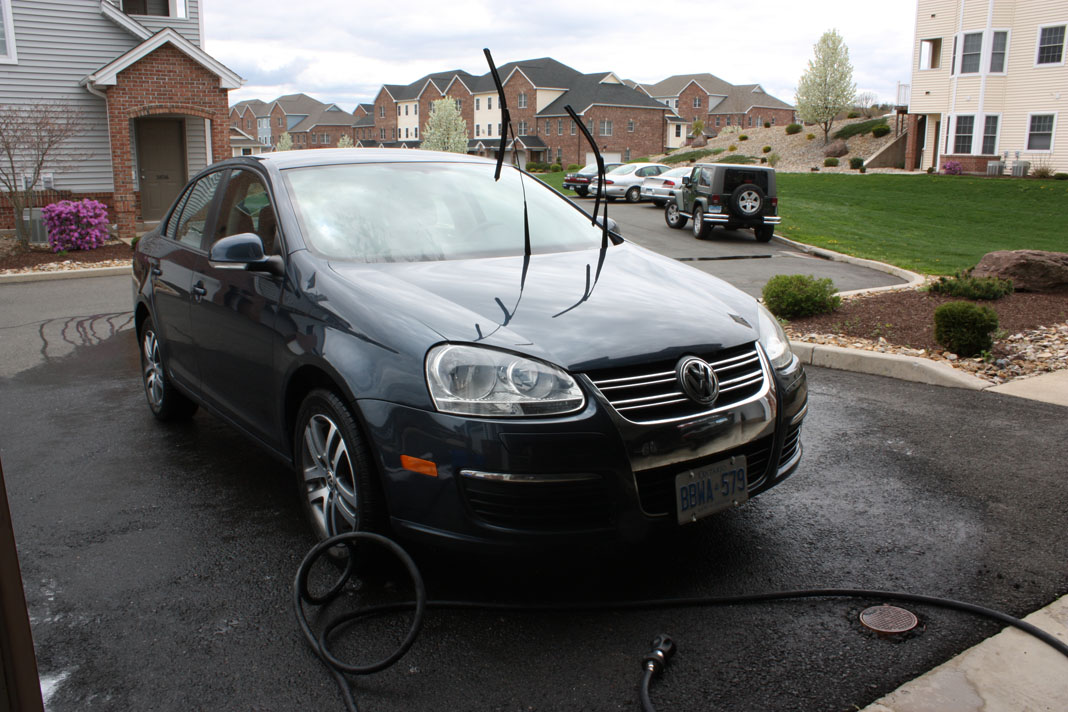
My favorite products to use when washing and drying, is the Duragloss 901 Shampoo, a Meguairs wash mitt, and the Cobra Waffle Weave Guzzler
1. http://www.autogeek.net/duragloss-ca...ncentrate.html
2. http://www.autogeek.net/meguiars-mic...wash-mitt.html
3. http://www.autogeek.net/cobra-hd200-3.html
Tools and Techniques
To get a nice, professional looking wash a few rules should be adhered to.
1. The first is to always wash in the shade. Washing in direct sunlight will cause the soap to dry and cake onto the paint. This is the number one cause of water spots on many car finishes.
2. Use a dual bucket method. By using two buckets, you reduce contamination and will always keep your mitt clean. One bucket will contain fresh water, while the other will have your soap mixture.
3. Wash one panel at a time. By washing one panel at a time, you really focus on the area that you are cleaning, as well as giving proper amounts of rinsing and soaping of the mitt
4. Use a grit guard. Using a grit guard in your fresh water bucket will help to loosen the debris that gets stuck on your mitt. Between washing panels, scrub your mitt in the fresh water bucket, then soak up some soap from the second bucket
5. Use a clean, quality cloth to dry your car. Using cheap "microfiber" cloths can do more harm than good, as well as using a dirty cloth. If you have access to a leaf blower, this can also be a valuable tool to help remove large amounts of water from your car.
Note: I know that this isn't an RX8, but I wanted to place it in the DIY so that the images are retained.
The Patient
Today I will be working on my gf's friend's car, a VW Jetta
Step 1: Wash The Car Thoroughly In The Shade, And Dry
My favorite products to use when washing and drying, is the Duragloss 901 Shampoo, a Meguairs wash mitt, and the Cobra Waffle Weave Guzzler
1. http://www.autogeek.net/duragloss-ca...ncentrate.html
2. http://www.autogeek.net/meguiars-mic...wash-mitt.html
3. http://www.autogeek.net/cobra-hd200-3.html
Tools and Techniques
To get a nice, professional looking wash a few rules should be adhered to.
1. The first is to always wash in the shade. Washing in direct sunlight will cause the soap to dry and cake onto the paint. This is the number one cause of water spots on many car finishes.
2. Use a dual bucket method. By using two buckets, you reduce contamination and will always keep your mitt clean. One bucket will contain fresh water, while the other will have your soap mixture.
3. Wash one panel at a time. By washing one panel at a time, you really focus on the area that you are cleaning, as well as giving proper amounts of rinsing and soaping of the mitt
4. Use a grit guard. Using a grit guard in your fresh water bucket will help to loosen the debris that gets stuck on your mitt. Between washing panels, scrub your mitt in the fresh water bucket, then soak up some soap from the second bucket
5. Use a clean, quality cloth to dry your car. Using cheap "microfiber" cloths can do more harm than good, as well as using a dirty cloth. If you have access to a leaf blower, this can also be a valuable tool to help remove large amounts of water from your car.
Last edited by paimon.soror; 04-30-2011 at 10:29 PM.
 04-30-2011, 10:21 PM
#2
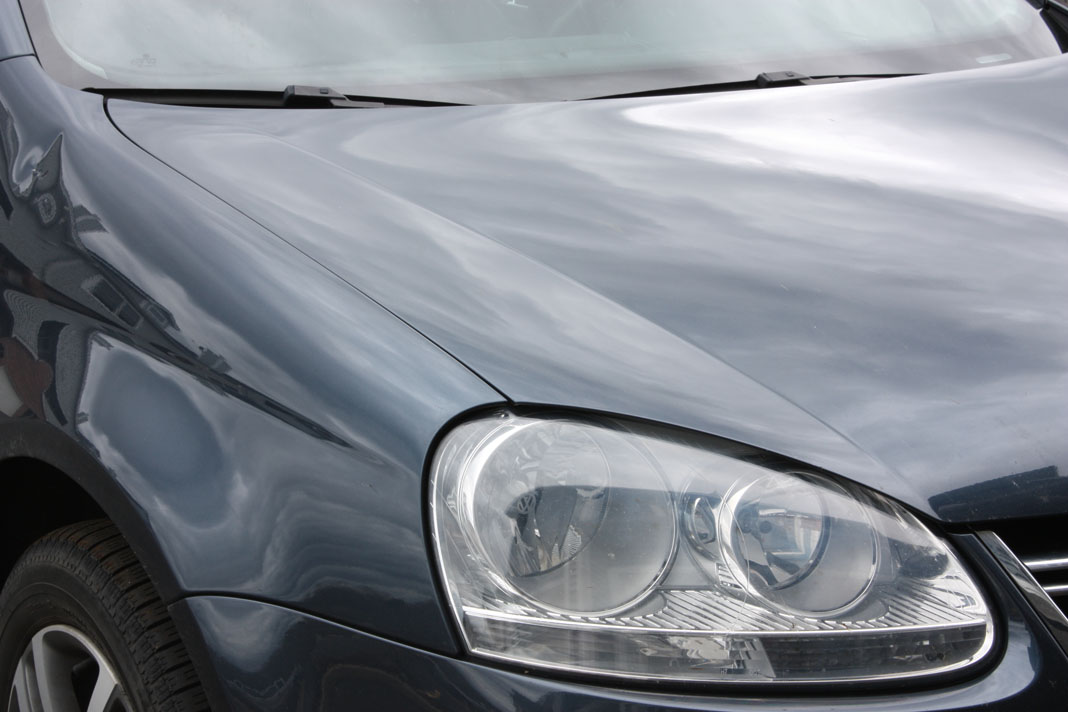
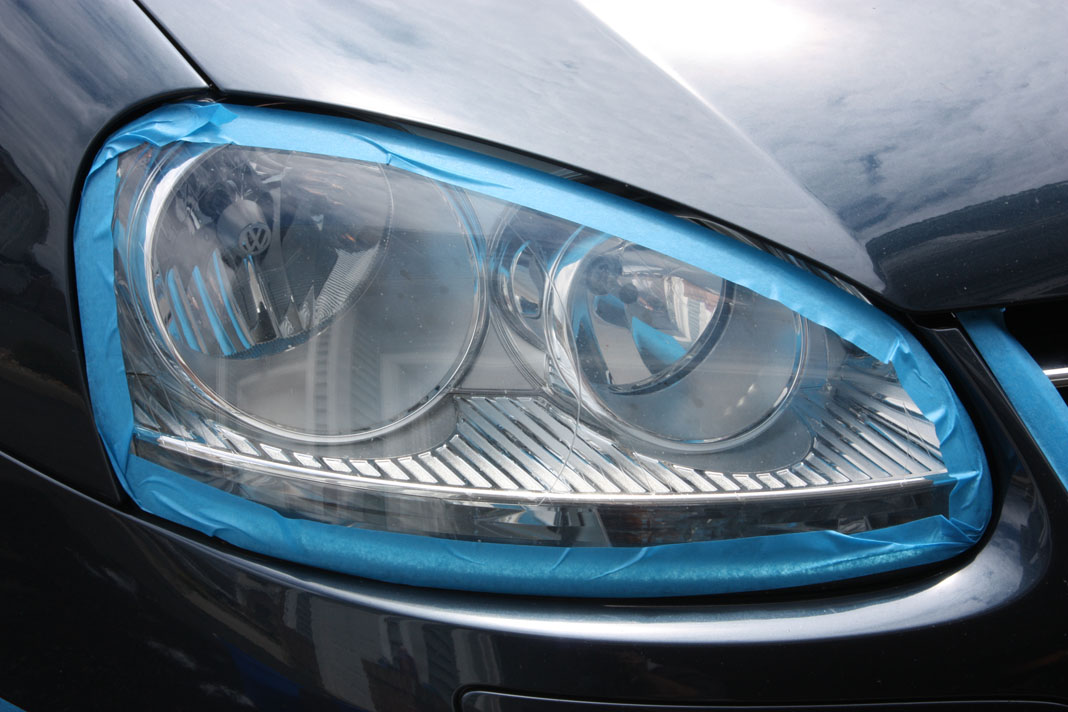
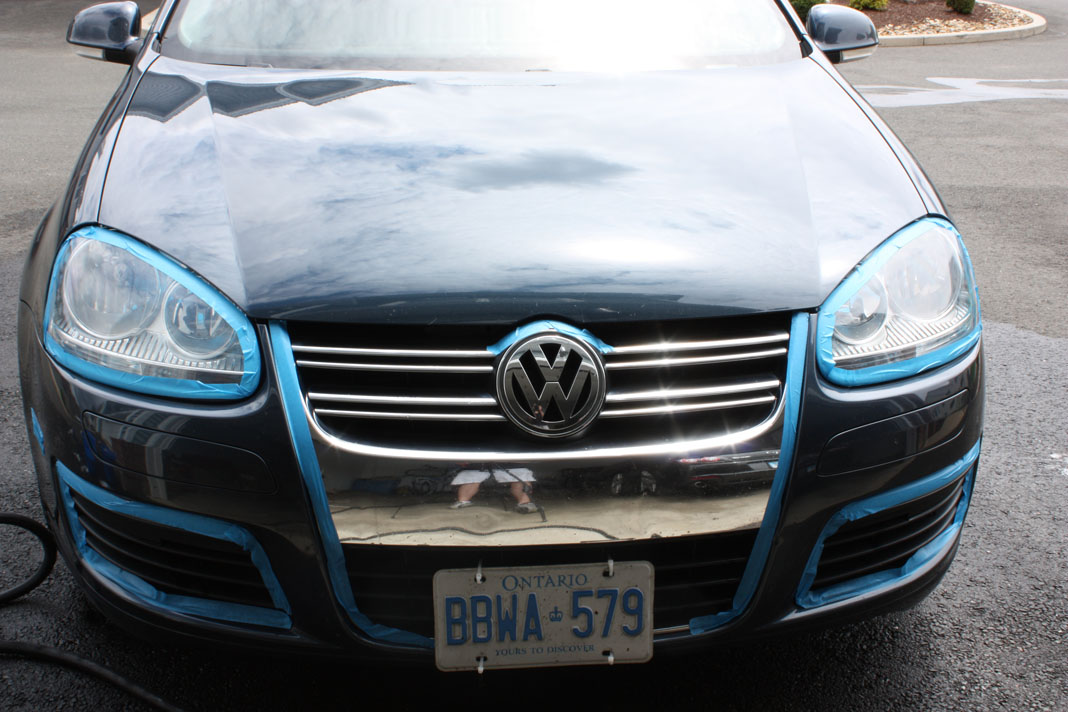
Step 2: Masking Off Plastic Trim
Ask anyone that has gotten wax on plastic trim pieces, it is not a pretty picture, and this is where you really want to spend the most time and take the most effort in preparing your car. Stand back and analyze your vehicles configuration. The key is to mask off plastic trim, using the least amount of tape possible. This is a hard technique to master, but it will save you a lot of time, and a lot of tape.
Tools and Techniques
The best tape to use is something that is sticky enough to stick to your paint, but not too sticky that it leaves behind residue. I found that 3m painters tape, and the next step up, the 3m masking tape, work very well and handle the abuse of the orbital polisher without leaving behind any sticky mess.
The easiest and cleanest way to do this is to try and use the least amount of tape possible, and to use the least amount of sections. For example, when doing your headlights, you can in most cases cover the edges with one piece of tape. This not only saves product, but also makes it very easy to remove when you are all done
Last edited by paimon.soror; 04-30-2011 at 10:36 PM.
04-30-2011, 10:22 PM
#3
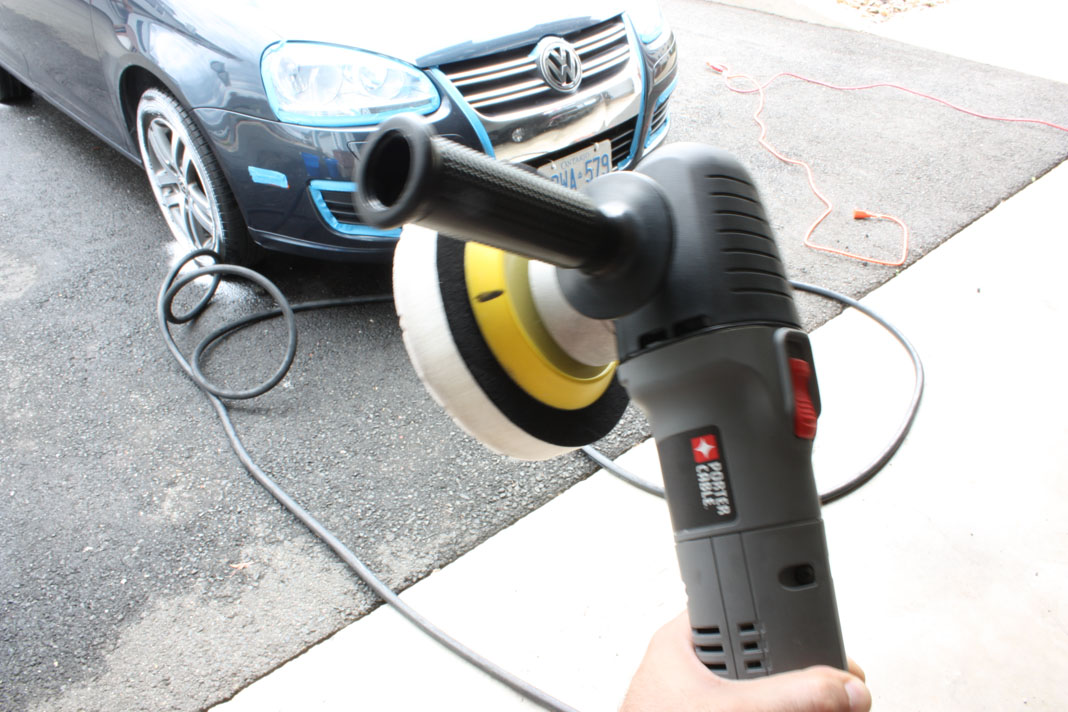
Step 3: Prepare Your Polisher
There are a few things to consider when dealing with your PC polisher.
1. Understand that you want the polisher to do the work, and not you. Make sure the pad is actually rotating, and that you are not putting so much pressure on the hardware to prevent this. To note this, the most common thing to do is to put a notch on the polishers spindle. I like using a black sharpee:
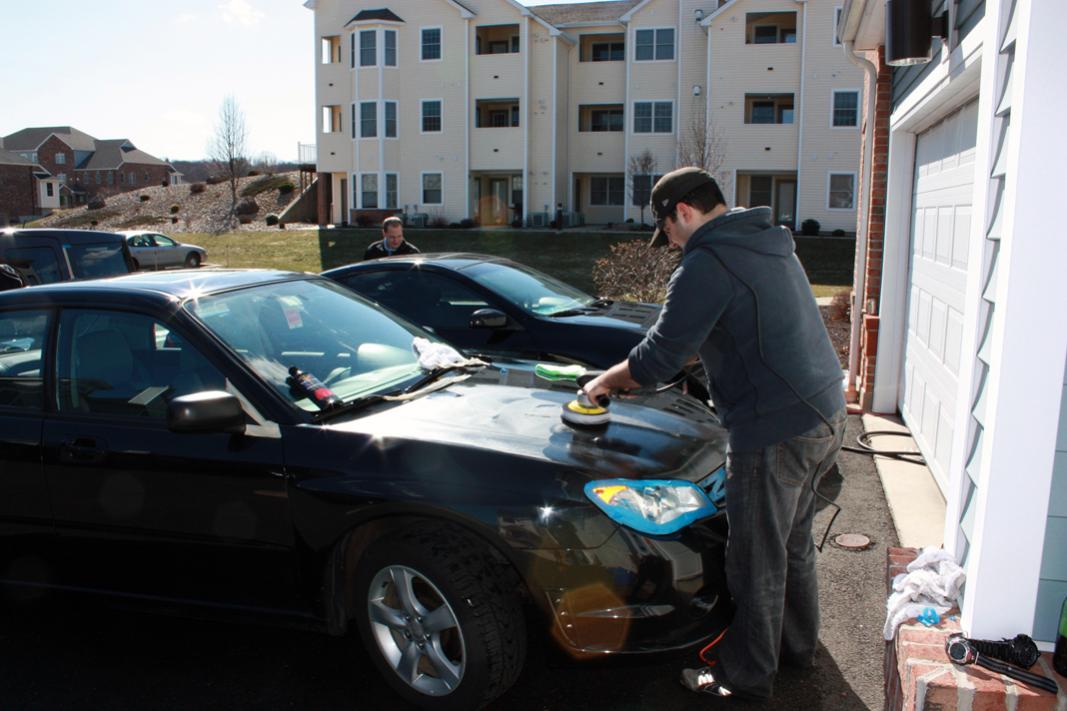
2. Posture is very important, not only for proper coverage and application, but also to prevent any injuries or cramping. Always have a proper stance with the opposite leg of your polishing hand a little bit in front of your other leg. For example, I hold my polisher with my right hand, and support with my left hand. So what i do, is take a small step forward with my left leg, so that I can center my weight and keep my back straight.
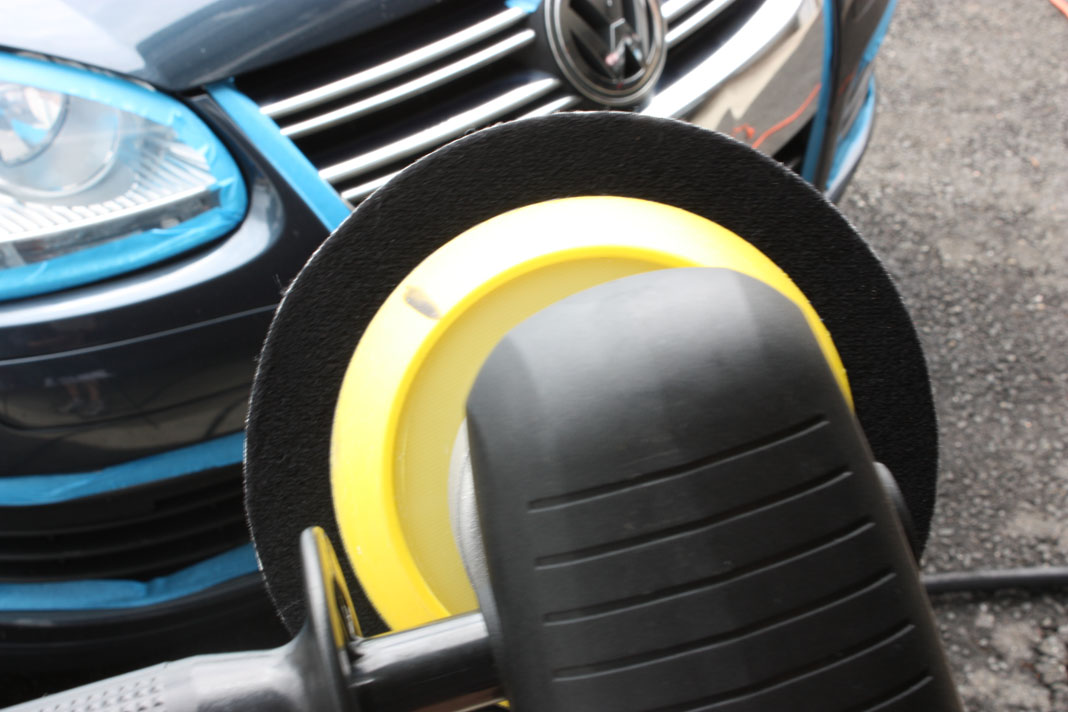
3. Always mind the cord as you dont want it to caress the paint that you just cleaned. The most common way of doing this, is to take the cord, and toss it over the opposite shoulder of your polishing hand. This keeps the slack behind you, and not dangling in front. An example of this is the following:
4. Take breaks. Especially when using polishes or abrasive compounds that require higher RPMs to work properly, your hands can cramp up quite frequently. Take breaks to rest your hands and to prevent any injuries.
5. Always use the right pads for the job. Lighter pads will not work well at higher rpms, and will actually "mushroom", these pads are to be used at the lower speed settings with a very light wax or polish. Heavier pads work best at higher rpms, these are to be used with cutting compounds as they are a bit more abrasive.
* http://www.autogeek.net/lc-6inch-kom...r-pad-kit.html
* I personally like to use Yellow pad if I am working on a badly swirl marked car (Speed 6), Orange is more common when doing routine polishing and maintenance (Speed 5), and Green for applying waxes (Speed 3)
There are a few things to consider when dealing with your PC polisher.
1. Understand that you want the polisher to do the work, and not you. Make sure the pad is actually rotating, and that you are not putting so much pressure on the hardware to prevent this. To note this, the most common thing to do is to put a notch on the polishers spindle. I like using a black sharpee:
2. Posture is very important, not only for proper coverage and application, but also to prevent any injuries or cramping. Always have a proper stance with the opposite leg of your polishing hand a little bit in front of your other leg. For example, I hold my polisher with my right hand, and support with my left hand. So what i do, is take a small step forward with my left leg, so that I can center my weight and keep my back straight.
3. Always mind the cord as you dont want it to caress the paint that you just cleaned. The most common way of doing this, is to take the cord, and toss it over the opposite shoulder of your polishing hand. This keeps the slack behind you, and not dangling in front. An example of this is the following:
4. Take breaks. Especially when using polishes or abrasive compounds that require higher RPMs to work properly, your hands can cramp up quite frequently. Take breaks to rest your hands and to prevent any injuries.
5. Always use the right pads for the job. Lighter pads will not work well at higher rpms, and will actually "mushroom", these pads are to be used at the lower speed settings with a very light wax or polish. Heavier pads work best at higher rpms, these are to be used with cutting compounds as they are a bit more abrasive.
* http://www.autogeek.net/lc-6inch-kom...r-pad-kit.html
* I personally like to use Yellow pad if I am working on a badly swirl marked car (Speed 6), Orange is more common when doing routine polishing and maintenance (Speed 5), and Green for applying waxes (Speed 3)
Last edited by paimon.soror; 04-30-2011 at 10:52 PM.
04-30-2011, 10:22 PM
#4
Step 4 : Prepare a Test Area
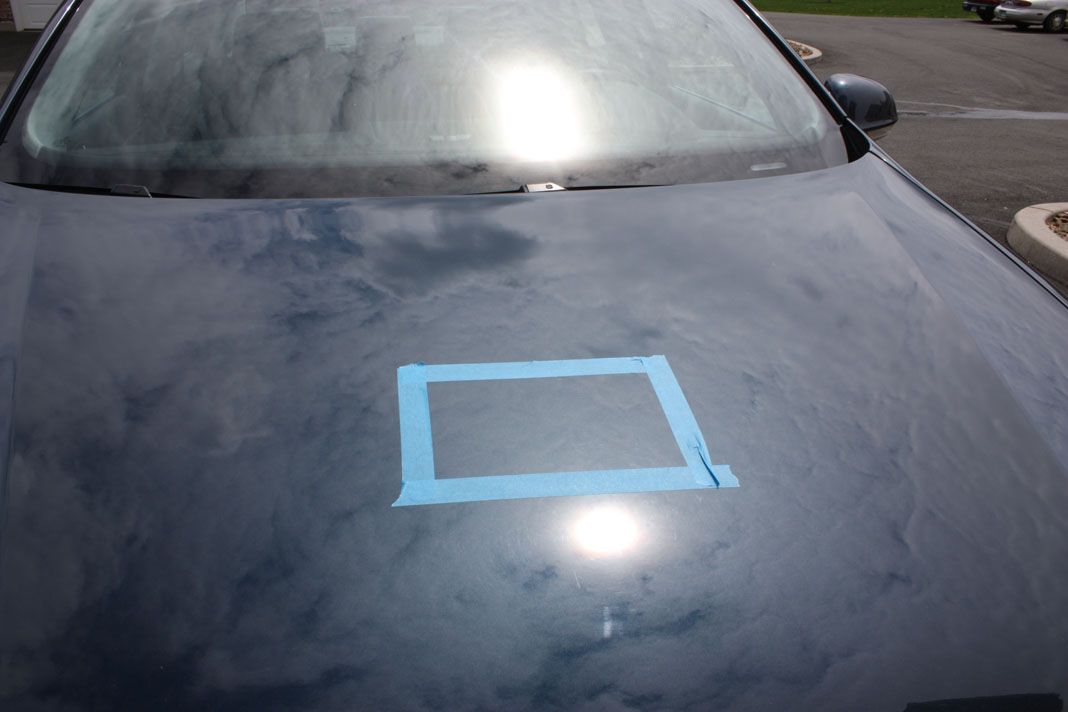
Nothing is worse than starting the job and realizing halfway through that the speed you chose isn't abrasive enough. To avoid this, mask off a small 1ft x 1ft square on the hood.
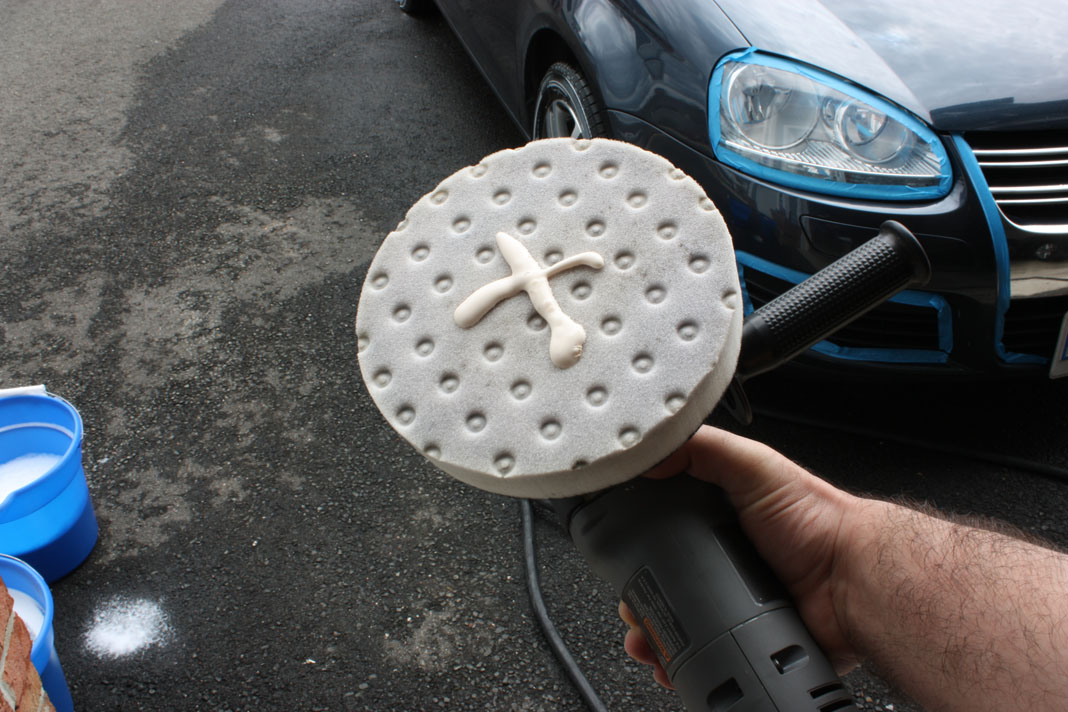
Next, take your cutting pad, and apply a small amount of product. The most common way to do this is to apply the product in an X shape across the pad. Because we are doing a small test, we will use a small X.
Take your polisher and set the speed to 5. Place it inside of the square while the machine is off, and gently spread the compound around the square. Then, start at the top left corner and envision that there are 6 columns within that square, turn on the machine, and work your way in a down-up pattern in small columns. The first pass should be at a steady pace, while a second pass will be nice and slow. Turn off the machine before lifting up the pad, and wipe down the area with a soft clean cloth
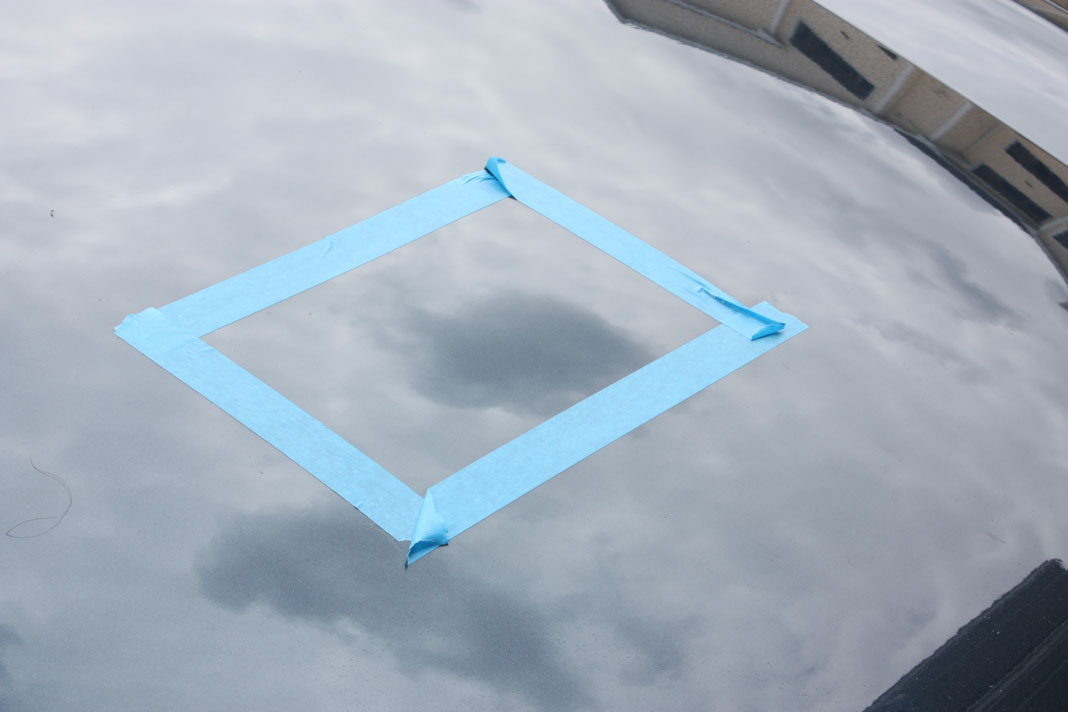
Compare your results within the square with the rest of the hood. If you still see swirls, you may need to increase the speed. Once you are satisfied with the results, remove the square mask and prepare your pad with a large X to do the rest of the car.
Tips and Techniques
1. Do not use too much compound! The pads that are used are highly absorbent and do their best once the compound has fully set inside the pad. When you first start polishing/cutting, you will notice the compound will come on the area thick, then slowly thin out, this is perfectly normal and preferred. A large X should cover about HALF the car.
2. Don't rush the job. Take your time, and make multiple passes making sure to get every nook and crannie possible. You took all this time to mask off the car and prepare yourself for this, so lets make it count.
3. NEVER EVER lift the pad off while the machine is on, or turn on the machine before the pad is on the car. Not only do you risk getting compound everywhere, but most importantly you risk slopping compound on your clothes, face, and eyes.
4. Always keep your eye on the black mark we made on the spindle. If you see the pad isn't spinning properly then either back off on the force you are putting, or make sure the pad is sitting flat against the surface.
Nothing is worse than starting the job and realizing halfway through that the speed you chose isn't abrasive enough. To avoid this, mask off a small 1ft x 1ft square on the hood.
Next, take your cutting pad, and apply a small amount of product. The most common way to do this is to apply the product in an X shape across the pad. Because we are doing a small test, we will use a small X.
Take your polisher and set the speed to 5. Place it inside of the square while the machine is off, and gently spread the compound around the square. Then, start at the top left corner and envision that there are 6 columns within that square, turn on the machine, and work your way in a down-up pattern in small columns. The first pass should be at a steady pace, while a second pass will be nice and slow. Turn off the machine before lifting up the pad, and wipe down the area with a soft clean cloth
Compare your results within the square with the rest of the hood. If you still see swirls, you may need to increase the speed. Once you are satisfied with the results, remove the square mask and prepare your pad with a large X to do the rest of the car.
Tips and Techniques
1. Do not use too much compound! The pads that are used are highly absorbent and do their best once the compound has fully set inside the pad. When you first start polishing/cutting, you will notice the compound will come on the area thick, then slowly thin out, this is perfectly normal and preferred. A large X should cover about HALF the car.
2. Don't rush the job. Take your time, and make multiple passes making sure to get every nook and crannie possible. You took all this time to mask off the car and prepare yourself for this, so lets make it count.
3. NEVER EVER lift the pad off while the machine is on, or turn on the machine before the pad is on the car. Not only do you risk getting compound everywhere, but most importantly you risk slopping compound on your clothes, face, and eyes.
4. Always keep your eye on the black mark we made on the spindle. If you see the pad isn't spinning properly then either back off on the force you are putting, or make sure the pad is sitting flat against the surface.
Last edited by paimon.soror; 04-30-2011 at 11:05 PM.
04-30-2011, 10:23 PM
#5
Step 5 : Wax and Congratulate Yourself on a Job Well Done
Now that we have polished up the entire car, use the same exact technique with your car wax, with a low RPM (Speed 3) and a softer pad. Again use the same techniques discussed in the last post, and take note that the pad will take even less force for it to stop spinning.
Tools and Techniques
1. My favorite wax to use is Collinite Insulator Wax : http://www.autogeek.net/collinite-in...r-wax-845.html . The product lasts a long time and a small amount goes a long way. Really brings out the natural shine of the paint, and protects against water, sun, and other contaminants
2. Most waxes require a wait time before you wipe up the product. In many cases, they ask you to wait until the product hazes. Always read the instructions.
Last edited by paimon.soror; 04-30-2011 at 11:10 PM.
04-30-2011, 10:24 PM
#6
Final Tips
1. If you ever find that you got wax on some plastic trim, you can use a few different products to restore the trim's finish. The most popular is Mother's Back to Black, however some people live by Zaino Z-14 http://www.zainostore.com/Merchant2/...oduct_Count=17
2. Always research your cutting compound, and always test on a small area before using. Some products are highly abrasive and may damage your finish if used improperly.
Last edited by paimon.soror; 04-30-2011 at 11:14 PM.
05-01-2011, 01:40 PM
#7
Living is best Modified.

Im not trying to steal the spotlight, but I gotta add a few things:
Random orbitals are easier and give the best consistant result without as much fear into burning the paint.
Blow drying with a air is the best way to get the car dry. You don't touch the paint, ending up with scraping dirt all over the surface. Black Baron dryer used here: http://www.youtube.com/watch?v=rcDcZjBODkA
I've had poor results with Mother's Back to Black to try to cover up waxy whiteness. It covers it up, but after a few months or weeks it comes back.
I noticed you're using Meguiar's Ultimate Compound for the VW polishing:
There's a lot of compounds out there, some are for machine use, some are for only hand application.
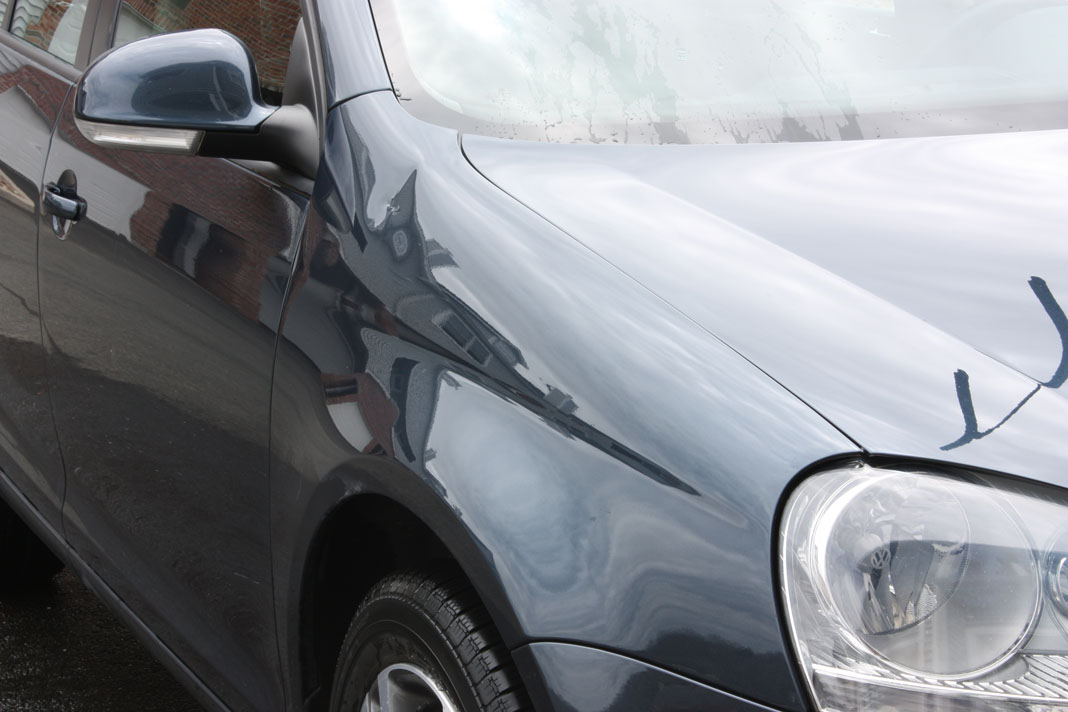
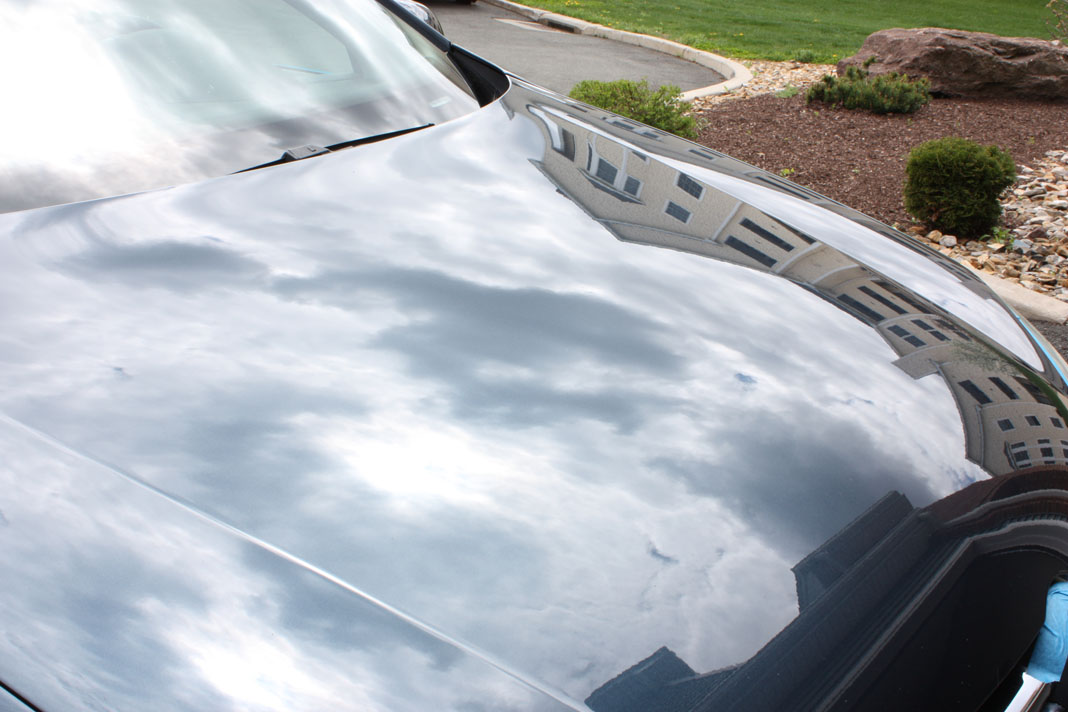
The test area is best used with a bright light source - either sun, or a halogen light. Both will bring out paint defections: Such as... -
swirls (See the partial circles around the sun):
holograms (It's a single light source creating all those trails):
pig tails from the factory.:.JPG)
There's a lot of tools, information, pictures, techniques for paint correction and detailing. It'll get expensive to learn, but when you do.. you'll have a show car
Random orbitals are easier and give the best consistant result without as much fear into burning the paint.
Blow drying with a air is the best way to get the car dry. You don't touch the paint, ending up with scraping dirt all over the surface. Black Baron dryer used here: http://www.youtube.com/watch?v=rcDcZjBODkA
I've had poor results with Mother's Back to Black to try to cover up waxy whiteness. It covers it up, but after a few months or weeks it comes back.
I noticed you're using Meguiar's Ultimate Compound for the VW polishing:
There's a lot of compounds out there, some are for machine use, some are for only hand application.
The test area is best used with a bright light source - either sun, or a halogen light. Both will bring out paint defections: Such as... -
swirls (See the partial circles around the sun):
holograms (It's a single light source creating all those trails):
pig tails from the factory.:
There's a lot of tools, information, pictures, techniques for paint correction and detailing. It'll get expensive to learn, but when you do.. you'll have a show car
Last edited by RogueTadhg; 05-01-2011 at 01:43 PM.
05-01-2011, 01:45 PM
#8
Registered

Join Date: Jul 2010
Posts: 224
Likes: 0
Received 0 Likes
on
0 Posts
Nice tutorial. I have one thing to add...Do NOT use microfiber of any kind. Its so good at hanging onto things all it needs to find is one piece of grit (theres no guarentee everything will be totally clean all the time) and it will hang onto it and drag it all across your finish! This could be during the wash, the buffing or the dry. This is one case where newer is NOT better (actually most recent inventions suck--don't even get me started on "clay bars"). Use 100% USA cotton towels, like Fieldcrest, for all buffing and chenille wash mitts...and as stated above I would air dry the car or even just go for a 100 mph blast if possible.
BTW, I found a track car wash near me that doesnt micromar the car AT ALL. And I have a black car! 15 bucks and it does a better job than I ever could. God bless the .5" lowering Racing Beat springs that allows me to do this.
BTW, I found a track car wash near me that doesnt micromar the car AT ALL. And I have a black car! 15 bucks and it does a better job than I ever could. God bless the .5" lowering Racing Beat springs that allows me to do this.
Last edited by Beefy98; 05-01-2011 at 01:54 PM.
05-01-2011, 02:02 PM
#9
Thanks for adding to the DIY, I appreciate more tips being added. If you dont mind me asking, what do you prefer as opposed to the B2B? I only use it because it was available at my local AZ. I hear the Zaino is great as well as I noted above.
05-01-2011, 06:00 PM
#10
Nature vs. Nurture
iTrader: (5)
Join Date: Oct 2009
Location: Maple Grove, MN
Posts: 382
Likes: 0
Received 0 Likes
on
0 Posts
Thanks for taking the time to write this up. i have wanted to take the plunge for a few years now, but still working on building up my mechanical skills.
I have the same complaint with the Back To Black. It doesn't even seem like it takes weeks before the black plastic looks as oxidized or more than before I first used it.
I have the same complaint with the Back To Black. It doesn't even seem like it takes weeks before the black plastic looks as oxidized or more than before I first used it.
05-01-2011, 07:06 PM
#11
Registered
Join Date: Jul 2010
Posts: 224
Likes: 0
Received 0 Likes
on
0 Posts
One of those 5 dollar "BS" products--like a can of engine flush. Or spray-on tire foams. They just gunk up the sidewalls, attract more dirt, and can even damage your clear coat.
11-24-2011, 06:49 PM
#14
Super Moderator
Great contribution Paimon (again)..
This is my opinion, and really simplifying car washing..
1. The more you clean or wipe your cars paint the more it will get ultra fine scratches.
2. Never use a waterless hand cleaning system.
3. Always soften dirt/grime first with clean water and keep the area damp before washing off dirt with a mitt, noodle type mitts are the the best type of cleaner tool, rinse mitt in a separate bucket at least twice before use on every panel, use a detergent with neutral PH (no Salts).
4. Rinse off with fresh water.
5. Squeegee off water with a 'wafer style' micro fiber cloth.
6. Always keep surface wet/moist, try and void clean paintwork from drying out before using cloth (5).
NEVER wash a car in direct SUN ever.
Never use Sponges on cars as they trap grit, and then scratch.
Never use Fabric (old clothing) as a wet cleaning sponge (again traps dirt).
Old style leather or synthetic Chamois are outdated and can do more harm than good.
Micro-fiber is the best cleaning material, as long as it is always kept wet/moist.
M-F is not perfect, but it is the best of what is around.
The only way to never get a damaged paint surface is to never clean it with anything that touches the surface...not practical?..
Touch-less Auto Car Wash's are OK to a point, but they too will leave grime behind and then there is the issue of very high pressure water on Paint and water getting into area's which should be kept as dry as possible.
Next step is detailing.....
I have reservations about electric buffers of any kind...but Paimon's info is very good.
11-25-2011, 07:00 PM
#15

paimon - I assume you lurk www.autopia.org also?
I have been on that forum since I was 15 (a good 7 years ago). Saved up and got a PC 7427 and other necessary elements. It sure helped me find a few bucks during my high school years . Unfortunately, the bearing of the PC decided to seize when I first detailed my RX-8 back in 2009. Procrastinated on fixing the damn thing. I might just go with a 7424XP instead. I still have a whole closet worth of polishes I haven't touched since my 7427 seized...
I have been on that forum since I was 15 (a good 7 years ago). Saved up and got a PC 7427 and other necessary elements. It sure helped me find a few bucks during my high school years
. Unfortunately, the bearing of the PC decided to seize when I first detailed my RX-8 back in 2009. Procrastinated on fixing the damn thing. I might just go with a 7424XP instead. I still have a whole closet worth of polishes I haven't touched since my 7427 seized...

Thread
Thread Starter
Forum
Replies
Last Post
duworm
Series I Wheels, Tires, Brakes & Suspension
1
10-01-2015 04:57 PM
jasonrxeight
RX-8's For Sale/Wanted
2
09-30-2015 01:53 PM