
Tail light lamp fogging (2014 thread!)


Thread Starter
Registered
Joined: Feb 2012
Posts: 55
Likes: 0
Tail light lamp fogging (2014 thread!)
I've read countless threads from the past 5 years or so on tail light fogging including various fixes like drilling holes, getting new gaskets and using heaps of black silicone to seal them up, including filling some odd little holes here and there, but the methods aren't working so I'm creating a new thread on the topic.
Both my lights were fogging up pretty badly in rainy England and so I removed both, dried both and fitted both again but this time using some flexible black silicone. I also filled a square or rectangle hole that I read about in one of the guides. The LHS unit has been fog free for quite some time now, coming up to 9 months or so, however the RHS one has never been cured.
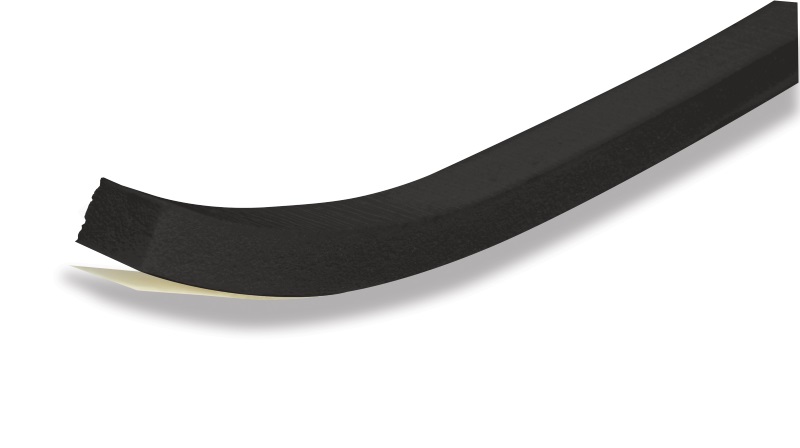
I bought some extra thick gaskets online from the USA and after removing, drying and thoroughly cleaning the RHS I fitted this new gasket.. however after some rain, the problem came back... but I ignored it over summer for the past few months.
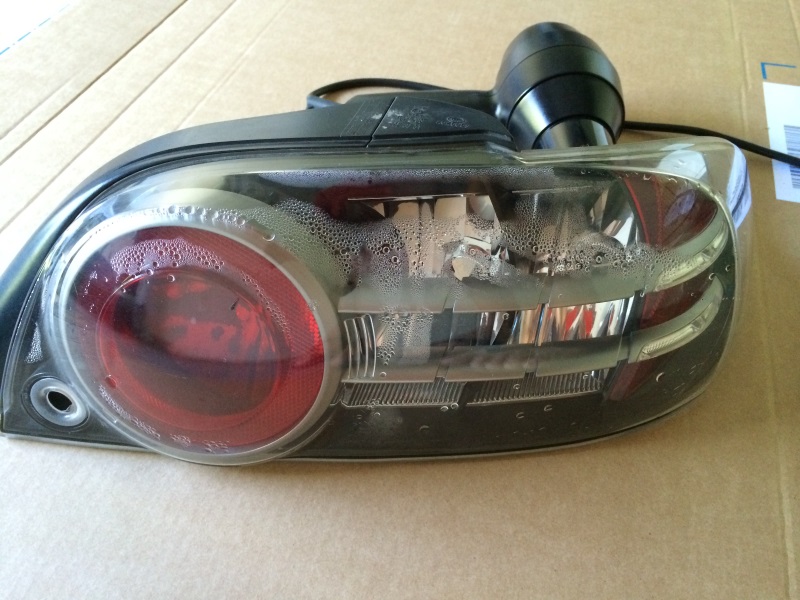
Just last week I started on this again and I removed the RHS again (this is getting tedious now.....) and dried it, and fitted again, this time using a bead of silicone just between the new thick gasket and the light.
Last week (complete with the girlfriends hair drier in action!):
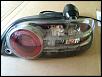
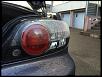
However.. it rained pretty heavily last night, so there must have been quite a bit of water flowing down the boot channel to the light area, as its all fogged up once again!!
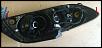
Today:
Now I'm at a loss as to what to try. I've tried all the methods of keeping the moisture out of the light, which is the goal, versus dealing with the symptoms of the illness with drilling holes. Winter is coming and I want to get this sorted out once and for all.
One interesting thing to note is that the brake light is 100% dry, its definitely only the other ones that has the issue, so that can be focused on as the goal.
So.... any ideas?
Cheers!!
Both my lights were fogging up pretty badly in rainy England and so I removed both, dried both and fitted both again but this time using some flexible black silicone. I also filled a square or rectangle hole that I read about in one of the guides. The LHS unit has been fog free for quite some time now, coming up to 9 months or so, however the RHS one has never been cured.
I bought some extra thick gaskets online from the USA and after removing, drying and thoroughly cleaning the RHS I fitted this new gasket.. however after some rain, the problem came back... but I ignored it over summer for the past few months.
Just last week I started on this again and I removed the RHS again (this is getting tedious now.....) and dried it, and fitted again, this time using a bead of silicone just between the new thick gasket and the light.
Last week (complete with the girlfriends hair drier in action!):
However.. it rained pretty heavily last night, so there must have been quite a bit of water flowing down the boot channel to the light area, as its all fogged up once again!!
Today:

Now I'm at a loss as to what to try. I've tried all the methods of keeping the moisture out of the light, which is the goal, versus dealing with the symptoms of the illness with drilling holes. Winter is coming and I want to get this sorted out once and for all.
One interesting thing to note is that the brake light is 100% dry, its definitely only the other ones that has the issue, so that can be focused on as the goal.
So.... any ideas?
Cheers!!

A silicone gasket will work, but only if it's actually sealing the light assembly. If you applied a silicone between the gasket and the light, then it would make sense that the failure point is between the gasket and the body. 
Have you tried siliconing both sides of the gasket?
Have you tried siliconing both sides of the gasket?
Thread Starter
Registered
Joined: Feb 2012
Posts: 55
Likes: 0
A silicone gasket will work, but only if it's actually sealing the light assembly. If you applied a silicone between the gasket and the light, then it would make sense that the failure point is between the gasket and the body.
Have you tried siliconing both sides of the gasket?
Have you tried siliconing both sides of the gasket?
Any ideas on how I can test it? I was thinking maybe I dry it out again and then pour water slowly over the boot / down the channel and then take it off to see what is wet. Not sure.
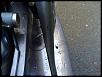
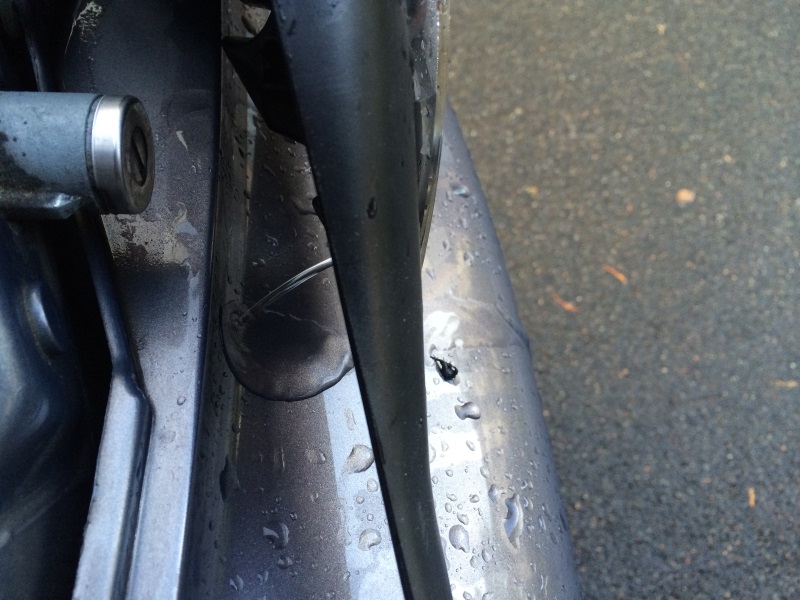
From what I can see all water going down the channel will hit a bit of factory foam and then basically will flow around the indicator/reverse light area on both sites:

I guess it just can't be sealing. Maybe I need to just put on heaps more gasket material in this area to get it nice and tight? Some standard door seal foam might be an option!
Thoughts?
Thread Starter
Registered
Joined: Feb 2012
Posts: 55
Likes: 0
I pulled it off again a couple of weeks ago and after I couldn't buy and of the foam stuff I was looking for I thought I might try using the LHS foam gasket on the RHS. Its a mirror fit and so all good, but it was too thick and the housing stays too far from the car. So I ended up using a whole bunch of black sealant to make a real proper seal between the car and the gasket around the indicator and reverse lights. Also did a small bead of silicone to try and direct the water away from that area.
After a long night of rain, its back again. Fogging up. I was certain that there was no way that moisture would come through the foam/gasket/silicone layer, but it is.
I'm really scratching my head now ..
After a long night of rain, its back again. Fogging up. I was certain that there was no way that moisture would come through the foam/gasket/silicone layer, but it is.
I'm really scratching my head now ..


Registered
Joined: Jul 2009
Posts: 227
Likes: 10
From: Utrecht, Netherlands
Hi keegs,
I experienced the same wellknown RX-8 problem, which is a partly faulty bonding of the clear cover and the black taillight body base.
Thus finally I discovered that it were not the seals but the bonding of the 2 taillight halves; after repair I instantly NEVER had any more water/fogging of my tail light. It was the passenger side which was the faulty one but I decided to repair them both.
Mine (series 1) was also always fogging since new (without accident); I tried the new improved type of gaskets of Mazda and payed a lot attention to a precise installation etc. still fogging........
Many other owners have the same problem and also always on the passenger side.........I now assume that this is a common production (sealing) failure of the subsupplier of the taillight and probabely only for the passengers side one (however I have heard since short also about leaking of the other taillight).
At last I submerged it in a bath; light bulb openings at the lowest point.
There was a small leak (tiny air bubbles escaped) between the clear plastic- and the black plastic halves {both (supposed to be) "sealed/glued" together} at the upper part of the light assembly (in mounted position). Rain water could enter constantly there.
The design of the taillight is in such a way that there is some common slot/free space between these halves (where sometimes green algea is deposited). In this slot/free space silicone kit can be applied almost all around the tail light. At first this space should be cleaned thoroughly in advance; removing dirt and algea.
Thereafter I rubbed clear silicone kit in this free space all around (360 degrees) the whole common sealing joint of both halves.
I did NOT inject it with the commonly used nozzle of the silicone cartridge pistol since in that situation you can not fill the common space sufficiently and will not achieve a complete uninterrupted sealing without enclosed air bubbles.
Apply the clear silicone kit in a "rich" manner time after time on your middle finger and rub/press it (in a 45 degr. angle versus the sealing joint of both tail light halves) into their common joint. You go all around the taillight paying good attention not to enclose trapped air......it takes some time but it is progressing surprisingly well. It is just like a wave of kit that you are driving forward around the joint.
Remove/clean the overdosis of silicone kit with terpentine and finally rinse the inner side of the tail light with distilled water in order to prevent limescale from the clear bathwater. Dry it at a moderate temperature with a hair dryer or give it a sunbath.
There is no specific expertise needed for this kind of repair; everybody can do it.
This worked perfectly for me.......never more any fog in my taillight.
Let me know if your repair is succesfull too!
Succes and best regards,
Ruud
Last edited by Rudolph; Nov 16, 2014 at 03:26 PM.
Thread Starter
Registered
Joined: Feb 2012
Posts: 55
Likes: 0
Hi keegs,
I experienced the same wellknown RX-8 problem, which is a partly faulty bonding of the clear cover and the black taillight body base.
Thus finally I discovered that it were not the seals but the bonding of the 2 taillight halves; after repair I instantly NEVER had any more water/fogging of my tail light. It was the passenger side which was the faulty one but I decided to repair them both.
Mine (series 1) was also always fogging since new (without accident); I tried the new improved type of gaskets of Mazda and payed a lot attention to a precise installation etc. still fogging........
Many other owners have the same problem and also always on the passenger side.........I now assume that this is a common production (sealing) failure of the subsupplier of the taillight and only for the passengers side one.
At last I submerged it in a bath; light bulb openings at the lowest point.
There was a small leak (tiny air bubbles escaped) between the clear plastic- and the black plastic halves {both (supposed to be) "sealed/glued" together} at the upper part of the light assembly (in mounted position). Rain water could enter constantly there.
The design of the taillight is in away that there is some common slot/free space between these halves (where sometimes green algea is deposited). In this slot/free space silicone kit can be applied almost all around the tail light. At first this space should be cleaned thoroughly in advance; removing dirt and algea.
I rubbed clear silicone kit in it around the whole common sealing joint of both halves.
I did NOT inject it with the commonly used nozzle of the silicone cartridge pistol since in that situation you can not fill the common space sufficiently and will not achieve a complete uninterrupted sealing without enclosed air bubbles.
Apply the clear silicone kit in a "rich" manner time after time on your middle finger and rub/press it (in a 45 degr. angle versus the sealing joint of both tail light halves) into their common joint. You go all around the taillight paying good attention not to enclose trapped air......it takes some time but it is progressing surprisingly well. It is just like a wave of kit that you are driving forward around the joint.
Remove/clean the overdosis of silicone kit with terpentine and finally rinse the inner side of the tail light with distilled water in order to prevent limescale from the clear bathwater. Dry it at a moderate temperature with a hair dryer or give it a sunbath.
There is no specific expertise needed for this kind of repair; everybody can do it.
This worked perfectly for me.......never more any fog in my taillight.
Let me know if your repair is succesfull too!
Succes and best regards,
Ruud
I didn't realise these lamps were prone to gaps in this area, I didn't see this on other threads, just discussions about body/lamp sealing.
I will give it a go next weekend!
Cheers
Registered
Joined: Jul 2009
Posts: 227
Likes: 10
From: Utrecht, Netherlands
1) Thanks for the info! I do have some dirt and a bit of algae around the edge so this must be where it's coming in. I've run an old toothbrush around the edge before just because I saw it was dirty but not much came out, I guess I'll try again with some cleaner or spray to help get out the dirt/algae.
2) I didn't realise these lamps were prone to gaps in this area, I didn't see this on other threads, just discussions about body/lamp sealing.
I will give it a go next weekend!
Cheers
2) I didn't realise these lamps were prone to gaps in this area, I didn't see this on other threads, just discussions about body/lamp sealing.
I will give it a go next weekend!
Cheers
Ref 1) The algea has in principle nothing to do with the leak itself. The algea is sometimes everywhere in the gap all around (nearly 360 degr.) the taillight.
Advice: At first submerse the taillight in a bath, pond (which I did) or other large container; light bulb openings at the lowest point......then you will exactly see where the very tiny airbubbels come from; that'where the leak is; at the upper part of the light assembly (in mounted position). .
It was with mine and I believe it is the case with most other reported problems that are not solved by working on the seals.
Ref 2) Indeed, very strange and very rare........I am a member of RX-8 forums in Holland, Germany, the UK, France and the USA and everybody ("the whole world") is thinking about te seals and struggeling with the seals; whether it is the Mazda-OEM; improved Mazda-OEM seal; own seals; all kinds of silicone kit.........I have gone the whole way, and could finally only conclude that the taillight itself (the 2 bonded halves of the taillight) must be the cause of the problem. This was immediately proven when I finally submerged it in a pond; observing the tiny leak bubbles.
Attention: after repair rinse the inner side of the taillight thoroughly with demineralised water; leaving no limescale deposits.
Best regards, Ruud
Registered
Joined: Jul 2009
Posts: 227
Likes: 10
From: Utrecht, Netherlands
Attention: rub with your finger as described; do not use the nozzle.........
Regards, Ruud
Last edited by Rudolph; Sep 30, 2014 at 03:06 AM.

Thread Starter
Registered
Joined: Feb 2012
Posts: 55
Likes: 0
So... I think I've finally found the root problem, and it wasn't Mazda! 
Once I submerged it in water to see where the air was getting out (ie the water in) it was apparent that the key area of the light had a big issue and heaps of bubbles were pouring out. I investigated further, thinking I might need to put a bead of silicone very carefully in that area and low and behold.... some dipsh!t previous owner has drilled the housing, allowing all this moisture to get in!!
I'm kicking myself for not noticing them earlier but sure enough there are two 2-3mm drilled holes, one in the bottom left and one the bottom right. In the past I've noticed the moisture/condensation starting in the corners but didn't think much of it.
So now the holes created by the previous idiot are filled up and the gasket is still looking good, I think I will be fine.. however will post up either way in the near future after the next downpour!!
Thanks for the advice on submerging it, it was meant to find other leaks (by the way - of which there were none...) and found this other issue.
Cheers
P.S On the upside, the holes did allow for "moisture to get out" so to speak when the light was completely full of water! I guess that is at a benefit

Once I submerged it in water to see where the air was getting out (ie the water in) it was apparent that the key area of the light had a big issue and heaps of bubbles were pouring out. I investigated further, thinking I might need to put a bead of silicone very carefully in that area and low and behold.... some dipsh!t previous owner has drilled the housing, allowing all this moisture to get in!!
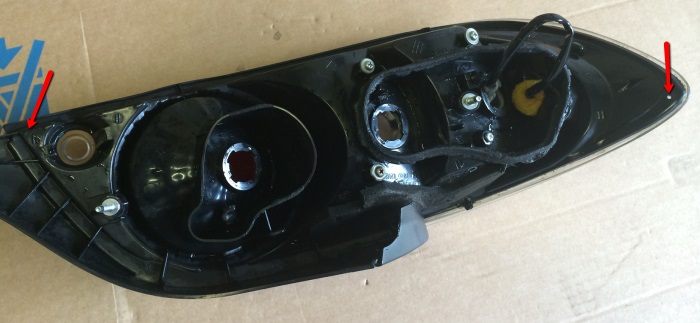
I'm kicking myself for not noticing them earlier but sure enough there are two 2-3mm drilled holes, one in the bottom left and one the bottom right. In the past I've noticed the moisture/condensation starting in the corners but didn't think much of it.
So now the holes created by the previous idiot are filled up and the gasket is still looking good, I think I will be fine.. however will post up either way in the near future after the next downpour!!
Thanks for the advice on submerging it, it was meant to find other leaks (by the way - of which there were none...) and found this other issue.
Cheers
P.S On the upside, the holes did allow for "moisture to get out" so to speak when the light was completely full of water! I guess that is at a benefit
Registered
Joined: Jul 2009
Posts: 227
Likes: 10
From: Utrecht, Netherlands
Hi Keegs,
Congratulations (for the time being) with your findings, however (mark my words) I am for 90% sure that after some time at least one, probably two units will fog again.
You should ask yourself why these holes have been drilled; that guy had a leaking/fogging problem and solved it in the wrong way; closing the holes as you did does not eliminate the/his previous problem.
Of course I hope that your problem has been solved, but as previously indicated I have my doubts.............if it turns out to be that I am correct, then I advise you to remember how I solved this problem enabling to get rid of it for ever.
Best regards, Ruud
Last edited by Rudolph; Oct 6, 2014 at 04:29 AM.
Thread Starter
Registered
Joined: Feb 2012
Posts: 55
Likes: 0
Yeah I hear what you're saying.. but as I couldn't see any bubbles coming out (once I had my fingers over the drilled holes) I thought I'd be OK.
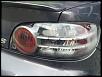
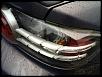
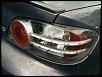
Last night had pretty heavy rain and this is the result this morning:
So, next weekend its time for some silicone.
Cheers
Last night had pretty heavy rain and this is the result this morning:

So, next weekend its time for some silicone.
Cheers
Thread Starter
Registered
Joined: Feb 2012
Posts: 55
Likes: 0
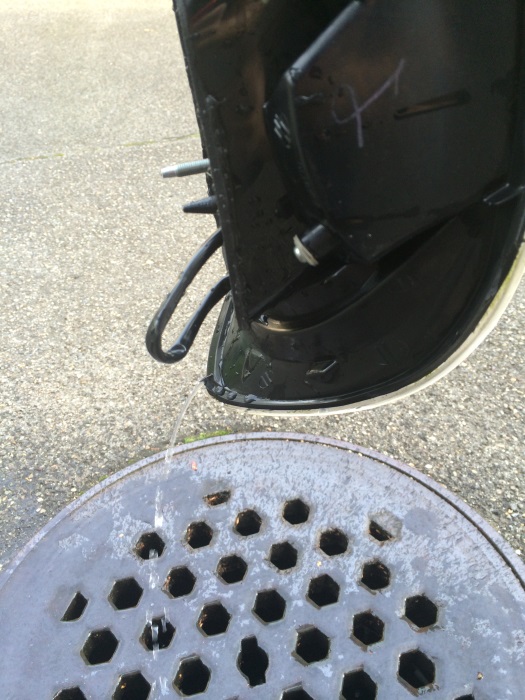
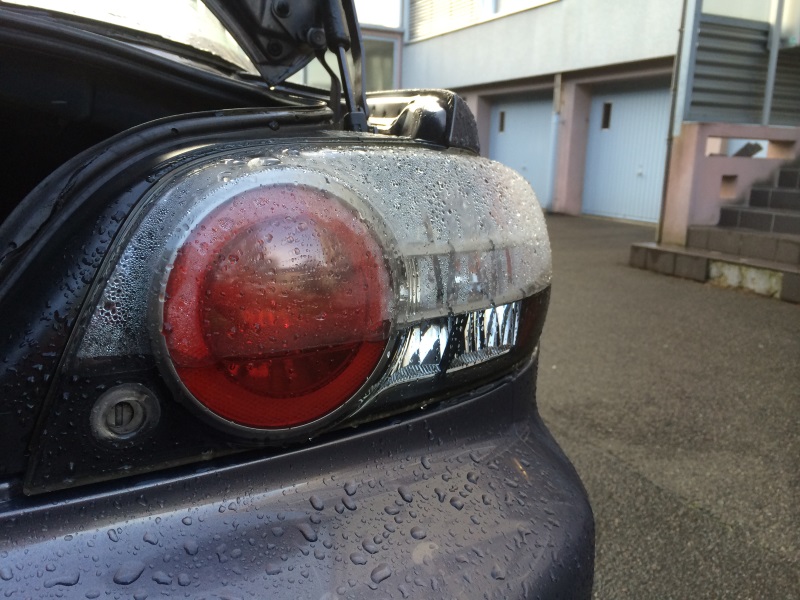
Well, I don't think I've been this "wrong" for a loooooong time. The holes were actually doing a pretty good job of getting the caught water out of the lens! I came out this morning and this is what I see:
Once I removed the black sealant near the key the flood gates were open:
So... another weekend... another dry out, a good clean, silicone around the edges & re-sealing up the holes and fingers crossed I should be alright.
I still can't believe that much water got in overnight!
Cheers
Once I removed the black sealant near the key the flood gates were open:
So... another weekend... another dry out, a good clean, silicone around the edges & re-sealing up the holes and fingers crossed I should be alright.
I still can't believe that much water got in overnight!
Cheers
Registered
Joined: Jul 2009
Posts: 227
Likes: 10
From: Utrecht, Netherlands
Eventually for the "bigger" problem.....simulate the rain with a water hose and observe what exactly happens.........
Last edited by Rudolph; Oct 8, 2014 at 03:26 PM.

Registered
Joined: Jan 2003
Posts: 294
Likes: 0
From: South Jersey
Ahhh...another Mazda engineering marvel. I was one of those "idiots" who drilled their lights. And it was for the very same reason you just realized, they were filling up with massive amounts of water. Which was also killing my bulbs. Of course, like you, after I drilled I couldn't fix the fogging. It was either they filled with water (and fogged) or they fogged but drained. I could never fix both problems.... Good luck!
Thread Starter
Registered
Joined: Feb 2012
Posts: 55
Likes: 0
I believe that so much water in one night must have some other reason; however I also believe that after repair of that you will still have the other problem as I described before...........
Eventually for the "bigger" problem.....simulate the rain with a water hose and observe what exactly happens.........
Eventually for the "bigger" problem.....simulate the rain with a water hose and observe what exactly happens.........
Thanks
Thread Starter
Registered
Joined: Feb 2012
Posts: 55
Likes: 0
Ahhh...another Mazda engineering marvel. I was one of those "idiots" who drilled their lights. And it was for the very same reason you just realized, they were filling up with massive amounts of water. Which was also killing my bulbs. Of course, like you, after I drilled I couldn't fix the fogging. It was either they filled with water (and fogged) or they fogged but drained. I could never fix both problems.... Good luck!
Registered
Joined: Jul 2009
Posts: 227
Likes: 10
From: Utrecht, Netherlands
1) So much water in one night will most probabely caused by a a bad seal; so renew seal with modified Mazda-OEM seal...... TSB 09-016/09.......https://www.rx8club.com/attachments/...ion-light.pdf.......or your home made seal and/or extra silicone paste.
2 ) After this repair (IMO) you still will be confronted with the small leaking (and therefore fogging) on the passenger side tail lamp of which the curing (after submersing for finding leaking area) was described by me before. Remember that this solution has cured my pass. side tail light fogging problem completely as I saw with my own eyes where the 2 halves were not properly sealed, releasing very tiny air bubbles........my drivers side one was OK because it did not "bubble"on that spot.
2 days ago I drove for hours in heavy rain and the car was parked home by raining the whole night.......the morning thereafter when sun was shining (excellent conditions for fog deposit after rainy night on top of pass. side tail light) ..........my lights were both 100% clear.
Last edited by Rudolph; Oct 9, 2014 at 02:08 PM.
Thread Starter
Registered
Joined: Feb 2012
Posts: 55
Likes: 0
Ah okay, all good then. As above, I plan to do the silicone work this weekend. I already have fitted a new thicker seal so that aspect should be fine.
Cheers
Cheers
Thread Starter
Registered
Joined: Feb 2012
Posts: 55
Likes: 0
Finally... all fixed! It's now been 2 weeks since the last repair attempt and still looking good! As above, this time was adding silicone all around the edge to seal the front and back better plus plugging the drill holes left by a previous owner.
Thanks all for your help

Thanks all for your help

