
Jacked up on the wrong point


Thread Starter
Registered User
Joined: Sep 2012
Posts: 2
Likes: 0
Jacked up on the wrong point
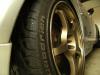
I stupidly jacked up the wrong point. Intended to use the front cross member but ended up bending the highlighted area:

It is only a minor indentation. What is this part called? and will it be ok slightly dented?
Thanks in advance,
RKE
It is only a minor indentation. What is this part called? and will it be ok slightly dented?
Thanks in advance,
RKE

New Age Knight
Joined: Jul 2012
Posts: 208
Likes: 0
From: San Antonio, Texas
It should be ok under normal driving conditions. When you take a turn really hard, who knows?
Go out and take a turn really hard. If it bends more, then it would've bent anyways. If it doesn't then you're good!
Just my 2 cents.
It's just a chassis brace, your car has more than that one installed stock.
Go out and take a turn really hard. If it bends more, then it would've bent anyways. If it doesn't then you're good!
Just my 2 cents.
It's just a chassis brace, your car has more than that one installed stock.


That's what I always use to jack up my car but you have to place the jack on the raised sections that have the holes in on either end.
Bending the brace a little wont hurt it, if it is bad unbolt it and straighten it out with a block of wood and a hammer.
Here is an image, for some reason it didn't show up in the post.https://www.rx8club.com/members/wrig...-points-34316/
My car is a series 1 though the jacking point I use don't look as sturdy on that photo.
Last edited by wrightcomputing; Sep 30, 2012 at 05:49 AM.

That's what I always use to jack up my car but you have to place the jack on the raised sections that have the holes in on either end.
Here is an image, for some reason it didn't show up in the post.RX8Club.com - wrightcomputing's Album: Misc - Picture
Here is an image, for some reason it didn't show up in the post.RX8Club.com - wrightcomputing's Album: Misc - Picture
Last edited by Grace_Excel; Sep 30, 2012 at 11:49 AM.
I usually just jack from the 2 columns that run parallel down the car length-wise that are on the outside of the crossmember. I hear small cracking sometimes but I think thats cause theres a weird felt-like material that crinkles over it.

Registered
Joined: Dec 2009
Posts: 2,100
Likes: 7
From: Aurora, CO
Ignore the white lines and boxes, there is a spot circled in red that has a black nub that sticks out a bit. I have never had a problem with that spot other than having my jack reach it. I think a nice long low profile jack would make it much much easier.
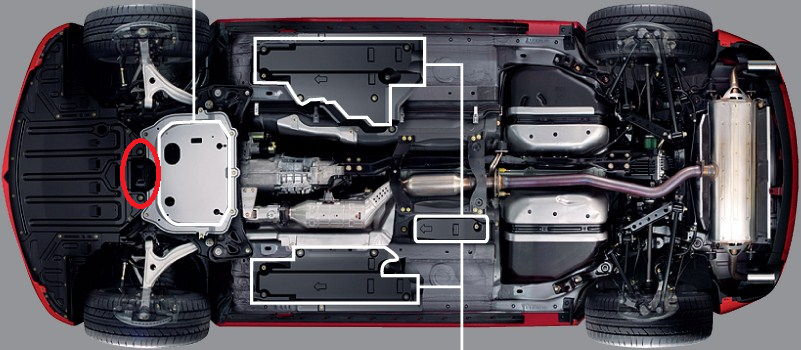
This is where I jack the car up for the front, it's a pic of an S2 but minus the oil pan guard it should be pretty much the same thing down there.
Ignore the white lines and boxes, there is a spot circled in red that has a black nub that sticks out a bit. I have never had a problem with that spot other than having my jack reach it. I think a nice long low profile jack would make it much much easier.

Ignore the white lines and boxes, there is a spot circled in red that has a black nub that sticks out a bit. I have never had a problem with that spot other than having my jack reach it. I think a nice long low profile jack would make it much much easier.

Xexok has the correct jack point. Once it's jacked up you put the stands on the frame rails. For the rear you jack up on the diff and place the stands on the jack stand stanchions that are already there thanks to Mazda.
^ This (and of course xexok).
It would be ideal to use the rear jack stand stanchions. Practically metal humps in front of the rear tires. I would be afraid to have the car seesaw if I placed four jackstands on the frame rails. Most jackstands will fit uniformed tot he stanchions as they have a U shape on the stand tip.
It would be ideal to use the rear jack stand stanchions. Practically metal humps in front of the rear tires. I would be afraid to have the car seesaw if I placed four jackstands on the frame rails. Most jackstands will fit uniformed tot he stanchions as they have a U shape on the stand tip.

Could I get a pic of this? Im not sure what you mean by this. Also I dont like to ask stupid questions but. These are the frame rails yes? The area with arrows pointed to it?
Last edited by Chrishoky; Sep 30, 2012 at 09:36 PM.

lol wouldn't that always be the case (unless you had some funky dry sump). You place a few 2x4s to distribute weight across the oilpan.
You mean here? Or the points along the sideskirt rails? Also, in my previous post I had a picture pointing at what I think are the frame rails. Can I get confirmation on this?
Last edited by Chrishoky; Sep 30, 2012 at 10:05 PM.

As per my previous post, can someone confirm where the frame rails are located? I have attached an image pointing to where I believe those are as well (Ignore the box) Any help there? I have a series 1.
The frame rails are where the red arrows are pointing, but in the rear you don't use the rails. In the front you want to put the stands as a far forward as possible not right where the arrows are pointing.
So in the rear I use the rear stanchions as pointed to in my previous post, and in the front i put the stands as far forward on the frame rails as I can near the front crossmember. Sound Correct?
ps. thanks in advance for all the help here guys..
ps. thanks in advance for all the help here guys..

New Member
Joined: Jan 2010
Posts: 2
Likes: 0
What is the part on the right?
I have been trying to locate a part number for the crossmember all the way to the right of the original photo. Mine is completely mangled. Even a suitable aftermarket replacement if no one knows the part number. I've looked at parts lists and all kinds of places and just can't seem to find that specific crossmember. Again, I'm looking for the one all the way to the right, just beside where two pieces of pipe connect. Thanks a ton if anyone can help.

I have been trying to locate a part number for the crossmember all the way to the right of the original photo. Mine is completely mangled. Even a suitable aftermarket replacement if no one knows the part number. I've looked at parts lists and all kinds of places and just can't seem to find that specific crossmember. Again, I'm looking for the one all the way to the right, just beside where two pieces of pipe connect. Thanks a ton if anyone can help.

you mean the last one (front to rear) ? 56-260A ?
if answer is yes, F151-56-H20B is the part you need.