
How I cleared my tail light


How I cleared my tail light
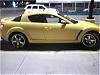
After some heavy rain, my right tail light would get water in it and get fogged up. I had it fixed under warranty. This year my left one started, and warranty on that was up, so I did it myself:
- Pull the light out
- carefully peel off the foam rubber gasket without tearing it. It costs like $50 so be careful. I noticed some parts had already let go, that's probably how water was getting in.
- clean as much crap off as you can
- glue it back on with some silicone sealant, or equivalent
- drill a tiny drain hole in each black plastic shroud around the lights, but not into light's body. Its the plastic between the backside and the gasket. That way if water does get in there, it won't get high enough to enter the light.
- Reassemble once dried.
I had a fair bit of water in mine, and it having a heater blow on it wasn't going quick at all. I ended up pouring a little more water in, swirling it around to get most of the residue off the lens, then using a straw and just sucking it all out. The final moisture just evaporated after a few hours.


Registered User
Joined: May 2009
Posts: 108
Likes: 0
From: Winnipeg, MB
unclip the trunk plastics by pulling the middle piece of the rivet, and then with that pulled. pull the rest of the rivet out. (i believe one of them you have to screw)
when you have access to the back of the light. untwist each light bulb. it should be only a quarter turn and they'll pop out. then there will be one left. the far left wire. which is an LED i believe. there will be a grey foam casing a little further down the wire. you'll want to pull that foam back and unplug the connection.
then all you gotta do is take of the bolts with a 10?mm wrench.


Registered User
Joined: May 2009
Posts: 17
Likes: 0
From: Westport, IN
And with a little searching, we come up with...
TSB 09-005/09 WATER IN REAR COMBINATION LIGHT
http://www.finishlineperformance.com...05-09-2055.pdf

TSB 09-005/09 WATER IN REAR COMBINATION LIGHT
http://www.finishlineperformance.com...05-09-2055.pdf

Thread
Thread Starter
Forum
Replies
Last Post
JimmyBlack
Series I Major Horsepower Upgrades
273
Feb 10, 2020 10:23 PM