When you click on links to various merchants on this site and make a purchase, this can result in this site earning a commission. Affiliate programs and affiliations include, but are not limited to, the eBay Partner Network.
I need to replace a leaky cooler line. Do you remember the size of the banjo bolt? 22mm is too small and 24mm is too big so I'm buying a 23 mm (genius, huh?). Seriously, is it a metric bolt or imperial?
Yes, I'm 99% sure its 23mm This car is Metric front to back as far as I can tell.
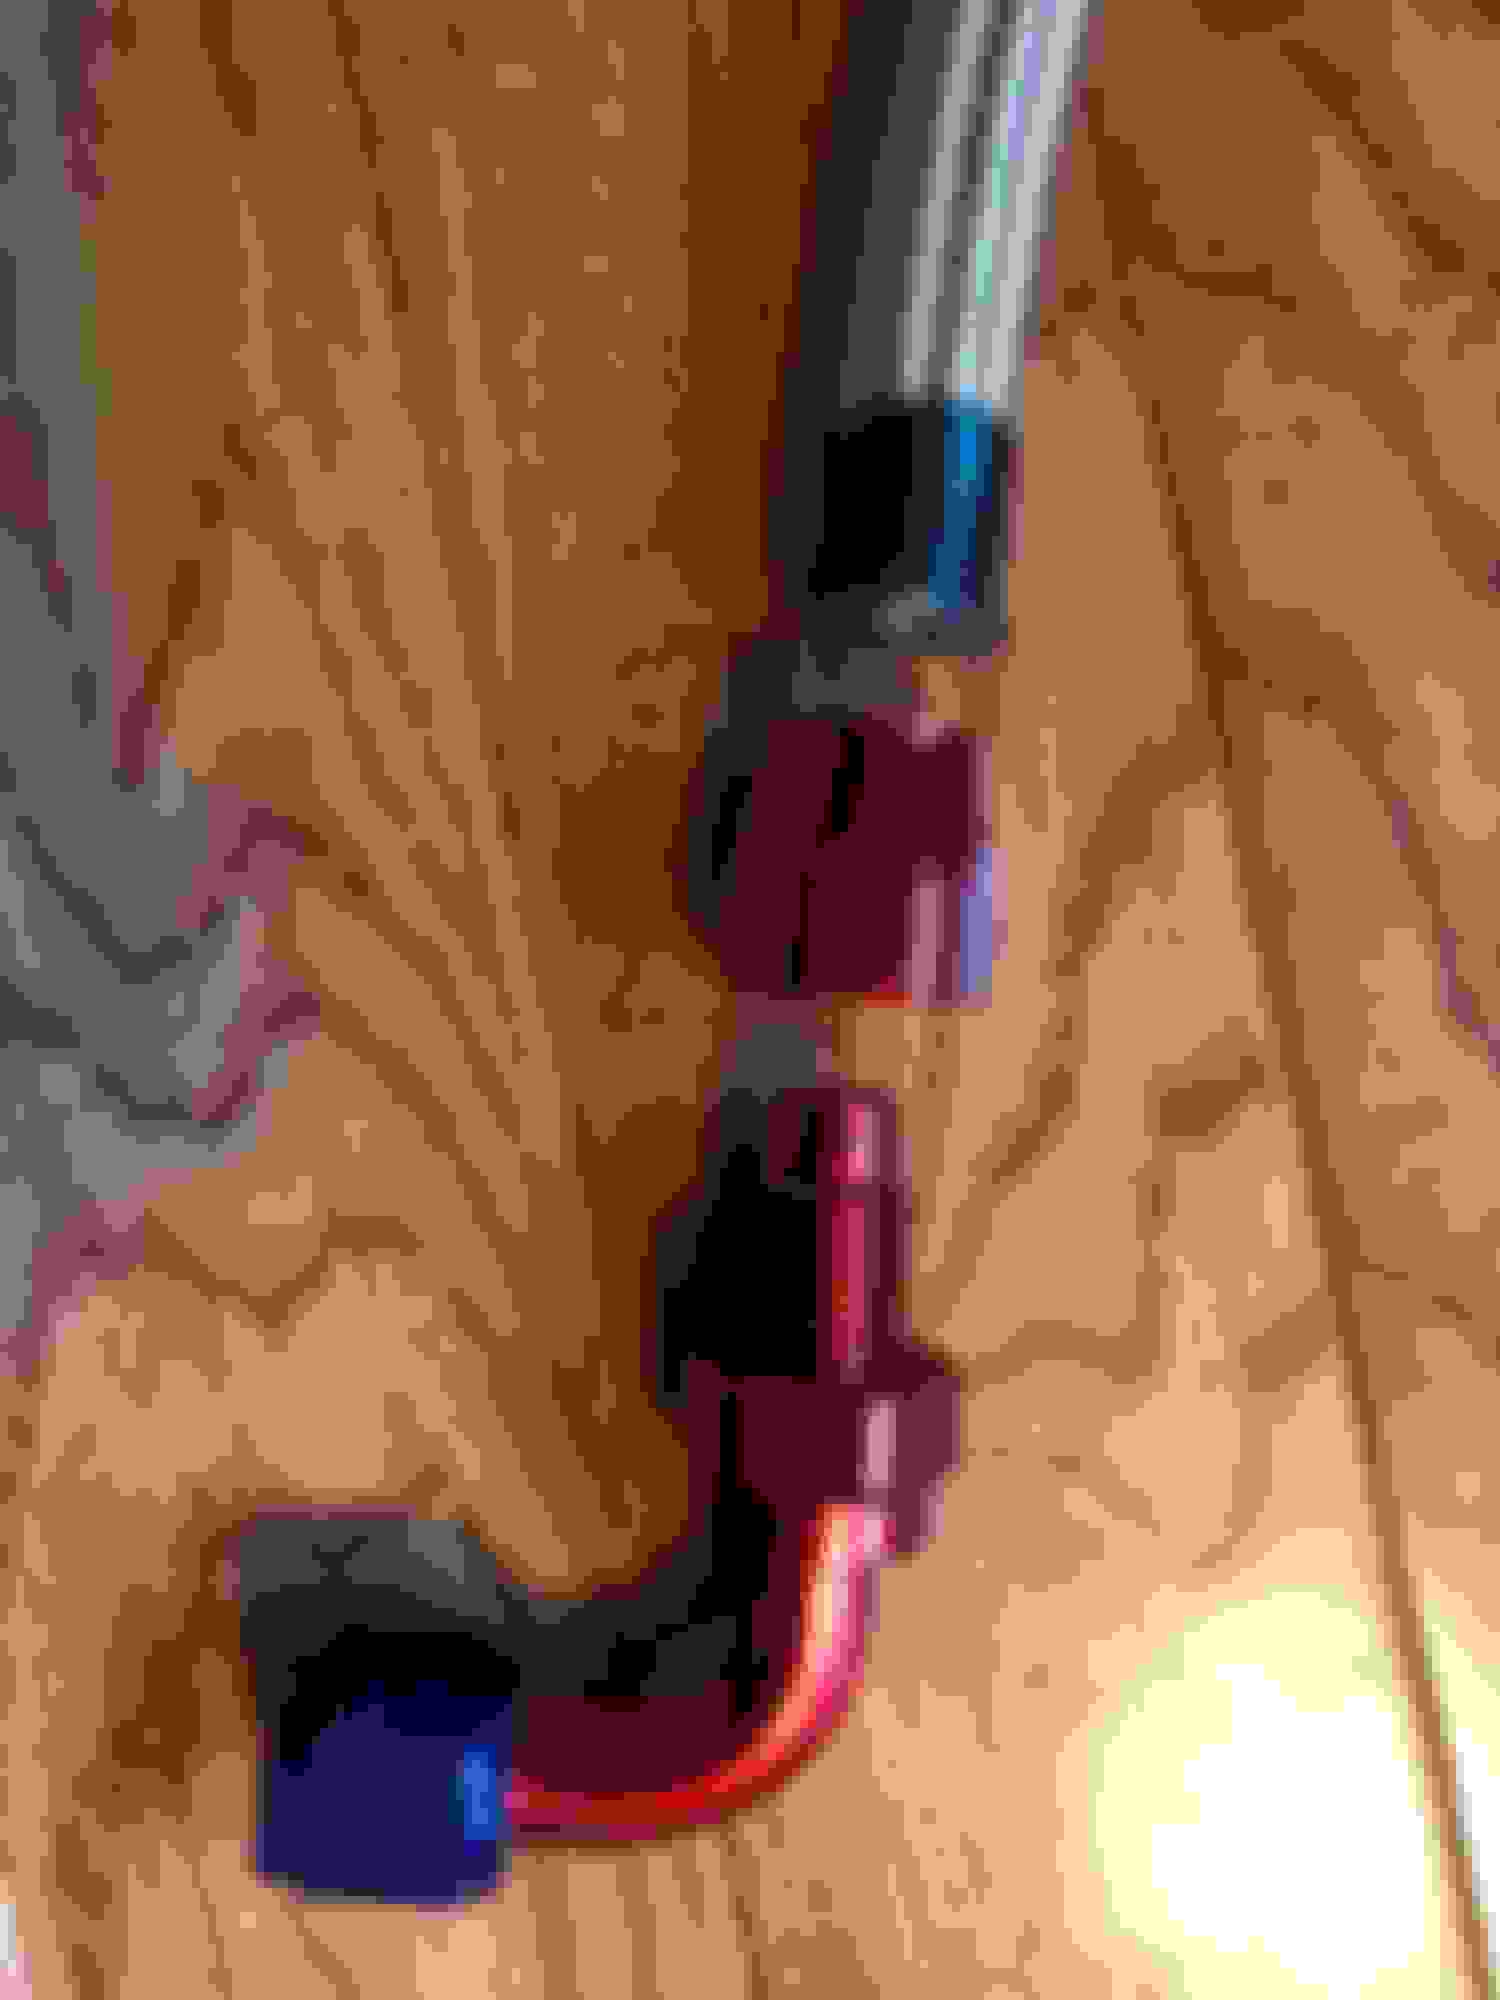
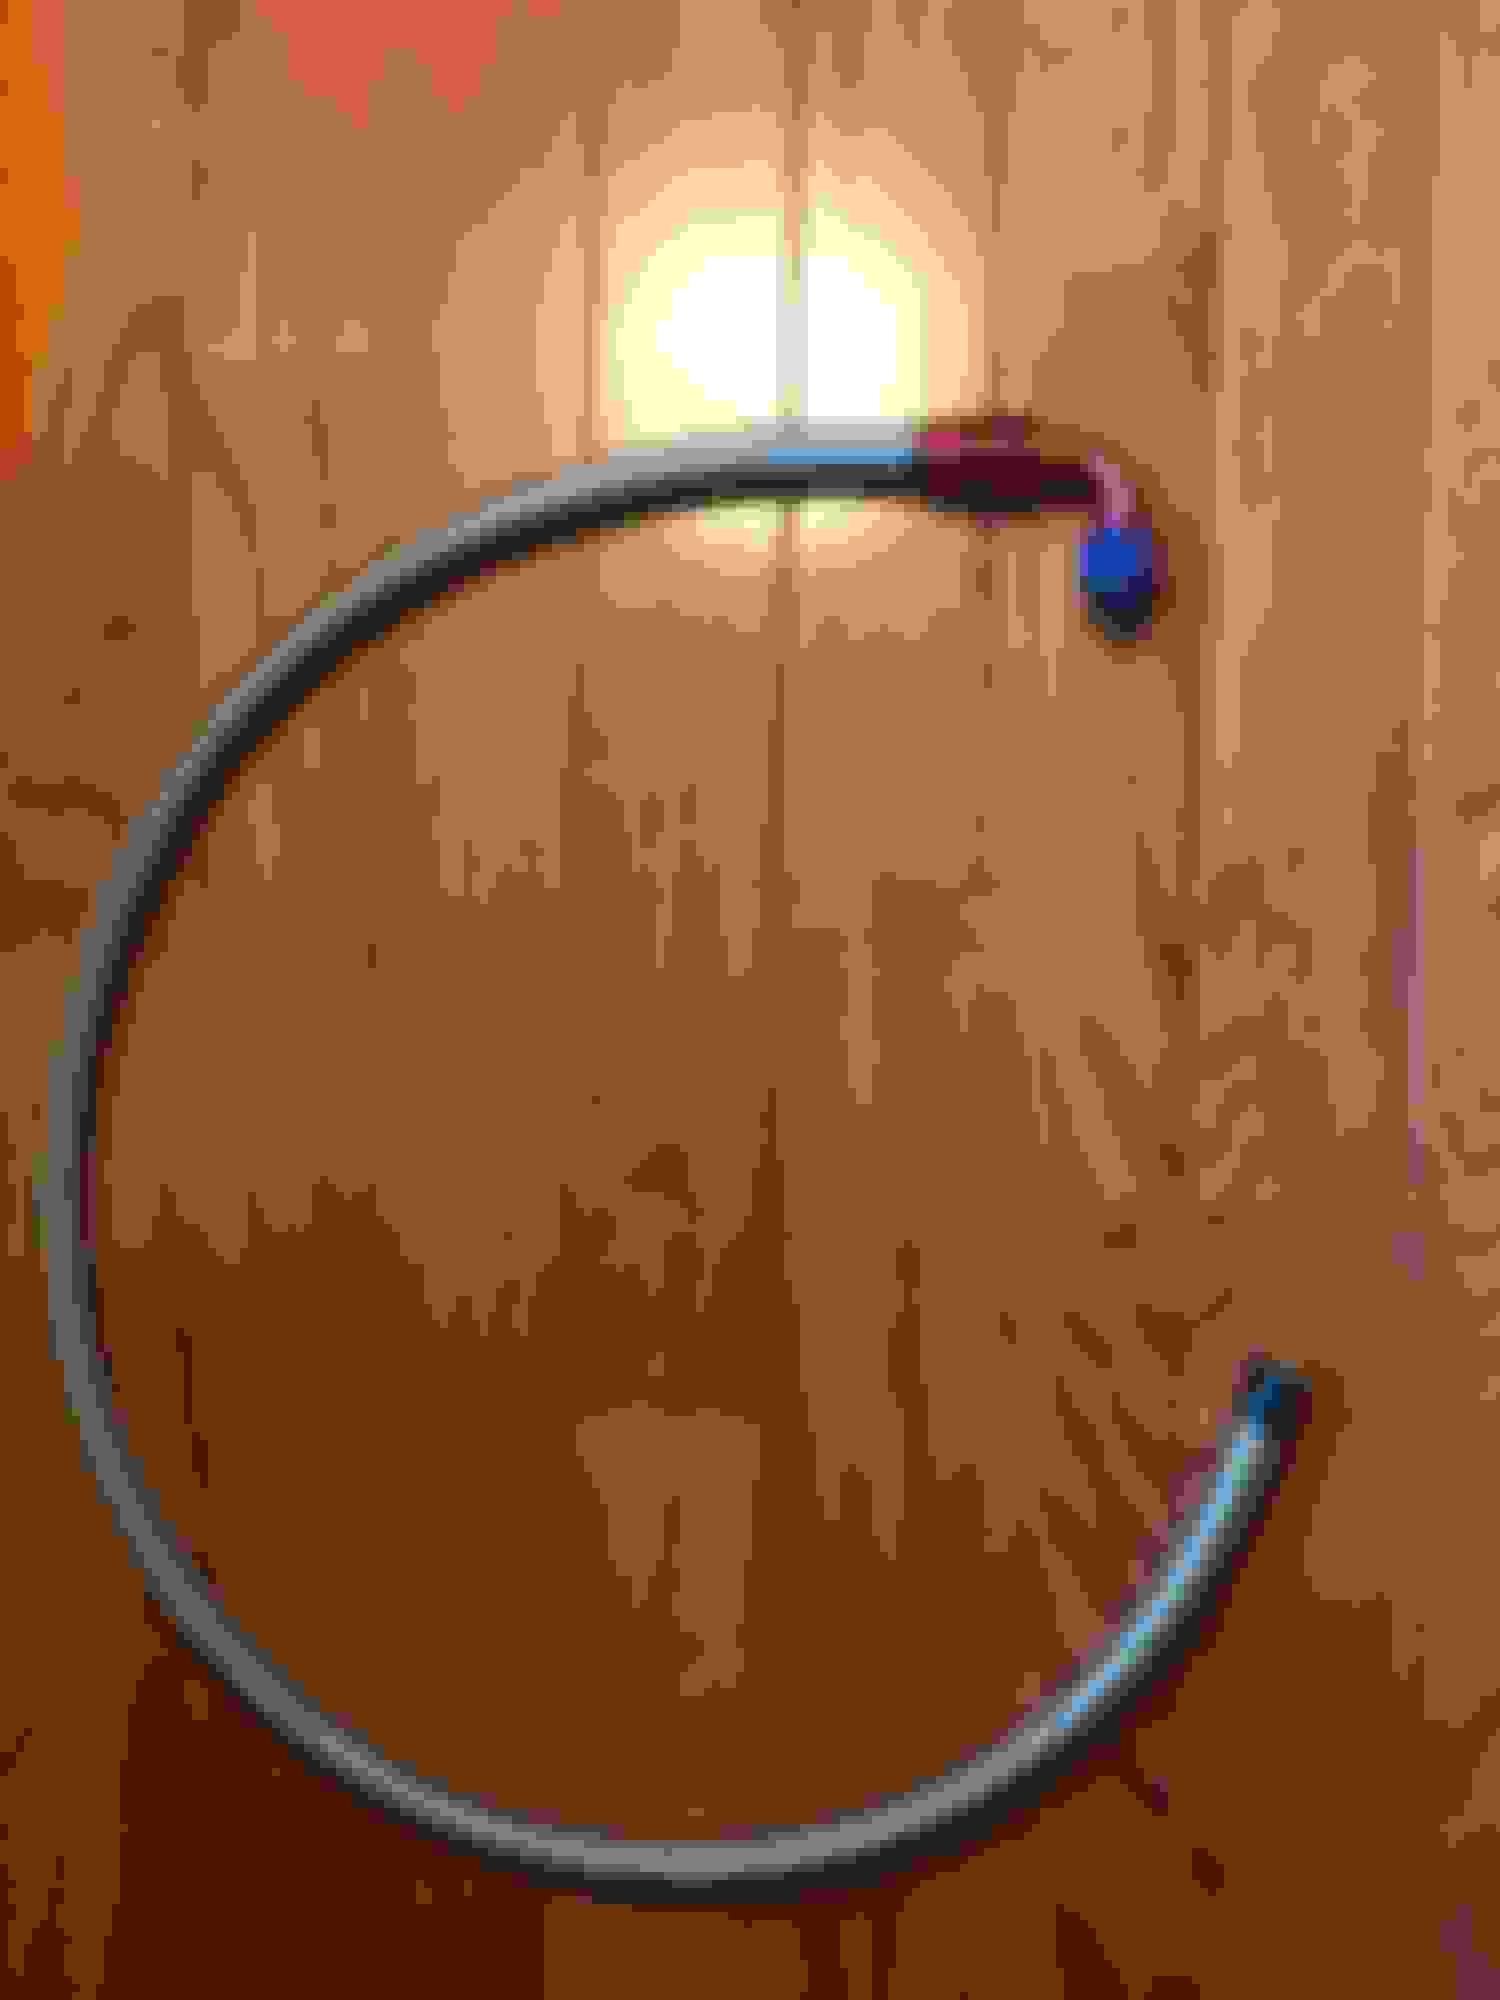
I thought I'd post a little report of my successful replacement of the leaky oil cooling line. I replaced the shortest one, going from the left port of the driver-side radiator to the engine block. Looking at the ridiculous prices of the aftermarket parts, I decided to build my own. I found the exact same parts used in the Racing Beat kit on eBay. Namely:
1. 2 pieces Black AN10 10 an to M18x1.5 Metric Male Fitting Straight Adapter
2. 4ft 10AN Stainless Steel Braided Fuel /Oil/ Gas Line Hose
3. 2pcs 10AN 90 Degree Universal Aluminum Fuel Hose End Fitting 90�Swivel Hose End
Metric to 10AN adapter:
self-tightening fitting
assembled fitting
hose with one fitting on
The whole thing cost $33.
Little things I learned while making the repair:
1. I needed an impact wrench with 23mm socket and very long extension to remove the 2 banjo bolts
2. Need 1 inch flat wrench to tighten the 90 degree elbow on the engine side. It's very tight there and my adjustable wrench didn't fit
3. I used pipe join compound on the thread. Not sure if it's needed but made me feel better.
4. Since I was not sure the exact length of line needed, I attached only one fitting at first and secured that to the engine block side. I then fit the line to the radiator, cut to length, and attached the second fitting.
I see no difference in type or quality. Even the colors are the same. I'm pretty sure it all comes from the same factory in China.
Here is the final install. I modified the line holder by removing the bottom part that held the previous line, drilling a hole for a mounting screw, and adding a rubberized hose clamp.
You see no difference because you don't have any experience with quality -AN fittings. The RB kit uses quality Earl's components. Holy crap that rust. You are also not supposed to use thread sealant on -AN fittings.
"Earl's Performance Instant Pipe Sealant. Secure your metal pipes and fittings with Earl's instant pipe sealant. The sealant fills in the space between threaded metal parts, preventing leakage caused by tape shredding, vibration loosening, damaged threads, and solvent evaporation. Earl's pipe sealant is designed to be used for both low and high-pressure applications and it seals to the burst strength of most piping systems. It has lubricating properties that make pipe fitting easy. It works on any gas, fuel, liquid, and oil lines and features an anti-galling compound to work with stainless and aluminum fittings. Parts can be disassembled with basic hand tools."
Second, please notice that all the part I got are aluminum. Aluminum doesn't rust!
That's cool and all but is that what you used? Generally any hydraulics or hose shop will tell you not to use sealant. But what do they know and I am sure it will be fine and it will outlast that other rusted hose up top anyway so it's a moot issue.
Life in the rust belt. Mine look easily bad, if not worse.
That was the main discussion I was having with myself, why not replace the other 2 lines at the same time? I should have but I was not yet sure my approach was going to work. By the time I finished replacing the leaky one, I just wanted to get my car back. Besides, it had to go to the dealer for a couple of recalls.
I�ll get back to it in the spring.
Imo it’s a mistake to use a thread-in cooler/engine attachment fittings on those lines rather than put banjo bolt connections there and then the hose attaches to it. With the threaded fitting you have two sets of threads working against you in the same rotation plane. You have to be especially careful if attaching these to the aluminum cover. If you’re not careful you can strip out the threaded hole on the cover trying to tighten the hose fitting. Using banjo bolts there eliminates this by putting the those threads perpendicular to the attachment fitting threads. Then you also only need one wrench rather than monkeying around with two wrenches to try and hold one while breaking the other loose or tightening it.
Just one of the reasons I think most of the oil cooler hose kits are crap, over-priced, and in the case of SS lines way too heavy too. They usually give you the cheapest, thinnest aluminum hold-down clamps from backwater China too. I’m sure there are exceptions, but I’ll personally give a thumbs down on the Racing Beat kit having installed one for someone else.
Also, those threads are only to close the flared sealing joint where the real seal point is. They are not designed to be a sealing thread.
Yeah I feel the same way about the SS lines and the RB kit was a PIA to install due to the lines being SS. I used used Parker JIC fittings and Parker hose on my oil cooler setups and it has held up great for years. I used Fragola braided and fitting everywhere else because the commercial stuff is not as pretty and it has held up great. I learned the hard way with cheap -AN fittings.
Yep, getting ready to do my own custom routing using banjos with push-in AN fittings and superlight fiber-braided hose, then wrap those in urethane piping sleeves for wear resistance where needed. SS hoses are for race cars that might get into a crash and don’t want to be out of the race due to a cut line. While durable, they just don’t have much purpose for what people use them here for other than some sort of bling factor.
I thought I'd post a little report of my successful replacement of the leaky oil cooling line. I replaced the shortest one, going from the left port of the driver-side radiator to the engine block. Looking at the ridiculous prices of the aftermarket parts, I decided to build my own. I found the exact same parts used in the Racing Beat kit on eBay. Namely:
1. 2 pieces Black AN10 10 an to M18x1.5 Metric Male Fitting Straight Adapter
2. 4ft 10AN Stainless Steel Braided Fuel /Oil/ Gas Line Hose
3. 2pcs 10AN 90 Degree Universal Aluminum Fuel Hose End Fitting 90�Swivel Hose End
Metric to 10AN adapter:
self-tightening fitting
assembled fitting
hose with one fitting on
The whole thing cost $33.
Little things I learned while making the repair:
1. I needed an impact wrench with 23mm socket and very long extension to remove the 2 banjo bolts
2. Need 1 inch flat wrench to tighten the 90 degree elbow on the engine side. It's very tight there and my adjustable wrench didn't fit
3. I used pipe join compound on the thread. Not sure if it's needed but made me feel better.
4. Since I was not sure the exact length of line needed, I attached only one fitting at first and secured that to the engine block side. I then fit the line to the radiator, cut to length, and attached the second fitting.
Hi StephZoom, did mine for �20, reused the original banjo bolt, got a hydraulic company to detach and reattach the ends to a high temperature pipe, installing was easy, though tight at the engine end, so hand thread first then used extension and midsized wratchet to tighten. Forgot to put the washers in as was in the oil i drained, so slight leak, but will redo that end this week since I'm doing an oil change. What's the thickness of the washer?
Mrqng,
Mazda PN is 9956-21-800 my dealer charged US$3.02
.944 OD .718 ID .053 thick (24mm OD 18.25mm ID 1.35mm thick)
Mazda spec Torque is 40-50 Ft-lbs
Hopefully the aluminum AN fitting will hold up to that.
So, that replacement job was 2 years ago and still holding up! I thought I’d mention it in case there are lingering doubts about the cheap eBay stuff. 😊
 11-03-2017, 02:01 PM