Subwoofer Enclosure Build Inside
 03-21-2011, 07:35 PM
#1
Disco Biscuit
Thread Starter

Join Date: Aug 2008
Location: Palm Bay, FL
Posts: 116
Likes: 0
Received 0 Likes
on
0 Posts
Subwoofer Enclosure Build Inside
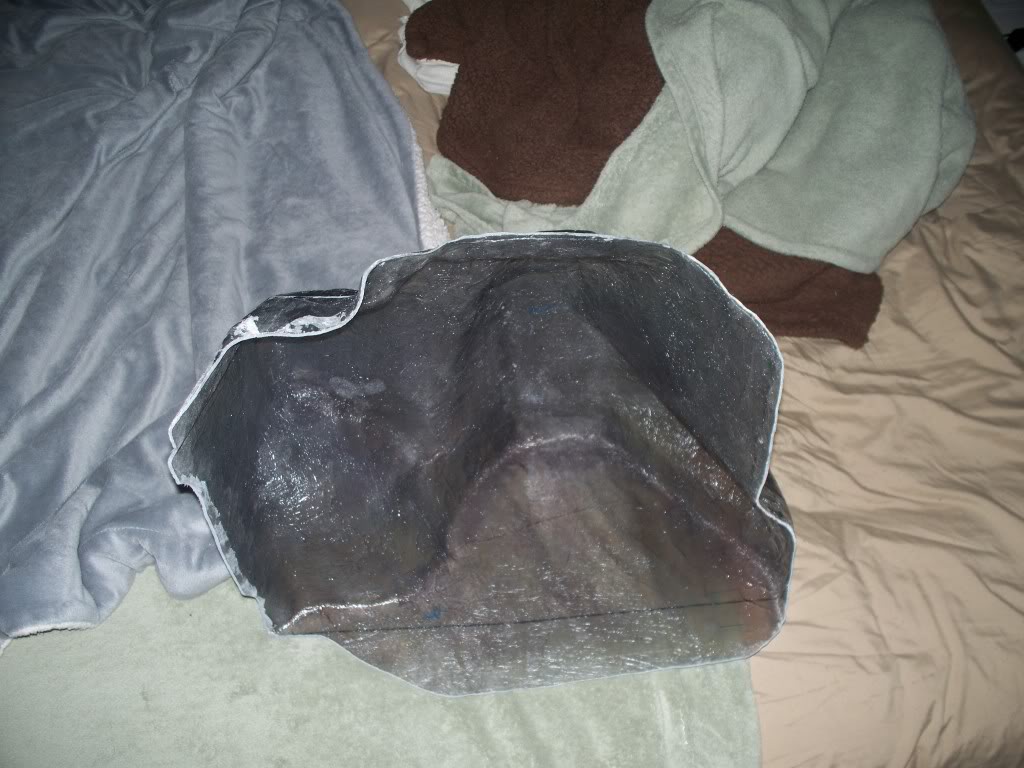
Here is what I am working on at the moment.
Day 1
Prep:
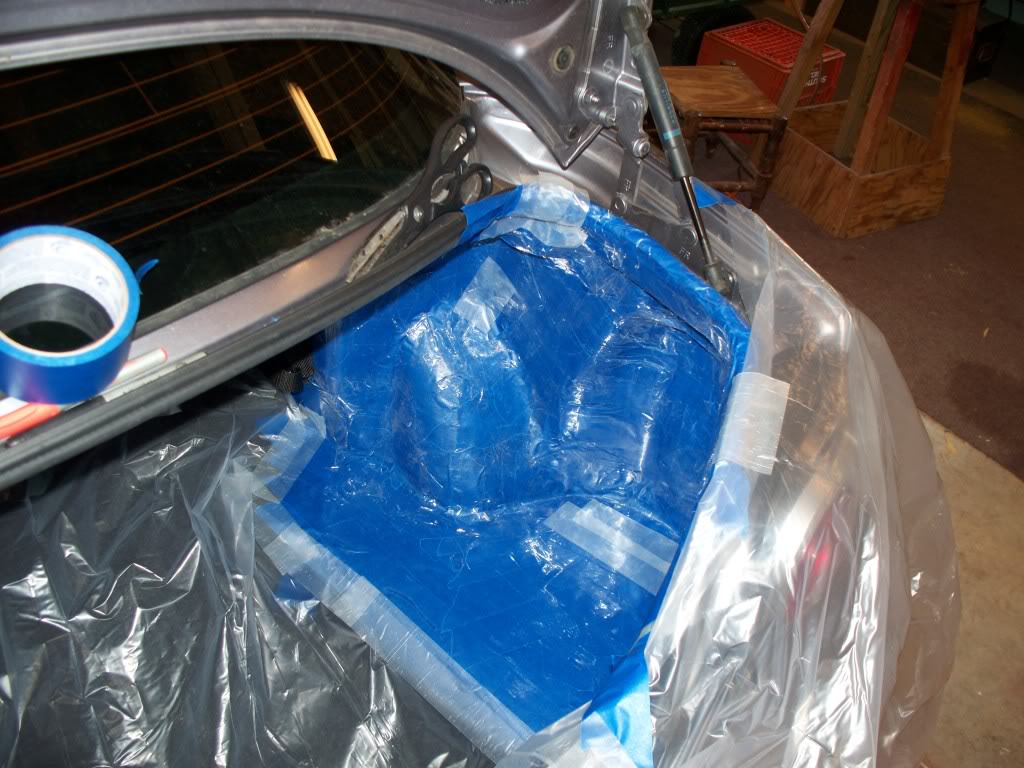
First Layers:
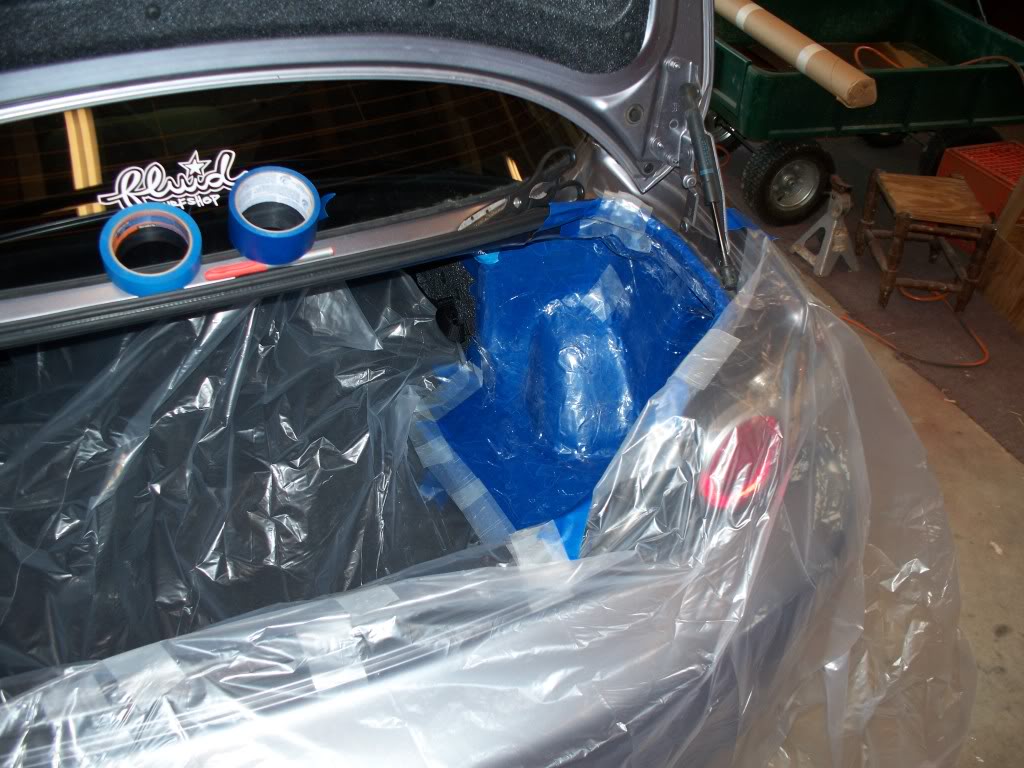
Day 2
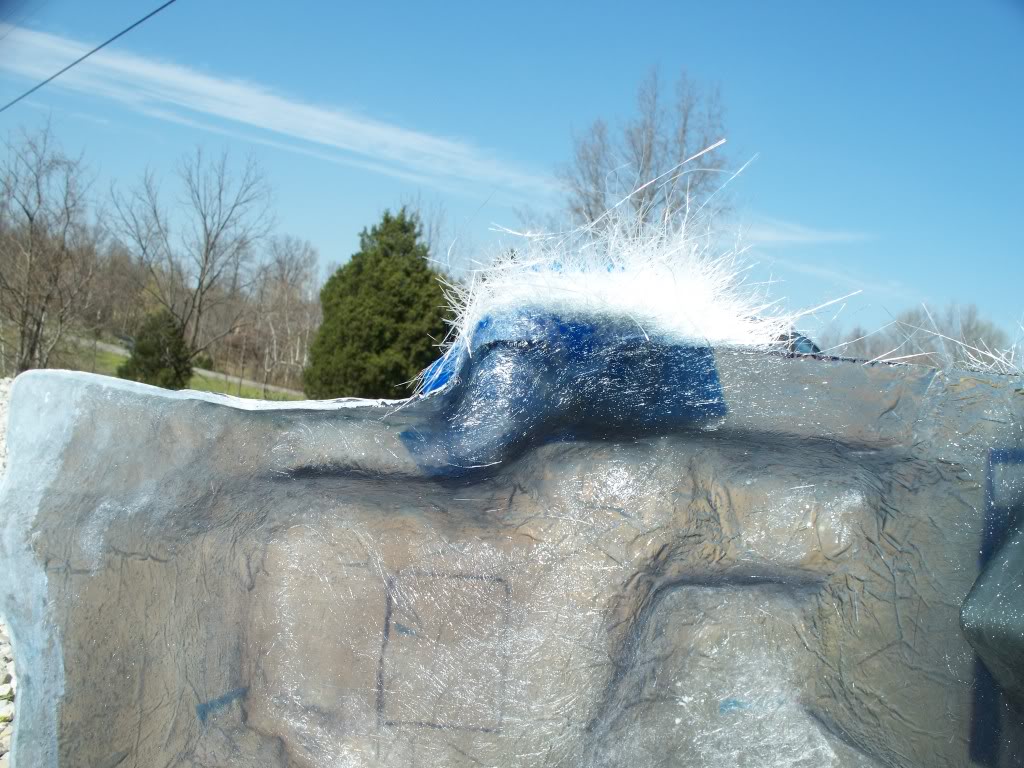
Removed the plug and let the enclosure cure in the sun.
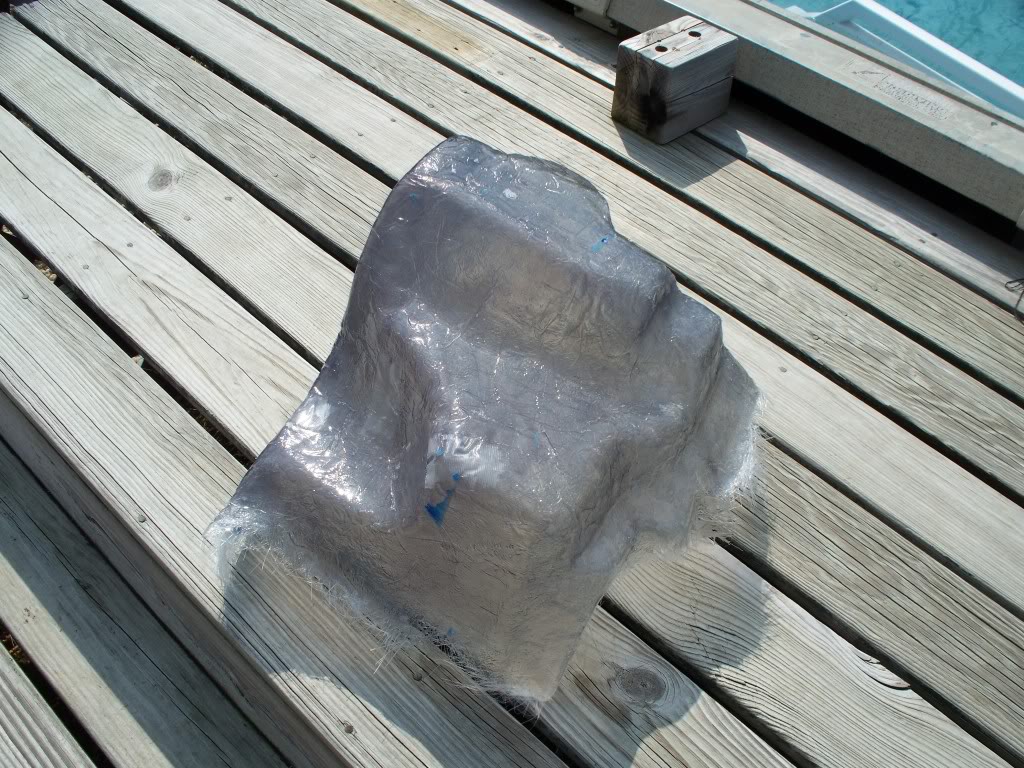
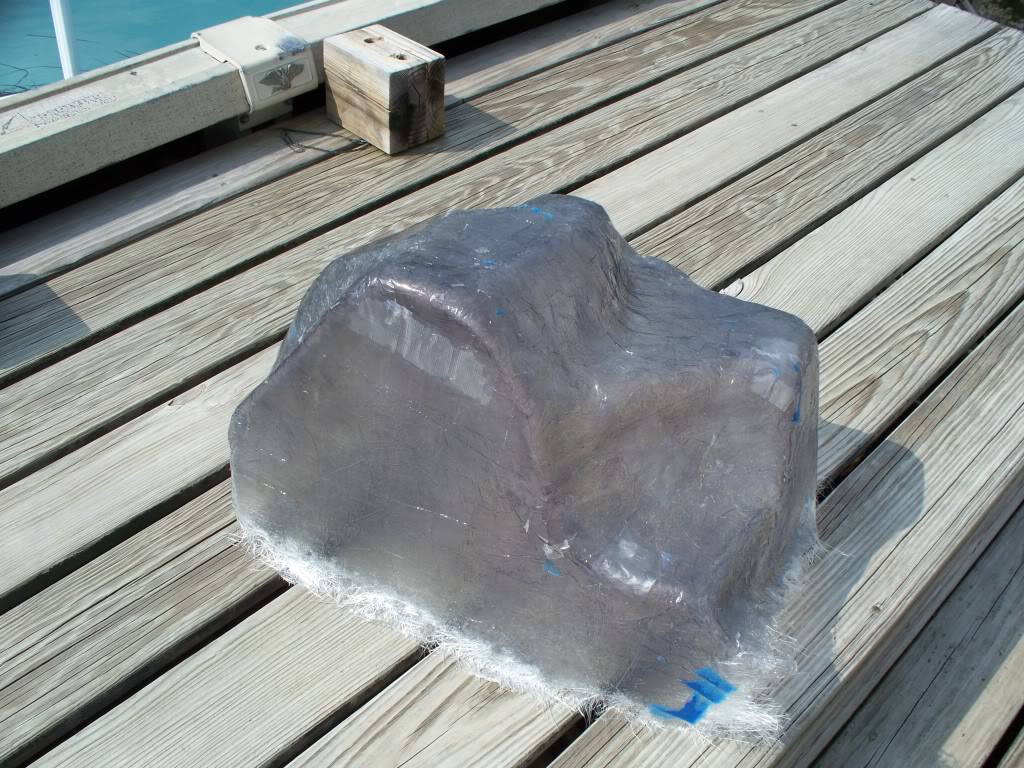
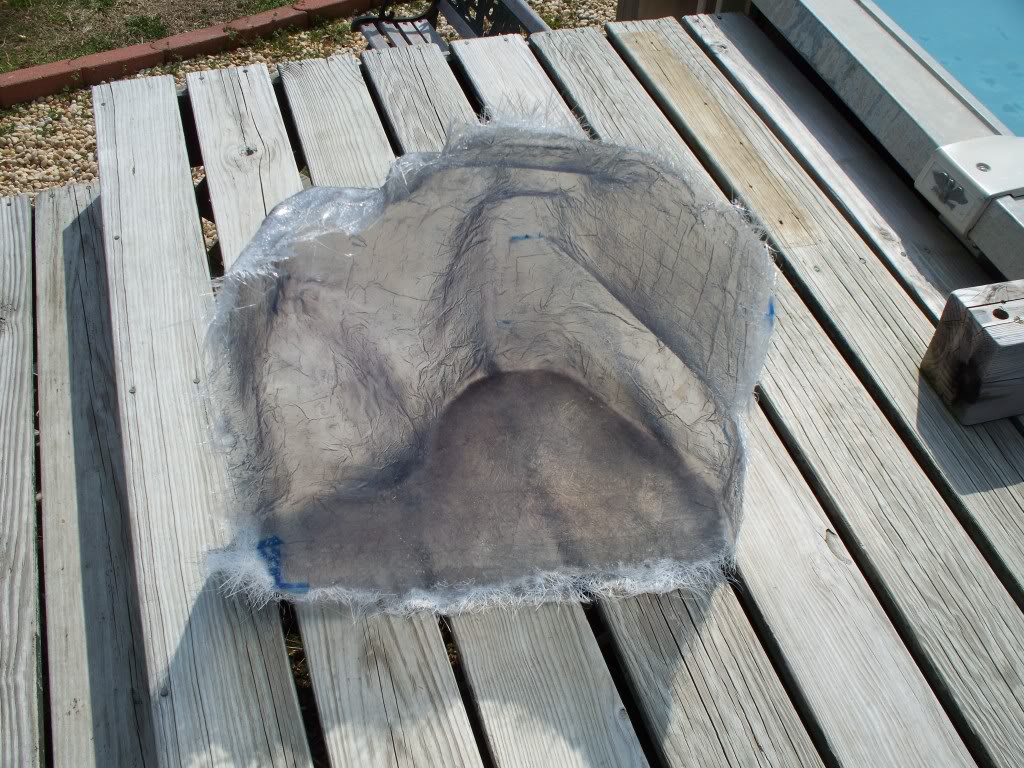
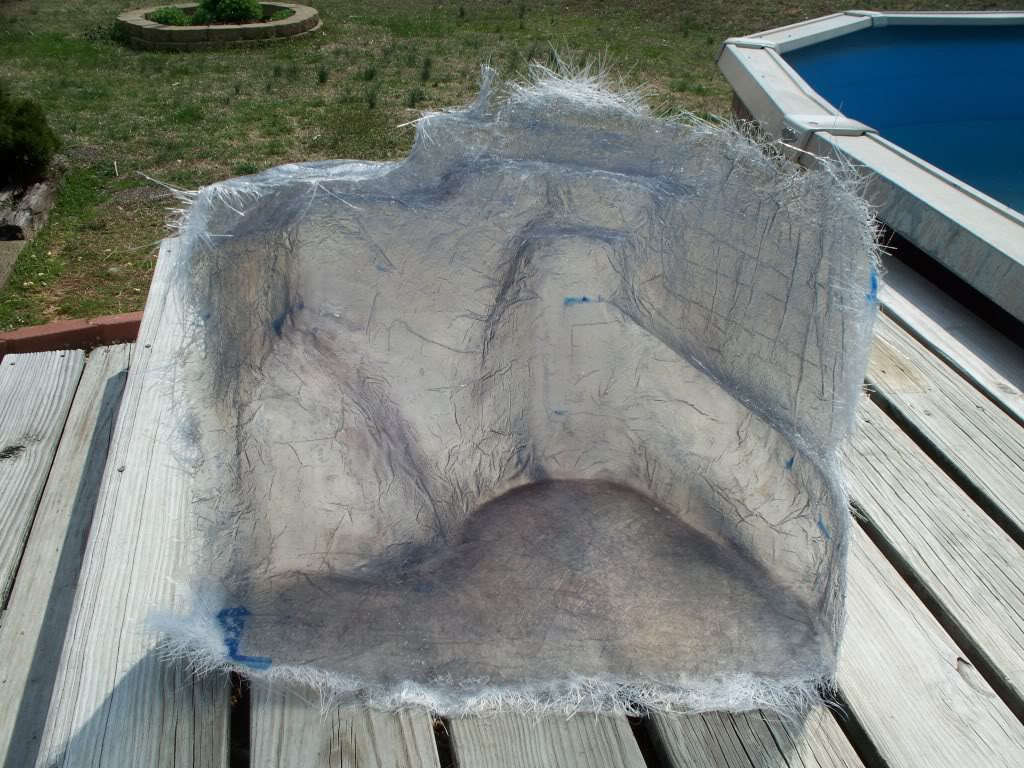
Day 3 (today)
Additional layers of glass and resin. More curing in the sun.
Day 1
Prep:
First Layers:
Day 2
Removed the plug and let the enclosure cure in the sun.
Day 3 (today)
Additional layers of glass and resin. More curing in the sun.

 03-21-2011, 07:47 PM
#4
Disco Biscuit
Thread Starter
Join Date: Aug 2008
Location: Palm Bay, FL
Posts: 116
Likes: 0
Received 0 Likes
on
0 Posts
Thank You. I do not think that I am going to mold this box and make copies.
There is a guy already building them for both sides for the rx8.
That being said: I do not believe that I could sell enough of them to cover the cost of building the mold, materials, time, etc.
I am only planning on building one for the passenger side, so the weight will offset the drivers weight and not ad any additional weight to the drivers side.
 03-21-2011, 09:13 PM
#6
Disco Biscuit
Thread Starter
Join Date: Aug 2008
Location: Palm Bay, FL
Posts: 116
Likes: 0
Received 0 Likes
on
0 Posts
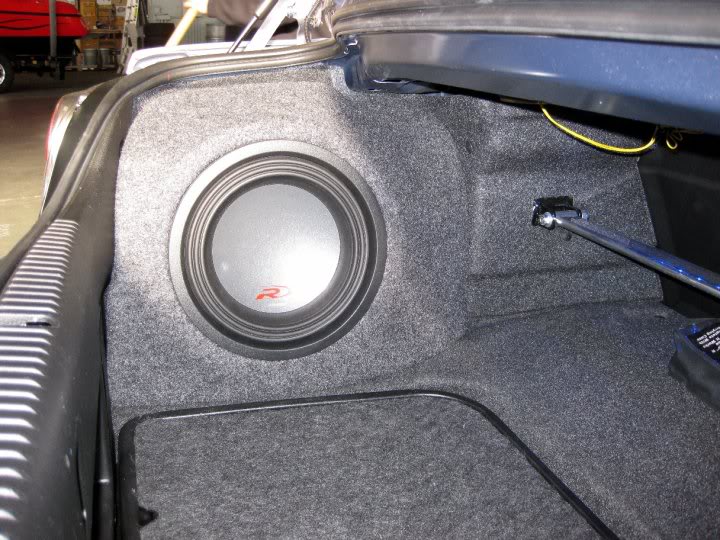
Very nice. If you do not mind me asking, how much did they charge for the enclosure? How is the sound quality?
I have yet to listen to a corner box in a trunk. How do they compare to a rear facing box in a trunk?
I have yet to listen to a corner box in a trunk. How do they compare to a rear facing box in a trunk?
03-21-2011, 09:22 PM
#7
I zoom therefore I am.

total cost with woofer and amp was under 1k.. they have done lots of work for me so the labor was basically free
Sound quality is great once the HU was properly calibrated. i want clean with the ability to boom if the mood hits. The single 10" fits that bill for me.
I've heard single corner, dual corner, and single/dual rear facing..
rear facing just puts too much thump into the cabin. I dont like the sounds, it feels too much like BASS BOOST on the old crappy walkmans.
Dual corners would have taken too much of the trunk and been more bass then i needed. The 8 is already a beautiful car and doesn't need me rolling down the street making myself deaf to draw attention.
03-22-2011, 11:06 AM
#9
I zoom therefore I am.
as the OP has said, the time vs money balance isn't in his favor. If you're looking to get one either contact a local audio place or go to http://www.4080enclosures.com/shop40...sp?idProduct=4
03-22-2011, 11:47 AM
#10
Disco Biscuit
Thread Starter
Join Date: Aug 2008
Location: Palm Bay, FL
Posts: 116
Likes: 0
Received 0 Likes
on
0 Posts
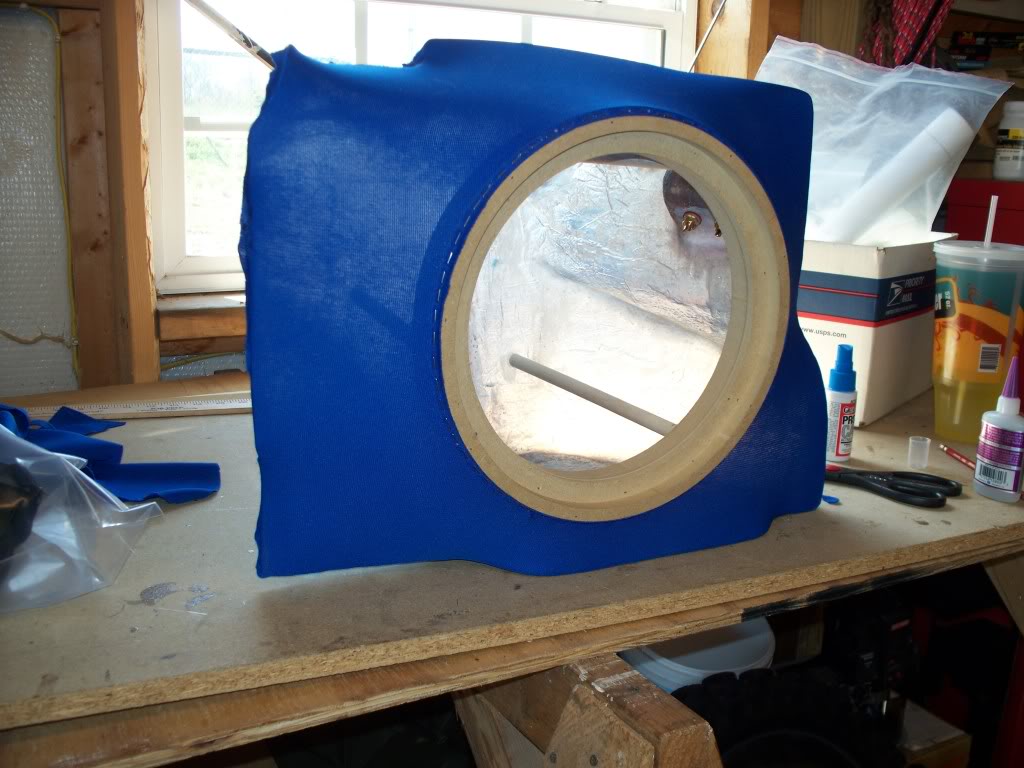
Thank You. 4080 is who I was referring to, as currently producing these type of boxes.
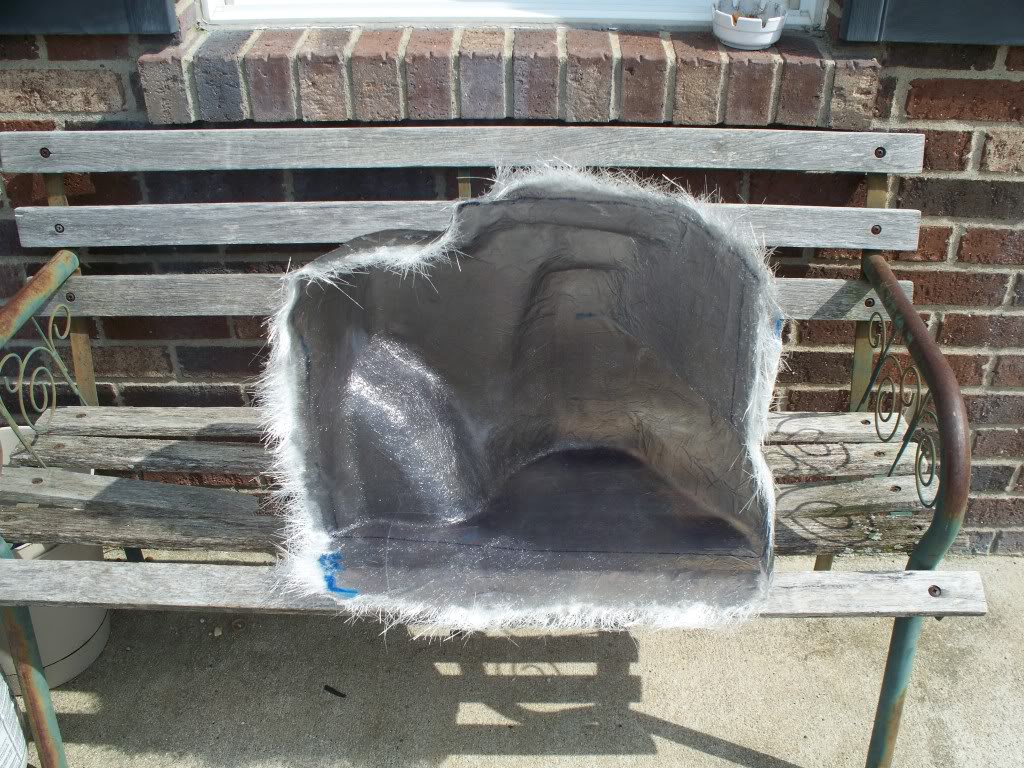
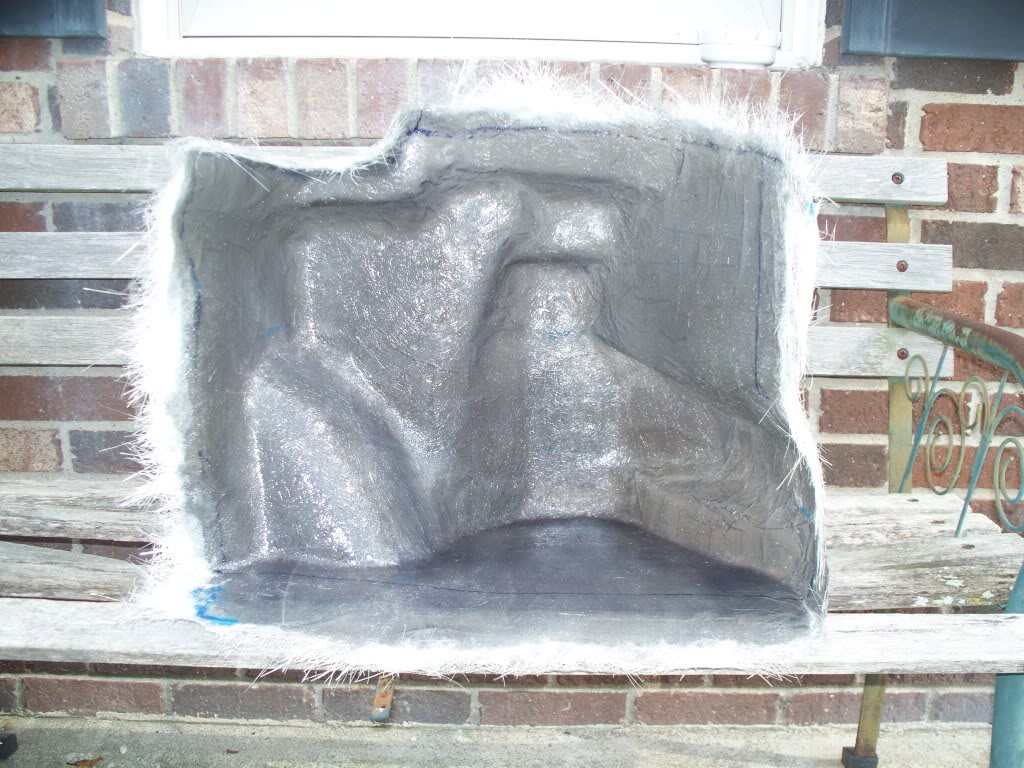
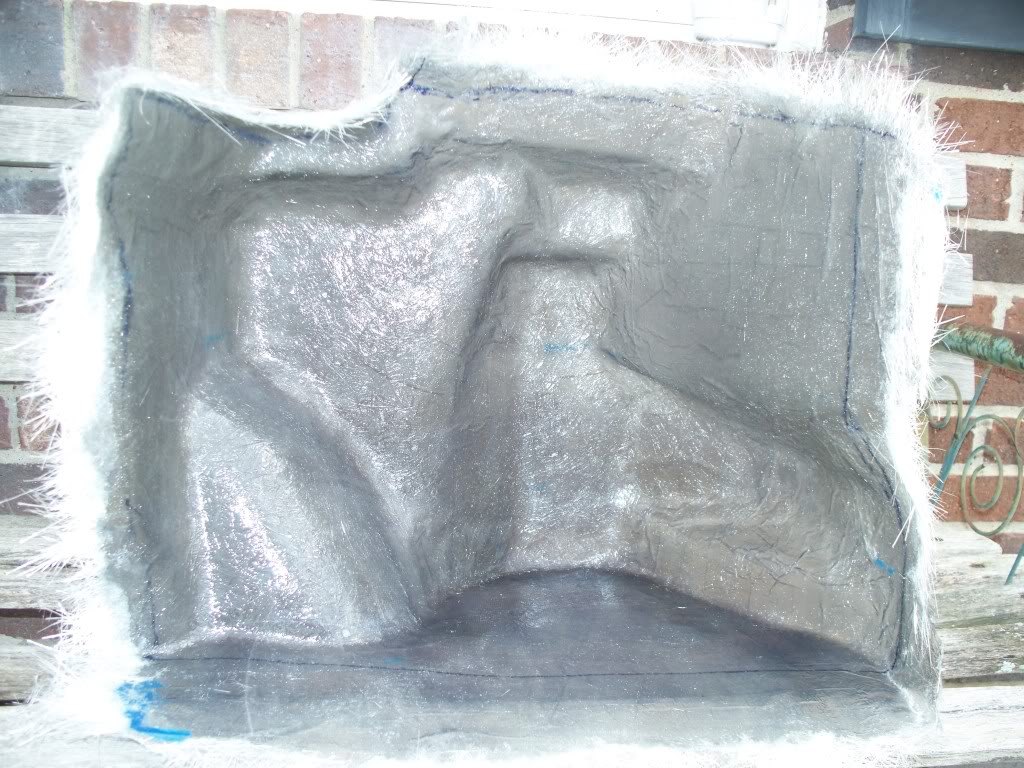
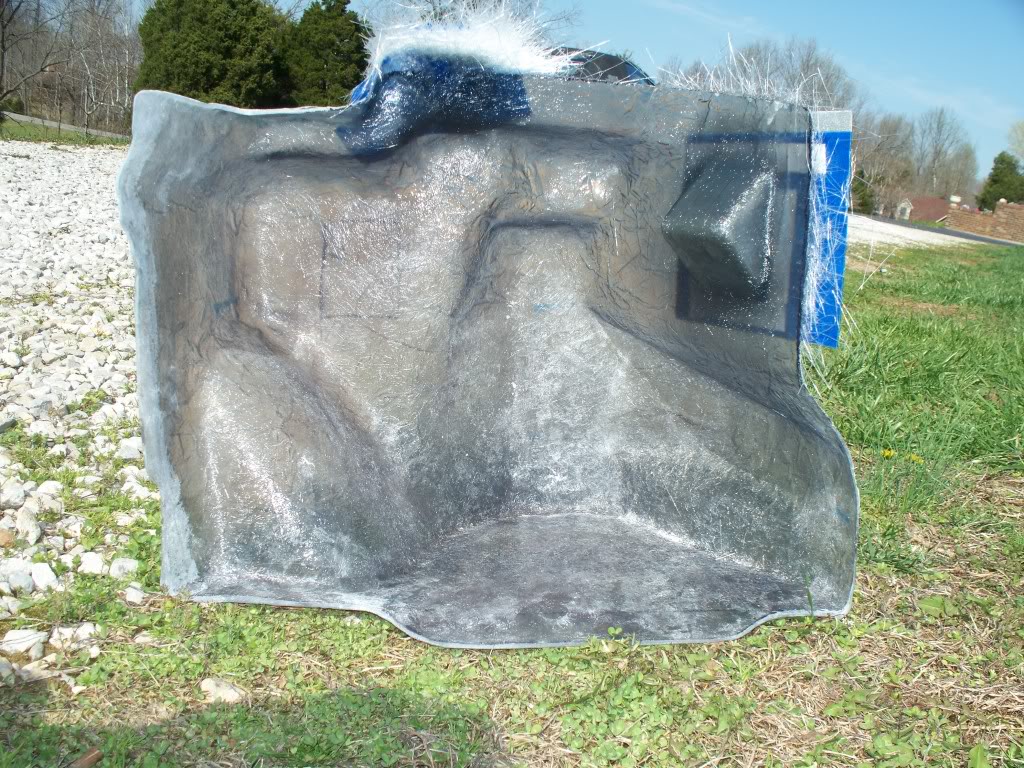
Update: Roughly trimmed down the edges. Going to test fit it again in a little while and make sure it still fits.
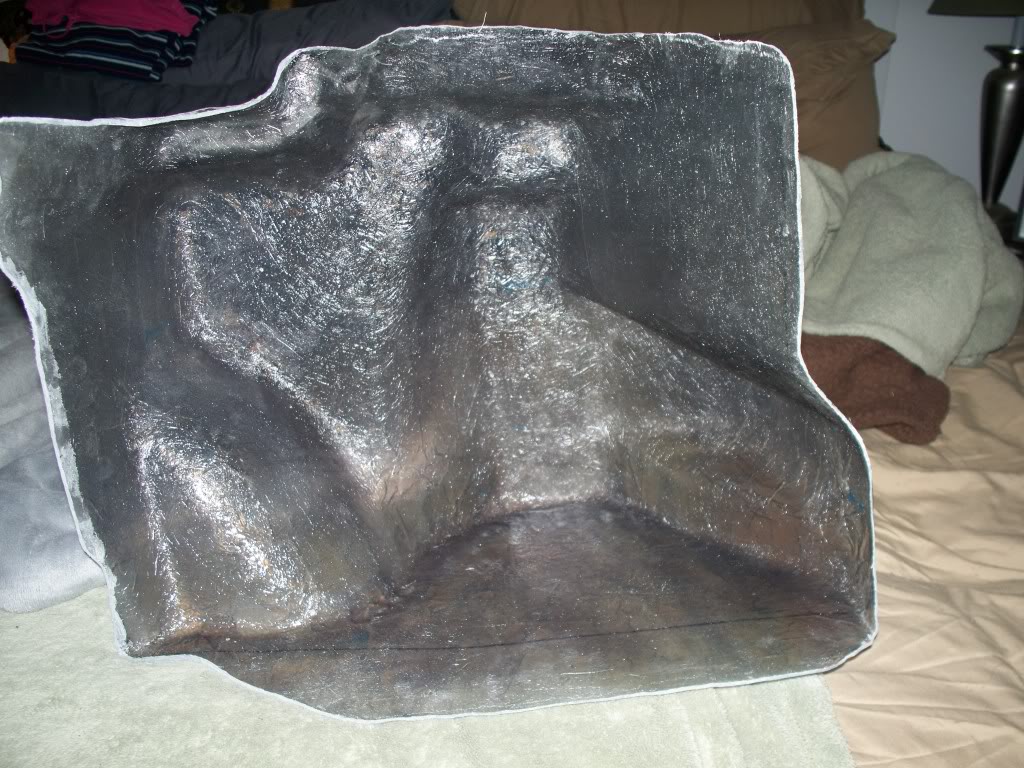
Update: Roughly trimmed down the edges. Going to test fit it again in a little while and make sure it still fits.
03-22-2011, 12:29 PM
#11
I zoom therefore I am.
that looks just awesome!
And to anyone saying "i wish i knew how to work with fiberglass" I be the OP didn't fall out of the womb with the knowledge. It just takes time and skill.. with a little practice thrown in.
I use to work on RC airplanes and could have made my own enclosure. But at my age time>money so the hours it would have cost me were not worth the money.
Lunchbox, that is really a clean looking box. That must have been some serious dremel cut off wheel time spent on the edge.
What kind of glass are you using?
03-22-2011, 03:51 PM
#12
Disco Biscuit
Thread Starter
Join Date: Aug 2008
Location: Palm Bay, FL
Posts: 116
Likes: 0
Received 0 Likes
on
0 Posts
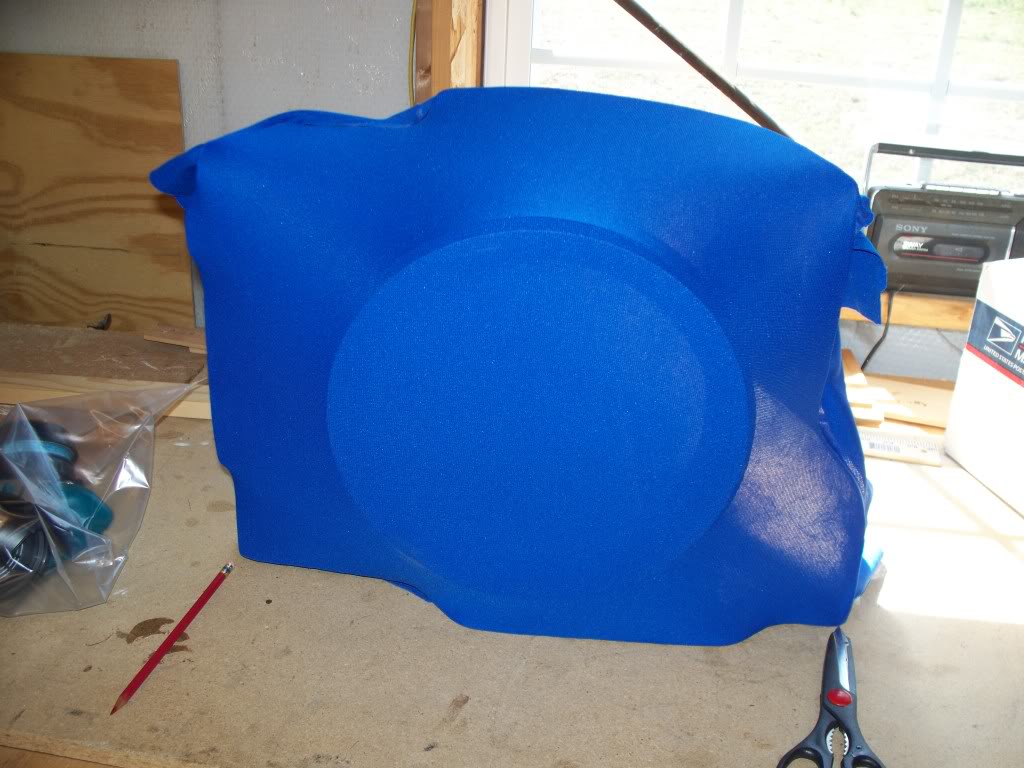
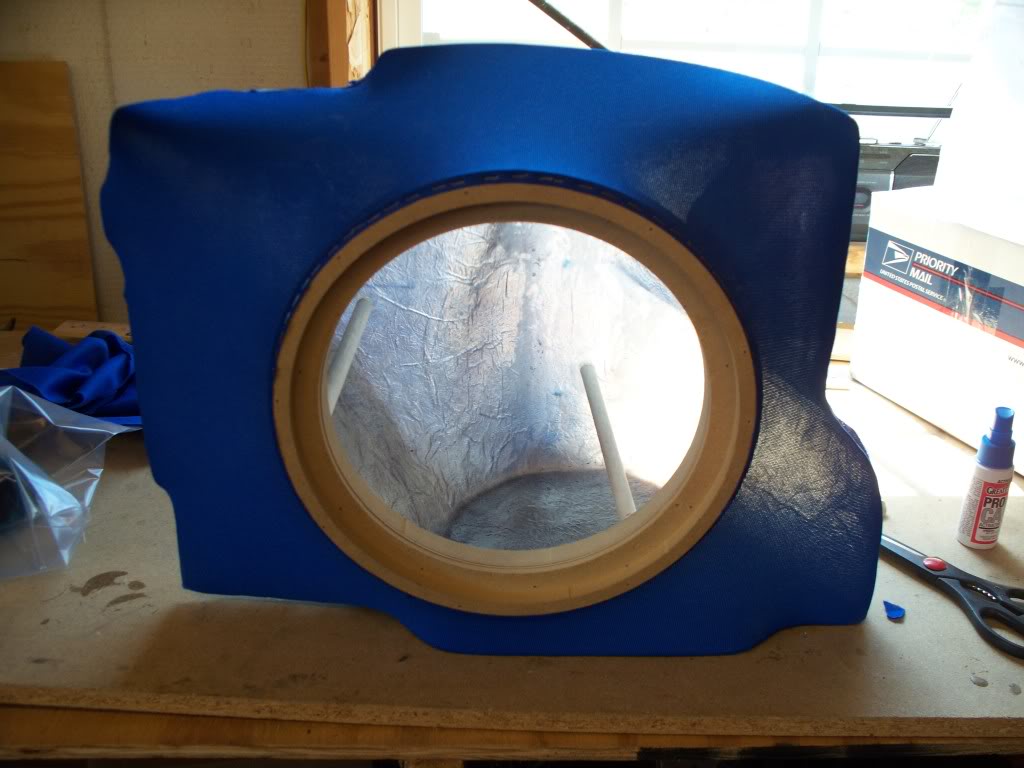
Thanks for the encouragement. It may look I know what I'm doing but.............. this is actually the first fiberglass subwoofer box that I have ever attempted to build. I have been reading, reading, more reading, watching videos, and I have been working on some tweeter pods.
Here are some fitment pictures. The tape was to aid me in marking the box for final trimming, before making the face.
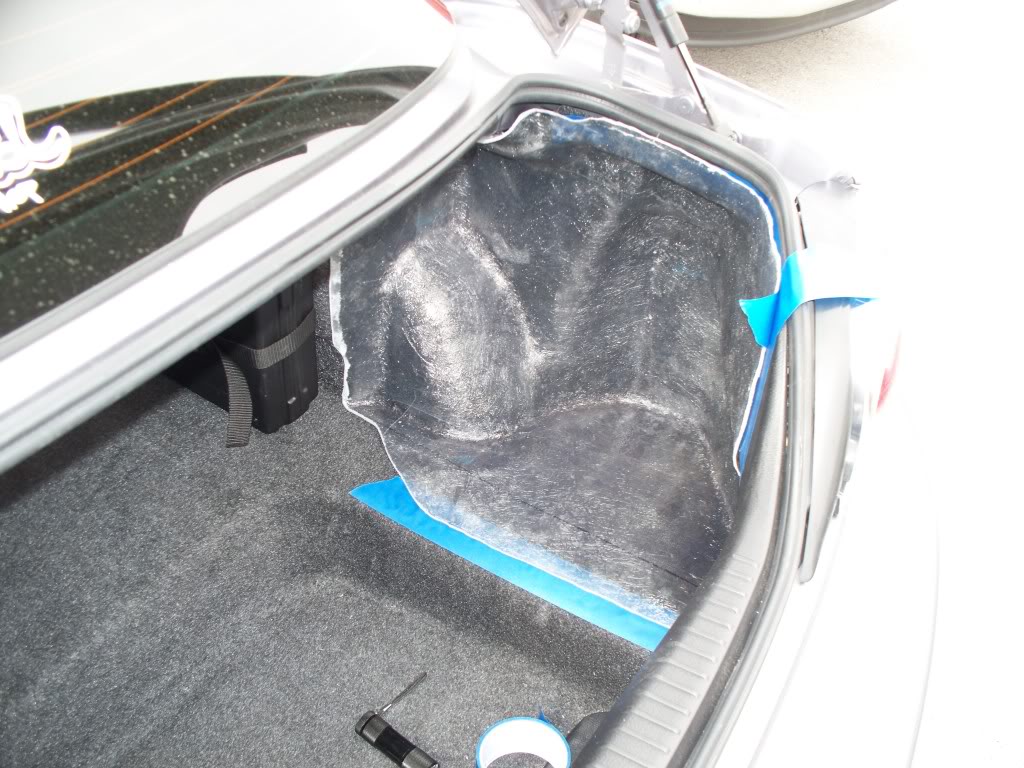
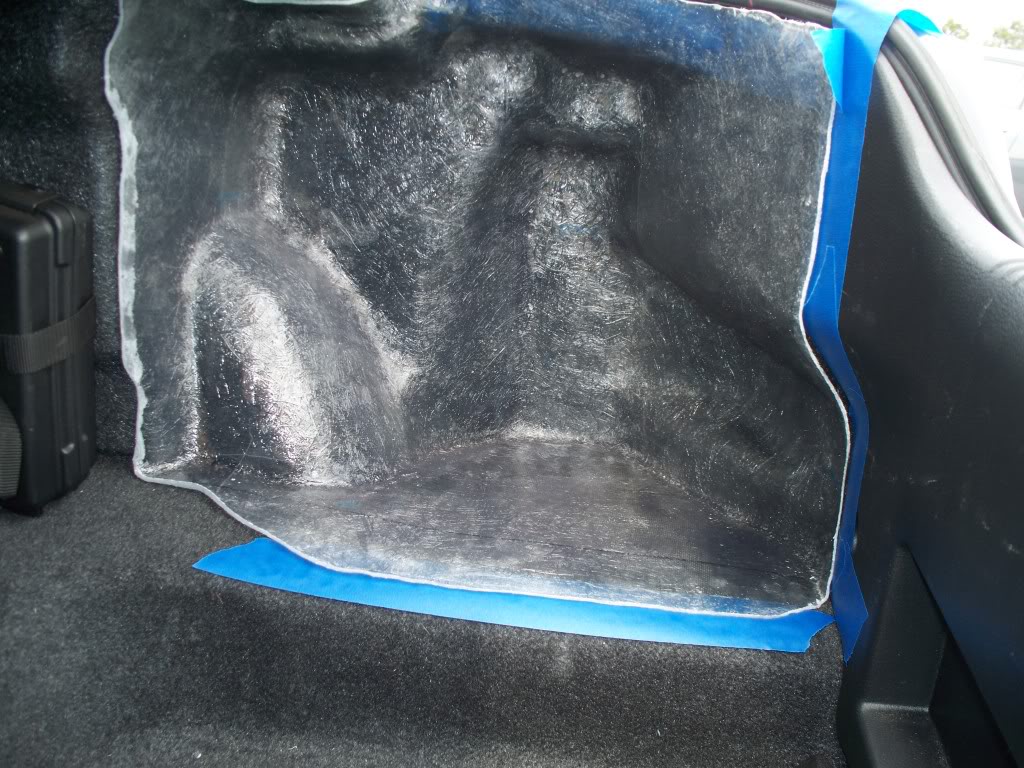
Here are some fitment pictures. The tape was to aid me in marking the box for final trimming, before making the face.
03-22-2011, 11:07 PM
#13
I zoom therefore I am.
thank god for the interwebs, if you give time for research you can find out how to do almost anything. If you hadn't said it was your first try, I dont think anyone would have known.
Can't wait to see how this progresses
Can't wait to see how this progresses
 03-25-2011, 03:51 PM
#15
Disco Biscuit
Thread Starter
Join Date: Aug 2008
Location: Palm Bay, FL
Posts: 116
Likes: 0
Received 0 Likes
on
0 Posts
Okay it's cold and rainy so progress has slowed to a creep.
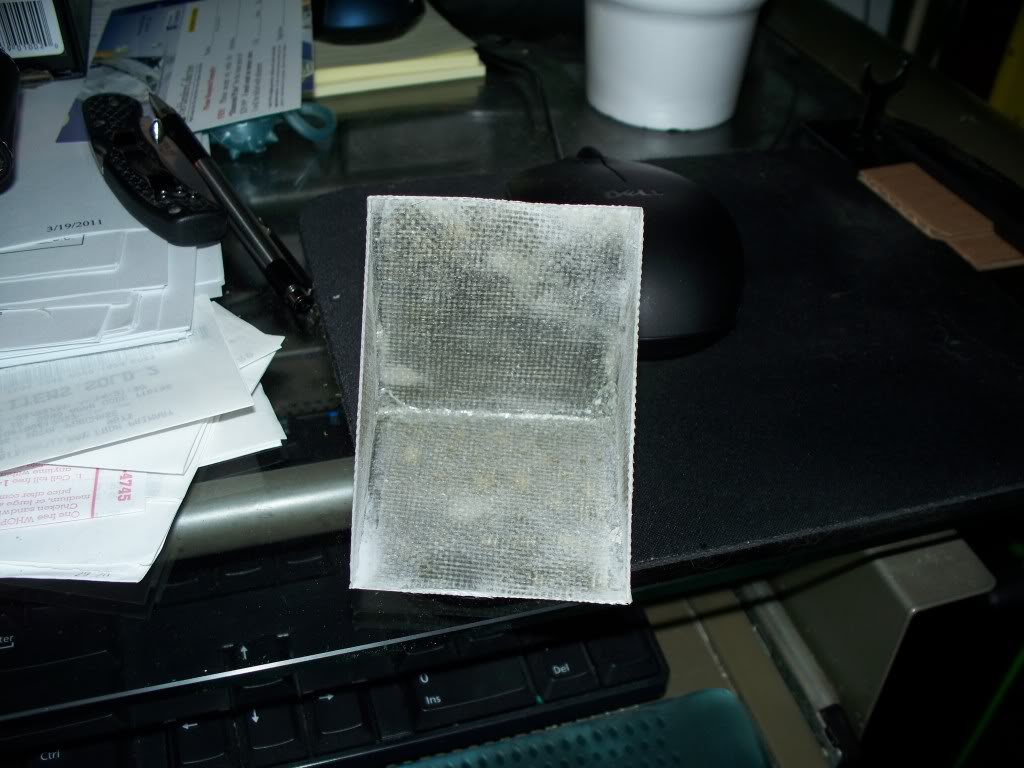
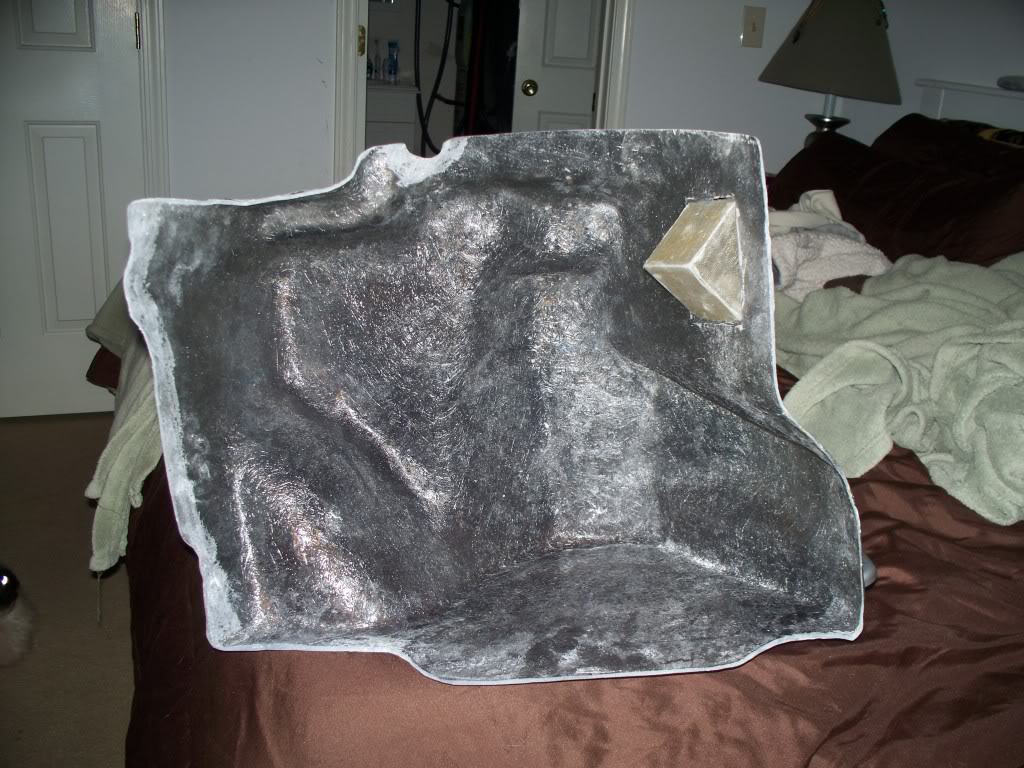
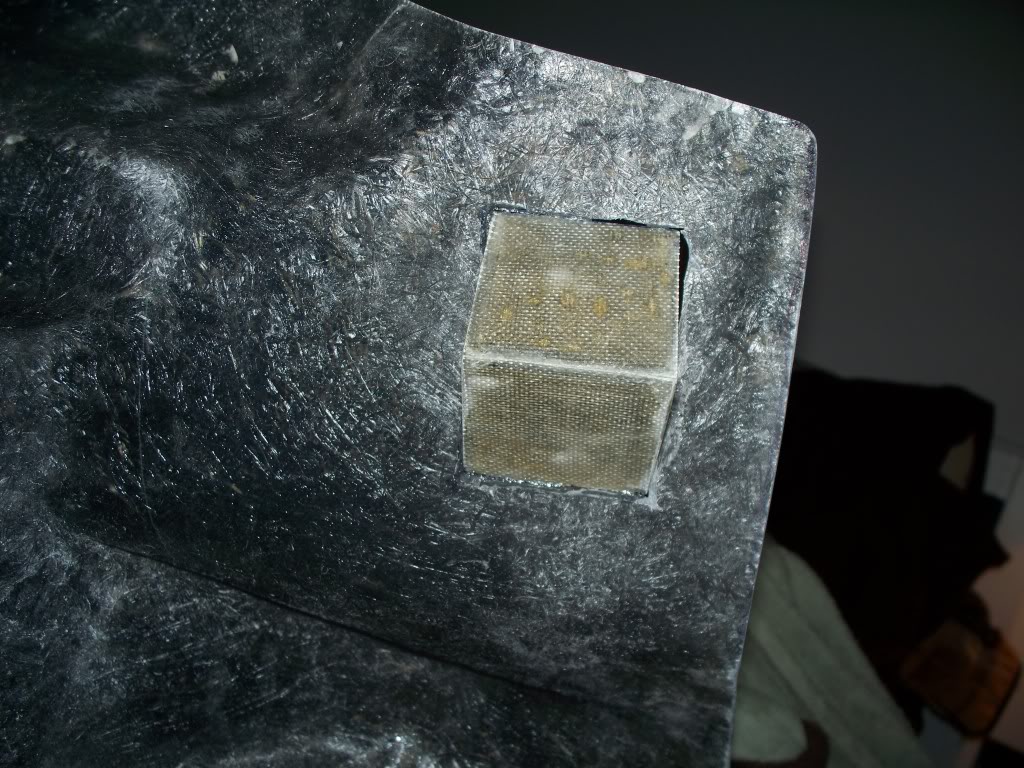
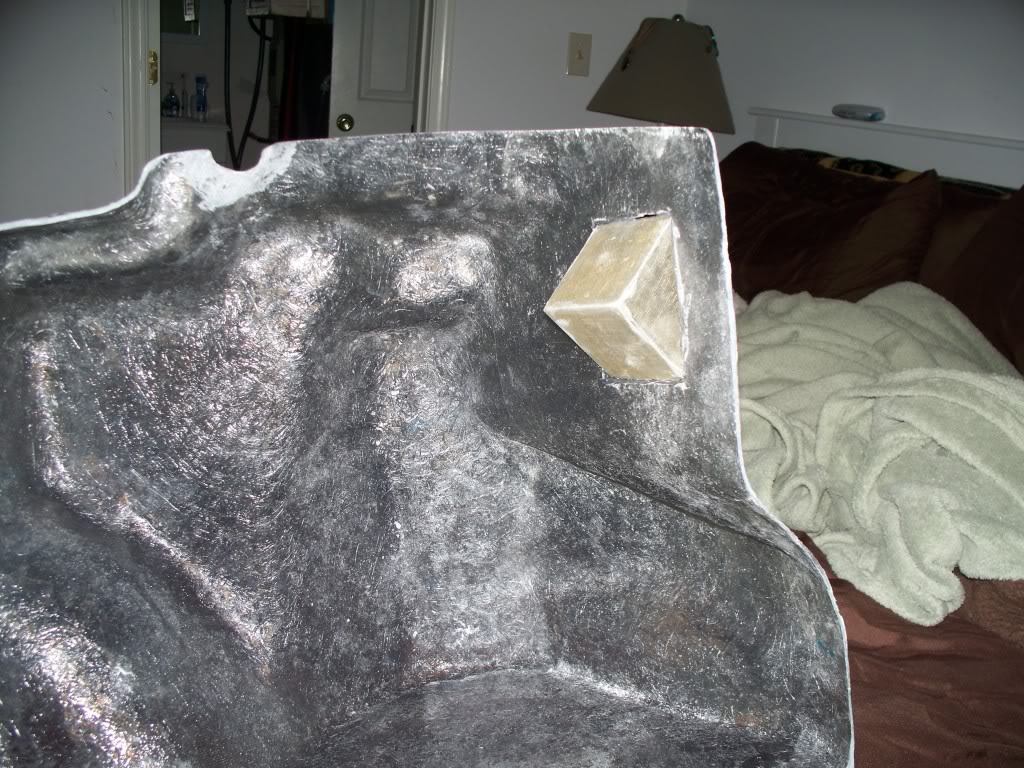
I did fab up a recessed speaker terminal void to mold into the box. I'm sure this sort of thing has been done, but I have not seen it done in any of the write-ups that I've viewed.
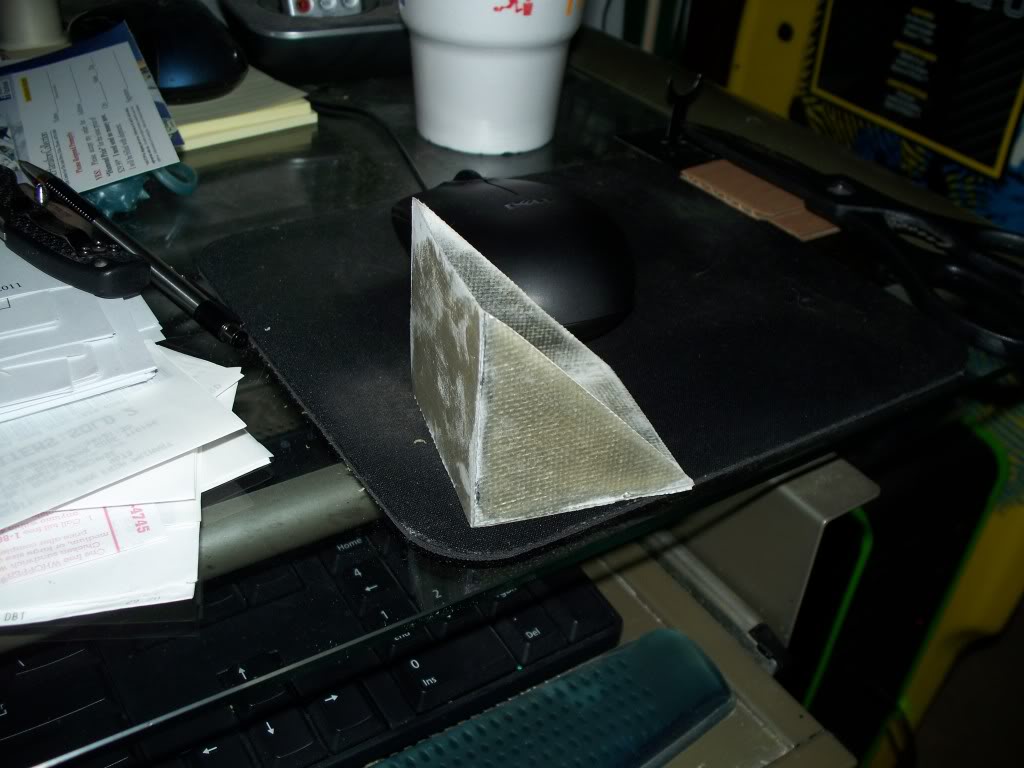
I'm pretty sure it's going right here.
or maybe here
That's the only updates for today. Thanks for viewing.
I did fab up a recessed speaker terminal void to mold into the box. I'm sure this sort of thing has been done, but I have not seen it done in any of the write-ups that I've viewed.
I'm pretty sure it's going right here.
or maybe here
That's the only updates for today. Thanks for viewing.


 03-27-2011, 10:32 AM
#19
Disco Biscuit
Thread Starter
Join Date: Aug 2008
Location: Palm Bay, FL
Posts: 116
Likes: 0
Received 0 Likes
on
0 Posts
Thanks Guys.
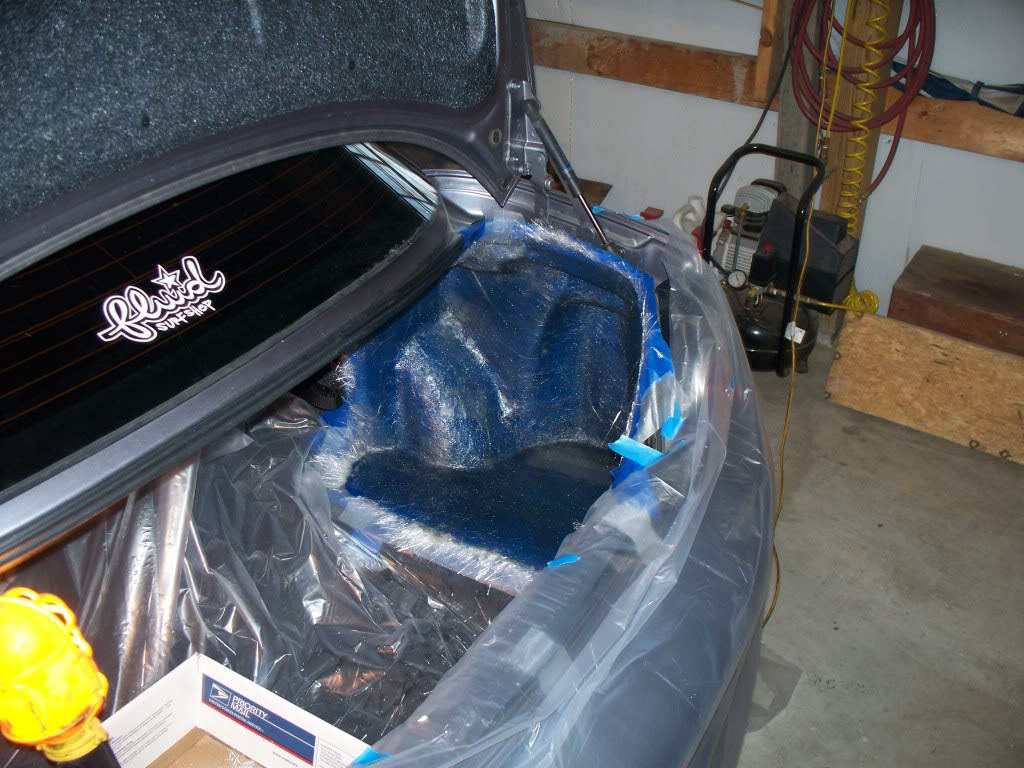
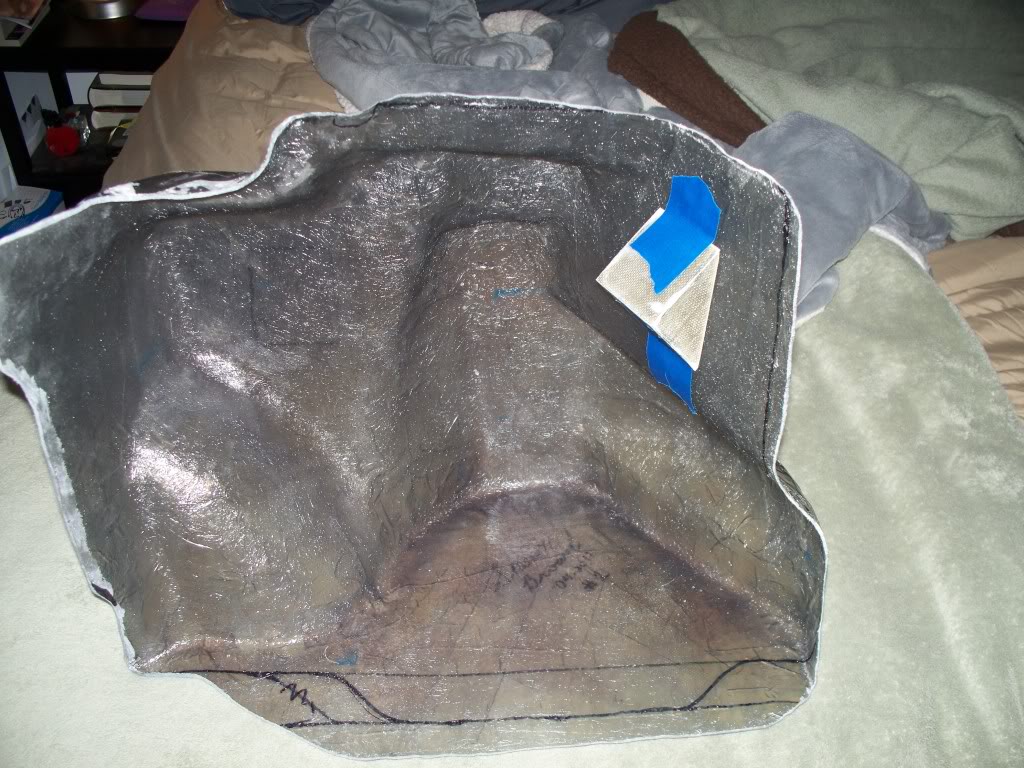
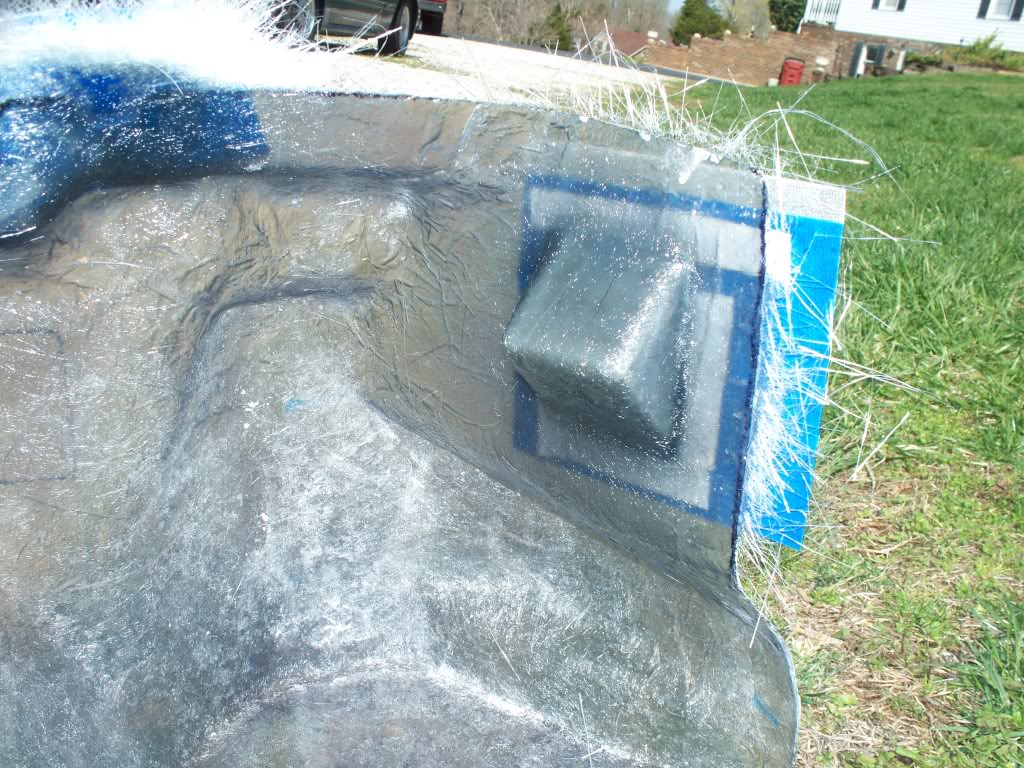
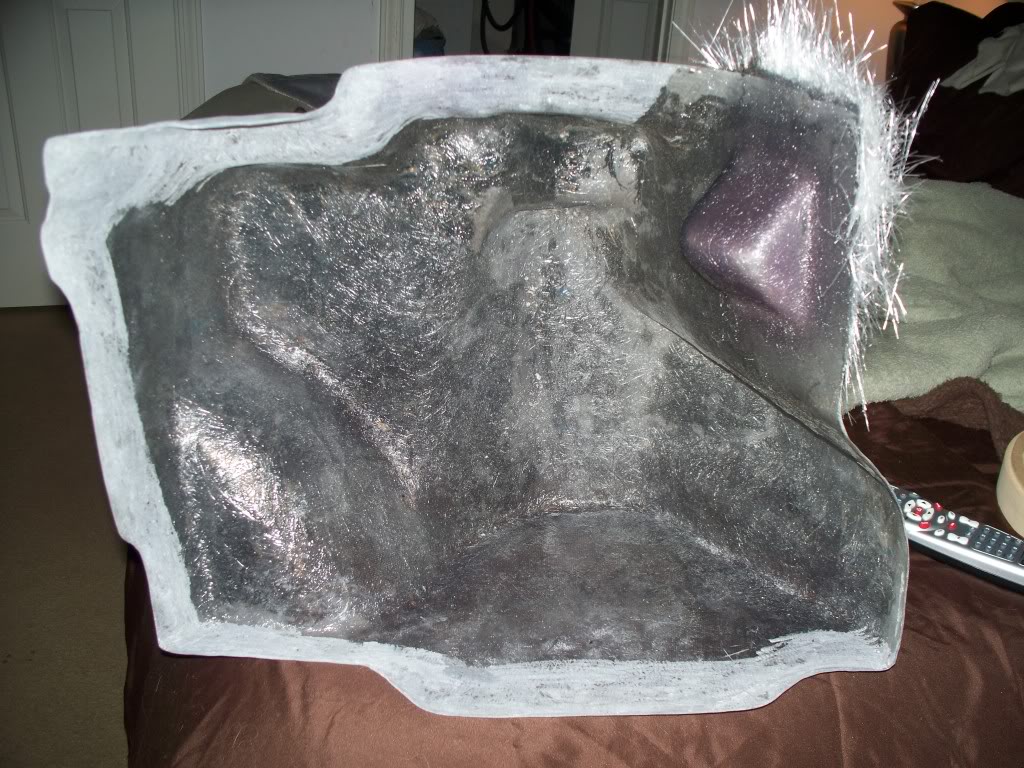
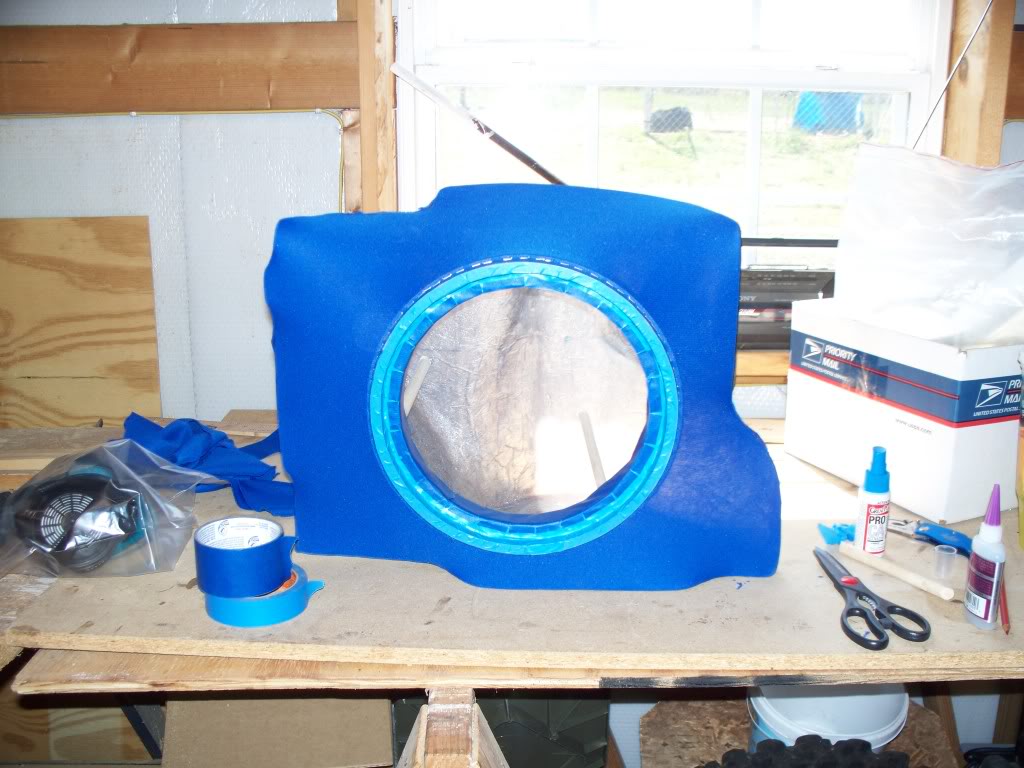
I've made a little progress. Weather is not being glass friendly; however, I did get some more trimming done, and the recessed terminal box glued into place awaiting some glass.
I've made a little progress. Weather is not being glass friendly; however, I did get some more trimming done, and the recessed terminal box glued into place awaiting some glass.
 04-02-2011, 04:03 PM
#22
Disco Biscuit
Thread Starter
Join Date: Aug 2008
Location: Palm Bay, FL
Posts: 116
Likes: 0
Received 0 Likes
on
0 Posts
Thanks guys I appreciate the encouragement.
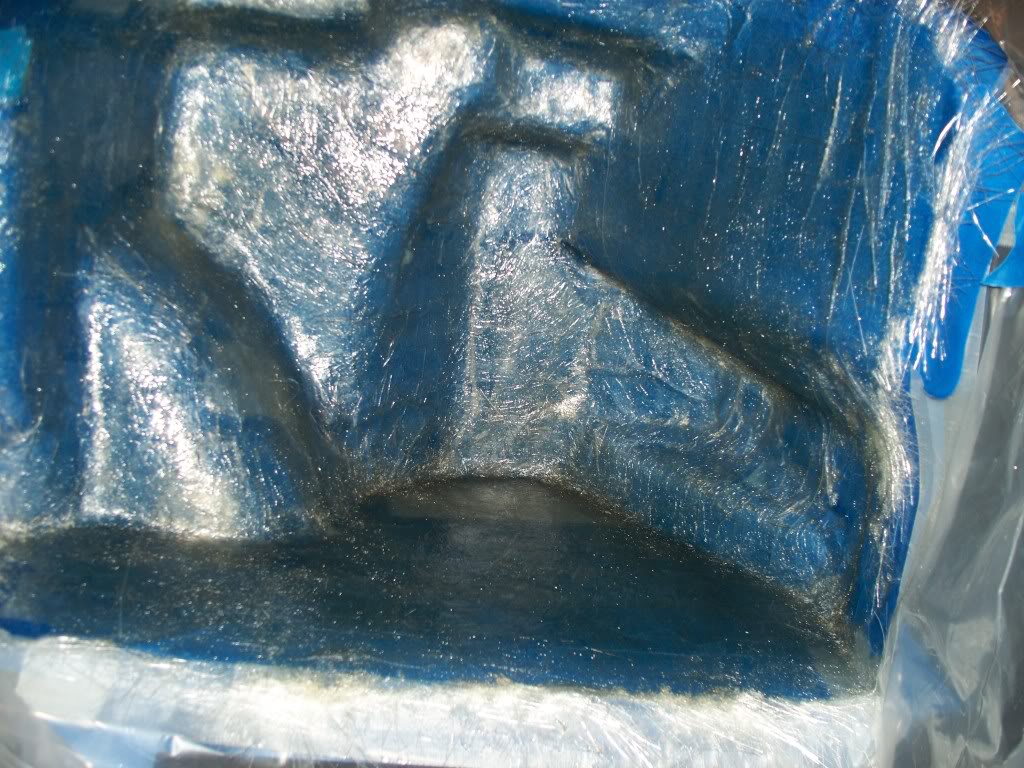
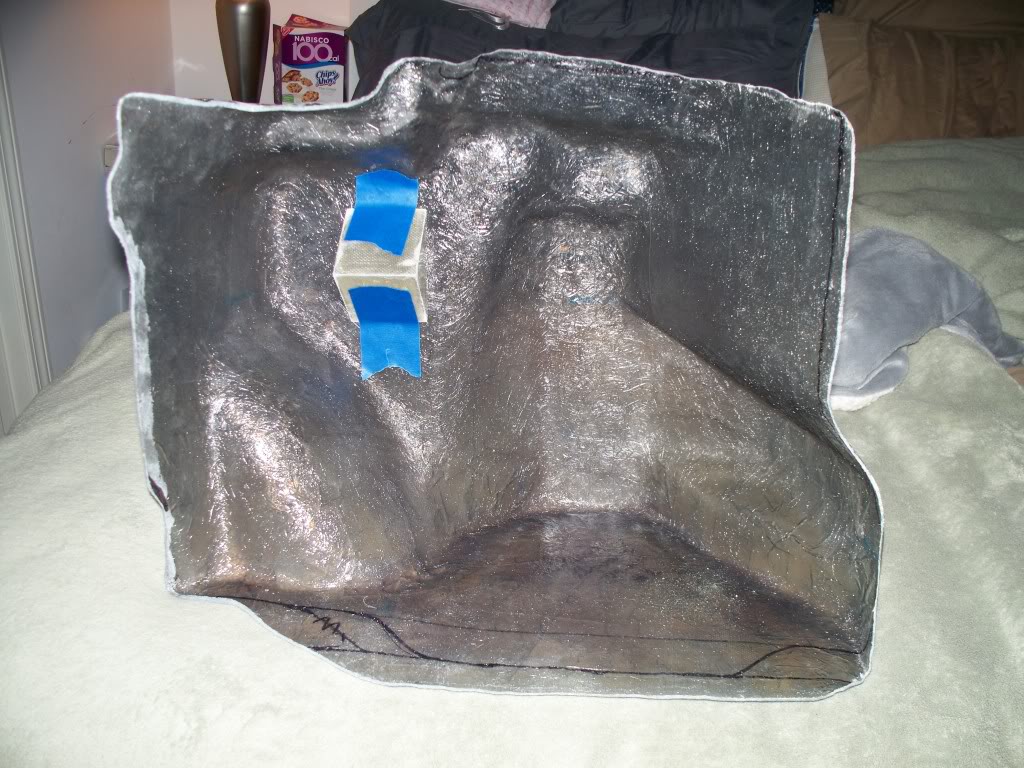
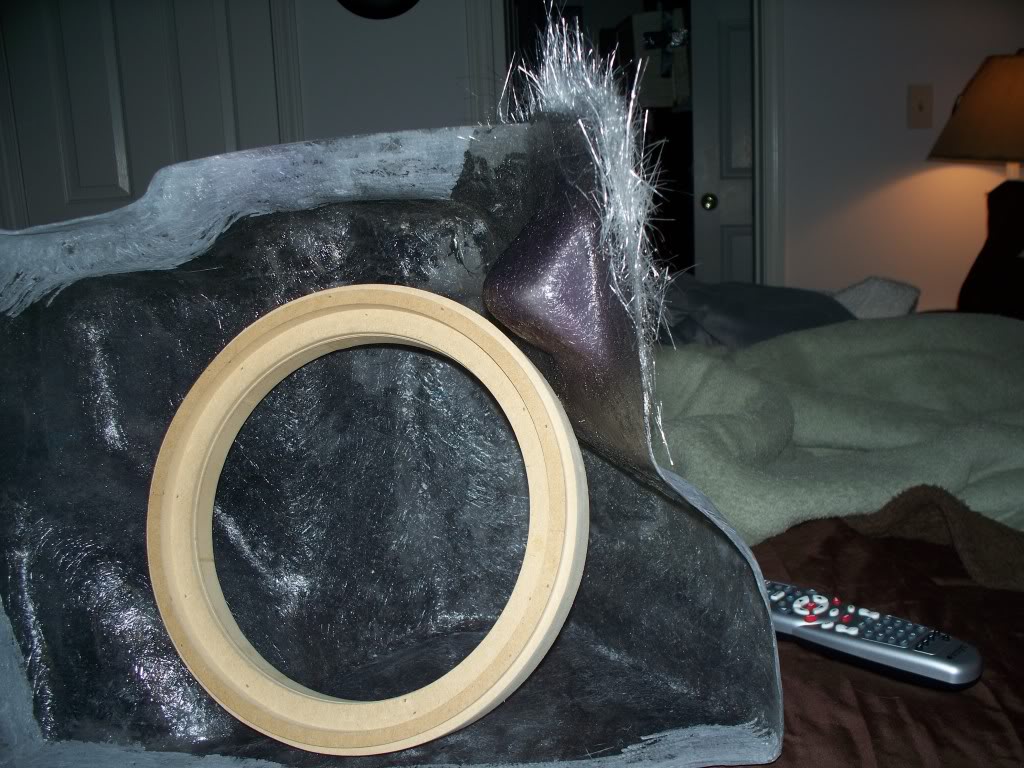
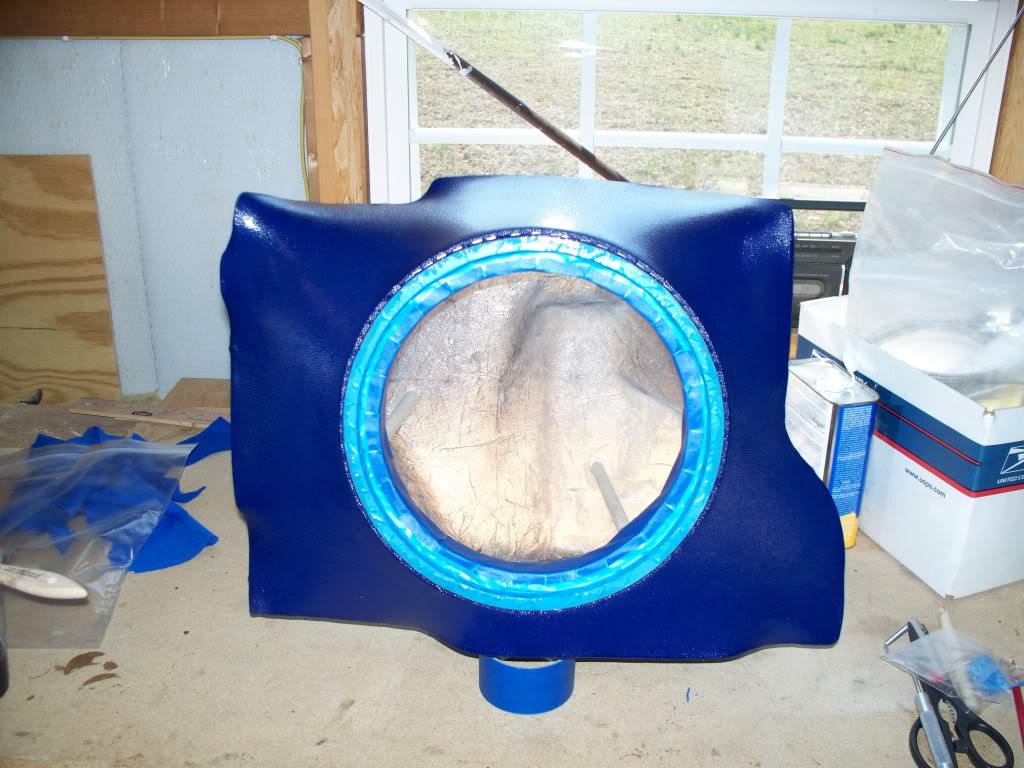
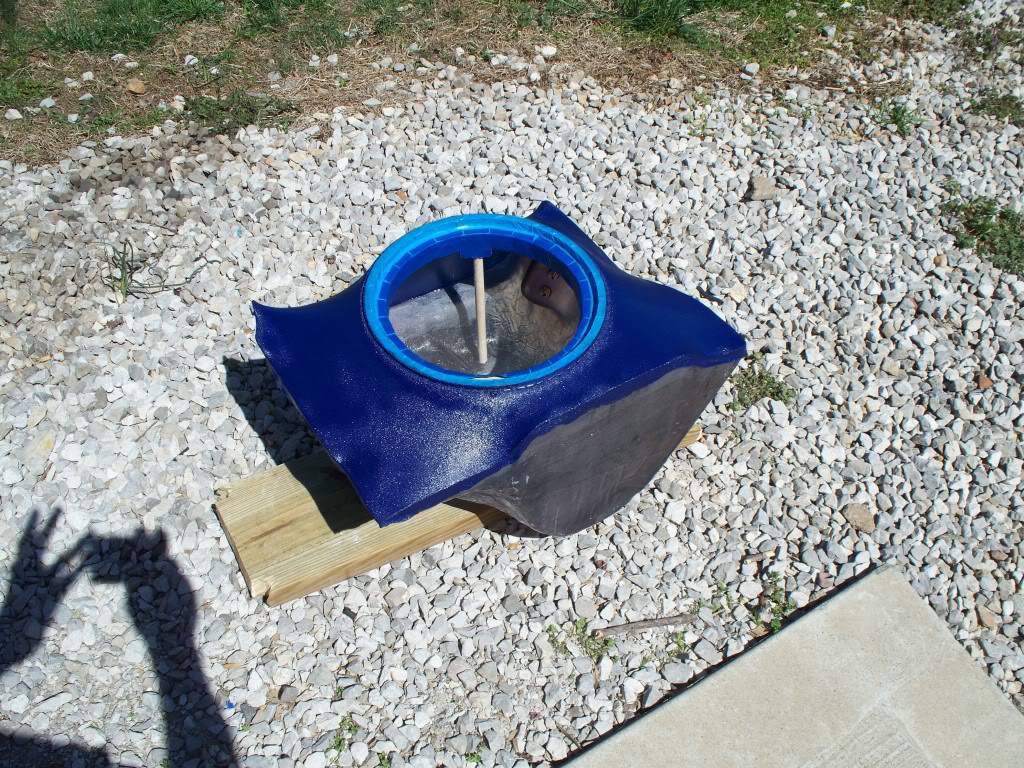
I made a little progress yesterday and today. Sanded out the plug in the terminal area, and got too happy and sanded 2 far in two spots. So this morning I layed 6-8 more layers to fix that.
While that was curing I went ahead and cut the speaker ring (it is not attached to the box yet, just posing it for the picture).
04-02-2011, 09:27 PM
#23
I zoom therefore I am.
the one flaw of the first time fiberglasser, trying to make it "too" perfect. I'm really enjoying seeing your progress with this. It's also great to see you embracing the learning curve.
Keep up the good work Lunchbox
Keep up the good work Lunchbox


 04-03-2011, 01:42 PM
#25
I zoom therefore I am.
went with 12 inch? that's going to be some serious bass!
One suggestion, mix some epoxy and loose strands then form a fillet around the dowels against the fiberglass and felt ends. With a 12 inch sub you dont want to run the risk of shaking them loose
Unless you already did this of course and i'm just blind
One suggestion, mix some epoxy and loose strands then form a fillet around the dowels against the fiberglass and felt ends. With a 12 inch sub you dont want to run the risk of shaking them loose
Unless you already did this of course and i'm just blind