Notices

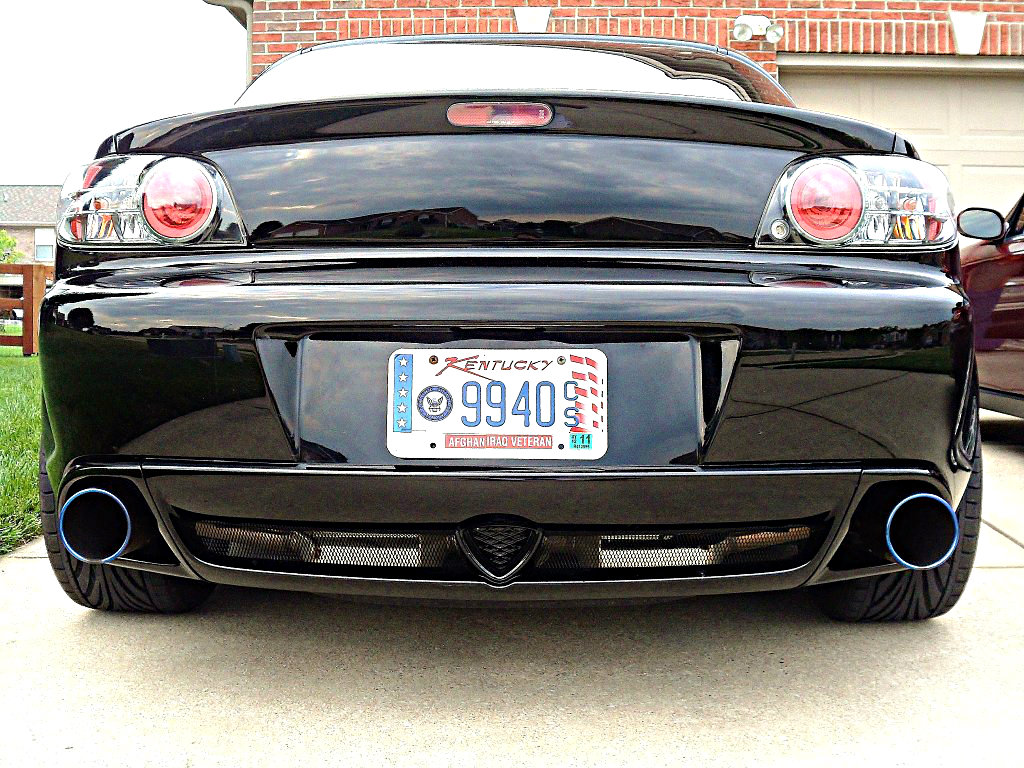
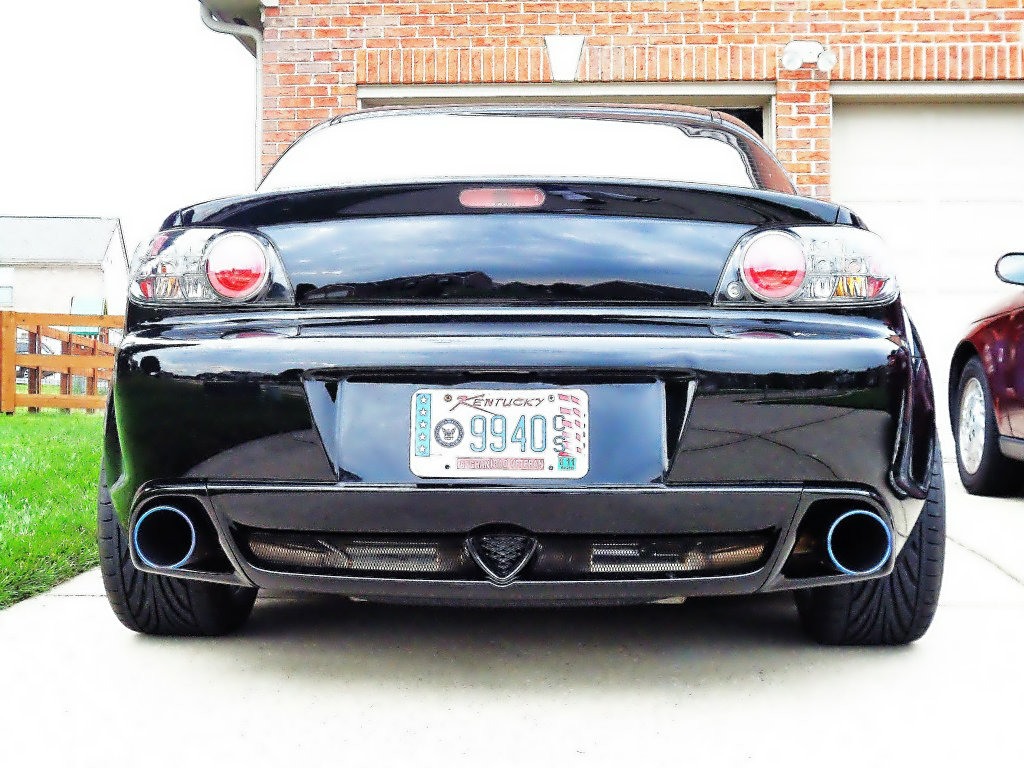
3 hr DIY rear bumper mod

Thread Tools
 
Rate Thread
 
Old Mar 26, 2009 | 06:30 AM
  #51  
Rotr8's Avatar
Thread Starter
whines all the way home
iTrader: (2)
 
Joined: Oct 2004
Posts: 7,402
Likes: 2
From: Towson/Baltimore, MD
Originally Posted by flip
How did you attach the grill to the bumper? Could you post close up shots? ... also, did you paint the whole lower part black -- along w/ the part by the plate?
There are three flanges that attatch the area that I ended up cutting away, I bent those down to keep some back pressure on the mesh, the mesh also tucks up and over the lip on the inside of the upper wall of the area around the hole, essentially the mesh is formed into an upsidedown L shape...

so far no problems with the bumper flexing or the mush falling out or moving around Ive been to 125mph with it in so far...

Last edited by Rotr8; Mar 26, 2009 at 11:23 AM.
Reply
Old Mar 26, 2009 | 11:13 AM
  #52  
L337fpc's Avatar
ლ(ಠ益ಠლ)
iTrader: (4)
 
Joined: Sep 2008
Posts: 2,368
Likes: 6
From: Franeke
very nice. I might have to do this with my WB...but i'll probably paint it blue.
Reply
Old Mar 26, 2009 | 08:57 PM
  #53  
marsredr100's Avatar
Registered User
iTrader: (1)
 
Joined: Jun 2007
Posts: 1,112
Likes: 0
From: Houston, TX
Originally Posted by flip
How did you attach the grill to the bumper? Could you post close up shots? ... also, did you paint the whole lower part black -- along w/ the part by the plate?
The left, right and center sections are held in place with Right Stuff gasket maker. I used some leftover foam pads I had to hold the mesh in place and with rubber gloves on I place dabs of Right Stuff around the perimeter. I let it sit overnight, removed the foam the next morning and it is strong enough to hold the mesh in place. I did not paint the bumper, just the mesh with Rustoleum flat black.
Reply
Old Mar 26, 2009 | 11:50 PM
  #54  
05rex8's Avatar
sold the 8... :(
iTrader: (7)
 
Joined: Feb 2008
Posts: 4,917
Likes: 0
I will do this as soon as I get off my lazy butt. I even have some mesh sitting in my garage left over from my front bumper.
Reply
Old Mar 27, 2009 | 08:38 AM
  #55  
Rotr8's Avatar
Thread Starter
whines all the way home
iTrader: (2)
 
Joined: Oct 2004
Posts: 7,402
Likes: 2
From: Towson/Baltimore, MD
do it , do it now...
Reply
Old Mar 27, 2009 | 11:11 AM
  #56  
L337fpc's Avatar
ლ(ಠ益ಠლ)
iTrader: (4)
 
Joined: Sep 2008
Posts: 2,368
Likes: 6
From: Franeke
i has a question... can the stock rear bumper be removed easily? I want to dye the faded trims soon and when I dye them, i'll do this mod. But i had some trouble finding any easy steps to removing the back bumper, mainly the black trim sections.
Reply
Old Mar 27, 2009 | 11:40 AM
  #57  
Rotr8's Avatar
Thread Starter
whines all the way home
iTrader: (2)
 
Joined: Oct 2004
Posts: 7,402
Likes: 2
From: Towson/Baltimore, MD
The trim pieces can be removed by themselves without removing the bumper, that would be the easiest way....
https://www.rx8club.com/showpost.php...40&postcount=2
Reply
Old Mar 27, 2009 | 11:56 AM
  #58  
L337fpc's Avatar
ლ(ಠ益ಠლ)
iTrader: (4)
 
Joined: Sep 2008
Posts: 2,368
Likes: 6
From: Franeke
yea but im concerned about the center part, between the 2 shrouds.
Reply
Old Mar 27, 2009 | 12:35 PM
  #59  
Rotr8's Avatar
Thread Starter
whines all the way home
iTrader: (2)
 
Joined: Oct 2004
Posts: 7,402
Likes: 2
From: Towson/Baltimore, MD
yeah that is connected to the bumper,,,
Ive removed the front dozens of times but never had to take off the rear...
Reply
Old Mar 27, 2009 | 01:52 PM
  #60  
SiLVeRE8's Avatar
a.k.a. WhITeRE8
iTrader: (8)
 
Joined: Apr 2005
Posts: 2,231
Likes: 0
From: Nor Cal *
I drilled tiny holes on the corners of the openings and just zip tied the mesh.
Reply
Old Mar 27, 2009 | 04:29 PM
  #61  
636's Avatar
636
Rice Police
 
Joined: Nov 2006
Posts: 654
Likes: 0
From: California
^ lol zip ties ftw >_>. Use sparingly , or else sooner or later your whole car will be held up by them lol...like my buddies 240sx...
Reply
Old Mar 27, 2009 | 07:47 PM
  #62  
SiLVeRE8's Avatar
a.k.a. WhITeRE8
iTrader: (8)
 
Joined: Apr 2005
Posts: 2,231
Likes: 0
From: Nor Cal *
hey they are strong as hell
Reply
Old Mar 30, 2009 | 12:32 PM
  #63  
firebirdude's Avatar
User and Abuser
iTrader: (3)
 
Joined: Nov 2006
Posts: 3,113
Likes: 9
From: Sunshine State
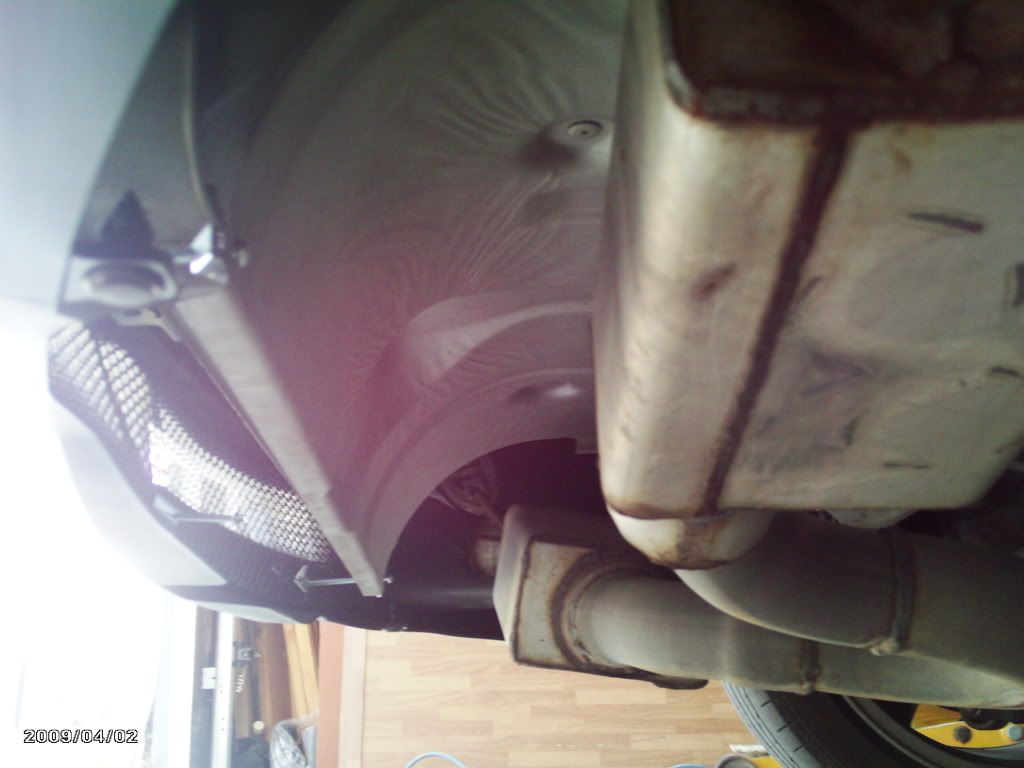
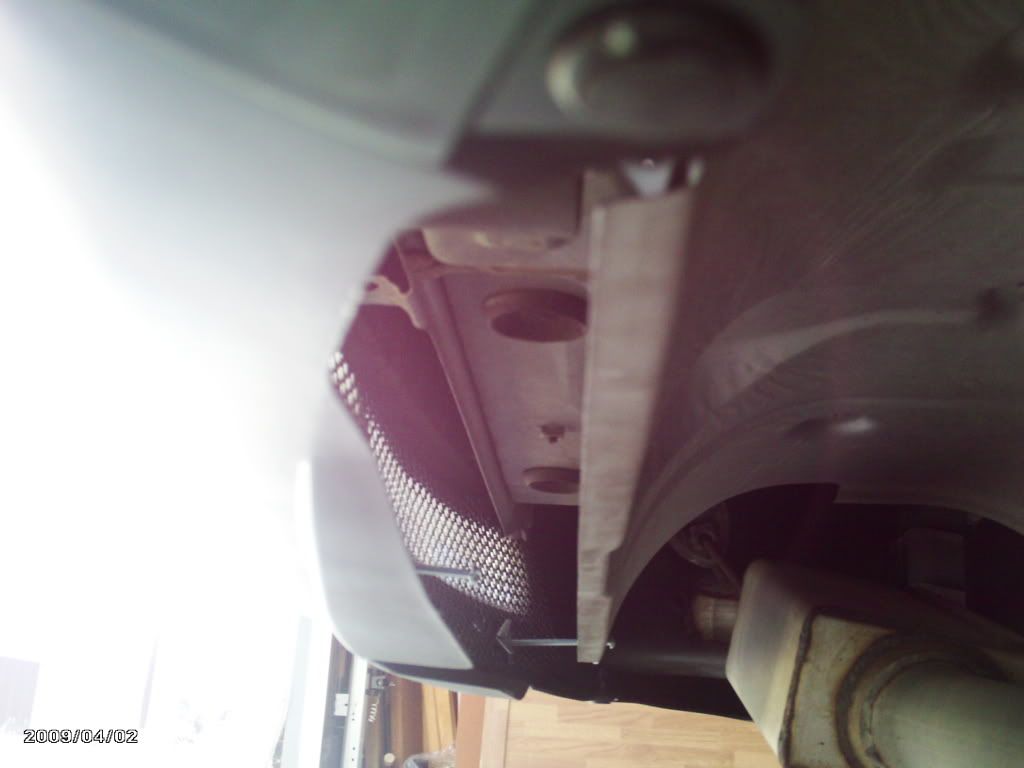
Does anyone have any, or can take some, pictures of how their mesh is secured to the car? Other than those who used zip ties? The folks who used the factory "connectors" back there..... I found them, but cannot see how this would work. So detailed pictures about how this all secures together who be MUCH appreciated. Just want to make sure everything is planned perfect before I start hacking away at my car. lol
Reply
Old Mar 30, 2009 | 02:34 PM
  #64  
Rotr8's Avatar
Thread Starter
whines all the way home
iTrader: (2)
 
Joined: Oct 2004
Posts: 7,402
Likes: 2
From: Towson/Baltimore, MD
those metal flanges are somewhat flexible I just bent them down so that they applied a good amount of pressure on the backside of the mesh I can take pics tonite maybe if its not rainin...
Reply
Old Mar 30, 2009 | 02:38 PM
  #65  
firebirdude's Avatar
User and Abuser
iTrader: (3)
 
Joined: Nov 2006
Posts: 3,113
Likes: 9
From: Sunshine State
Originally Posted by Rotr8
I can take pics tonite maybe if its not rainin...
If you would, I would be forever grateful. I just can't see how all this secures in place. How pressure is applied to what, how mesh ties to whatever, etc.
Reply
Old Mar 31, 2009 | 11:26 PM
  #66  
Daggoth's Avatar
Registered
 
Joined: Aug 2007
Posts: 23
Likes: 0
From: SoCal
I did same thing accept i painted my plastic and meshed the front to. All with no zip ties lol!

https://www.rx8club.com/west-rx-8-forum-34/painted-meshed-stock-bumpers-170409/
Reply
Old Mar 31, 2009 | 11:40 PM
  #67  
emmers's Avatar
Registered User
 
Joined: Sep 2008
Posts: 16
Likes: 0
From: Southern California
damn that looks very nice!
Reply
Old Apr 1, 2009 | 07:14 AM
  #68  
firebirdude's Avatar
User and Abuser
iTrader: (3)
 
Joined: Nov 2006
Posts: 3,113
Likes: 9
From: Sunshine State
Originally Posted by Daggoth
I did same thing accept i painted my plastic and meshed the front to. All with no zip ties lol!

https://www.rx8club.com/showthread.php?t=170409
So share how you affixed the mesh to the car! Pix for extra points!
Reply
Old Apr 1, 2009 | 07:17 AM
  #69  
bse50's Avatar
#50
 
Joined: Nov 2007
Posts: 7,521
Likes: 11
From: Caput Mundi
Rotr8 i have done your same mod and removed the exhaust heatshields as well.
While moving hot air will come out of the real grille so now go and reduce your car's weight!
Reply
Old Apr 1, 2009 | 08:19 AM
  #70  
Rotr8's Avatar
Thread Starter
whines all the way home
iTrader: (2)
 
Joined: Oct 2004
Posts: 7,402
Likes: 2
From: Towson/Baltimore, MD
yeah I was thinking about crimping the heat shield so that it leads to the openings I dont want to remove it entirely my trunk gets warm enough as is,,,
Reply
Old Apr 2, 2009 | 05:53 PM
  #71  
Daggoth's Avatar
Registered
 
Joined: Aug 2007
Posts: 23
Likes: 0
From: SoCal
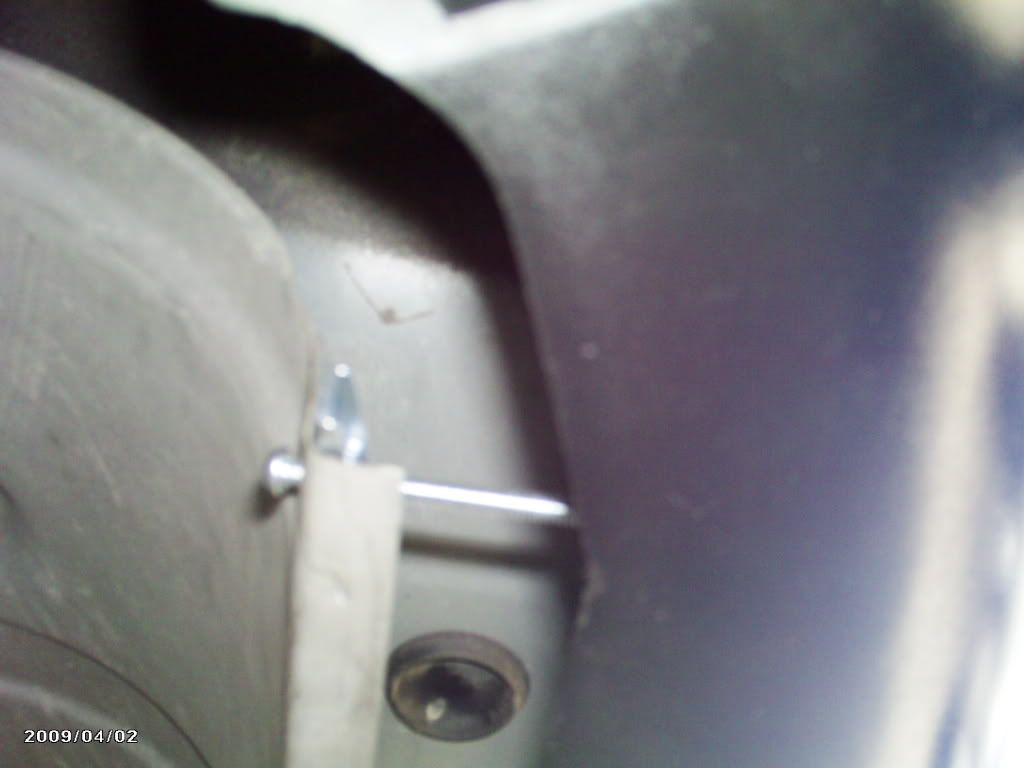
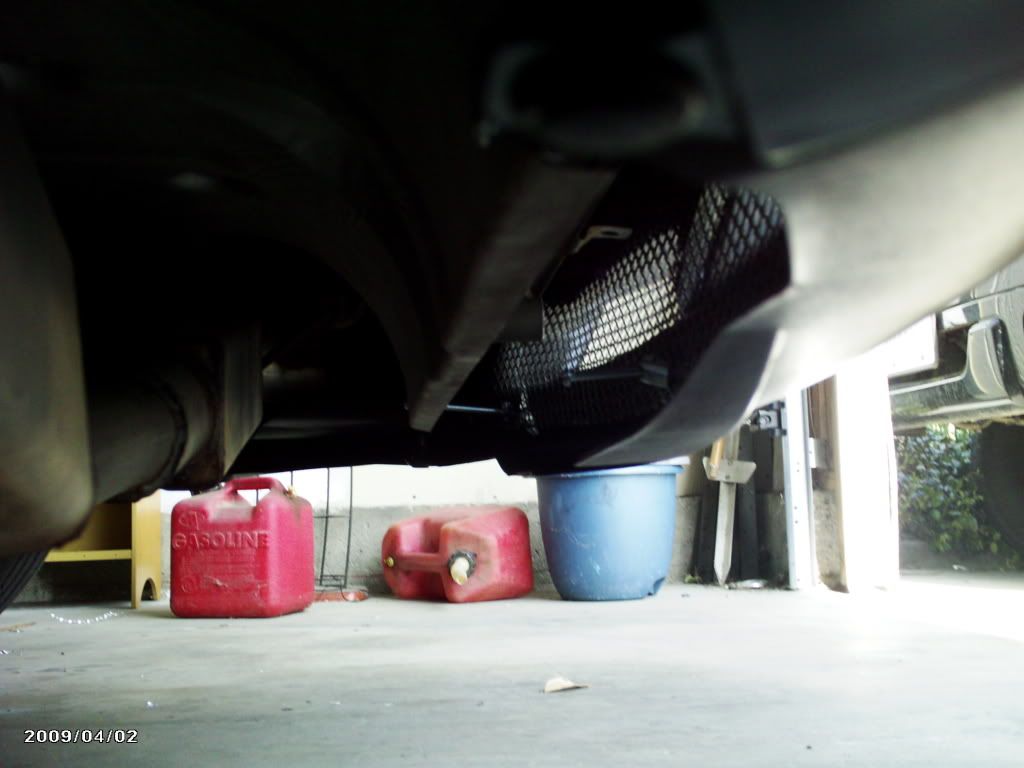
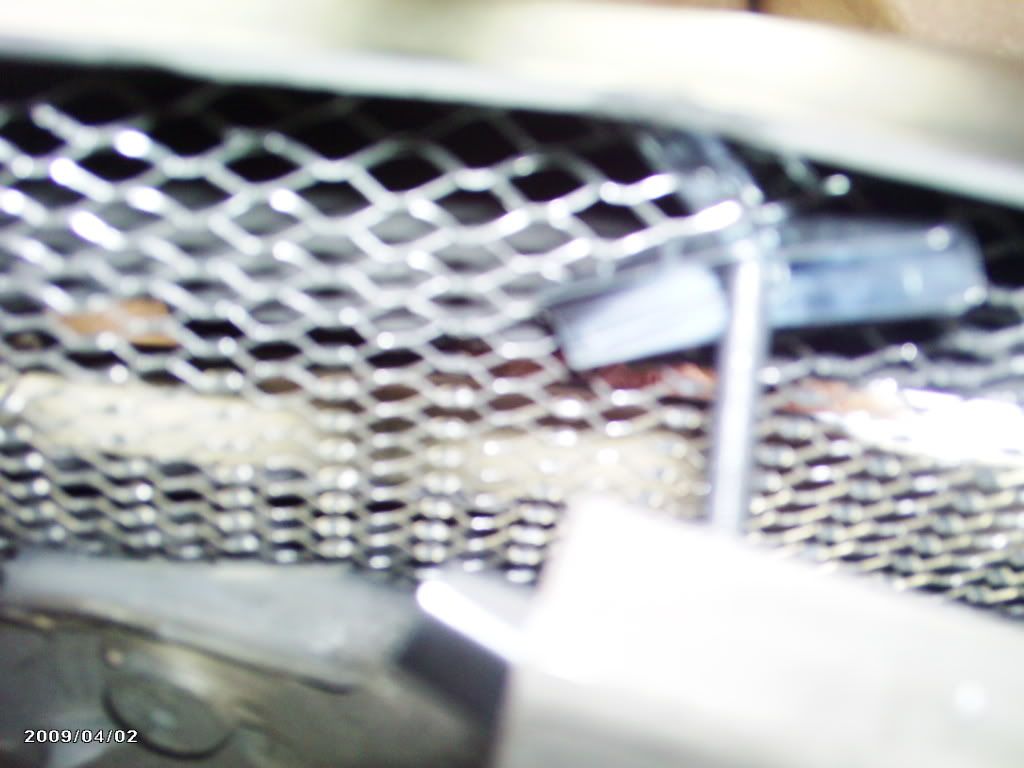
I drilled two 3/16 holes on the bottom corners of the heat shield and used toggle bolts to hold the mesh 3 toggle nuts on each side. One securing the bolt to the heat shield and one on each side of the mesh to hold it in place. The top is hanging from the old thin metal brackets that were used to hold the plastic mesh piece i cut in place. Then I cut holes in the mesh the width of the brackets and bent the brackets up at about a 45 then hung the mesh there. The toggle bolts pull the mesh down holding it in place. Here are pics


Hope this helps if you have anymore questions feel free to PM me or just reply.

Last edited by Daggoth; Apr 2, 2009 at 05:55 PM.
Reply
Old Apr 2, 2009 | 06:03 PM
  #72  
Rotr8's Avatar
Thread Starter
whines all the way home
iTrader: (2)
 
Joined: Oct 2004
Posts: 7,402
Likes: 2
From: Towson/Baltimore, MD
cool thanks for adding,,,, good job...
Reply
Old Jun 6, 2012 | 12:50 PM
  #73  
brilliantblackrx8's Avatar
Registered
 
Joined: Jul 2007
Posts: 669
Likes: 1
Here's my HD gutter screen. I used bonding putty and wrapped them tight around the openings.

Name:  SAM_0234.jpg
Views: 2756
Size:  255.4 KB
Name:  SAM_0233.jpg
Views: 5209
Size:  210.9 KB
Reply
Old Jun 6, 2012 | 12:59 PM
  #74  
Rotr8's Avatar
Thread Starter
whines all the way home
iTrader: (2)
 
Joined: Oct 2004
Posts: 7,402
Likes: 2
From: Towson/Baltimore, MD
Nice...
Reply
Old Jun 6, 2012 | 01:04 PM
  #75  
9krpmrx8's Avatar
SARX Legend
iTrader: (46)
 
Joined: Jan 2007
Posts: 33,788
Likes: 462
From: San Antonio, Texas
Nice. I need to paint the black portion of my rear bumper and do this.
Reply


You have already rated this thread Rating: Thread Rating: 0 votes,  average.


All times are GMT -5. The time now is 06:23 PM.