
DIY: Shift Boot Change


Thread Starter
Vegas rx8!
Joined: Mar 2007
Posts: 1,286
Likes: 0
From: Las Vegas
DIY: Shift Boot Change
**pictures don't seem to work so just click on the links for the pictures**(maybe too many pics in 1 post)
Hey guys, I recently bought a red CF boot with black stitching from shiftstyle. His company makes some awesome shift boots that have top-notch quality. On a scale of 1-10 of difficulty, I would give this a 3 or so. I'd give it a three because of 2 reasons.
1. Because 1 of the clips to remove the center console is very difficult to take off, and it breaks very easily. So be very careful!
2. Because matching up the holes can be a bit hairy. Just be patient
None the less, this install should take you 15-30 mins depending on how long it takes you to get the center console removed at the beginning.
tools required:
1. Flathead screw driver
2. Super glue
3. Patience
Step 1.
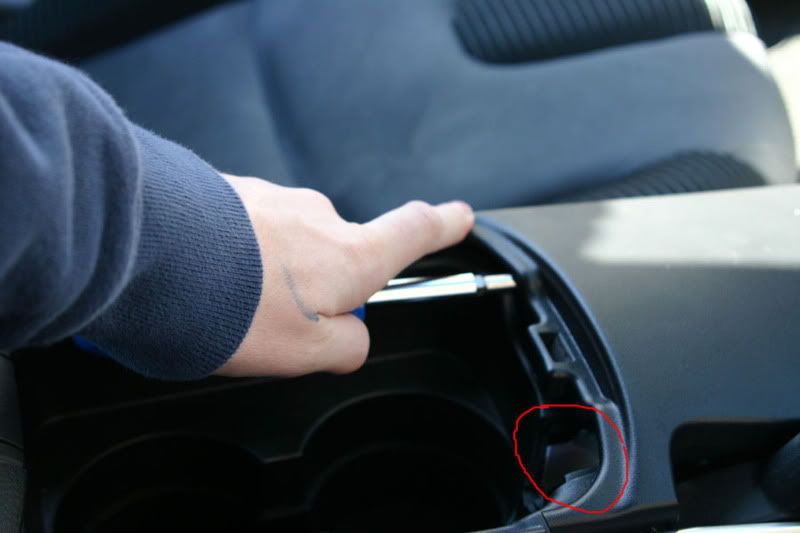
First remove your shift ****. The shift **** just unscrews counterclockwise. Then you need to take out the removable panel on the right side of the cup holders. It can simply be pried out with your fingernails and your screwdriver. (circled in red)
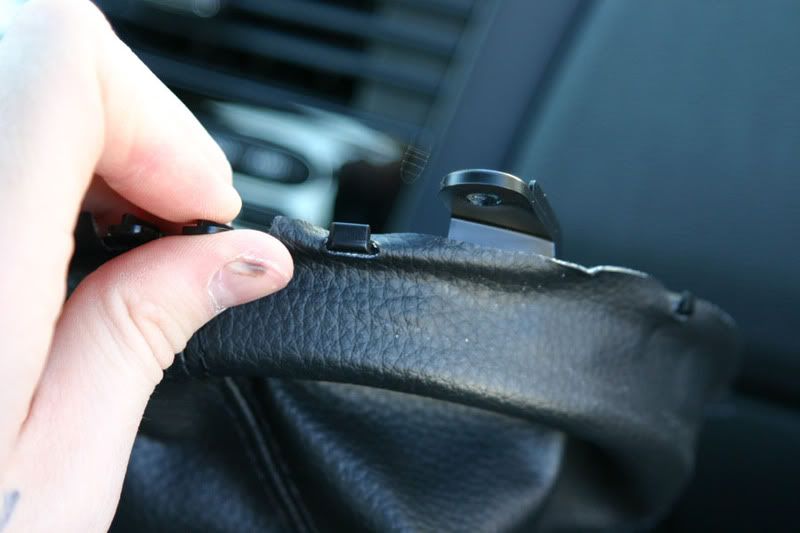
Then you need to proceed to lift up the edge of the panel with the screwdriver as pictured. Be careful not to scratch the plastic. You will hear a pop when the clip that holds down the left corner releases, just pull up to release.
Step 2:
Next insert your thumb through the hole that was created when you removed the small panel with your fingers and screwdriver. This hole is pictured in red. Then put your index finger in the hole just on top of the E-brake handle. The green circle represents where the clip will be that needs to be pressed in order to release that corner. Be careful this clip easily breaks!
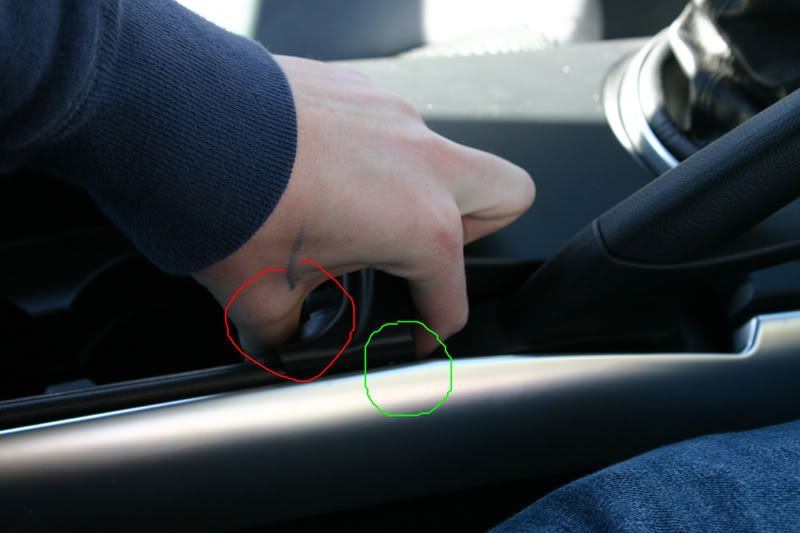
This is the dreaded clip that i was talking about.
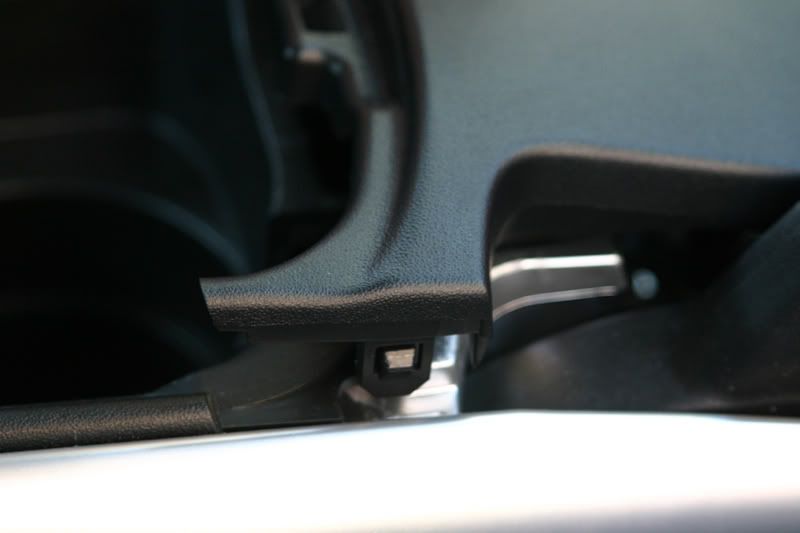
Step 3:
continue to simply lift up the center console carefully. This will release the last 2 clips.
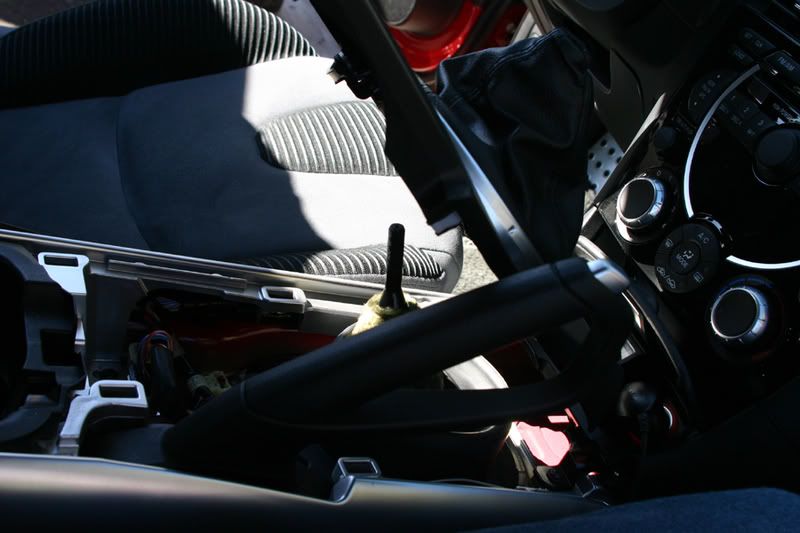
This is what under the center panel looks like.
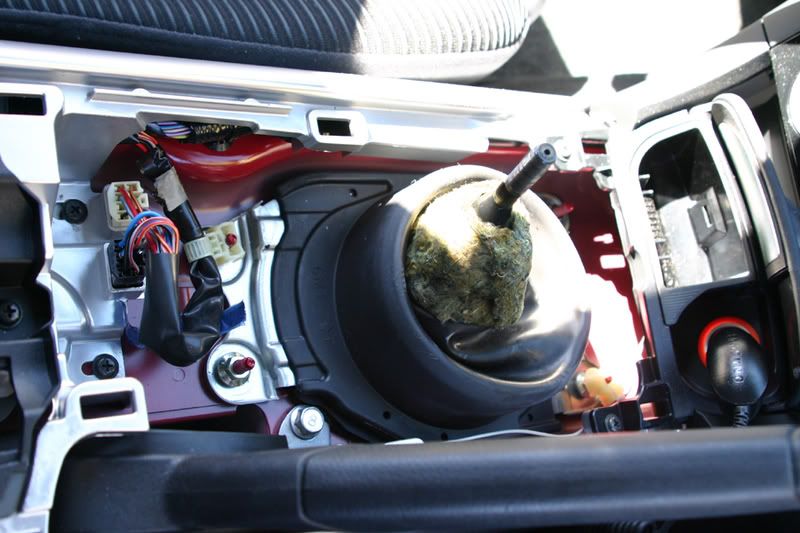
This is what under the plastic center panel looks like.
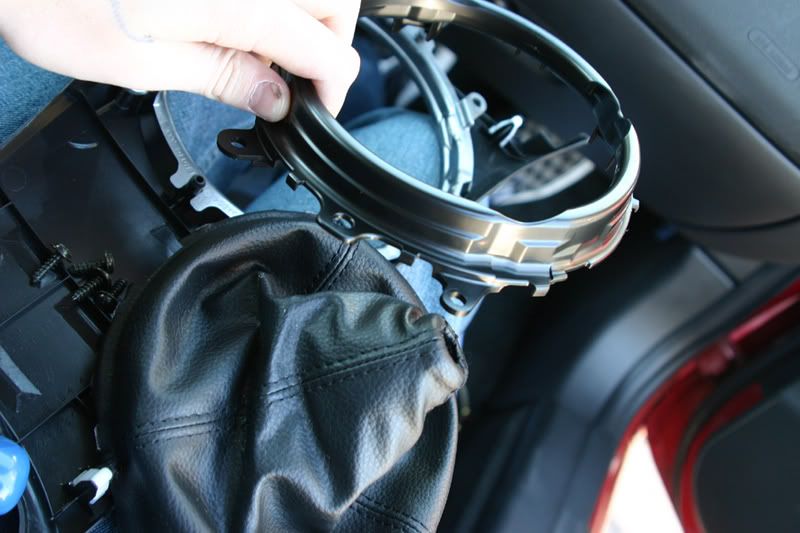
Step 4:
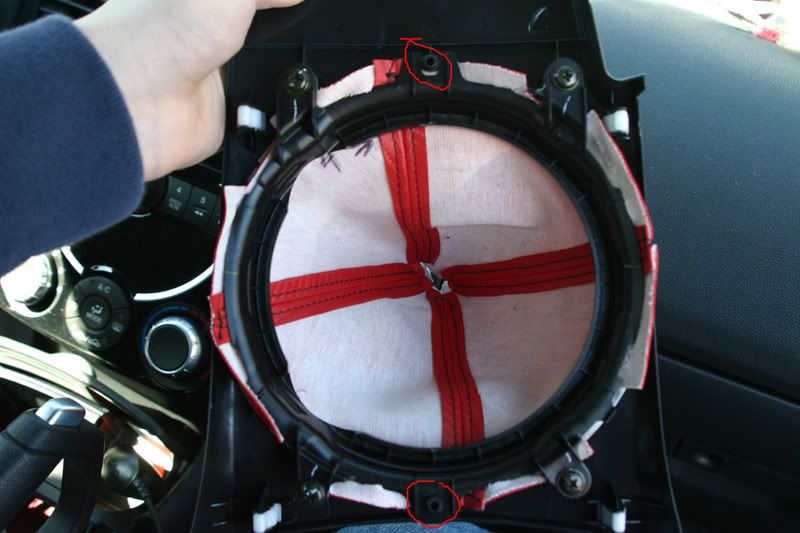
Remove the screws marked in red.
Remove after all screws are taken out
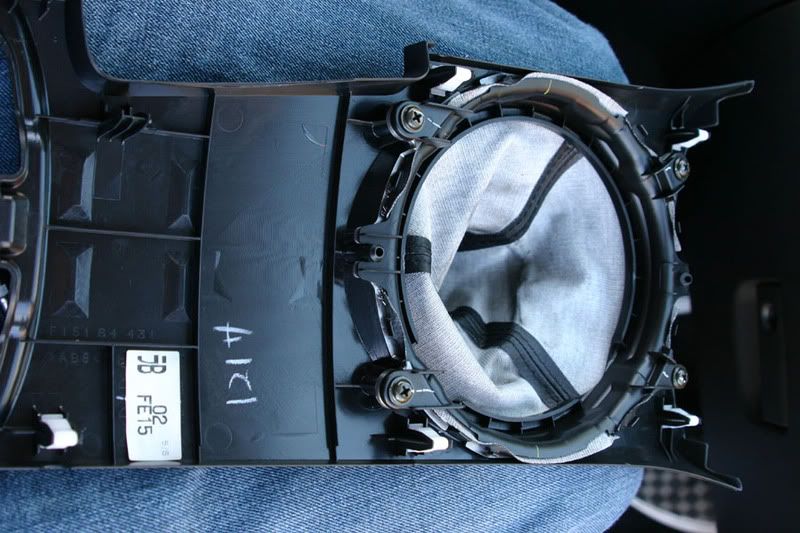
Step 5:
Remove all these clips around the stock boot
should come off like this
Step 6:
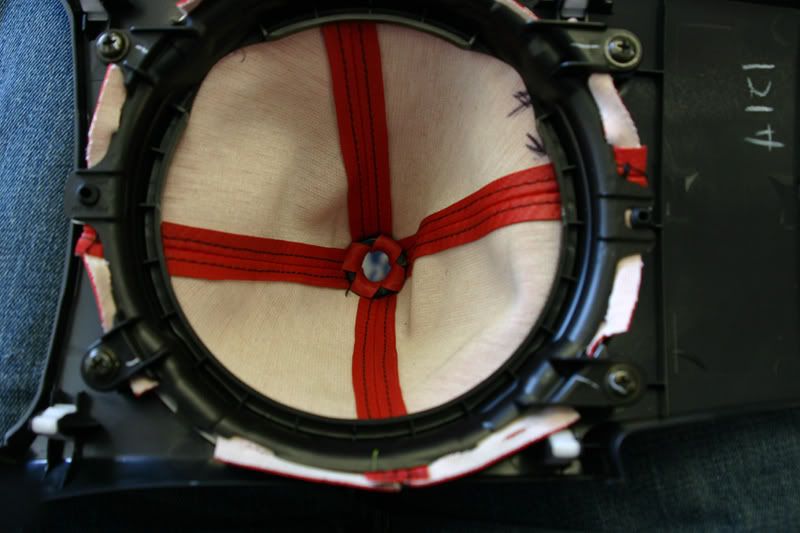
Match up the slits cut out (green lines) as best your can with the screw holes (outlined in red)
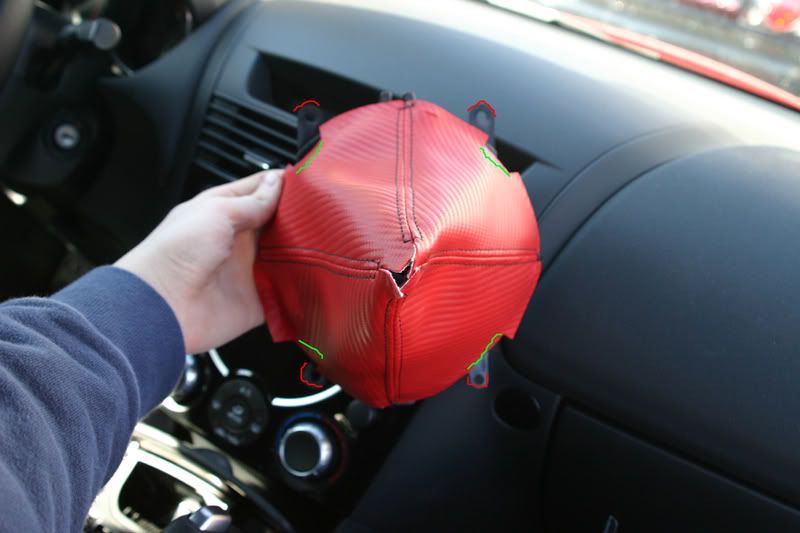
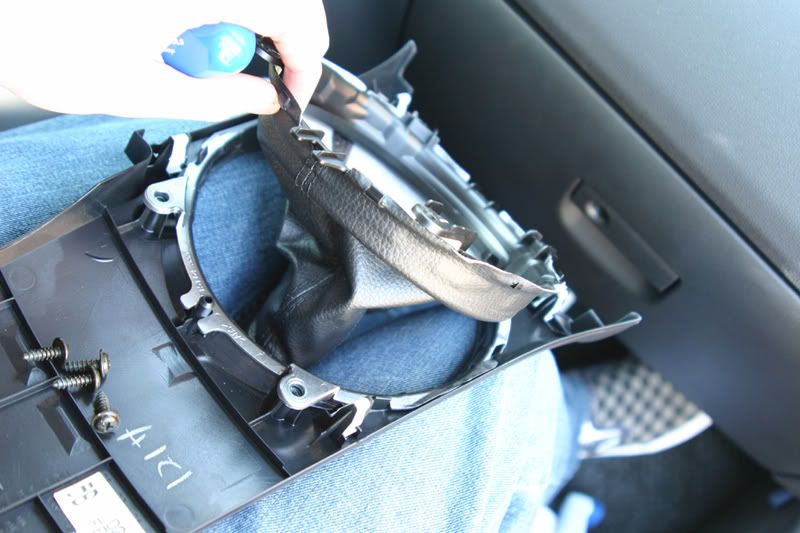
Step 7:
Match up the clips as best your can with the holes in the boot
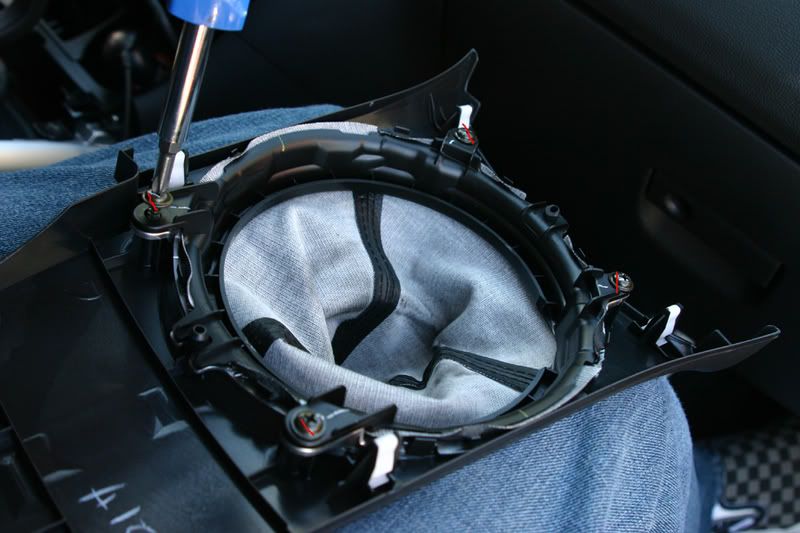
Step 8:
Screw it back into the circle and it should look like this. Make sure to move the fabric away from the pieces marked in red.
Step 9:
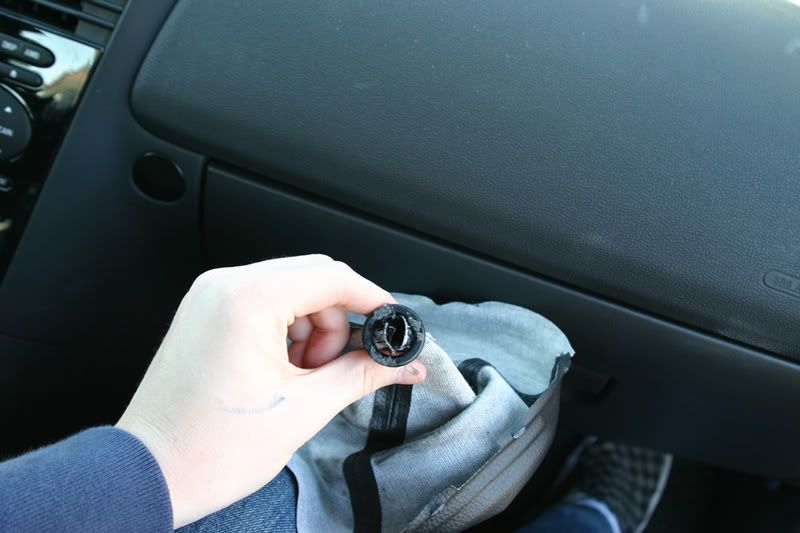
Now pick up the old shift boot and turn it inside out. There should be a black ring on the top of it. The stock shift boot is super glued onto the ring, simply use your hands and pry off the ring.

Step 10:
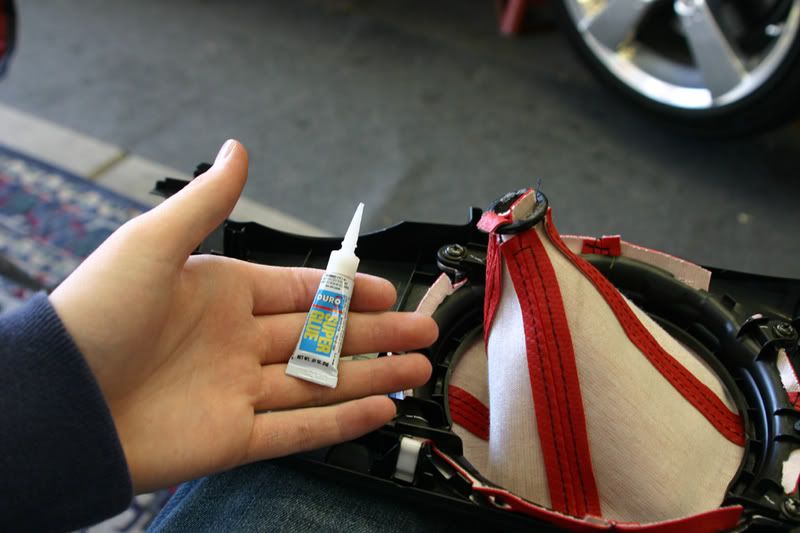
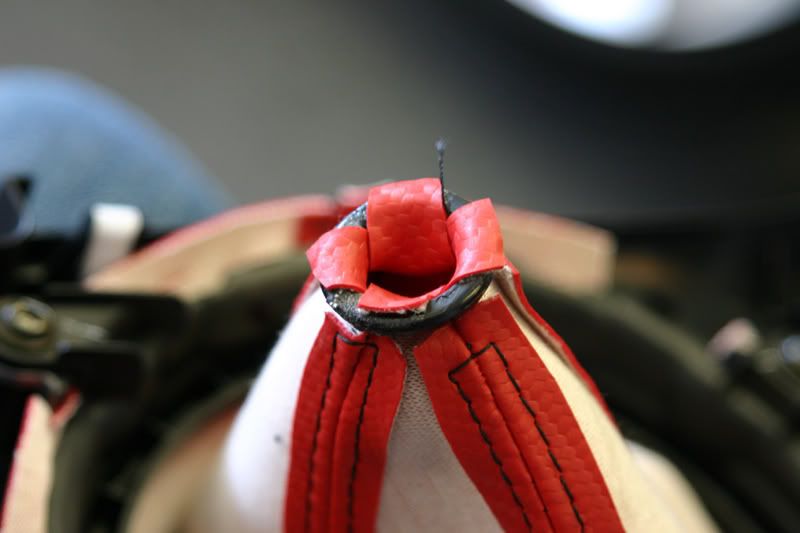
Invert your new shift boot and grab some super glue. Then Glue your tabs onto the black ring as shown. Pull all the shift boot tabs tight, it will make it look like it belongs there.
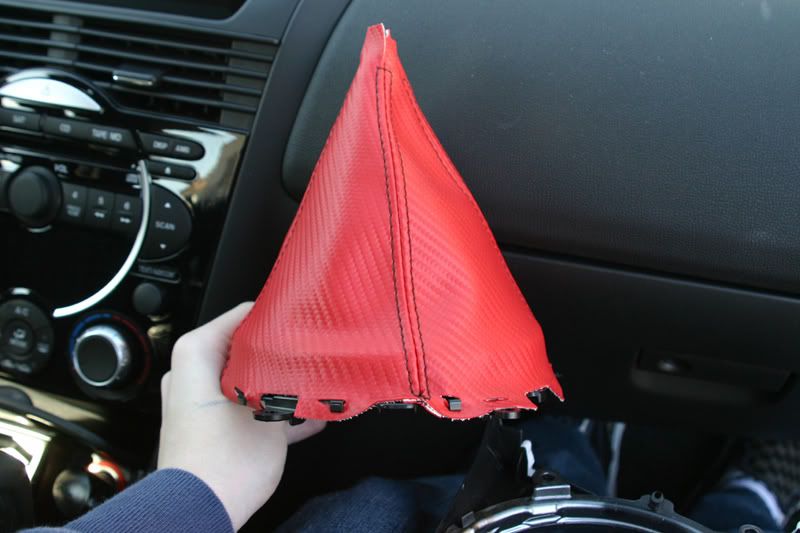
Step 11:
Once it is glued on, invert it again so it is the way it is supposed to be.
Looks great!
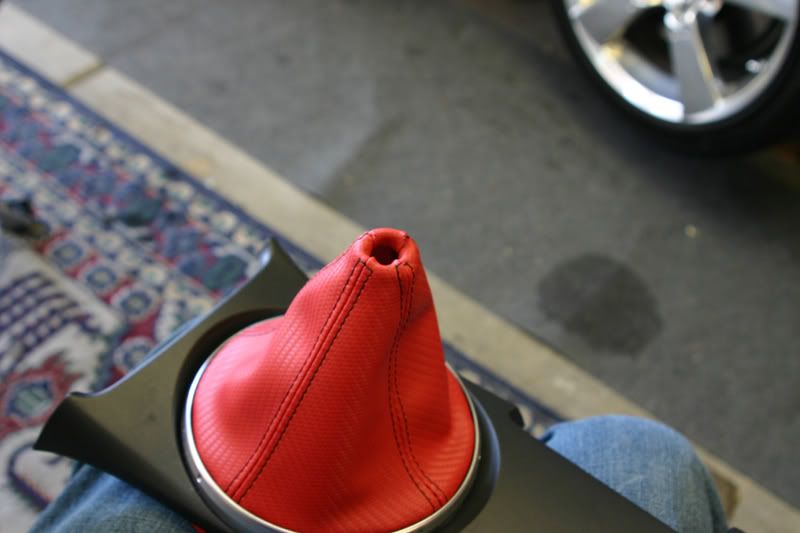
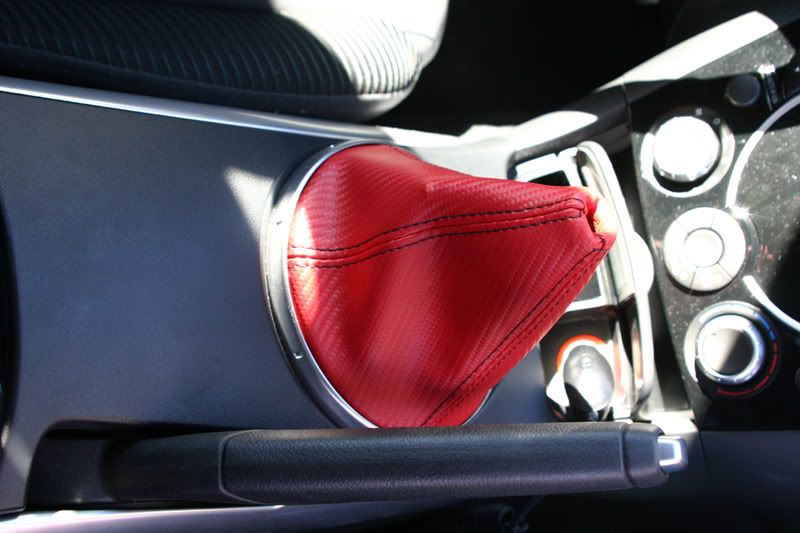
Step 12:
Simply place the panel back in the car and screw on your shift ****. It will look fantastic!

Sorry for the wordy post, but I'd rather give too much information than too little.
**pictures don't seem to work, so just click on the links for the pictures**(maybe too many pics in 1 post)
Hey guys, I recently bought a red CF boot with black stitching from shiftstyle. His company makes some awesome shift boots that have top-notch quality. On a scale of 1-10 of difficulty, I would give this a 3 or so. I'd give it a three because of 2 reasons.
1. Because 1 of the clips to remove the center console is very difficult to take off, and it breaks very easily. So be very careful!
2. Because matching up the holes can be a bit hairy. Just be patient
None the less, this install should take you 15-30 mins depending on how long it takes you to get the center console removed at the beginning.
tools required:
1. Flathead screw driver
2. Super glue
3. Patience
Step 1.
First remove your shift ****. The shift **** just unscrews counterclockwise. Then you need to take out the removable panel on the right side of the cup holders. It can simply be pried out with your fingernails and your screwdriver. (circled in red)
Then you need to proceed to lift up the edge of the panel with the screwdriver as pictured. Be careful not to scratch the plastic. You will hear a pop when the clip that holds down the left corner releases, just pull up to release.
Step 2:
Next insert your thumb through the hole that was created when you removed the small panel with your fingers and screwdriver. This hole is pictured in red. Then put your index finger in the hole just on top of the E-brake handle. The green circle represents where the clip will be that needs to be pressed in order to release that corner. Be careful this clip easily breaks!
This is the dreaded clip that i was talking about.
Step 3:
continue to simply lift up the center console carefully. This will release the last 2 clips.
This is what under the center panel looks like.
This is what under the plastic center panel looks like.
Step 4:
Remove the screws marked in red.
Remove after all screws are taken out
Step 5:
Remove all these clips around the stock boot
should come off like this
Step 6:
Match up the slits cut out (green lines) as best your can with the screw holes (outlined in red)
Step 7:
Match up the clips as best your can with the holes in the boot
Step 8:
Screw it back into the circle and it should look like this. Make sure to move the fabric away from the pieces marked in red.
Step 9:
Now pick up the old shift boot and turn it inside out. There should be a black ring on the top of it. The stock shift boot is super glued onto the ring, simply use your hands and pry off the ring.
Step 10:
Invert your new shift boot and grab some super glue. Then Glue your tabs onto the black ring as shown. Pull all the shift boot tabs tight, it will make it look like it belongs there.
Step 11:
Once it is glued on, invert it again so it is the way it is supposed to be.
Looks great!
Step 12:
Simply place the panel back in the car and screw on your shift ****. It will look fantastic!
Sorry for the wordy post, but I'd rather give too much information than too little.
**pictures don't seem to work, so just click on the links for the pictures**(maybe too many pics in 1 post)
Last edited by ivory8; Mar 2, 2008 at 10:52 PM.


Thread Starter
Vegas rx8!
Joined: Mar 2007
Posts: 1,286
Likes: 0
From: Las Vegas


Registered User
Joined: Jan 2008
Posts: 196
Likes: 0

Registered User
Joined: Jan 2008
Posts: 196
Likes: 0
Thread Starter
Vegas rx8!
Joined: Mar 2007
Posts: 1,286
Likes: 0
From: Las Vegas
cf stuff is actually a stamped/molded pattern on a durable rubbery type stuff. even from a foot away it looks like real red cf but, when you feel it you know its not. i didn't want the suede because i thought it would look funny in my car. but to each their own.


Registered
Joined: Jan 2007
Posts: 248
Likes: 0
From: Eureka, California
haha yeah i had this pretty neato Krew stamped material, i always carried it in my car, so after i figured out how to take apart the shift boot i stitched it onto the actually shift boot, looks pretty nice. haha. it wasnt very hard and i didnt ruin anything so if i wanted to undo it it wouldnt be hard.

♥'s racing beat
Joined: Apr 2007
Posts: 176
Likes: 1
From: jersey, BITCH
haha yeah i had this pretty neato Krew stamped material, i always carried it in my car, so after i figured out how to take apart the shift boot i stitched it onto the actually shift boot, looks pretty nice. haha. it wasnt very hard and i didnt ruin anything so if i wanted to undo it it wouldnt be hard.
Registered
Joined: Jan 2007
Posts: 248
Likes: 0
From: Eureka, California
ok so these shhould be the pics.. haha you can can see my Razo shift ****,nitto phone holder thing, and my cool saint christopher and lil cross thing i have around my shifter too.
hope you like.
hope you like.
Registered
Joined: Jan 2007
Posts: 248
Likes: 0
From: Eureka, California
thakns glad you guys like... i know that the pattern isnt the best matchignf ro the car, but hey i had to try it with something.. haha. its only took like three or four trys to get the fitment right..

anti-bandwagon
Joined: Mar 2006
Posts: 160
Likes: 0
From: Diamond Bar, CA
um... some of you guys might have better luck with not matching the 4 slots with the four screw tabs and instead following the oem pattern and matching just 2 of the slots on the shift boot with those two things sticking out of the frame. (by those "two things sticking out of the frame" i am referring to the only other things sticking out of the circle that aren't screw tabs.)
Registered
Joined: Jan 2007
Posts: 248
Likes: 0
From: Eureka, California
um... some of you guys might have better luck with not matching the 4 slots with the four screw tabs and instead following the oem pattern and matching just 2 of the slots on the shift boot with those two things sticking out of the frame. (by those "two things sticking out of the frame" i am referring to the only other things sticking out of the circle that aren't screw tabs.)
Thread Starter
Vegas rx8!
Joined: Mar 2007
Posts: 1,286
Likes: 0
From: Las Vegas
he is referring to the slots cut out for the screw holes in step 6. and yes as he stated...every shift boot will be slightly different and you have to adapt to every situation. just fit the shift boot as best you can and it should look great.