
DIY: illuminate your old gear shift knob

Thread Starter
US Navy Rotary Enthusiast
iTrader: (3)
Joined: Aug 2007
Posts: 1,062
Likes: 3
From: New Orleans, LA
DIY: illuminate your old gear shift ****
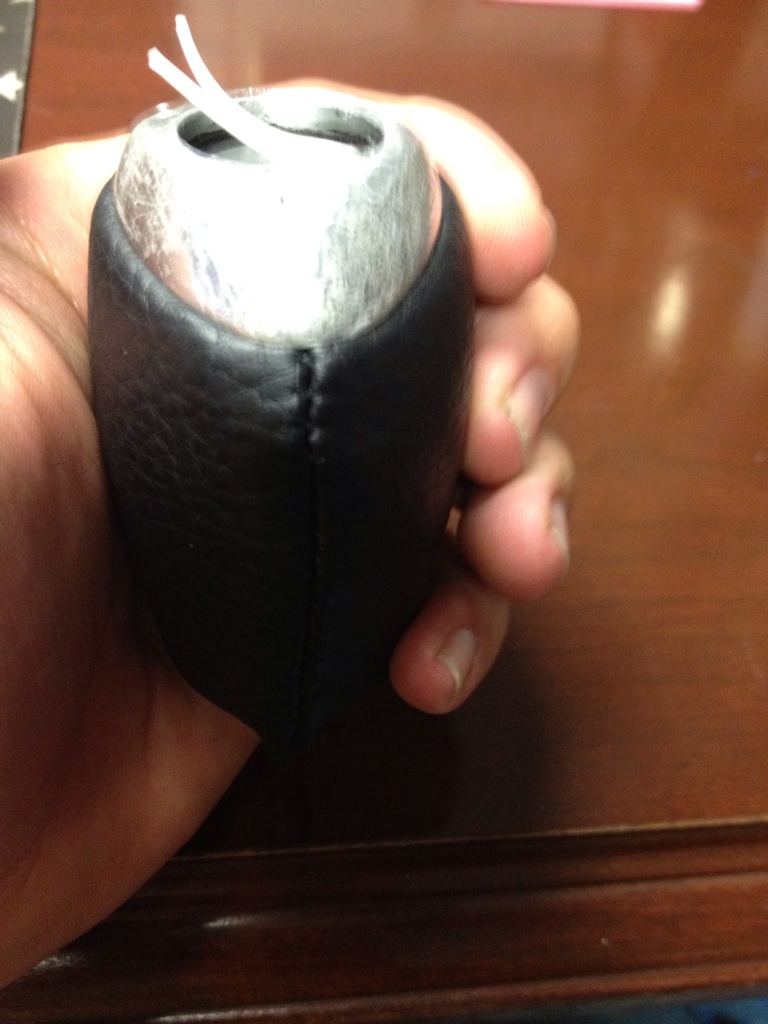
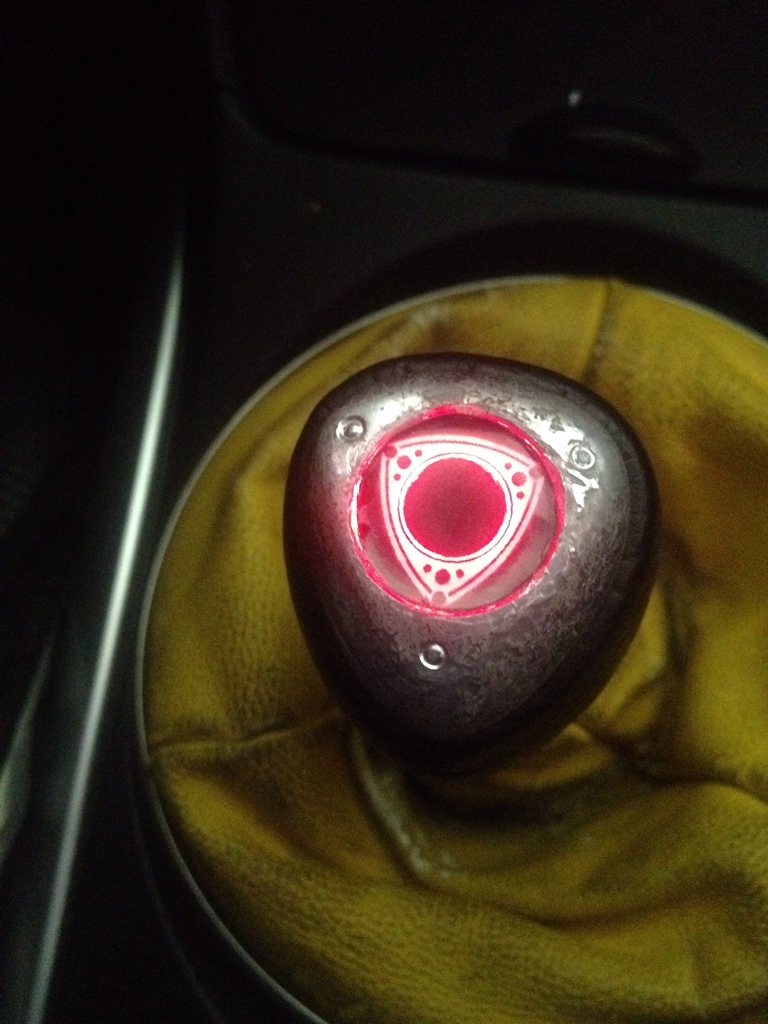
So a couple years ago I posted about making my own illuminated gear shift ****, seems like everyone thought I was crazy for wanting to try this. Well, my leather on the **** wore through, so it was time to customize!
Materials needed:
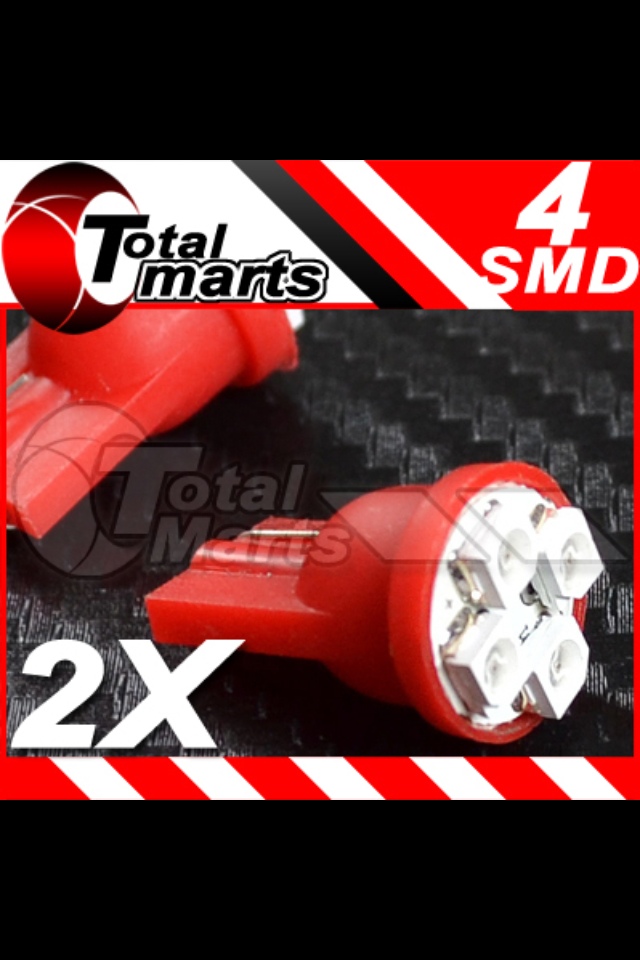
194 bulb with red SMD LED's
Soldering Iron
Solder
Heat Shrink
Jewelers Screwdriver
Thin rubber/silicone
Sheet of thin plastic
250 grit sandpaper
1000 grit sandpaper
2 ft 20 gauge wire
Clip (bent key ring from padlock keys was used)
Waterhose seal
leather/pleather(optional)
Sewing Machine
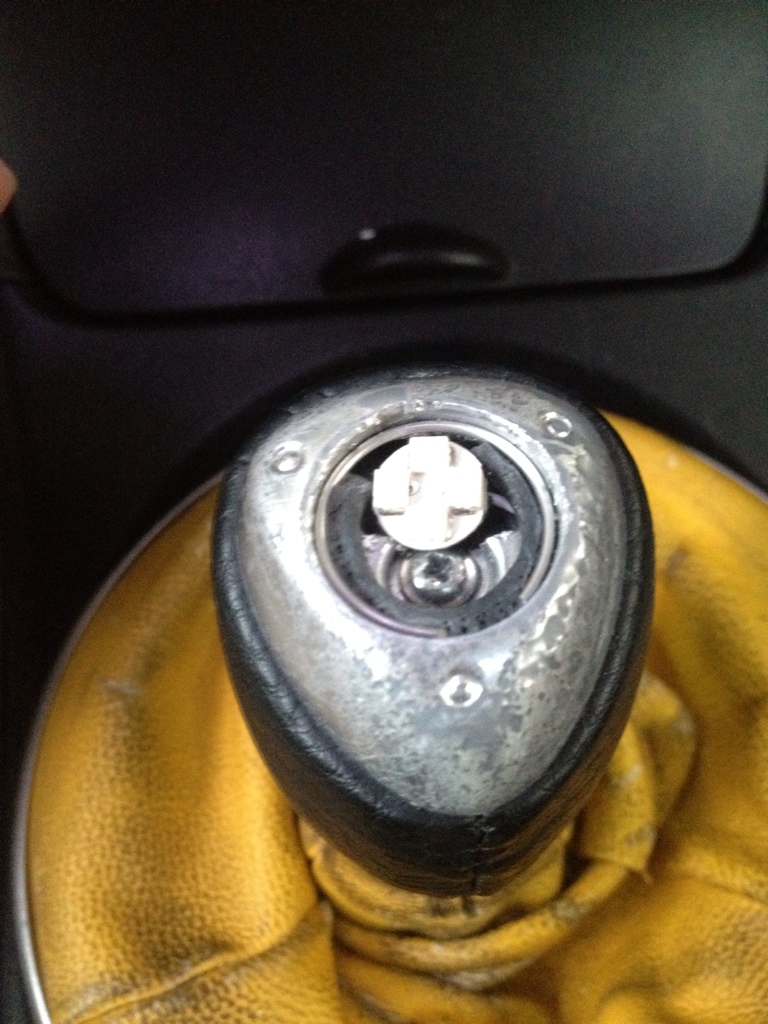
1.) Put **** in oven on top of a pot holder at 250 degrees for 15 minutes. Remove the **** with a different pot holder to keep from burning yourself. Take a real fine jewelers screwdriver in between the acrylic and the metal rotary symbol and pry up on the clear cap, and yes it's metal! You may ding up the cap, but there is a stainless steel cap you can use to cover it up at www.rotaryfx.com. If it is dinged up use sandpaper to make sure it is smooth on top again. Clean up all the double sided tape from all the parts.
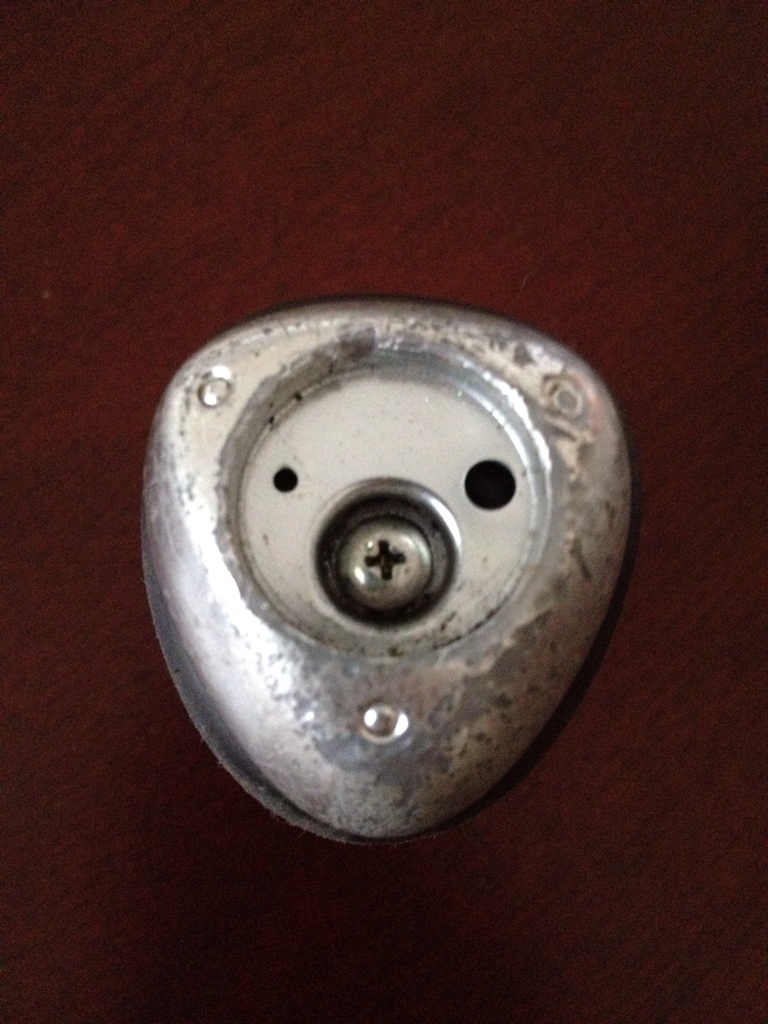
2.) Remove the screw from the center. The rotary cap will come off.
3.) If you need to replace the leather now is time to do it. I made the stitching in the front so I could put yellow cross stitching for decoration in the future. I used the old leather as a stensil to cut it. This was pretty simple with a sewing machine. Take the leather and fold it in half the rough side out and sew the ends together. Cut the excess material off so it doesn't clump up at the seam. NOTE: CUTTING TOO MUCH OFF WILL CAUSE THE SEAM TO PULL THROUGH.

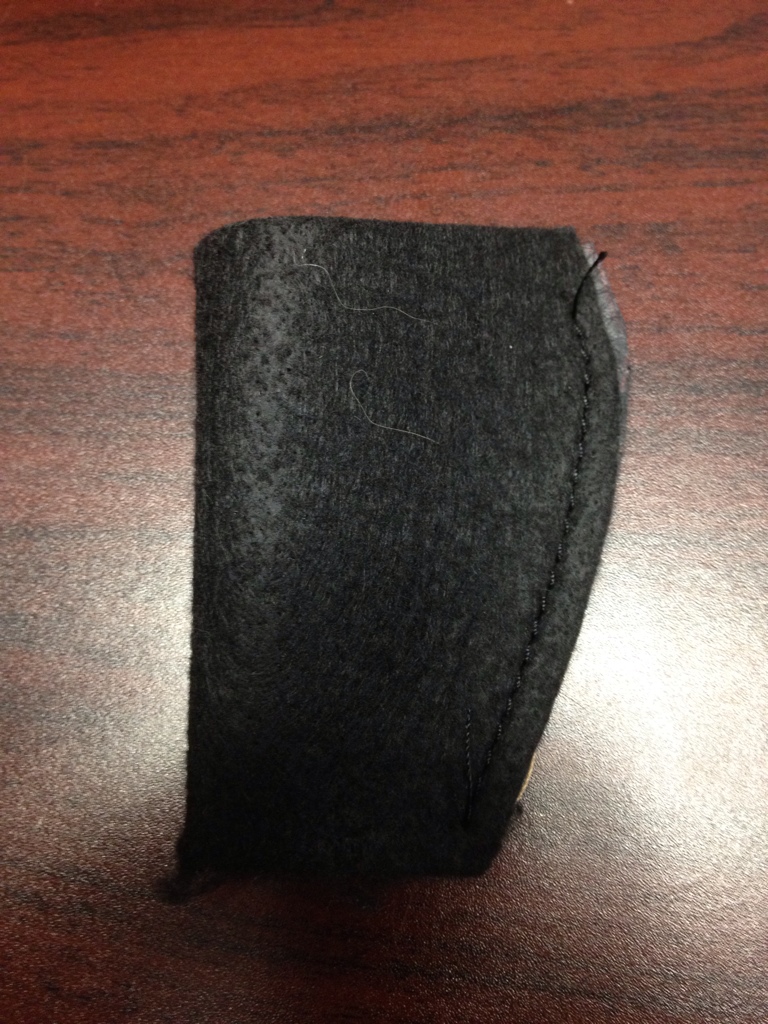
4.) Turn the leather right side out and heat up, I used the inside of my car as it is 95 degrees outside and it had been outside at work. Insert the gear shift **** small part first into the sleeve. This will take some work as the leather has to stretch to get it to fit. If it is real leather getting it wet helps to stretch and as it dries it will form to the ****. I got this for free so I didn't use real leather.
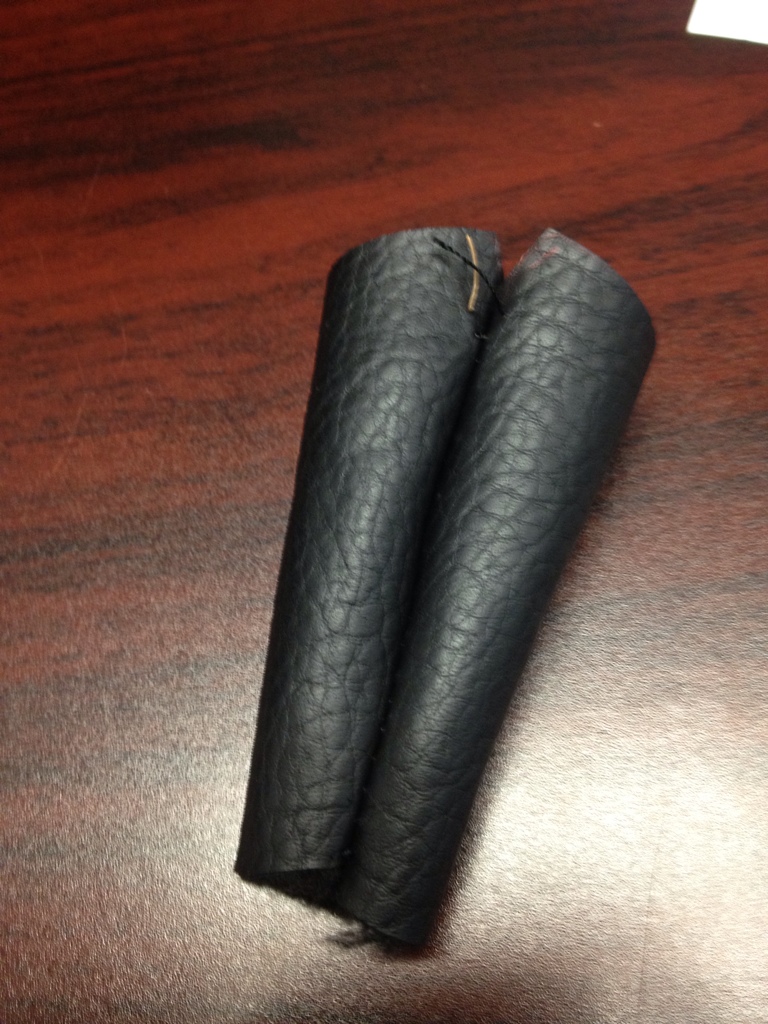
5.) After wrapping in leather I folded (2)20 gauge wire in half and ran the folded part down the **** where the stitching was so it wouldn't be bumped up.
6.) Cut a hole in the cap from the two holes all the way to the edge of the cap to make room for the LED to sit.
7.) For parts I ordered a 4 SMD LED 194 bulb from eBay. Make sure you buy the ones with the metal prongs bent over the plastic.
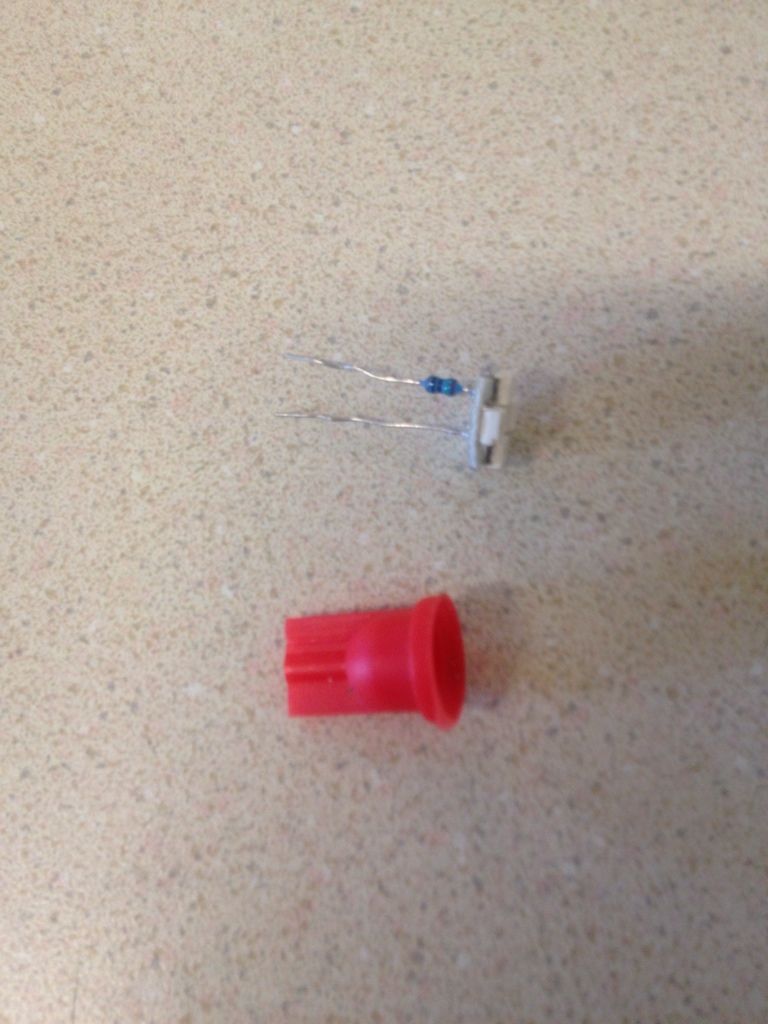
8.) Remove the bottom cap from the LED bulb.
9.) Place the rotary cap on top of the ****, routing the wire through the cut out hole and tighten it down about halfway. Take the excess leather and shove it under the cap, making sure to stretch it tight and screw cap down snuggly. Make sure not to tighten it too much as you will damage the leather.
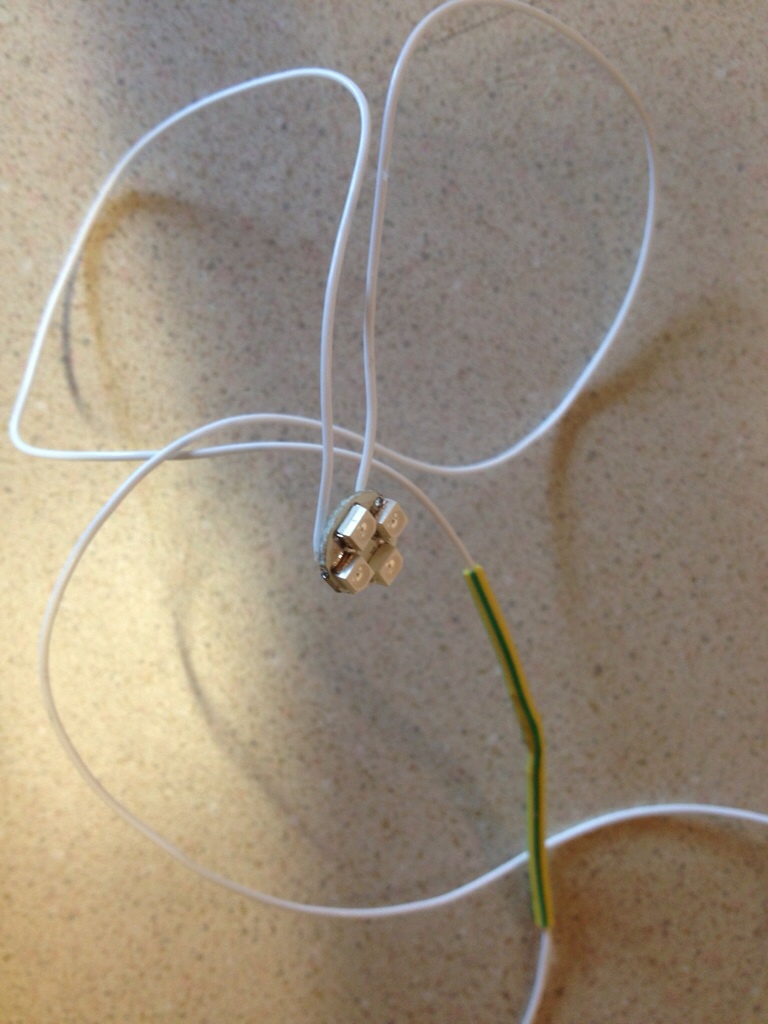
10.) Unsolder the pins on the LED, making sure to remember which pin the resistor is on. Solder a 12 inch wire to each soldering point on the LED. About halfway down the wire cut the one that needs the resistor and solder it in where it was cut. Wire color will not matter as we will figure that out later. Make sure to use heat shrink to cover all the exposed wires and resistor.
11.) Electrical tape will be needed on the back of the LED to insulate the LED from the metal ****. Used a small drop of super glue to attach the LED to the screw holding down the cap, make sure it is center. Use a water hose seal and cut it to fit in the hole to create a spacer for the LED to fit. Cutting the seal in half will make it thinner allowing the acrylic to sit on top flush.
12.) A paper thin piece of plastic will be need to sandwich the LED to the cap. I used laminating sheets. Cut it out just bigger than the acrylic, enough to allow the clip to hold it down.
13.) After inserting the thin plastic on top of the LED, insert the clip to hold it down against the LED
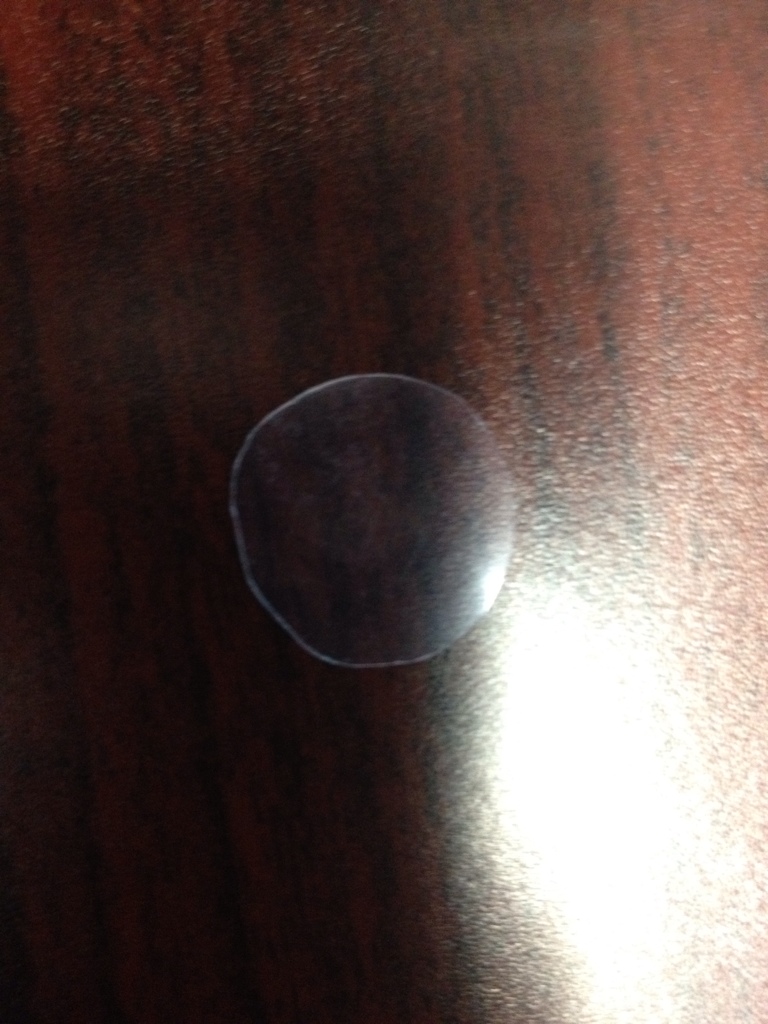
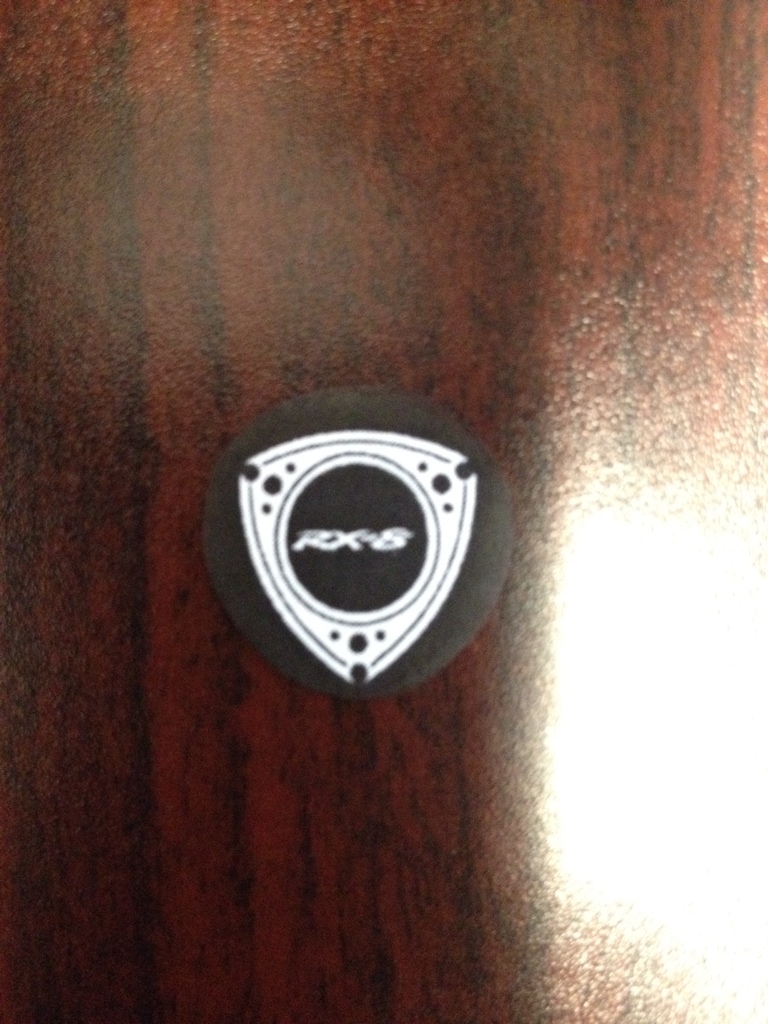
14.) For the design inside the clear part of the ****, print whatever you want on the **** on cardstock paper with the quality set to high, as you don't want the light to shine through the black. After printed out blacken out only the black design on the back and front side with several layers of black sharpie. If you just want 1-6 gears then you will have to do that also because you have to sand the acrylic down thinner than it is.
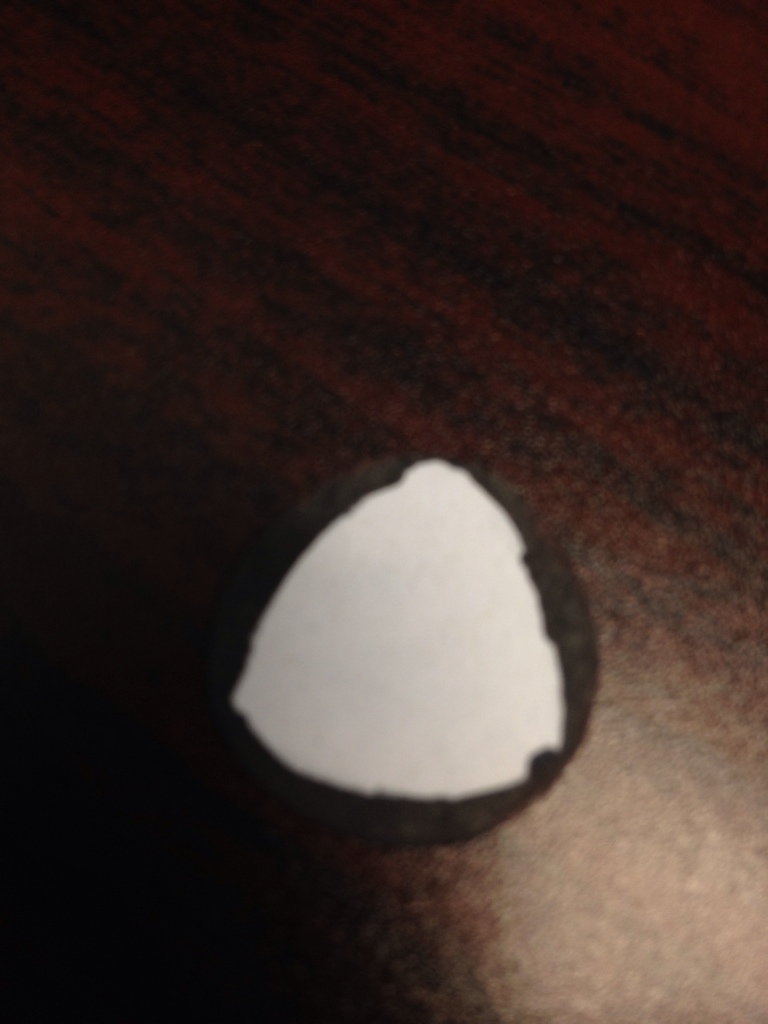
14.) Sand the acrylic down past the seam in the middle, you must make room for the LED's to fit. Use lower grit sand paper such as 250. As you get closer to the thickness you need go to 1000 grit to buff out the scratches you just created. I used a buffing pad on my drill to get a flawless shine. Lens should be a little thicker than cardstock or so. (After all this, I was installing the lens on and dropped it and was lost, went to lowes and got 1/8 inch plexiglass and sanded it down thinner and made it a tad big to be able to hold everything in place without glue or something.)
Materials needed:
194 bulb with red SMD LED's
Soldering Iron
Solder
Heat Shrink
Jewelers Screwdriver
Thin rubber/silicone
Sheet of thin plastic
250 grit sandpaper
1000 grit sandpaper
2 ft 20 gauge wire
Clip (bent key ring from padlock keys was used)
Waterhose seal
leather/pleather(optional)
Sewing Machine
1.) Put **** in oven on top of a pot holder at 250 degrees for 15 minutes. Remove the **** with a different pot holder to keep from burning yourself. Take a real fine jewelers screwdriver in between the acrylic and the metal rotary symbol and pry up on the clear cap, and yes it's metal! You may ding up the cap, but there is a stainless steel cap you can use to cover it up at www.rotaryfx.com. If it is dinged up use sandpaper to make sure it is smooth on top again. Clean up all the double sided tape from all the parts.
2.) Remove the screw from the center. The rotary cap will come off.
3.) If you need to replace the leather now is time to do it. I made the stitching in the front so I could put yellow cross stitching for decoration in the future. I used the old leather as a stensil to cut it. This was pretty simple with a sewing machine. Take the leather and fold it in half the rough side out and sew the ends together. Cut the excess material off so it doesn't clump up at the seam. NOTE: CUTTING TOO MUCH OFF WILL CAUSE THE SEAM TO PULL THROUGH.
4.) Turn the leather right side out and heat up, I used the inside of my car as it is 95 degrees outside and it had been outside at work. Insert the gear shift **** small part first into the sleeve. This will take some work as the leather has to stretch to get it to fit. If it is real leather getting it wet helps to stretch and as it dries it will form to the ****. I got this for free so I didn't use real leather.
5.) After wrapping in leather I folded (2)20 gauge wire in half and ran the folded part down the **** where the stitching was so it wouldn't be bumped up.
6.) Cut a hole in the cap from the two holes all the way to the edge of the cap to make room for the LED to sit.
7.) For parts I ordered a 4 SMD LED 194 bulb from eBay. Make sure you buy the ones with the metal prongs bent over the plastic.
8.) Remove the bottom cap from the LED bulb.
9.) Place the rotary cap on top of the ****, routing the wire through the cut out hole and tighten it down about halfway. Take the excess leather and shove it under the cap, making sure to stretch it tight and screw cap down snuggly. Make sure not to tighten it too much as you will damage the leather.
10.) Unsolder the pins on the LED, making sure to remember which pin the resistor is on. Solder a 12 inch wire to each soldering point on the LED. About halfway down the wire cut the one that needs the resistor and solder it in where it was cut. Wire color will not matter as we will figure that out later. Make sure to use heat shrink to cover all the exposed wires and resistor.
11.) Electrical tape will be needed on the back of the LED to insulate the LED from the metal ****. Used a small drop of super glue to attach the LED to the screw holding down the cap, make sure it is center. Use a water hose seal and cut it to fit in the hole to create a spacer for the LED to fit. Cutting the seal in half will make it thinner allowing the acrylic to sit on top flush.
12.) A paper thin piece of plastic will be need to sandwich the LED to the cap. I used laminating sheets. Cut it out just bigger than the acrylic, enough to allow the clip to hold it down.
13.) After inserting the thin plastic on top of the LED, insert the clip to hold it down against the LED
14.) For the design inside the clear part of the ****, print whatever you want on the **** on cardstock paper with the quality set to high, as you don't want the light to shine through the black. After printed out blacken out only the black design on the back and front side with several layers of black sharpie. If you just want 1-6 gears then you will have to do that also because you have to sand the acrylic down thinner than it is.
14.) Sand the acrylic down past the seam in the middle, you must make room for the LED's to fit. Use lower grit sand paper such as 250. As you get closer to the thickness you need go to 1000 grit to buff out the scratches you just created. I used a buffing pad on my drill to get a flawless shine. Lens should be a little thicker than cardstock or so. (After all this, I was installing the lens on and dropped it and was lost, went to lowes and got 1/8 inch plexiglass and sanded it down thinner and made it a tad big to be able to hold everything in place without glue or something.)
Last edited by Hesselrode; Aug 1, 2012 at 08:55 AM.

actually you cant do that in the DIY forum, you need to attach the images so they never go away if you delete them. (making the thread useless for the future)
Thread Starter
US Navy Rotary Enthusiast
iTrader: (3)
Joined: Aug 2007
Posts: 1,062
Likes: 3
From: New Orleans, LA
It is wired up. you have to splice into the light for the ashtray or the cigarette lighter. When hooked up to the cigarette lighter it will be on when the car is one. When hooked up to the ashtray light it can be controlled with the dimmer switch and will only be on when the parking lights are on. I will attach the pictures to the thread once I get all the pictures together and am completed with the DIY. For right now everyone can just click the link if they want to start this mod now. I am awaiting parts from ebay and will continue when I get them.

This looks like a good write-up!
But, just for future reference, it would be easier to start everything on a word doc, then just copy and paste when you're ready/finished. Just a thought
But, just for future reference, it would be easier to start everything on a word doc, then just copy and paste when you're ready/finished. Just a thought


Thread Starter
US Navy Rotary Enthusiast
iTrader: (3)
Joined: Aug 2007
Posts: 1,062
Likes: 3
From: New Orleans, LA
9K, no offense, but no one cares about your opinion. The boot and the cap definately need fixed, but this isn't a how to on that but a how to on how to insert a light into your gear shift. It was time consuming but not difficult at all.
Last edited by Hesselrode; Jul 25, 2012 at 01:31 PM.
Don't be such a puss, I'm just being honest. No offense taken. It looks horrible man, I doubt anyone will say that looks good.
Thread Starter
US Navy Rotary Enthusiast
iTrader: (3)
Joined: Aug 2007
Posts: 1,062
Likes: 3
From: New Orleans, LA
The picture doesn't do it any justice, but it isn't any different than the stock one as far as looks. Maybe a little brighter, but that can be fixed easy.
Fellas, fellas, let's be cool here,
 No doubt the shift boot and accent still need work, but I think the project part itself is great, especially considering a good lit up gear shift is +$200 (unless that has change in the past year).
 I'm with shadycrew31 on this one, except I would plastidip the rotary accent black (I HATE chrome
 ). And it's not like Hesselrode can't improve on it once it's done. He did some great work on a sub box he made for his trunk (Seen it myself in person)and I'm sure he will keep improving this till it looks great as well! (I know he is currently making his own new shift boot). Give him time.

Fellas, fellas, let's be cool here, No doubt the shift boot and accent still need work, but I think the project part itself is great, especially considering a good lit up gear shift is +$200 (unless that has change in the past year).
I'm with shadycrew31 on this one, except I would plastidip the rotary accent black (I HATE chrome). And it's not like Hesselrode can't improve on it once it's done. He did some great work on a sub box he made for his trunk (Seen it myself in person)and I'm sure he will keep improving this till it looks great as well! (I know he is currently making his own new shift boot). Give him time.
No doubt the shift boot and accent still need work, but I think the project part itself is great, especially considering a good lit up gear shift is +$200 (unless that has change in the past year). I'm with shadycrew31 on this one, except I would plastidip the rotary accent black (I HATE chrome
). And it's not like Hesselrode can't improve on it once it's done. He did some great work on a sub box he made for his trunk (Seen it myself in person)and I'm sure he will keep improving this till it looks great as well! (I know he is currently making his own new shift boot). Give him time. ask me how I know.

Thread Starter
US Navy Rotary Enthusiast
iTrader: (3)
Joined: Aug 2007
Posts: 1,062
Likes: 3
From: New Orleans, LA
