
DIY: Foglight bulb swap


Jingle Ballzzzz!
Joined: Mar 2006
Posts: 2,358
Likes: 15
From: Renton, WA, USA, No. Am, Planet Earth
I was all prepared to do this DIY because one of my fog lights burned out, then I decided to have the dealship do it while it was replacing my broken sun visor. They quoted me $80 to replace one foglight, ouch, but when I showed up Tuesday with my car, the service guy tells me that my foglight, unless it was broken, could be replaced under warranty. It wasn't broken... and they really did replace it for free!! Seems weird to me to replace light bulbs with warranty...

just installed hoen H11 xenon match fogs, had to post to tell of my success because it was dam hard to install the bulbs without being able to see behind the fogs.
i just reached my hand up there from underneath the front and twisted as hard as my aching thumb could! finally turned and after that it wasnt too hard anymore.
but yeah, ill take some pics later when it gets dark and ill post them up!
i just reached my hand up there from underneath the front and twisted as hard as my aching thumb could! finally turned and after that it wasnt too hard anymore.
but yeah, ill take some pics later when it gets dark and ill post them up!


hoen
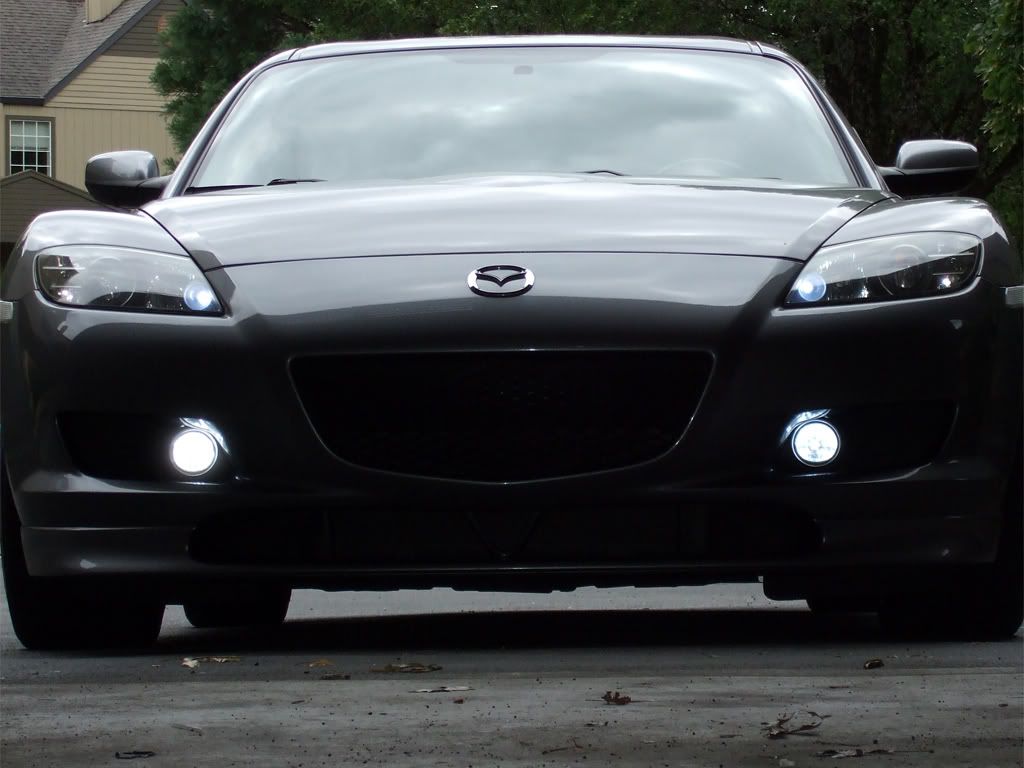
i finally got my hoen fogs in. man they look good. way better than stock - great compliment to the headlights.
i had my pass. side bulb out for months. i totally meant to do that side first, then take a pic w/ the stock and the hoen (since my stock driver's side worked still), but i was so excited i went straight to the drivers side! sorry, i'll still post pics later if people are interested, but the pics already up here are good.
fyi - while it's not HARD to do, getting the fog light loose can be super hard. i'm not very strong, but it was a struggle for me. eventually i got it, had to jack up the car though (left the wheels on). man it was stuck in there good. once i was ready for it though, the passenger side was a breeze...
yeah i thought i was going to break it trying to get it loose but it didnt break suprisingly...and i just realized i havent taken pics yet haha. ill have to take some pics some day.
Last edited by \\Konig\\; Mar 13, 2013 at 06:32 PM.
someone gave a super long explanation of this. but basically you have to wedge against that outer ring - it needs to remain still while you "unscrew" the screw part. if you STILL can't get it, just rip the thing out, they're cheap -- i broke a couple anyway. it'll stay on when you put it back together as long as you have most of them on.

Call me ROTO BAGGINS
iTrader: (1)
Joined: Apr 2008
Posts: 462
Likes: 0
From: The big OH yeah! (Cincinnati, OH)
So I bought some 6000s from AutoLumination to put in my fogs, and when I asked the dealer how much the install would be, thy said $34. So I got there, and then they strongly recommended that I NOT put them in because the higher resistance would cause problems (blown fuses, etc.) and it would wind up being expensive in the end. Are they blowing smoke?
I haven't tried to do it myself yet, but I figure I have to take off my wheels this weekend to paint my calipers, so I might give it a go then. Last time I tried to remove the wheel liners though, it seemed like they were tucked into the sheet metal pretty tightly. Am I imagining that?
I haven't tried to do it myself yet, but I figure I have to take off my wheels this weekend to paint my calipers, so I might give it a go then. Last time I tried to remove the wheel liners though, it seemed like they were tucked into the sheet metal pretty tightly. Am I imagining that?

Registered User
Joined: May 2008
Posts: 53
Likes: 0
From: Miami, Florida
I purchased Nokya 2500K 80w yellow bulbs.
I installed the left one first and it turned on instantly, after two minutes it turned of while the right stock fog remained on.
I checked the fuses, and put back the stock fog back and they work.
idk what to do? if anyone knows please contact me asap.
I am currently working on it as we speak.
They are H11 btw
Call me ROTO BAGGINS
iTrader: (1)
Joined: Apr 2008
Posts: 462
Likes: 0
From: The big OH yeah! (Cincinnati, OH)
What is that little rubber round thing right by the fog light housing? Is it important? It fell off when I put my driver's side fog in and I couldn't figure out where it goes. Please let me know. Thanks.

Wow you guys take the long way to change your fog light bulbs. Jack the front of the car up un-screw 6 screws ( 3 on each side). Pull the plastic piece back so you can but your hand up there to reach the fog light bulb. disconnect the bulb and twist out. Only takes like 5 min to change both bulbs and have every thing back in place

you dont have to jack the car up!
just undo the 3 screws from the left and the right side of the car that are holding the fender liner in place.. bend out of the way and stick your hand up and in, the end.
just undo the 3 screws from the left and the right side of the car that are holding the fender liner in place.. bend out of the way and stick your hand up and in, the end.

I tried that al, couldnt get my hand in - fat hands or something i guess, so i had to take the cover off, etc. what a pain in the ***.  after all that i don't even like the bulb i got.
  I'm just gonna get a set of HID replacements and stick em in - screw it. Unless someone knows of a better bulb that more closely matches the head lamp.
either that or i'll just go with a different LED.
after all that i don't even like the bulb i got. I'm just gonna get a set of HID replacements and stick em in - screw it. Unless someone knows of a better bulb that more closely matches the head lamp. either that or i'll just go with a different LED.

Registered User
Joined: Aug 2004
Posts: 346
Likes: 0
Has anybody tried these?
I ordered a pair in hyper-white for $24 shipped with a 1 year warranty.
http://www.luminicsbulbs.com/h11_bulbs.php
I ordered a pair in hyper-white for $24 shipped with a 1 year warranty.
http://www.luminicsbulbs.com/h11_bulbs.php
thats what i got. not close enough to my head lamps or the led parkin bulbs - should have gone with LED but i wasn't sure if LED in non LED housing was gonna fly with the cops.
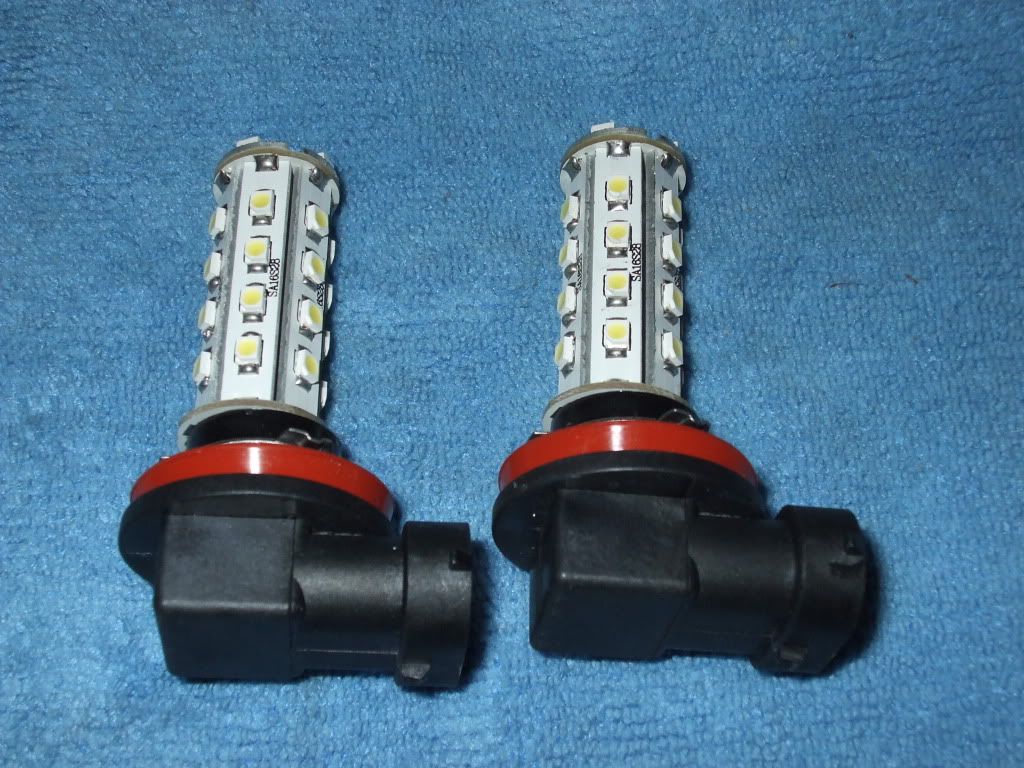
Got my new high power H11 bulbs, they are quite a bit brighter than the standard ones, definitely worth the extry $10 if you are thinking about getting LED fogs. If you've already got the standard LED bulb I don't know if I'd upgrade unless you are hardcore like me They are probably 25% brighter and are definitely more visible at a distance during the day. You still won't be able to drive by them or anything.
They also seem more white/less blue, but the high power .5 watt white LEDs seem to color shift some after a while (white LEDs are made from blue leds with a phosphor coating which gives them the yellow look when off, the coating burns off some with the heat of the high power LEDs).
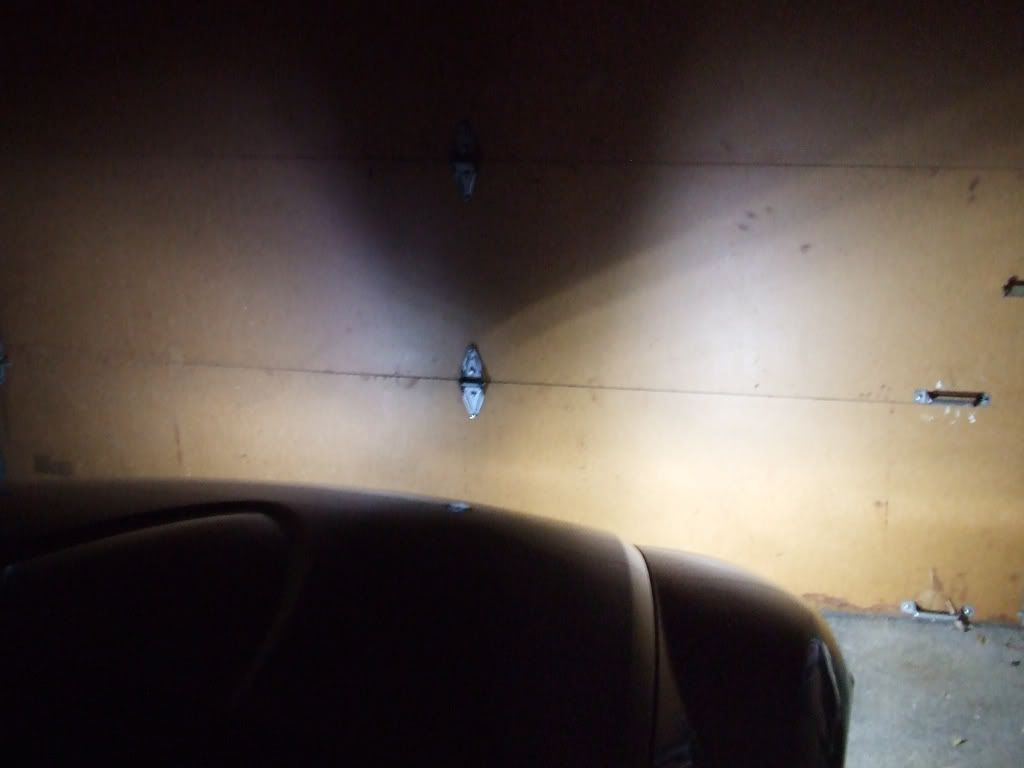
I took a bunch of pics, but honestly my cheap camera wasn't able to capture the difference in light that well. The two below captured the difference the best. I'll take some more pics with both bulbs installed tonight when it gets a little darker.
They are probably 25% brighter and are definitely more visible at a distance during the day. You still won't be able to drive by them or anything.They also seem more white/less blue, but the high power .5 watt white LEDs seem to color shift some after a while (white LEDs are made from blue leds with a phosphor coating which gives them the yellow look when off, the coating burns off some with the heat of the high power LEDs).
I took a bunch of pics, but honestly my cheap camera wasn't able to capture the difference in light that well. The two below captured the difference the best. I'll take some more pics with both bulbs installed tonight when it gets a little darker.

Sorry to revive this thread but I just wanna help the next person who will do it.
It is not necessary to jack the car although it helps A LOT. I jacked mine like i was doing my oil change. Removed the plastic protection from underneath only and a couple of those plastic clippers around the wheel. (you dont even need to take all of em off) I used pliers to hold the plastic cover so I could see where im going.
1. You must remove the connection between the bulb and the wire by pressing on it BEFORE you remove the bulb.
2. Remove the bulb by turning counter clockwise
3. When putting back the new bulb (this is where it took me at least 1 hour) Make sure you position it evenly in all the 3 sockets cause if one doesnt fit properly it wont screw in even with force. I got fed up at one point so I went by trial and error applying very little pressure to the bulb while trying to screw it back in. And then just like magic it went in.
4. Put back wiring harness
5. Screw plastic cover back in
** I changed fog light bulbs and replaced my clear corners with new LEDs in a total of 1 hour. (Not counting the hour I lost trying to figure out how to position the stupid fog lights)
Very easy to do... My clear corners and fog lights were in my garage for about 4 months cause i was scared it would be hard and I had to remove the bumper.

Registered User
Joined: Aug 2010
Posts: 42
Likes: 0
Great DIY, thought I was going to have to remove the whole bumper to replace a fog light with a broken lense until i read this... although now that I've done it, it might've been easier to take the bumper off lol it was pretty difficult to get to the screw on top of the light.

Registered
Joined: Jun 2007
Posts: 1,134
Likes: 1
From: Sheboygan Falls, Wisconsin
Can you get a bag full of those plastic tabs at the Mazda shop? I broke most of them getting them out. I think some of the problem is 6 years worth of very fine dirt getting in there, preventing it from turning properly. A couple I stripped with a screwdriver so I just stuck a putty knife underneath and pryed it until it broke out.
EDIT: I only broke 2 of them, but I got the bulb changed ok. I'm convinced it is the fine dirt that gets in there that locks those tabs up so they won't turn properly, but I'll pick up some new ones next time I'm at the dealership.
My next question is...how do you change the bulb in the headlight assembly? (the bulb closest to the middle of the car...same yellow color as fog light) What's the best way to get at that one? My driver side one is out. Do I have to remove the fuse box to get at it?
Last edited by 77mjd; Nov 20, 2010 at 03:11 PM.
Just want to reiterate that for those who had trouble removing the bulb, YOU HAVE TO REMOVE THE WIRE HARNESS FIRST. I struggled for a while trying to get leverage on the bulb, then noticed the single post in this thread saying you have to unclip the wire harness first. Did that, and had the new bulbs in on both sides in less than 10 minutes.