
DIY: Foglight bulb swap

AW YEA?
Joined: Jul 2004
Posts: 42
Likes: 0
From: SoCal
Originally Posted by Nubo
The inner "screw" portion needs to turn counter-clockwise *relative* to the outer "ring" portion. The problem is they both want to turn together. You need to hold the outer ring stationary while you turn the inner screw. Usually you can do this by wedging a flat-blade screwdriver behind the ring, or if it's really stubborn you can pin the ring down with the flat-blade if you don't mind putting a nick into it. I suppose you could also use a thin pair of needle-nose pliers to hold it but I haven't tried that. It only takes a quarter-turn to retract the screw, iirc.
When you put the clip back in, you don't need a screwdriver at all. It just pops in place. You do need to make sure the inner screw is retracted though, before you pop it in place. Otherwise, the prongs will be expanded and it won't want to go in. This is usually when they get broken.
Ah, this probably calls for a DIY of it's own. Lol

Registered User
Joined: Jul 2003
Posts: 911
Likes: 1
From: NC
Great thread. Much help. I don't know if it was mentioned before, but you must push down on the back part of the wire connector before you rotate the bulb unit it self. I remember one car I had where you rotated first and then disconnected later. Lost about 15 minutes on this. Second one was one tenth of the speed. It was getting dark, I was in a hurry have to be somewhere tomorrow morning, and decided not to take the wheel off. Then I was having trouble with the plastic connectors, had trouble on other side as well. Ended up only removing the three metal screws underneath and was able to reach up and do the second one (drivers side). Took at most 10 minutes. And I was still able to use a flashlight and see what I was working with. I'm not 100 % certain I would recomend it to a person that's never done it before. Well yes I would because those three screws must come out no matter what. So my 2cents, try with just the three screws out and if that doesn't work, then try again without removing the wheel, then as a last resort, jack up the car and remove the wheel.


>> Motion
Joined: Dec 2005
Posts: 333
Likes: 0
From: Elmont, NY
i don't know if i'm doing it wrong or if i'm just stupid but i was trying to take the fogs off for about 2 hours. i tried pushing in and turning it counterclockwise and twisting it and it wouldn't come off! i'm just gonna try again tomorrow.. by the way, does anyone know what the black circular rubber is? i accidentally took it off.


2005 Black RX-8 GT 6M
Joined: Jul 2006
Posts: 6,350
Likes: 0
From: San Jose Area
This DIY was much more effort than the clear side marker swap I did at the same time. I installed Hoen Xenonmatch H11 bulbs. http://www.hoen-usa.com/
The Hoen's were ~$30 a pair and seemed to be just as good and cheaper than competing PIAAs (which I have used). They are definitely whiter than stock and a closer match to the HIDs.
My recommendations:
1. If at all possible, lift the front end. It will make sticking your arms and head underneath that much easier. It can be done without lifting--I did it, but I think I'll go buy myself some ramps soon.
2. Removing the wheel liner can be a big pain. The liner continues under the front chin and so there are an additional 3 regular screws and 2 pop screws to work with under the car. This is why lifting is easier. The OPs pics don't show this! For whatever reason, two of the front chin pop screws (one each side) did not want to turn and release. I finally got one undone and the liner out. The other side would not budge. I was able to do the passenger side somewhat blind. The downside was that bumped and dropped (!) the bulb on that side before successfully struggling it in. I was a bit worried, but it works flawlessly (cross fingers for long run).
3. Disconnect the wiring harness connector to the bulb first. It makes it easier to twist and come out.
4. Wash the pop connectors with some water before putting them back on. They seem susceptible to dirt and crud buildup and lockup.
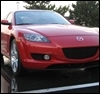
Pic 1: Stock left, Hoen Xenonmatch right
Pic 2: Stock
Pic 3: Hoen Xenonmatch
The Hoen's were ~$30 a pair and seemed to be just as good and cheaper than competing PIAAs (which I have used). They are definitely whiter than stock and a closer match to the HIDs.
My recommendations:
1. If at all possible, lift the front end. It will make sticking your arms and head underneath that much easier. It can be done without lifting--I did it, but I think I'll go buy myself some ramps soon.
2. Removing the wheel liner can be a big pain. The liner continues under the front chin and so there are an additional 3 regular screws and 2 pop screws to work with under the car. This is why lifting is easier. The OPs pics don't show this! For whatever reason, two of the front chin pop screws (one each side) did not want to turn and release. I finally got one undone and the liner out. The other side would not budge. I was able to do the passenger side somewhat blind. The downside was that bumped and dropped (!) the bulb on that side before successfully struggling it in. I was a bit worried, but it works flawlessly (cross fingers for long run).
3. Disconnect the wiring harness connector to the bulb first. It makes it easier to twist and come out.
4. Wash the pop connectors with some water before putting them back on. They seem susceptible to dirt and crud buildup and lockup.
Pic 1: Stock left, Hoen Xenonmatch right
Pic 2: Stock
Pic 3: Hoen Xenonmatch
Last edited by CarAndDriver; May 1, 2007 at 08:04 PM.
My method.
1. Lift front of car onto 2 floor jacks.
2. Remove front wheels.
3. Remove innner wheel liners.
4. Easy access to fog light bulb. (Helps to have a light in front of the car to shine through.)
5. Twisted bulb out, replaced.
6. Reverse order.
Pics:


1. Lift front of car onto 2 floor jacks.
2. Remove front wheels.
3. Remove innner wheel liners.
4. Easy access to fog light bulb. (Helps to have a light in front of the car to shine through.)
5. Twisted bulb out, replaced.
6. Reverse order.
Pics:

13BEAST
Joined: Mar 2007
Posts: 207
Likes: 0
From: Union City, CA
my car is right next to me as im typing and the freakin fog light bulb wont budge. im trying with all my strength to turn it counterclockwise (fog light on passenger side) and the freakin thing wont pop out. im gonna try again. i just needed to vent out my frustration somewhere. my girlfriends not home so the forum is my only form of outlet. wish me luck.

Surf Hard, Drive Hard
Joined: Feb 2007
Posts: 7,840
Likes: 13
From: Indialantic, Florida
my car is right next to me as im typing and the freakin fog light bulb wont budge. im trying with all my strength to turn it counterclockwise (fog light on passenger side) and the freakin thing wont pop out. im gonna try again. i just needed to vent out my frustration somewhere. my girlfriends not home so the forum is my only form of outlet. wish me luck.

Why would you want to take your front wheels out ?
Just turn it like CarandDriver said.
I did mine that way couple months ago.
13BEAST
Joined: Mar 2007
Posts: 207
Likes: 0
From: Union City, CA
thanks for the tip maz...too bad i read this after i put everything back together. i probably spent a whole hour trying to take the passenger side bulb out. i didnt even bother trying it on the driver's side since my bulbs wouldn't match if i was able to do it on that side. i can see the bulb turning slightly from looking at it through the fog light lens but i just won't come off. i'll try it again next weekend with wd40. i had the front of the car on jack stands with the wheels off and the wheel well cover off which i thought would make things easy. i had great access to the fogs but i just couldn't turn it and that was the most frustrating part.

Club Marbles Member
Joined: Jul 2005
Posts: 3,252
Likes: 0
From: DFW, TX
I couldn't turn it either. I tried twice. I was surprised I couldn't get it to budge. In the end, the effort of taking all the connectors and wheel wells out wasn't worth it. Didn't want to break anything either. Oh well, I guess I can ask my dealership to change them.
13BEAST
Joined: Mar 2007
Posts: 207
Likes: 0
From: Union City, CA
last week, i tried my best to turn my fog lights counter clockwise but failed miserably. during the past week, i've been doing curls, push ups, pull ups, and shoulder presses, all so i can loosen the stock fog light bulbs. whatta you know, it worked. okay, so i didnt really work out but with some leverage, you can actually get them to budge. that's the key to this whole thing that some folks forget to mention, LEVERAGE. haha, just wanted to post my feelings of success and satisfaction. my hoen ion yellow fogs look good by the way.

BAhh to all of you, i like doing things the hard way. Just take of the front fascia(sp?) After you do it once or twice, you'll get it off in less than 10 mins. and the same for putting it back on. Then everything is easy to reach
Uh, because it only takes 2 minutes to do with a jack and impact gun. I also should have mentioned I needed to tighten the fog housing down since it was replaced. My first time getting inside there. Found a small forest of leaves around the oil cooler.

Hummmmm...
Joined: Jan 2006
Posts: 979
Likes: 0
From: Brooklyn, NY
Installed: Polarg Shinning Wizards
To start things up, I failed with the foglight DIY swap miserably.. 2 days of attempts at twisting the original foglights from their sockets and I couldn't get them out. I ended up having the dealer install them.
Anyway here's the outcome. I went with Polarg Shinning Wizards (that's not a typo) H11. They're stock wattage but put out a 5000K light. I had done Polarg for my parking lights before (https://www.rx8club.com/showpost.php...1&postcount=53) and wanted foglamps that were slightly purplish blue but mostly white. I love the results. Its a very clean beam and doesn't get me pulled over by the cops.
They're noticeably dimmer than the stock bulbs but since day 1 of getting my car, I've made the decision that the foglights hardly do anything for night visibility on the RX-8 so going all-cosmetic was the goal. I haven't heard of anyone going with these bulbs in the forum before but after doing allot of homework, I opted not to go for the Hoens.. although inexpensive, reliable, and much better than the stocks, they're too plain white, I think.
These pretty much sold me: http://forums.vwvortex.com/zerothread?id=3015111 .. it doesn't look that blue for our foglights though.. which I think is a good thing. On the ground, they put out white and I have a hard time finding the cut-off from the foglights and the stock HIDs. Before the swap, I disliked having the stock lamps on as it made the car look cheap. Now I never turn them off

Registered User
Joined: Dec 2007
Posts: 1
Likes: 0
I can make the bulb to turn Counter Clockwise
I know that a lot of people has had problems with this in the past. I have a 2007 rx8 and I can make the foglight bulb to turn counter clockwise. Any hints how to do it? and pictures?

this was actually very easy, i didnt even have to remove the wheel well liner.
(i have small hands btw)
so I turned the wheels completely to one side, i removed 4 philips screws on the panel underneath the front bumper on each side.. i then easily fit my hand through the opening and unscrewed and rescrewed the bulbs, easy enough. i did not even have to jack up the car. took 20 minutes.
al
edit: ill help anyone in nyc that needs it done
Last edited by alz0rz; Apr 20, 2008 at 03:58 PM.
'04 MT RX8/71 351C Mach1
Joined: Mar 2005
Posts: 462
Likes: 11
From: Waukesha, WI
Did the swap of the parking and fog lights yesterday. Got to the fog lights via the "down under" technique, which worked great. Installed the 4 led 194's from autolumination.com for the parking lights and the XD5 H.I.D. halogen 5800K Super White H11's off eBay for the fogs. It seemed the cheap way to go, so we'll see how long they last.
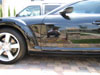
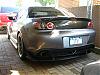
Here's the results:
Original stock bulbs:

New bulbs:

New bulbs with stock driving lights:

Here's the results:
Original stock bulbs:
New bulbs:
New bulbs with stock driving lights:
Last edited by glassetcher; Sep 22, 2008 at 06:36 PM.