
DIY: Ebay Spoiler Install


Thread Starter
Registered User
Joined: Jan 2007
Posts: 12
Likes: 0
From: Austin, Texas
DIY: Ebay Spoiler Install
After quite a bit of careful research, I decided to buy an OEM knockoff spoiler from "thespoilerstore" on ebay. Price was around $120 shipped. I know a few others have purchased this spoiler and had good results with it. I've documented my install in case any others are considering getting one of these.
Tools Needed: Big phillips screw driver (#3 or bigger), 3/32" drill bit, 7/32" drill bit, touch up paint, silicone sealant, tape measure
NOTE: It's a good idea to make sure you trunk lid is very clean before starting this project. You don't want any grit or anything grinding away your paint under the spoiler legs
0) get a helper, you will screw this up if you try to do it yourself (girlfriends work well)
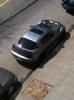
1) Before shot
2) The spoiler comes with pre-fab mounting bolts molded in, 6 zinc plated screws and washers, and some plastic guides that will help you position the spoiler so the holes can be drilled properly. The guides have little hollow pegs that the screw holes in the spoiler sit on. My initial idea was to tape these tabs to the spoiler so it would be easier to set down on the car. This proved to be a bad idea, as after I had done all the positioning, I could not remove the spoiler without also pulling up the positioning tabs. Here is a shot of what NOT to do...
That having been said, you need to put the pegs on the tabs into the two outer screw holes on each side. Have you helper do one side. Then hold them in place as you set the spoiler on the car. Note that there are 3 screw holes on each side, but I only used the 2 outer ones, as the 3rd (inner) hole would be beind a section of the trunk lid reinforcement, and although you could put a screw in that location, it's not needed, and the cars with spoilers from the factory only have the 2 outer screws.
3) IOnce you have the spoiler sitting on the positioning tabs on the trunk, get your helper to stand in the middle of the car and hold the spoiler so it doesn't fall off the trunk. Then you can move around the edges to get everything in the position you want. The best way to position it is probably either take a look at a car with a factory spoiler or get some pictures of one.
I used the following measurements:
Front corner of trunk to front corner of spoiler (slight diagonal): Approx. 9 3/8"
Edge of trunk to edge of spoiler: Approx 3/8"
I tooke me about 15 minutes of measuring and checking to be satisfied with the placement. After you are satisfied, take some masking tape (the blue kind will come off the easiest later) and tape down the edges of the tabs. Depending on how you are using the tabs, it's likely that you will need to bend them around the contour of the car a bit and tape them to the rear quarter panel as well, effectively taping the trunk shut. Don't worry, we'll fix that in a minute.
Once the tabs are secured with masking tape, carefully lift the spoiler off the tabs. With the spoiler out of the way, you should be able to tape of both sides of the pegs but still be on the trunk lid. Once you have the tabs safely secured to the trunk lid, you can remove the pieces that tape the tabs to the quarter panel.
here's a shot of what mine looked like at this point
Another shot of this step
One more from a different angle
4) Now you'll want to quadruple check the placement again. Remember, you're drilling holes in your car! You should measure the following things on one side of the car (NOTE: if you are measuring distances to pegs on the tabs, make sure you are measureing "center to center":
-Front corner of trunk to front peg/tab
-Front peg/tab to rear peg/tab (Approx 1 7/8")
-Front tab to edge of trunk (Approx 7/8")
-Rear tab to edge of trunk (Approx 7/8")
Now that you've checked those measurements, open the trunk. You should see a 2-3" flat area right behind the pegs. You can see this flat area in the pics below. At this point, it should also be apparent to you why it would be a pain to use the 3rd screw. If you are satisfied that one side is accurate, now you can check the other side against the measurements you just took and see if they are the same. If so, good job, if not, adjust accordingly. For small adjustments, you can probably gently slide the tab under the tape. For anything more than a 16th of an inch, you'll probably want to loosen the tape and move the tab.
Once you are satisfied that the pegs all measure out right, place the spoiler back on the car and check visually and measure one last time.
5) Now it's time to drill. The pegs are hollow, and you should be able to get a 3/32" bit snugly inside. Even with the pegs as drill guides, it's a good idea to give the bit a light tap in each hole to "center punch" it before you start. Also remember, for the rear peg, you're in the vicinity of the tail light housing, so don't get out of control and knick it with the drill bit. Light controller pressure is the way to go. Let the weight of the drill do the work, but keep a tight grip on it so that when you break through the bottom it doesn't get away from you. Go ahead and drill out all 4 holes to 3/32" inch. When you're done, pull the tabs and tape off.
NOTE: Be careful of the metal shavings at this point. blow them out of the way so they don't scratch the paint.
Holes drilled shot
From the inside
6) Now you'll want to take the larger bit and open up the holes to accept the spoiler bolts. I used a 7/32" but a 1/4" would work too. The main difference is that 7/32" will allow the screws to thread into the trunk metal vs. sliding cleanly through. Your choice. You'll want to drill these holes from the top too so they don't do any damage to the outside of your trunk lid. Go slowly with these, and when you get through, put the drill in reverse and run it in and out a few times to clean up the holes. After you're done, you can use your finger or a knife to clean up the metal flakes on the edge of the holes.
Big holes drilled
Another shot of the big holes
7) Once you have the holes all drilled and cleaned up, the first thing to do is get rid of any remaining metal shavings laying around on your car. Then you can take the screws and wasers and get them started in the holes. If you used the 7/32" bit the screws should thread into the holes and therefore stay put when you partially close the trunk. The idea here is to get them to the point where you can set the spoiler on them.
photo of this step
The best way to attach the spoiler is with your helper holding the trunk half open and also helping hold the spoiler in place while you get the first screw started. It's probably a good idea to get one screw about 80% in and then put the other screws in, and then tighten each screw a little at a time the way you would with lug nuts. At this point i found that one of my holes was about .5mm off, and was causing one of the screws to bind. I was able to easily make the whole a little bigger with the drill without taking the whole thing apart again.
close up of one of the bolts "finger tight"
Another shot of the bolts going in
8) Now time to finish up. Take the spoiler off and set it aside somewhere. You'll want to touch up the bare metal that's been exposed from drilling the holes. I used universal black from Advance Auto Parts, but if your car isn't black you'll probably want to get it from the dealer. I tried to keep the paint inside the holes and used it very sparingly on the outside of the trunk surface. I also gave the bolts and washers a quick coat of paint as well, as they do show when the trunk is open and they are just barely visible from the side of the spoiler, mostly because of the gold zinc coating. I let the paint set about 10 minutes before going on.
Painted bolts photo
9) You'll probably want to use some silicone to seal up these holes just in case. I put a small ring around the screw holes and then set the unpainted side of the washers into it. I used black silicone sealant/adhesive also from Advance Auto Parts, but if your car is not black, the clear kind would probably be better looking. Make sure you are getting the kind that is safe for paint, they have some sealants that warn on the back that they will eat paint.
Photo of applying silicone
10) put everything back together now. I also put a small amount of silicon on the bottom of each bolt head before it was totally tight so that when it tightened against the washer there would be a good seal. You'll probably have a bit of excess to wipe off with a damp towel. For this final assembly, make sure the bolts are tight, but don't try to over tighten them. You don't want to crack the plastic in the spoiler that holds the molded in nuts. I found that there was a definite "end" to how tight they should be. After I had everything put together, I touched up the bolt heads with paint, mainly in the screwdriver slot.
11) Finished product
Photo 1
Photo 2
Photo 3
Photo 4
Photo 5
Tools Needed: Big phillips screw driver (#3 or bigger), 3/32" drill bit, 7/32" drill bit, touch up paint, silicone sealant, tape measure
NOTE: It's a good idea to make sure you trunk lid is very clean before starting this project. You don't want any grit or anything grinding away your paint under the spoiler legs
0) get a helper, you will screw this up if you try to do it yourself (girlfriends work well)
1) Before shot
2) The spoiler comes with pre-fab mounting bolts molded in, 6 zinc plated screws and washers, and some plastic guides that will help you position the spoiler so the holes can be drilled properly. The guides have little hollow pegs that the screw holes in the spoiler sit on. My initial idea was to tape these tabs to the spoiler so it would be easier to set down on the car. This proved to be a bad idea, as after I had done all the positioning, I could not remove the spoiler without also pulling up the positioning tabs. Here is a shot of what NOT to do...
That having been said, you need to put the pegs on the tabs into the two outer screw holes on each side. Have you helper do one side. Then hold them in place as you set the spoiler on the car. Note that there are 3 screw holes on each side, but I only used the 2 outer ones, as the 3rd (inner) hole would be beind a section of the trunk lid reinforcement, and although you could put a screw in that location, it's not needed, and the cars with spoilers from the factory only have the 2 outer screws.
3) IOnce you have the spoiler sitting on the positioning tabs on the trunk, get your helper to stand in the middle of the car and hold the spoiler so it doesn't fall off the trunk. Then you can move around the edges to get everything in the position you want. The best way to position it is probably either take a look at a car with a factory spoiler or get some pictures of one.
I used the following measurements:
Front corner of trunk to front corner of spoiler (slight diagonal): Approx. 9 3/8"
Edge of trunk to edge of spoiler: Approx 3/8"
I tooke me about 15 minutes of measuring and checking to be satisfied with the placement. After you are satisfied, take some masking tape (the blue kind will come off the easiest later) and tape down the edges of the tabs. Depending on how you are using the tabs, it's likely that you will need to bend them around the contour of the car a bit and tape them to the rear quarter panel as well, effectively taping the trunk shut. Don't worry, we'll fix that in a minute.
Once the tabs are secured with masking tape, carefully lift the spoiler off the tabs. With the spoiler out of the way, you should be able to tape of both sides of the pegs but still be on the trunk lid. Once you have the tabs safely secured to the trunk lid, you can remove the pieces that tape the tabs to the quarter panel.
here's a shot of what mine looked like at this point
Another shot of this step
One more from a different angle
4) Now you'll want to quadruple check the placement again. Remember, you're drilling holes in your car! You should measure the following things on one side of the car (NOTE: if you are measuring distances to pegs on the tabs, make sure you are measureing "center to center":
-Front corner of trunk to front peg/tab
-Front peg/tab to rear peg/tab (Approx 1 7/8")
-Front tab to edge of trunk (Approx 7/8")
-Rear tab to edge of trunk (Approx 7/8")
Now that you've checked those measurements, open the trunk. You should see a 2-3" flat area right behind the pegs. You can see this flat area in the pics below. At this point, it should also be apparent to you why it would be a pain to use the 3rd screw. If you are satisfied that one side is accurate, now you can check the other side against the measurements you just took and see if they are the same. If so, good job, if not, adjust accordingly. For small adjustments, you can probably gently slide the tab under the tape. For anything more than a 16th of an inch, you'll probably want to loosen the tape and move the tab.
Once you are satisfied that the pegs all measure out right, place the spoiler back on the car and check visually and measure one last time.
5) Now it's time to drill. The pegs are hollow, and you should be able to get a 3/32" bit snugly inside. Even with the pegs as drill guides, it's a good idea to give the bit a light tap in each hole to "center punch" it before you start. Also remember, for the rear peg, you're in the vicinity of the tail light housing, so don't get out of control and knick it with the drill bit. Light controller pressure is the way to go. Let the weight of the drill do the work, but keep a tight grip on it so that when you break through the bottom it doesn't get away from you. Go ahead and drill out all 4 holes to 3/32" inch. When you're done, pull the tabs and tape off.
NOTE: Be careful of the metal shavings at this point. blow them out of the way so they don't scratch the paint.
Holes drilled shot
From the inside
6) Now you'll want to take the larger bit and open up the holes to accept the spoiler bolts. I used a 7/32" but a 1/4" would work too. The main difference is that 7/32" will allow the screws to thread into the trunk metal vs. sliding cleanly through. Your choice. You'll want to drill these holes from the top too so they don't do any damage to the outside of your trunk lid. Go slowly with these, and when you get through, put the drill in reverse and run it in and out a few times to clean up the holes. After you're done, you can use your finger or a knife to clean up the metal flakes on the edge of the holes.
Big holes drilled
Another shot of the big holes
7) Once you have the holes all drilled and cleaned up, the first thing to do is get rid of any remaining metal shavings laying around on your car. Then you can take the screws and wasers and get them started in the holes. If you used the 7/32" bit the screws should thread into the holes and therefore stay put when you partially close the trunk. The idea here is to get them to the point where you can set the spoiler on them.
photo of this step
The best way to attach the spoiler is with your helper holding the trunk half open and also helping hold the spoiler in place while you get the first screw started. It's probably a good idea to get one screw about 80% in and then put the other screws in, and then tighten each screw a little at a time the way you would with lug nuts. At this point i found that one of my holes was about .5mm off, and was causing one of the screws to bind. I was able to easily make the whole a little bigger with the drill without taking the whole thing apart again.
close up of one of the bolts "finger tight"
Another shot of the bolts going in
8) Now time to finish up. Take the spoiler off and set it aside somewhere. You'll want to touch up the bare metal that's been exposed from drilling the holes. I used universal black from Advance Auto Parts, but if your car isn't black you'll probably want to get it from the dealer. I tried to keep the paint inside the holes and used it very sparingly on the outside of the trunk surface. I also gave the bolts and washers a quick coat of paint as well, as they do show when the trunk is open and they are just barely visible from the side of the spoiler, mostly because of the gold zinc coating. I let the paint set about 10 minutes before going on.
Painted bolts photo
9) You'll probably want to use some silicone to seal up these holes just in case. I put a small ring around the screw holes and then set the unpainted side of the washers into it. I used black silicone sealant/adhesive also from Advance Auto Parts, but if your car is not black, the clear kind would probably be better looking. Make sure you are getting the kind that is safe for paint, they have some sealants that warn on the back that they will eat paint.
Photo of applying silicone
10) put everything back together now. I also put a small amount of silicon on the bottom of each bolt head before it was totally tight so that when it tightened against the washer there would be a good seal. You'll probably have a bit of excess to wipe off with a damp towel. For this final assembly, make sure the bolts are tight, but don't try to over tighten them. You don't want to crack the plastic in the spoiler that holds the molded in nuts. I found that there was a definite "end" to how tight they should be. After I had everything put together, I touched up the bolt heads with paint, mainly in the screwdriver slot.
11) Finished product
Photo 1
Photo 2
Photo 3
Photo 4
Photo 5
Last edited by jimbojsb; May 28, 2007 at 09:21 PM.


Rotary Wanker
Joined: Sep 2005
Posts: 413
Likes: 1
From: Washington, DC
Installing the factory spoiler is almost exactly the same except the factory gives you paper templates that you have to cut out and tape to the trunk for alignment. You need to drill 3 holes each side for the factory spoiler because it has an alignment stub that sits in the third hole. The factory kit includes stronger trunk support pistons (although it didn't seem like they were necessary). Oh yeah, it's painted but costs $300.

factor spoiler
Installing the factory spoiler is almost exactly the same except the factory gives you paper templates that you have to cut out and tape to the trunk for alignment. You need to drill 3 holes each side for the factory spoiler because it has an alignment stub that sits in the third hole. The factory kit includes stronger trunk support pistons (although it didn't seem like they were necessary). Oh yeah, it's painted but costs $300.
Last edited by rx8 man; Aug 3, 2007 at 04:30 PM.


Thread
Thread Starter
Forum
Replies
Last Post
projectr13b
Series I Do It Yourself Forum
1
Sep 6, 2015 01:04 PM
Rupanrx
Series I Aftermarket Performance Modifications
1
Sep 4, 2015 06:44 AM